Our $35 secondhand chairs – found here – aren’t quite done yet (picture me tapping my foot as I not-so-patiently wait for the paint to dry) but we thought we’d share our makeover progress in the interest of real-time fun. First a quick rundown of all the colors that John & I talked about for the office chairs at one point or another:
- emerald green
- turquoise, aqua, or dark teal
- dark gray or light gray
- plum
- navy
- white or light celery
- lime green or grellow
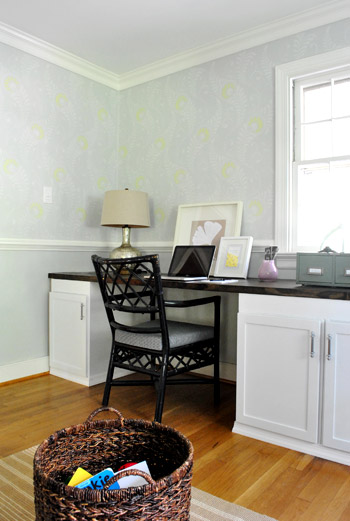
Oh and here they are in the office before paint and new upholstery (from a few different POVS), just to refresh your memory:

Here’s where our brains went when we continued to debate each of those color options over the last month or so:
- when you look into the office from the dining room there are two bright teal bookcases on each side of the doorway, so we thought turquoise or aqua or dark teal would be too “everything’s-teal” from that view
- after going with gray on the walls, we abandoned the light or dark gray idea for the chairs since it felt a little too blah
- navy was close to the color that was already on the chairs and it felt too dark for us
- we worried that white or light celery might be a bit too safe (and could skew a little too palm beach) so we decided to go for something bolder and more cheerful
- we worried plum would be just as dark as the original navy-ish color that was already on the chairs
So then we were left with emerald green and lime green or grellow. And I’m not gonna lie- I was rooting for emerald green for a while. I thought it would be nice and not-too-matchy when it came to the light grellow in the stencil and on the adjoining kitchen walls. But we held up ten million emerald swatches and stepped back and they all looked sort of… wrong. That’s the only way to describe it. The not-yellow undertones just seemed to clash with the adjoining kitchen and even the pop of color in the stencil since they were such warm greens and the emerald was so cool-ish and not-golden.
And the winner is…. grellow! Who is surprised? No one. Ok then. We figured why fight it if a super saturated & bold grellow would fit right in and reference the lighter kitchen walls and the soft grellow in the stencil while playing well with the other nearby elements (like the indigo light fixture, the teal globe on the file cabinet, the dark teal bookcases in the dining room, and the green runner & curtains in the dining room). The key was definitely hunting down something distinctly different (& bolder!) than the soft color on the kitchen walls and in the stencil so it didn’t feel bland and too monochromatic. Enter Sue the Napkin, stage right:
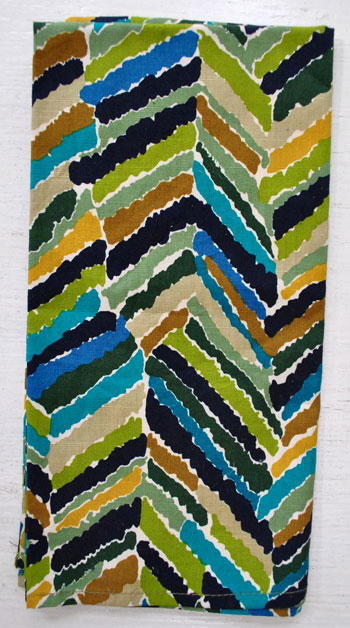
Since Sue is pretty much responsible for a ton of the color decisions that we make around here, we figured she couldn’t do us wrong in the “what green should we go with?” department. So we plucked a deep greeny-yellow right out of the napkin by holding up swatches until we landed on one that looked the most like it: Benjamin Moore’s Olive Tree. Then we taped that swatch to the chair, stepped back, and got heart eyes. It was magical. Everything was getting along swimmingly. Done deal.
But we needed to get spray paint in that color (since all the weaving in the chair definitely wouldn’t be easily coated with a paint brush) so the plan was to go to our local Benjamin Moore store to get them to make some custom spray paint mixed in that color (they can actually do that, well some of them can – just call to see if yours is one of them). Late last week I actually called to make sure ours still did it (they did) which is when I learned that it was too late in the day for them to make any (they closed at 6 and it was around 4 when I was calling). Bummer.
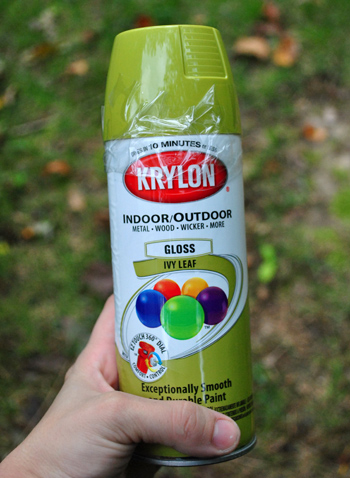
I planned to just wait to head over there the next morning but lo and behold while we were at Michael’s later that night we came across the spray paint aisle there, and what did we find? Krylon spray paint in “Ivy Leaf” which was – I kid you not – almost identical to the Benjamin Moore swatch of Olive Tree that I had tucked into my purse. So we bought two cans of it at $5.99 a pop. Hooray! Update: I just called Benjamin Moore back to see how much custom spray paint would have run me and they told me I would need to get a minimum of six cans of spray paint at $7-10 each! So glad Michael’s accidentally came through for us.
After we got home with my beloved spray paint I just removed the seat cushion on each chair (it was held in from the underside by four screws).
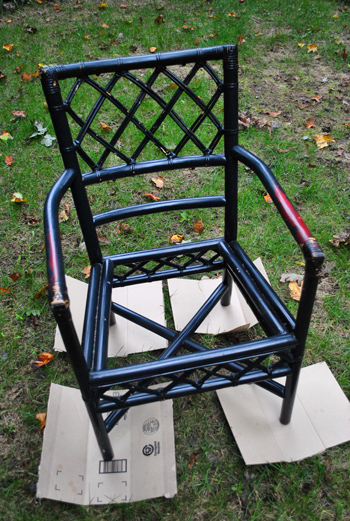
Then I wiped everything down with some liquid deglosser (we like Next Liquid Deglosser by Crown since it’s non-flammable, biodegradable, and low-VOC) and set them outside on cardboard for some spray primer. If the chipped paint had been rough and bumpy I definitely would have sanded to smooth things out, but the paint was worn down in such an oddly smooth way, there wasn’t anything for me to sand. Then it was primer time.
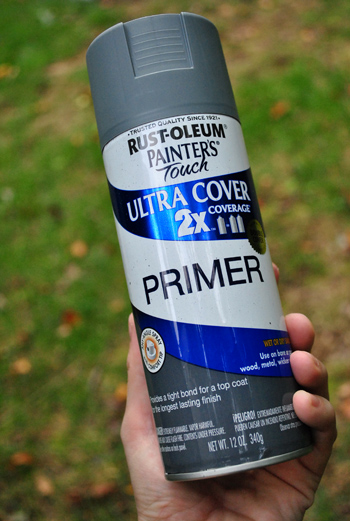
I applied a few thin and even coats (picture me misting it from 8-10 inches away, always keeping my arm moving to avoid drips) and let that dry for about 40 minutes.

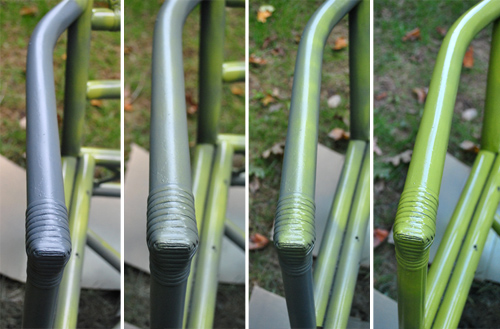
Then I thought to read the can, which informed me that the topcoat should be applied within an hour or not until 24 hours later. So I impatiently decided that I didn’t want to wait. I quickly misted both chairs with about four suuuuper thin and even spray paint coats until they were happy and grellow. I snapped some photos of each thin coat so you could see how they’re very light (there’s almost zero coverage at first) and they build up to full coverage.
Here are a few more of my favorite spray painting tips:
- Skip the bad/cheap/terrible $2 stuff in favor of the quality $6-7 options (I like Rustoleum’s trigger spray nozzle because it goes on thin and even – and doesn’t get all over your fingers).
- Always keep the can moving. Seriously. If you’re a-sprayin’ your arm better be a-swayin’.
- It’s best to keep the nozzle about 8-10″ away from whatever it is that you’re spray painting.
- You really want a mist, not a heavy wet coating.
- Three thin and even coats are better than one thick and drippy one.
- Spray paint has yet to go no-VOC, so apply it outside with a mask, and let it fully cure as long as the can recommends outside whenever you can (usually 24 hours, we try to double that just to be even safer).
- You can “seal” any spray paint (to limit off-gassing once you bring it inside) by applying two thin coats of Safecoat Acrylacq, which is low-VOC and non-toxic.
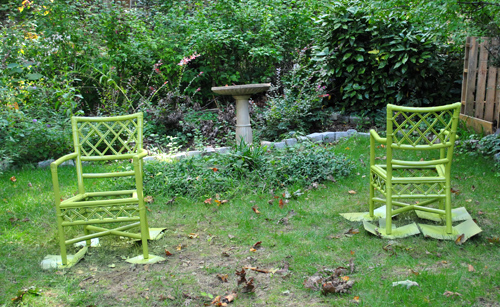
Voila, I was left with this chipper guy:
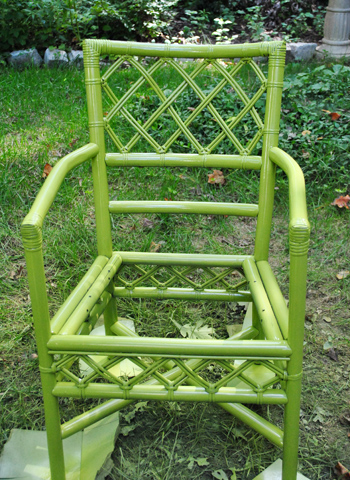
Make that two of them. Just chillin’ in the yard.
Oh but it took me three cans of spray paint total, so I had to go back for one more. As for the seat fabric, I had some leftover yardage from my little dining room curtain project.
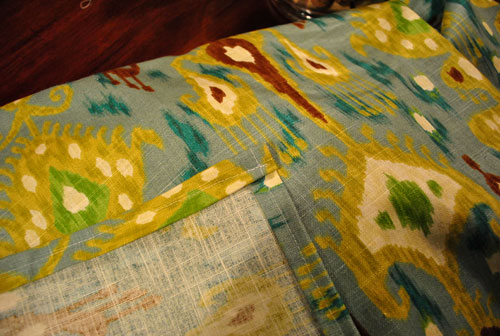
And after holding up the fabric to the freshly grellowed chairs we were so happy. All systems are go. They look great together.
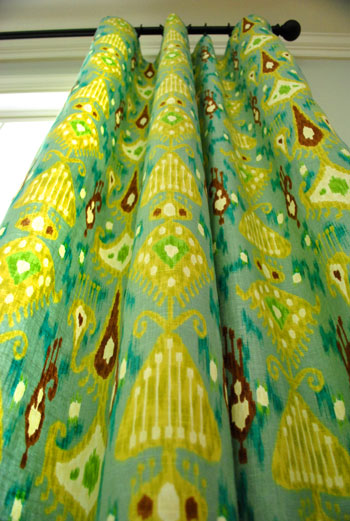
Originally I intended to use that extra fabric to make roman blinds for the office since that room is so open to the dining room thanks to the giant double doorway that’s flanked by the built-ins. But I got to thinking that it might be too matchy-matchy to use it on the windows and John and I kept dreaming more and more about bright grellow chairs, so it was the perfect compromise. This afternoon’s project is to reupholster the seats. I’ll share all those details along with after pics in a day or two (as soon as they’re dry enough to get jammed back together for photos).
Oh and don’t go very far this morning. We’ll actually be back in a few hours with a rare 11am post instead of our regular 2pm jam. Which is nice because it frees up my afternoon for reupholstering. Everyone wins.
Psst- We’re over on BabyCenter sharing an amazing resource for projects that you can DIY with your kiddos. There are so many fun ideas to add to our “someday to-do list” with Clara.

Andrea says
You’ve probably seen this already -same material on a chair in Urban Outfitters:
http://www.urbanoutfitters.com/urban/catalog/productdetail.jsp?id=17995671&color=045&itemdescription=true&navAction=jump&search=true&isProduct=true&parentid=A_FURN_FURNITURE
Peacock Ikat is the name!
YoungHouseLove says
Isn’t that funny? Love it!
xo,
s
Brenda says
Love these chairs!! I picked this same color for my metal craft desk this summer, and I am loving the pop of color. Does your Walmart sell Krylon spray paint? Mine has it for only $2.97 a can.
YoungHouseLove says
Oh man, that’s a steal! Don’t know if ours has it – we’ll have to check it out!
xo,
s
Stefanie says
Hi! I was wondering what material the chairs are (perhaps I missed this detail in the related posts) as I have a piece of furniture (I guess it’d be considered a bar?) that has the same detailing as your chairs. It’s medium-dark wood with a tight weaved wicker like top. I’d like to change the color to black but not sure how to go about it. It has a solid base, a drawer and a shelf in the middle. I’ve read your previous post about using Rustoleum All Surface and I was thinking of using it in black satin. Should I also use deglosser (the piece now has a semi shiny finish) and primer as you did with the chairs? This is my first refinishing project. Thank you for your help! I love reading your blog!!
YoungHouseLove says
We believe they’re some sort of faux bamboo material, but I’d definitely recommend using deglosser, spray primer, and Rustoleum All Surface spray for the most durable finish. Good luck!
xo,
s
Julia says
Man.. you guys are OBSESSED with that placemat :). Gave you a shout out at http://www.hazelnutblog.com/2011/10/cuban-braised-beef-with-avocado.html
Your new place is looking’ great!! I love seeing what you do.
-Julia
of hazelnutblog.com
YoungHouseLove says
Haha, I love it!
xo,
s
Allison says
How are these holding up? I just bought some bamboo chairs at a resale shop that I’m dying to paint. I’m just scared the paint will chip over time!
YoungHouseLove says
They still look great! Both the fabric and the paint are going strong, even with a dog and a kid who bang on them/jump on them. Haha.
xo,
s
Gail Barrett says
Now that you’ve been using the chairs for awhile, have you had any challenges with the paint chipping? We painted some chairs using primer and a Bejamin Moore paint product designed for furniture, however the metal grommets on my husbands back pockets have rubbed off paint on the back chair rails. I would like to save the chairs, as I did the upholstery job on the seats (which is flawless, btw:-) and the chairs are perfectly good. Any suggestions would be welcome. Keep up the great work!
YoungHouseLove says
No issues! I mean there are a few spots where Clara has repeatedly bashed a metal car against them that are a bit scuffed, but nothing too bad! Maybe try respraying it and using a clear sealer spray on top for more durability?
xo,
s
Ann says
Love the color for the chairs. I bought that color but haven’t used it on anything. Waiting for the right piece.
Monika says
I love, love, love these chairs!!! And Krylon’s Ivy Leaf looks awesome. I’m going to attempt painting my brass lamps with the Ivy Leaf. I have a question about the primer. Do you need to use the gray’ish primer when using Ivy Leaf? Or can I use a white primer with the Ivy Leaf on my brass lamps? Thanks a bunch!
YoungHouseLove says
Any primer works :)
xo,
s