This post is going to cover a lot of ground. Not only are we sharing before & after photos and a video tour about how we organized it all, we’re also spilling how much the whole thing cost, tossing out some closet planning tips to help you tackle an update yourself, and the details on how we made it all look built-in like a bonafide custom closet (with just $65 of wood!). First let’s get to the eyeball-related things: the before & afters. Also, please note how badly Burger wanted to be in this post. Photobombs out the wazoo.
This little room of ours has come a long way. The photo below shows how we even upgraded the entrance to the closet. See that super narrow doorway? It was 22″ wide (WHYYY?!?!?) and not centered on that wall (again…. WHYYY?!?!). For reference, John’s shoulder to shoulder measurement is 20″. Yes, that means he had about an inch of clearance on each side when he walked through that old doorway every day for the last six years that we’ve lived here. We took the door that used to be there right off the hinges right after we moved in because with the door in that opening John couldn’t get through without sliding in sideways.
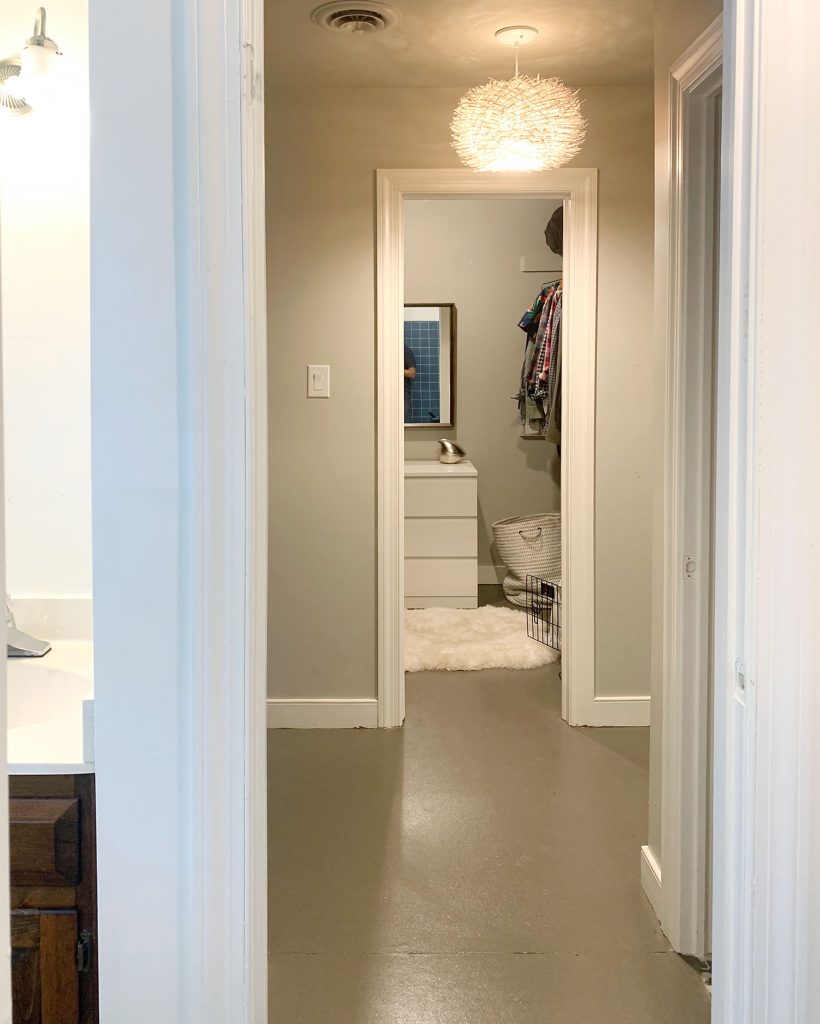
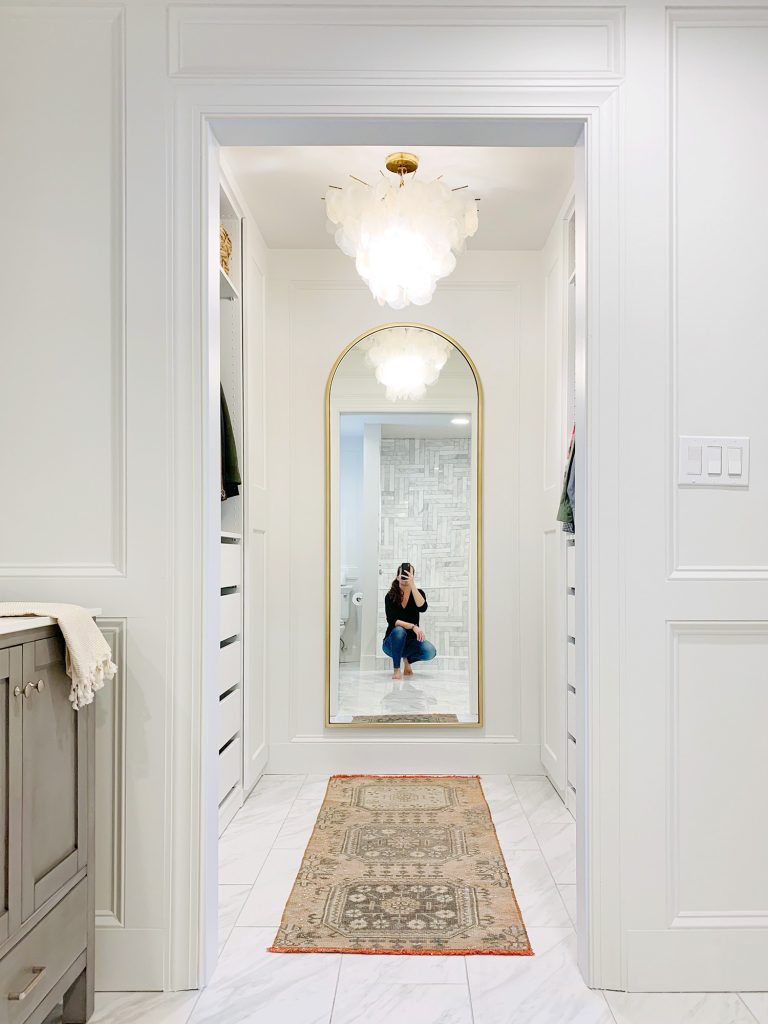
Taking the time to widen and center the opening made a huge difference in the feeling of the space. Plus it allowed us to add built-ins along each side wall for a completely symmetrical feeling when you step inside. We went with a nice wide 34″ doorway when we reframed that opening, which is the widest we could do while still allowing space for the cabinetry on each side to tuck behind the doorway.
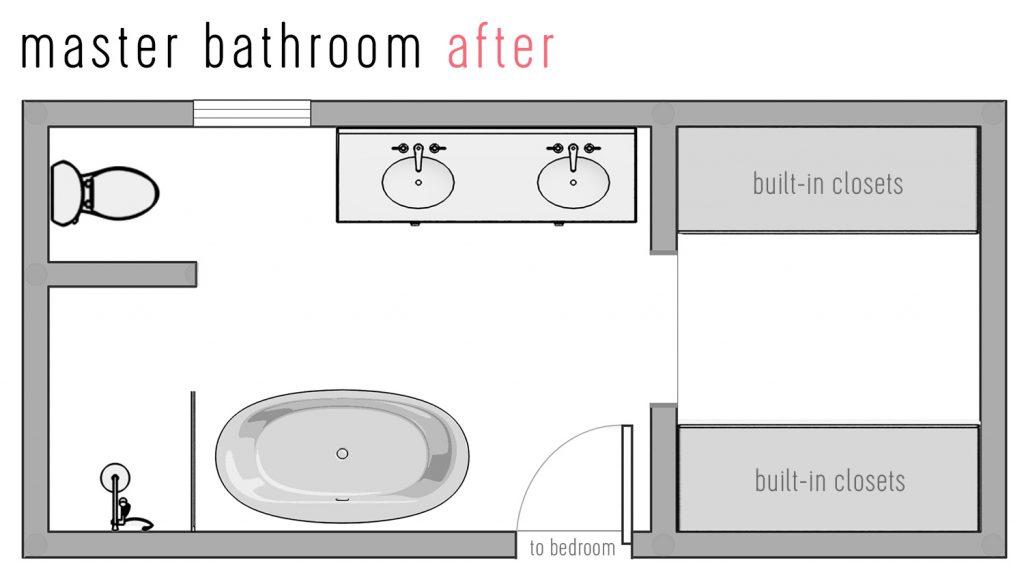
We kept the exact same footprint as the original closet – we just packed it with about 948% more function. The raw size of the closet was 8′ wide by 6′ deep, so that’s what we were working with. Why not change the actual footprint of the closet? Well, it would have been a lot more money/trouble to move the entire wall versus just widening/centering the doorway, and once we realized we could fit a shower and a separate tub (along with a HUGE double vanity) in our bathroom’s footprint, we had zero desire to steal any more space from this room. Here’s the floor plan for reference:
Another reason we knew we’d use every inch of this closet’s original footprint is because we had a goal of not only working in our clothing & shoe storage, but also squeezing in a linen closet and adding extras like a built-in hamper, a drop-zone for donations, etc. This is a flashback to what we had going on in the old closet. It was pretty much just one long hanging bar on my side with shoes stored on the floor on some old shoe racks. John had a dresser with his clothes in it as well as two hanging bars on his side (and more old shoe racks on the floor).
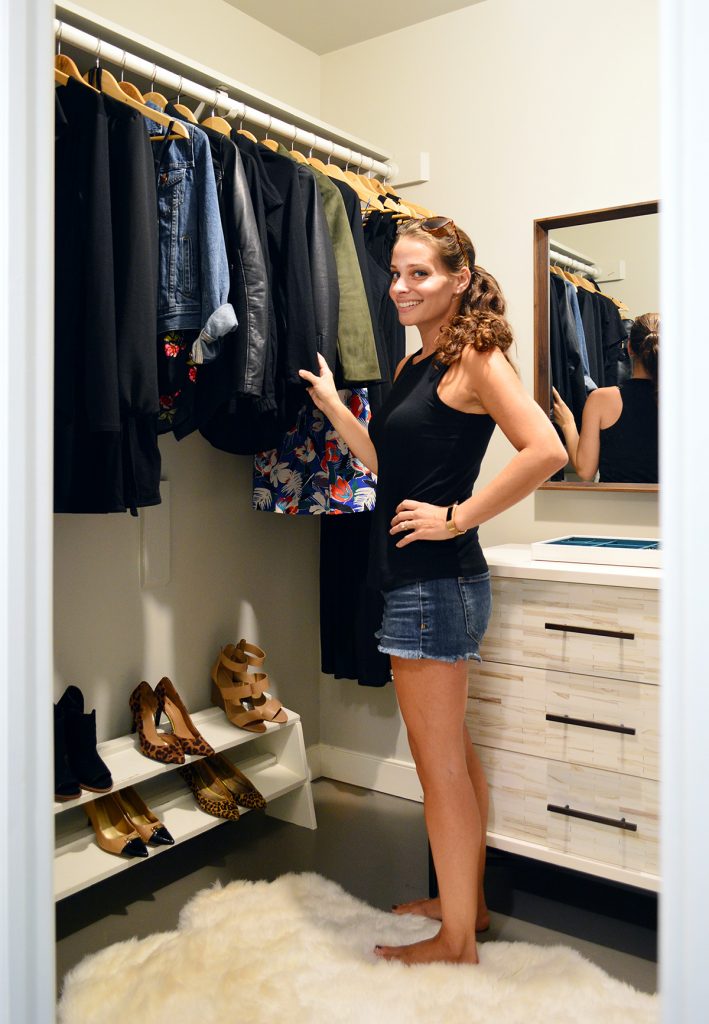
OMG THIS NEXT PIC IS SO CHEESY. LOOK AWAY.
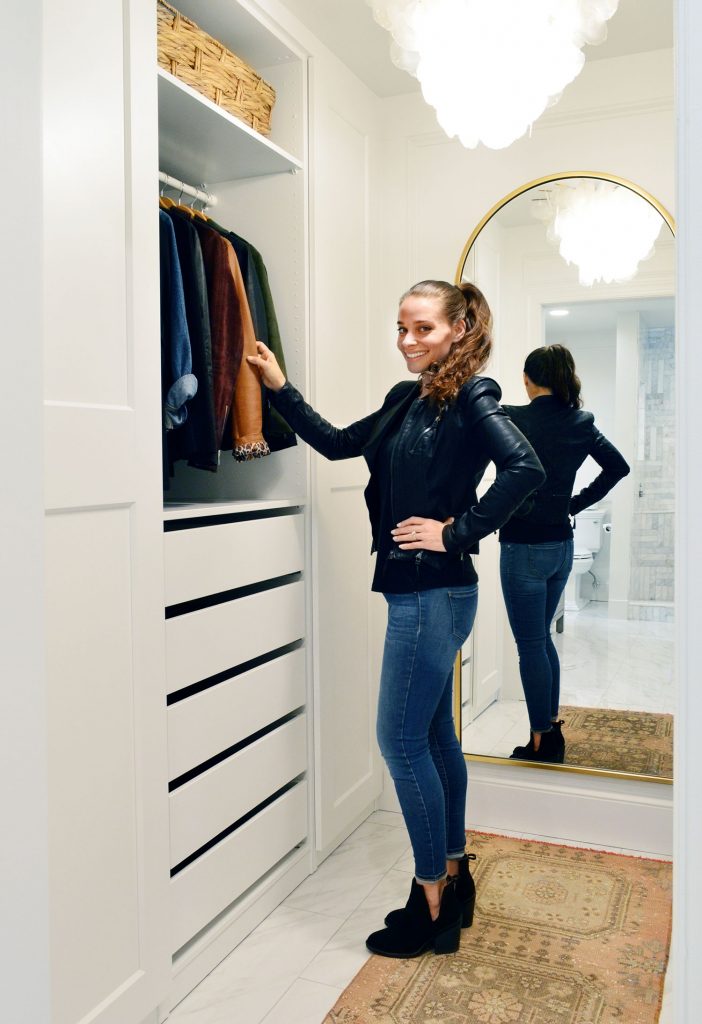
John was trying to pose me to look the same as the before picture above it from October of 2018 (can you believe that’s how long it’s been since I shared this post about my minimal wardrobe?) and it just went horribly wrong. But try to look beyond my Vanna White impression at the actual background, because I was trying to stand in the same spot as the picture above to demonstrate what a game changer built-in storage can be in a space like this. Again, this room is 8′ wide by 6′ deep for anyone wondering.
Here’s another good demonstration of what we had going on in there. That dresser (which later moved out into our bedroom) got replaced with a simple white Malm from Ikea, but you can see John’s side of things here.
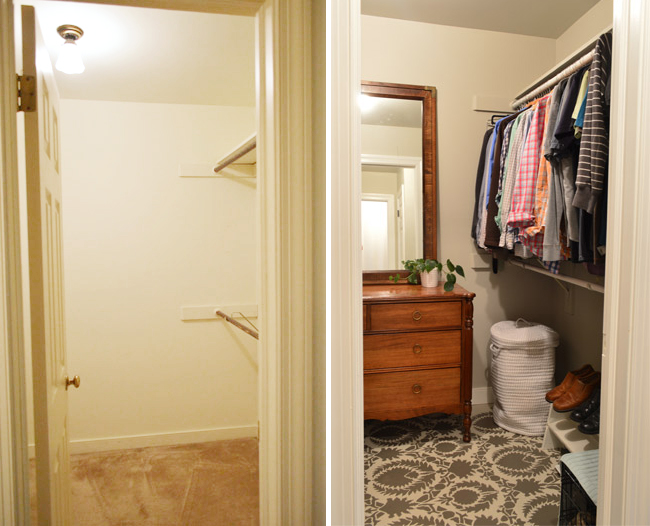
You can also see how the room started out with carpeting in that before pic on the left (the old beige carpet carried into the sink vanity area – so we gleefully ripped it out and stenciled the subfloor as a “temporary measure to tide us over” until we did a real bathroom/closet reno). Little did we know it would be 6 years… but dang was it worth the wait!
Here’s one more flashback to how things looked in this closet over the last half-decade. This photo was from before we moved this wood inlay dresser to the beach house (it’s hilarious how much we switch our dressers) and it’s a better shot of Burger’s crate and the other stuff that used to live on the floor of this space. As for where Burger lives now, our prince got upgraded to the bedroom. He likes carpet more than tile & Burger gets what Burger wants. Truly the irony is that he has never spent more time in the closet than when we were taking the photos for this post.
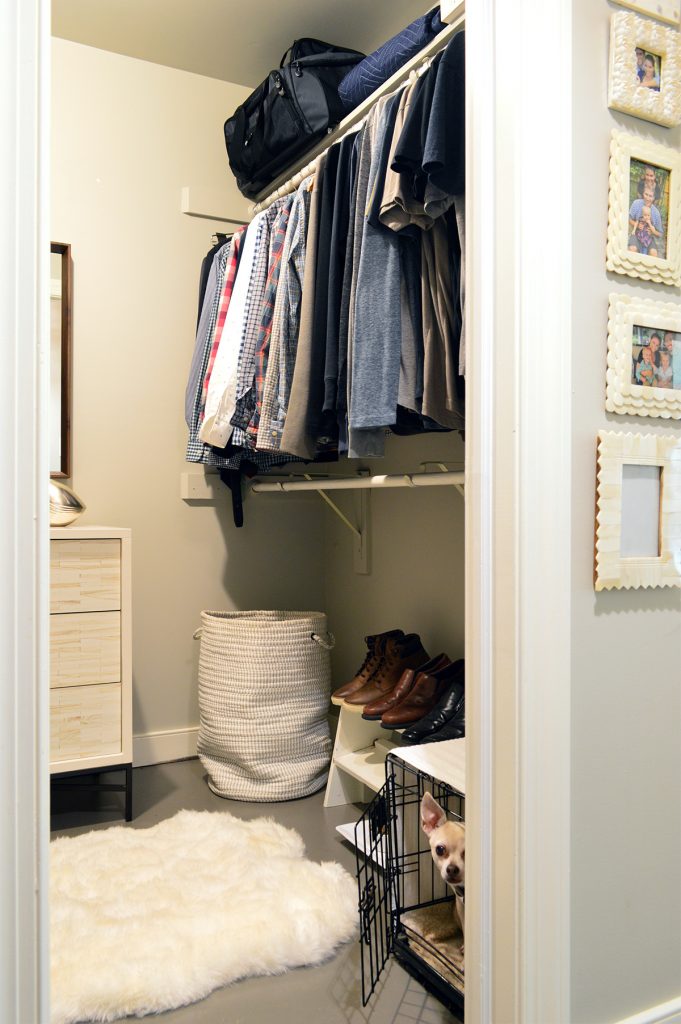
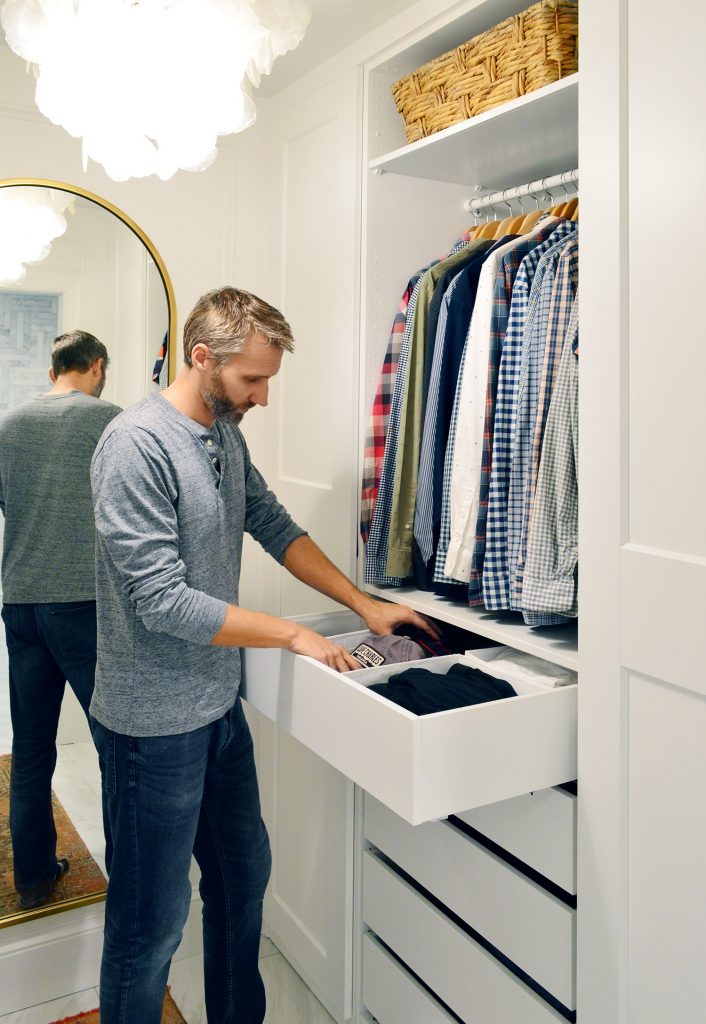
But back to the finished closet. Here’s John’s side. I just can’t even impress upon you how much we enjoy walking into this space now. We lived 6 years without this closet, so it’s not like we can’t survive without it, but boy is it nice to have an organized and customized place for all of our things. Literally everything we hoped to have a spot for, now has a designated place. And instead of half of my wardrobe living out in drawers in the bedroom (and me having to walk back and forth to assemble an outfit) it’s all in one place: this closet.
Why We Used Ikea Pax
There’s a reason if you search “Ikea pax closet” on Pinterest, you’ll find pages and pages of closets full of this system. It’s a REALLY customizable way to get a completely built-in looking closet system that can store every single item that you have in every single way that you’d like (using drawers, doors, pull outs, shelves – even upscale looking clear drawer fronts and felt-lined jewelry trays).
I shared this closet as one of our inspirations back in this planning post in October, but truly if you search “Ikea pax closet” on Pinterest you can find tons of them (like Chris & Julia’s lovely one from their last house, and this one by The DIY Playbook). You can even click around to see how people organized them inside. Hello, my name is Nosy.
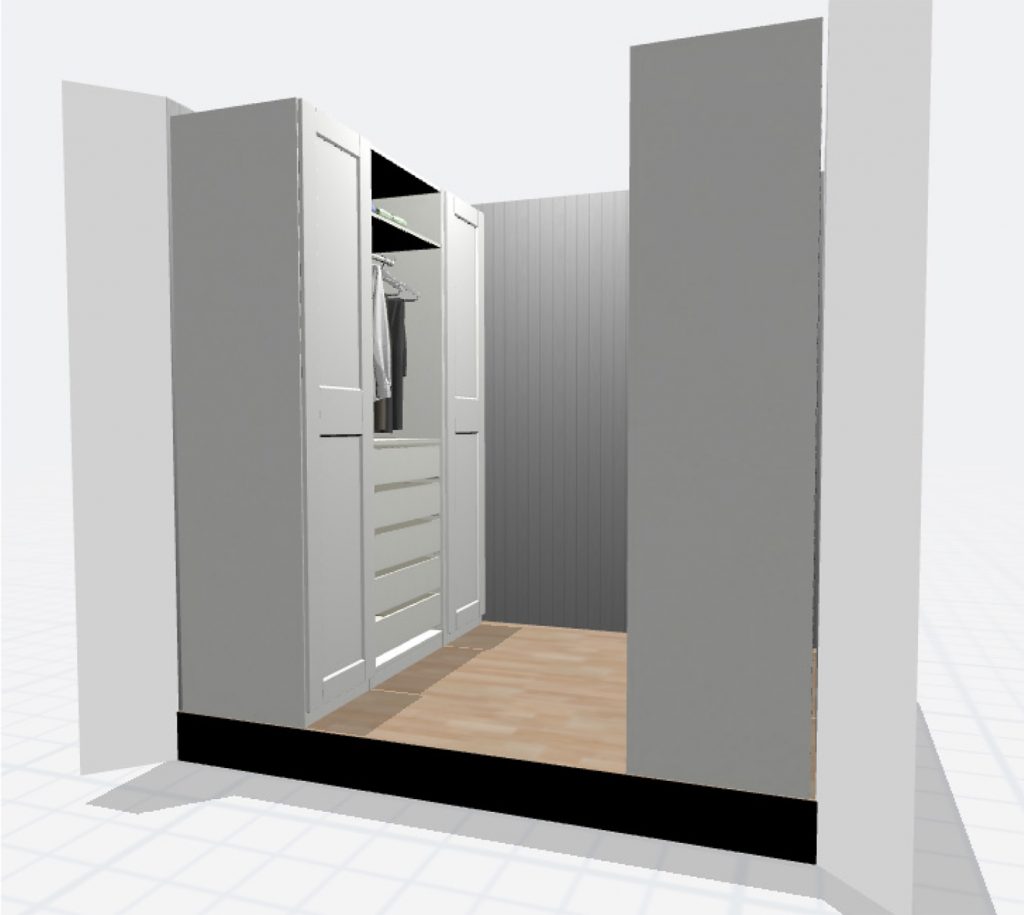
Plus we’re huge fans of using the Ikea closet planning software, which is what we did to pre-plan some ideas before heading to Ikea and meeting with a closet expert there who helped us finalize things and put in our entire order. The rendering below is where we started at home, and then a few things evolved once we stood in the store and got a better idea of scale and height and stuff, which are hard to grasp online.
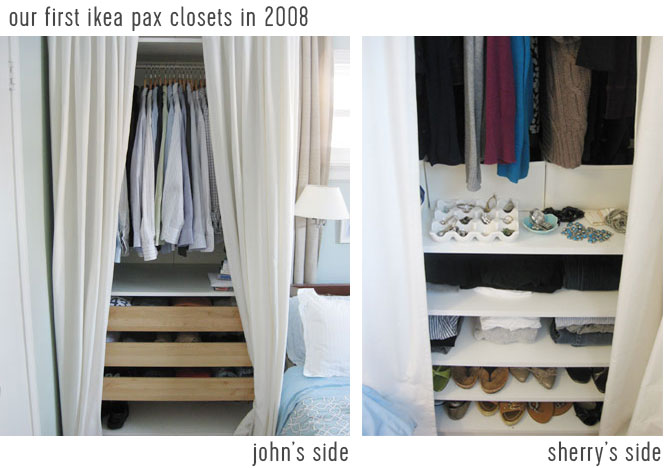
One other reason we went with a Pax closet system? We were existing happy customers! We used these exact same closets 11 years ago in our first house! We added Ikea Pax wardrobes on either side of the bed all the way back in 2008, which created so much more vertical storage and function for us in that room (who remembers this post?)! And the truly hilarious thing about John’s side of those built-ins from 11 years ago is that the way he planned his central wardrobe for our current closet is nearly identical to the one he designed 11 years ago for his side of the bed! How funny is that? If it ain’t broke…
Organization Video Tour
Ok, but now on to how we organized the entire closet. We filmed this video tour so I could throw open every door and drawer for you to see exactly what goes where, why we wanted certain closet features for certain purposes, and how we fit everything in – from a hidden hamper to an entire linen closet!
You can also watch the video here on YouTube
For anyone who can’t watch the video right now, below are a few photos, but they’re not nearly as exhaustive as the video (plus you get to see the pullouts in action, etc). So I highly recommend coming back to watch that when you have a few minutes to spare later on. Also for the dozens of people who are going to ask if short ol’ me can reach X, Y, and Z (it happens every time we share a closet post or a stacked laundry setup – ha!) you can see me reaching everything in the video. Like a boss.
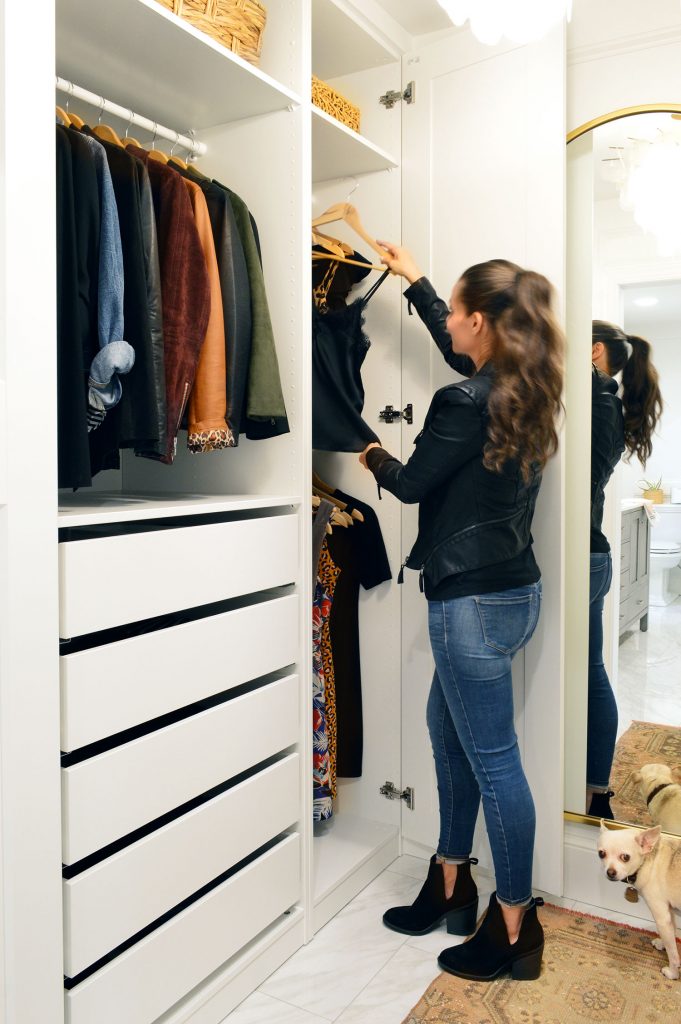
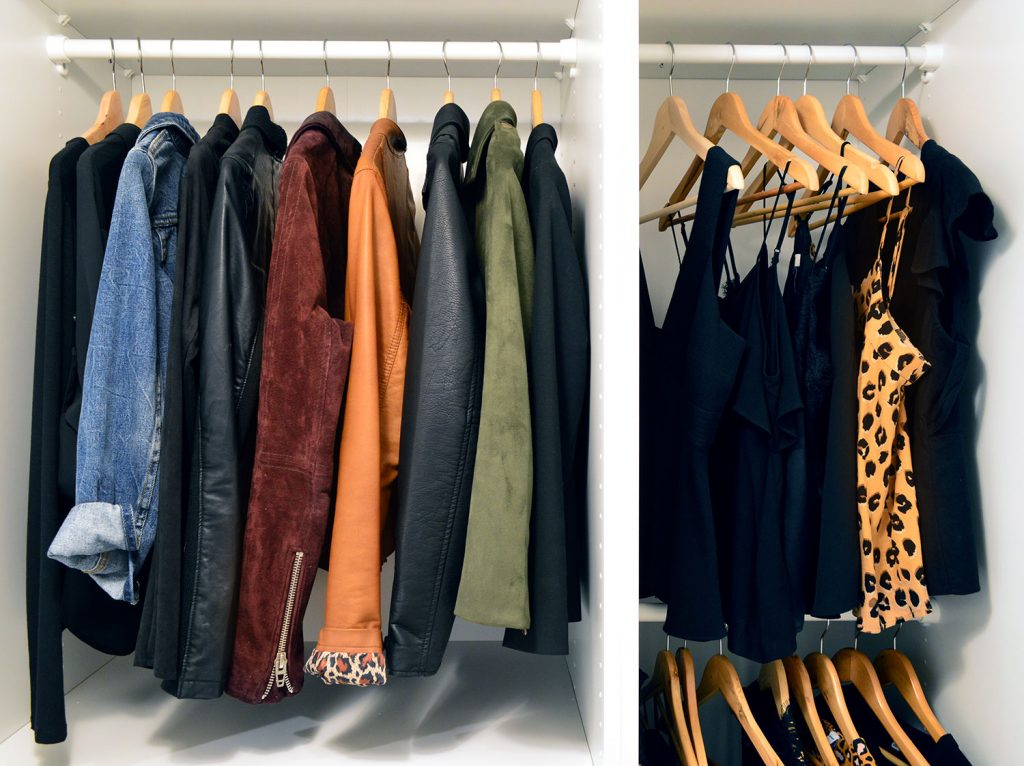
I also tried to cover some closet planning tips too (like how 3M command velcro strips can come in handy!) so that’s all in there for you. But back to the photos. You can see all three of my hanging bars here. I did jackets & long sleeved shirts on the middle hanging bar, and then silky tanks and short sleeved tops on that top right hanging bar, and dresses on that bottom right hanging bar.
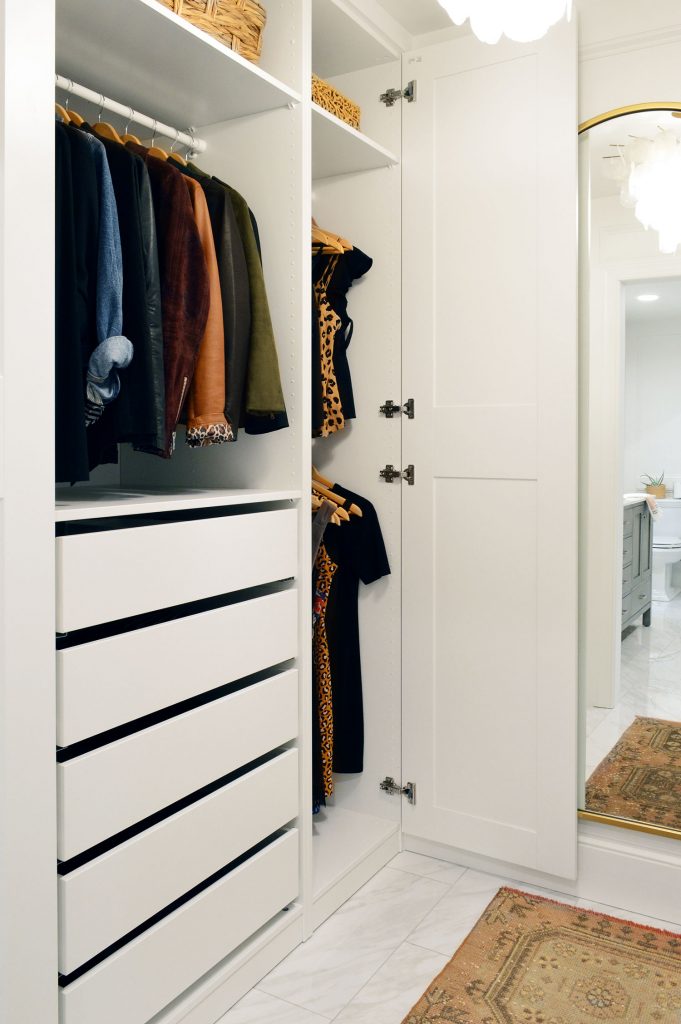
I didn’t do one long hanging bar because I don’t need one (more on that in the video), but definitely plan the closet you need. If you have long dresses that necessitate a longer hanging area – work that into your design. Another nice thing about the Ikea Pax system is that it’s super flexible. If we sell this house in a decade or two and the next owner wants a long hanging spot, they can just remove that lower bar in the right cabinet and boom: longer hanging area achieved!
This is more of a straight on shot. I love that thanks to having a pretty small wardrobe (more on that here) I have some really nice space between my hangers instead of it all feeling packed in there. Kinda feels like I have my own boutique and that’s one of the many reasons I love a small wardrobe in the first place. I adore the feeling of a simplified closet & the ease of finding everything I’m looking for in one second flat. Plus it saves me money and I’m not storing a bunch of stuff I don’t actually use or wear (more on that here).
This compartment all the way to the left on my side of the closet is my favorite area of the entire room (well, it might be tied with the arched mirror). It’s where I have my purses and clutches & scarves and even a leopard hair tie (hanging bar + pullout hook rail = extremely flexible storage). Also: gimme leopard everything.
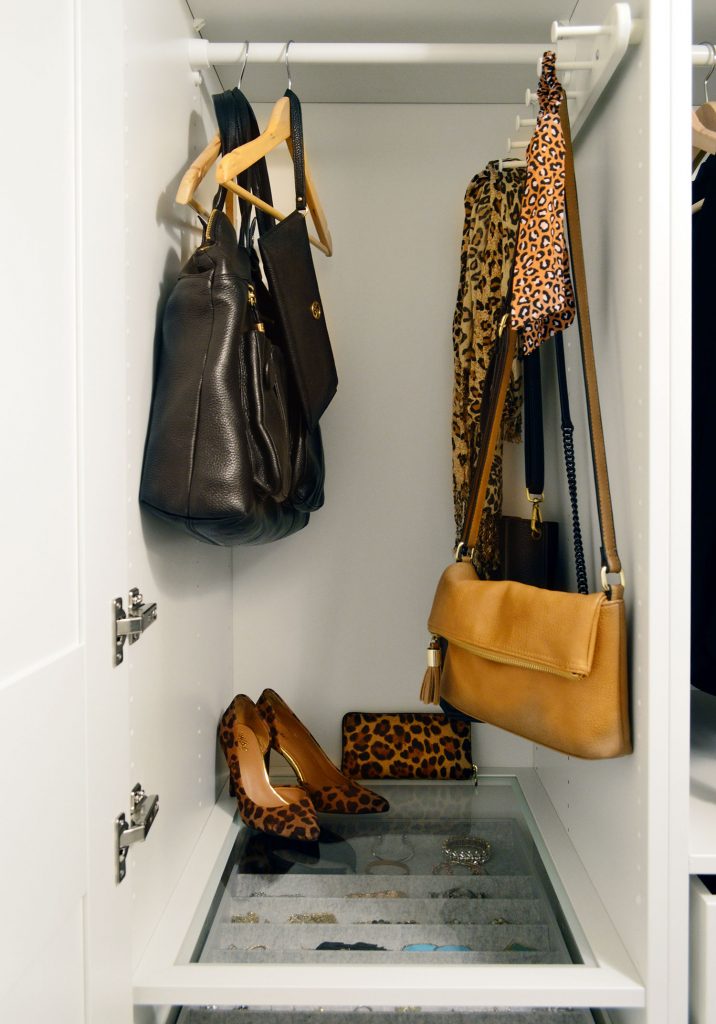
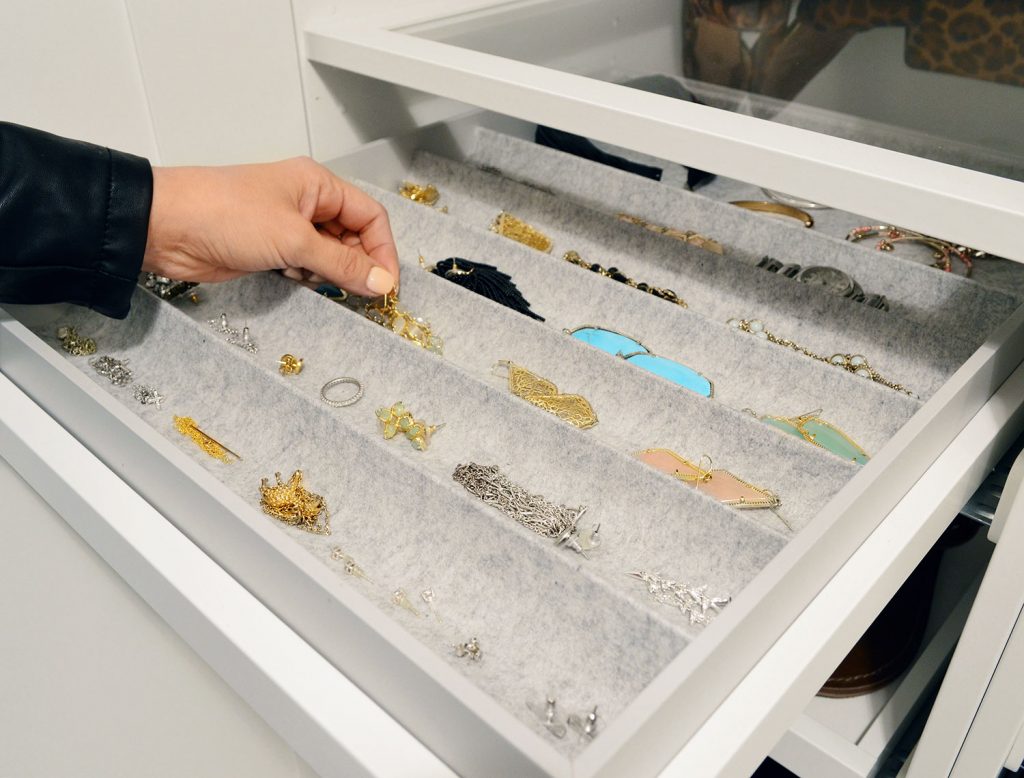
Down below that section (which I Vanderpump-ed with some leopard heels and a leopard clutch because I’m from New Jersey and it’s my love language), I also have a glass shelf that looks down on my beloved jewelry pullout, which makes me feel SO FANCY I CAN’T EVEN TELL YOU.
To be able to see everything through the glass, and then pull it out and grab what I want?! Let’s just say it was worth the six year wait and then some. And see how perfectly the felted tray fits into the pullout, and how polished the glass shelf looks? I feel like this is where the Pax wardrobe system really shines.
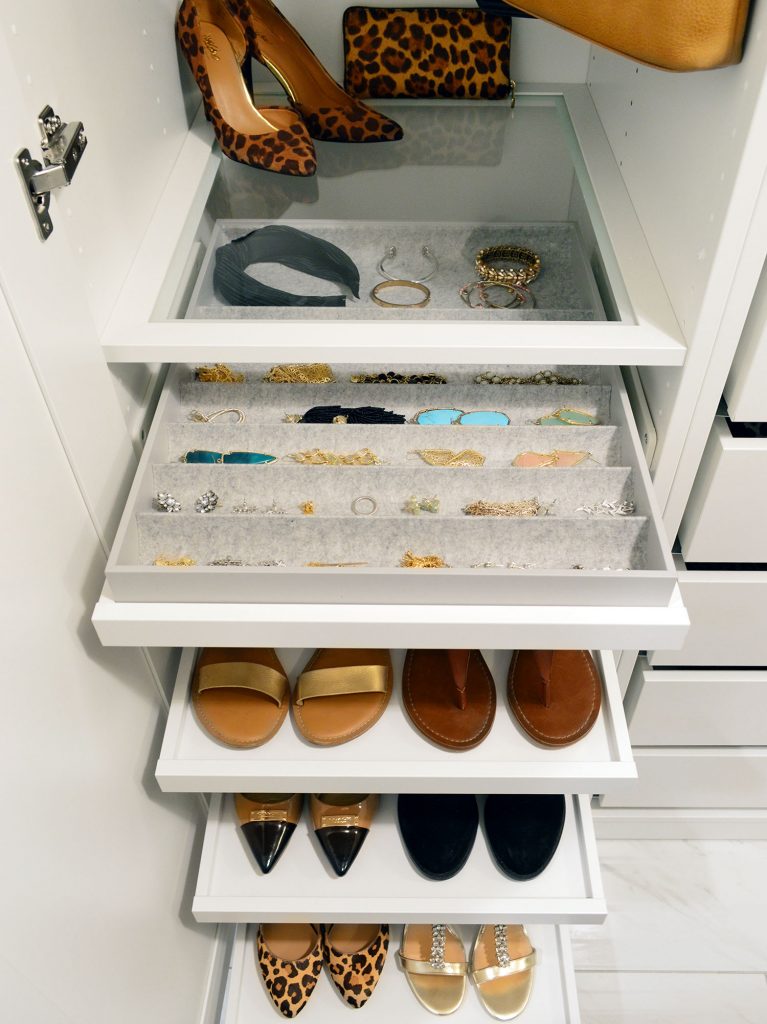
It looks so upscale, but the price of these fittings is pretty affordable – especially in the scheme of redoing an entire closet. The jewelry tray & pullout that it sits in were $40, and the glass shelf above them was just $25 and so much nicer than a basic white shelf that would have covered it all. I mean, I feel like you can spend $65 on a tabletop jewelry box, and this just has so much more built-in appeal to me. We didn’t splurge for these fancy upgrades anywhere else, but just this one spot where I did makes me so happy. This closet is my lobster. Also John is my lobster for now clearly being able to see how much leopard print I own and still loving me.
Below my little jewelry station, you can see my three shoe pullouts. I chose pullouts because a fixed shelf at that height would mean I’d have to kneel on the floor and take out a pair of shoes in the front to get to the ones in the back, versus having a pullout that comes to you (and you don’t have to kneel or remove anything to access anything else). The main point is that I can remain on my feet and still get the shoes in the back versus crawling on the floor like a person playing laser tag.
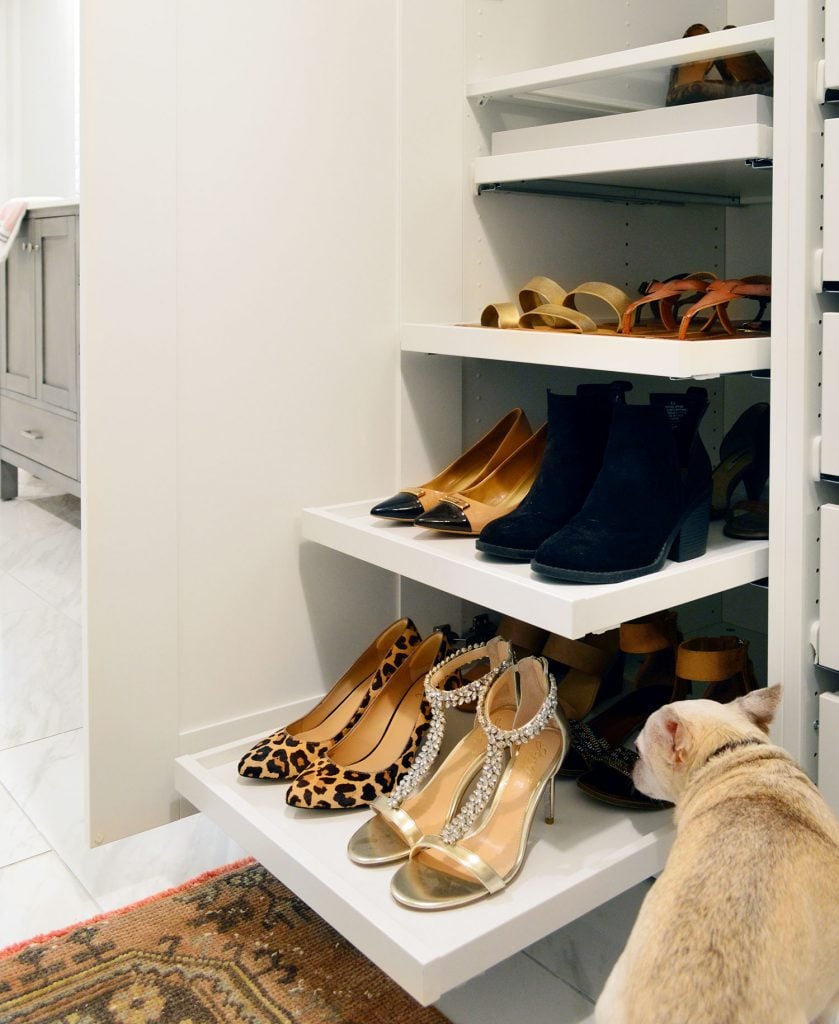
Burger really likes my bedazzled shoes, ok?
Also it should be noted that alllll of my regular shoes are stored downstairs in our little built-in mudroom so these are just lesser used shoes that I typically wear for special occasions, which is just like my jewelry (I wear the same small studded everyday jewelry & just add dangly earrings for special occasions). That is the ONLY REASON I’m cool with pullouts behind doors. I am of the mindset that everyday clothing (like underwear, t-shirts, or jeans) that are stored in a drawer behind a door is one too many barriers for entry for me. Might not be for you though. All that is to say: know thyself when planning a closet. Only add drawers or pullouts with doors in front of them if you’re certain that move won’t bug you. For me, doing that a few times a day = way too much. But once or twice a week = just fine.
Now moving over to John’s side (again – you can see A LOT MORE of what’s in each drawer in the video – even if you watch without the sound on). But this shot is a good demonstration of just how nice some well-planned storage can be for taming the insanity of allll the different things that are being stored. Look how clean this looks:
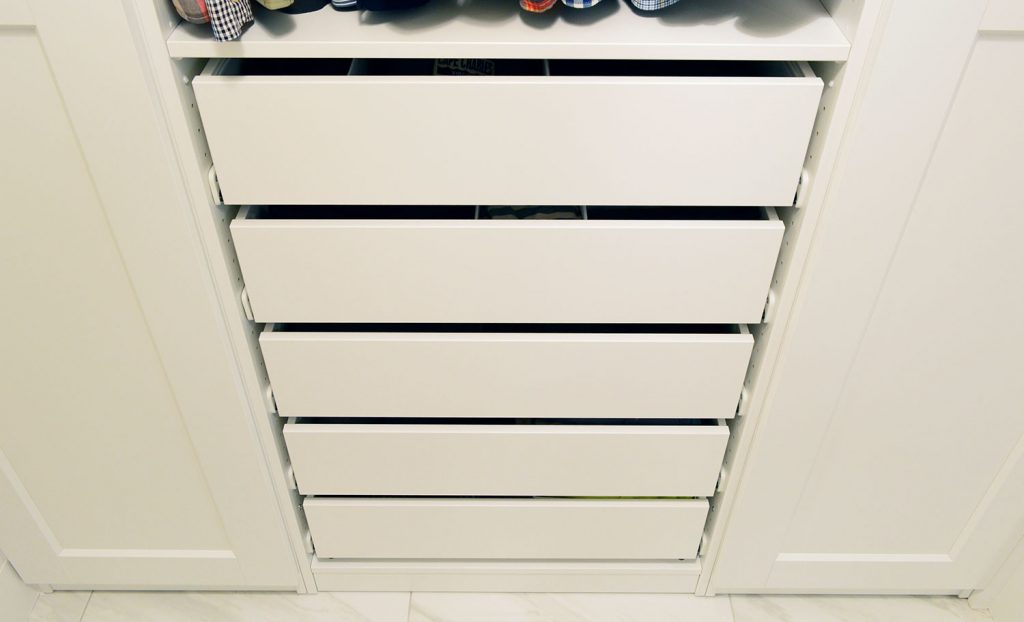
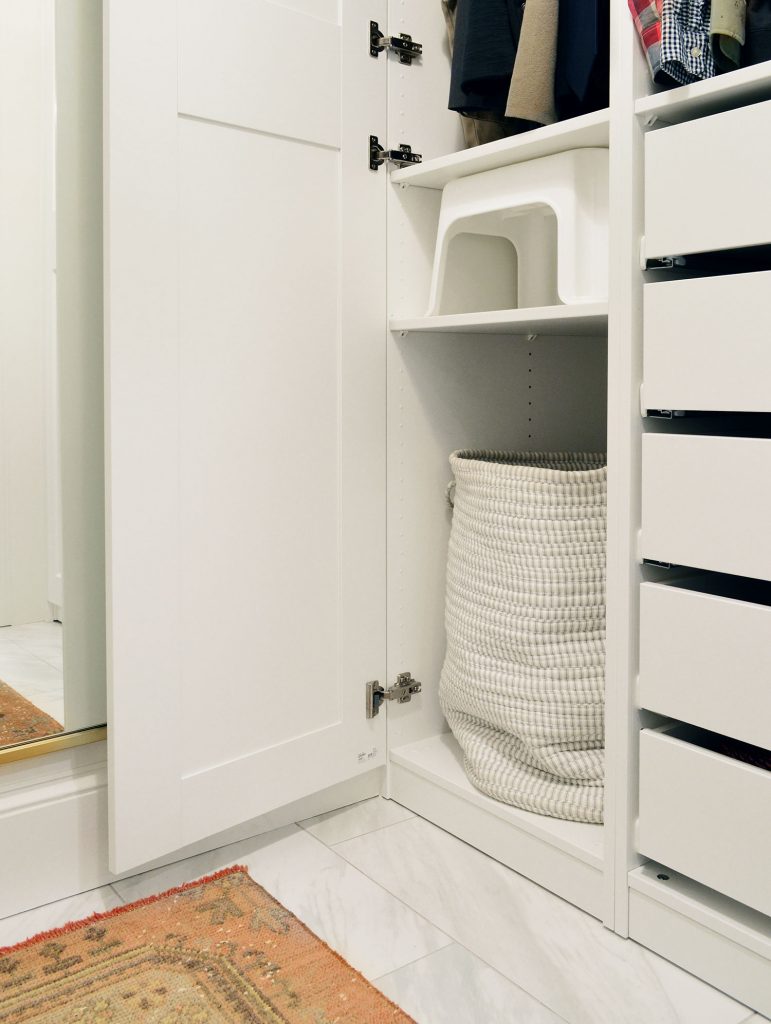
And yet, when things are open you can see JUST HOW MUCH STORAGE, GLORIOUS STORAGE IS BACK THERE! Nice tall spot for a hamper and even a stepladder for me to reach the top shelves? Check! Hats and undershirts and socks? Check! Bathing suits and long sleeved shirts and short sleeved shirts and sleep shorts? Check! We literally planned these drawers and shelves and hanging bars to house all of the things we have – and then some!
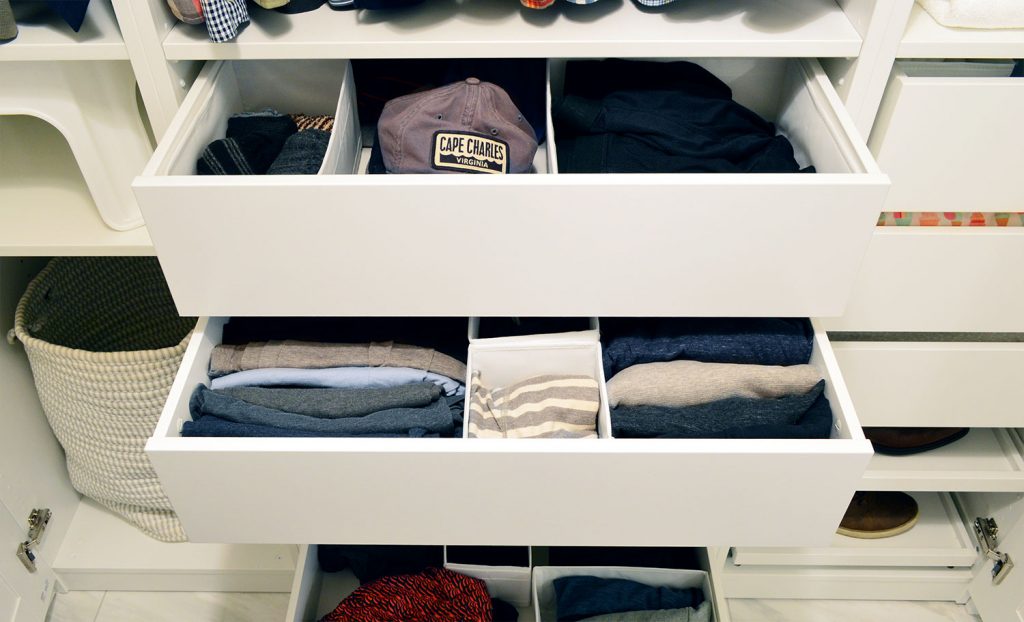
Make sure that you take inventory from home before planning online with their closet software and then bring notes with you about exactly what you have when you’re in the store as well. Don’t just write down obvious stuff like how many drawers you’d ideally have or how many hanging bars you want. Actually count how many shoes you want to store for example. That’s great intel to be armed with to build your closet around.
Sure your number of shoes can and probably will change over time (and these closets are SUPER flexible, which is great) but going in with a target number of things that you want to be able to store is key for actually coming home with the right items to achieve that goal. For example if you know you have 12 pairs of shoes that’s totally different than going and being like “I think maybe I have 7 pairs?” and returning home to see 12 and immediately wishing you had added one more shelf or pullout for the extra ones. Do the extra twenty minutes of work to inventory stuff so your new closet doesn’t come up short right off the bat.
And now, I’ll introduce you to our linen closet! It’s essentially this entire right wardrobe on John’s side, thanks to him only needing a few pullouts at the bottom for lesser used shoes (remember, his everyday shoes are downstairs in the hidden mudroom too).
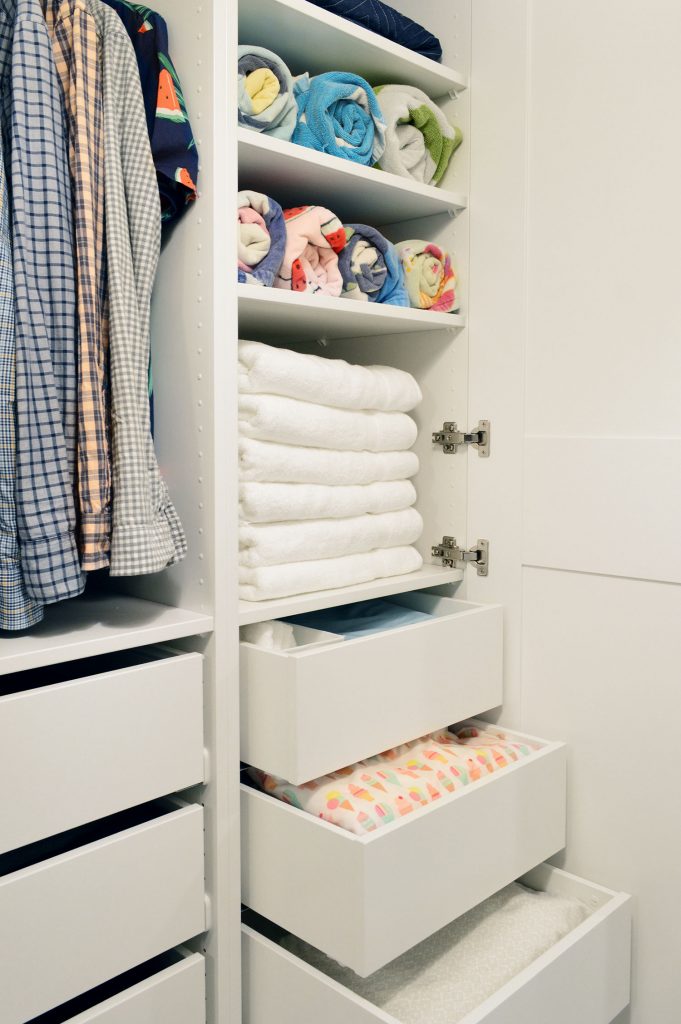
You can see where we have our beach towels and bath towels, as well as our sheets in those pullout drawers. Once again, I don’t mind these drawers being behind a door because we change the sheets weekly, so we’re not battling the door/drawer combo daily or anything). As for other “linen closet” items in here, there’s even a packing blanket (great for moving furniture from criagslist!) and a spare pillow on the shelf up top that’s just out of frame in this pic (you can see it in the closet video!). Gaining a full service linen closet right off of the bathroom within the existing square footage of our closet?! IT FEELS GLORIOUS.
We actually had a linen closet within the bathroom before, but ripping it out gave us a much more open layout full of a lot more light while also allowing us to have A BRAND NEW FREESTANDING TUB! So we’re all for removing a linen closet and working it in somewhere else if it means you can earn the tub of your dreams (and it is literally a tub that I dream about). We also have a hall closet where we store luggage and wrapping paper and a few upstairs cleaning supplies that we could have squished and added linens to, but it was a much better option for us to work it into our closet. It’s all nice and flexible though – so if someone else with more clothes moves in down the road and wants this to just be a regular closet, they could SO EASILY move the linens into the hall closet. Storage options abound.
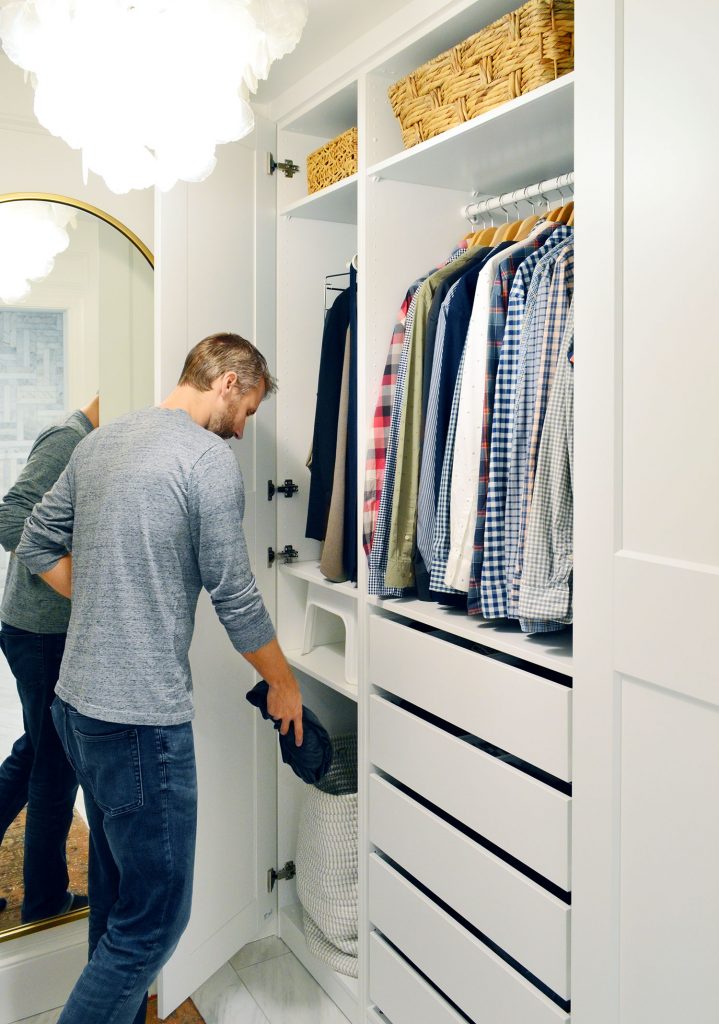
Oh and one quick tip for your hamper. Be sure when you’re planning the closet that you don’t just make a compartment for it that’s the height of the hamper, because you need room above it for your hand to go in and out easily.
Allow John to model that action for you:
And since we’re modeling different closet actions all of a sudden, here I am showing you that the little white step stool that we worked into the closet actually does allow me to reach those baskets on the top section of the closet. Have I told you people commonly doubt that I can reach anything without photo evidence?
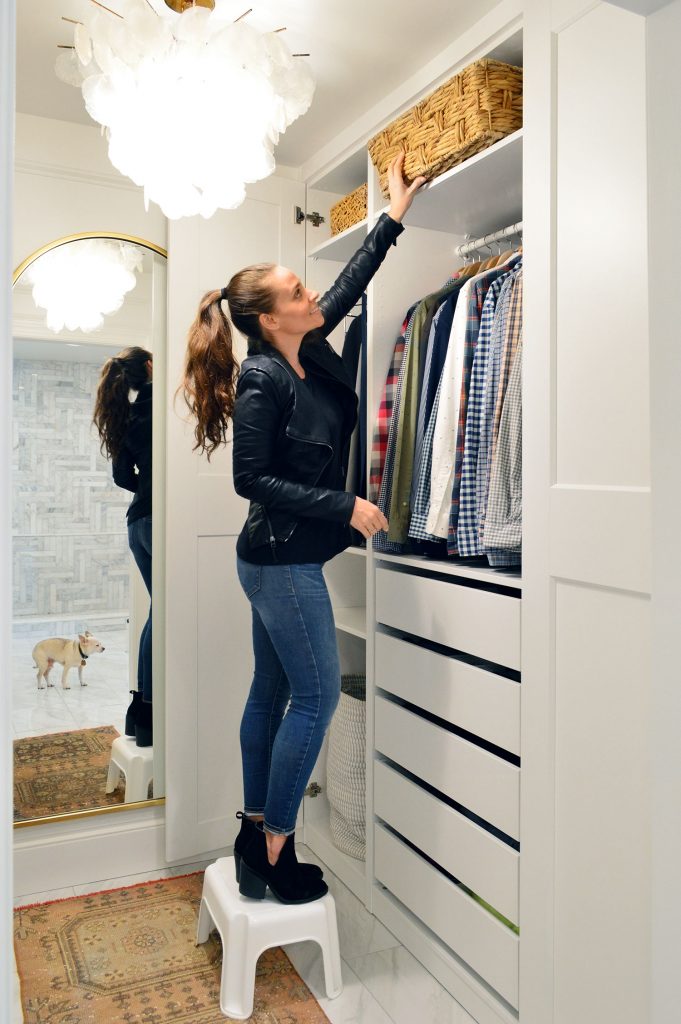
We have actually decided to use these two large exposed baskets for donations & hand-me-downs (the kids outgrow things so quickly, and we often have things we want to donate but no real system for them, so they sit on the dining table or by the door forever). Having a designated spot to store them all while they accumulate will be such an upgrade from awkwardly moving spare piles of things all over the house for months on end.
Also, one other closet tip that we touched on yesterday in our newsletter were these awesome and super cheap plugs that Ikea sells to cover all of the dark holes throughout their wardrobes. If they don’t bother you, skip them, but at a little over a dollar for 100 plugs, I WAS ALL IN. We did nearly every hole in here but ran a little short. There are a few remaining holes towards the back that I still want to fill, so we picked up some extra bags at Ikea on Monday.
It looks nice and polished once they’re in, so I’m psyched that Ikea makes them. I think they’re relatively new but should work on older wardrobes and billy bookcases if those holes bug you.
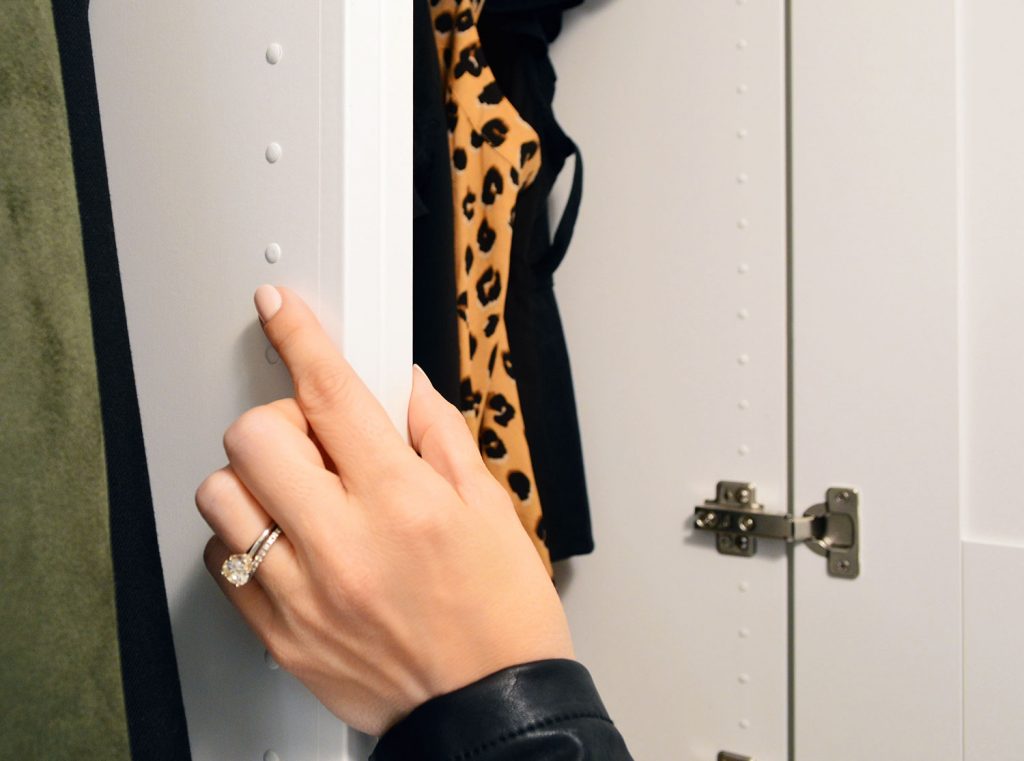
Another perk to this closet system? The soft close feature! It comes standard in drawers and pullouts and doors! You can actually see them in action in the video. I love that there’s no upcharge for that.
Overall, my main tips for building a closet that works harder for you would be:
- Take inventory of what you have to make sure you don’t add way too many drawers or hanging bars when in fact you wish you had more shelves or a spot for the hamper, etc
- Put the most often accessed items in the most easily accessible areas. Our everyday items are in the open center sections of the closet, but lesser used items like spare sheet sets and special occasion shoes are fine to be behind a door on a pullout or in a drawer (know thyself and adjust accordingly if that would drive you mad)
- Check out the add ons that can make your closet feel even more customized. From the hole plugs that make things more finished looking to the glass shelf that adds function (you can see what’s below it!) as well as beauty – there are a lot of options
- Think about potential sticking points and try to solve them right off the bat. I would have had to bring a chair into the closet from two rooms over to reach the top shelves of this closet if we hadn’t built in a spot for a little step stool. Makes the whole thing work harder and boom: no more sticking point!
- Shoot for the moon when it comes to solving other issues in your house. If you don’t have a designated spot for donations and they often accumulate on the dining table or near the back door, adding a big basket or two to give them a bonafide drop-zone in your closet can even solve problems that exist in other rooms
How We Made It Look Built in
A big part of making Ikea Pax wardrobes look more expensive and custom than they are (for that fancy closet vibe that a Jersey girl with bedazzled shoes like me adores) is building them in so they look like part of the room.

Again, our closet is 8′ wide x 6′ deep, so with a little research & planning we realized we could fit two of their 93″ tall and 19″ wide wardrobe boxes flanking one centered 29″ box (also in that 93″ height) on each 6′ side of the closet. This left a couple of spare inches on the outside edges, plus about 3″ on the top (our ceilings are just shy of standard 8′ ones in here). So luckily there weren’t huge gaps to fill in order to make them look like they truly go wall-to-wall and floor-to-ceiling.
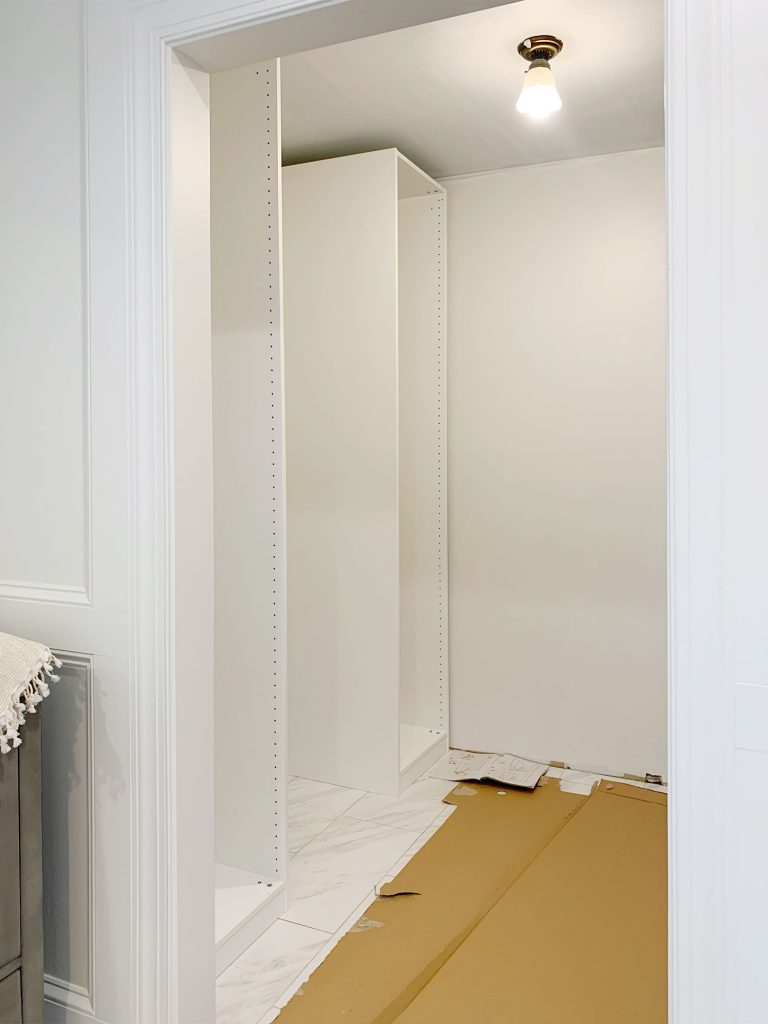
We had loosely planned to add crown molding and baseboard, but neither would actually fit in those small gaps since our ceiling was under 8′, and we decided that the other wall molding that we added to the room made us want to keep it simple around the closets so things didn’t compete. The goal was just to make them look simple and clean so the more interesting molding could steal the spotlight around the mirror and in the adjoined bathroom. But if you have more height to play with, you can see how we added baseboard and crown molding to another Ikea piece in those two posts.
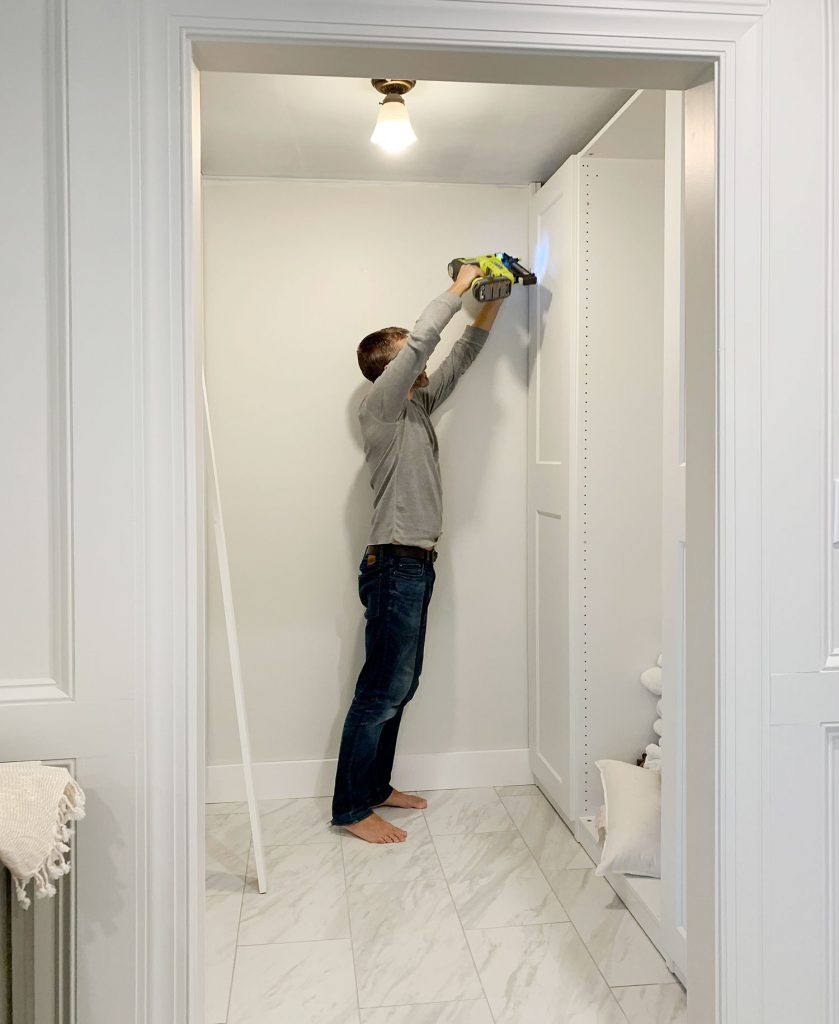
The secret to making Ikea stuff look built in is to make sure you’re adding pieces that end up being flush with the doors, not just the boxes (this is especially important when doing an Ikea kitchen). The method we like to use is a two-board approach. You nail a first board (which doesn’t have to be precisely cut) to be flush with the cabinet or closet box. This is easy to do with a nail gun, right through the inside edge of the box. The white thicker board sitting across the top of each of the wardrobes below is this first board:
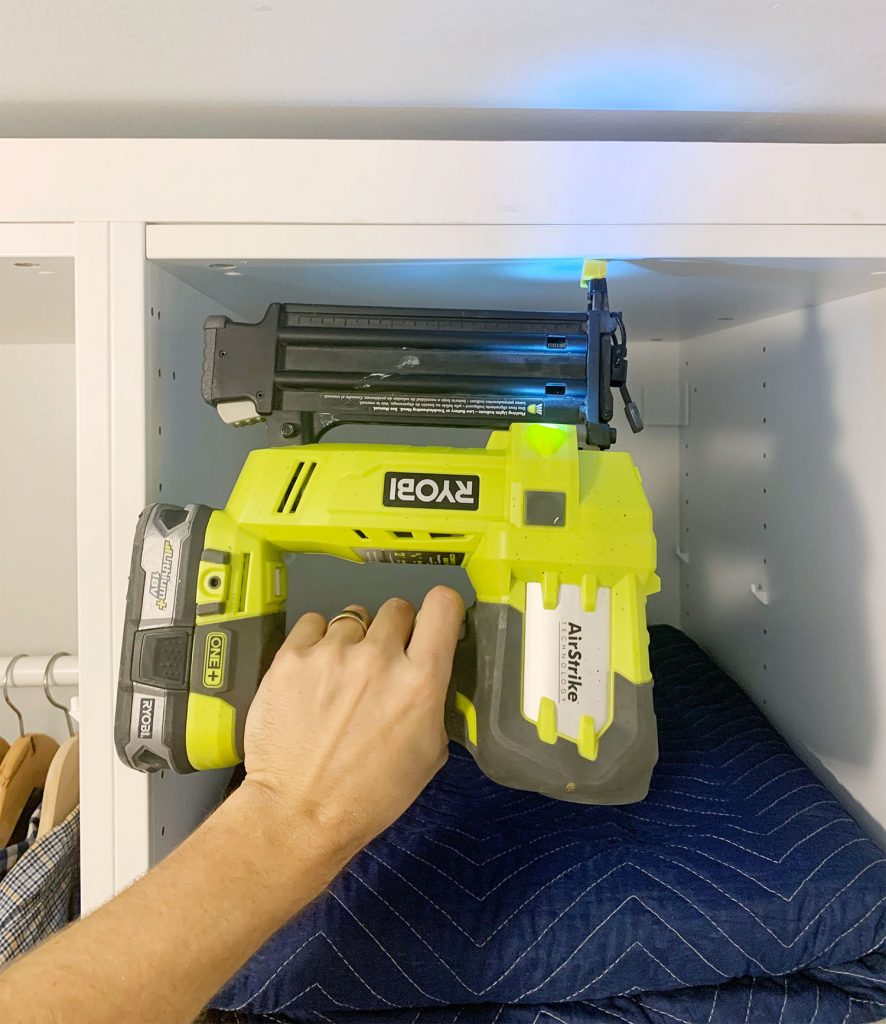
Then you nail your second board to the first board, which should be pretty precisely cut. Ikea sells filler pieces for this purpose, but you can also use primed 3/4″ boards like we did here and just paint them to match the Ikea wardrobe (literally just bring home some white swatches, find one that matches, and grab a little quart of paint for a really nice finished look).
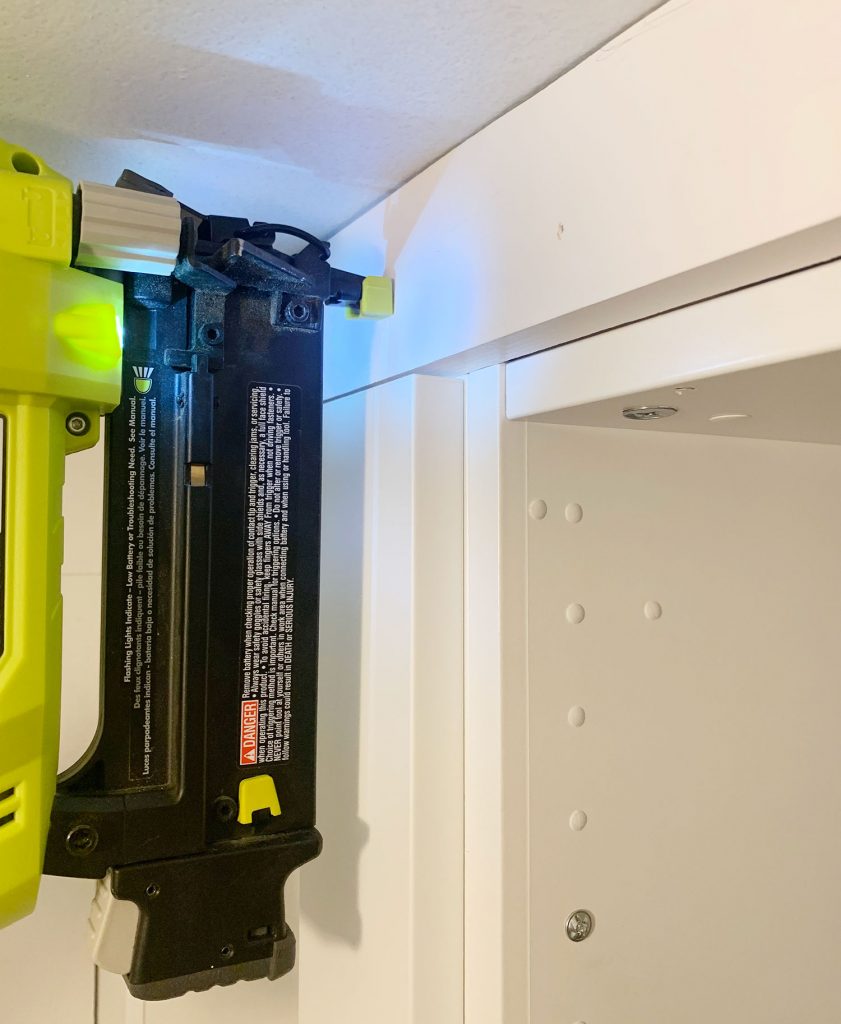
We repeated this technique around the sides, first filling the gap next to the wardrobe box, and then adding a second piece of trim nailed into that in front so it’s flush with the doors (skip the second one if you’re going doorless and just make everything flush to the boxes). This is the exact nail gun that we used & we used 1.5″ nails for this.
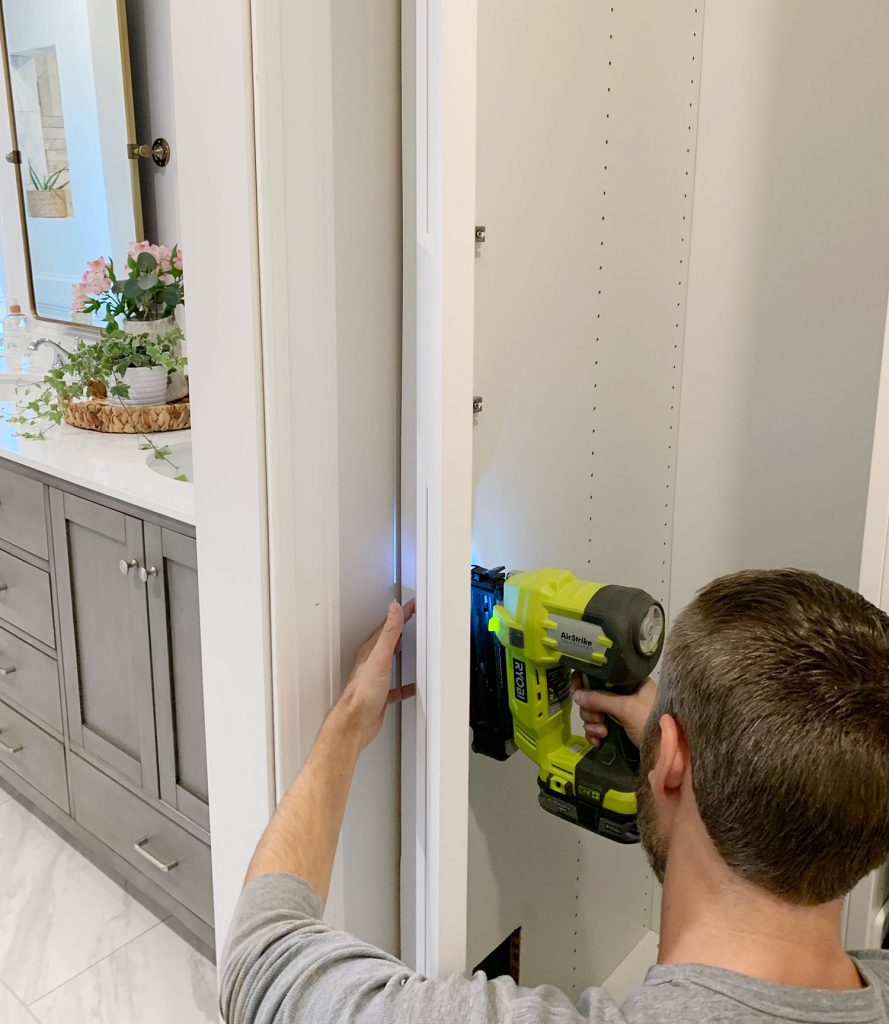
Here’s another photo that shows what the two-board system looks like. These are the side pieces that we used to fill the gaps against the walls. The other primed boards on the left side of the picture are just part of the molding treatment we did in the closet and bathroom, so ignore those if you’re not adding that as well. And yes, John is going to write a post about how we did that fancy molding very soon for everyone asking. I think it’s the single best thing we did to elevate the entire feeling of the closet and bathroom! And it wasn’t that expensive at all!
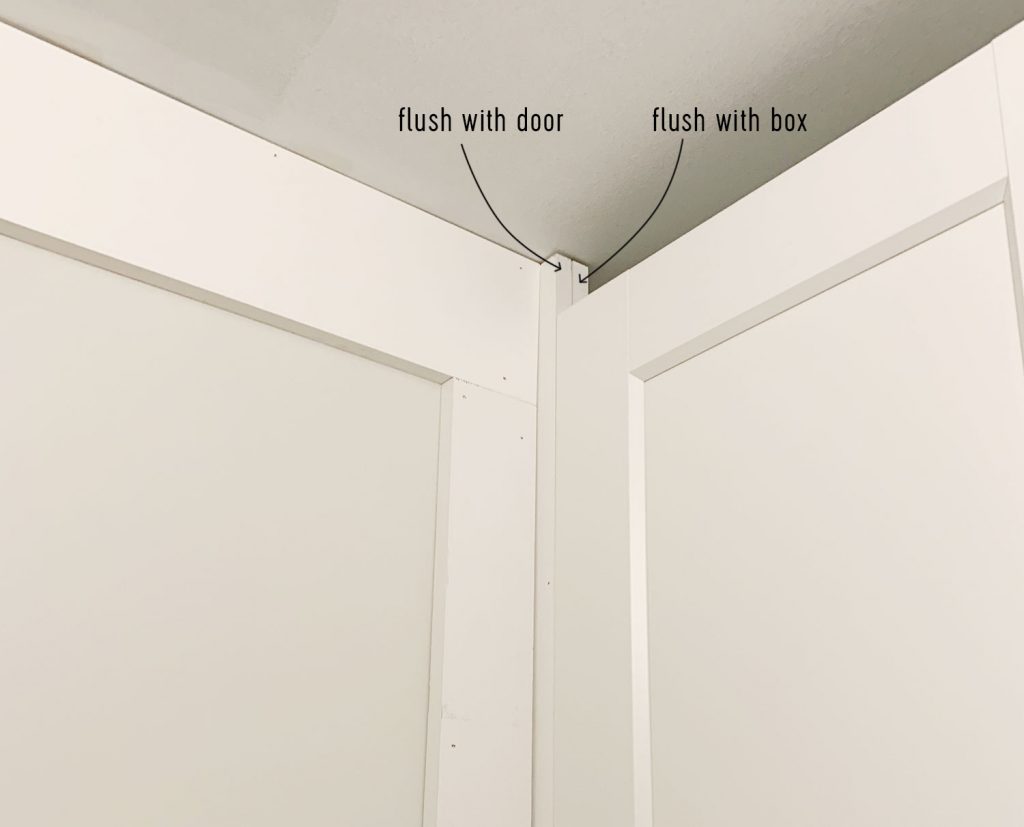
Once everything is nailed in place, you just have the fun/tedious task of filling all of your nail holes (this guy makes quick work of that) and caulking your seams (this is our favorite caulk for this job). You can see how unfinished the seams and cracks look in the photo below versus the picture under this one when they’re all filled and painted.
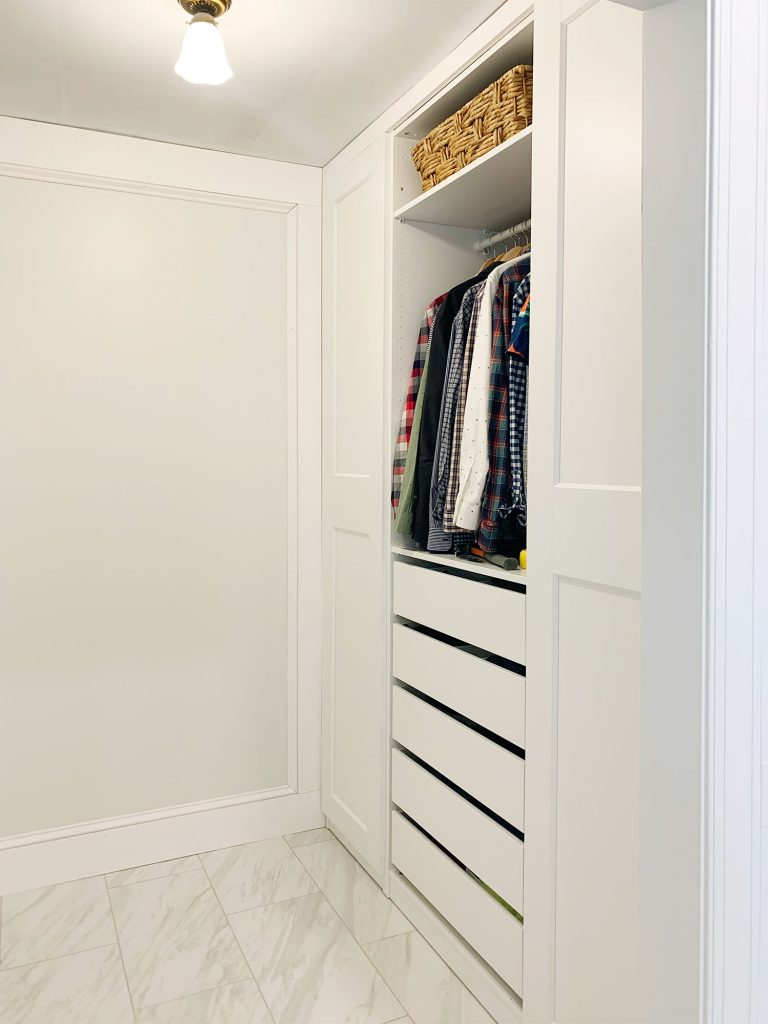
Speaking of paint, after you’ve caulked and filled your holes, the last step is just to paint all the primed wood that you added whatever color you’ve determined looks closest to your cabinetry in the lighting situation that you’re dealing with (we used Behr’s White – that’s the actual name of the color).
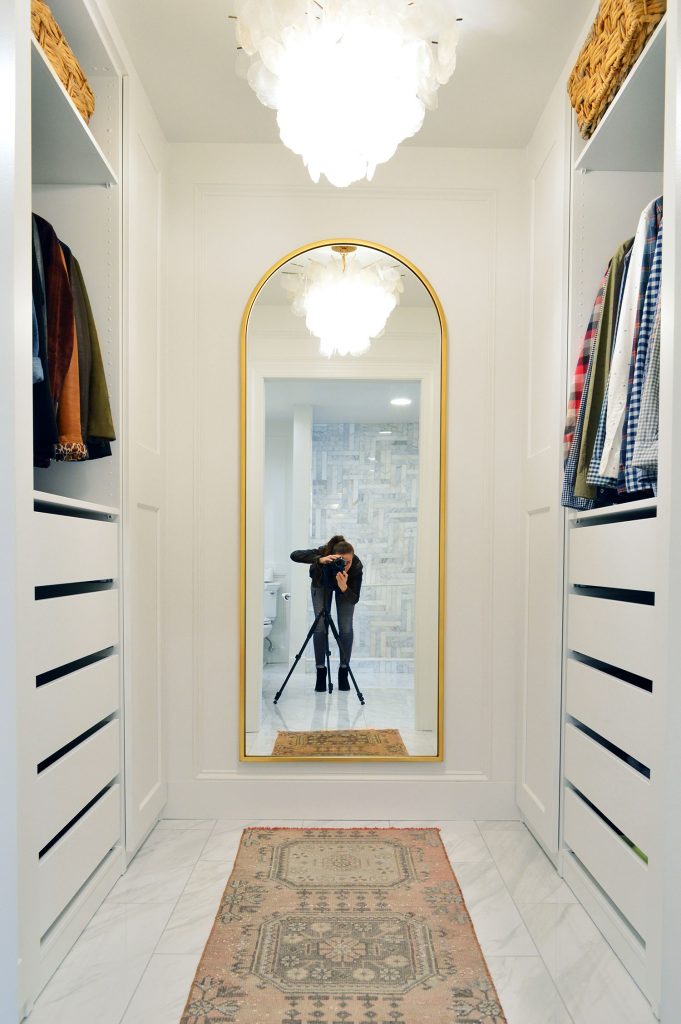
When the dust clears and the paint dries, it’s pretty amazing what $65 worth of wood can do to make an entire closet feel way more polished. Speaking of the how much things cost…
The Budget Breakdown
Let’s break this sucker down. Here’s what we spent to make a bare 8′ wide by 6′ deep box of a room work a whole lot harder for us:
- Pax Wardrobes (Boxes): $440 (during their 20% off sale – which is going on now again! Ends Feb 2nd!)
- Grimo Doors: $120 (for all 4)
- Interior Fittings & Dividers: $885
- Ikea Delivery Fee: $129 (this used to be $99 but we noticed on the receipt it went up – dang!)
- Brass Arched Floor Mirror: $385 (on sale down from $549 & we saved on shipping by picking it up in store)
- Capiz Chandelier: $199 (on sale from $250)
- Vintage Turkish Rug from Etsy: $187 (on sale from $250)
- Primed Wood To Build In Wardrobes: $65
- Paint & Caulk: $26
- TOTAL: $2,436*
*Note: this total doesn’t include the tile/electrical/drywall repair/etc that we did in the closet at the same time as the bathroom since it’s tough to break out the cost for just this space. That’ll all be in the bathroom budget breakdown though, so stay tuned for that!
And for anyone who might have a similarly sized closet but a lower budget – a quick way to slim down this closet cost would be fewer pullouts/drawers and more shelves (they’re significantly cheaper), you could also skip the doors, and grab a cheaper mirror at HomeGoods or even a thrift shop. I’ve been dreaming about this arched one for years & knew it would tie into the brass bathroom mirrors I’ve also loved forever, so I went for it when it got marked down during a big pre-Christmas sale. No regrets!!!
While we’re on the budget topic, we got asked a few times if we considered other systems – like the Elfa stuff from The Container Store. We definitely did but for many of the reasons we outlined above, Ikea’s Pax system won out. For anyone looking for a cost comparison, this much less built in looking Elfa system from The Container Store (in 6′ widths just like the two in our closet) seems to run about $1680 for two (that’s the current sale price, marked down from the original price of $2400 for two!). When we add up all of the Ikea parts for ours, including delivery it comes to $1574 for both 6′ sides of our closet, and that includes a lot more drawers and doors and pullouts (with soft close features!) and a much more built-in look that we personally prefer.
Just for fun I googled around to find out the average cost of a true “custom closet” and according to this site those typically cost between $3,000–$5,000. That’s interesting to know because I honestly had no idea (I’m the person who assumes all the Housewives closets are at least a million dollars on their own – you know, before they add all the Birkins and the boudoir photos of themselves).
Ok, that feels like a good note to end on. Hope you enjoyed this beefy burrito of a post about the closet. We’re planning to finish off the bathroom soon and share all of that info, although it probably won’t be next week. But… SOON! And if you want to see it almost finished, here’s a huge update post we shared a little while ago. So close to the finish line I can taste it.
*This post contains affiliate links, so we may earn a small commission when you make a purchase through links on our site at no additional cost to you.
