Tired of messing with garden hoses, sprinklers, and timers to water your lawn? Or just watching your grass die in the summer sun? Well, it turns out that you can install an automated, in-ground irrigation system yourself! It takes some planning, patience, and elbow grease, but we saved hundreds of dollars tackling this project ourselves. Here’s how we did it…
Before we dive into the step-by-step instructions for this project, let’s answer a few important questions.
Should You DIY Your Sprinkler System?
I’m proud of accomplishing this project, but to be honest, I don’t think a large yard like ours was a good candidate for a DIY sprinkler system. Due to its size and funny shape, this project took longer and was much more exhausting than I expected. I worked over three weeks to accomplish what a professional crew could’ve knocked out in a day or two. It got done, but my body felt it… hard.

So I think smaller yards or gardens are better candidates for DIY irrigation system – especially if a drip irrigation system will do the job. They are super easy to install! But installing a large system like this can be taxing due to the repetitive digging, gluing, and shoving pipes together.
That all being said, we did save around $1,700 vs the professional estimate we received. Plus, knowing how my system is installed means I can make changes or troubleshoot issues down the road without paying a pro.
Why Install A Sprinkler System
Sprinkler or irrigation systems are helpful for lots of reasons. Most obviously, they help lawns, gardens, and even pots & planter beds stay healthy and thriving by providing consistent, deep watering – even during dry times. This can save you time, energy, and worry versus water by hand with a hose, sprinkler, or watering can.
Additionally, modern irrigation controllers offer lots of customizations that can make your watering as effective and efficient as possible. For example, you can create schedules that water drier sections of your lawn longer than shaded areas. We also installed a wifi-connected smart controller that uses local weather forecasts to skip scheduled waterings when rain is expected.
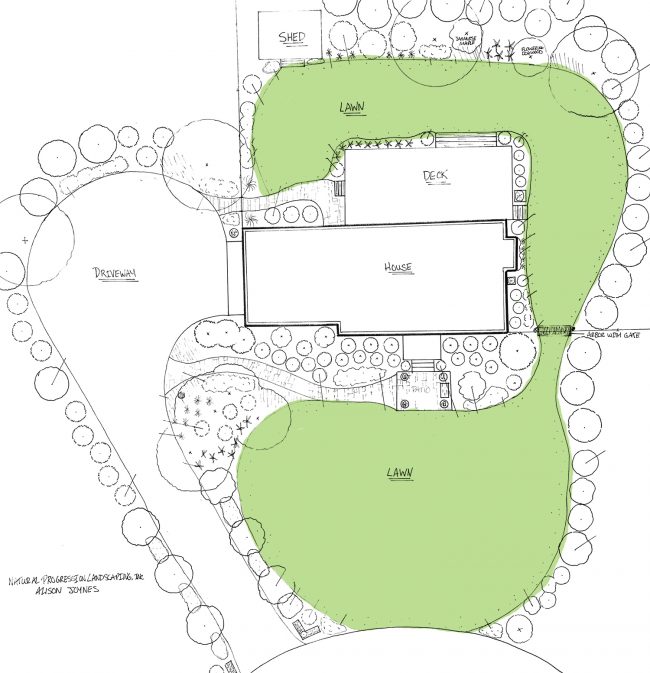
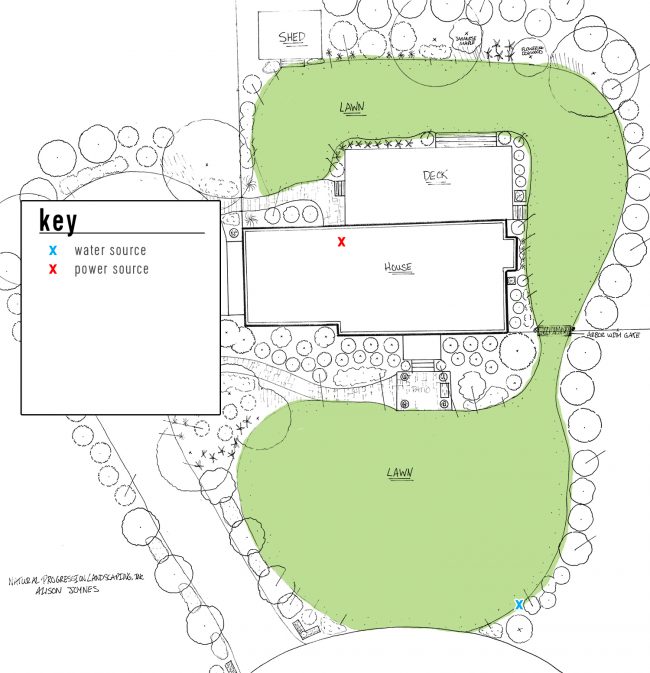
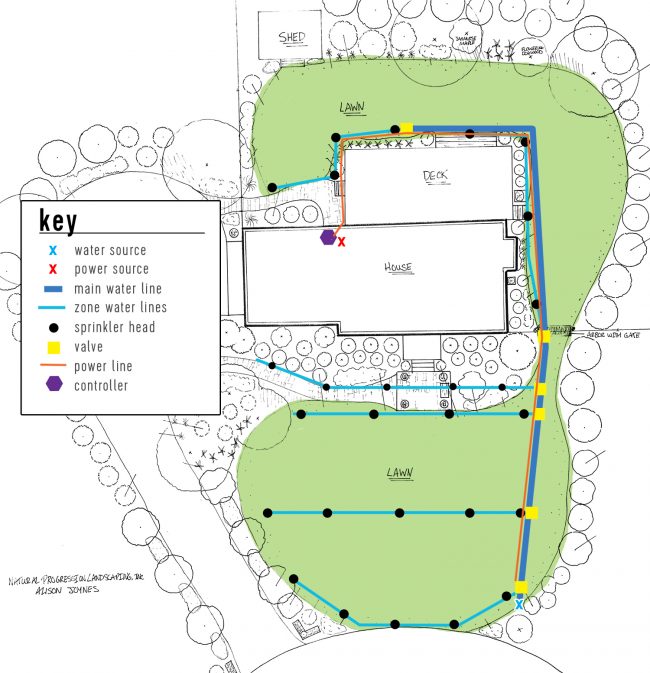
We chose to add a sprinkler system because we were embarking on major landscaping improvements. As an anniversary gift to ourselves, we paid a landscape architect $300 to draw the plan below. But she advised we figure out a watering plan before investing any money in plants, since the summer sun bakes our yard pretty hard. We haven’t started on this plan, but I’ll use it in this post to diagram our sprinkler system.
We got a few quotes from professionals to install an irrigation system. The costs were about $3,500. We were juuuust about to pull the trigger on one when a neighbor caught wind of our plan and offered to help install one ourselves. He had done it twice before, so last September, we finally got the ball rolling.
Steps to Installing a Sprinkler System
Here’s a quick rundown of the steps you’ll follow to DIY your sprinkler system. We’ll break each part down in more detail below.
- Get A Companion Meter
- Plan Your Layout
- Call 811
- Buy Supplies
- Dig Trenches
- Lay Your Pipes
- Install Your Valves
- Install A Backflow Preventer
- Add Sprinkler Heads
- Wire Everything Together
- Program & Finishing Touches
Step 1: Get A Companion Meter
A companion meter is a secondary water meter that many municipalities offer for things like irrigation systems or swimming pools. Your primary water meter probably charges you for both water use and water disposal, aka sewer fees. Since there is no sewer activity related to sprinkler systems, companion meters only charge for water use, which will keep your utility costs down over time.
In our county, companion meters are installed by the county water department. We had to submit an application to their office, pay a $500 fee, and wait a couple of weeks for it to be installed. So get this ball rolling before you do anything else, depending on what your locality requires.
Step 2: Plan Your Layout
Planning a smart layout for your sprinkler system is one of the most important steps. It can save you time, effort, and even money. Ultimately, you want to get water where you need it, following the least complicated route possible.
To start, identify two important sources:
- Where your water is coming from (your companion meter)
- Where your power is coming from (where you’ll install your controller box)
For us, the water meter location was set by the county. And since we wanted the irrigation controller in our garage, we identified a convenient outlet we could plug everything into.
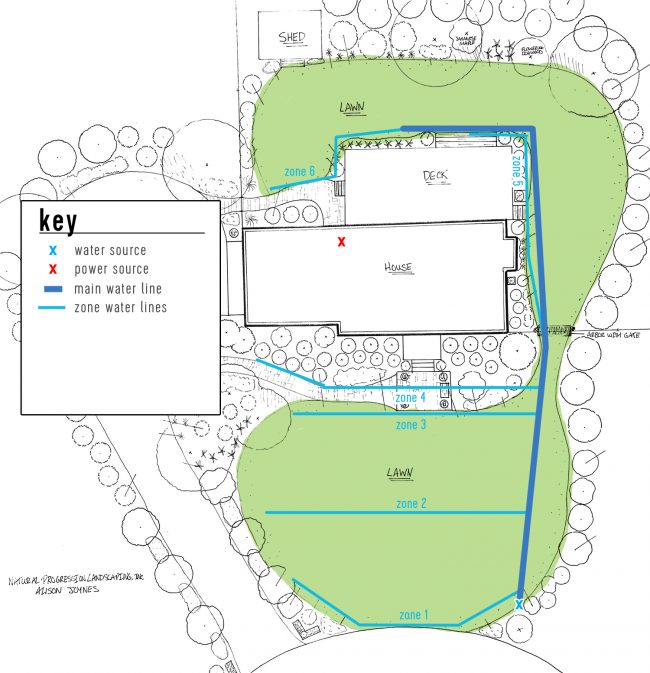
Next, determine where you’ll run a main water line. From this, you’ll branch off smaller water lines to each zone. These zones are groups of sprinkler heads that will turn on or off together. Zones serve a couple of purposes:
- Maintaining water pressure. Depending on the size of your yard, you may not have enough water pressure to get ALL of your sprinkler heads to spray simultaneously. Zones break them down into a smaller sections.
- Customizing your watering plan. Creating zones means you can adapt to different watering neds in different parts of your yard. For example, a shady section of lawn may need less water than the sunny areas.
Here is how we planned our main line (dark blue line) and zone lines (thin blue lines):
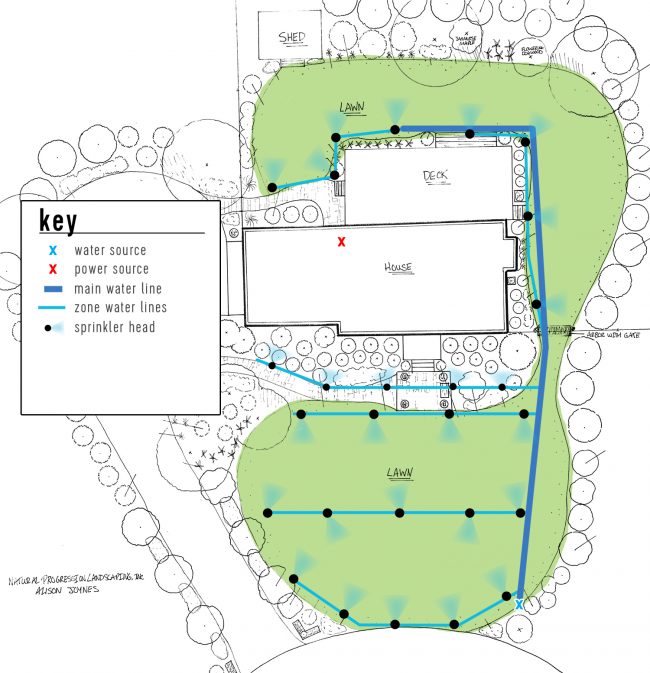
Next, plan and mark the locations of each sprinkler head. We walked off the distance between each head (about 8-10 large steps apart) and marked them with orange marking flags. Remember you’ll be able to adjust the arc and direction that each head sprays later. This way, you can get sufficent coverage while limiting overspray to areas that don’t need water (woods, driveways, decks, etc).
Step 3: Call 811
Once you have marked your layout, be sure to call 811 to have utility lines marked. This is a critical step to complete before you begin digging. Most of your trenches won’t be deep enough to hit utility lines, but it’s always important to check.
Step 4: Buying Sprinker System Materials
Having planned your layout, you can now purchase supplies. Here is a general list below, but the quantities will depend on your plan. We’ll explain what each does below it.
- Sprinkler heads (for lawns)
- Mister heads (for gardens / flowers beds)
- 1/2″ Swing pipe or “funny pipe,” 1-4 ft for each head
- 1/2″ Swing pipe elbows, 2 for each head
- 3/4″ x 3/4″ x 1/2″ threaded tee, 1 for each head
- 3/4″ valve, 1 for each head
- Valve box, 1 for each valve
- 3/4″ PVC pipe
- 1″ PVC pipe
- Assorted 1″ and 3/4″ PVC connectors
- PVC cutting tool
- PVC primer and cement
- Controller with enough zones
- Sprinkler wire with enough zone wires
- Backflow preventer
- Digging tools, such as a trench shovel
I know that sounds like a lot, but once you understand how a sprinkler system is connected, it makes more sense. We’re going to work backwards a bit, starting from the most visible part of your system.
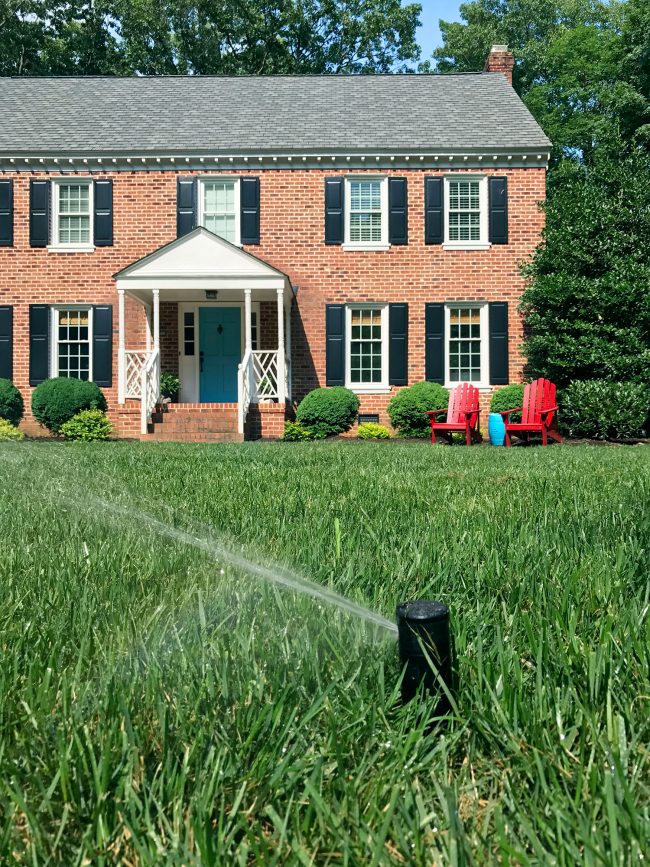
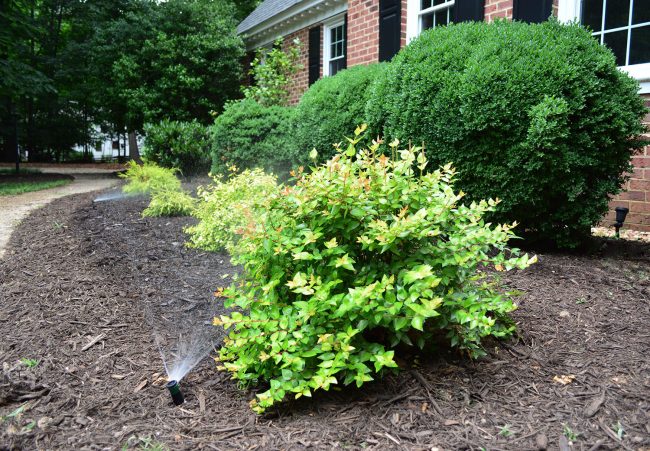
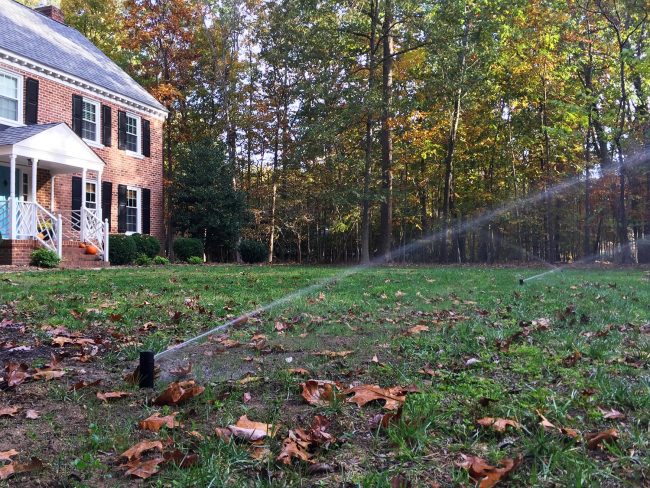
Sprinkler heads & connections
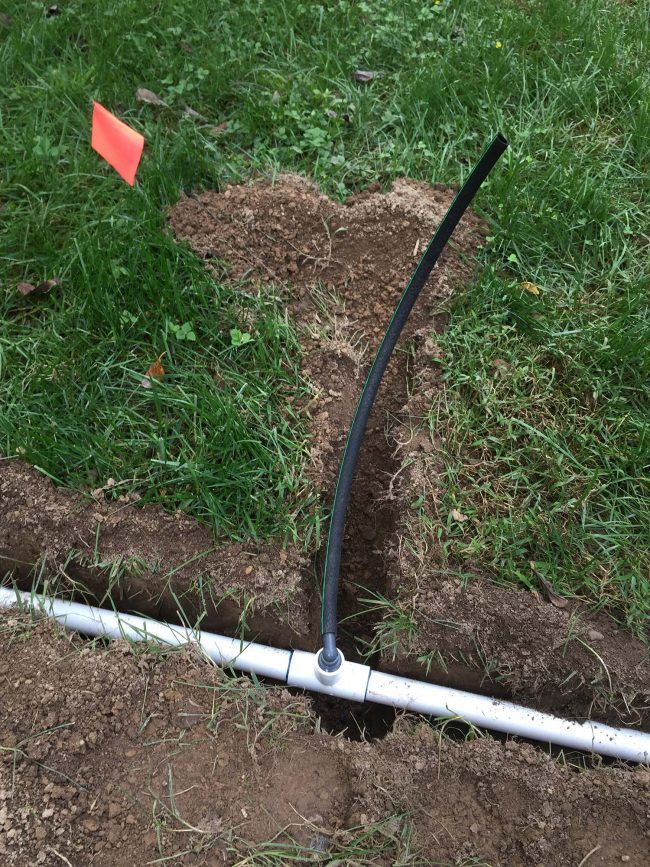
We chose these sprinkler heads for our lawn and smaller misters for our mulch beds. In both cases, most of the head is buried underground, sitting just barely above the dirt line. When the water turns on, the pressure pops the head above ground (as shown below) and rotates back-and-forth in whatever arc you set. When the water shuts off, it lowers back down.
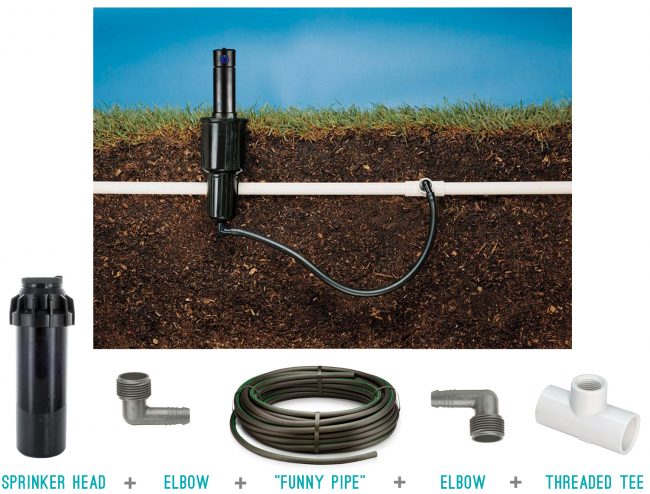
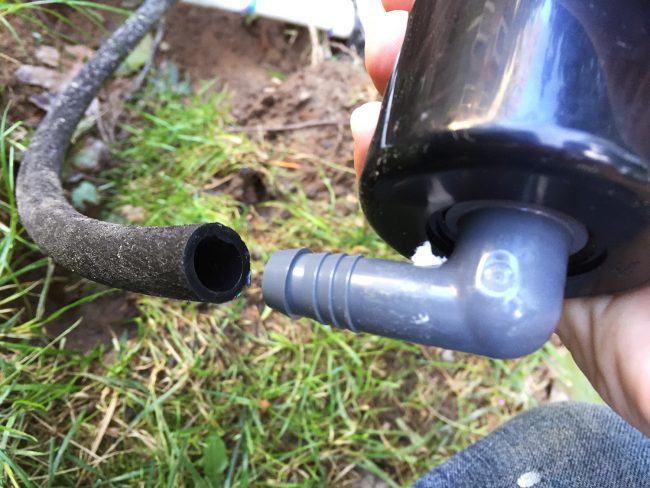
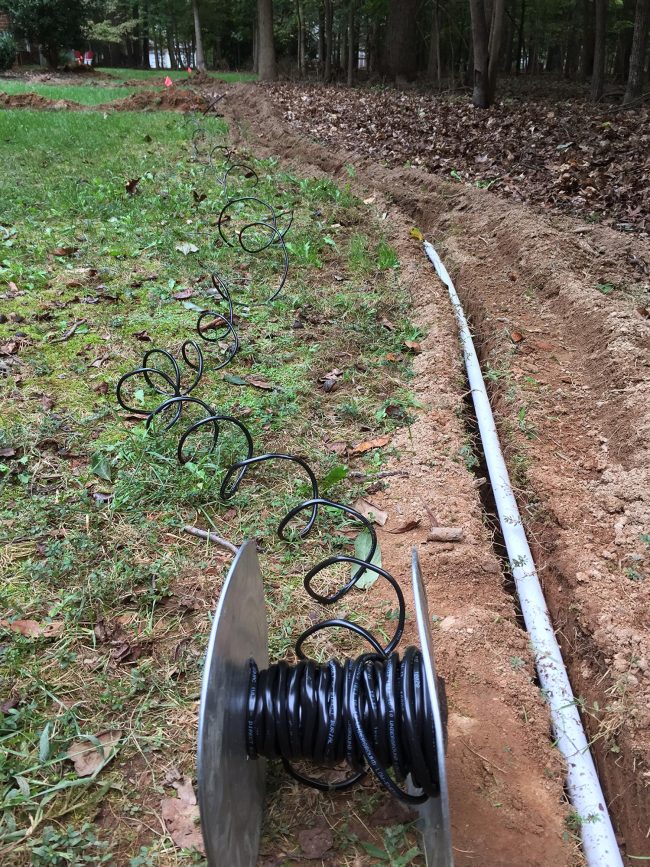
Each head gets water from the zone water line (made of 3/4″ PVC pipe) via a short section of swing pipe, sometimes called “polyethylene pipe” or “funny pipe.” This flexible pipe makes it easy to place the head exactly where you want them, especially around curves or other areas where rigid PVC would be unwieldy.
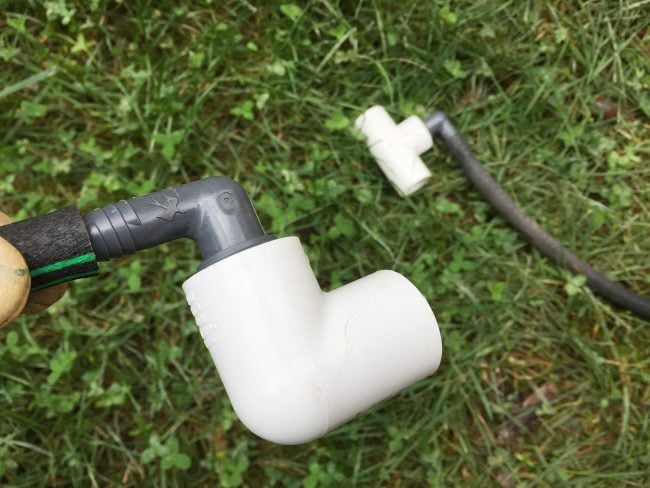
To connect the swing pipe, you’ll need a swing pipe elbows on either end. One screws into the bottom of the sprinkler head, the other into a threaded tee installed in your PVC zone line. Make sure you have enough of the illustrated shown above for every head you’re installing.
Valves & Controller
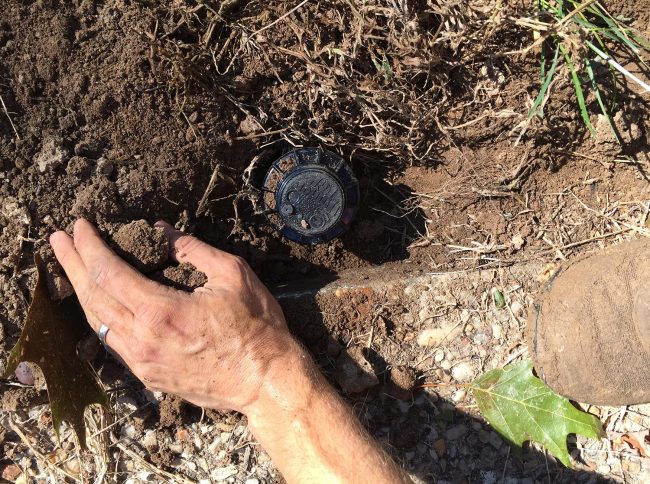
Next, let’s talk about valves. Each zone is controlled by a valve. This is small electronic device that is installed at the start of each of your zone water lines and controls when water flows into that zone. Since the valves also sit underground, you’ll install it within a valve box that keeps it clean and provides easy access for repair or troubleshooting.
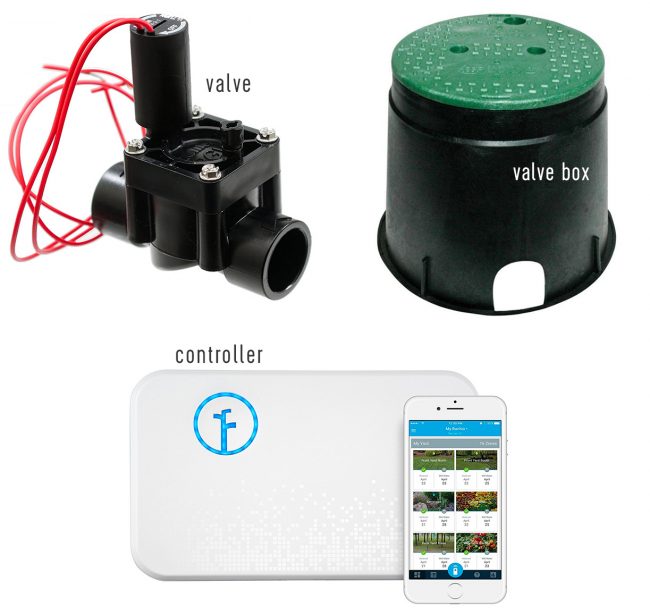
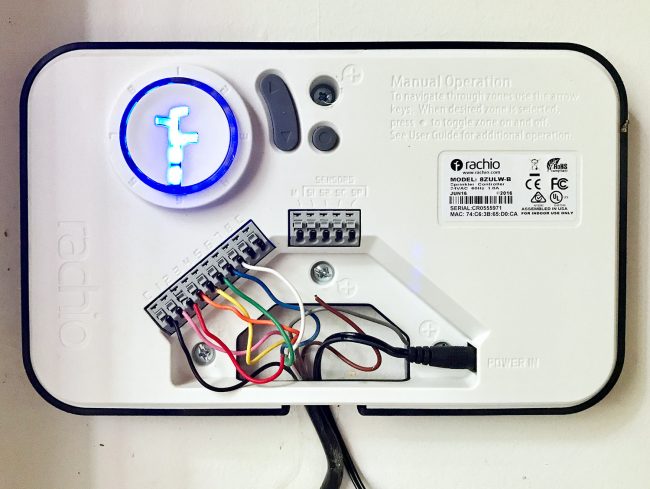
The valves are controlled by a controller, which is where you’ll program your watering schedule. Be sure to buy one that accommodates the number of zones in your plan. We had 6 zones, so we bought an 8-zone version (the smallest option).
We chose a smart wifi controller so that we could control our sprinkler system via an app, but there are simpler options with their own screens and buttons. We also liked that it automatically adjusted watering based on the local weather forecast (no need for a separate rain sensor). Plus, we get phone alerts when it’s running or there’s an issue, and we can even control it with our Alexa!
Wire, Pipes, and Other Supplies
The controller plugs in near your power source and is wired underground to each valve. Make sure the underground sprinkler wire has enough strands so each zone gets a dedicated line/color. Each strand should have its own color. It’s fine if it has extra.
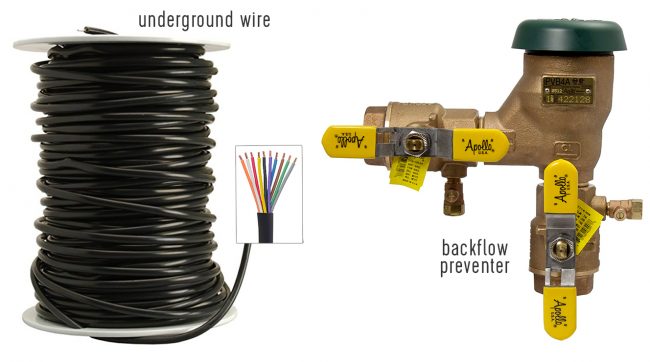
The last item on the list is a backflow preventer, which is a device our county requires. It prevent water in your system from flowing back into the water main. It’s one of the few above-ground parts of an irrigation system, so you may have noticed them in yards with a sprinkler system.
And obviously, there’s lots of PVC pipe and assorted supplies. We use 1″ pipe for our main line and the first 2 or 3 heads of our zone lines. We then reduced to 3/4″ for the rest of each zone, since it saves a little bit of money. You will also need various connectors (couplings, tees, elbows) as well as a cutting tool and glue, but we will cover that later. But refer to your layout to estimate how much length of PVC you will need.
And of course, you’ll also need tools to dig your trenches. Speaking of which…
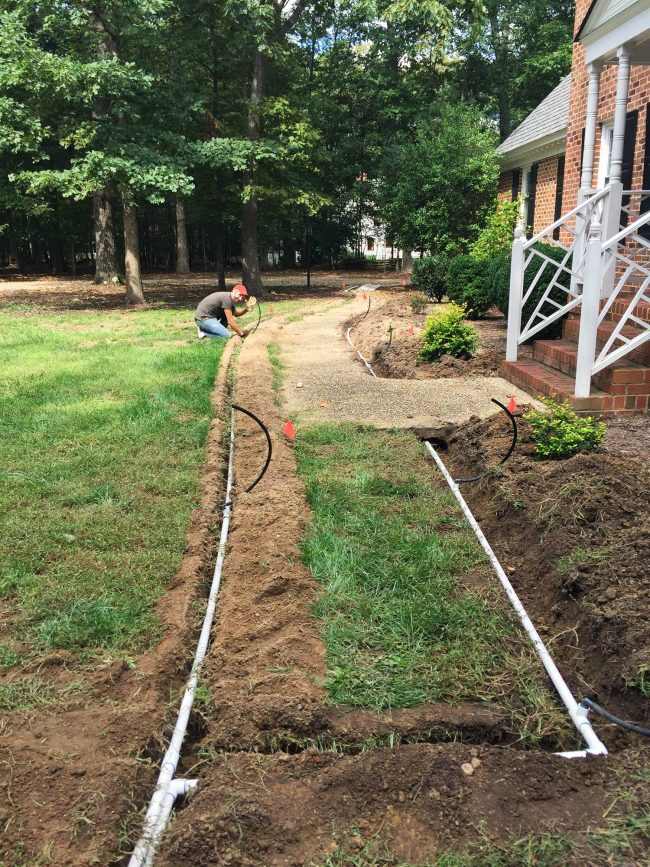
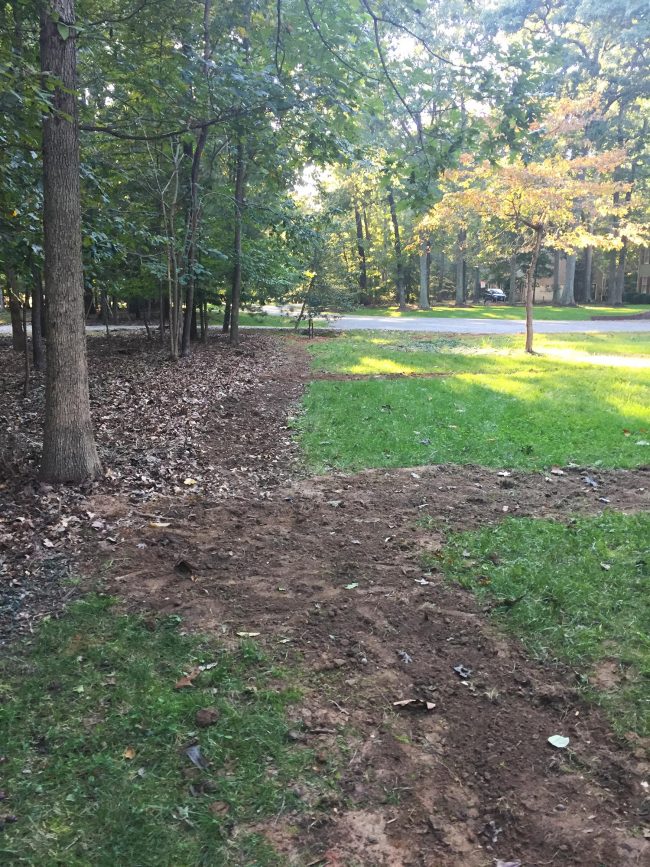
Step 5: Dig Trenches
Depending on the size of your yard and the density of your soil, this step may require some heavy machinery. Again, make sure you call 811 first and take extreme caution around utility lines. For instance, we hand-dug a section near a gas line just to be safe.
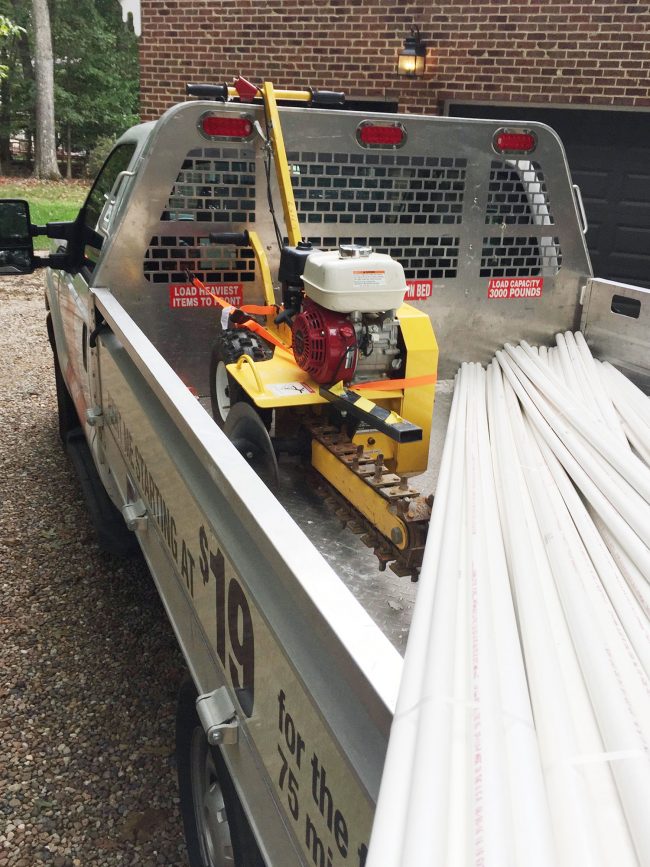
For the rest of the yard, I rented a trencher from our local Home Depot for was $88/day. I also had to rent their truck to get it home, so I bought several 10ft pieces of PVC pipe at the same time.
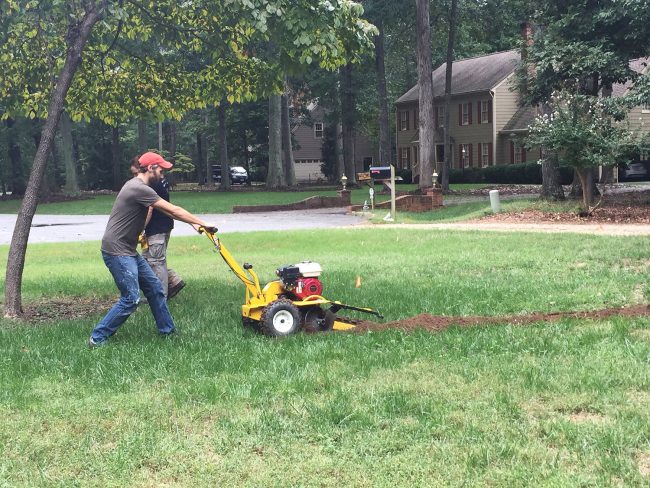
The trencher was VERY heavy and tough to manuever. It took me and two neighbors just to get it in and out of the truck! Opreating it was also tiring. You steadily pull it backward as the “blade: churns the dirt up and leaves a narrow trench. Between yanking its weight around and feeling the vibration it sent through your bones, it wore me out BIG TIME.
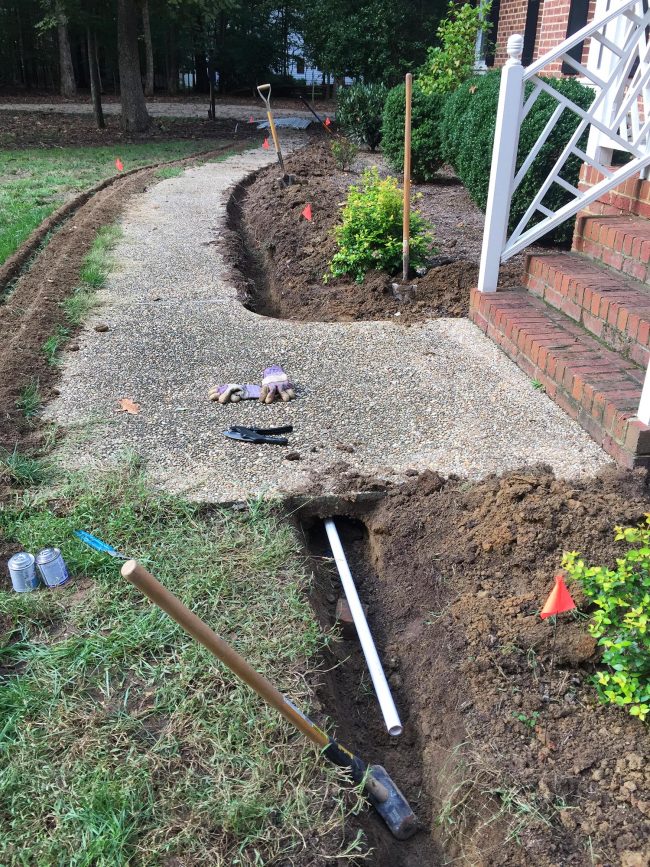
Additional, we hand dug some sections close to our sidewalk (as not to damage it) and had to ram a section of PVC under our concrete using a mallet. All in all, it was a very tiring start to the project and this step took us nearly an entire day.
My neighbor thinks he used a smaller cable installer last time. I can’t speak to whether that would’ve worked or not (the trench is a bit smllaer) but it might be worth asking at your tool rental place, since it may be easier and faster to maneuver.
Step 6: Lay Your Irrigation Pipes
Once your channels are all dug, it’s really just about connecting the pieces together. This is straightforward, but can be tedious and time-consuming. I started by loosely laying out my PVC along my trenches.

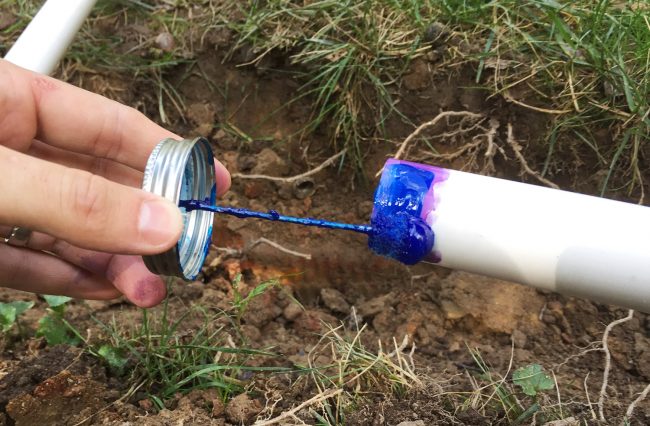
To connect all of the pipes, you’ll use various couplings and elbows that get glues in place. To do that, you’ll use a PVC primer and cement. Start by coating the end of both PVC pieces in this purple primer using the built-in brush. It’s thin and stains, so try not to drip it on sidewalks or driveways.
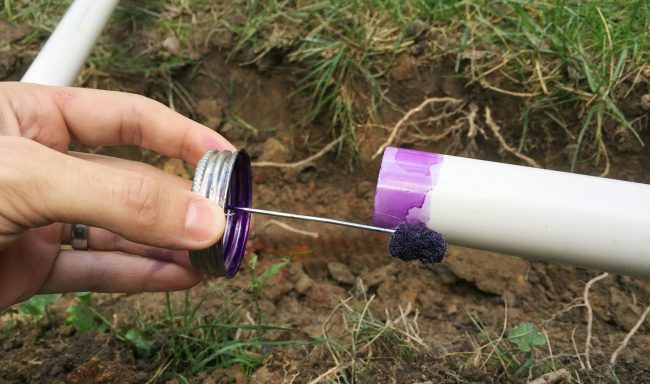
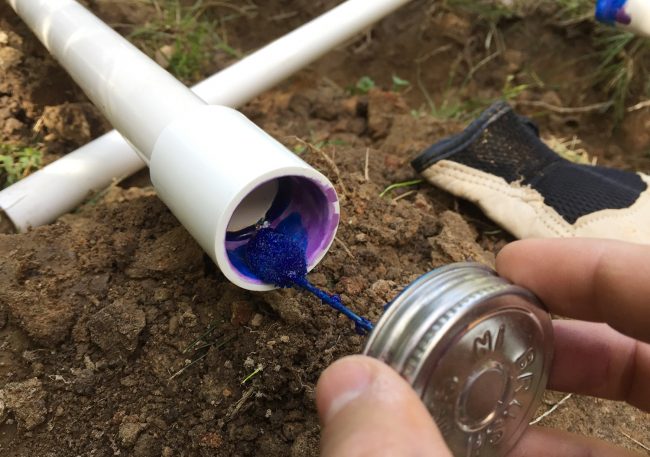
The primer dries within a couple of seconds, at which point you can apply your cement the same way. The cement blue and gooey, so again be mindful of drips.
Repeat this process on the other surface you’ll be attaching it to – in this case, the inside of a coupling.
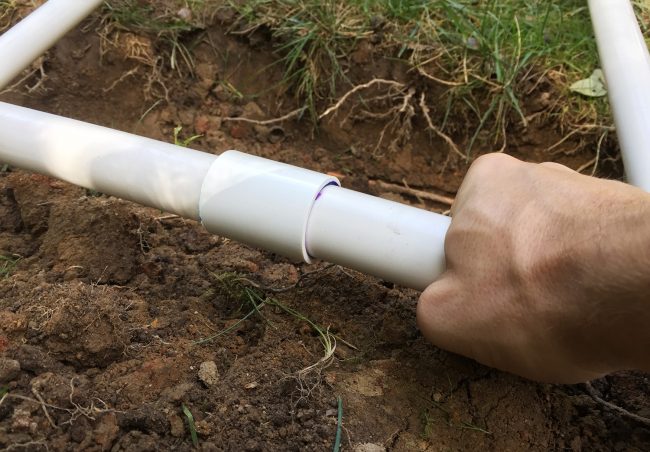
Then you push the pieces together, giving it a slight twist and holding for about 30 seconds. I usually do this with two hands to apply pressure from both sides, but one hand was occupied taking this pic.
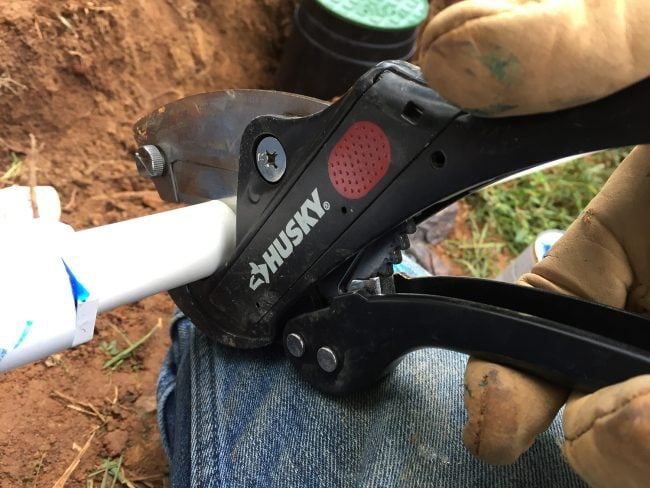
If ever I needed to cut a piece of PVC, I used this ratcheting pipe cutter. It’s much easier and faster than using a regular saw or knife.
This process was easy, but very tiring. There were LOTS of connections to create and working hunched over, repeatedly pushing pipes together with some force took a toll on my back and shoulders. I had some of the worst sleeps of my life during this project this repetition tweaked my shoulder at some point.
Step 7: Install Your Valves
Along the way, you’ll need to install a valve at the start of each zone, right where you branch off your main line. Valve installation has two parts – the plumbing and the wiring. Connecting it to your PVC pipes follows the process above, but you want need to buy threaded couplings that screw in place. We secured ours with plumbers tape and a couple of tightening twists of my wrench.
Be sure to install each valve in a valve box and in the right direction too. They should have arrows that indicate the direction of water flow.
The valves still need to be wired, but that can wait until you’ve finished all of your plumbing tasks.
Step 8: Install A Backflow Preventer
A backflow preventer was required by my county and it’s where I encountered several hiccups, causing me to dig up my work more than once.
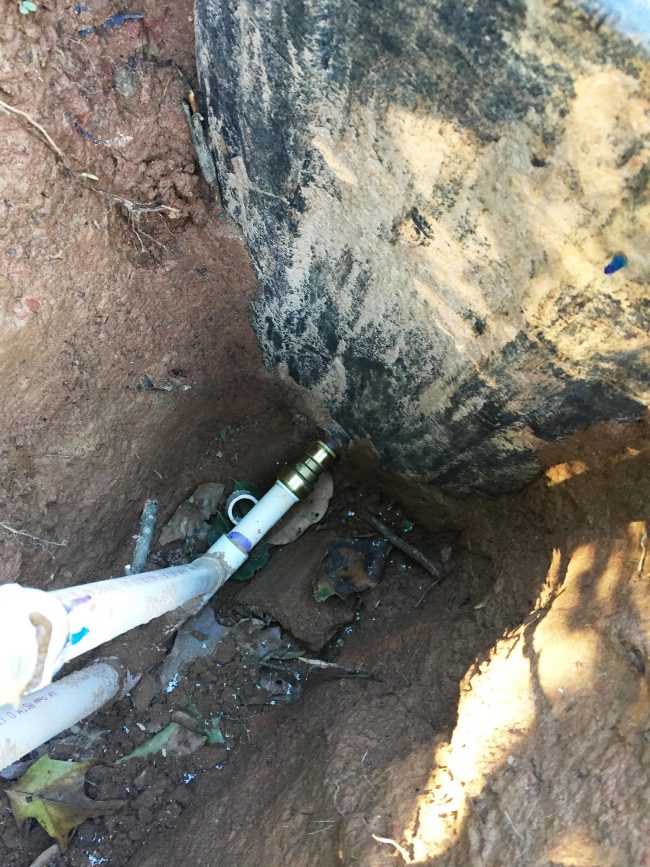
My first “saga” was connecting my PVC pipe to the county’s copper pipe without leaks. This connection was about 2.5 feet in the ground, making it very difficult to work on. We tried several things, no luck. We eventually called a plumber and even they took two visits to solve it. Turns out the county’s pipe had a gash on its underside (which none of us could see). We finally got a leak-free connection after he cut that part of the copper pipe off. It was super annoyed and $150 poorer.
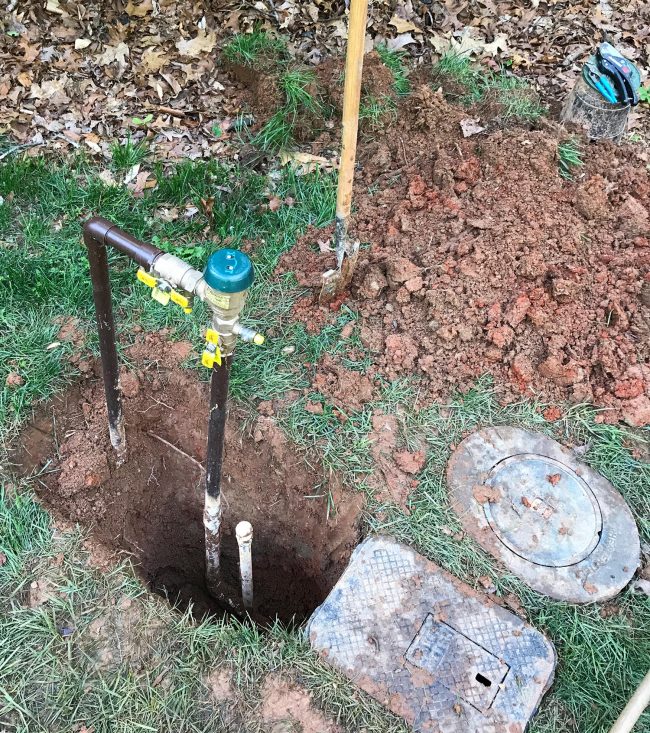
With that fixed, I installed my backflow preventer to match my neighbors (similar to to this diagram). But when the county inspector arrived, I learned several requirements had been updated and I failed in 3 ways.
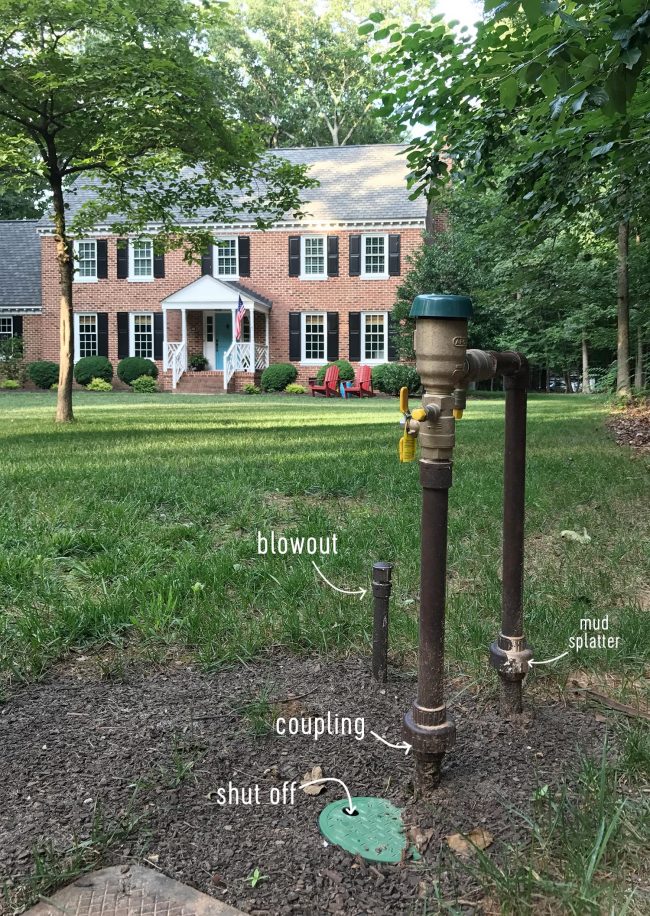
- I hadn’t installed a separate shut-off valve before my backflow. I thought the county shut-off was sufficient, but apparently not.
- I hadn’t installed couplings on either side of the device, so that the backflow can be fully removed for winter storage.
- I had put my blowout before the backflow preventer. The blowout is used to send pressurized air through the system when you winterize it. This is supposed to go after the backflow so you’re not blowing air through it.
Long story short, I am not the authority on backflow preventers and be sure to check your local requirements before installing yours!
Step 9: Add Sprinkler Heads
With my valves and backflow preventer installed, I moved on to installing my sprinkler heads. Previously, as I had laid my zoned water lines, I had prepped spots for my sprinkler heads by incorporating a threaded tee connector in my zone line. A tee is basically a straight coupling with a third hole on the top where I could screw in a threaded swing pipe elbow.
The swing pipe elbows threaded easily by hand, but I tightened each with screwdriver in the end for leverage for one last twist. I assembled these connections in bulk one night on the couch and also cut small (18″-ish) sections of funny pipe in bulk and attached them. They just twisted on with a bit of pressure. You’ll also need one eblow for the end of each zone line to stop the flow of water.
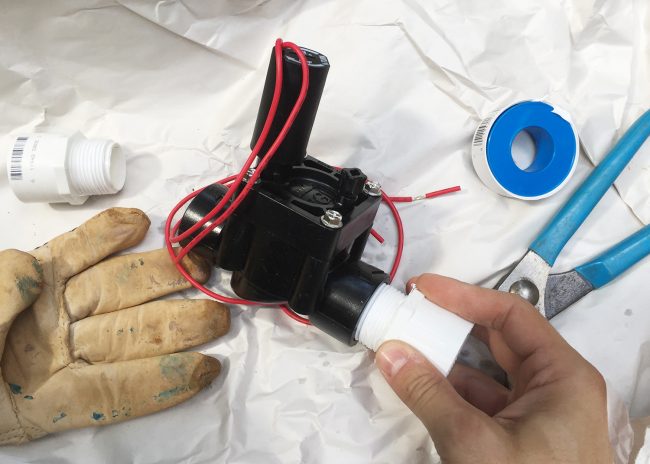
That same night on the couch I also one prepared my sprinkler heads in bulk (I had 27 in total, including misters). This meant twisting another elbows into the back of each one…
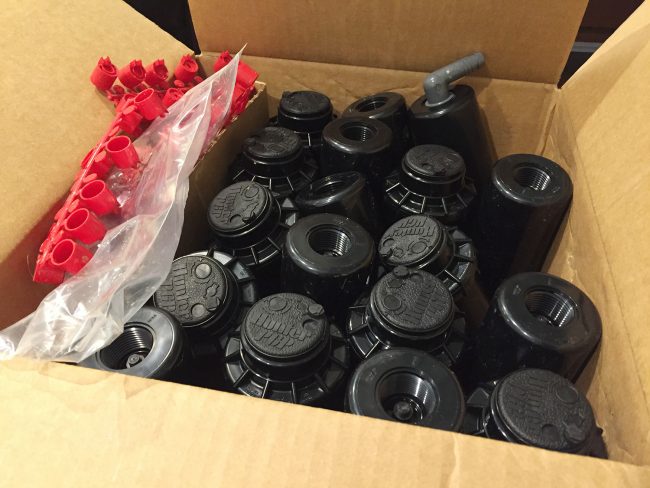
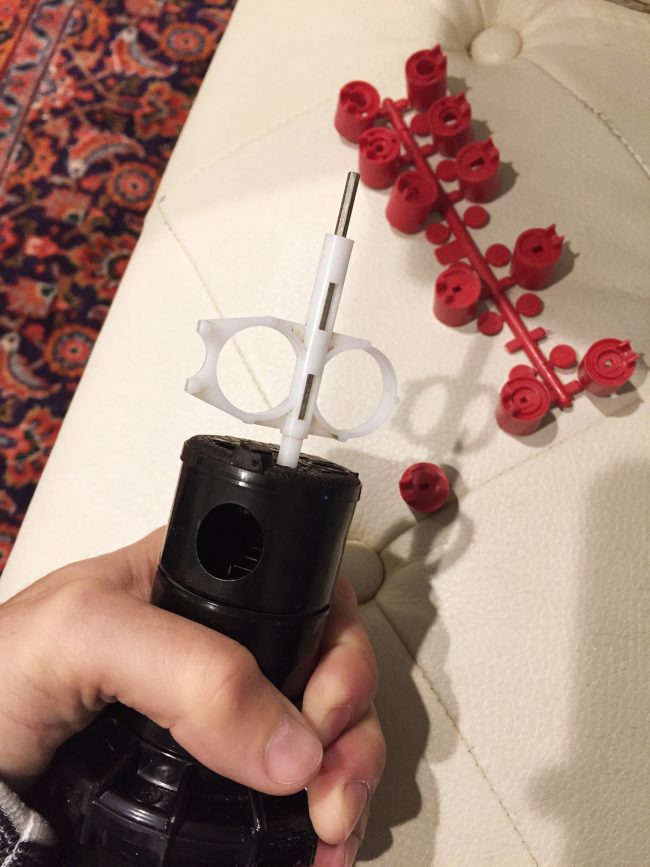
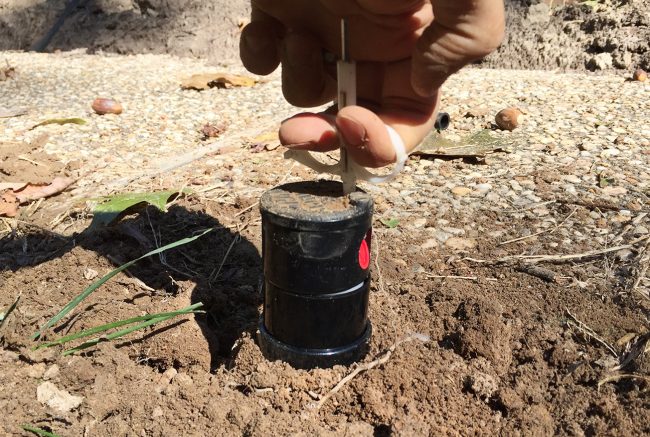
…and installing red nozzles into each one based on the type of spray I wanted. This took longer than you’d expect, since I had to use that special white “key” to pull the sprinkler head out of its chamber to access the nozzle hole. It took a surprising amount of force to keep it from snapping back in (note my white-fingertip grip).
The next day I was able to install all of my sprinkler heads to the other end of the funny pipe, cutting it to the desired length so that I could position my sprinkler head exactly where I wanted it in the ground.
I hand dug holes for the pipe and sprinkler heads to be buried, leaving just top of the each spinkler head exposed. They need to be low so you don’t trip over them or catch them with your mower.
You’ll still need to set the spray arc (determine stop and start points, or full circle) but that is done one the system is running.
Follow the manufacturer instructions for this and have patience. It can take a while, especially if you have 27 sprinker heads like us!
Step 10: Wire Everything Together
With all of your plumbing components in place, all that’s left is installing your controller and wiring your valves. Remember, you’ll be using sprinkler wire that is basically several individual wires wrapped together, each with a unique color for easy identification. That way you can keep track of which wire controls which zone’s valve.
I first installed one cut end into my smart controller, which I had mounted in my garage. I made black the common wire and then just went in “rainbow order” to help me keep my zones straight. The gray and brown wires could be used later if I wanted to add two more zones.
With my controller wired (but not plugged in) I threaded the wire across the yard, through my main line trench, all the way to my first valve. I left excess as I went, since it was better to have extra than not enough.
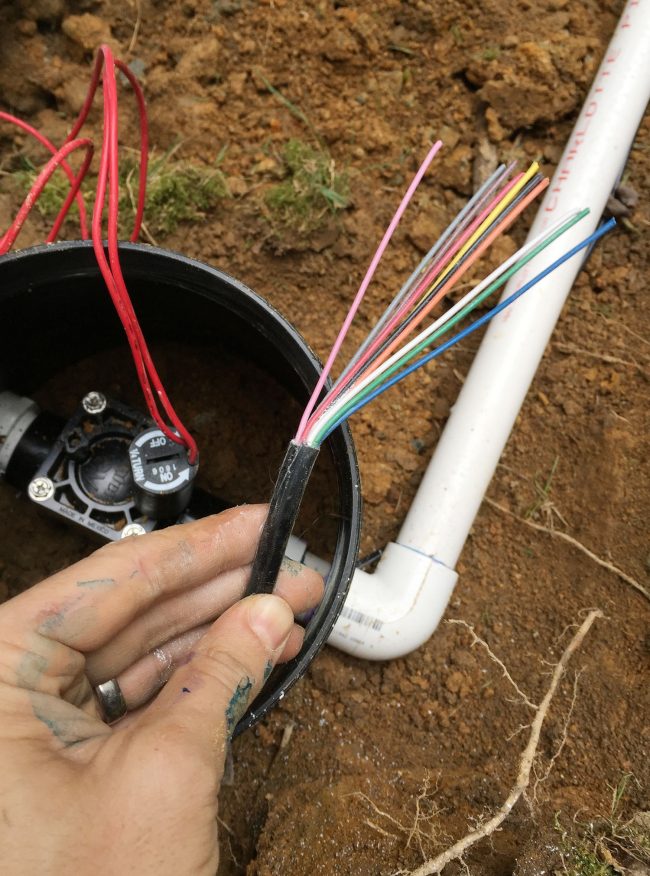
I then cut the wire at each valve and connected it to the valve’s wires using waterproof wire caps. One wire got the black (common) wire and the other got that zone’s assigned color (green in this photo).
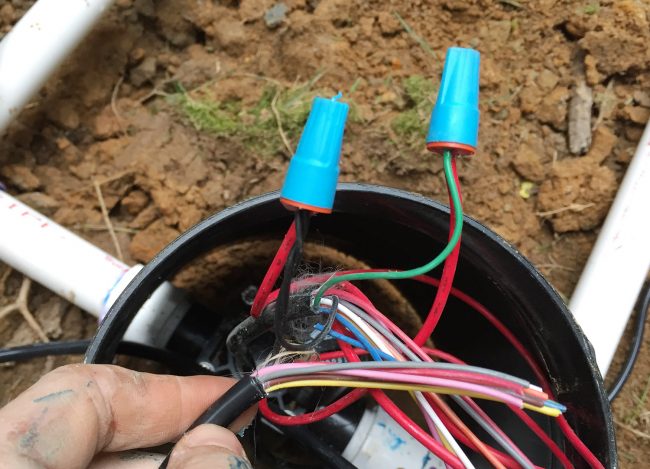
Once a color is connected to a zone, it’s no longer needed further down the line. But in order to continue all of the other colors down the system, I connected them one-by-one to the same color strand on my next section of sprinkler wire. Same goes for the black common wire. In retrospect, I probably could’ve figured out a way to not cut all of the colors at each valve and just extract the colors needed – which would’ve saved lots of time. Maybe next time!
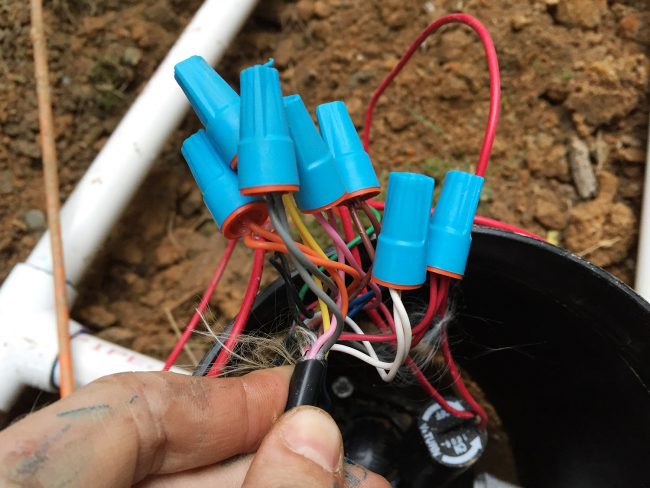
By the last valve the only strands left were the Zone #1 color (pink), the common (black), and my two unused colors (gray and brown). I continued my unused colors throughout the whole system so I could add a new zone at any spot, if desired, within having to dig up the whole new line.
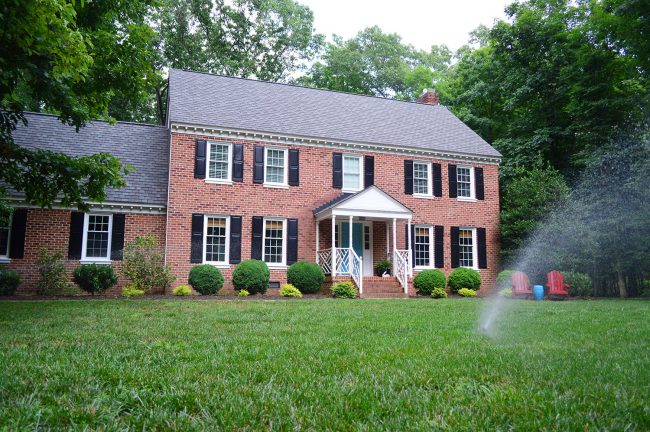
Step 11: Step Finishing Touches
The last steps are to test your system (checking for leaks, adjusting spray arcs), programming your schedule, and filling in your trenches and holes. Some heavy rains during my project turned my dirt piles into dried, muddy clumps filling in took some effort. Surprise!
You will also probably want to throw down some grass seed or sod, if this time of year is right, to regrow the areas you dug up.
So as you can see, installing a sprinkler system yourself is do-able and straightforward, but it does take effort, planning, and patience. For us, I regret not hiring a professional and would probably recommend someone else with a large yard do the same – assuming budget allows.
Our DIY sprinkler system cost us around $1,800, including the tool and truck rental – which is about half what we were quoted by a professional irrigation installer. So yes, that money saved is satisfying, but I may need to put it towards a massage therapist to work out all the kinks in my shoulder.
I’m kidding… sort of…
More Outdoor & Landscaping Projects
Here are some other DIY yard project you might be interested in reading about.

- How To Install Drip Irrigation
- How to Make a DIY Vine Trellis
- How To Install DIY Landscape Lighting
- A Beginner’s Guide to Pressure Washing
- How to Strip A Wood Deck for Stain
- How To Stain & Seal A Deck
- How to Protect Plants From Freezing
*This post contains affiliate links, so we may earn a small commission when you make a purchase through links on our site at no additional cost to you.
