Particle board subfloors aren’t always great under hardwoods – especially when you buy nail-in flooring like we did. Some folks install right over it without any issues while other folks have big problems down the line. Because it’s so unpredictable, hardwood manufacturers void the warranty if you install them that way – which was definitely not a risk we were willing to take. According to our initial research, we were left with three not-so-hot options.
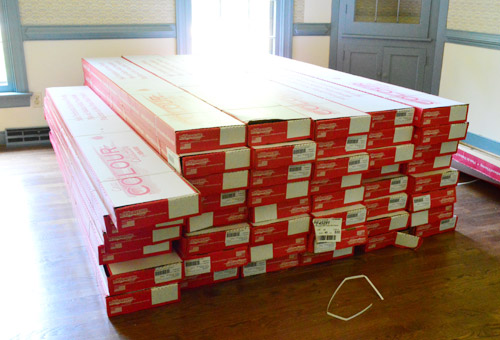
- Return the meant-to-be-nailed flooring and buy a meant-to-be-floated floor instead. But after falling hard for the one we picked and our adventure getting it home, we weren’t eager to take it back. Especially since none of the floating options were as close of a match to our existing wood stairs and hardwoods downstairs.
- Remove the particle board subfloor to (hopefully) reveal plywood underneath. This would’ve been time-intensive (the particle board was laid under all of the door jambs and everything) and it would’ve lowered the level of the floor (making door heights and transitions into the bathrooms weird). It would also cause us to lose the sound deadening effect that this particle board was installed to create in the first place. And we definitely didn’t want a loud and echo-ey floor upstairs.
- Install plywood right over the particle board. This was most the promising option, except that it too would’ve been time intensive, would’ve raised the floors (requiring us to cut down all of the doors and live with a noticeably high top step of the stairs). It would also carry an extra material cost.
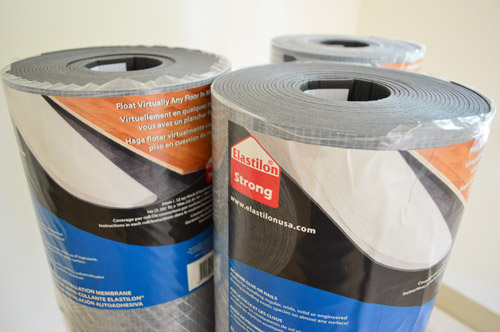
- It has a lifetime warranty, and is guaranteed to last as long as the hardwoods
- It’s elastic, so it stretches along with your boards during seasonal changes in temperature (this helps to prevent cracking, gapping, or warping)
- We only needed an exacto knife to install it, which saved us the expense of buying or repeatedly renting a nailer (although we were a little sad not to get to try one)
- It’s non-toxic, has no-VOCs, and no odor – which is great considering it’s an adhesive product
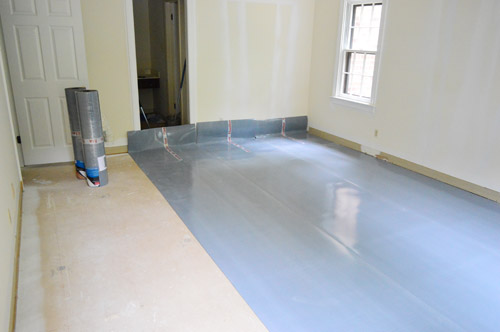
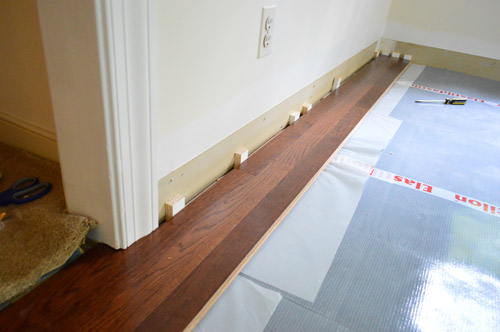
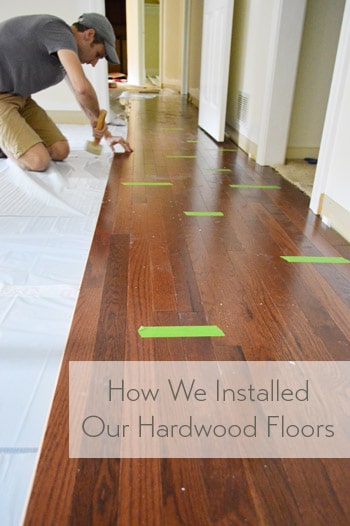
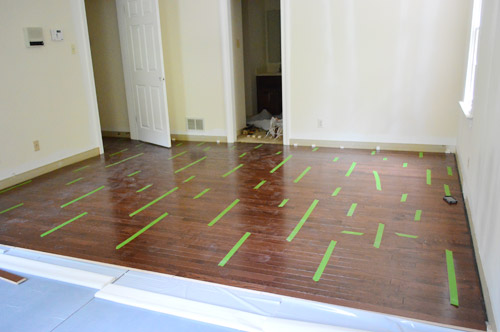
Laying the first row is a tricky step, since it sets the tone for how straight your entire floor will be. And you can’t always trust your drywall to be straight. So we started building our floor using some of the longest, straightest boards we could find to help overcome any curves in the wall. Oh, and those are scrap wood spacers against the wall that help leave an expansion gap around the edge (for when changes in temperature may make the floor expand).
Another thing that helped us feel more confident about our first row being straight was laying it across as long of a wall as possible. For us, this meant taking our first row all the way out into the hallway. Which also meant rough-setting a lot of boards before anything was actually ever stuck down – just to make sure they didn’t look wonky.
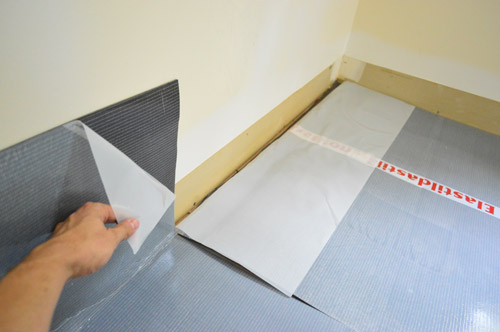
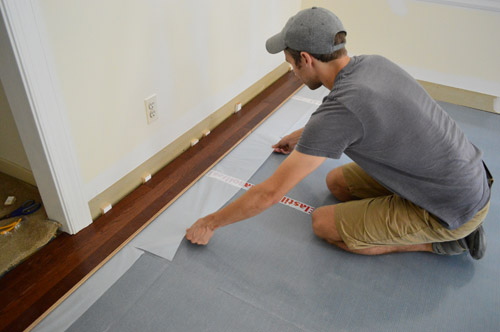
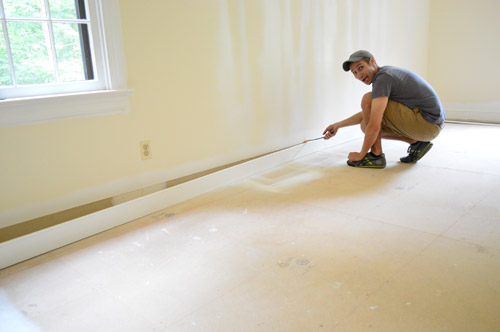
Once we felt good about our first few rows being straight, it was time to permanently secure them in place. Here’s where that extra flap of plastic comes in handy. You pull on it slowly so that it exposes the sticky Elastilon beneath the floor boards, so the bottom of the boards can be joined to the underlayment, permanently holding them in place.
Once those boards touch the Elastilon, boy are they stuck. It takes a good yank (and sometimes even a pry) to get them loose. So that makes us feel good about the long term hold of this stuff!
From there, it was pretty much the same process – lay a couple rows, bang them in tightly, peel back the plastic so they’re secured, and move on. Laying the boards was just like any floor – the boards have a tongue and groove that slide together, and we used a rubber mallet to tap them snugly into place.
We also used a bit of wood glue on the groove at the end of each plank as suggested, just to further secure everything.
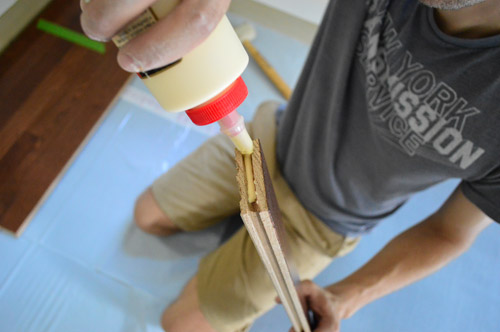
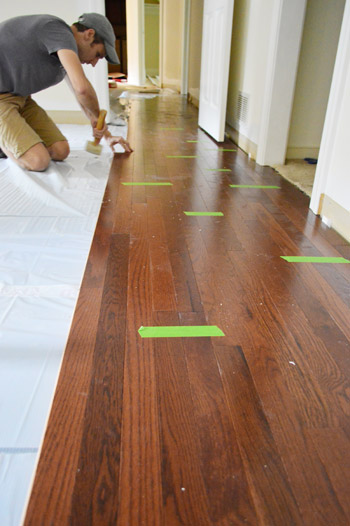
Oh and we periodically taped the boards together, which was also recommended – just to discourage slipping or shifting during the install. If there are two of you working on this project, one person might grab boards, run a bead of glue along the end grove (seen above), and hand them to the other person who’s clicking them in and hammering them into place. The person on glue duty can also pull the Elastilon every few rows and toss down some tape as you go. That’s the grove that Sherry and I got into (and every few hours we switched jobs to keep from getting too sore/tired).
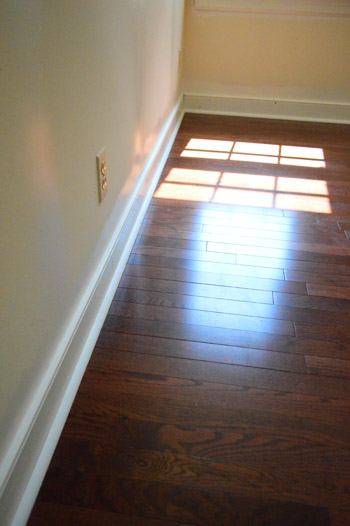
The result? A super tight gap-less floor that will still flex with fluctuations in temperature without cracking or warping – and it should outlast us. Huzzah!
Except… as simple as the process was, it still was not a quick process. I think our bedroom took us 10 hours to tackle together (across two days) while my parents watched Clara. Granted it was the largest room and it was our first one, but boy did it not inspire much confidence in how quickly this could get done.
As is the DIY way, there are always little curve balls. For example, we originally had hoped to not have to remove our baseboards. But when we looked at things more closely, losing 3/4″ of the baseboard behind the floor made them look dorky-short. And we learned that neither quarter round alone (nor baseboards alone) would cover the expansion gap that our hardwoods required in order to keep the warranty in tact. So we pried all of our baseboards up and resigned ourselves to later having to reinstall them with quarter round. Le sigh. At least they’re already painted so we’ll just have a few small touch ups to take care of.
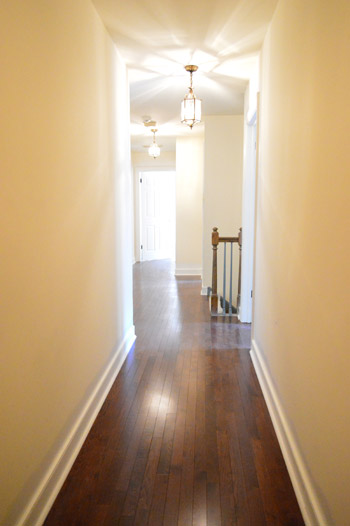
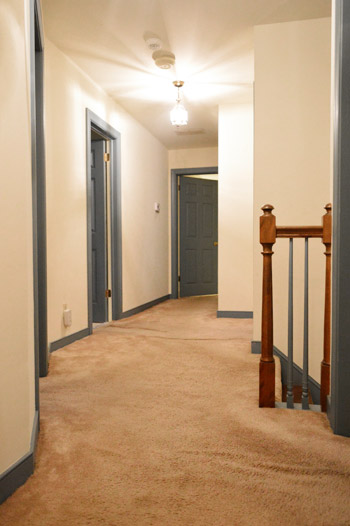
The good news is that we made lots of progress over the long weekend and yesterday evening we finally finished. We even got around to adding the baseboards back and placing the quarter round in most of the rooms already. The floors are looking awesome and feeling super solid.

So much better than the carpet.
More Flooring Projects
If you would like to read about other flooring projects we’ve done, please check out the posts below: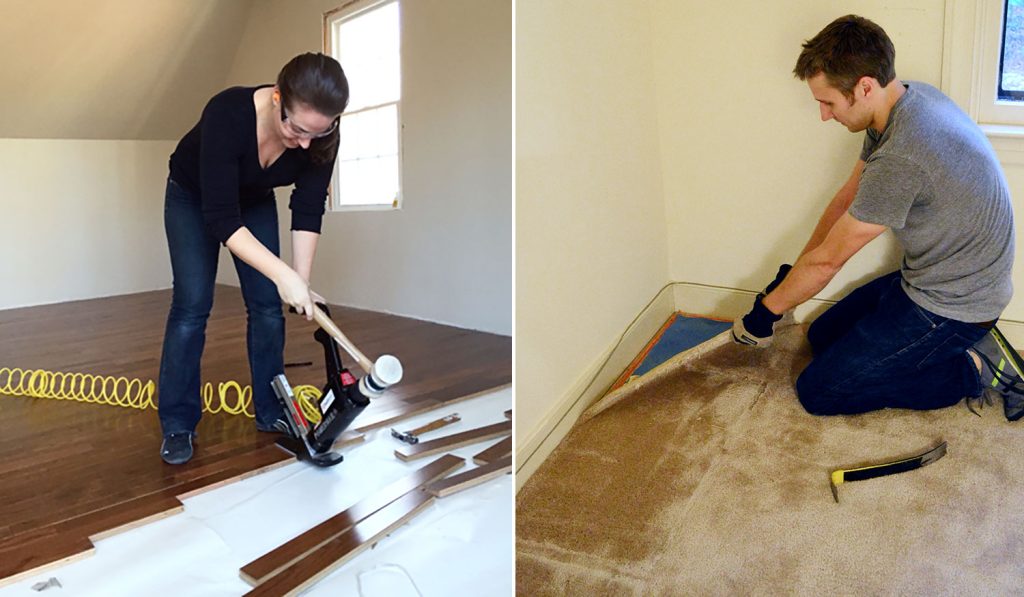

Kate says
It looks like there’s still carpet in your bathroom — are you planning on putting tile there eventually, is that why you didn’t extend the hardwood into the closet/bathroom space?
YoungHouseLove says
Yes, we didn’t want to pay for hardwoods in there when we eventually plan to make that one big tiled bathroom with a double sink, so we’re not sure what we’ll do in the meantime, but perhaps a cheaper alternative like $1 peel and stick tiles will work for now instead of paying for all that hardwood just to rip it out later :)
xo
s
Theresa says
What a great job!! You 2 are amazing and must be so happy to have it down and ready for the move this weekend. Wishing you good luck and dry weather for the move :)
Laura says
Hi there! The floors look amazing and you guys did a great job! Quick question – I see a little bit of carpet in the corners of the 8th and 9th photos down; I thought you guys ripped up all the carpet upstairs and so I’m wondering what that room/space is and whether you are planning to continue in there with the wood floors or, if it’s a bathroom or something, lay tile. Thanks!
YoungHouseLove says
That’s the bathroom and we’ll be laying tile in there down the line, so we didn’t want to pay/spend time installing hardwood that we’d later remove :)
xo
s
Darcie says
Wow! I’ve been looking at vinyl plank flooring because my condo is on a concrete slab. Elastion looks like it could be a great solution for me! Just hit the manufacturer’s website and it looks like there is a $500 rebate offer?!http://www.elastilonusa.com/coupon.php Oh wait — you get $5-$500 at random. Boo!
YoungHouseLove says
Boo! Hope you hit the jackpot with the $500 one!
xo
s
Dana says
I can’t believe what a HUGE difference new floors and not blue trim makes! Looks amazing. Can’t wait to see how the rest of the house comes together over the next few weeks/months/years.
Traci says
It looks sooooo good! What a wonderful job you guys did! I can’t wait to see more! The upstairs must have that “new car” feel to it now.
Marlayna says
Wow! The work you’ve already done on the upstairs is awe inspiring! I bet that will have some folks second glancing at creepy carpet and blue trim fixer-uppers! Beautiful renovations! I can only imagine how much effort that took to get all that done already. This month you totally get an award for most diligently hard working folks!!!
Ps. That gorgeous hallway is beckoning to have someone suppersliding up and down it in slippery socks while making crazy jazz hands and singing happy songs!!! (I’ll volunteer :) haha!) Or maybe you guys should just take a day or two off and break them in celebrating them for yourselves. Congrats!
YoungHouseLove says
Oh there has already been some pretty impressive break dancing…
xo
s
Kristin says
Elastilon looks like giant duct tape (which I recently learned is NOT duck tape, although it sounds cuter).
YoungHouseLove says
Ha! Kinda – it’s also a bit squishier (kinda like a thin foam).
-John
Sandi says
I keep singing the “Open the door, get on the floor, everybody walk that dinosaur”. LOL
Looks beautiful!!
Melissa@TheHappierHomemaker says
It looks fantastic! You guys have made such a huge difference in the upstairs already, I’m so excited to see what you tackle next!
mary says
I’m glad you installed them under the trim boards. In my house, they butted the new flooring up to them and it would look so much better if they hadn’t.
I hope you guys have friends helping with this sort of thing, maybe even a handyman or two, and just don’t share that part!
YoungHouseLove says
Heck no, that’s cheating! If we blog about doing something ourselves, we really do it ourselves! But we do chat about bringing people in to help too when that happens (there’s no shame in getting a little help if something’s above our skill level, so we typically get help with involved electrical stuff or load bearing walls). Hope it helps!
xo
s
Ferchelle says
Wow! It looks amazing! What a difference already!
tirsa says
Carpet? What carpet? There was never any carpet up here, just these gorgeous floors. :)
The transformation is really amazing guys. You must be feeling really accomplished right now. Congrats!
Anne says
They look ah-mahzing! Just curious are you guys going to do any sort of budget break down (per square foot)? We’re looking at adding hardwoods on our first floor. And thanks for the tip about elasto-stuff. We have a slab on grade, so it might be concrete underneath that carpet.
YoungHouseLove says
Oh yes, we should cover that in our last flooring post, shouldn’t we? We talked about the price per square foot of the wood here already, but didn’t factor in Elastilon.
xo
s
Katie says
Seriously…can you guys bottle up some of your energy and mail it to me. I wish I had 1/2 your energy to finish my projects.
Looks great…as always. :)
Can’t wait to watch all your ideas unfold in this new home.
Julia says
Y’all are rockstars! I am beyond impressed!
Kayla says
I imagine you guys doing this job with superhero attire on. It’s amazing what you guys get done sometimes. Way to go!! Can’t wait to see what else you guys do to the new casa!
Alice says
I swear, is there anything you two can’t do?? Those floors look fabulous! At first I was sad you were moving, but now I am excited to see all the improvments to the new house!
Mary | lemongroveblog says
This looks amazing!!! Think of how great things will look when you get some paint on the walls and new light fixtures! :) Love it!
Jen@The Decor Scene says
GORGEOUS!!! So much better then the carpet. It’s like a new house. :)
Priscilla says
What an amazing transformation. You two are my heroes! Is the oak flooring you purchased pre-finished?
YoungHouseLove says
Thankfully, yes. Here’s the post on that for ya: https://www.younghouselove.com/2013/05/would-wood-we-do/
xo
s
Ohio12 says
I am wondering why you didn’t put hardwoods in the bathrooms as well. We are thinking of building a house and I envisioned running the hardwoods in the bathrooms too. Is that a no-no?
Also, I am worried about you guys. We are DIYers too, but I feel like maybe you are overdoing it. Please consider taking some more breaks!
YoungHouseLove says
Don’t worry Ohio! We can’t wait to move in and catch our breath, so this time crunch is just for now, not forever. We can do it! At least that’s what we’re telling ourselves. Haha! As for the hardwoods, we like them in half bathrooms, but anywhere with a tub/shower can be tough on them (they’re not supposed to get that wet) so for full bathrooms we prefer tile, which is what we’ll be putting in the master and the hall bathroom when we redo them. Can’t wait to see where we end up!
xo
s
Lisa E says
There’s always that fabulous tile that looks like wood! Jus’ sayin’……… ;)
Amanda B says
They do have pretty cool tile that looks like wood flooring now though, since wood floors are a no no in bathrooms!
YoungHouseLove says
Oh yeah that wood-like tile is awesome!
xo
s
Katie D says
What an amazing transformation! It already looks like a completely different house! I’m so excited to watch this house progress like the others. It inspires me to keep at all the improvements I want to make in mine.
addie says
this. looks. AMAZEBALLS!!!
i love these sort of posts because it shows that “small” changes (not saying that replacing ALL the flooring on your 2nd floor is small) makes HUGE GINORMOUS improvements to a house.
it also makes me less scared to buy a fixer-upper house. :):)
Jessica F. says
I saw the pictures and saw the house’s “bones” and knew it was going to be my all time favorite!! Just new flooring and painted trim, not even painted walls yet and it already looks a million times better!! You can’t see this but I’m giving you a round of applause and a standing ovation! Bravo!! I’m sending you good rented truck/moving mojo. :)
YoungHouseLove says
Aw thanks Jessica!
xo
s
jeannette says
god, this is heroic. nothing like a deadline to help you solve problems/curveballs in hours it would take amateurs weeks to master.
in terms of heroism, this almost, almost, mind you, reaches greg’s insane feat of rescuing hex tiles from a century-old nocal jack london saloon floor, CLEANING each one with a toothbrush, and laying them on his wonky victorian floor in eureka, CA. lemme see if i can get you the link for that.
http://petchhouse.blogspot.com/search?q=bathroom+tiles
(the other crazy heroes of home reno are gary leitzell, the mayor of dayton, OH, and his pile in ohio and his search for real shellac, and the devil queen guy, who actually moved his house, and after unbelievable adventures, threw the towel in.
(http://thisoldcrackhouse.blogspot.com/
(http://thedevilqueen.blogspot.com/)
YoungHouseLove says
AMAZING!
xo
s
Linda says
Just astounding, guys. Honestly, I bet your appraised value just went up by a material amount! Those floors look just terrific. I bet you just can’t stop staring at them – even as you’re moving in!
Kim says
Waaait a minute. I thought you guys went to the beach this weekend. Did you do that AND still finish these floors on time? That is crazy yo! You deserve a drink (or 3!). :)
YoungHouseLove says
We only went to the beach for 48 hours, so of the 4 day weekend we spent two on the floors (Friday/Monday) and two with the fam (Sat/Sun). We’re tying for that whole balance thing, and we couldn’t keep Clara from the beach on Memorial Day :)
xo
s
Marissa says
I am SO excited to read this post!!!! We have a older farm house that has nasty carpet over particle board. I really don’t like how the floating floors look or sound. I really want solid hardwood but I was told we would have to rip out the particle board and lay down plywood. Super expensive and time intense!!! So happy to hear there might be another option! I am going to have to make the trip to Lumber liquidators. Thanks SO Much. Happy day!!!
Morgan says
This is really getting me excited to put down new floors of my own. I live in an 800 square foot condo in an up and coming area of my town and I plan on selling in the next year or two. You can check out the pictures on my blog. I have been wanting to install new floors of some kind. I have been batting between hardy vinyl plank and laminate “hardwood.” I don’t want to put in something that I won’t get my investment back on which is why I am not doing hardwoods. I have the laminate hardwood in my kitchen and it cost an arm and a leg to have it professionally installed. I want to do it myself this time. What would you guys suggest as far as flooring goes for a little condo? Thanks for this post by the way.
YoungHouseLove says
The kitchen we shared yesterday was done with laminate that looks like wood and it’s affordable and durable and gorgeous! I think it’s great for a condo!
xo
s
GreenInOC says
That was A LOT of work but the payoff is gorgeous! I love having floors with minimal transitions too.
JL says
Y’all are rock stars for finishing that! It looks great. I hope you take a few days off from blogging to get yourselves packed, moved and adjusted with Clara and Burger-man. Seriously, get some guest bloggers or do some re-posts or something. Y’all need a break!
Jessica says
Looks like someone(sometwo?) works really well under pressure and time constraints! Those floors look fantastic. Please tell me you guys have some help moving this weekend and won’t be doing that all yourself. I just can’t picture Sherry helping to carry Carl in the house. I can picture her trying, but I think she’d get lost in the cushions.
YoungHouseLove says
Oh yes, we have some heavy lifting help for the big stuff and some amazing friends and family who are all coming over for the free pizza (and the loading and carrying, haha).
xo
s
Jackie says
Wow! This is amazing! Your diy abilities are amazing. The hardwoods make the hallway look bigger too! Good luck getting moved in :)
jenw says
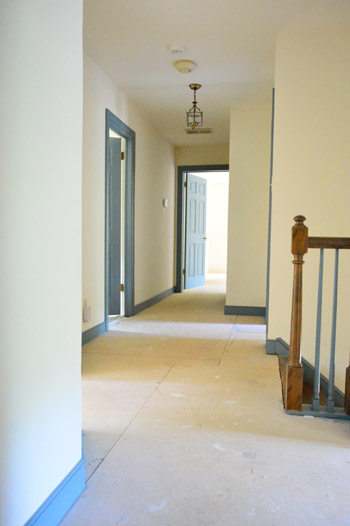
I can’t believe the difference the flooring and trim color made to the wall color!! In the before photo the walls look like a cool white. In the after they look like a creamy yellow.
YoungHouseLove says
Isn’t it funny how white trim shows that things that look white are actually kinda yellowed? Of course there was the whole different-times-of-day thing going on in those pics too!
xo
s
Sharon N says
Oh my gosh, I wish you had posted this a year ago! My husband installed wood flooring in our daughter’s room last June, but we had a concrete slab underneath and had to use the stinky, sticky, totally-not-worth-the-price glue. Elastilon sounds like the way to go when we finish the rest of our rooms. Your floors look beautiful, hardwoods were definitely the way to go!
Catherine says
This looks so awesome! I am completely in awe of you doing that yourselves. My hubby is so not handy so I know we will never be doing that! #settingupbankaccounttopayforflooringinstallation
Laina says
Oh my goodness, I hope you aren’t installing all the nails by hand! You have to use a pneumatic nailer! It’s the only way to go and mega faster. Although it looks like you’re already done with the floors, if you have any left, I’d highly recommend renting one. It is the difference between nailing something with a wood block and using a hammer.
Andrea says
I’m 99% sure this is what we have underneath our oak floors, and we love it! No squeaks anywhere in the house, and our floors feel solid. We’ve had a few incidents where our bottom floor flooded (burst pipe, backed up sewer line, and then there was that time the water started coming UP through the foundation after six straight days of rain :/ ) but our floors have survived it all (with a lot of fans, and stress on our part).
The difference made just from the paint and floors is astonishing! Can’t wait to see what you guys do with this house.
Soiledrotten says
You guys are making me tired from watching all your work get done lol
Christine says
Hi – I tried to scroll through all the comments to see if anyone asked this, so I apologize if I missed an answer! And, can’t imagine you guys getting to these comments today – not quiet sure how you’re even standing! As the Katz’s Deli customer said about Sally – I’ll have whatever she’s having! We took the easy route and had our hardwoods installed years ago, but didn’t realize they would slap that floor-matching (oak) quarter round to the baseboards/flooring, making our baseboards look like elf-sized boards. Yuk. I notice you chose white for your quarter round – but did you add completely new baseboards or just pull off the old stuff and re-install on top of the floor? Doubtful we could do that now (though who knows) but I’d still like to rip out the wood-colored quarter round and install white to match the baseboards.
YoungHouseLove says
Those are the original baseboards (we sprayed them white here) and then added pre-primed quarter round that we painted before it went up too!
xo
s
dana828 says
OK, follow-up question/opinion needed. We will be putting in dark wood floors. All of the woodwork in our house is golden oak. I HATE it, but am not sure I’m up to the task of painting it all, and my husband is totally not on board with replacing all the doors in the house. I do plan to paint the kitchen cabinets (maybe gray?). Anywho, my question is…what about the baseboards??do we replace them with the dark wood to match the floor, or do we leave them lighter like the doors/window trim? I’m so lost here!
YoungHouseLove says
I’d paint them white if it were me, but if you’re not up for painting them you could replace them with dark wood to match the floor (although that’s a somewhat big job in itself, so painting them in place, just one room at a time over the years might be easier and would definitely be cheaper).
xo
s
Crystal says
WOW!!! The new floor looks sooo awesome – great job guys!
Heather says
It looks so awesome! Great job! I can’t wait to take on some DIY projects when we get our first house….you both are very inspiring!
Blake says
Wow. Looks awesome. Had no idea that solution existed. Last spring we installed floating engineered oak throughout the house because of the same subfloor issue. Had already picked out solid wood when the installer pointed out it wouldn’t grip nails.
We do like our floor, although there is some bounce in certain areas where the subfloor is uneven. Because the top layer is solid oak, we can buff and refinish at least once if needed, which made me feel better about our choice.
Jenna says
Oh man, I’m sore/tired just looking at those photos! You guys are such troopers!
Tiffini S. says
Now I’m going to be singing “Walk the Dinosaur” all day long. Ugh.
Julia says
They look beautiful! What are you going to do with the stairway spindles-it looks like they are still blue in the after shots? Paint them? Replace them?
YoungHouseLove says
Paint those for sure!
xo
s
Lindsay B says
Love the floors! It’s amazing how white trim with the new floors makes it look like a totally new and updated space.
I was wondering if you were able to let the wood sit in your house for a few days before laying it down. When our hardwood was installed, the contractor left the boxes of wood in our living room for a week to allow it to acclimate to our house’s environment and humidity level. Since you’re on such a time crunch, I was just curious if you had time to do that, or if it was recommended.
YoungHouseLove says
Oh yes, acclimation is super important! We let it sit for a full week in the dining room before installation.
xo
s
Kristin says
Looks beautiful! Quick question though—what do you do when you get to the edge of the stairs? Is there a plank that is rounded off or does it just sort of drop down?
YoungHouseLove says
We’ll share a post with pics and details of that soon (lots of requests for more info on those tricky little areas so we’ll try to cover them all at once).
xo
s