Particle board subfloors aren’t always great under hardwoods – especially when you buy nail-in flooring like we did. Some folks install right over it without any issues while other folks have big problems down the line. Because it’s so unpredictable, hardwood manufacturers void the warranty if you install them that way – which was definitely not a risk we were willing to take. According to our initial research, we were left with three not-so-hot options.
- Return the meant-to-be-nailed flooring and buy a meant-to-be-floated floor instead. But after falling hard for the one we picked and our adventure getting it home, we weren’t eager to take it back. Especially since none of the floating options were as close of a match to our existing wood stairs and hardwoods downstairs.
- Remove the particle board subfloor to (hopefully) reveal plywood underneath. This would’ve been time-intensive (the particle board was laid under all of the door jambs and everything) and it would’ve lowered the level of the floor (making door heights and transitions into the bathrooms weird). It would also cause us to lose the sound deadening effect that this particle board was installed to create in the first place. And we definitely didn’t want a loud and echo-ey floor upstairs.
- Install plywood right over the particle board. This was most the promising option, except that it too would’ve been time intensive, would’ve raised the floors (requiring us to cut down all of the doors and live with a noticeably high top step of the stairs). It would also carry an extra material cost.
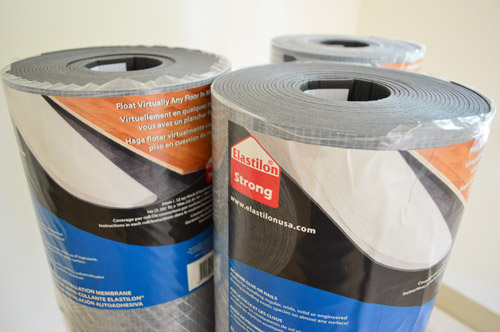
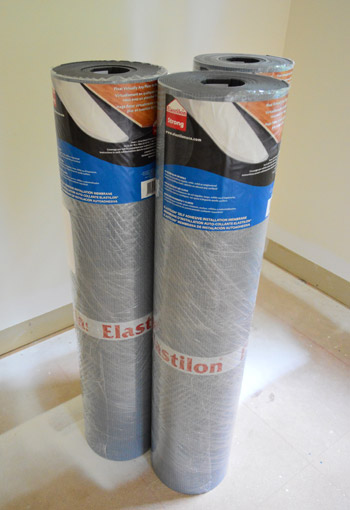
- It has a lifetime warranty, and is guaranteed to last as long as the hardwoods
- It’s elastic, so it stretches along with your boards during seasonal changes in temperature (this helps to prevent cracking, gapping, or warping)
- We only needed an exacto knife to install it, which saved us the expense of buying or repeatedly renting a nailer (although we were a little sad not to get to try one)
- It’s non-toxic, has no-VOCs, and no odor – which is great considering it’s an adhesive product
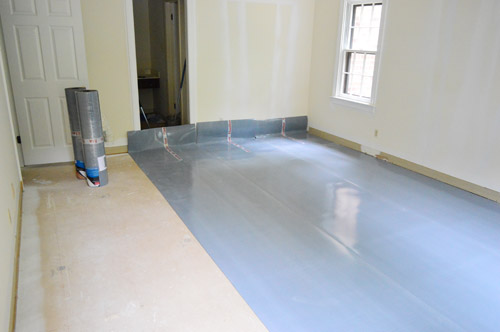
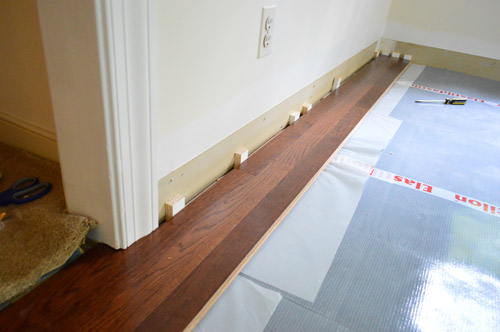
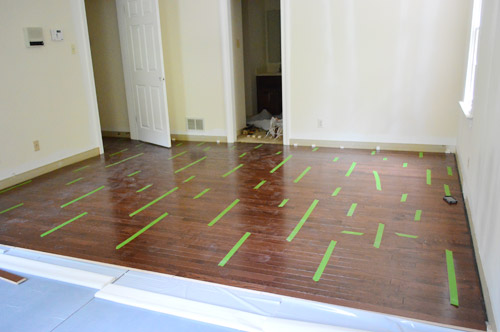
Laying the first row is a tricky step, since it sets the tone for how straight your entire floor will be. And you can’t always trust your drywall to be straight. So we started building our floor using some of the longest, straightest boards we could find to help overcome any curves in the wall. Oh, and those are scrap wood spacers against the wall that help leave an expansion gap around the edge (for when changes in temperature may make the floor expand).
Another thing that helped us feel more confident about our first row being straight was laying it across as long of a wall as possible. For us, this meant taking our first row all the way out into the hallway. Which also meant rough-setting a lot of boards before anything was actually ever stuck down – just to make sure they didn’t look wonky.
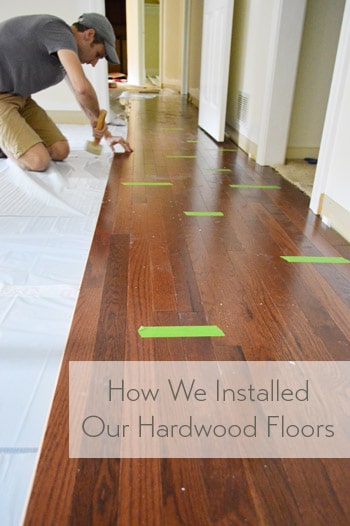
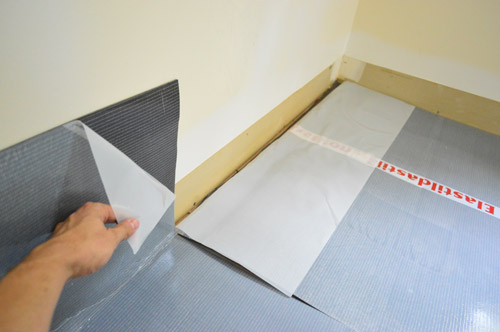
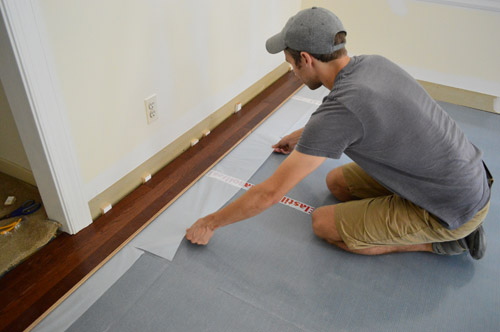
Once we felt good about our first few rows being straight, it was time to permanently secure them in place. Here’s where that extra flap of plastic comes in handy. You pull on it slowly so that it exposes the sticky Elastilon beneath the floor boards, so the bottom of the boards can be joined to the underlayment, permanently holding them in place.
Once those boards touch the Elastilon, boy are they stuck. It takes a good yank (and sometimes even a pry) to get them loose. So that makes us feel good about the long term hold of this stuff!
From there, it was pretty much the same process – lay a couple rows, bang them in tightly, peel back the plastic so they’re secured, and move on. Laying the boards was just like any floor – the boards have a tongue and groove that slide together, and we used a rubber mallet to tap them snugly into place.
We also used a bit of wood glue on the groove at the end of each plank as suggested, just to further secure everything.
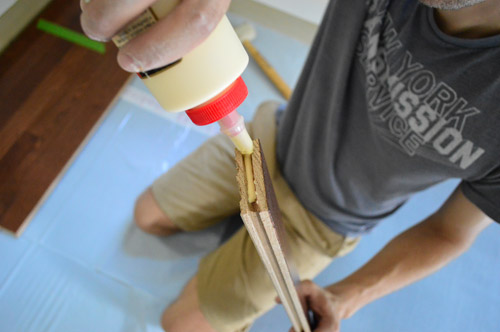
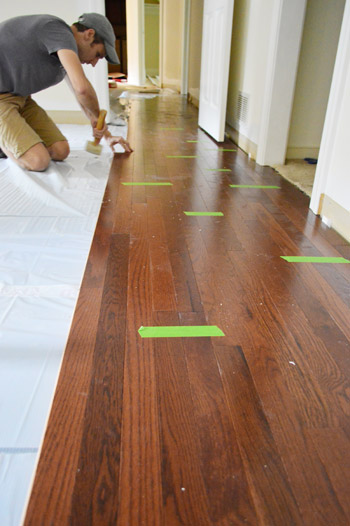
Oh and we periodically taped the boards together, which was also recommended – just to discourage slipping or shifting during the install. If there are two of you working on this project, one person might grab boards, run a bead of glue along the end grove (seen above), and hand them to the other person who’s clicking them in and hammering them into place. The person on glue duty can also pull the Elastilon every few rows and toss down some tape as you go. That’s the grove that Sherry and I got into (and every few hours we switched jobs to keep from getting too sore/tired).
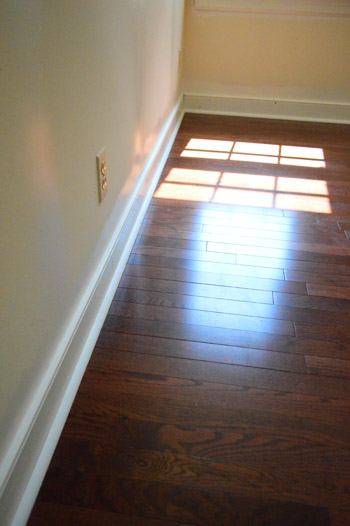
The result? A super tight gap-less floor that will still flex with fluctuations in temperature without cracking or warping – and it should outlast us. Huzzah!
Except… as simple as the process was, it still was not a quick process. I think our bedroom took us 10 hours to tackle together (across two days) while my parents watched Clara. Granted it was the largest room and it was our first one, but boy did it not inspire much confidence in how quickly this could get done.
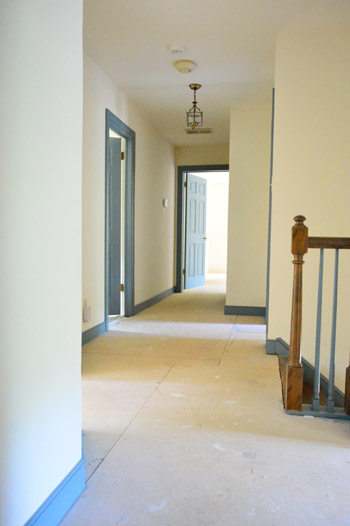
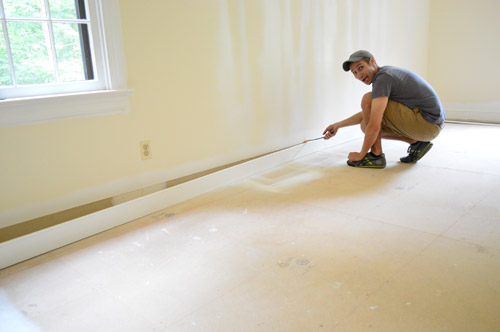
As is the DIY way, there are always little curve balls. For example, we originally had hoped to not have to remove our baseboards. But when we looked at things more closely, losing 3/4″ of the baseboard behind the floor made them look dorky-short. And we learned that neither quarter round alone (nor baseboards alone) would cover the expansion gap that our hardwoods required in order to keep the warranty in tact. So we pried all of our baseboards up and resigned ourselves to later having to reinstall them with quarter round. Le sigh. At least they’re already painted so we’ll just have a few small touch ups to take care of.
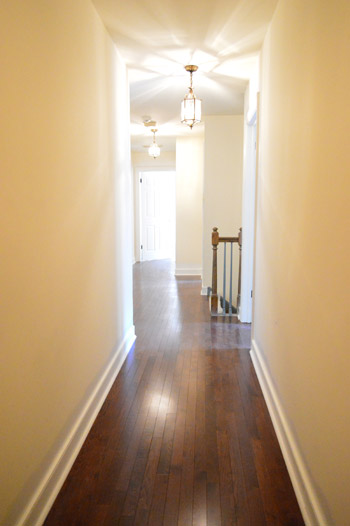
The good news is that we made lots of progress over the long weekend and yesterday evening we finally finished. We even got around to adding the baseboards back and placing the quarter round in most of the rooms already. The floors are looking awesome and feeling super solid.

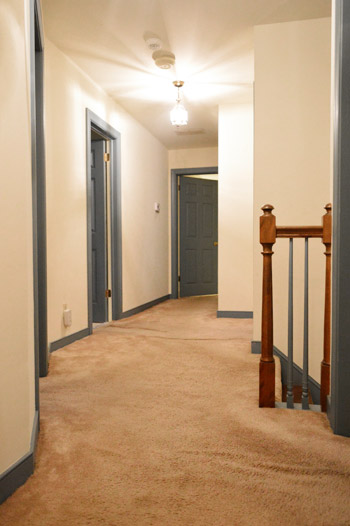
So much better than the carpet.
More Flooring Projects
If you would like to read about other flooring projects we’ve done, please check out the posts below:

Vickie says
Love it! How do you plan to transition the hall flooring over the top step on the stairway?
YoungHouseLove says
We’re getting a lot of requests for that info/those pics, so we’ll write a detailed post (with pics) for those tricky spots!
xo
s
Jamie says
So delicious! What a difference it makes in that hallway!
Sophie says
Wow, it makes such an improvement! Way down the line, would you guys ever replace the tile downstairs so the whole house matches?
YoungHouseLove says
The kitchen has faux brick laminate so that’ll definitely get replaced, although we’re torn between doing heated tile in there or more hardwoods. We’ll have to see where we end up!
xo
s
Guylaine Côté says
WOW!!!
You are a very very good andy man!!!!!!!!!!!!!!!
It looks sooooooooooooo beautiful!
Guylaine
christina @ homemade ocean says
YAYYYY! They look AMAZING!
Hope you all have a great move in day :)
tia says
i swear the two of you never cease to amaze me. what an awesome job!
Lauren @ The Highlands Life says
It seriously looks like a whole other house up there!! Already looking beautiful. What a difference floors and paint make. It’s amazing, truly. Ya’ll are awesome for busting it out before moving in. Can’t wait to see all your existing furniture and accessories and how they fit into your new space.
Mallory says
The new floors and new paint have already improved the space so much! It looks awesome! I was a little anti-new house because I just love your old one so much, but now I’m all about this new house and what’s to come. I’m really excited to be following along with the very beginning of this house, since I didn’t get to do that with the first two. Hope y’all have great weather for the moving weekend! :)
YoungHouseLove says
Aw, thanks Mallory!
xo
s
Julia says
I just found YHL last year, so this is my first “full house” that I’ve gotten to follow along too. ;-)
michael says
Wow, beautiful! I have always wondered about installing hardwoods as I hate the laminate kind, however after reading this, when I buy a house and it has carpet I will install hardwood. I cant wait for the posts about the new house!
Jeannine @ Small & Chic says
I really looks wonderful! Good luck with packing and the move!
Shannon says
Wow, wow, and wow. It looks amazing!! I can’t wait to see it with fresh paint! It really makes me want to get the ball rolling in my house! Who am I kidding, I always have…maybe I should show this to my husband to get him in the mood!
Elizabeth@ Food Ramblings says
It already looks like a different house!!!
heidi says
It is amazing what a difference the floors and woodwork make!
kristen says
It looks beautiful! Way to go!
Teri says
Just curious: How did you handle painting the baseboards so quickly? Did you roll, spray or hand-paint? While they were off the walls?
YoungHouseLove says
We sprayed them here: https://www.younghouselove.com/2013/05/buh-bye-blue-trim/
xo
s
Brooke says
I just LOVE your blog. You guys share all of the details we really want to hear. It’s fun to read and so fun to see how all of your hard work pays off! Thanks for sharing all of these fun tutorials.
Angel says
A few thoughts…
1. Everybody walk the dinosaur!
2. I’m amazed you guys did that without knee pads!
3. Just how sore are you?
4. I want to slide on these with my fuzziest socks.
5. They’re beautiful – you guys made a great choice!
YoungHouseLove says
3. SORE! But the happy rewarding kind. And completely RELIEVED!
xo
s
VIvian says
Petersik’s rock! I can’t believe you got it all done…I’m hanging my head in shame for doubting you!
Lorraine says
Wow, what a difference already. Change the floors, paint the trim – wow!!
Tanya says
Everybody walk the dinosaur!
Did I just show my age? Love the floors. Xx
Angel says
Boom, Boom, Shackalackalackaboom!
*although I feel this might be more of an Elaine reference, I can’t help but sing the song.
Megan says
Those floors look amazing! Good luck with the move!
dana828 says
NICE!! The floors look beautiful! Thank you for sharing your process. We just had our house measured for new floors this week, and will (hopefully) order them this weekend. We are leaning towards solid or engineered hardwood, and likely installing it ourselves (entire main floor, minus bathrooms). As much as I’d love to have someone install it for us and get it done quickly, the approximately $3K in savings makes doing it ourselves seem SO worth it. Since we will also be replacing all of our kitchen appliances at the same time, that’s $$ that can go towards one sweet new stove! Thank goodness the husband has alot of vacation time saved up that he can use to get this done!
YoungHouseLove says
Good luck with everything Dana!
xo
s
Jen says
Looks great! Did you accidently cover any floor heat vents? I lost one in my master bedroom—completely forgot about it after it was covered by underlayment. DIY fun!
YoungHouseLove says
Oh no! Thankfully all of ours are in the wall/ceiling so we didn’t have floor ones to work around.
xo
s
Chunk says
Looks great! Were you able to purchase the Elastilon from Lumber Liquidaters? Did you trim the boards with a table saw or other tool? Also, can you share the approximate square footage and cost of this project?
YoungHouseLove says
Yes, we got the Elastilon from LL and we trimmed the boards with a miter saw (and used a table saw just to rip them the long way for the last row). We’re planning a more detailed post about 5 tricky things and how we solved them as we went, so those details will hopefully be in there with lots of pics :)
xo
s
Taya says
Gorgeous! Kind of inspired to install some hardwood flooring myself someday! Good luck with the move… Can’t wait for more new house adventures.
Brittney Everett says
It’s sooo nice to have that all done though before you move! I don’t know how you’ve had time to pack and do the floors! Did your mother help pack while she was with Clara?
YoungHouseLove says
They were at her house since our house is a wreck, but we got a lot of packing done last night once we were back home and Clara was in bed! Every time we go over to the new house we have been bringing loads with us in the car, so we’re slowly making a dent- and the big truck stuff is this weekend…
xo
s
Stephanie says
Looks awesome, guys! The difference in the before and after photos is amazing. A little paint and new floors and it already looks like a totally different house. Can’t wait to see more, since you got the new place I scroll through blogger every morning so I can read your updates first.
Kate says
The floors look fantastic! A total 180 and you haven’t even done anything else yet. Wow!
Eventually I’ll be doing something similar in my house…
I’m so happy for you guys. I’m glad things are working out for you. =)
YoungHouseLove says
Thanks so much Kate, you’re so sweet.
xo
s
Julia says
The upstairs looks absolutely amazing! I’m so impressed with your floor laying ability, you didn’t even cover cutting all those angled corners in the hallway – I’m sure that couldn’t have been easy. The change in paint and flooring makes it look like a completely different house – man, you guys have some vision! :-)
MJR says
Looking good! Can’t wait to see some pics with your furniture in the house. I know you must be so excited! Congrats guys!
Kara says
Three observations:
1. The walls look white in the before picture but really yellowed in the after.
2. The baseboards look bigger! The carpet must have eaten up some of their height.
3. Write trim is just the best. It disappears so the space doesn’t look all chopped up (which the blue trim did, but so does any natural wood trim, unfortunately), but it gives clean and subtle definition (unlike painting trim to match the walls… Which is gross but I see it a lot.)
And now a question: Why did you choose to paint the shoe mold instead of stain it to match they floors? Is there a “right” way to do it, or is it just preference? I’ve seen it both ways.
YoungHouseLove says
Oh yes, isn’t it funny how true white trim can make non-white walls look yellowed? The pics were also taken at different times of day and all that so it could be that too! As for the shoe molding people do it both ways, and we had wood quarter round in our first two houses (came with ’em) but since we would have to buy it to match the new floors we were laying in the new house, it was cheaper to get primed wood than matching quarter round through Lumber Liquidators – and we like that look too, so we went for it!
xo
s
Megan A. says
Amazing what new floors will do! Looks fantastic.
Melissa @ Loving Here says
I can’t believe you guys are doing this all right before a move! We were working on our house before we moved last summer, but we were just painting and removing wallpaper. You guys put in a whole new floor for crying out load. I have to admit, I think you’re brave…because I’m scared to try DIYing our future hardwood installation. Yikes. Great work!
Hillary says
UNREAL! You must have worked so hard to get all that finished before the move. The floors look so good, I wanna lick ’em.
Ash @ HumberHome Project says
I can’t believe how much BIGGER the hallway seems without carpet & blue trim!
You guys are beasts for knocking that out alone over just a few days! rawr!
Margurette says
LOOKS FANTASTIC! I admire all the prep work you did to learn about what you needed to do in order to keep all your warranties in tack. It paid off and the floor looks great.
Heather B says
love, Love, LOVE!!! Reminds me of our house. We had similar carpet (just picture as being faded teal instead of beige), and put in similar color floors and paint and trim and just love it! So clean. So neat. And just beautiful. It has been a couple of months since we got ours done, and at times I still just stare around with a goofy smile on my face :)
Belinda says
What great progress already! Good luck with the move, I can’t wait to see what you were able to bring into the new house and what you decided to part ways with! So excited for your next adventure! :-)
Elizabeth says
Looks amazing! Great job!
Jenny says
Great job! Would you guys consider writing a post about the details of installing your floors (ie: how you navigated the transitions from hall way to room, how you dealt with the stairs, how the door moldings are cut, how to measure the planks so that one end isn’t super thin, etc)?
YoungHouseLove says
Yep, we’re planning a follow-up with a bit more detail about the intricate parts of the process. Stay tuned!
-John
Kate says
It looks awesome! What a difference before and after! Did you paint the walls too? They totally look more yellow in the after picture.
YoungHouseLove says
We didn’t – they probably just look more yellow now that the trim is crisp and white! :)
-John
Dot says
What an interesting product. Does the back side of the Elastilon stick to the subfloor or just to the hardwood?
Beautiful job!
YoungHouseLove says
It’s just sticky on one side (the side that attaches to the hardwood).
-John
Melissa says
Looks amazing! It kills me that even the stair railing spindles are blue!
Olivia says
HOLY COW, this is impressive. They look soooo good. You must be thrilled to have this done. What a huge feat!
Liz@GrownupPretenders says
I would have had a “moment” if I’d hauled home the floor and discovered nailing it into the subfloor wasn’t going to work. Seriously, it would not have been pretty. Thank goodness Elastilon exists.
jennT says
so you were totally singing this song, right? http://youtu.be/zYKupOsaJmk
YoungHouseLove says
Heck yeah, until someone got Macklemore in my head…
xo
s
Becky says
That’s exactly how I felt when I had laminate installed. I couldn’t believe the difference! You did a beautiful job!
Heather says
The floors look fantastic! We have new flooring that has been sitting in our guest bedroom for almost a year waiting for us to put it down… My husband had shoulder surgery so we kinda have an excuse why we haven’t put it down yet but now I want to run home and start tonight!!
I have a question about how you did the seams. I have read that you should offset seams by 6 inches or so for stability but how did you do the spacing so it looks natural and not an obvious evenly space pattern? I think this is one reason why I am so hesitant to start installation. I don’t want it put that much work into it and it end up looking bad :( Thanks!!
YoungHouseLove says
Yes, you are supposed to offset the seams as you’ve read. Keeping a random pattern was really easy in our case because the wood came in random lengths. So each box had an assortment of sizes – and not just short, medium and long – there were barely two identical lengths in one box! So it was pretty easy to keep a random look.
-John
ShellHawk says
Congrats on the new floors, and just in time, too! You did a great job picking everything out, and I’m glad for you that you found the double-sided tape! ;) They look gorgeous and the color is so rich!
You’re so fortunate to be handy and have the patience required for these time-intensive projects. You could never have gotten my husband to do this in a million years, and if you did, you would have seen epic fits appropriate to a three-year old high on sugar and caffeine! lol
Rachel Dowd says
Its beautiful. Really pretty!!!