When we last talked floors in the kitchen, they looked pretty much done.
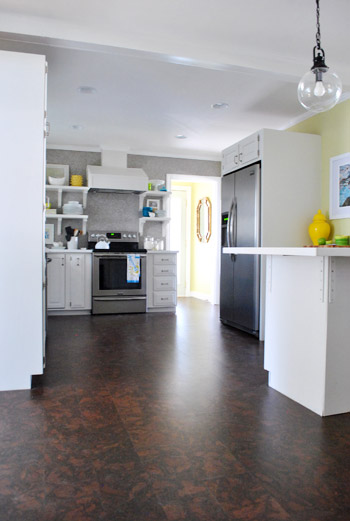
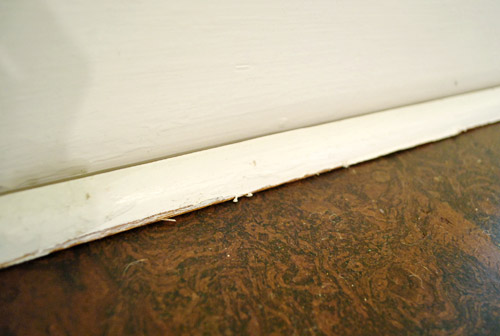
But if you looked closely, they weren’t. They still needed some finishing touches – namely shoe molding to cover the gaps around the edges (which are intentional to allow for temperature expansion and contraction) and some coats of sealant (to keep moisture out of the seams and provide some added durability).
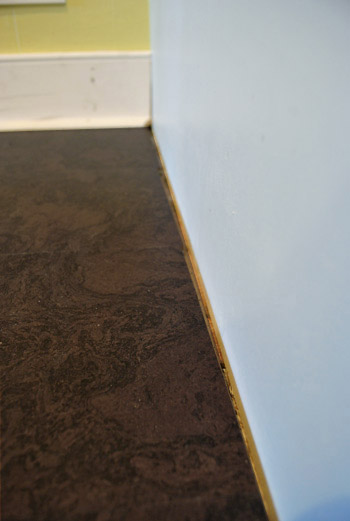
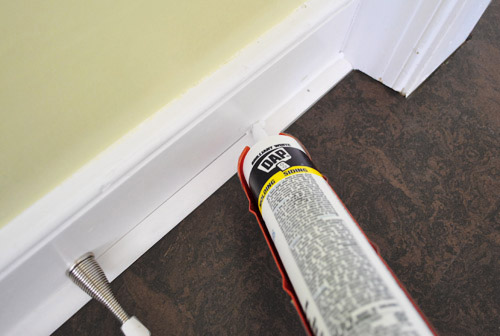
The short version of the “adding shoe molding” step goes something like this: Now you see a gap…
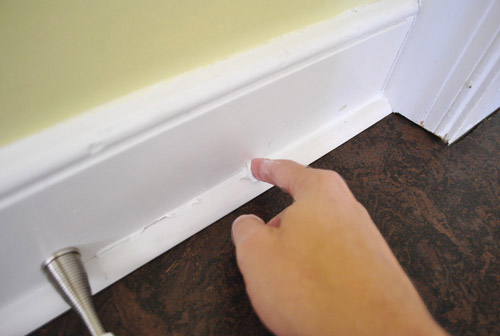
And now you don’t…
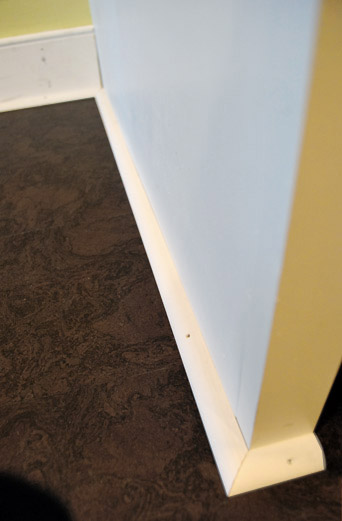
Of course then there’s caulk and paint involved (to cover the nail holes and any seams like where corners meet).
But let’s go with the longer version of the story – which has a few more twists and turns – for folks who like details. The first twist was that we actually ended up ditching our plans to reuse our old shoe molding, despite having saved (and meticulously labeled) all of the old pieces when we removed them a few weeks ago:
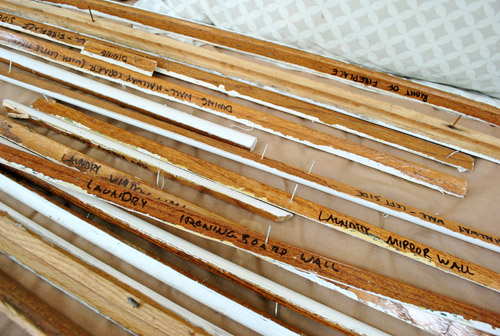
We initially thought that reusing it (after all that meticulous labeling) would make our lives easier. You know, not having to re-cut shoe molding for each span of wall. But when we tried to put some of the old painted pieces in place, they didn’t look so hot. The paint job was a little scrappy looking, and even with touch ups we worried the less than crisp edges wouldn’t look as finished as they could (especially since there’s such a high contrast between the white trim and the dark floor).
So we opted to install all new shoe molding. We had to buy some new stuff for around the cabinets anyway (like the peninsula, which didn’t have old shoe molding for us to reuse since it was newly added), so it wasn’t a bit deal to pick up a few more pieces of it. We figured it wasn’t worth “finishing” our pretty new floor job with rough looking trim. So in total, it was about $35 worth of shoe molding for a nice clean “like new” (because it is new) look.
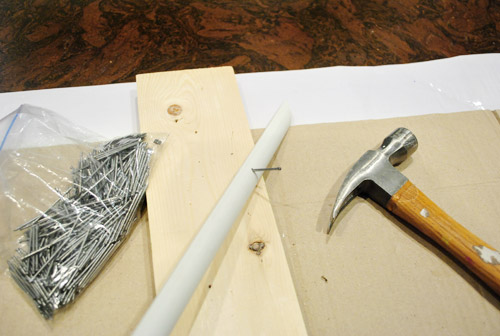
Since we don’t own a pneumatic nail gun, we installed it old skool style (although we’ve talked about getting one – maybe for Christmas this year?). After cutting each piece, we’d pre-hammer our nails against a piece of scrap wood to get them in a ways, which minimized how much hammering we’d have to do against the floors.
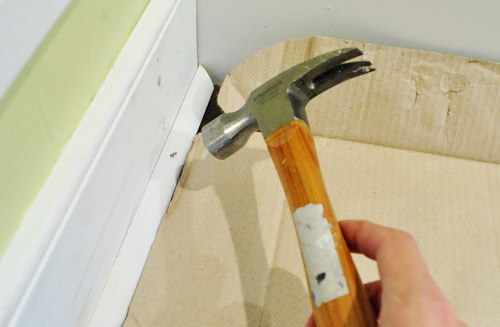
Even when it was ready to nail into place, we still put a piece of cardboard under the work area to keep from banging up the floor too much. Oh, and forgive that piece of baseboard for looking a bit beat up. It was new too (the previous piece was too short since we switched the fridge and pantry location) so we hadn’t painted it yet. It came pre-primed but a bit scraped up.
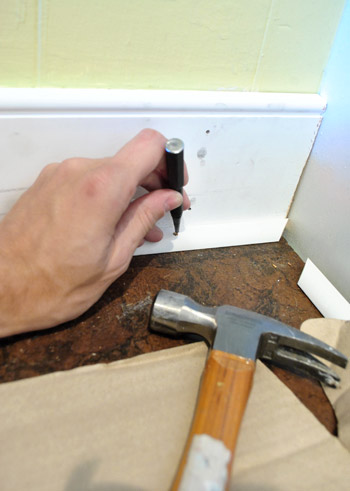
Once the nail was in as far as I could get it with my hammer, I used a manual nail punch to get it in even farther, just beneath the surface. Love that thing. It’s basically just a metal peg with a tiny head that you place right on the nail and bang the end of it to sink the nail in (without leaving big dings in the wood like hammering the nail directly could cause).
I wouldn’t say there were any “big” transformations as part of this step, but if I had to name one – it would be the area around the peninsula, which was lacking both shoe and baseboard:
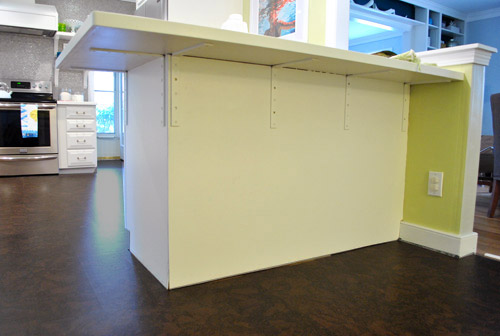
Here it is with baseboard, finally. I’d been dying to add it, but we always figured it didn’t make sense to add until the new floor was in.
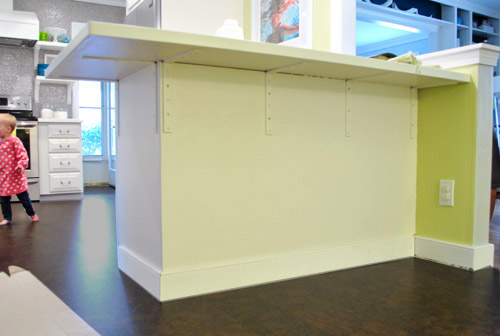
And here’s what it looked like once we had cut the shoe:
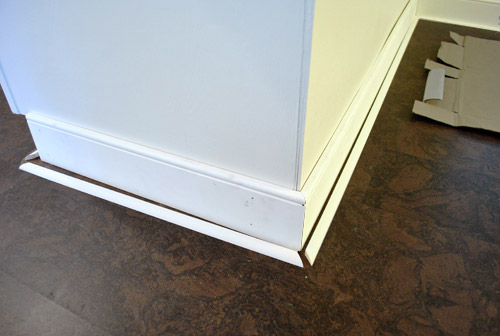
…and now here it is with the shoe all hammered in. It still needs some work (we’d love to add wood molding to hide the metal brackets and add interest to the back of the peninsula someday), but at least it’s looking a bit more finished. When the stools are in there (and you’re looking at it from a normal height instead of squatting in front of it) you actually don’t notice the brackets too much.
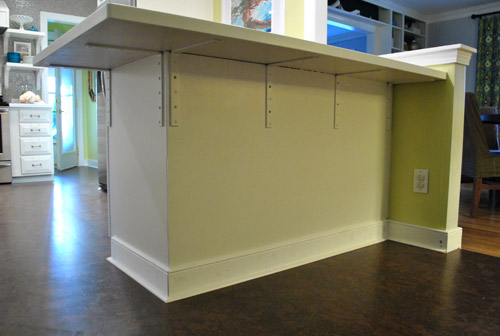
Oh and that picture above is after another important step of the shoe-ing process: Caulk! We always go over all of our seams (including the corners) with a bead of caulk to make everything look more polished. So here’s us gunning a line of it on:
And here I am using my finger to smooth it out. We like to dip our pointer fingers in a cup of warm water to help keep it smooth as we go (and to help keep the caulk from sticking to our hands).
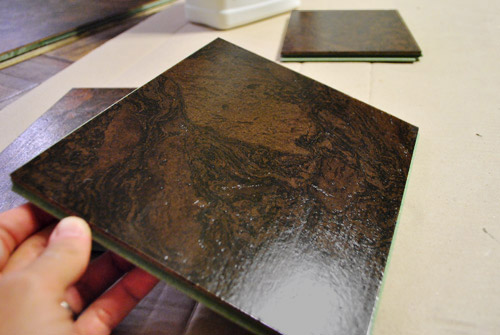
The step after this… well, after the caulk dries… is to paint. We still have to do some of this in a couple of spots, but overall it’s looking much better. But before any “after” pictures, let’s talk about sealing the cork. Even though our cork planks already came pre-sealed, experts recommend sealing them with three additional coats of water based poly after they’re installed to add protection and effectively seal the cracks between the boards (which aren’t sealed even if the tops of each plank come pre-sealed). This also should keep dust and crud from settling into any seams so it’ll hopefully look nice and smooth for the long haul.
We had trouble finding much good info about how this step should go, so we called Lumber Liquidators (where we got our cork) and got to speak with one of their installers. He actually installs and seals the Lisbon Cork that we purchased, so he was able to give us some very clear instructions:
- Hand sand with 100 – 150 grit sandpaper to remove some of the existing finish (“anything higher and you’re just polishing them”).
- Apply a layer of the poly with a 3/8th nap roller
- After that has dried (about four hours according to our poly manufacturer’s label), repeat steps 1 & 2 again… and then a third time.
So yeah, those were his explicit instructions… and we veered off course pretty quickly. But we’re so happy we decided to test things first, because even when experts recommend something, after you painstakingly install something, you want it to look awesome. Not scratched or purple. Yikes.
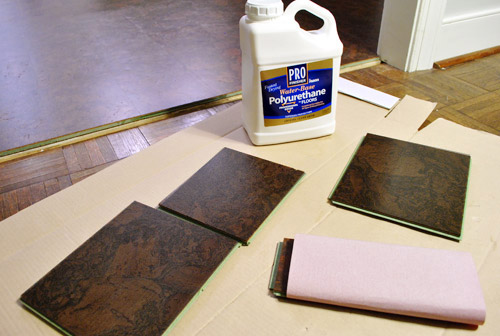
When it comes to what we used, we got some PRO Water-Based Polyurethane from Home Depot since it came highly recommended. We were so glad we didn’t have to use oil-based stuff since when we refinished our first house’s floors it stunk for months- especially on a hot day. Thankfully this stuff has no odor after the four hour drying period. So hooray for water-based stuff.
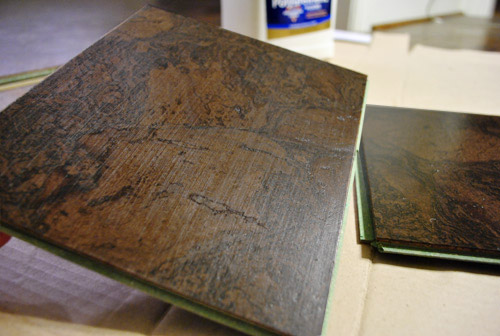
But our deviations off course began after we picked up the recommended poly. It all started at the sanding step. The sound of that very step made us nervous. Sand our pretty new floors?!? So we did some tests on scrap pieces first. On the first piece we sanded just as instructed with the exact grit he recommended. We even watched the guy demonstrate his hand-sanding technique and replicated it exactly, but it left some very obvious (and ugly) swirly scratches on it. And even after applying a layer of poly it didn’t disguise them. Bummers.
So we thought that maybe sanding in a straight motion might be less terrible looking. Nope… just a different brand of scraped-up-yuck (in person it’s really clear that the surface is scratched, although in this pic it looks sort of like wood grain). Not good.
Since sanding seemed to only make things worse, we gave it a go without any initial sanding. We feared it might bead up or slide right off or something without roughing up the surface first. But nope, it worked just fine – and even made the color of the cork really pop. And that, my friends, is how we decided to skip the sanding step. Thank goodness for testing (if we had sanded a corner of the room instead of a test plank, we’d probably be pretty ticked off).
Having opted out of sanding, we went straight to applying it with a 3/8th nap roller, as per the second instruction. Enter “Yikes” moment number 2. This purple party certainly didn’t look right:
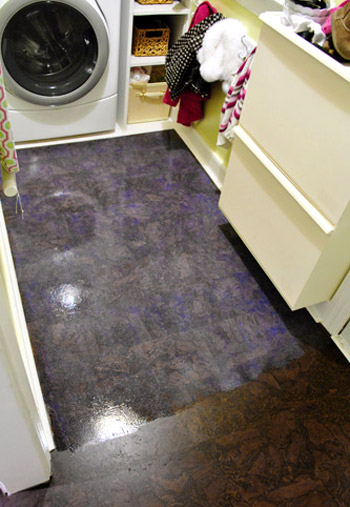
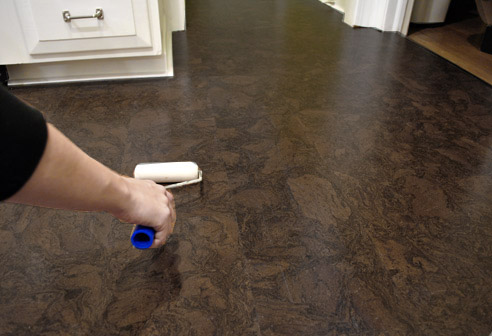
So in a total and complete panic (yes, there might have been some cursing) we quickly wiped up the thick-ish layer of poly that the 3/8th nap roller left with paper towels. It just didn’t feel right. The part of us that lives by the “thin and even coats” mantra (which is how we always apply water-based poly to seal things like wood furniture) decided that we needed to revise this instruction, pronto. So we broke out the least nappy rollers that we had: ultra smooth small foam rollers (the same thing that we use to poly furniture when we stain or paint it).
Worked like a charm. No more glowing purpley-blue haze, just nice thin and even coats to protect things and seal our floors for the long haul. Because just like when you seal furniture, the rule is that thin and even coats adhere better and last longer (anything too thick can crack or peel right off). So it actually makes sense that this works on floors too – all without the purple haze. Whew.
Our revised technique seems to have worked just fine. We can’t even begin to guess why the installer’s detailed tips didn’t work on our sample planks (perhaps he installs lighter cork more often since it’s more common, so maybe the scratches or purple haze aren’t as apparent on that color?).
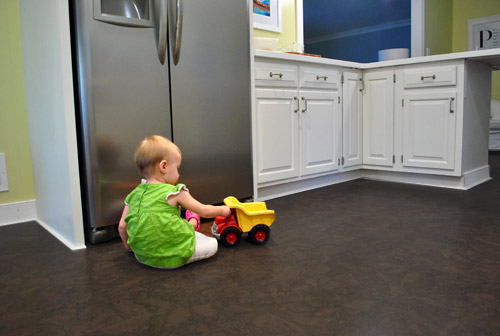
Thankfully, after three coats (one applied on Friday night right before we went to bed – so we wouldn’t have to avoid the kitchen all day – followed by one on Saturday night and one on Sunday night) it didn’t discolor and it seems to be sealed. Not that we tested it out by dumping water on it or anything. But we have had some small spills that were really easy to wipe up (one even involved boiling water that a friend was using to sanitize her bottles). And it seems to standing up to Clara just fine so far, dump trucks and all:
So now here are some “after”-ish pictures of the floors all trimmed out and sealed, with Clara doing some quality control exercises.
We even dropped a plate (which miraculously didn’t break thanks to the soft cork that cushioned the blow) and there was nary a ding or a dent. And Burger’s nails don’t make any marks either (we heard from someone on this post who has cork floors and a 70lb dog and still doesn’t have any nail scratches, which is pretty cool since we weren’t sure how a larger dog would work with cork).

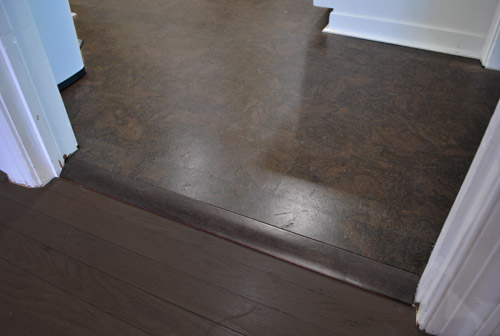
Oh and there was one other thing that are required to “finish” the floors: transitions. We have four doorways in this room, and each needed its own “reducer” – which is a piece designed to join two rooms where one floor is slightly higher than the other. Ours is only about a half-inch higher in the kitchen (due to the asbestos liner under our original vinyl tile, which meant that we couldn’t tear it up and would have to float the cork over it). The guy at Lumber Liquidators suggested getting oak transitions since cork, being a slightly softer wood, could get more beat up on an edge like this where things can catch. LL sold transitions for about $45 a pop, but I found similar options at Home Depot for $29. So after measuring, cutting, and nailing them in – our floors were officially transitioned. Okay, well, I’m actually waiting for two longer length reducers to come in on special order at Home Depot (they only carry 47″ lengths for $17 in the store), so our floors are officially mostly transitioned, to the tune of $140 total (including the special order pieces).
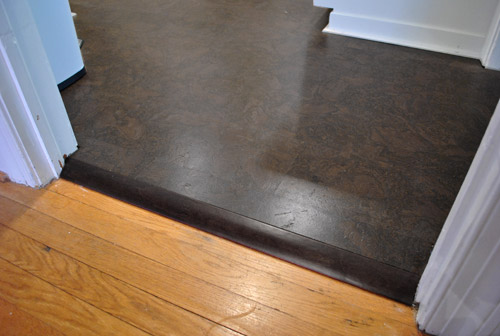
And once we get around to having our other floors stained darker, we might have something that looks more like this (the cork and hardwoods will never look identical, but the same rich mocha tone will unify and help with flow, so our rooms don’t feel as chopped up and disjointed). Ahh, if only getting floors refinished were as easy as Photoshop…
So we’ll call that a wrap on the kitchen floor. And since it was the last big project in the kitchen, we’re thinking we owe you guys some real after pictures and a full-on budget and time breakdown for the entire project. How does that sound? We have some photos to take and some receipts to tally up, so let’s say Wednesday. Same time, same place. In the meantime, what did you guys do this weekend? Any shoe molding installation or sealing going on?

Bet @ Design Your Dwelling says
It was not long ago that I was putty-ing holes and re-painting base-boards. Not a fun job at all. The good news is that the final product looks awesome! Nice work on your floors, they look great!
Christine says
I love this transformation! We’re going to be starting my sisters kitchen soon. We just resurfaced the counter-tops about a month ago!
paige says
Are you going to cover the l brackets with the same ones on your shelves?
YoungHouseLove says
We do have two extras now so we’re thinking about it. Just don’t want them to be knee-banging obstacles so we’re giving it some thought before going for it!
xo,
s
Marie says
Blaugh, trim I hate doing trim! Although I do own a nail gun, it still doesn’t make it any more fun. I love how the floors turned out. The brackets on the island just scream out for coverage in the picture. BTW, you have inspired us to start a “DGOTA” drive at our house. I will be choosing one incomplete project (and there are plenty) per weekend through the summer, so maybe it won’t feel like such a steep mountain to climb. Thanks for the inspiration.
Lindsay @ Me, Ed and Pea says
Looks great guys! Getting a nail gun is life changing. LIFE. CHANGING!! Don’t wait for Christmas.
YoungHouseLove says
Haha, thanks Lindsay!
xo,
s
Erin C says
This weekend I did something that I’m actually quite proud of!
I used your mudroom area in your last house as inspiration and created a mud “nook”. The corner near our back door was too small so I used the wall next to it. I purchased a cute $30 coat rack at Target and used a small bench we already had. Voila, instant mud “nook”. I can’t stop staring at it!!!!
Thank you for inspiring me!!
YoungHouseLove says
Sounds so cute!
xo,
s
Seriously Sassy Mama says
The floors look great!
Ashley@AttemptsAtDomestication says
It looks really good! I love how it anchors the kitchen down now! We’ll probably be refinishing our wood floors sometime in the next few months and I’m so excited!
Kate B says
Your floors look GREAT! I shared the post with my husband, as we just bought a box of cork flooring to use on a platform we built for our washer and dryer in the bathroom we’re currently renovating. We hemmed and hawed for a while about using cork, because we were afraid that if there were a leak from the washer and water sat for awhile, the floors would be ruined even with sealing. We finally bit the bullet and are going to do it when the flooring comes in. (Partly because I knew you guys were doing it in a kitchen with a dishwasher, heh.)
Anyway, I was all “okay, here’s a post about sealing the cork. We are not sanding ours!” and his response was that maybe the installer uses oil-based poly. In my husband’s experience with refinishing things, oil-based poly tends to fill in sanding marks pretty well. Maybe that was the difference? Either way, since our little platform is going to be covered mostly by appliances and our square-footage is going to be close to the box quantity, I’m pretty sure we’re going to play it safe in our laundry area, but maybe that’s why there was a disconnect in the installer’s instructions and your test pieces?
Looking forward to your next projects. We’re aaaaages from doing our kitchen, but watching the progress of yours has made me pretty antsy!
YoungHouseLove says
That would totally make sense except he totally stressed that water-based poly is the way to go! Isn’t that weird? I’m just wondering if he’s used to installing lighter cork (like the color of a cork board) it might hide scratches and somehow not have the purple haze issue, but I really have no idea!
xo,
s
Sandi says
I’m so happy we were able to watch your progress of the kitchen. My husband and I are contemplating redoing our kitchen before starting a family so everything is ready to welcome a new little one in but the budget part is scaring us. So seeing a break down would be amazing.
Laura says
Great job!! My husbando finished putting baseboard on our basement last week since we had to replace the carpet due to some water damage we got during huricane Irene. I was wondering what caulk you used for the shoe molding?
YoungHouseLove says
We love Dap window and door caulk that’s white and paintable. Hope it helps!
xo,
s
Lynn @ SafeBeauty says
That poly finish looks really understated. I was thinking it would give it a super shiny piano finish but it still looks pretty much the same. That’s nice. And we aren’t living in the 70’s so who wants to live with a purple haze anymore? ;o) This weekend was spent virtually every waking hour over at the new house installing our new floors. And today and the next day after that. It will be so worth it once it’s done though, they are looking mighty spiffy.
My best, Lynn
Kate says
Forgive me if you’ve already answered this, but how did you test to find out about the asbestos liner? We’re considering buying and fixing up an old house, and I imagine that’s definitely something we would need to do.
The floor looks beautiful!
YoungHouseLove says
We just learned that any black tar-paper looking liner in a house of our era is usually an asbestos liner, so as soon as we saw the black paper when we moved the fridge and the pantry. Hope it helps!
xo,
s
Gina says
Your kitchen looks just stunning! Totally fantastic! You really have come a long way with this room. I am so impressed!
However, you story also shows how much an expert’s advice is really worth. I have a hard time understanding how this can happen. Basically, you would have ruined your floor had you done what he told you. It also scares the heck out of me since I am a total DIY newbie. We bought an old house almost two years ago, and it will need work in all places down the road. If I don’t know how to do things I ask experts who should know. Now I am no longer confident that I will get the right advice. I will definitely always, and I mean always consult your blog! You are the DIY gurus!
It is such fun to see what you are doing to your house (even though I sometimes feel like a stalker)!!!!
YoungHouseLove says
Aw thanks Gina! We have gotten so much helpful advice from experts along the way- just sometimes circumstances are different and somehow one person’s method just doesn’t work! One great way to gain confidence and not worry as much is to test things. From painting or staining furniture to floors, you can use a scrap piece of wood or cork or whatever flooring or furniture material you’re working with- or even test things out in an inconspicuous place (like the underside of a desk for example). One great thing about DIY is that you can usually do things over or test them beforehand, so what seems risky and scary is usually something you can accomplish on the first (or second) try! Haha.
xo,
s
Anne says
Wow, what a stunner! Must be a great bday treat for ya, Sherry! I wish you a very, very happy bday! Hope you get to dance all around the kitchen in heels, have all your dog-owning friends over, and have a throw-plate-on-ground-competition (Must be so fun to not have them break!), now that your floor is sealed! Enjoy! All the best to you!
YoungHouseLove says
Haha, thanks Anne!
xo,
s
Sarah says
Hey, the floors look great! How did you match the transition piece to the cork stain color? We are contemplating a floating floor in a much smaller space and are nervous about both matching the transition piece to the flooring and about the difference in level of a floating floor above the rest of the hardwood floors in the house.
YoungHouseLove says
They sell them in a number of colors so we brought a cork remnant with us and held it up and just bought the transition that was the closest. It’s nearly identical!
xo,
s
Simon says
Looks great, guys! Something I didn’t see was a step between setting the nails and caulking. Did you spackle and sand the nailholes? Some of the post-pics still seem to show the nailholes. Also, did you use shoe-molding or quarter-round?
YoungHouseLove says
Yes, we just caulk over the nail holes when we caulk the cracks and seams and then once it’s all dry we paint. Oh and we used shoe molding.
xo,
s
Stacy says
I installed this exact same cork in my bedrooms and bathrooms a few months ago. How odd that my lumber liquidator guy gave me completely different instructions on how to seal! I used a similar sealant (though in a paint can, and I can’t remember the name, but I am certain it was water based). He said to use a rag to apply the sealant in thin coats- 3 coats with 24 hours in between. I followed the drying time on the can. I have only sealed the bathrooms so far. I am not sure I will seal the bedrooms as I don’t expect to have water in those rooms. I guess it would help with dirt. . .
YoungHouseLove says
So funny! Sounds like your way was closer to the way we landed on (no sanding and thin applications).
xo,
s
Ashley says
Very inspiring website. Many times I have come back to this site and can easily spend lots of time here. I look forward to seeing future posts.
Beth says
The floors look fantastic!!!! We’re thinking about cork flooring for the basement when it comes time to start that project…I love the look, and the added warmth. I’ve been wondering what to do with our area on the back side of the island as well, so I’ll be watching to see what you decide!!
Andrea says
Wow, it looks great… everything is coming together which must be SO satisfying. Awesome work :)
Mamaw03T says
Your kitchen is to die for! Absolutely gorgeous! Good job, y’all!!
Christen says
Looks amazing! Can’t wait for the full kitchen re-cap!!
Completely on a different subject, I wanted to ask if you guys were still happy with your DSLR camera? I’m going to finally pull the trigger on buying one later this week and was thinking of getting the same one you have. Are you happy with how it takes pictures in low lighting? Any issues? Thanks (and sorry for the annoying, unrelated to decor question!!)
YoungHouseLove says
Yes, we love it! We got a nifty fifty lens that’s especially good in lower light and helps keep Clara less blurry, although it’s less of a wide angle than the stock lens, so we still use the stock lens for nearly all blog pics (the nifty fifty is great for Clara or Burger pics though). Of course we’re still learning how to be good photogs, so any bad pics are usually user error and have nothing to do with the camera. Haha.
xo,
s
Christen says
Thanks for the camera advice, Sherry!! I just read some of the comments and saw that it’s your birthday. Hope it’s a great one!
YoungHouseLove says
Thanks Christen!
xo,
s
The Mrs @ Success Along the Weigh says
I think I almost fainted when I saw the initial glaze, I can only imagine how it felt for you guys! :) It all looks great though and those finishing touches make all the difference. I just discovered caulking baseboards and seams 2 months ago and you couldn’t stop me. I was a caulking machine! Annnd as I look past the laptop, I see I didn’t hit the area by the fireplace yet.
*runs to garage for caulk*
YoungHouseLove says
Haha, too funny. Happy caulking!
xo,
s
katie says
If you are looking to get a nail gun, the craftsman evolve brand is a good choice, it is meant for people who are just using it around the house as opposed to using it for construction. We got the air compressor and it came with all of the attachments (like to pump up tires and stuff) plus a nail gun for $69 from sears and we have been very happy with it, we even got my dad one for christmas!
YoungHouseLove says
Wow- thanks! Such a good price!
xo,
s
Laura B. says
Oh it must feel so good to be finished!! Will you guys stain your own floors this time? We did it in our home, and it was pretty easy!
YoungHouseLove says
We’d love to give it a try!
xo,
s
Rachel says
Looks amazing, the dark tones of the cork flooring work so well with the white cabinetry!
Just curious though – why did you decide to add baseboard and shoe molding around the peninsula, while only adding shoe molding to the side of the fridge and pantry?
YoungHouseLove says
Since there’s already baseboard under the front of all of the cabinets, we just added shoe molding to keep the look consistent on the sides of the pantry and fridge. If we added more baseboard to the sides of those items, it wouldn’t connect in the front of the fridge/pantry. Hope that makes sense. Hard to explain!
xo,
s
Kate says
Floors are looking goooood!
We had my sister-law, her husband, and her kids (4 yr and 10 mo) out for the weekend, and we had a ton of fun! I did sneak in a little craftiness – I got my sis-in-law totally hooked on Ana White’s site after I showed her our new bed, and I spraypainted our master bathroom light fixtures – pitted brass to gloss black, looking much better now!) during our lovely March heatwave here.
YoungHouseLove says
Wahoo! Go Kate! Sounds like fun.
xo,
s
Elaine says
Did you also caulk the gap between the baseboard and the drywall? And if so, does this mean that you’ll be repainting that portion of your wall? I have this gap right now and am contemplating not caulking it because I’m too lazy to repaint the wall :)
YoungHouseLove says
Yes! It’s actually not too hard to do (just run your finger down and do a smidge of paint touch ups) and it makes it all look so seamless!
xo,
s
jeannette says
wow, two fatal instructions — sanding and 3/8″ nap — from the “expert”. that’s scary, and your talking about it, and your meticulous previewing of the sanding, is why this is better than HGTV. they never get bad advice or make/acknowledge mistakes, even though you see the results with your own two eyes on the screen. (extreme home makeover, i always wondered how the impoverished jobless ill people and their 12 children under 10 were going to pay the $9,000 yearly prop tax on the new palace).
in terms of cladding the peninsula to hide the brackets, the bronson pinchot project at DIY network has him redoing a whole kitchen in reclaimed wood, very trendy, a little over the top, but also very pretty. it might give you some ideas for your penin panels.
thank you for this. it’s kind of creepy how nervous the sanding pictures made me. it’s like watching the perils of pauline!
YoungHouseLove says
Ooh reclaimed wood sounds gorgeous! Will have to check it out.
xo,
s
Laura says
LOVE the new floors, but the important question is:
DID YOU GUYS WATCH THE WALKING DEAD LAST NIGHT??? ;)
YoungHouseLove says
Ahhhhh, yes!!! Insane! The part with the hooded person (trying not to give things away here) was a crazy twist! Can’t wait to see how that pans out.
xo,
s
Kate says
But now we have to wait until next fall to see what happens next. :(
YoungHouseLove says
I know!
xo,
s
Mckae says
Wow This looks awesome! I love that’s not something you see everyday. And your wood will look to good stained. Great idea!
Shareen says
We have cork floors in our kitchen and dining rooms too (love the softer feel underfoot – especially because we spend so much time in the kitchen!) and we have an 85lb hound. We’ve noticed little ticks in the floor from her nails, and also little indents (from where I’ve moved a stool to stand on it to reach something) but overall these things are hidden by the natural pattern of the cork and I wouldn’t change a thing.
The cork was here when we bought the place and so we haven’t had to seal it, do you know if it’s a process that has to be repeated periodically?
YoungHouseLove says
That’s a great question! We plan to reseal our cork whenever we think it looks like the existing seal has worn away (it might not be obvious, but if we see dust gathering in any seams that used to not have that happen since they’re nice and sealed, we’ll seal it again). It took just a few hours for a few nights in a row, so it was definitely worth it to keep the floor protected – so doing it once ever five or ten years shouldn’t be too hard! Hope it helps!
xo,
s
jeremyb says
You might want to use latex gloves when applying the caulking —– it probably contains a California Proposition 65
Warning: This product contains a chemical known to the State of California to cause birth defects or other reproductive harm.
YoungHouseLove says
Yikes! Thanks for the tip! Will look into that for sure!
xo,
s
Elizabeth@ wake&gather says
We have the same wood floors in our house (also a 50s rancher) and I love the varied warm toned wood but when I see them against your new kitchen floors it definitely makes them look orange and dated. I hope I’m not just blinded by love for our house and our floors really do add character haha.
Ann says
Looks awesome!!
Mandi says
It looks amazing!
On the subject of nail guns, though, I happen to have just bought one! I had always thought the cost would be prohibitive, but when I was at my beloved Lowe’s about a month ago, the hardware guy showed me this: http://www.lowes.com/pd_103500-43657-FP209599DI_4294813361_4294937087_?productId=1205535&Ns=p_product_prd_lis_ord_nbr|0||p_product_qty_sales_dollar|1&pl=1¤tURL=%2Fpl_Air%2BTools%2Band%2BCompressors_4294813361_4294937087_%3FNs%3Dp_product_prd_lis_ord_nbr%7C0%7C%7Cp_product_qty_sales_dollar%7C1&facetInfo=
It’s compact, lightweight, and $99! I’ve used it for a bunch of stuff so far, and I absolutely adore it. It works perfectly for home projects, though I obviously wouldn’t try to use it for, say, building a heavy duty outdoor deck.
The best part is that there are a variety of attachments for purpose, so it can become a paint sprayer when I finally sack up enough to tackle repainting the kitchen cabinets!
YoungHouseLove says
Thanks for the link Mandi! It looks awesome!
xo,
s
angel p says
We actually laid new flooring this weekend too and are on the shoe molding step. However, that is where we are stuck as my husband is having a hard time figuring out how to cut the angles of the shoe molding. Do you have any quick tips on getting the proper angles? Keeping up with all the steps you used to put in your floors REALLY helped out with putting ours in so thanks a ton!! Your flooring looks great and now I’m eager to get mine finished off and call that room done.
YoungHouseLove says
We use a miter saw to cut them at a 45 degree angle. It’s actually pretty easy. Much more straightforward than crown molding! Hope it helps.
xo,
s
Lee says
Just curious, how come you didn’t use baseboard along with the shoe trim on the refrigerator unit? I think it would look more polished.
YoungHouseLove says
Since there’s already baseboard under the front of all of the cabinets, we just added shoe molding to keep the look consistent on the sides of the pantry and fridge. If we added more baseboard to the sides of those items, it wouldn’t connect in the front of the fridge/pantry. Hope that makes sense. It’s hard to explain!
xo,
s
Danielle says
Absolutely beautiful! I’ve loved the idea of cork floors in a kitchen since I first saw them in a Frank Lloyd Wright home (Kentuck Knob, in case you’re wondering). So much more comfortable on your feet (and back) than the tile I seem to see everywhere!
We installed wood in our last house, but I’m definitely inspired by your installation how-to’s. And I’m pinning it for our future home inspiration! thanks for sharing!
BeccaK says
The floors look amazing, and I really like the transition thingies – they look much classier than the cheap-o metal ones that came with our house . . . I may have to DIY myself some nicer options, since it seemed pretty simple.
This weekend for me? Patching a huge drywall hole. Didn’t end up quite as nice at the edges as I’d hoped (you can see a raised area where the patch was placed in), but I’ve now figured out that I might have been able to avoid that if I’d sanded off all of the wall texture first before applying the mesh tape around the seams, so it would sit lower. Live and learn, right? Good thing it’s in the master bathroom; I’m not feeling a compulsive need to start all over again, since it’s not something most people will ever see (and I have plans to paint a mural on that wall anyway, which will mask the imperfections quite nicely).
YoungHouseLove says
I love that you have figured it out for next time though! We totally do the live and learn thing here too!
xo,
s
Allison H. says
If you have any more trim to do before you buy your pneumatic nailer, there is a dandy little tool called a nail spinner for only about $5. It fits into your drill and it holds the nail while drilling it in so you don’t have to worry about cracking your trim. You still have to use your hammer and nail sink to get the nail in all the way, but it works faster and you won’t have any cracked trim. We trimmed out our entire house this way after having gutted it. A couple of years later we bought our air nailer and we both said we didn’t know why we didn’t do it sooner!!! ;) It makes any project SO much easier! Good luck! You guys do really nice work!!
YoungHouseLove says
That sounds awesome, thanks for the tip Allison!
xo,
s
janie says
It looks great!
Putting my molding geek hat on, the molding you used is quarter round. Quarter round is as high as it is tall. Shoe molding is taller than wide, and goes the same distance up as quarter round, but protrudes less on the floor than quarter round.
http://blog.townfloors.com/2011/10/12/shoe-molding-vs-quarter-round/
YoungHouseLove says
Aw man, I always try to get that right! Wrong again. Haha. Thanks for the tip!
xo,
s
Suzanne @The Wine{a}be says
Oh my, I can imagine the panic when the purple haze happened! Yikes!
Great fix…looks amazing.
cheers!
Jillian {Her Split Ends} says
looking gooood kids! love it. I’m working on the hubs to maybe do something similar when we finish our basement!
~ Jillian
http://www.hersplitends.com
Yvonne says
You guys are awesome! I am always amazed how you end up going with your gut-feeling when things don’t go quite as planned. I have been painting kitchen cabinets all weekend…
YoungHouseLove says
Aw thanks Yvonne! Good luck with those cabinets- it’ll all be worth it in the end!
xo,
s
Katie @ Strawbridge Stuff says
Very nice! We just finished installing a new floor in our basement, and it’s amazing how much those finishing touches make a difference in the overall appearance of the floor – and the room!
Jackie says
Please! Do yourselves a favor and buy an air compressor driven nail gun. We’ve remodeled from top to bottom and you’re gonna need one, especially if you have all those bathrooms to do still. Also, you can use the compressor to fill up your tires! Other than the frustration of watching you guys do things the hard way (in the time it takes you to get contractor quotes, you could just get a permit and do the wiring yourselves! It’s not hard!), I love you guys. Maybe I’ll send in a reader redesign one day.
Scentsy Rob says
I can relate to the meticulous removal of molding in the attempt to reuse it! Aren’t you glad the DIY gods gave us caulk!? Nice looking kitchen.
YoungHouseLove says
Yes! What would we do without caulk?!
xo,
s
Morgan says
I just want to say a big old thank you to you guys! I found your blog not too long ago, and have been loving following along with your home renovations. My husband and I just purchased our first home (owned it a week today!), and you two are such an inspiration to us. We have a huge number of projects to take on (spent about 25 hours total this weekend working on removing popcorn ceilings), and it’s so wonderful to see other DIY enthusiasts able to take on projects yourself! So thanks for doing what you do, and sharing everything along the way!
YoungHouseLove says
Aw, thanks Morgan! So sweet of you to say. Good luck with everything!
xo,
s