My little stenciling project above the chair rail in the office has officially concluded. Woooo to the hooooo! It only took three 4.5 hour installments spread out over four days (so my hand-claws could turn back into hands between sessions). You can read all about my stenciling process here), but in short: it was well worth all that work and a bag of chips. Behold:
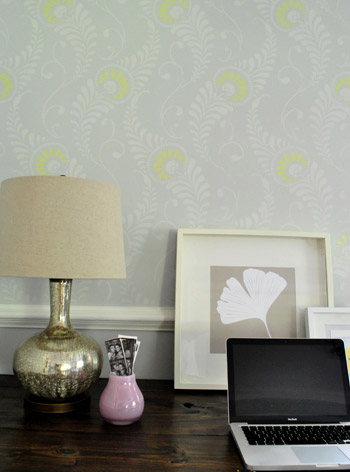
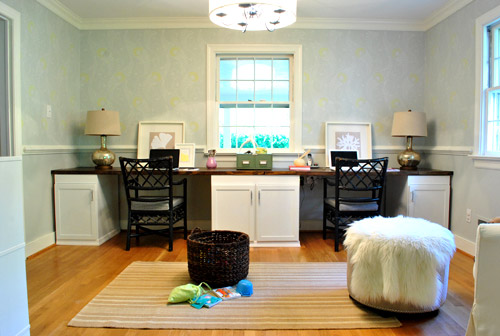
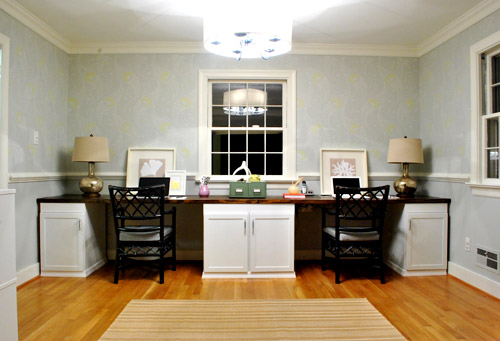
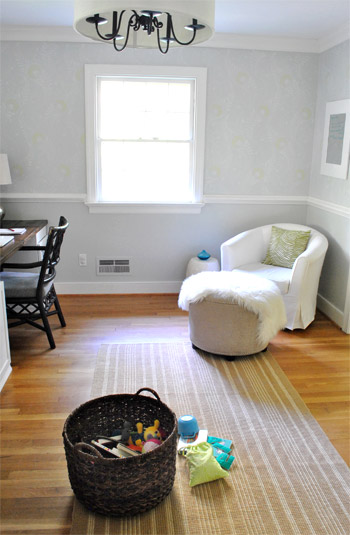
Of course since it’s a subtle tone-on-tone effect, the further away that you get the more – well, subtle – it gets. In person when you stand at the doorway to the office you see pretty feathery texture, but of course in photos it’s somehow MUCH harder to capture. Here’s a shot I snapped during the day (ignore the too-dark chairs, non-permanent lamps, bad leaning frames, too short rug, giant placeholder ottoman, random toy basket, lack of window treatments, etc):
And here’s one at night (again, avoid all the weird we’ll-change-that-later stuff going on). I wish the stencil were more obvious in photos, but in real life, yeah, it’s our favorite thing we’ve done so far. Maybe someday we’ll master the Nikon enough to truly do it justice on film.
Here’s the much requested shot from the dining room, where in person you can still see a soft & pretty tone-on-tone texture (you’d swear it was wallpaper from this distance). But again, in photos it’s nearly impossible to capture. It’s a nice amount of subtle interest beyond the bold teal built-ins and colorful textiles in the dining room. And hopefully when we hang some art and add window treatments in the office it’ll be a good balance between those two rooms.

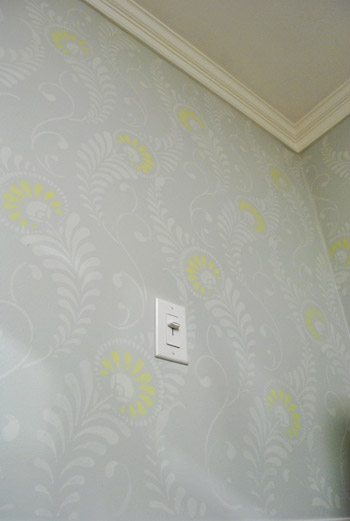
But let’s get closer again. It’s more fun.
Even closer…
Oh yeah, that’s the stuff.
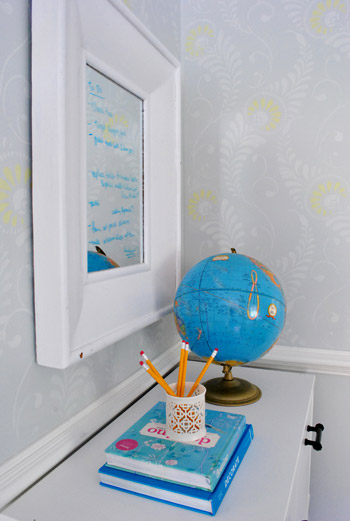
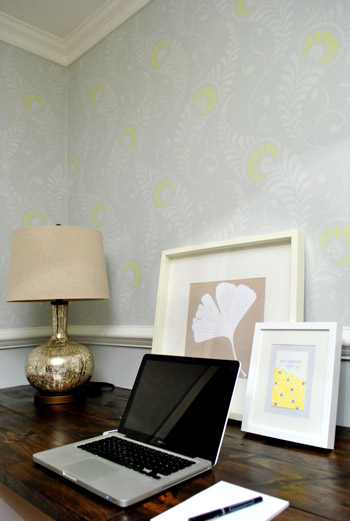
The writing on the mirrors is our weird to-do list madness. Ignore that too.
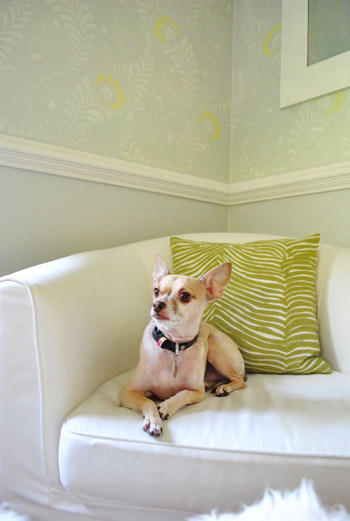
But don’t ignore this sweet faced chihuahua who just turned five (five days ago, actually). Burger is always my favorite accessory (tied with the bean of course).
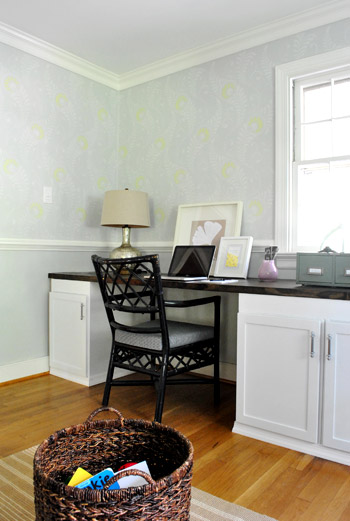
But let’s go back to ignoring stuff. Like the just-for-now chair and too-big ottoman (borrowed from the living room) along with the too small rug. Just figured you guys might appreciate seeing the room from a few different angles (even though the only “finished” things in here are really the light, the desk, and the stencil):
As for the wall color under the chair rail (Moonshine by Benjamin Moore color matched to Olympic no-VOC paint in satin), we’re toying with the idea of going a smidge darker to ground the stenciled upper part and add a tiny tiny bit of dimension (don’t want too much contrast since that might look crazy from the dining room beyond the built-ins). Of course we’ll keep ya posted if we make any changes! The nice thing about stenciling is that any other regular painting project feels like a cake walk by comparison. Haha. I actually wish you guys could all come over and see it in person – it’s so much better than these photos! Who’s down for a quick visit?
Oh but before I go back to staring at the walls with the same expression that I reserve for Eric from True Blood, let’s get into the paint color details, how we did it, and the budget breakdown. As for those paint details, here you go:
- Gray paint for stencil: half tint of Moonshine by Benjamin Moore color matched to Olympic no-VOC paint in a satin finish
- Grellow paint for stencil: Sesame by Benjamin Moore color matched to Olympic no-VOC paint in a semi-gloss finish
Oh and how about a time breakdown? It took 13.5 hours over three evening sessions. Definitely not a quick project, but one that makes you especially proud/excited/relieved/amazed when it’s actually done. As for all of our stenciling tips and techniques, click here for a nice long post all about applying the stencil. Now here’s that budget breakdown for ya:
- Stencil (from here): $54
- Martha Stewart Stencil Adhesive (from Michael’s): $2.99 (with 50% off coupon)
- Foam brushes (from Michael’s): $2.50 (with 50% off coupon)
- Quart of gray paint* for stencil (half tint of Moonshine from Lowe’s): $11
- Grellow paint* for stencil: $0 (leftover from kitchen, but would be $3 for a test pot)
- TOTAL: $70.49
I’ll admit it, it’s definitely not a super cheap-o paint project (which normally run us about $15-30. But to wallpaper the entire room above the chair rail could easily have been five hundred beans or more. And the effect is so amazing that – dare I admit it? – I probably would have paid $150 to get ‘er done. But not a penny more. Haha.
And true to form, we we still have about ten million things on the ol’ to-do list in here (one project at a time = sanity, glorious sanity). So we’ll definitely be tackling these things over time:
- adding window treatments
- painting and reupholstering our desk chairs
- hanging art on the walls (no, the oddly small leaning frames aren’t for keeps)
- finding a more permanent armchair, ottoman, rug, etc (there are lots of placeholders goin’ on)
- replacing the lamps (or reupholstering the shades, not sure yet – but we’ll keep you posted)
Anyone else do any stenciling lately? Or make any home office updates in general? Do you have a special expression that you reserve for Eric (or some other celebrity)? Oh yeah, let’s talk about that. Who’s your famous man (or lady) crush? Any Jake Gyllenhaal ladies here? Matt Damon? Team Edward? Team Angie? When I met John he totally had a Britney Spears calendar… and she was wearing leather bodysuits with sneakers. Le yikes.
Psst – You can read all about my stenciling process & the paint colors that I used here (there’s even an application video).
Update – Wanna know where we got something in our house or what paint color we used? Just click on this button:


Leave a Reply