File this under “A Lazy Mom’s Trick To Get More Sleep.” I made no-sew, mind-numbingly-easy, shortcut, DIY blackout curtains. Enough adjectives for you? I’m an over-explainer. Anyway, this isn’t the professional way, it’s the cheater way. Haha.
First the why. Although the faux wood blinds on Clara’s bedroom window provided a decent amount of light-blockage, I knew blackout fabric would make the room pitch black in the middle of the day (which means it might help with the just-one-forty-five-minute-nap that we’ve been getting these days). To JoAnn fabrics I flew, and purchased 5.5 yards of blackout fabric (which sort of felt like the white fabric on roller-blinds). Thanks to a 50% coupon I got it all for $15.
How I Made Blackout Curtains:
- I returned home with the 5.5 yards of fabric (I measured her existing curtains to see how much I’d need beforehand)
- I washed the fabric (it said dry clean only but the lady at the counter said I could wash it on cold and air dry it without any issue and she was right)
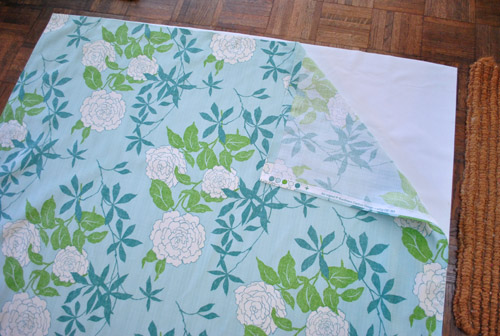
- I unclipped the two fabric curtain panels from Clara’s room and laid one on the floor on top of the blackout fabric to use as a template
- I cut two blackout curtain panels to the same size as the two curtains
- I debated sewing the back side of the fabric to the back side of the blackout fabric on three sides and then turning it rightside-in to hand sew the top closed, creating a finished panel the same way you’d make a pillow cover
- I realized I had four minutes before nap time and couldn’t wait to see if the blackout curtain would even make a difference
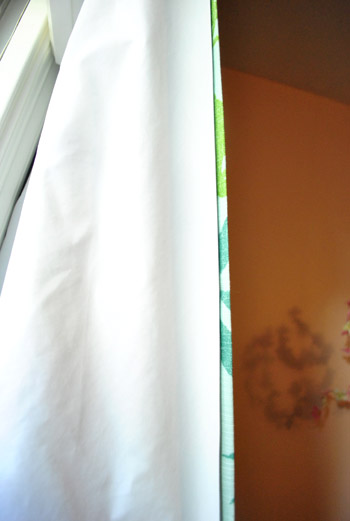
- I used my ring clips along the curtain rod to clip the curtain up in front of the blackout fabric without sewing anything together (thanks to the weight of both materials, the fabric drapes down in front of the liner, looking virtually identical to how it looked without it)
Haha, so with that description of virtually identical, I will now share a photo of Clara’s room that looks pretty much the same as many others I’ve shown sans blackout liner. Haha. But know that it’s there. Lurking.

So yeah, I’ll probably go back and sew at least a few sides of them together like a proper semi-dysfunctional seamstress (remember, I’m not exactly old friends with Oh Brother, but for now… it works). Clara has been giving us about 90 minutes for naptime instead of 45 for the past two days since we added it (we’ll take it!) and now sleeps 12+ straight hours overnight (from 7:30 pm to 8 am). In the keep-it-real department, she has always been an awesome night sleeper (I take no credit, it’s just how she was made) so this was more about attempting to convince her that napping for more than 45 minutes in the 12-ish hour span of day between that awesome night of sleep is a good idea. It was a total bonus that her usual 7:30 wake up time scooched back to 8.
So those DIY blackout curtain liners are well worth the fifteen bucks and fifteen minutes spent. Sleeping until 8 for the past two days has been amazing life saving, especially since we’ve been going to bed around 2am due to book stuff. But it’s all worth it! Can’t wait to share sneak peeks of our book shoots and other how-does-this-word-doc-become-an-actual-book stuff as we go (now that the final manuscript is in as of last night, well, this morning at 2:14am). Woot!
Have you guys taken any shortcuts lately? Are you all in complete disbelief that Clara runs around all day long and only naps for 45-90 minutes? When the Bowers came to visit Will was regularly serving up three hour naps and Jeremy couldn’t believe how Clara would pop back up a little over a half-hour later and be raring to go. And yes, I was jealous of their sweetly slumbering son. Very, very jealous. Do you know how much backsplash tile we could start installing over a nice three hour chunk of time? Haha. That’s ok though, we definitely can’t complain about the awesome night sleep Clara has given us pretty much from day one. And the fact that we can put her to bed at 7:30 and hammer away from 8 o-clock on is pretty darn awesome.
Psst- Wanna know where we got something in our house or what paint color we used? Just click on this button:


Veronica says
Thank you so much for this great idea! I have already spent HOURS reading reviews on expensive blackout curtains, and I certainly would have spent many more — now I will spend much less time and money!
I hope someone didn’t already ask you and I am being a repeater, but do you have any trouble with the curtains not meeting all the way in the middle and leaving a little slit of light, or do they meet just fine? We have BRIGHT rooms, and any little slit is a death sentence. We currently have big dark blankets up, and I would love to replace them with something a little less ugly!
If you have time to respond, thanks in advance!
YoungHouseLove says
Thankfully they meet just fine! I usually overlap them about an inch or two (since they graze the ground, I can pull them closed and they’ll stay like that). Hope it helps!
xo,
s
amy says
getting started lining curtains w blackout fabric. I had my bonding and iron all set…but read your post. I’m going to give it a go just clipping em on….
YoungHouseLove says
Good luck!
xo,
s
amy says
it is working like a dream…..thanks for the tips and inspiration!
YoungHouseLove says
So glad!
xo,
s
Krystal says
I’m so glad I found this post! I’m a night shifter, so it is imperative for me to have the room as dark as possible while I’m asleep during the day. We are going to be redoing our bedroom in a grey and yellow motif, and I was concerned that I was going to be stuck with ugly curtains, simply because I needed the blackout kind. I’m pinning this for future reference! (BTW, you guys rock.)
Jenny says
I did the same exact thing when my little one wasn’t napping! So easy and works like a charm. xox
PATTY says
So… about how far down from the ceiling do you generally hang the curtain rod? I understand you want the window to appear bigger and walls to appear taller, and hanging it closer to the ceiling plays that ‘trick’… but I feel like the window in our nursery is practically smack-dab in the middle of the wall… so I’m uncertain where to place the rod. Um, does this question even make sense?
YoungHouseLove says
I usually just go for around 4-5″ below the ceiling. Nice and high, baby.
xo
s
Shanna says
Did you ever sew the panels on? I just got new curtains for our bedroom that are not blackout–this is horrible since our last ones were and worked so well. I am going to buy the blackout liner fabric and was planning on doing this cheater way like you did. After searching the internet to see if anyone has “cheated” like me before I found you did! Wondering if the cheated method worked long term or if I will be sewing them together at some point. Thanks!
YoungHouseLove says
Never did! They still work well, and now I can transfer them to her big girl room easily!
xo
s
Ginger says
Your site is great! Thanks for the tips!
Erica says
Hi Sherry,
I’m sorry if you already answered this questions, but are you happy you washed the blackout fabric before adding it to the existing curtains? I don’t anticipate washing the blackout fabric the same way I would wash the curtains (in the future), so I’m trying to decide if I should wash at all. Thanks!
YoungHouseLove says
It definitely didn’t hurt – I wanted to get that plastic-y smell off of it :)
xo
s
Jennifer says
How do you hang it? Do you have to cut holes in the top in order to slide the shower curtain rings in??? You keep saying clip…is there a clip option in shower curtain rings? I’ve never seen that before.
YoungHouseLove says
They’re curtain ring clips so they hold it (pinched at the top like a clothespin). They sell them at Target. No need for holes if the clips hold the fabric :)
xo
s
HeatherB says
Still not sewn? Preparing to do some for my daughter’s room…kinda want to sew, but then read some reviews that said needle might leave holes allowing light through (?!). Wondering if you ever decided to sew or if still using as clipped together.
Michal says
Hey, this is great! I’m just a little confused – how did the liner stay attached at all? Did you make slits in the fabric to attach via the ring clips? I re-read it a couple times and couldn’t figure it out. Thanks!
Michal says
(oh gosh, never mind…just saw the the other comments. thank you) :)
Lynn says
Just perfect Sherry. Loved your ideas so much I dropped them on this blog post about how best to sleep a little later on the weekends
http://www.ebed.com/mattress-sleep-better-blog/4-steps-to-sleeping-better-with-children/
ESPECIALLY with little ones in the house! Keep up the good work!
Annw says
We move frequently and often have to stay in temporary apartments where the window treatments don’t block any light at all. The first such place we stayed had very tall windows, so I bought a lot of blackout fabric and used it all by itself on clip rings, with no sewing or additional curtains. Our next place had shorter windows, but I didn’t bother cutting my old panels to size— I just folded over the top to get the right length. (I could have folded up the bottom and used adhesive tape almost as easily. The next place I live I might need the extra length. So I guess I am even cheaper and lazier than you! I just use these in the bedrooms, where no one but we can see them, but they still look fairly nice, as the blockout fabric has a lot of body. In the living room I would get fancier.