Hold onto your miniature hats, it’s time for the fun part of painting and personalizing the dollhouse!
Our last post was full of the building process, which you can see by (clicking here) – so let’s move on to how we finished everything off.
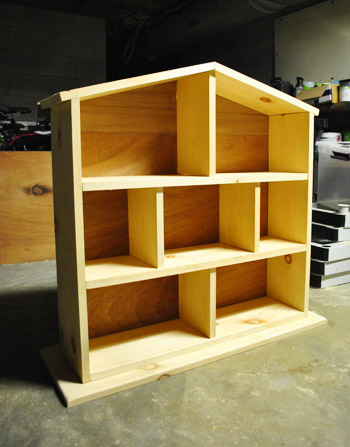
After it was all assembled, it was time to schlep our 31″ x 31″ creation up into the sunroom for some priming and painting. Just like our office cabinets, kitchen cabinets, and the play kitchen we made for Clara, I used a coat of Zinsser Smart Prime (it’s no-VOC but amazingly good for blocking bleed through when you’re painting raw or stained wood) followed by two coats of Bejamin Moore’s low-VOC Advance paint (really durable and awesomely self-leveling). I went with Decorators White since we had it leftover from painting the office cabinets and the play kitchen, so this step didn’t cost us anything. Here’s our little house when it was primed but not yet painted:
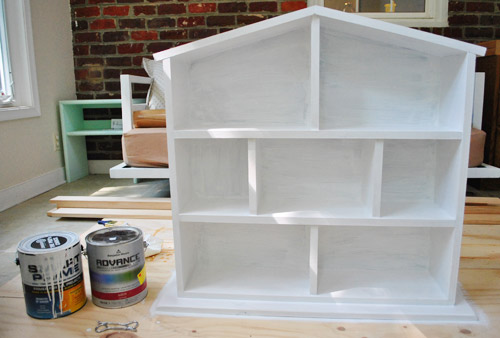
And here’s my first coat of paint going on (I used a brush for some of the hard to roll places and a small foam roller for the more expansive roll-able places – like the sides, roof, and back).

Then I gave it about 30 hours to cure up before it was…
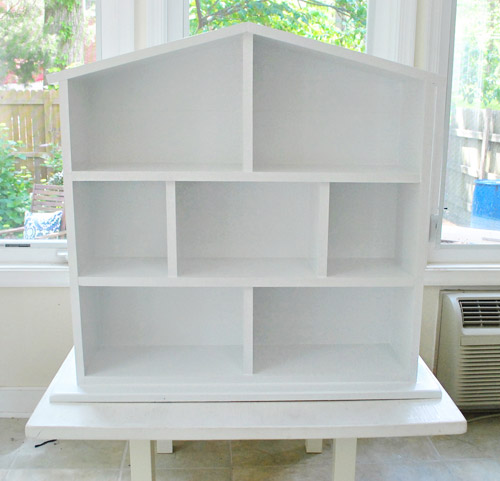
… wallpaper time!
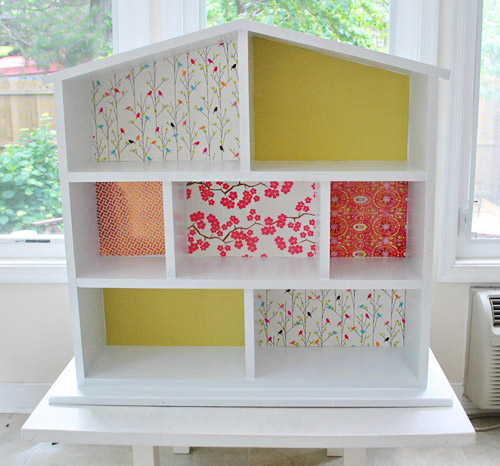
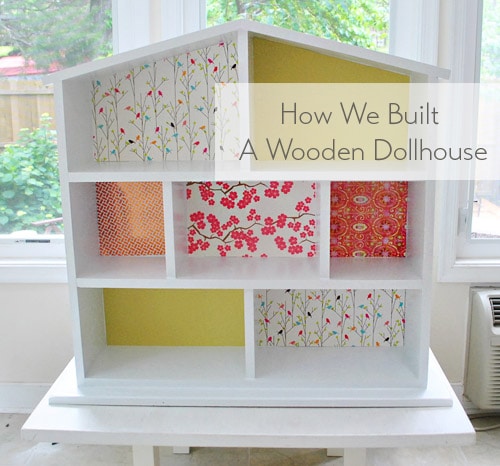
I actually used the following things that I already had in the house (I just ransacked my craft bin/gift wrap closet) to wallpaper the dollhouse:
- Top left: Gift wrap sheets picked up from a local place called Mongrel a few months back
- Top right: Decorative paper from Michael’s leftover from some other project
- Middle left: A roll of leftover decorative tape from Michael’s (I just taped four strips of it to a piece of card stock)
- Middle middle: More gift wrap from Mongrel (this one’s actually from a few years back)
- Middle right: More decorative paper from Michael’s
- Bottom left: Even more decorative paper from Michael’s (I have a nice pile of leftover paper under the bed)
- Bottom right: More gift wrap from Mongrel
As for how I did it, I cut templates for the back wall of each room using regular old printer paper (taping a few sheets together if it was bigger than one sheet and trimming things until it was a nice snug fit). Then I just used that paper template to cut out the right sized piece of gift wrap or decorative paper. I used double sided tape to affix them to the back wall of the dollhouse, and then brushed a thin coat of matte Mod Podge over each of them – just to give them some protection from being scratched or ripped (except for the room with the decorative tape, which was already shiny).
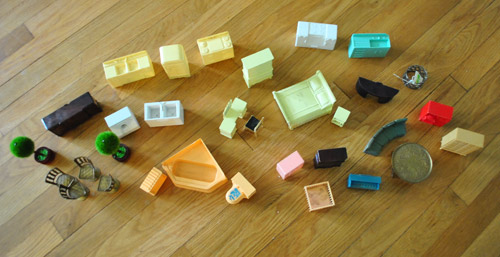
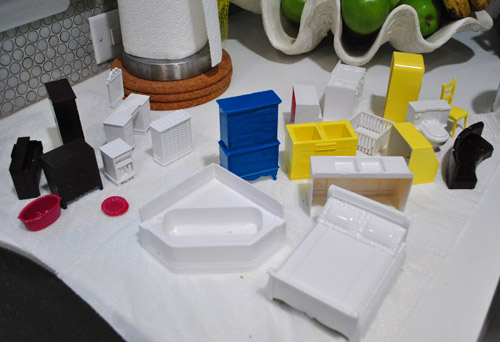
As for furniture, I bought a big “mixed lot” of old dollhouse furniture (most of it from the 50s/60s) from eBay for $30 including shipping. Oh and for those wondering about scale, it’s 1/2″ scale. This is what it looked like after it came and I soaked everything in hot soapy water to remove years of grime.
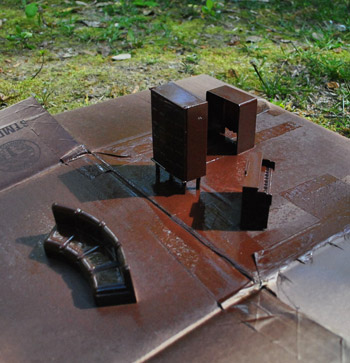
But since those colors weren’t exactly what we were going for, I turned to my good friend spray paint. We knew spray primer and spray paint was the best way to permanently update the furniture (no-VOC paint would most likely scratch off within one or two play-sessions – and we really want this to be a durable and long-lasting gift) but we didn’t want the dollhouse to smell all fumey like spray paint, so I actually ordered this furniture in February and sprayed it all in March so it could be left in the sealed off sunroom (and brought outside on sunny days) to off-gas for a nice long time. Thankfully there’s nothing stinky about it after all that curing time, and it actually looks pretty convincingly done – as if that’s the color the manufacturer sprayed on it a few decades back. Speaking of color, some of them got leftover dark brown spray paint (with built-in primer by Rustoleum) for the whole “wood look.”
But most of them got white primer + paint as a base (Rustoleum Universal in Satin White) …
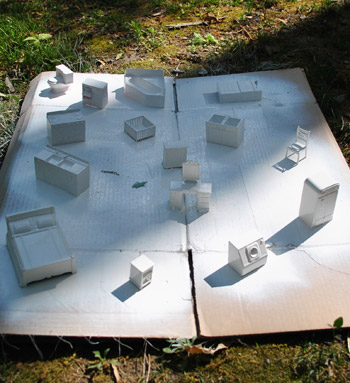
And then some of them got a shot of bright color on top of that primer + paint base, just for fun (thanks to leftover cans of random colors). Who doesn’t love a yellow washer or fridge? They’re Sun Yellow by Rustoleum, and the turquoise dresser in the background is Lagoon by Rustoleum.
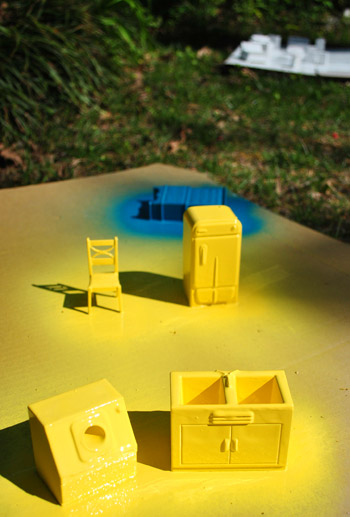
They sat around in the sunroom after their March paint job so long that they actually got dusty by May. Haha. So here they are after a little rinse-down in the sink.
I couldn’t wait to finally get things into the house…
I didn’t put much thought into what went where since I figure Clara will be moving things around, and we’ll probably add some more items (like some much-needed wall art – maybe by laminating photos that we’ll print).
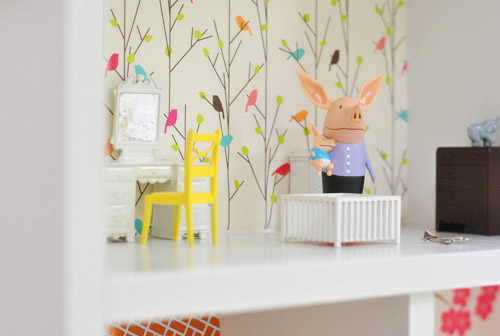
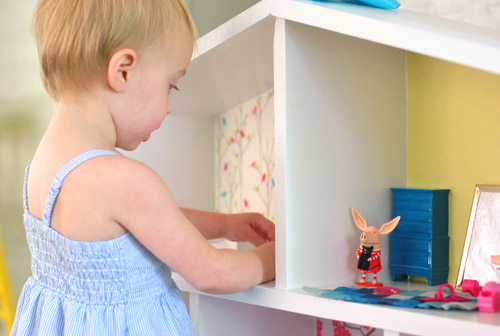
Oh yes, but what about dollhouse people? We couldn’t find many that we liked (they either had ceramic faces that we worried Clara would shatter or were a bit too big for the scale of our furniture, or were just kind of scary looking) – although I later learned about these, which are pretty darn cute… so we went with Olivia’s family.
Clara loves Olivia, and when I saw a family set at Toys R Us that looked perfectly scaled for our house, we scooped them up. They’re bendy plastic so they seem pretty indestructible and Clara has so much fun putting them in different rooms (ex: “Olivia’s daddy is taking a nap” and “Olivia’s mommy is in the crib – so silly”).
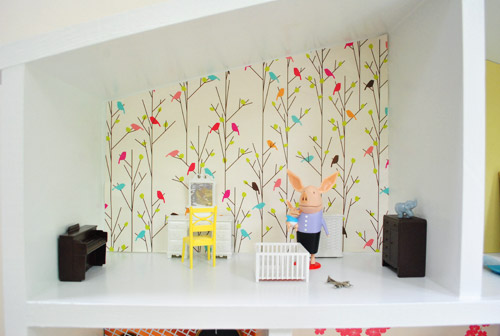
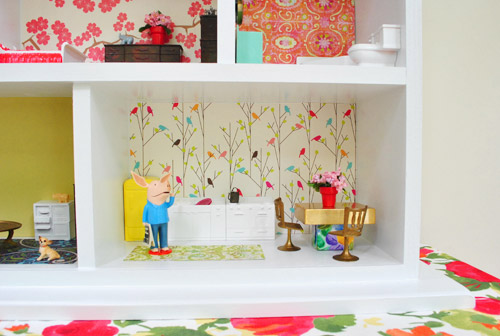
Although everything changes each time Clara rearranges things, the room above is sort of a nursery with a crib, a vanity with a happy yellow chair (and tin foil that I added to make the mirror look more like a mirror), a baby piano (Clara loves playing one at Grammy and Tom Tom’s house) and a dresser. There’s even a little airplane “toy” for the nursery, that I found at Michael’s (it’s really a charm for a necklace, but the scale is right so I went with it). But more on how we’re keeping the super tiny things in the dollhouse Clara-safe in a second.
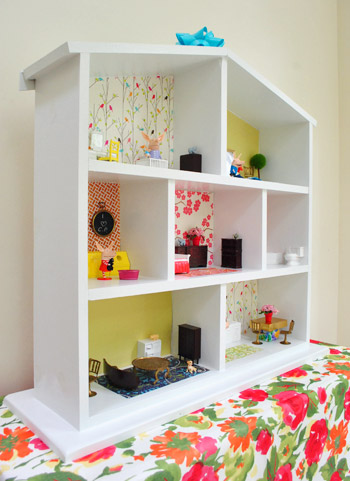
Speaking of scale, as John mentioned yesterday, we opted for an 8″ room height on the first two floors and a sloped attic that’d go from 6″ to about 10.” This was all a bit big for the scale of our eBay furniture, but we wanted to err on the side of giving Clara plenty of room to move around rather than being sticklers for scale – and who doesn’t love a room with extra high ceilings anyway?
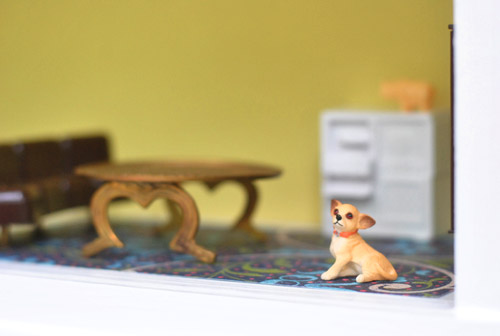
The room below is sort of a playroom/ extra bedroom without a bed (remember this whole thing is still evolving, haha) so it’s mostly filled with random furniture, a fabric rug that came with the dollhouse lot, a small frame that I found at a thrift store for a nickel with the glass removed and a piece of tinfoil in there to make it resemble a leaning mirror, and a small potted topiary that I found at Michael’s from the wedding aisle (it’s actually a place card holder).
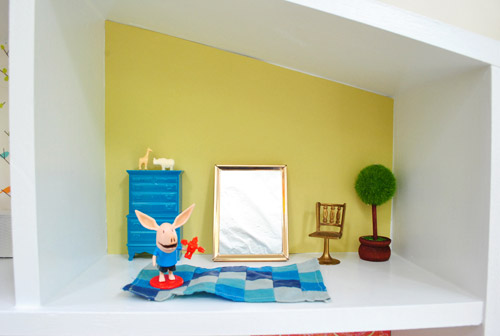
Oh and see those “ceramic animals” on top of the blue dresser above? They’re just plastic beads I found at Michael’s. I thought it was cute to add some animal friends to Clara’s dollhouse, and although Clara’s past the putting-things-in-her-mouth stage, a few smaller accessories like these and the previously mentioned toy airplane get put away in a box that only comes out when we’re playing together (so if she’s playing alone they’re not in there for her – just in case she gets any crazy ideas…).
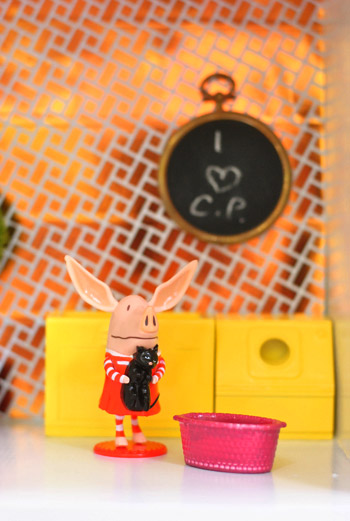
The laundry room might be my favorite room. The metallic tape I used for the wallpaper doesn’t photograph as great as it looks in real life, but in person it’s kind of swanky and geometric. I loved spraying the utility sink and the washer bright yellow and adding that cute pink basket on the floor. And see that black thing hanging on the wall? It’s a thrift store find for 10 cents (it was some sort of plastic frame ornament or something) but I used leftover chalk board paint to make it into a hanging chalkboard by just painting the plastic disk inside the frame and hanging it up.
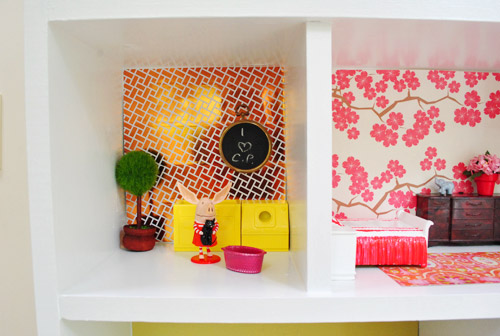
I love that we can change the message whenever Clara asks me to write something new (it actually says “Moooo!” right now at her request).
The next room is the bedroom, complete with a paper rug (I thought laminating it would make it last longer, but Clara has yet to pick it up and crush it so we’ll have to see if I get around to it). I’d also love to make fabric rugs from old scraps from her monthly pics someday, so I’ll keep you posted.
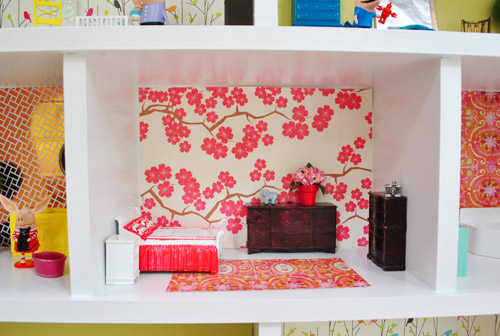
Oh and see the tiny metal camera on the dresser and the small flower pot on the other dresser above? Those are little doodads I found for a few bucks at Michael’s (the camera is a charm for a necklace actually – it’s another one of those things I tuck away when Clara is playing by herself since it’s so small). They also sell tiny flowerpots and fake flowers so I made that little potted plant and painted the terra cotta pot with the same pink nail polish that I used to make chevron pillows and a matching pink duvet skirt on the bed.
Here’s the bathroom with a mint green sink, and the other one of those plastic thrift store frame ornaments. Instead of making this one another chalkboard, I just put some tin foil behind the plastic pane and made it into a mirror for over the sink.
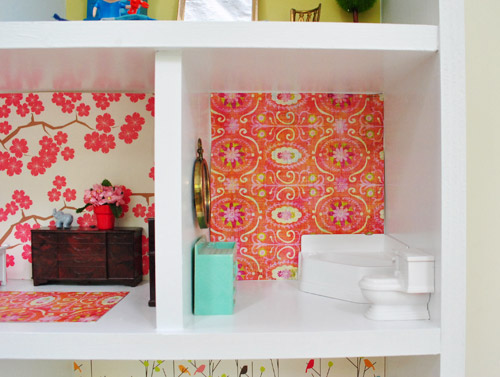
Oh and Clara was sad the potty didn’t open at first, but then was very excited when I taught her we could flush it by making a swissssssshhhhhhh noise with our mouth. Now Olivia and her family hang out in the bathroom a lot.
The living room is in dire need of some art on that blank wall, but it does have a funny little retro record player/TV cabinet (the white thing) with a “ceramic” rhino on top of it, so that tickles me.
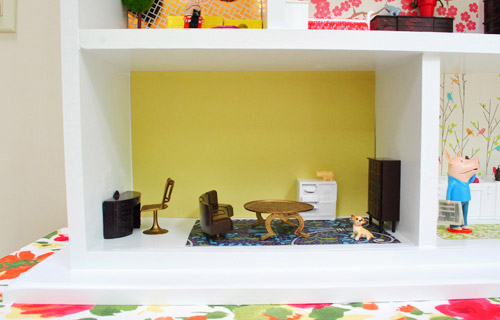
My favorite guy in there is the tiny Burger I found on eBay. You bet I paid $3 plus $3 shipping to have him represented in the house. Haha. Clara was pretty psyched to see him. She calls him “Baby Burger.” It’s very sweet.
Next to the living room is the kitchen, with an oven/stove and a sink (complete with tiny dishes in it, which also go away when Clara plays alone because they’re pretty small) and a happy yellow refrigerator. I also made the table with the top of a little wooden box I had lying around and used a small paper gift box as the base. Another homemade flowerpot + faux flower combo went on top along with chairs from the eBay lot of furniture. Oh and that’s another paper rug I just quickly made and might get laminated for protection (or it’ll get replaced with a fabric one I’ll make down the line).
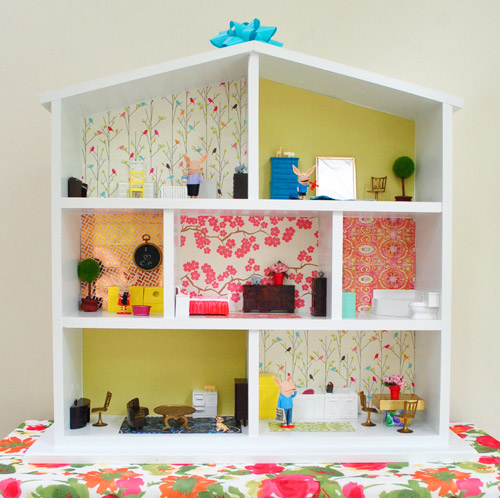
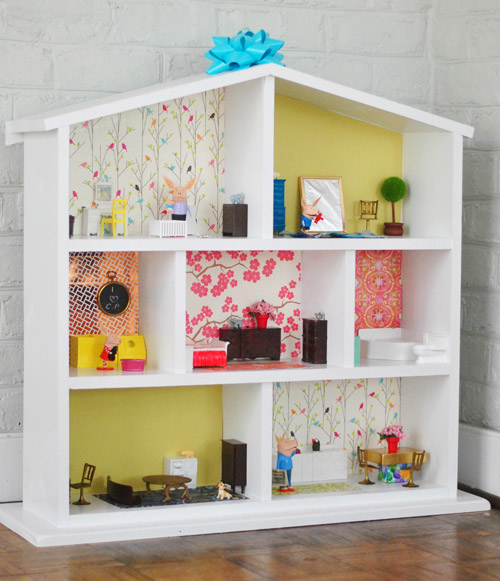
After loading in all the furniture, it was time to top it with a bow…
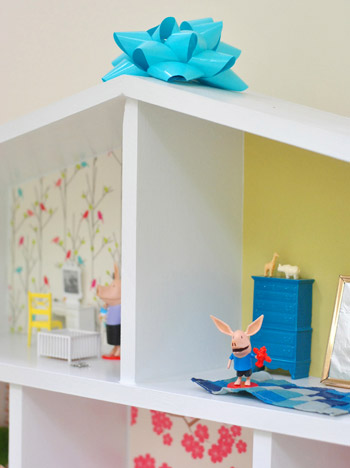
… and carry it out of hiding and into the living room for Clara to discover after her nap.
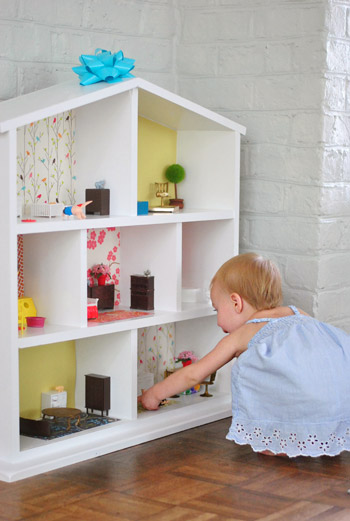
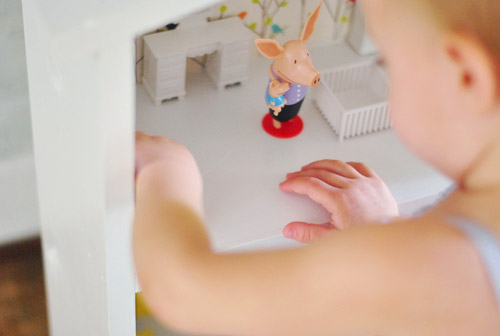
She ran right in as if it had always been there and picked stuff up and got right down to the business of playing.
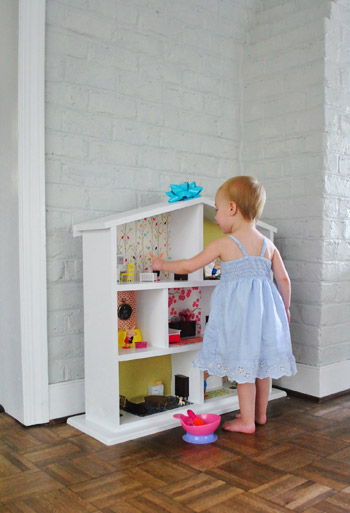
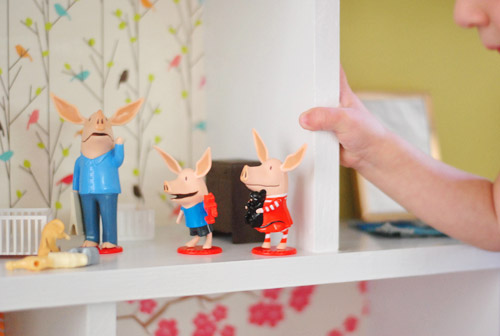
It was so cute to watch her little brain work out that things were too small for herself, but perfectly sized for Olivia and her family. The little family of pigs was definitely her favorite part at first and slowly she picked up on things like baskets and chairs and the crib, bed, and toilet- which became fun to work into Olivia and her family’s routine.
We love that nothing is too precious to worry about because we really wanted it to be something she could go to town on without fearing that delicate things could be broken.
Thankfully since the furnishings are all plastic or metal, they should hold up to Hurricane Clara. Oh yes, and the fact that Olivia is holding a kitty = Clara’s favorite part (other than discovering Baby Burger). The girl loves her animals!
So it’s safe to say that she likes it. Whew. The next morning it was the first thing she talked about as we got her our of her crib. And we might like it a little more than adults should too (not that we played with it after she went to bed, ok maybe we did just a little).
As for the budget breakdown, here ya go:
- Wood: $35 (we did get to reuse a scrap piece we had for the back to keep costs down)
- Nails and wood glue: $0, already owned (but they might run you $5 if you don’t have them)
- Primer & paint: $0, leftover from painting other things like cabinets & the play kitchen ($70 would get you a gallon of each that would probably last for a ton of furniture painting projects like ours have – even big ones like cabinet painting)
- Dollhouse furniture: $30 (including shipping) bought as one “lot” on eBay
- Michael’s doodads: $5 (small flower pots, faux flowers, beads, camera and airplane charm, etc)
- Baby Burger: $6 (including shipping) on eBay
- Olivia’s family: $10, Toys R Us
- TOTAL: $86
Thanks to having lots of those odds and ends on hand (primer & paint, decorative paper and gift wrap, Mod Podge, and even a piece of scrap wood for the back of the dollhouse) we were able to come in almost $15 under our $100 goal. Actually $86 is lower than all of the used wood dollhouses that we found on Craigslist. Which I think means that momma should get $15 to spend on future upgrades and furnishings, right? Haha. Can’t wait to see how this thing evolves as Clara grows!
Have you guys used things like gift wrap and decorative tape as wallpaper? Any other plastic-beads-turned-ceramic-animals out there? We heard so many awesome ideas in yesterday’s post, from carpet samples or even wood/tile on the floor to using tongue depressors to make shingles. Love it all.
Psst- Check out Part 1 of this project here.

chitra says
Aww…How cute is that doll house!! Clara is one lucky girl..
‘baby burger’ steals the show
One day our munchkin was pretend playing ‘garage sale’ outside on the porch with her stuff toys…Looking at this, our very generous and sweet neighbors passed on their tween daughter’s doll house to our daughter.The cutest thing in the doll house is that it has ‘lift/elevator’….she can move her doll placing in the lift and wind it…the lift moves up and stops at any room.
I’m so glad God blessed us with another daughter and she is tunring ONE next week…and she can continue to play in the doll house:)
Sorry for the logn story…just got excited seeing the Doll hosue and Olivia’s family:)
Chitra
YoungHouseLove says
Aw so sweet! The lift sounds awesome!
xo,
s
Suzanne says
I have my childhood dollhouse upstairs and I’ve been MEANING to renovate it for 2 years now – but this might be the push I need to actually get to it. And painting the vintage doll house furniture was brilliant! Mine is so mismatched and ugly I’ve been thinking about tossing it all. Spray paint to the rescue!
Esther says
So so so adorable!!! You guys did an amazing job! And the whole family napping in the crib at the end – hilarious
Andrea says
I want one. My barbie dollhouse as a kid doesn’t even compare to this one. Love the Olivia dolls, we watch a lot of that around here.
shaleah says
So cute! You did a really great job on the house, my daughter and I are working on revamping an old dollhouse we found at a thrift store. She totally adores it and will sit and play for hours!
Tammy says
Love it! I ran across this link of tiny food. Thought you would appreciate given the scale of things. It would clearly send Clara’s dollhouse over-the-top in awesomeness.
http://www.flickr.com/photos/shay-aaron/sets/72157618675112894/
YoungHouseLove says
So insanely cool!!!
xo,
s
Martha says
I am tickled that you didn’t like the look of the play furniture. Even Clara’s toys must have good design. Now I’m brainstorming making a doll house for my little one in a year or so. ;-) Love it!
eRin @ growing up senge says
This is seriously the cutest EVER. The mini ceramic animals make it just totally over the top awesome. She is going to have so much fun with this for years and years and years. What a great place for her to start experimenting with her own style!
Heidi P. says
Love that rug in the living room – I used that paper to make some tile coasters last year :)
http://dhperezfamily.blogspot.com/2011/11/tile-coasters.html
The tape wall is totally swank and posh.
YoungHouseLove says
So pretty!
xo,
s
Caroline M says
I’ve read for two years but never posted, but after seeing this I absolutely had to…as one of four girls I know my way around a dollhouse and these Calico Critters(pasted below) were my sister and my favorite toys when we were little. I recently bought them for my niece! They’re a good size for small furniture. The houses can be expensive, but the families are adorable!
http://www.shopatron.com/products/productdetail/Buckley+Deer+Family/part_number=CC1457/224.0.1.1.11161.5115.0.0.0?pp=12&
YoungHouseLove says
So cute!
xo
s
Rebecca says
This is unbelievably adorable. I love that your decorative instincts carry over into your gifts for Clara, and I love seeing all the tiny details you put in!! The aluminum on the mirror, the “ceramic” animals on the dresser. And I absolutely adore Olivia, so I’m psyched to see her feature in Clara’s life.
You guys are so awesome. Nice work.
Katherine says
This is really cute and colourful. Sorry to be the one to add the word BUT – There are a few items that are really small and could be a choking hazard. It might take just a bit of tweaking to make it completely safe.
YoungHouseLove says
Oh yes, check out this post to see where I mention that although Clara’s past the stage of putting things in her mouth, the very small items are tucked away in a box that only comes out when I’m right there next to her- just in case!
xo,
s
Brooke Reasoner says
Wowza! So cute!! While I am sitting here reading through the comments I had an idea. I wonder if there would be a way to use some type of earring to hook to the ceiling in the bedroom or living room to look like a chandelier?? Like something with a dropped cluster of beads. Maybe something like the blue ones here: http://eringallagher.wordpress.com/tag/earring/
You could just take the hook part (that goes into your ear) off and hang with a little tiny screw-in hook or something? Just a thought. Oh, and also, you could use a fun colored plastic button and take a little ‘Olivia family portrait’, scale it way down, and cut it to fit inside the rim of the button to make it look like a round frame. Or just some more fun patterned paper to look like ‘artwork’ inside the button frame. Cheap and lots of easy ways to attach to the walls. See what you’ve done to me?!?? I don’t even have any kiddos of my own yet, and here I am brainstorming doll house decorating ideas! Seriously, though, the house is AWESOME!
YoungHouseLove says
I love it!! Such a fun idea!
xo,
s
Erin Rose says
Good job guys! My dad built me a huge Victorian style doll house with shingles to boot for me when I turned 4. For my daughter (who is only 7 months) in the future I want to revamp it a bit with wallpapers and spray painted furniture. My dolls were Little Critters. Super durable and cute. I always love animals for doll houses over people. It’s just so whimsical I think. Happy birthday Clara! :)
Elaine K says
Love it! I’m sure she will have hours of fun playing with it. When she gets bigger you can keep it interesting by decorating it for Halloween, Christmas, etc. I think the idea of designing for a toy company is excellent! There’s so many electronic toys these days that all do essentially the same thing. There’s so much more play value with your kitchen and dollhouse.
Christy K. says
This dollhouse is fabulous! I loved having one growing up! Have you thought about using felt for the rugs? If you cut them to a standard size, Clara could redecorate.
Also, if John feels so inclined to build again, there is always a stable for the horses or farm animals that Clara’s owl family owns
YoungHouseLove says
That’s a really fun idea!
xo,
s
Tiffany says
Super sweet, I enjoyed the photos. Very imaginative and creative.
Jessica says
this makes me want to pull out my dollhouse furniture and start playing in my dollhouse! My grandma made it for me when I was really little (maybe 5-6?) and I used to spend so much time playing with it. She wallpapered it, put down carpet… she even painted flower beds around the outside so it looks like landscaping. I still remember the day she climbed out of her car with it, I was so excited. Clara is in for years of fun!
Kirralee says
This is adorable!! Fantastic job! Love all the little details, you guys are so clever! Xoxo
Kristin says
Oh my goodness! I wanna play too! Adorable!
Marie says
I love, love, love the dollhouse! When I am lucky enough to have grandchildren, I will have to put both the dollhouse and Clara’s play kitchen on my husband’s “get on that already” list!
Sonia says
Clara is lucky to have parents like you.
YoungHouseLove says
And we’re lucky to have a sweet girl like her!
xo,
s
Pat says
Really neat dollhouse; you’ve made something she’ll play with for a long time, and her friends will come over and will only want to play with THAT. I’m writing because it looks like the furniture scale would also be just right for Barbie’s little sister Kelly – not made anymore – but you could find her on ebay, too. I know those brass chairs and they are just the right size. If Clara outgrows Olivia, Kelly and her friends could move in, or Olivia could have a human visitor. Have fun!
YoungHouseLove says
Thanks so much for the tip Pat! We’ll have to look out for Kelly and her friends!
xo,
s
Jen @ The Well Read Fish says
Favorite post of all time.
Eileen Treitler says
Wow! I love the dollhouse! As usual you two did an amazing job creating something so special for such a special little girl!!! Love to all of you!!
YoungHouseLove says
Aw thanks Aunt Eileen!
xo,
s
Corinne says
The whole house is super cute & beyond adorable. My favorite part is Olivia’s family. :) My 8 year old is named Olivia, after the books which I discovered while I was pregnant with her. She has the same family set & loved the fact that Clara says Olivia in the videos. She’s a huge Clara fan. :) This is by far (in her opinion) the best post ever!
YoungHouseLove says
Aw thanks Corinne! You guys are all so sweet!
xo,
s
Dawn says
Just watched the video. I’m a Speech Language Pathologist and I can tell you that Claras language skills are really advanced for a 2year old! Keep talking to her – you’re doing it right. PS Love the dollhouse!
YoungHouseLove says
Aw thanks Dawn! She’s our little chatterbug!
xo,
s
Nichole says
When I was little, my mom and I put together a kit dollhouse and decorated it together. I thought it was so cool at the time, and we used wall paper samples for the walls and carpet samples to make rugs. For some reason I remember that being my favorite part. I also loved it at Christmas time when we would decorate it with miniature Christmas village items!
I bet Clara will soon get to the point where she will be redecorating the dollhouse. Maybe she can start up a mini blog for that! :)
YoungHouseLove says
Haha, I love that idea!
xo,
s
Nina @ Babbling Little Booties says
btw, Belated Happy Birthday to Clara!
She really loved that dollhouse.
You did a great job on that project John and Sherry!
Cheers!
Connie says
Jo Anns does indeed have dollhouse decor and such that would be to scale if you want to switch out the decor with the seasons! =) And thank you for suggesting my dolls for people who are looking for non-scary alternatives, lol! cheers and Happy Birthday Clara!
YoungHouseLove says
Haha, love your dolls and can’t wait to check out JoAnn!
xo,
s
Amy says
Oh my goodness, this may be one of my ALL time favorite posts! Such a lovely, meaningful handmade gift and soooooo cool! Clara is a lucky lil’ lady:)
Hanah says
Woah, that doll house is awesome!! You guys did an incredible job. I sort of want one for myself. I mean for my daughter. Not me. :P
By the way, I thought my daughter was past the age of swallowing small pieces so I was super shocked and traumatized the day she found a tiny bead and stuck it up her nose!! It’s very smart of u to put away those small pieces. It might save u a visit from the paramedics!
YoungHouseLove says
Thanks for the tip Hanah! I keep an eye on her with food too (we hear stories of peas or cheerios up the nose) so I figure by only bringing out the small stuff when we’re right there next to her hopefully we’d catch something before it goes up. Haha.
xo,
s
Lisa says
This is so utterly darling and creative, I can’t stand it! I dreamed of building a doll house with my dad when I was a little girl. We got it started but picked too ambitious of a design and never finished it. I wish the interwebs had been around about 20 years ago!
Jess says
Umm, I kind of want to keep watching her play with the dollhouse forever!! So, so sweet!
MelissaG says
I love it!! And I’m really not a “worrier” type of mom but I just had to add that, although all kids are different, I wouldn’t put it past a kid her age to still put things into her mouth. Again, totally not judging and I know you said you put the things up but just for future reference. Some of my kids were supposed to be WAY past that stage and for some crazy reason put something in their mouth. My youngest ate floam, my oldest almost swallowed a Lego head…I really wouldn’t be surprised if a 2-3 year old would totally still do it. That is all. :)
YoungHouseLove says
Thanks Melissa! As I mentioned we put the small stuff in a box up on a tall shelf and only bring it down when we’re right there next to her!
xo,
s
Emily says
That is such a cute dollhouse! I had a (store-bought) wooden dollhouse from the HearthSong catalog, I think. I loved it and played with it for many years, and I bet Clara will too. As I got older, I started to make my own decorations and furniture for the dollhouse, mostly out of paper. It was such fun!
Annemarie says
Wow, it’s amazing how Clara’s beautiful dollhouse resembles your house! Is that on purpose, or just your aesthetic? These posts also made me super nostalgic for my own dollhouse, which also resembled my parent’s house, even though it was a hand-me-down from a cousin… it had a cast-iron fireplace, like we had, and a woven burgundy and patterned rug, like we had… I don’t remember too much else except that we never bought beds for it, and after I’d had it for several months, my dad found some tiny “shingles” at some store and decided we had to shingle the dollhouse all over, just like our real house… it took us forever, but it looked great!
YoungHouseLove says
I think we tried getting Burger in there along with some of the colors we love and those ceramic animals, but I’m sure more things about it resembling our house are subconscious for sure! So funny!
xo,
s
Leslie says
You are the best parents ever. I may have to move the baby-making plans up a few years just so I can start building one of these.
Cynthia says
This is super cool! Clara is so lucky to have such wonderful parents who handmade her this special house. I love the Olivia toys. My son is so into that show too!
Lauren says
That’s awesome! When I was little, my Grandpa made me a dollhouse – and the funny part about it is I have the same set of copper style chairs that you have for Clara! I also had a matching table, goblets and wine pitcher with mine. It just brings back all those memories!
YoungHouseLove says
No way! The goblets came with mine too, I just haven’t put them out yet since they’re so tiny! Haha.
xo,
s
andrea says
I haven’t read all the comments, but depending how deep the rooms are when she is too old to play with it , you can use it as a bookshelf in her room and even use the teeny rooms to display things!
YoungHouseLove says
Love that idea!
xo,
s
Lauren O. says
Okay, this is seriously TOO CUTE! I had a dollhouse growing up and it was my FAVORITE thing. My grandpa built it. I still have it to this day! Clara will get a lot of great use out of it! So sweet! LOVE the bright, happy colors. Nicely done. And as always, love your blog!
Claire says
I “wallpapered” my kitchen walls with scrapbook paper that has vanilla frosting with multicolored sprinkles! It may sound crazy, but from a distance it just looks like a patterned white wallpaper. I just used double stick tape to hold it to the old wallpaper. For the backsplash areas, I put contact paper on top! It looks amazing and I still love it 4 years later – it’s a big conversation piece as well! I wish I could send in a picture but don’t know how!
YoungHouseLove says
You’re always welcome to post it on our Facebook page and then leave the link here for us all to click over!
-John
Robyn says
Ohmygoodness so incredibly cute!
Rae says
Love the doll house! I’m sure Clara will play with it for years to come.
Not sure if you know or not, but they have small wooden things at hobby lobby, that are similar in size and shape to what you were looking at on etsy. They come in two sizes, so you just get whatever size you want and paint away. Your dolls will be one of a kind. :)
I’ve saw them on pinterest as dolls for dollhouses and wedding cake toppers. :)
http://shop.hobbylobby.com/store/item.aspx?ItemId=158401&F_All=Y
YoungHouseLove says
So cute! Thanks for the tip!
xo,
s
Nicole says
Nice job guys!
We’re also building a dolls house for our daughter.
Here in Oz, we had Better Homes and Gardens undertake a dolls house project with DIY furniture which I love.
http://au.lifestyle.yahoo.com/better-homes-gardens/lifestyle/kids/article/-/6821012/make-your-own-dolls-house/
I hope you can open the above link to take a peek.
YoungHouseLove says
Love it! SO cool!
xo,
s
Maureen@The Parkland Project says
Of course I spotted that tiny white rhino… Where did you find one so small?
YoungHouseLove says
He’s actually a plastic bead! They sold a kit of animal beads at Michael’s that I grabbed since they looked like little ceramic animals!
xo,
s
Linda says
It’s been 21 years since I’ve decorated a doll house like that one for our youngest daughter. Her Papaw built it for her and I painted and decorated. I used stick on tile for floors, hung fabric curtains over fake windows, made pillows, quilts, sheets for a doll bed. She received a wicker patio set from her aunt and I made cushions for the chairs and love seat. We used some miniature trees (I love the topiary) and took apart some silk flowers to make small arrangements. I KNOW I had more fun decorating that she could POSSIBLY have had playing in it.
It was passed on to her neice who played in it for years and now uses it as a bookcase while we wait and hope that our youngest will have her own little girl someday.
I noticed you had it on a low table while painting. When Clara is bigger you could put it there to raise the level for more comfortable play (Attached well, of course.) and the area under the table can become the garage.
You did an AMAZING job and I’m sure she will play with it for years to come. It’s a piece to enjoy and then pass down through the years to her children and grandchildren, etc.
Linda
Tracy says
I have never commented on your post before but feel I must on this one!!! Absolutely precious dollhouse, you all are so blessed….
Deborah says
Completely, totally charming. And baby Burger—oh my heart. Olivia (and family) is perfection. You are all amazing!