The evening after posting our plans for a mini-update to our master bathroom last Monday, Sherry had us in the car and off to hunt down the blue light fixture in her mood board.

It’s a Shades of Light fixture that we hoped to find at a local lighting outlet called The Decorating Outlet (which is also where we bought the glass pendants over our peninsula, Clara’s capiz chandelier, and the shade that we added around the chandelier in our office).
Sherry was nervous that our luck would run out and they wouldn’t have any in stock – but they actually had not one, but two to choose from. They were half off the original price of $159, so for $80 we were soon headed home with a blue light to take the place of our formerly unglorious boob light (Ballard also sells a similar version for $189, so we were excited about our little outlet find). Still, at 80 beans it’s definitely not the cheapest pendant light we’ve ever bought, but for such an uncommon and cool effect (the seeded blue glass is really amazing in person) we were happy to shell out the dough to make it ours.
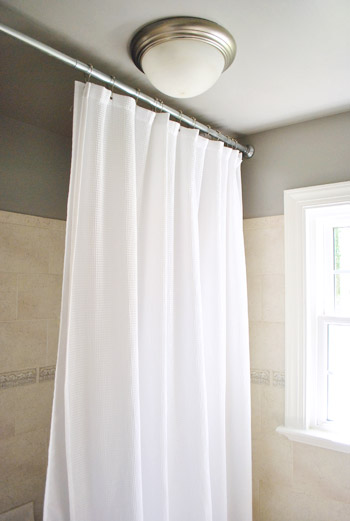
Part of the reason that we wanted to replace this flush mount guy with a pendant was so it’d hopefully look less crowded to the shower bar. Have we mentioned this room is tiny? Well it is, which means a fixture that’s centered in the space is pretty close to the shower curtain. Especially since this fixture was extra wide. We knew something with a smaller footprint against the ceiling would help, and that something with translucent glass and a much smaller diameter would lighten things up as well.
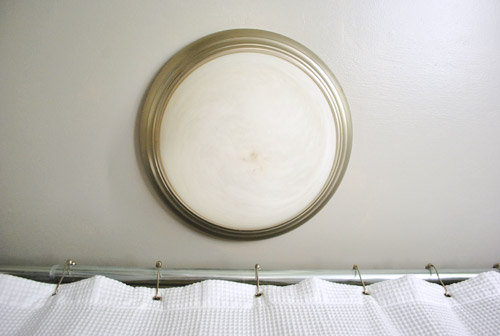
Plus, as much as I was determined to discover a new solar system in the light’s swirly glass, we figured bringing in the blue pendant would be a nice shot of color in the formerly “builder basic” room.
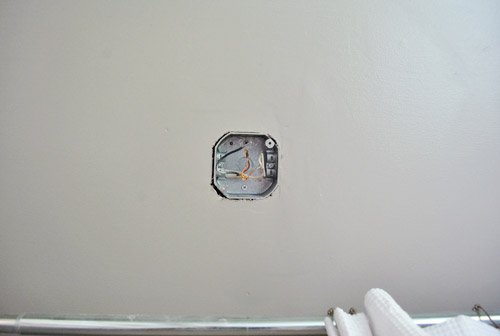
Installing new light fixtures is old hat for us by now (we just did three in the kitchen) so we figured we’d have this project knocked out within a few hours. But since clearly we failed to knock on wood or something, we uncovered this mess:
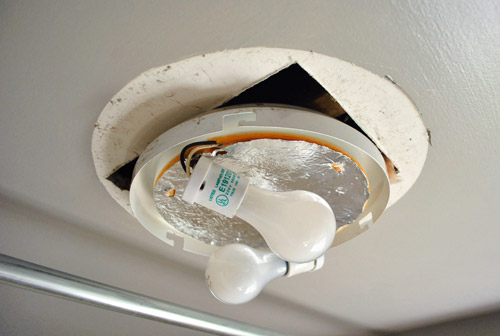
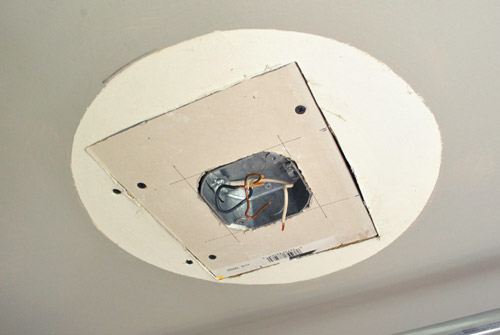
Don’t see it? How ’bout we turn off the power and remove the old fixture so the giant hole in the ceiling can’t be missed?
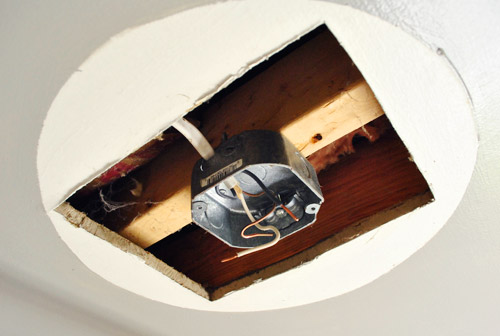
This obviously wouldn’t jive with the new fixture’s smaller base. Unless of course we were going for that exposed rafters look. So just like that our “install new light fixture” task go bumped below “patch ceiling” on our to-do list. Ah the joys of DIY, right?
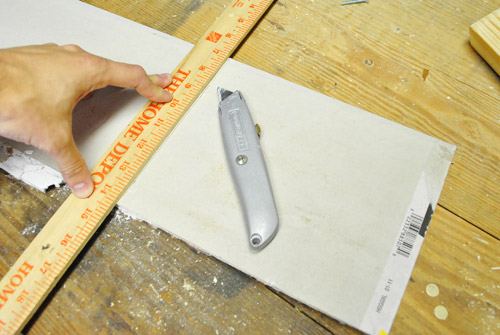
On the bright side, we had some leftover drywall in the basement from patching the new opening in the kitchen which meant we didn’t have to run out to the store to get started. So I used a box cutter to slice a piece down to size.
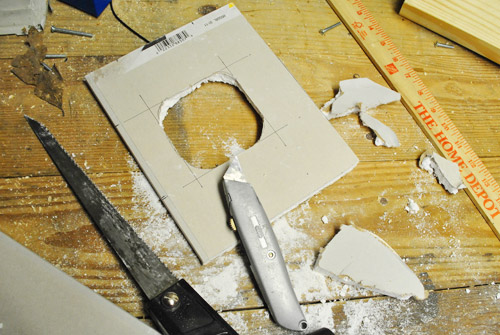
And then broke out a drywall saw to cut out a hole for the fixture box that I measured. It wasn’t the prettiest cut, but it’d do the trick, and the top of the pendant light would cover the hole for the fixture box, hopefully resulting in a nice seamless look.
To secure the patch to the ceiling, first I screwed some scrap wood into the ceiling that would provide a nice firm surface to screw into. One piece of wood went against the beam, while the other got screwed into the existing drywall.
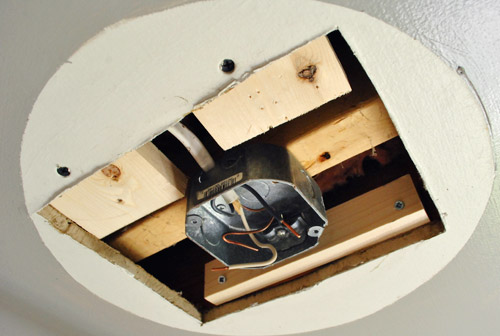
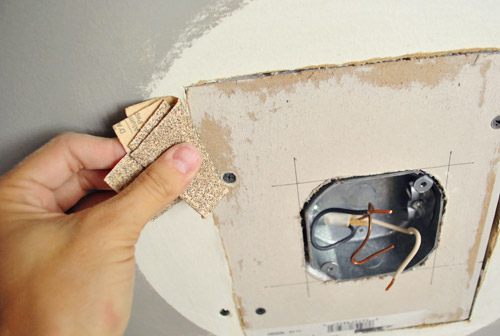
Here’s the new piece of drywall attached and looking all flush and fantastic-like. Except for all the cracks and sunk screw heads (be sure to sink your screw heads when it comes to drywalling!) that we needed to sand, spackle, sand, spackle, sand, prime, and paint.
So I sanded the edges a bit to make sure everything was smooth and there weren’t any weird lumps or bumps in the way of Sherry’s spackle job.
I don’t know how certain tasks got divided in our house to become “mine” or “Sherry’s” (like how I always roll and she cuts in when we paint, and I usually sand but she spackles). I think some of it comes down to skill (Sherry’s has a steadier hand for cutting in and spackling so we have learned she gets better results). And some it just comes down to things we enjoy more than the other (I love using my Kreg Jig while Sherry’s getting on pretty ok terms with her sewing machine). But I wouldn’t put it past her to build something (perhaps a dollhouse for Clara) and who knows, I might just sew something someday.
Anyway, here’s Sherry’s first round of spackle drying:
She did two rounds total (a round being spackling + letting it dry + sanding it with a sanding block) both of which were applied in consecutive evenings after we got the bean to bed. The idea of doing two rounds is that you can build things up with spackle to bridge gaps, sand things flush again, and do one more round to make sure you don’t miss anything (which could result in cavities where spackle was missing or raised portions that weren’t sanded down enough). And using a sanding block is nice because it’s flat like the wall, so it doesn’t flop around like a loose piece of sandpaper can.
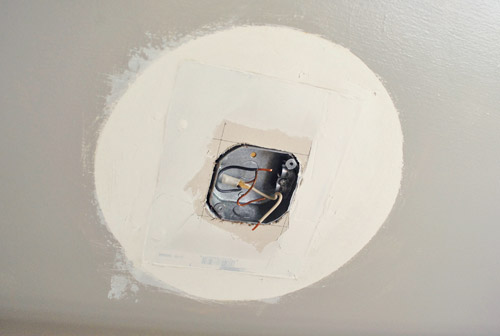
So after a night of spackling and sanding, followed by another night of spackling and sanding, we just had to set aside some time to prime and paint. Oh yeah and install the fixture that we originally thought was going to be a ten minute job. So the next night after priming our patch job (any raw drywall should be primed after it’s installed before painting commences) we applied two quick coats of paint (Rockport Gray, as you may recall in this post). We used a roller to get it up there and rolled far beyond the area we had patched, just to feather things out for a nice seamless patch job. By then it was way too late to get any decent pictures since we didn’t have a working light in there, but here’s what it looked like by morning. See how much further the fixture box looks from the shower bar now that there’s not an extra wide light up there encroaching on the shower?
It was finally ready for a new light fixture (the slightly rough area right around the fixture box will be covered by the top of the light for a nice clean look).
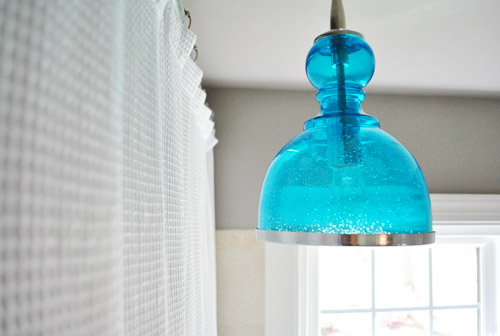
Since it was nearly four days since we started, we were more than ready to, in the words of Sherry, get on that already. Oh and here’s the fixture in all of it’s blue glass-y glory. It’s reading as sort of a very bright blue here in these pics, but in real life it looks more like the photo in our mood board above (it’s a soft sea-glass-ish blue that looks great with the white, gray, and sand colors that we have going on in there).
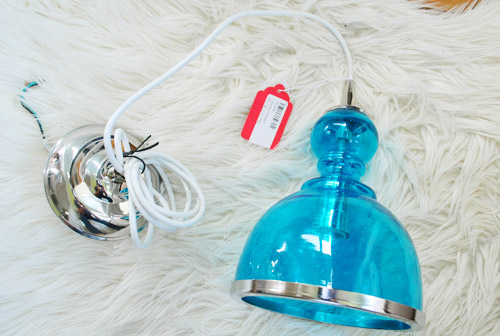
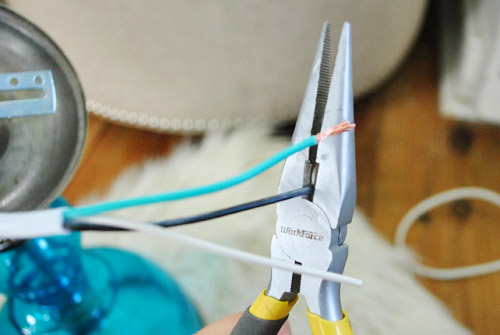
The cord is obviously waaaaay too long for our bathroom, so we had to cut it down before installing it. I used my scissors to put some slices in the outer white cord where I wanted the wires to end – I didn’t cut all of the way through since I wanted the inner wires to stick out a bit further. Then I folded it back and forth until the plastic-y white cord tore completely and I could pull the excess off. Update: We just heard that a better approach is to use a wire stripper (which is nice and cheap) since bending the wires back and forth until the casing tears can put unnecessary stress on the wires inside. Good to know!
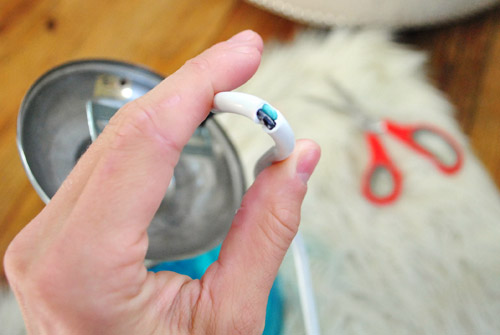
This exposed the inner wires (which I cut to a length just a bit longer than the white cord).
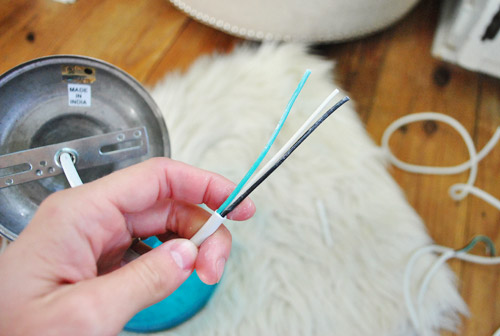
Then I used my pliers to gently cut the rubber coating off the tip of each of the wires without cutting the wires themselves (that way I’d have something to connect to the wires in the fixture). When it comes to connecting wires and covering them with a wire nut inside the fixture box, there are probably some great instructional videos on youtube to check out (we can never manage to take photos since it’s a two-person job in our house).
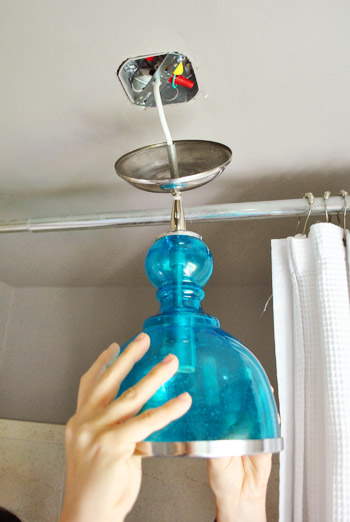
As for why it’s a two-person job, Sherry usually holds it up (supporting the weight of it so it’s not tugging down while I connect the wires). One person can definitely hang a fixture on their own, but we find the two-person method to be really helpful (and much faster). Thankfully it was a nice quick job now that the ceiling was patched. Which is a good thing since this process had already dragged out a bit more than either of us expected.
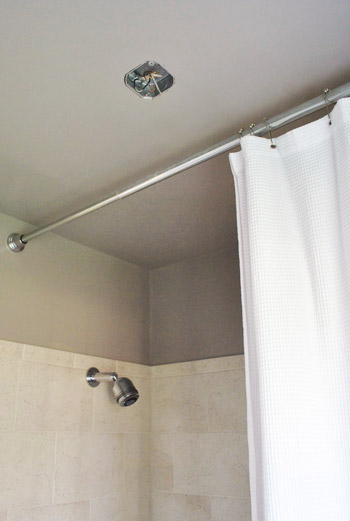
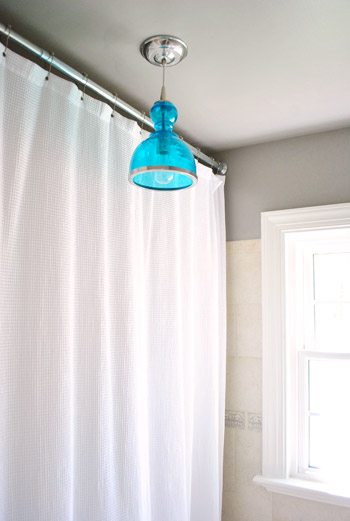
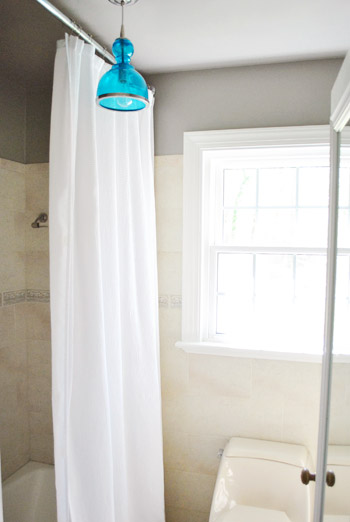
Speaking of dragging out, let’s get to the goods. Here it is all hung up, and we’re digging it. It definitely looks a lot less on-top-of-the-shower-bar than our past fixture did, and it’s still hung high enough not to interfere with a tall guy like me (code in our area requires that it be hung over 6’8″ from the bottom of the fixture to the ground and ours is 6’10”). Oh and speaking of code, in our area there aren’t any issues with hanging a pendant at this height outside of a shower, but it’s not allowed to be hung over a tub/in a shower (you know those fancy giant-chandelier-over-tub-bathrooms on HGTV and in glossy mags? they’re usually not to code). So this is just a general reminder to check out what’s to code in your area if you tackle anything similar.
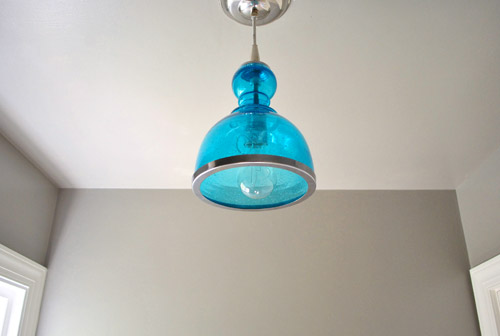
Of course the blue is looking more intense here than it does in real life, but in person it’s soft and awesome against the grey paint and the white curtain – so we feel like it’s a big check mark next to our goal of cheering-up our tiny neutral box of a bathroom. It definitely adds some not-builder-basic personality. And the chrome trim and ceiling cover on the light work with all of our bathroom hardware (the shower fixtures and doorknob are chrome) so it fits right in.
In a perfect world the fixture would be centered in the toilet half of the bathroom, in front of the window. But since this is a pretty quick-and-dirty makeover plan we’re trying not to get into anything too heavy duty at this point (after renovating the kitchen for months on end we’re happy to lighten up with a few easy bathroom updates for now). Perhaps we’ll move it over a bit later in Phase Two, when we’d love to redo the floor tile as well.
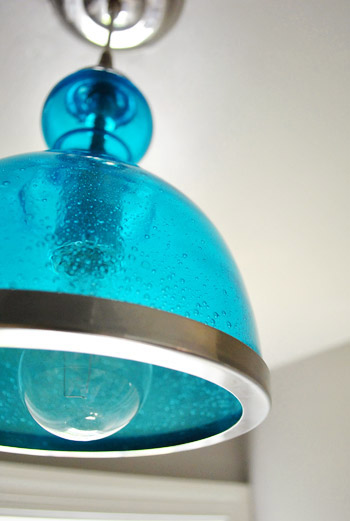
Oh and we did briefly worry about two things: 1) one 60 watt bulb wouldn’t be enough light for the room and 2) it would make the whole room look crazy like a big blue smurf. But happily, it casts more than enough light to keep our tiny box of a room illuminated and there’s no weird blue tint (we even asked in the showroom if that was an issue because we were so worried). Apparently since the bulb is clear, the light that it casts down and around the room is clear too. And the ceiling gets this cool soft seeded glass reflection that looks like a subtle starburst (we’ll have to try to shoot a picture of that). So it’s very flattering indeed. And not at all smurfy. Whew.
So despite the unexpected trouble it gave us (well, the trouble the ceiling gave us) we’re really happy with the update. And it’s making us pumped to keep the changes (and touches of color) coming into this room. We think some blue, green, white, and gray art will definitely tie it in really well. And Sherry can’t wait to hit the off-white trim with some bright white paint (it’s hard to see in the photos, but the door trim next to the bright white light switch looks dingy and mismatched).
So now our bathroom to-do list looks a little something like this:
paint the walls so they have some contrastreplace the boob light- paint the cream trim white <– it looks white in the pics, but the bright white light switch next to the cream door trim makes it painfully obvious in person
- hang some bathroom-friendly art
- craigslist the toilet and replace it with a classic white one
- do something to add privacy to the window
- remove the door so we can shave the bottom to allow for a rug/bathmat (and so it actually opens past the floor heating register instead of catching on it)
- replace the border tile around the room (maybe in phase 2?)
- replace the floor tile down the road (just to break things up since there’s so much of it)
What did you guys do this weekend? Did anyone add any new color to your bathroom or another place in your home? Or discover some type of hidden ceiling hole that was being obscured by a light fixture?
Psst- To follow our quick little bathroom reno from the start, check out this planning post, and this painting post. There, now you’re all caught up.
Pssst- Apparently we have great completely accidental timing, and today is “Light It Up Blue” day for Autism Awareness, so here’s more on that. Spread the word!

Leave a Reply