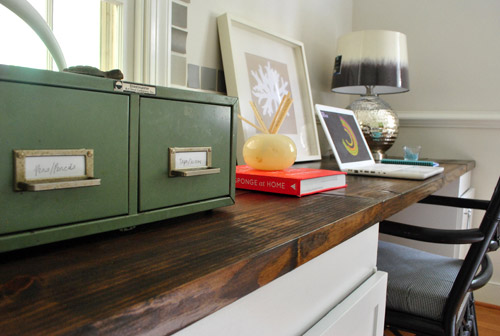
True to form, we’re all over the place over here. After switching up the ol’ blog design (and figuring out why the header was MIA for 20% of you – here’s hoping it’s back) we’ve also been plugging away at our $6 cabinet makeover but aren’t quite done with the painting/building-up process (here’s hoping we’ll have photos and lots o’ words to share early next week). But crazily enough, in the meantime we’ve also been doing some yard work, a random bedroom project, and have even started brainstorming the next phase of the kitchen. Hence this brain dump. We’re still saving our pennies for things like new appliances to begin the next step of our
A Fall Themed Baby Shower
Alternate punny title: Leaf it to me. Oh yeah, there’s nothing like a little corniness on a Tuesday afternoon. I blame it on being downright giddy to have power again. Ohthankgoodness. Anyway, this weekend before the chaos that was Irene I actually helped with a little bridal shower for our cousin Megan who is getting hitched this fall. John’s mom hosted the sweet informal gathering at her place, and each one of the daughters (and in this case, me the daughter-in-law) were asked to bring a few things. I was in charge of a bowl of candy, and a little bit of table decor. Nothing too crazy, just a few small touches to hopefully get
How To Prep Cabinets For Paint
We were humming along on our way to updating our $6 cabinets with some primer and glossy white paint until the whole hurricane thing took out our power (update: miracle of all miracles, it’s back on, and we’ve never loved electricity more). So the three day outage robbed us of our cabinet mojo since John has some building to do (which necessitates the use of a few electric tools like drills and saws) before we paint and reassemble everything in the office. Thankfully we did get to tackle all of the prepping and priming before the outage, and took about a million photos of the process (who’s surprised?). So we figured that part of the
Hurricane Irene Damage
As many of you know, Hurricane Irene swept up the east coast on Saturday afternoon and evening, bringing lots of wind and rain along with it. Sadly, our neighborhood didn’t fare very well with high wind gusts slamming a bunch of giant trees down on power lines, roads, and even homes. Thankfully, our house was spared. But many of our neighbors and friends weren’t so lucky. It broke our hearts to look out from our patio to see that a tree in our neighbor’s yard had fallen onto their home (it easily could have hit ours if it fell in the other direction). Thankfully although they were both home with their two dogs at the
The 8 Month Difference…
After yesterdays first house vs. current house comparison, this comment from Jess definitely got our wheels turning: “I think its an unfair comparison to put 8 months of work at the current place up against 4 + years at the old. You should have compared current photos from this house to what your old house looked like 8 months after you moved in there!!” Well, that’s probably not quite fair either, since we’ve definitely learned a ton in the last five years of homeownership (and also spend a lot more time doing house stuff these days since this DIY diary of ours is our job)… but we’re game! It’s Friday. But oh boy is this
Comparing Our First House To Our Current House
Last Friday on this post we got this comment and thought it sounded like a good time: “I love your videos and it’s crazy to see the difference in YHL style from the first house to this house! If you wanted to do a side-by-side of rooms past and present, I wouldn’t hate it :)” – Sarah I decided I wouldn’t hate it either. So here we go. It’s a battle to the death. First house vs. current house. Cue the dramatic music and picture me in a Gladiator outfit. Of course it’s kind of an unfair fight since we’ve been in this house for eight months and it took us four and a half
How To Reupholster A Rocking Chair With Fabric And Nailheads
Ok I’m back with part two of the madness that is Me vs. Rocker. But remember my disclaimer from yesterday’s post that this entire process was much like when aliens took over my body and I made a quilt for Clara, which is to say: I went rogue. I took in all the advice from you guys along with some google tips and some suggestions from a reupholstering-fiend friend of mine… and just played it by ear and did what seemed to work as I went along. I mean, it’s not a family heirloom, it’s a $25 craigslist find. But enough chatter, heeeeere we go. Although there was a sneak peek pic of the almost-finished
How To Redo A Rocking Chair With Spray Paint And Fabric
That’s right. I broke out the word dastardly. And I know we should be hard at work on our office cabinets, but that’s a big job (aka: a weekend job – maybe even a two-weekend job) and I have been giving this rocker the stink eye since November (yes, even before we moved). For anyone who can’t even remember that far back (me), here’s a recap: I originally picked it up off of Craigslist for $25 because I really liked the simple lines of it. Then it sat untouched for over nine months until this weekend. Why? Well, no sooner had I gotten it home than I realized I had no earthly idea how to
Any Given Day
Can you believe it has already been almost five months since we shared a house tour with you guys? So I decided to walk around with the Flip cam and show you how each room can look on an average day (since we had lots of fun with a no-cleaning-first tour back in April). And yes, this is the real deal. I didn’t pick up a thing (as demonstrated by my embarrassing bra on the chair in our bedroom, so just pretend you didn’t see that, ok?). Oh and for those of you who are at work, you can watch it on mute and pretty much get the gist of the average everyday glory. Or
How To Spray Paint Hardware
How you like them handles? (Handles, apples. It’s all the same. Right Matt Damon? What? You don’t think Matt Damon reads this blog? Of course he doesn’t.) Anyway, I’m back to share the hardware makeover play-by-play and a ton of pics that we couldn’t squeeze into our door-painting post on Wednesday. So fasten your seat belts. Oh yeah, it’s gonna get crazy. First I have a secret. The hardware on our sliding doors in the living room looked like this: Le yikes, right? It’s all sorts of bad with the swoopy handle. If you look a little closer it’s not even shiny and new looking gold, it’s all rusted and neglected… So as you can
How To Paint Your Front Door
We’re back as promised with the whole front door shebang. First, here’s what we started with: Yup, it was an old maroon storm door with three issues: 1) the grids didn’t match up with the six paneled door behind it, 2) it was always jamming, and 3) it didn’t latch closed very well, so it would bang open in a storm. It was nothing but a nuisance to us, so we opted to go storm-doorless (just like we chose to do in our first house) since we didn’t use it once in eight whole months (we have a screen/storm door on the side of the house that we occasionally use along with screen doors in
Painting Our Door Bright Yellow
Allow me to share a few hints: y-e-l-l-o-w-d-o-o-r Yup, I’m painting our front door the happiest of shades: rain boot yellow! That’s not the real name of the paint swatch that we settled on, I just think it’s the perfect way to describe the glossy sunny yellow that we chose. I was hoping to share some after pics, but alas, this is real life and all the prep work took longer than I thought. Boo. The good news is that I’m done with the drilling, the spackling, the sanding, and the deglossing. So all that general readying stuff is out of the way. And if all goes well I’ll be back with a ton of
- « Previous Page
- 1
- …
- 55
- 56
- 57
- 58
- 59
- …
- 124
- Next Page »


