As exhilarating as demolition can be, there’s always that nagging voice in the back of your head reminding you that you’re going to have to replace whatever you’re demolishing.
Bummer, right?
Well, we didn’t let ourselves wallow in that realization too long and dove right into reconstructing the kitchen. Actually, between demoing the tiles and the plywood we actually snuck out to The Tile Shop (in my sister’s borrowed SUV) to buy cement board so we’d have all of our supplies ready as soon as demo was done.
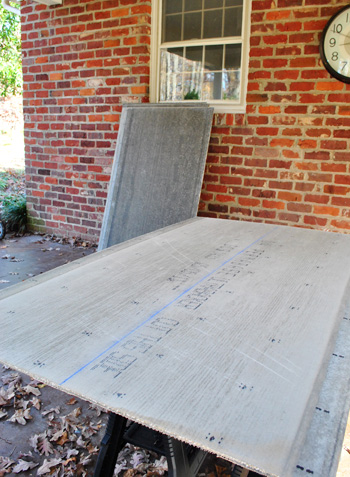
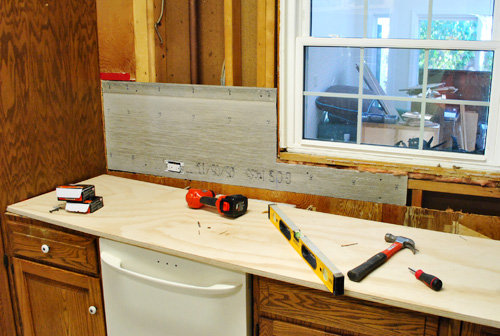
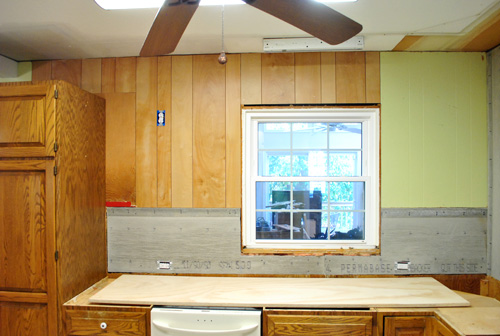
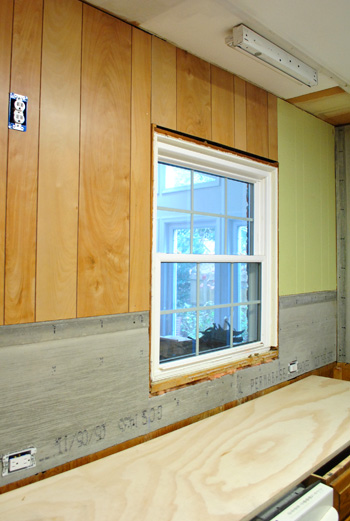
The cement board (1/4″ thick Permabase Ultrabacker to be exact) was about $10 per 3ft x 5ft sheet after the 10% discount code that they offer everyone (YHL10) and I bought four of ’em. Actually, I bought eight of them because of some gross miscalculations on my part but only used four. So once our extra board returns were made it was about $40 spent. We knew we’d be using them along the entire back wall above the stove (that’s going to be our focal wall with tile to the ceiling, a big range hood, and open shelves) as well as wherever else our standard 18″ backsplash would go on the other walls of the kitchen. I started with the 18″ backsplash boards first since they were smaller and more manageable. They just required some careful measuring to ensure that I cut accurately around the window and for the outlet holes.
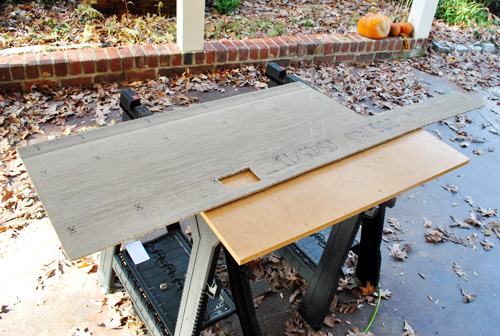
To make my cuts I used my jigsaw, since it was convenient and I was good at controlling it. I also wore a gas mask (not a paper one, a real deal rubber one with filters) to avoid ingesting any of the nasty dust that flew. Though I’m pretty sure I wasn’t using the right blade for that material though. It cut just fine, but by the end of the job my blade looked like this:

Notice all of the missing teeth in the middle? Cutting literally sanded them off. So yeah… lesson learned. Maybe I was supposed to use a diamond blade since cement board is so coarse? Either way, I was happy to get ‘er done.
Setting the cut boards in place was pretty easy. I was able to balance them along the old plywood under them (they were the same thickness, which was really handy for a seamless result). Then I just made sure they were level and drove some screws in all by myself while Sherry kept Clara out of the danger zone (aka: our tore-up-from-the-floor-up kitchen).
So once I was sure that all of my screws were adequately sunk into the cement board (pokey screw heads are bad for flush-laying tile) I continued on my merry way around the room. This wasn’t so bad, actually! Especially since I dreaded it so much because we didn’t exactly have a great time with the same process while rebuilding our first house’s bathroom. Maybe absence makes the heart grow fonder?
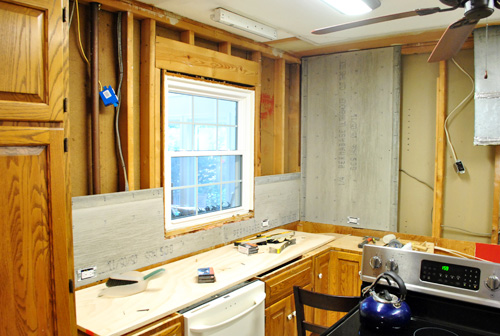
The thing that made my life much easier was the fact that the 5ft tall boards fit just about perfectly in my 5ft tall wall behind the stove. That meant I didn’t have to do any cutting on those boards (except for the outlet holes). So the ease of cutting made up for the extra difficulty of maneuvering a bigger, heavier board. Luckily Clara was napping by this point so I was able to enlist Sherry’s help to hold them in place while I drilled. It certainly made this part of the day go much faster.
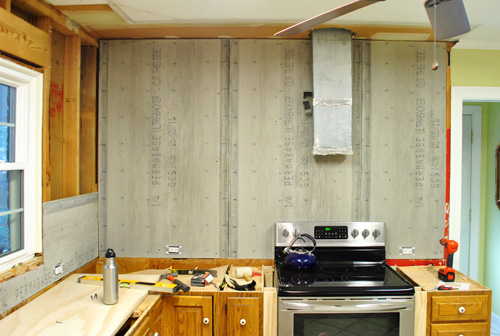
Oh, and as for the dangling outlet up by the vent – it’ll eventually be used to hook up our future range hood. Since we’re not 100% sure how /where that’ll be hooked up we just placed it somewhere temporarily that could (hopefully) work . If not, at least the hole will be hidden behind the vent cover we’re eventually going to build (and there’s some play in the wiring that connects to that junction box so we’ll be able to move it if we need to).
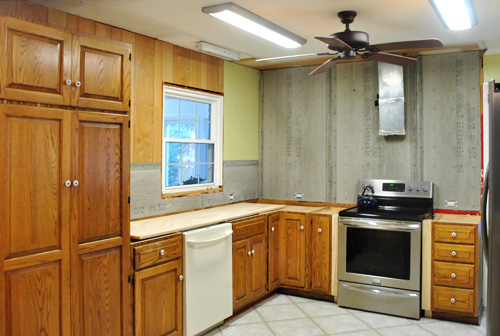
If you look at the photo above you’ll see that our future range hood won’t be perfectly centered on that wall of tile, but it will be perfectly centered on that back wall of the kitchen (when you include the space next to the cement board over the doorway). So once we add our penny tile to the ceiling and install our open shelves and our built-in range hood, we think the way that we “accessorize” the floating shelves will also help restore balance. We plan to use them to house everyday dishes that we’ll use so often they don’t have a chance to get dusty along with other items that are always stored out in the open like vases, some art, a plant or two, etc (more on the whole dust/open shelves thing here).
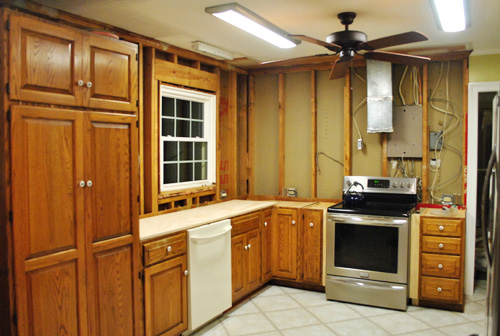
But just because cement board was done, didn’t mean we were done with our walls. After all, we still had this going on above the sink and pantry:
We briefly talked about doing more tile to the ceiling on that wall, but thought that one focal wall with open shelves and a big range hood with tile to the ceiling would be enough. So we decided that a regular old wall with a standard 18″ backsplash will better balance the other side of the kitchen which will also have that going on next to the fridge. Oh and we also thought tile over the pantry would just be super weird, and that would be the natural stop point for a rectangular effect like the other wall, so we’re happy we bailed on that idea.
But the walls of the kitchen aren’t drywall. Nope, remember they’re painted paneling (which we actually don’t mind for the soft texture and coziness it adds once it’s painted – we had some in our first home’s den too). So we did the unthinkable…
… we actually purchased a sheet of paneling. And oy how it pained us. We’re pretty sure everyone at the checkout was thinking “welcome to 2011, why the heck are you buying paneling?!” Luckily we had one leftover piece of painted paneling leftover from the doorway opening project that we were able to reuse to the right of the window above where the backsplash will go. So I just had to buy one sheet at Lowe’s.
So yes, that was a first. Never in my life did I think I’d be BUYING new wood paneling. And thank goodness it’ll get painted any second now (along with that rough looking ceiling), so we didn’t have to worry about matching color.
Luckily that one 4ft x 8ft piece o’ paneling covered all of the areas that we needed. We had the guy at Lowe’s cut the pieces to size so (a) they’d fit in our Altima and (b) we didn’t have to do it ourselves. But I did buy a new jigsaw blade while I was there (so I could cut the hole for our microwave outlet).
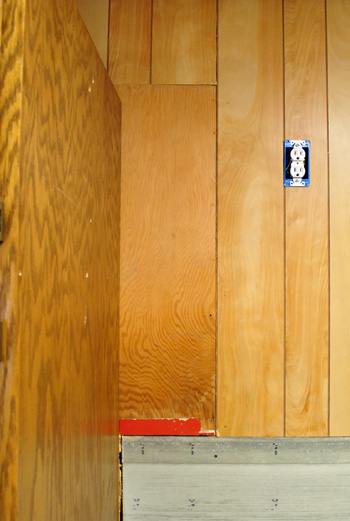
Oh yeah, and notice our moment of laziness above? Since a small-ish upper cabinet will be covering that section of wall we didn’t go through the trouble of cutting out that piece of plywood (it would’ve meant moving the pantry, and it won’t be seen once we install the cabinet with added crown molding around the top anyway). Gotta love one wall-hanging shortcut along the way.
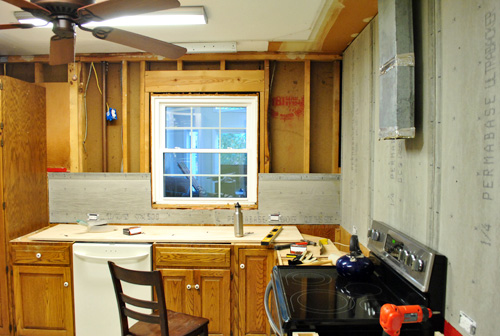
As for the cement board seams, we’ll be taping them and then using thinset over them to set the tiles, which should hold everything in place for the long haul per The Tile Shop’s recommendation. But wait, let’s go back to this picture of that wall head on:
You might be wondering about that oddly placed window (it’s not centered on that expanse right now) but once we add the small-ish upper cabinet to the right of the pantry there will be exactly 14″ of wall space between the side of that cabinet and the window trim. There will also be 14″ of wall space between the right side of the window trim and the 12″ floating shelves that will be hanging on the focal wall (they’ll jut out 12″ to house all of our big dishes and stuff, which is nice because the window will eventually look perfectly balanced with 14″ of wall space on either side).
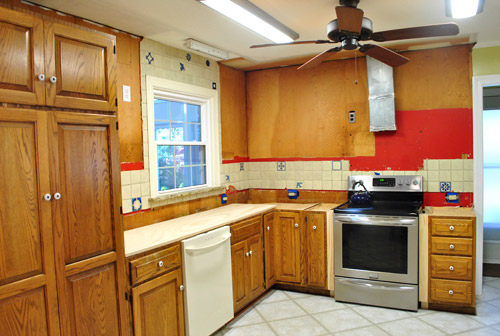
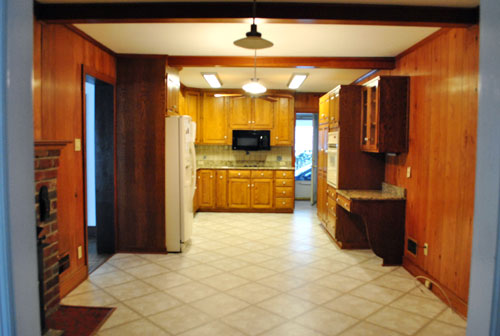
Anyways, here’s what the kitchen was looking like when we were all done. Still not great, but definitely better. And not only do we love how the room feels without upper cabinets crowding us, it’s also nice to start to see what it’ll look like once the tile backsplash is installed. I wish I had taken a wider shot so you could see the paneling on the other side of the room with the 18″ backsplash that will go over there (next to the fridge) since it really feels nice and balanced with one wall of tile and two standard backsplashes on each of the other two side walls.
Oh, and since lots of folks asked on our last kitchen post – these are both interior walls (that window looks into to our heavily insulated sunroom, not the outdoors) which is why they weren’t insulated before and why we didn’t opt to add any insulation during this step of the process. We lived here through last winter (which was colder and snowier than most) and we knew that the sunroom didn’t get very cold, so thankfully the kitchen never feels drafty or uninsulated (in our experience, brick ranches are great about maintaining a comfortable temperature in general since they’re so solidly built and aren’t usually drafty).
As for the timeline, this whole destruction/reconstruction process took us two days (one for demo/buying cement board, one for installing the new walls) so overall it wasn’t that bad. Though I was pretty darn sore by the end of it all. Thankfully Sherry pointed out that our next step was paint touch ups, which aren’t too bad (ceilings are my least favorite surface to paint, but we don’t have much of it to deal with). We’re actually kind of excited to get that done because the room will hopefully look less Frankenstein than it’s looking now (mismatched appliances + mismatched cabinetry + mismatched paneling = ca-razy). But still better than the before that we started with:
What about you guys. Have you ever hung cement board or actually had to (gasp) buy paneling? Any ceiling painting on your agenda?
Pssst- We’re over on BabyCenter chatting about the birthday time capsule that we finally completed for Clara to open on her 18th birthday.
Psssst- We’ve listed our black above-the-range microwave on craigslist if anyone is interested (it’s only a year old, works great, and is still sold by Sears). Here’s the link.

Amanda @ Our Humble A{Bowe}d says
Bahahah! BUYING wood paneling?!? That wood (haha, punny me) be odd. At least it will be painted. Welcome to 2011 (almost 2012)
Lindsey @ arkadian belle woods says
That’s the downside to demo. “GRRR! YEAH!!! SLEDGEHAMMER!!!! AHHH That felt good!” “Aww man! We have to fix this mess?!”
Haha! The upside like you said is that you didn’t have much time to wallow. When my hubs and I tore out the wood paneling in our living room to replace with sheet rock, we were so excited to get it done that we just kept busy. I think that would be a great bit of advice for any first timers or anyone thinking about demo. Keep moving. If you stop to long, you’ll get bogged down and overwhelmed.
YoungHouseLove says
Agreed! Gotta keep the momentum up!
xo,
s
John@Our Home From Scratch says
I can’t say I’ve ever hung paneling, but it’s def the right move for your kitchen. If you drywalled it, it may not match the rest of the walls. I’ll tell you what, these little decisions can be the most aggravating part of a remodel, but they can have a huge impact to the final look. Looking good!
Molly says
Nice work! I am starting to see the vision with the walls only 3 shades of wood+paint+paneling. :)
annabelvita says
It’s looking great already! I love that you had to buy some panelling, if they know you’re bloggers that would make me laugh. “YHL loves panelling” Ha. Anyway.
lisa says
great job!
Kelly says
Looking great!
Meredith says
Pretty sure you mean “coarse” rather than “course”.
Also, “we didn’t opted” –> “we didn’t opt”.
Sorry, I shall now go back to my full-time job of proof-reading contracts…(seriously). The DIY kitchen impresses me to no end! It’s looking fabulous! :)
YoungHouseLove says
Thanks for the tip! Rushed proofing job this morning = yikes. All fixed!
xo,
s
Jess says
And plywood, instead of “playwood.”
YoungHouseLove says
Got that one! Thanks!
xo,
s
bridget b. says
good work! it’s looking better already. can’t wait to see the finished product.
was it to drill holes through the cement board? did you use regular nails? do you just secure the cement board to the studs?
thanks!
YoungHouseLove says
No, it wasn’t too bad. Yes, we used regular drywall screws into the studs. I used a hammer to tap the screw into the board a bit before drilling (to sink it in a bit, no pilot hole needed). Hope it helps!
-John
Erin @ One Project at a Time says
They also sell Dur-rock screws for this purpose, which I would recommend in a bathroom with a lot of moisture as they won’t rust.
YoungHouseLove says
Oh yes, those are great!
xo,
s
christy says
Looking great, guys! Honestly, I think the worst thing (for me, at least) about cement board is the way it feels on my fingers! By the end of our last bathroom tile project, I could hardly stand to pick the stuff up. And the stinkin’ dust/particles from the cutting is just nasty so the ol’ rubber mask wasn’t overkill if you ask me :)
I can’t wait to see how this wall of open shelving and custom made hood range turns out, I’m considering doing something similar in my own kitchen and am basically waiting to see how y’alls turn out before I make any moves.
YoungHouseLove says
Yes I completely agree! It’s so hard and dry and chalky! Like a giant pumice stone!
xo,
s
Regan @ RenovatingRothenbergers says
I’m super impressed with how quickly you’re making progress! Every little project seems to take us forever to complete . . . Can you please come up to Amish County and help us redo our kitchen?
YoungHouseLove says
Sure, we’ll be right over! Haha.
xo,
s
Katy says
Wow, it looks amazing! I have yet to do any demolition work but you guys are inspiring me to go out and get a sledge hammer!
~Katy
Page says
Typo alert clue:A horse is a hoarse, of course, or coarse. :-)
YoungHouseLove says
Haha- thanks Page! All fixed.
xo,
s
Kelly says
Definitely starting to get a sense of how it will look with the tile with the addition of the cement board.
I feel your pain about buying paneling-it’s definitely not 2011-but I love how you updated it with paint. It gives it a modern but vintage feel. Sadly our paneling had to come down in our family room-it was actually two layers on the wall and when I removed the first layer the second had to come off too. Not quite as simple as painting for sure, but we’re really happy with the outcome. http://www.thecentsiblelife.com/2011/11/before-after-family-room/
YoungHouseLove says
Wow- looks great!
xo,
s
Kristen @ Popcorn on the Stove says
The kitchen looks so much better with the cement board up. I can’t believe you guys bought paneling though! How funny! Are you guys sticking with the green color or will you be surprising us??
YoungHouseLove says
For now we’re still loving our avocado walls, but if the tile and shelves go in and we paint the cabinets and hate it we won’t be afraid to repaint!
xo,
s
Ericka says
I love watching your progress on this and then it blows my mind to think that you’ve been working on a book behind the scenes! I don’t know how you guys do it, but you guys rock!:)
weirdfishes says
Was the panelling 1/4″ as well? Or did you have to shim it or something to get it flush with the cement board?
YoungHouseLove says
Yup, same exact depth! We asked around at the Tile Shop for 1/4″ stuff and they had it!
xo,
s
Wendy says
That looks much better all ready and you can see where the penny tile is going to go. I have installed cement board many times and I just use a linoleum knife (curved blade) to score the smooth side – score it a couple of times. Then you lay it on the floor over a 2×4 and it will break over the score line. Very easy and very little dust or noise! Are you going to apply thinset to the cement board seams?
YoungHouseLove says
Wow- that’s an awesome tip! As for the seams, we’ll be taping them and then using thinset over them to set the tiles, which should hold everything in place for the long haul per The Tile Shop’s recommendation.
xo,
s
meganleiann says
I agree. I just scored and broke off the much-thicker-than 1/4 inch cement board that I used for my fireplace tile. It broke off relatively easily with minimal dust. I didn’t use a 2×4 though. That is a great tip! I stood on one end and broke it myself. Leverage would have helped a lot. :)
I can’t wait to see the tile! I am so excited for you!
Alissa says
Yikes! Good thing you wore the mask so you didn’t breathe in those saw teeth, eh?
(And note it should be “coarse”, not course, and you’ve got the word “playwood” in there.)
YoungHouseLove says
Thanks Alissa!
xo,
s
Page says
Seriously guys, you must be busy! “Mush easier”? You never make these kinds of mistakes.
YoungHouseLove says
Hahah- so sorry! Rushed proof job this morning (teething toddler). All my fault!
xo
s
Allyn says
Maybe you guys could start a new trend. Call it the “bare bones” look.
YoungHouseLove says
Haha, sounds good. Anyone interested in carrying on the trend?
xo,
s
Erin @ One Project at a Time says
I love watching this all come together, and it’s making me really excited to start demoing out our bathroom. (We’re saving that until after the holidays though, we’re not crazy like you to always take on a huge project in December! :) )
Are you guys painting the ceiling before you get the new lights? Would hate for you to do double work…
YoungHouseLove says
We figure we’ll have other paint touch ups to deal with as we go (when the counters slide in sometimes walls get scratched, etc) so we’re cool with painting just the outside edges of the ceiling that are black now (so gross) for the time being, and doing a bit more ceiling stuff later when we get to the lights.
xo,
s
Claire says
Wow, that saw blade is pretty sad looking! Glad you got yourself a replacement. :) Everything is looking good – keep the progress coming!
Any word from your counter guys yet? Maybe they’ll come early!!
YoungHouseLove says
We’re hoping they’ll give us a ring within a week or so to schedule the install! You know I’m not shy, so I’ll call them if they don’t call us. Haha.
xo,
s
Gwenalyn says
It looks like everything is coming along well! You guys amaze me. I can’t even find the motivation to prime over an ugly painted border in my bedroom! Not to mention you’re working on this stuff during the holiday season? Wow!
JessiBee says
It’s really looking great! I love the penny tile Clara chose and can’t wait to see it on the wall. By the way…does a giant clock live in your carport? Awesome.
YoungHouseLove says
Haha, yes. It used to live in our first home’s sunroom so the day we moved in I stuck it up on a big nail in the carport and it has lived there ever since. It actually comes in handy when we’re working outside and wonder what the heck time it is. Haha.
xo,
s
amyc says
great work as always, yhl!
Thanks for keeping us updated… my husband and i are diy-ing vicariously through you until our bank account grows to diy our own kitchen!
Ruthie says
*GASP* My sister and I pinky sweared we’d never buy that stuff… and I’m surprised they are still making it. How much for a sheet of paneling?
YoungHouseLove says
It was around $20 or so I think! So glad we only needed one.
xo,
s
Monika says
Great work you guys! As always. I have a question. How does the Tile Shop discount work when you buy in the store? Would I need to bring a print out of anything?
YoungHouseLove says
We just ask at the desk if they can honor the YHL10 code (we have heard that it varies from store to store and some will and some wont). We don’t tell them “we’re YHL” or anything – haha. So they just think we’re readers I think!
xo,
s
Monika says
OK, will call to inquire first (we are in MD). I love the penny tile you chose and eyeing it for my kitchen. Can’t wait to see your tile installation post to see if I could manage. So worried, ha ha. Thanks for your response btw :)
Jen says
Ceiling painting is on my to-do list, too … I don’t *mind* doing it, but it feels like a prep step, like sanding, before I can get to the really fun part — putting color on the walls.
Mostly what I don’t like about it is having the room taken apart for so long — BUT since reading your blog, I got the courage to freehand the wall-ceiling edge, which means not having to have the room taken apart for long enough for the ceiling paint to be tape-able. Thanks!
Annie says
Looking good, but dang, ya’ll need a step stool! ;)
Shannon @ Bungalow960 says
I love your idea to add the paneling. My cousin has a basement full of paneling, and now she sees the light after I showed her the before and after of your kitchen!
Janice says
Yeah for progress that makes things look better! Helps you feel better while you live in the space as well. I am loving this whole kitchen reno.
I thought you were doing tile on the whole stove wall, above the door to the laundry room as well. No?
YoungHouseLove says
We rethought it and decided it felt best to just tile over where the counter would go (since it’s an extended backsplash it feels weird to add backsplash over a door, ya know?). Thankfully when we put the cement board up it looked nice that way so we’re happy!
xo,
s
Melanie @ Mailbox Journey says
Looks like everything is coming along nicely. I probably would have disguised myself if I had to go out and buy paneling, so no one could recognize me, haha!
YoungHouseLove says
Seriously! We needed four of those glasses with mustaches and fake noses (two for Clara and Burger of course, since they come).
xo,
s
Lola says
Apologies if you’ve already had this question a thousand times…but…what are you doing for a kitchen in the interim? What do you eat? Do you have a make shift kitchen in the mean time? Eating out is not only unhealthy but tiresome and costly! What is your timeline for having it all done? We are planning to do our kitchen in the spring and all these questions are looming in my mind! Thanks guys!
YoungHouseLove says
All of our appliances still work (we’re sinkless, but we still have an oven, a dishwasher, and a stove- so we cook at home!
xo,
s
Amy S says
Love the progress, we will be doing a renovation much like yours-reusing cabinets but redoing tile, floor, appliances etc. next summer. This is a great introduction for what we should expect at our home :) Just wondering, did you ever consider taking out the window and making it a pass through to the sunroom?
YoungHouseLove says
We would love to do that someday! For now we have to wait because the sunroom is on another heating system that we rarely use, so if we took out the window it would decrease the efficiency of our home’s air and heat. But if we ever extend the ductwork into the sunroom we could make that a pass though!
xo,
s
sarah says
I am in the process of doing the exact thing (new kitchen) in my new-to me-house. As a matter of fact ceiling paint is on my list for this friday night… you know exciting friday night activities. I actually like the painted panelling – it kind of channels a beadboard look :)
YoungHouseLove says
I totally agree! There’s something sort of vintage-y and textured about it!
xo,
s
KiTx says
There is “everything-painting” on our agenda for our new home. My most recent realization- the crown molding is all white, but half the baseboards are cream. This is a recurring issue throughout the house. So over winter break (I think I’m going to take off an extra week on top of my handy-school-mandated 2 weeks) I will start painting the living room, all of their baseboards, probably all of the molding, and God help me, possibly the ceiling, too. Merry Christmas, we get a pretty living room! =)
YoungHouseLove says
Wahoo! You can do it! I won’t lie, it’ll suck while you’re doing it – but it’ll all be worth it in the end!
xo,
s
Seriously Sassy Mama says
I cannot wait to see the penny tile up. The tile is gorgeous.
Brandi @ His Shabby Her Chic says
Looking rough but better for sure. I seriously can’t wait to see the tile and cabinets and counter tops and shelves…
Zoe Feast says
Looking great and I had to laugh at your agony of actually having to buy some wood paneling, it’s amazing it’s still sold really. I am all for painting it too, it’s makes such a difference doesn’t it. My entire 1970’s basement is decked out in paneling, it was dungeon brown but is now a crisp white
see here.
http://www.creativeinchicago.com/2011/07/more-basement-makeover.html
YoungHouseLove says
Such a difference! It looks gorgeous!
xo,
s
Skye @ Neathering Our Fest says
I love how you make everything look so easy and definitely do-able for anyone. I would love to have open shelving in our kitchen but we don’t have a true vent hood… we have a microwave over the stove and I hate it. I’m just scared to even think about having that microwave removed and having a real hood installed. YIKES! So for now I will just live vicariously through your kitchen redo! :) Can’t wait to see that penny tile backsplash go up! :)
Laura says
I like the look of painted paneling as well – good choice! Sitting on the edge of my seat waiting for that tile wall to go up… no pressure or anything
YoungHouseLove says
Haha- can’t do backsplash until counters are in (backsplash always goes in after counters so it doesn’t get cracked during install and sits nice and flush with the counters). Can’t wait!
xo,
s
Bryan says
Just out of curiosity, it looks like the wall with the window is an exterior wall. Is there no insulation there at all?
YoungHouseLove says
There’s a paragraph in this post about that for ya (the second one above the last picture). Hope it helps!
xo,
s
Bryan says
Ctrl+F “insulation”, totally missed the sunroom paragraph
YoungHouseLove says
Haha, no worries!
xo,
s
Shannon says
Unfortunately, I need to buy some wood paneling too. I’ve been putting off undoing this project here…. http://quarryorchard.blogspot.com/2010/01/if-walls-could-talk.html
because our ‘patch’ didn’t work. Our house has lots of (now painted) wood paneling. I’ve been avoiding buying the one sheet that it will take to fix this just because I don’t want to actually go buy it :)
We also used backer board and tiled in the bathroom that you get a little glimpse of in that link.
YoungHouseLove says
Haha- cute kitty!! And such a fun idea!
xo,
s
Josh says
Looking good, cant wait to see if finished
When we replaced our entire backsplash and hung cement board I used an angle grinder with a diamond blade… saved ALOT of time and made perfect cuts.
YoungHouseLove says
Ooh that sounds awesome!
xo,
s
TheChangingHouse says
Even unfinished it looks fabulous! How do you do it??!!
YoungHouseLove says
Haha, you’re sweet! In person the dark paneling and stained ceiling corners are so gross! Can’t wait for paint!
xo,
s
Jackie says
I’m 2/3 on this one! We were like you- the cement board was a lot easier to work with than we anticipated. We used a Sawz-All to cut it, and our blade was pretty much trash afterward as well. We removed the paneling from two rooms, which also led to scraping and repainting the ceilings in those rooms. After all that I’m not sure what I hate more- glittery popcorn ceilings or holding the roller over my head to paint said ceilings.
Kari says
We added on to part of our house, which meant that we walled up one side of our sunroom. Which meant that we had to buy paneling. It was painful to put paneling up (even though we knew we were going to paint it to match the rest of the paneling), but we already have paneling + brick walls going on in there (all painted) and I couldn’t see a third texture making any kind of sense.
Bboss says
I have had to buy paneling! We have paneling in our split level 70’s basement. Fortunately it is painted. It is very strange to buy it. The fact that they sell it still says something about demand for it.
Kristen@OldHouseNewFolks says
We’re redoing our bathroom right now and just hung cement board as well. We used Hardibacker and just scored it with a box cutter and popped it apart (like drywall). Might try that next time to avoid damage to your jigsaw if it will work with the type of cement board you use.
Everything looks like it’s coming together nicely though!
YoungHouseLove says
Awesome tip Kristen! We’ll have to try it next time!
-John