I’m back with the LAST chapter before the quote-unquote “big reveal” next week. I know you might be rolling your eyes at the continued suspense, but the wait actually mimics the true pace of this project. This ain’t no TV show where you get a before and after tied up nicely with a bow 30 minutes later. Instead you get the nitty gritty play-by-play as we go. But lucky for you it’s a bit less dusty and tiring than what we’ve been experiencing firsthand. Plus you’ve all been happily showering at home every day over the last month while you patiently (or not so patiently) wait for the after pics. In contrast, we just took our first shower in the newly completed bathroom this morning after about a month of remote gym showering. Yeah, it was awesome. So hold your breath a smidge longer as we take you through last weekend’s big project: the vanity!
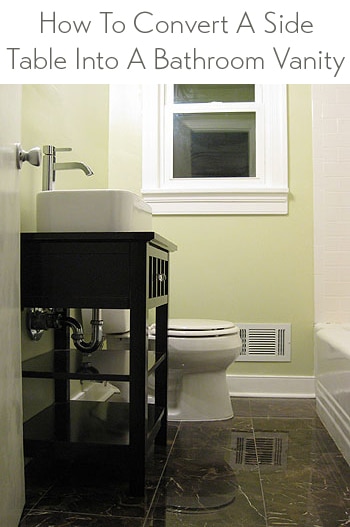
Just as Sherry described in our first bathroom post, we opted to create our own DIY vanity by retrofitting a piece of furniture. Despite drooling over similar options at Pottery Barn and Restoration Hardware, we weren’t about to blow our budget on a $1500 piece. So thanks to some internet sleuthing by Sherry and a full day of home decor & thrift store hopping (don’t I deserve good husband points for that?) we settled on a discounted clean-lined white sink and a sleek chrome faucet from Overstock.com that we’d pair with a Crate & Barrel night table purchased with a 15% off coupon (see more info about the mood board below here).

Those finds added up to a modern-meets-traditional vanity that barely touched the $400 mark… not bad when you look at vessel sink cabinet options from Lowe’s and Home Depot that ring in at around $500 without including the faucet or the sink in that price (like this one and this one). Oh and we actually ended up ordering a slightly different faucet than the one in the mood board above (from amazon.com with free shipping instead of from a random ebay seller) so that explains why it looks a bit different in the pics below.
Anyway, assembling (yes it came home in a “some assembly required” flat box) the night table was so easy a pregnant lady could do it (in fact, one did while I was tiling). But since the finish on a night table isn’t quite splash ready, we added some extra durability and waterproofing with three coats of protective lacquer. After some research, Sherry discovered an eco-alternative to our usual go-to: oil-based polyurethane. We bought this Safecoat Acrylaq at a local store called EcoLogic, where the sales person swore by its easy application and durability. Update: For any non-locals, they also sell it on Amazon, so here’s an affiliate link for ya.
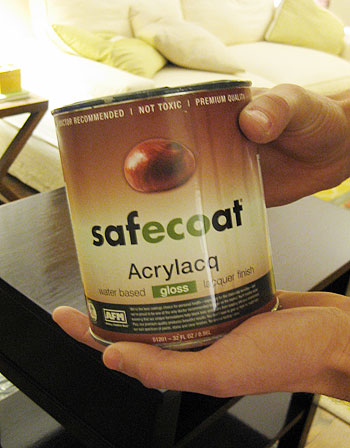
Although the Safecoat is low-VOC, Sherry took the extra-cautious-mom-to-be route and applied all three coats (after giving everything a light sanding) on the porch just to be as well ventilated as possible. Yes, a pregnant girl sealing a dresser on a front porch is something our neighbors put up with thanks to our home improvement obsession. And while we haven’t really put it through years of rigorous testing yet, so far we’ve been extremely impressed with the lacquer we chose. Droplets of water bead up right on the surface and it seems as though this stuff is generally impervious to water (which is a good thing in a bathroom). Here’s what it looked like all Acrylaq-ed up and begging for some vanity-ification:
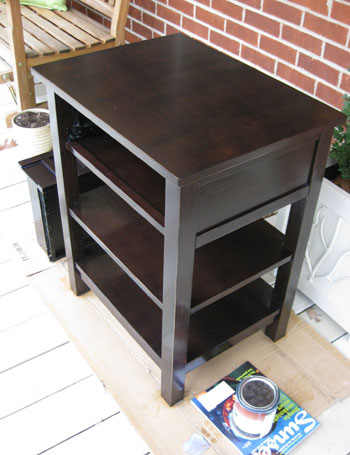
The elbow greasiest part of the project was poking holes in all the right places so the faucet, sink and related plumbing would all sit nicely (and firmly) in the right spots. So once the night table dried (and the floors were in place) we put the table in the bathroom to see what modifications we’d have to make to accommodate the plumbing. Luckily, the p-trap sat perfectly under the drawer and upper shelf, meaning both of the bottom shelves could stay 100% intact (this felt like a miracle discovery at the time- picture cartwheels and happy jigs). But of course, the hot & cold water pipes stuck right into the back of the drawer (and I’d need to drill some holes in the top of the vanity for the drain and faucet to pass through).
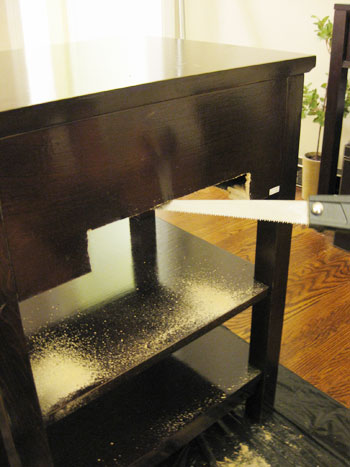
So I carefully marked which sections of wood needed to go and started cutting away. Despite my new obsession with power saws, I did this the old fashioned way: drilling a pilot hole big enough to get my handsaw through and then cutting things manually. It was actually pretty easy considering a lot of what I was cutting were thin panels, not thick support legs.
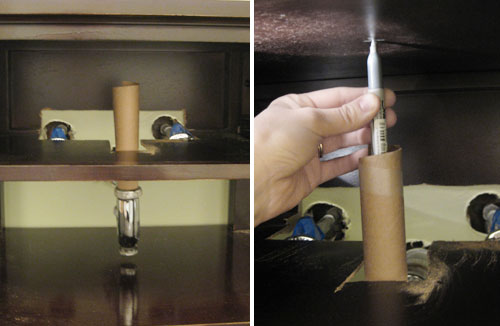
With the back cut out enough to accommodate the plumbing so we could push the night table flush against the bathroom wall, our next step was to figure out where we needed to make those two holes through the top. Our main concern was making sure we drilled the hole for the sink drain directly above the p-trap so no “creative” pipe tricks would be required. Fortunately, it only required some creative marking techniques instead. We simply used a slightly trimmed, empty paper towel tube as a stand-in drain pipe followed by a silver Sharpie centered in the tube to mark the underside of the tabletop. After drilling a small guide hole up through that spot, I officially had my mark to begin carving a big hole in the top from above.
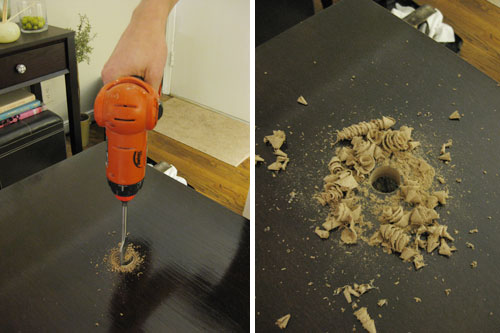
Using the measurements included in our sink’s directions, I purchased a hole boring bit for my drill to do the job precisely. It was totally worth the $6. I was through the thick tabletop in no time with a perfectly sized hole (and a bit of a mess – good thing we had laid down a towel and a plastic bag for easy clean-up afterwards).
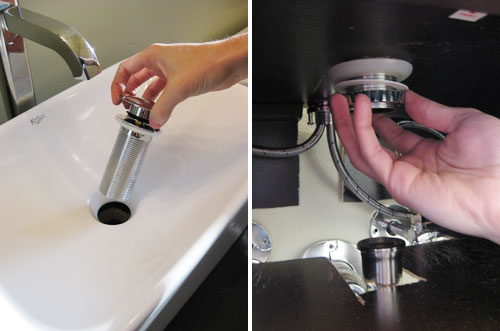
We then put the sink temporarily in place to make sure the drain stopper fit (it did) and figure out exactly where we wanted the faucet to go from there. With that marked, it took just another few spins of the drill to have the second hole ready to go.
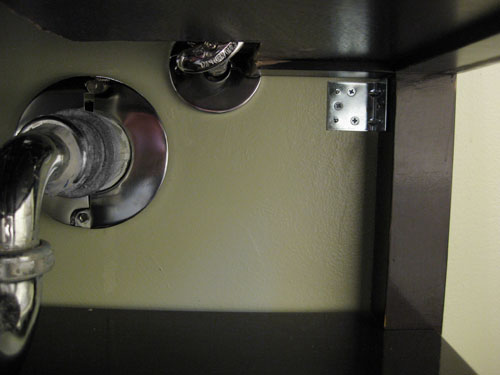
Next we decided to install the faucet before placing the vanity in the bathroom, mainly because it would be easier to screw it tightly in place from behind (without a wall in the way). After attaching the provided hot and cold braided hoses to the faucet itself, we just fed them through the top of the hole and began tightening the nuts on the other side. This is where we realized another strip of wood had to be cut out so that the nut sat flush and tight against the underside of the vanity top. A few cuts of the saw and one creepy, reflected glare later, we had this:
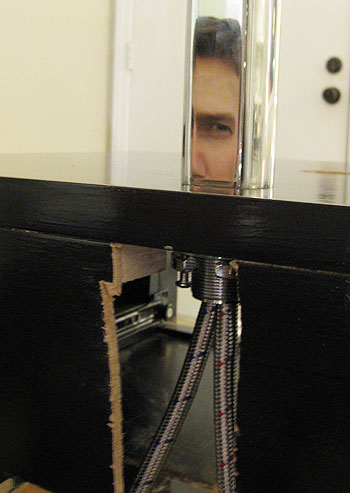
Note that my cuts are far from pretty – but since they’re all hidden against the back wall (with a soon-to-be-adapted drawer that would obscure them from the front) I wasn’t too concerned with how they looked as long as they were in the right place. Someone would literally have to remove the drawer and squat down to be at eye level with the vanity to see ’em.
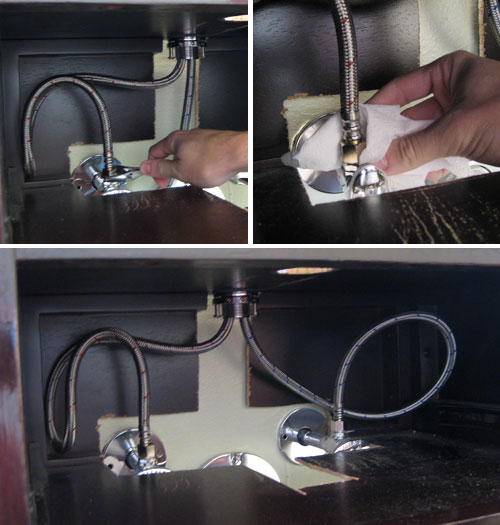
So with the faucet firmly attached and everything tightened, we carried the piece into the bathroom and connected the water hoses to the plumbing on the wall. This step just called for a combination of plumber’s tape and a few turns of the wrench (the key is tight, but not overtight!). Oh and we can’t forget my simple “paper towel test” (patent pending… not really) to see if anything was leaking. Explanation: I hold up a dry paper towel for about 60 seconds to see if any water spots appear. No spots = you’re good to go. Then with both water hoses attached, I shoved them as far back in the drawer cavity as possible and sailed along to the next task (we’ll explain how we retrofitted the drawer bit later).
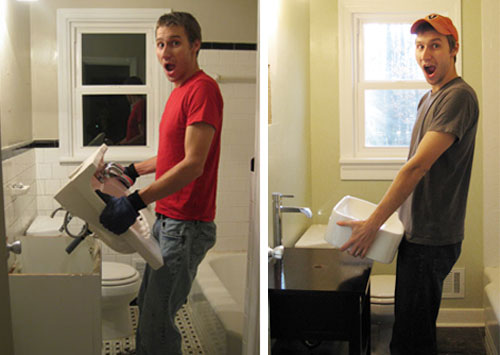
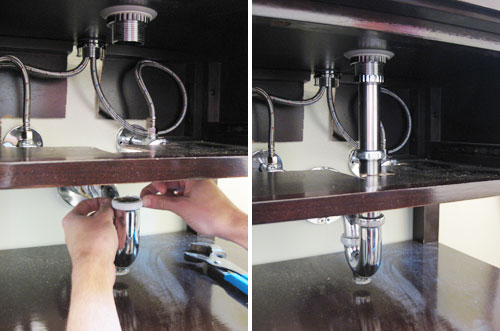
The next thing on the agenda was attaching the sink, which would be held in place through a combination of plumbing and adhesive. But before doing that, we carefully did a “dry run” installation where I brought the vanity, sink and faucet in and loosely hooked up all of the plumbing to make sure things were lining up perfectly. Fortunately, they were – except that I need about 4″ of extension pipe to connect everything. But even an unplanned trip to the home improvement store couldn’t dampen my enthusiasm for the progress we had made in about an hour of vanity building. For instance, see how much happier/crazier I look in the “after” sink picture below? I look like I’m auditioning for Glee.
Ok, so after returning with the small section of extension pipe that we needed to connect all the plumbing, we now had the confidence to glue the above-counter sink onto the top of the vanity. For this we used a clear waterproof silicone caulk – since it would do both the job of adhering and blocking water. Plus, the guy at Lowe’s had just done something similar in his bathroom the week before and was convincingly confident about it (and we knew the plumbing for the drain would also firmly hold the sink in place for added security).
We laid a line of silicone along both edges where the sink would rest on the vanity top (the bottom of the sink appears flat in the photo below, but it actually arcs in the middle so we only applied caulk where the sink would directly make contact with the vanity). Oh and we did leave a small break in the caulk line at the back of the sink – reasoning that if we had a leak issue down the road, it would be nice for it to seap out the back of the sink where we could see it (instead of silently collecting between the sink and the vanity top while we had no idea what water damage was lurking underneath). Oh, and even though the caulk looks white in the picture it dries clear.

With the sink laid carefully in place and pressed down, it was ready for plumbing. Since I’d confirmed that all the plumbing would fit together before during my “dry run,” there wasn’t much magic to this step. I inserted the drain stopper from the top, screwed on and tightened the washer and nut from the bottom (all per sink instructions) and attached the rest of the drain pipe using plumber’s tape and some tightening (but not overtightening) with a wrench. Then – with my trusty paper towel sitting on the shelf under it to help me identify leaks – we turned on the water and (after a couple of tightening adjustments) had a leak free sink. Victory. More happy jigs and cartwheels ensued.
Then we whipped out the same clear silicone caulk that we used to hold the sink down to seal around the base of the sink where it meets the vanity (except for that small span of space in the back which we left unsealed to alert us of any potential under-sink leaks). Looks pretty much complete, eh?
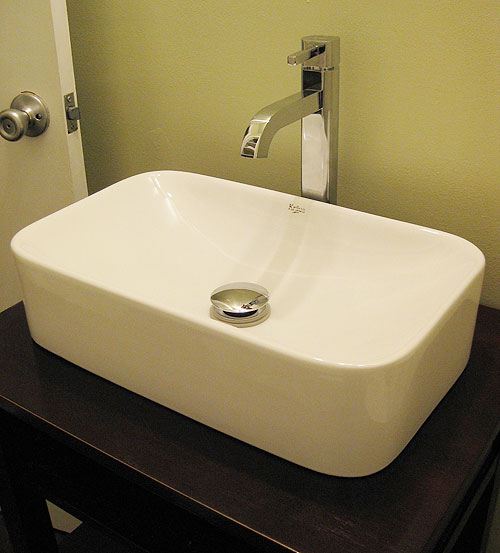
Nope, two other tasks were in order before we could wash our hands of this project (and then subsequently wash our hands in this project). First we wanted to be 100% sure that our DIY vanity wouldn’t pull away from the wall (since the only thing holding it in place were some pipes). So using some simple L brackets and a few long screws we secured the vanity tightly against the wall in two spots right under the drawer base (meaning they’re completely hidden from view). Now this baby isn’t going anywhere.
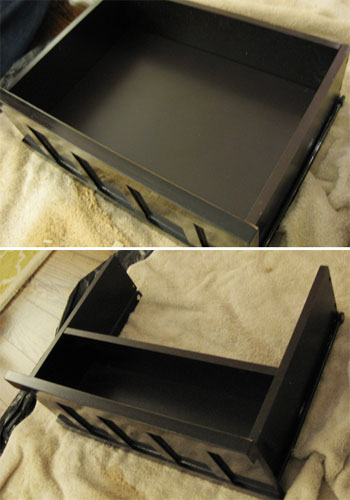
Our second job was to adjust the drawer to work around all of the plumbing that I had just carefully installed right behind it. Thanks to some trial-and-error before moving the piece into the bathroom, we figured out that all we needed to do to salvage the function of the drawer was to trim the big base panel and reinstall the back panel at a shorter depth (ie: shorten the drawer to create clearance for the pipes). This was easy since Sherry had constructed the thing in the first place, so it was no big deal to take the drawer apart and make those adjustments.
After unscrewing and removing the back of the drawer and sliding out the bottom panel, we used a circular saw to shorten the bottom to the new depth. The wood was thin so a handsaw would’ve easily cut it, but this cut needed to be straight for a secure fit (so not trusting my hand, I went over the top and headed to the garage where the power tools with laser guides could do my dirty work). The shortened base panel slid right back into place and with a few self-made drill holes, we easily attached the back of the drawer at the new depth.
So with the drawer in place (which left just enough room to store toothbrushes, toothpaste, contact cases and deodorant) we were officially D-O-N-E with the vanity! And it only took a few hours to accomplish the whole thing. Not bad for saving several hundred bucks, right?
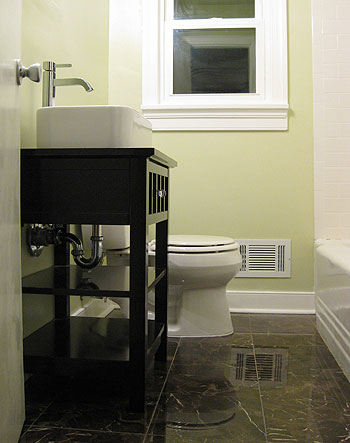
And now that this chapter is also d-o-n-e, the next post up will show you the whole shebang completed and accessorized. Not to mention a full budget breakdown and us answering the ten million dollar question: would we do it all again? And don’t worry, we’ll still follow-up after the big reveal with other details like how we reglazed the tub and made some new art. Details, details. But one thing we won’t be covering is the riveting tale of re-installing the toilet, which you can see is already in place (since we’ve got that step-by-step available here). Besides, I’m spent.
What about you guys? Has anyone else altered a piece of furniture in some way to make it more customized and functional for your home? Sherry’s mom actually turned an old cabinet into a sink over ten years ago, on a serious budget no less (so that’s where Sherry gets it from!). We’d love to know what sort of furniture “hacks” you guys are taking on these days. Do tell.
Wanna read about the first few chapters of the big bathroom makeover? Check out Chapter One (Moodboard), Chapter Two (Demo), Chapter Three (Wall Reconstruction), a little teaser post, Chapter Four (Tiling), Chapter Five (Grouting) and Chapter Six (Trim) right here.

Leave a Reply