Adding a headboard to your bed is one of the best ways to add polish and coziness to your bedroom. And, lucky for you, making your own DIY upholstered headboard is super easy and affordable (ours only cost $66!). This means you can customize the fabric, size, and design to get exactly the look you want. Believe us, we’ve done A LOT of them over the years!
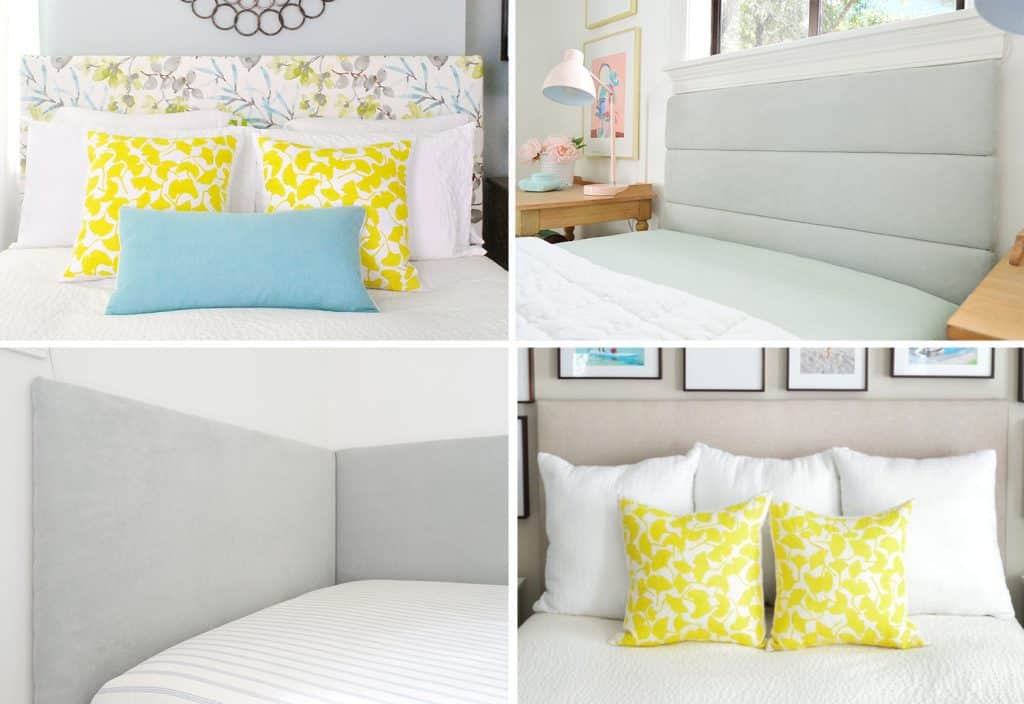
Today we’re going to take you through the step-by-step process to create the first headboard in the grid above (top left). It’s our favorite, classic headboard tutorial. But you can check out more headboard ideas below:
- How to make a channel-tufted headboard (top right)
- How to make a daybed-style headboard (bottom left)
- How to make a wall cleat to hang a headboard (bottom right)
Materials & Tools

Your exact supply list may vary from ours, but generally, this is what you’ll need to make your own upholstered headboard for your bed:
- Fabric of your choosing (we used 2 yards)
- Extra loft batting (we used 4 yards)
- 5/8″ plywood or MDF
- Two or three 1×3″ whitewood boards
- Miter, table, or circular saw to cut your wood (optional)
- Heavy-duty staple gun & staples
- Screwdriver and screws
Why Add A Fabric Headboard?
We wanted to add a headboard because fell out of love with our 4-poster bed (so we cut off the posts!) and wanted something cozier instead. You know, something plush we could lean up against at night. And the short wood headboard that we currently had wasn’t cutting it.
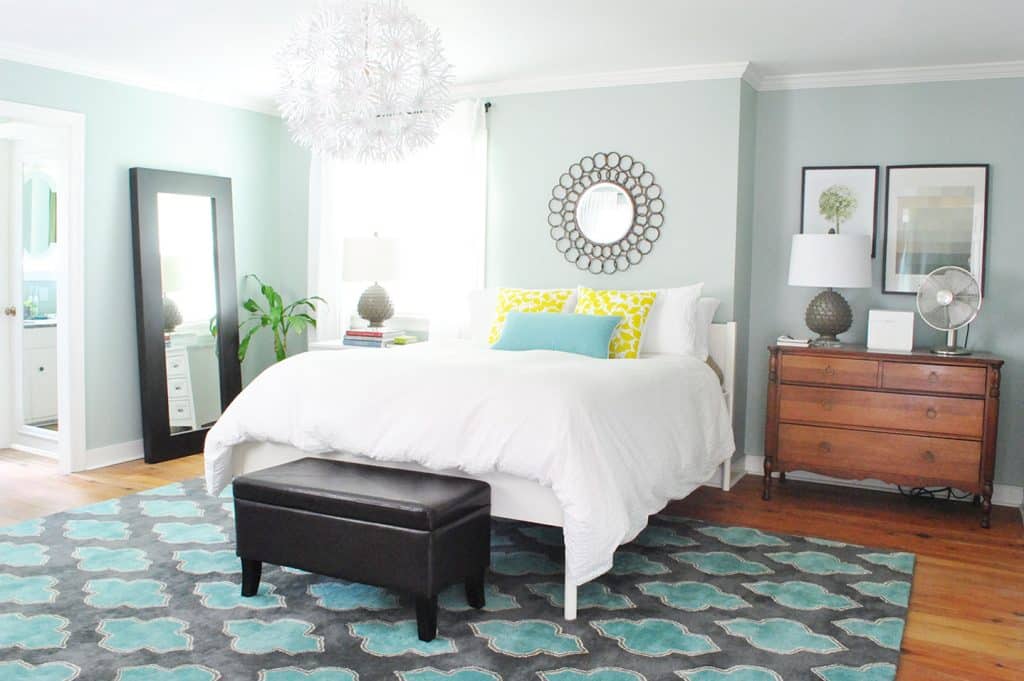
But generally, headboards can add a lot of personality and polish to a bedroom. Bedrooms without proper headboards can scream “college dorm” or “first apartment,” so adding one is a no-brainer upgrade. Plus, depending on the fabric you choose, it can add some bold color and pattern to a room OR add to the restful, zen space you’re trying to create.
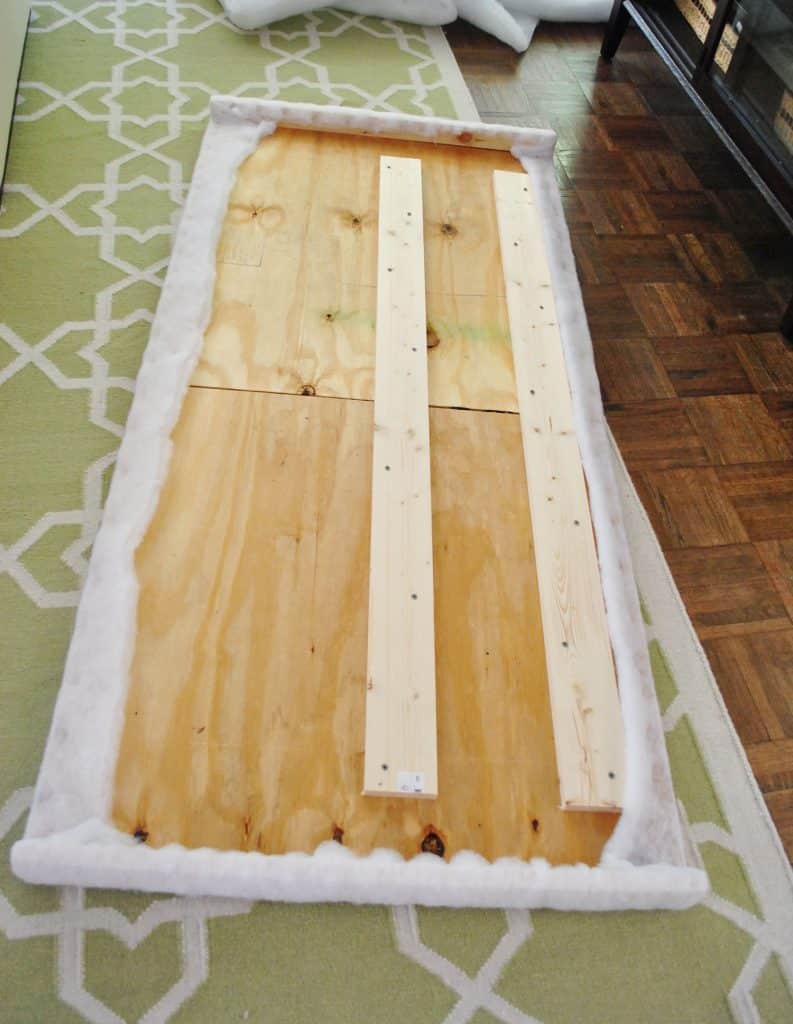
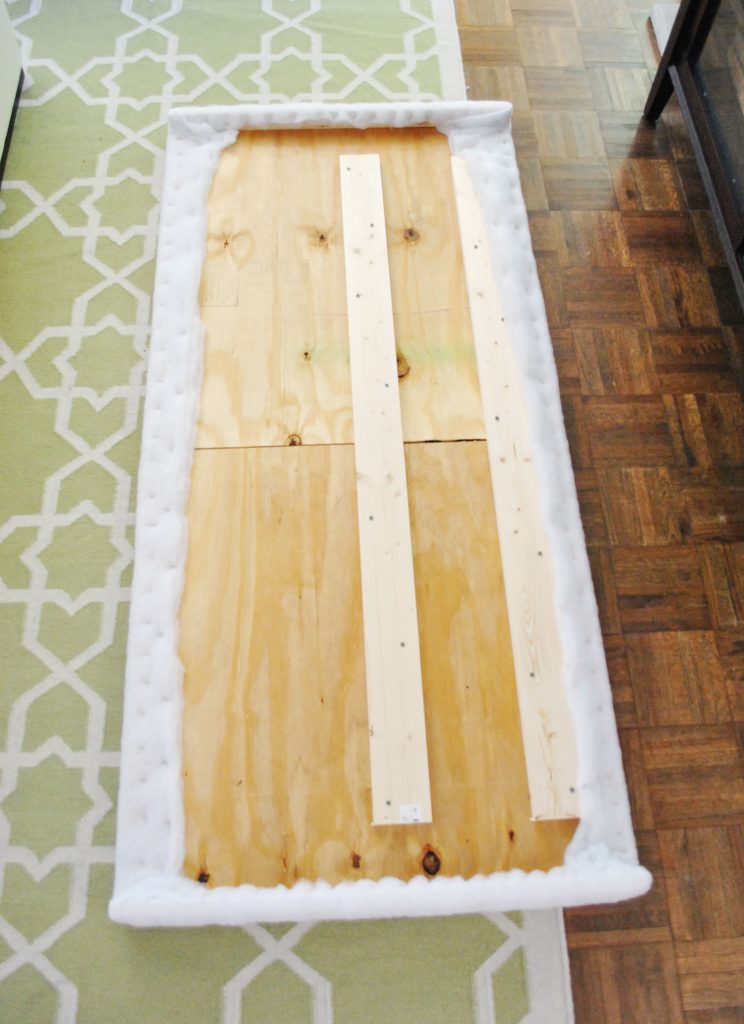
Step 1: Build Your Wood Frame
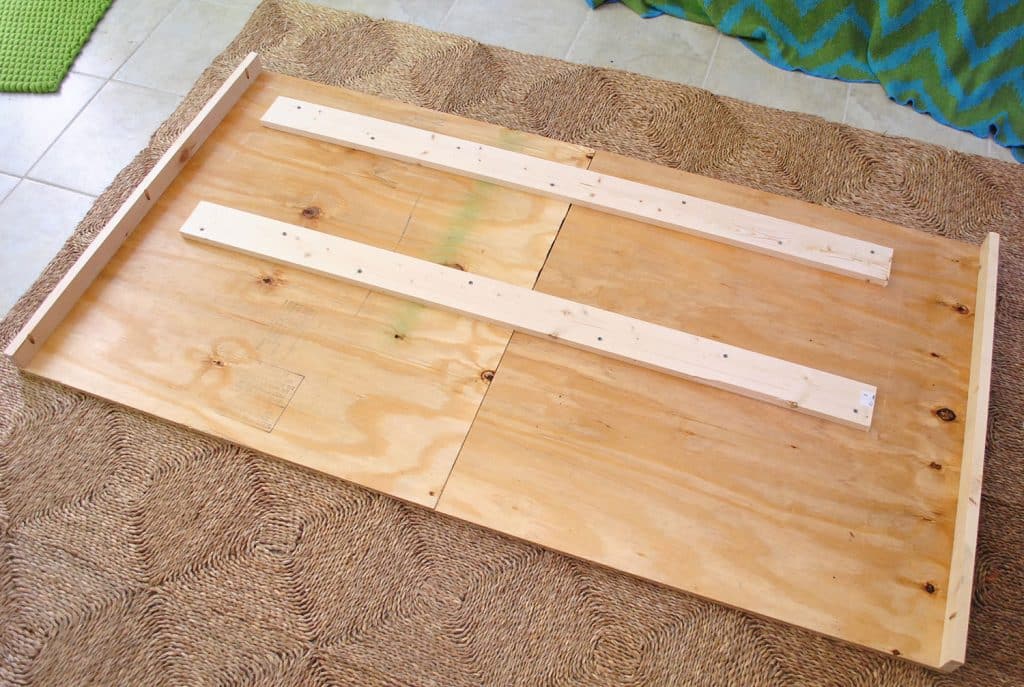
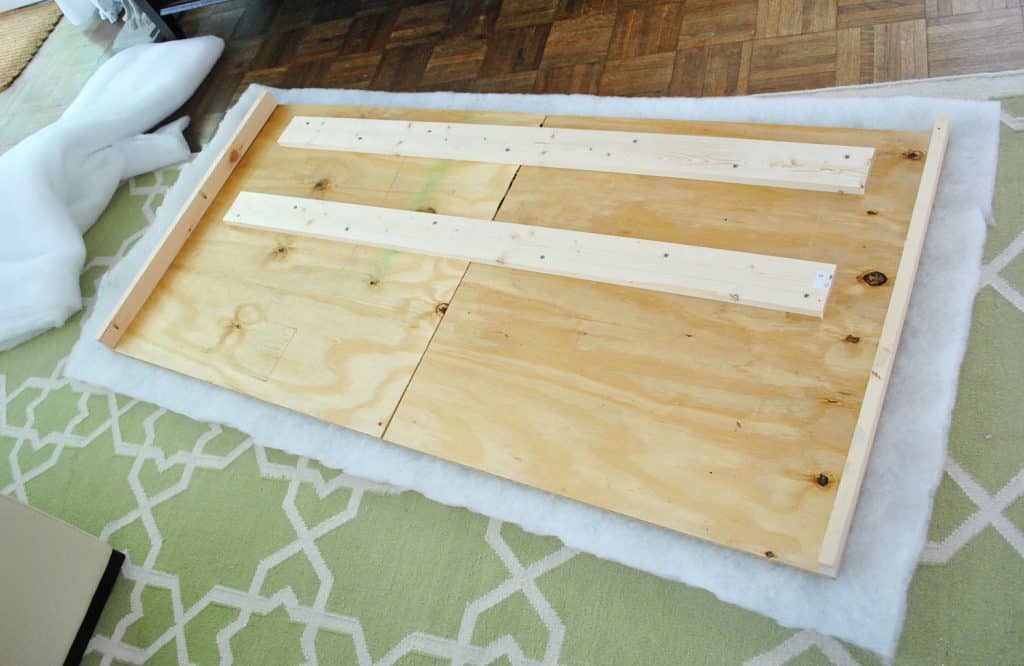
There are a few ways to create the wood frame for your headboard (including this super lightweight option) but for this particular bed, we constructed a sturdy plywood frame. If you want a simple rectangular design, this step can be as simple as cutting your plywood sheet to size (or having them cut it for you at the home improvement store). For our queen-size bed, we ultimately decided on 65″ wide and 31″ tall. But you can easily customize your dimensions depending on the location or width of your bed.
Ours looked a little more complicated, and I’ll tell you why…
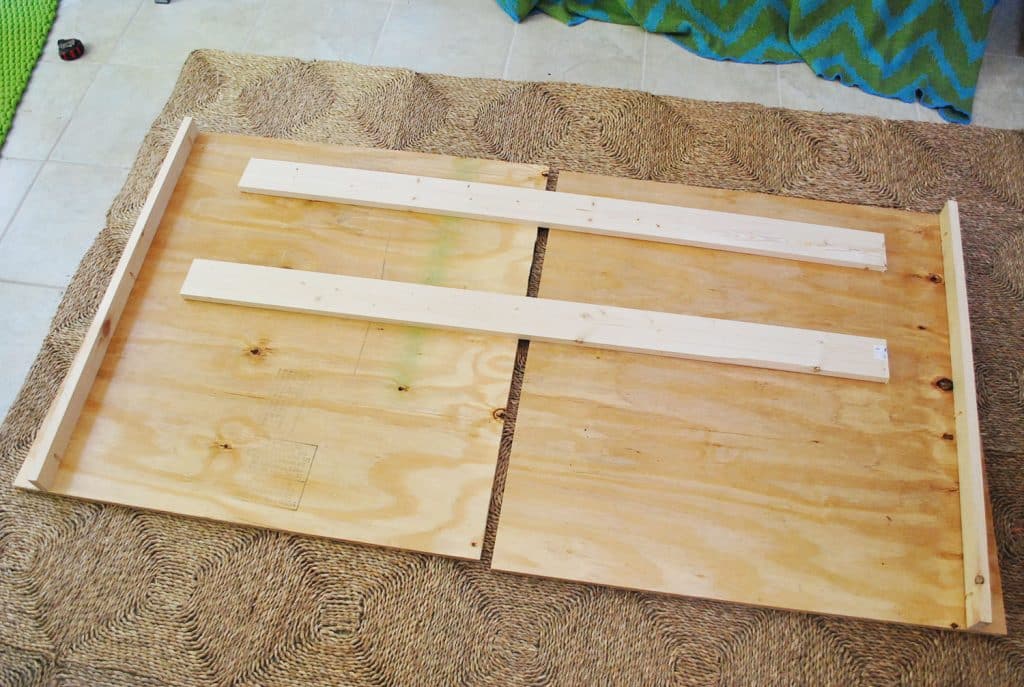
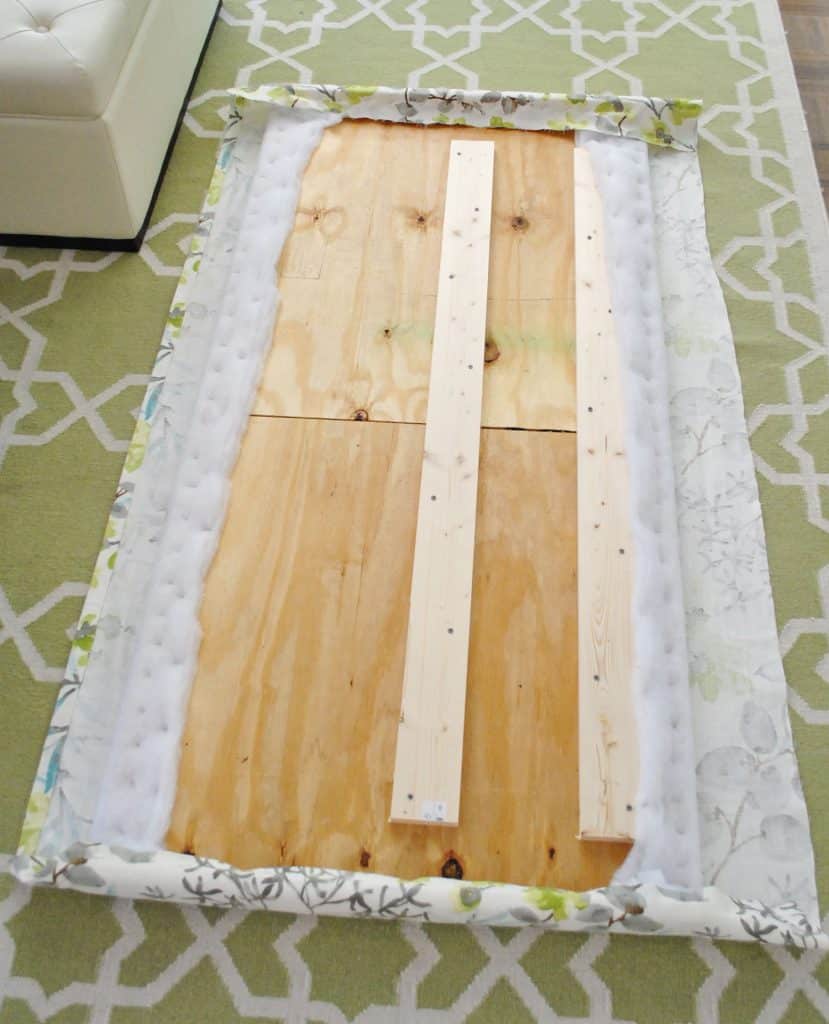
First of all, we were planning to place our DIY headboard around the existing headboard/posts leftover on our Ikea Edland bed. We concocted a plan that would sort of “wrap around” the existing posts, which we mocked up in Photoshop below. But this concept would also work if you wanted to create a popular “winged” headboard look as well.
To add these small side pieces, we attached two 1×3 whiteboard boards to each edge using screws drilled into pocket holes we drill using our Kreg Jig. Alternatively we could’ve secured them with wood glue and nails.
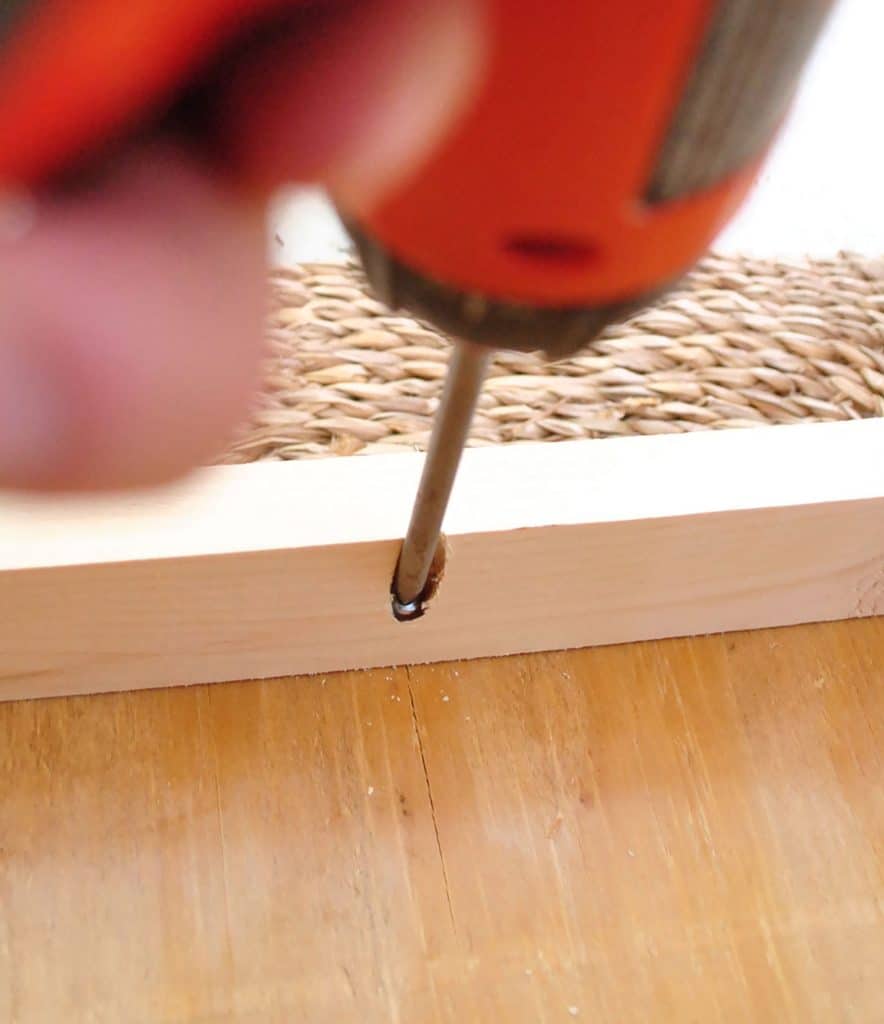
The other reason ours was more complicated than a solid sheet of plywood was that we couldn’t fit it in our little car (ha!). So at Home Depot we had them rip it in half, and we reconnected the two halves at home with scrap pieces of whitewood boards. We’re fancy like that!
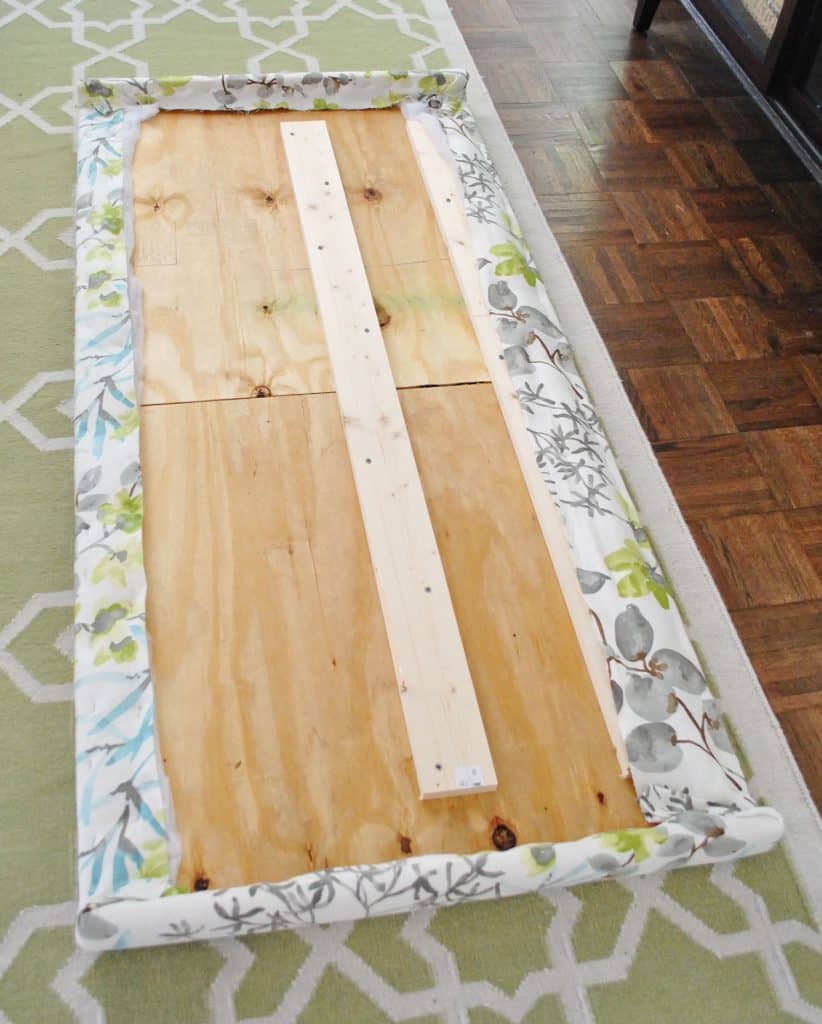
Before proceeding we upholstery, we brought our frame in to make sure it fit around the existing bed frame like we planned. Phew – it did!
You can also now see what that wrap-around piece looks like, and how it hides the existing bedpost. And since we’d soon be upholstering it with fabric, it didn’t matter that the edges were a little raw looking.
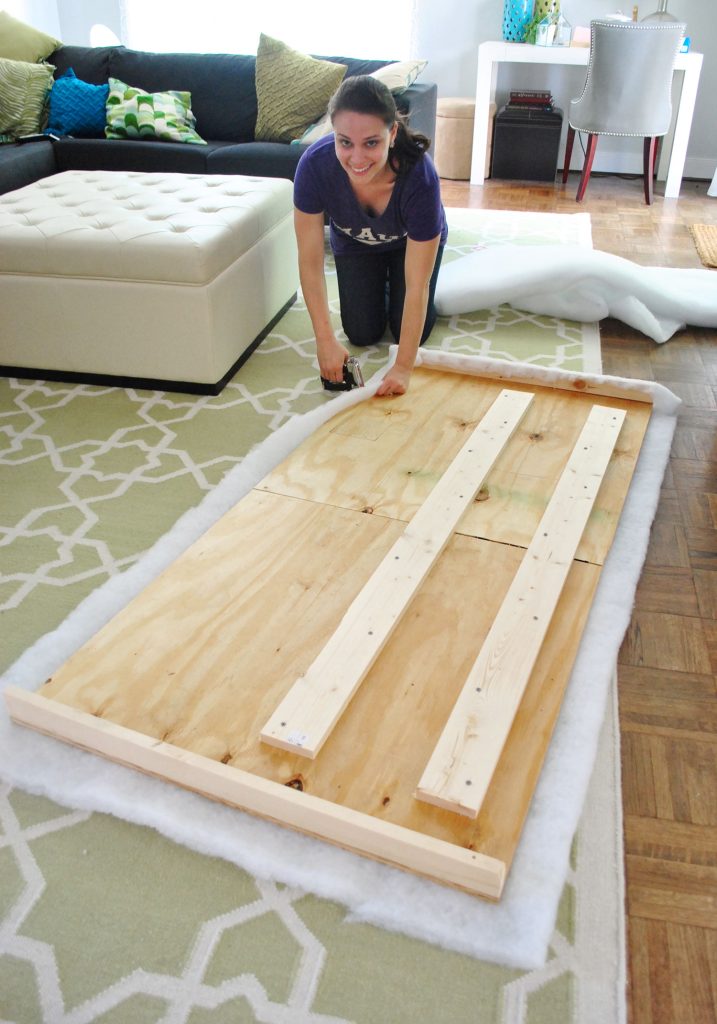
Step 2: Add Your Batting Layer
If the carpenter in you trembles at the idea of upholstery, just remember: if you can wrap a present, you can upholster a headboard!
Before adding our fabric, we wanted to first add some padding in the form of extra loft batting. We decided to do two layers so it’d be plenty plush, but still not lose its shape. Sherry trimmed a 2-yard section of batting using regular scissors, laid it on the floor, and we placed our frame on top of it. You’ll want about a 2-3″ overhang on all sides.
Then we used our staple gun to begin attaching the batting. We just wrapped the batting tightly around the edge and stapled it every few inches.
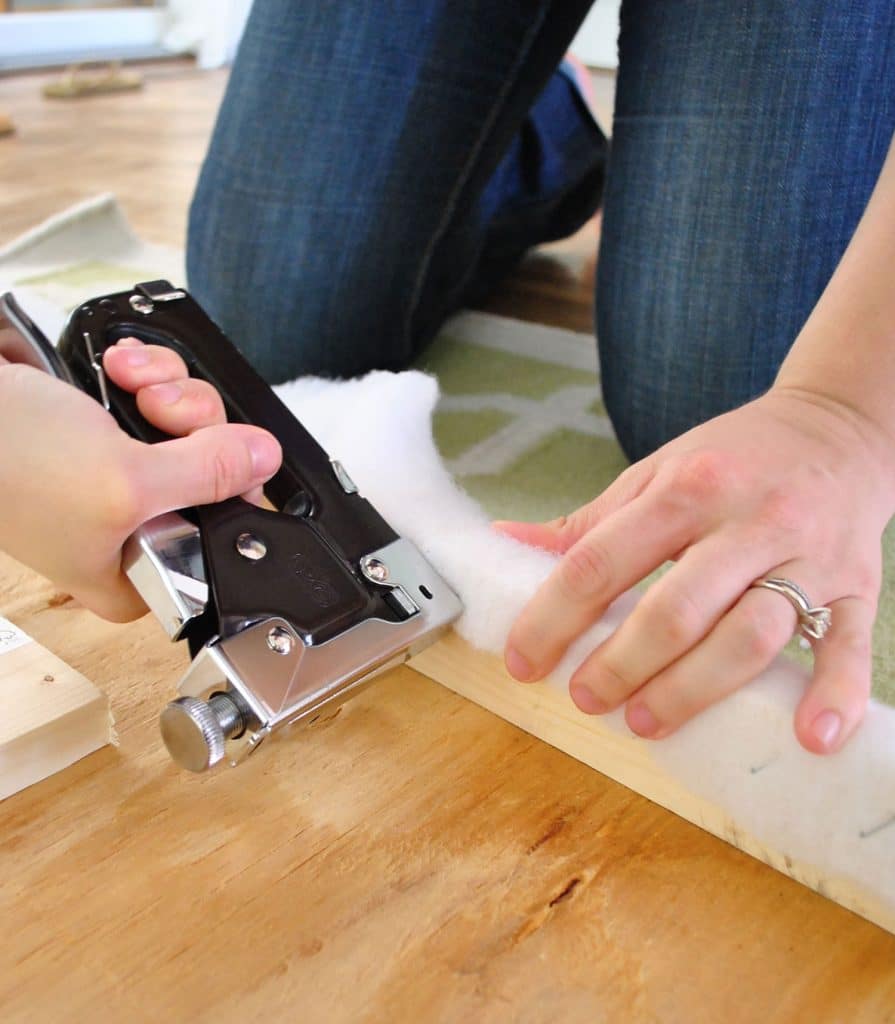
When we came to a corner, it was just like wrapping a present. You just fold it back and staple it so it all looks smooth from the front. Try to pull the batting tight so your corners don’t get too bulky. Bam, bam, bam – it’s done.
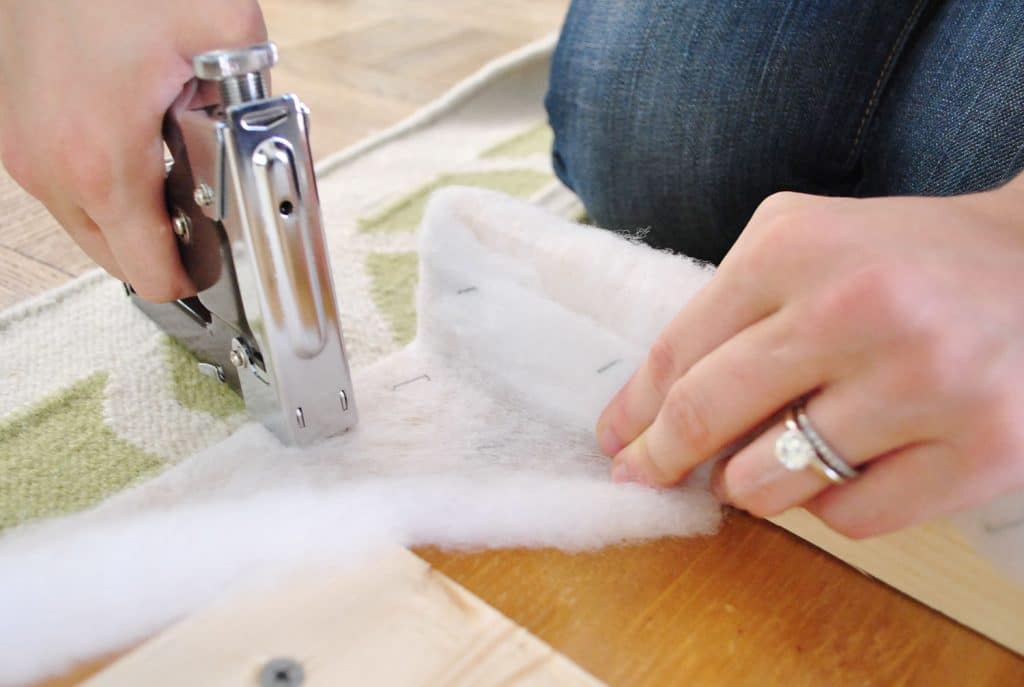
We just worked our way around the back of the headboard, stapling away. At some point John made me pose for this awkward photo too. Winning.
Eventually the whole thing was stapled nice and tightly around the back.
We decided to do a second layer of batting, just repeating this process. Here’ what it looked like with the double-thick batting!
Note: Another option is to use upholstery foam that you attach to your plywood with spray adhesive. We prefer the batting method since it’s easier to wrap around the edges. But if you’re looking for a much thicker, cushier feel – it may be faster to use foam, rather than wrap 4 or 5 layers of batting. Too many layers of batting can also make it difficult to staple into the wood.
Step 3: Staple On Your Fabric
Here’s where the fun really begins. Now you can repeat that process, but with your selected fabric! Just give it a good ironing first to make sure it’s free of creases or wrinkles before you start.
Just like with the batting, we laid it flat on the floor and placed our (now batting-covered) frame on top, making sure it was pulled taut underneath to avoid any wrinkles. Then I trimmed offthe excess fabric around the perimeter, leaving a few inches for it to be wrapped and stapled around the back, just as I had with the batting.
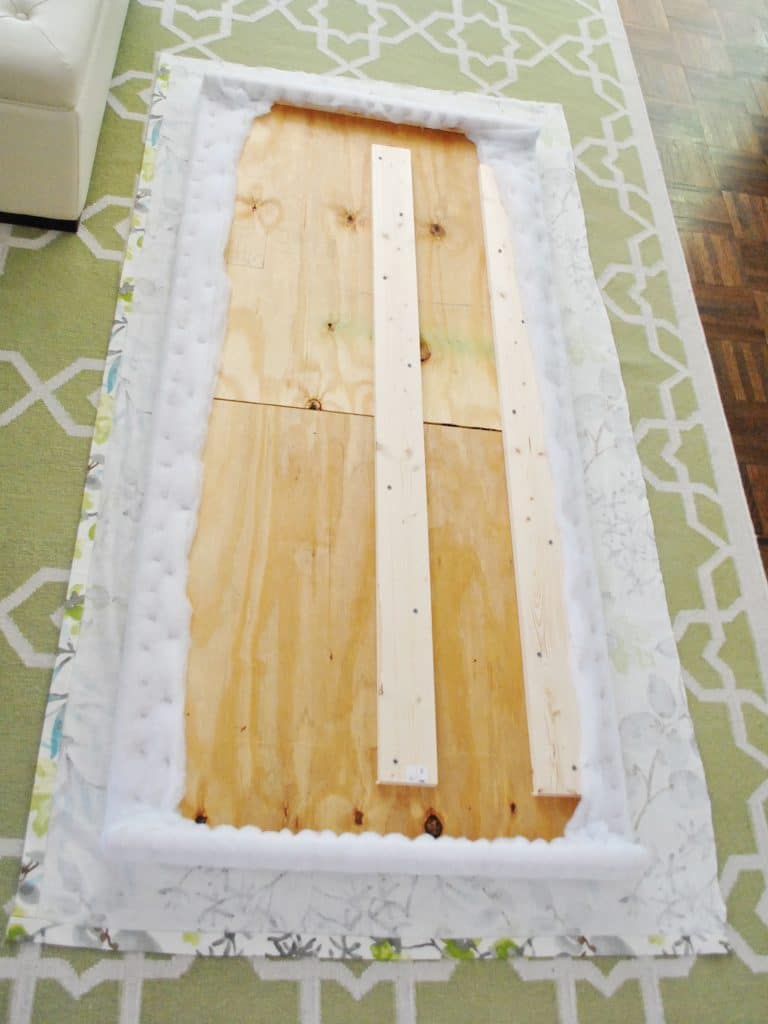
We started by stapling each side, being sure to pull it extra tight so it won’t end up all loose and baggy over time. I started with one side, pulling it all very tightly, then stapled along the opposite side, again pulling it nice and tight.
Once it was secured on those two sides, I did the same thing to keep it secured vertically, by pulling tightly and stapling the top side and pulling it tightly and stapling the bottom side as well.
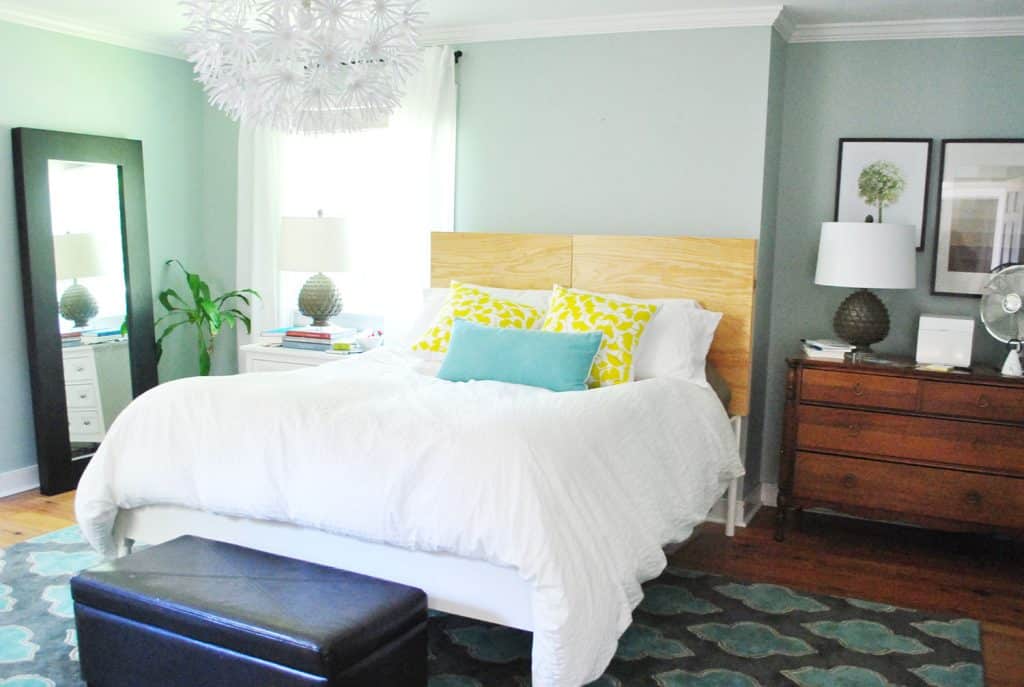
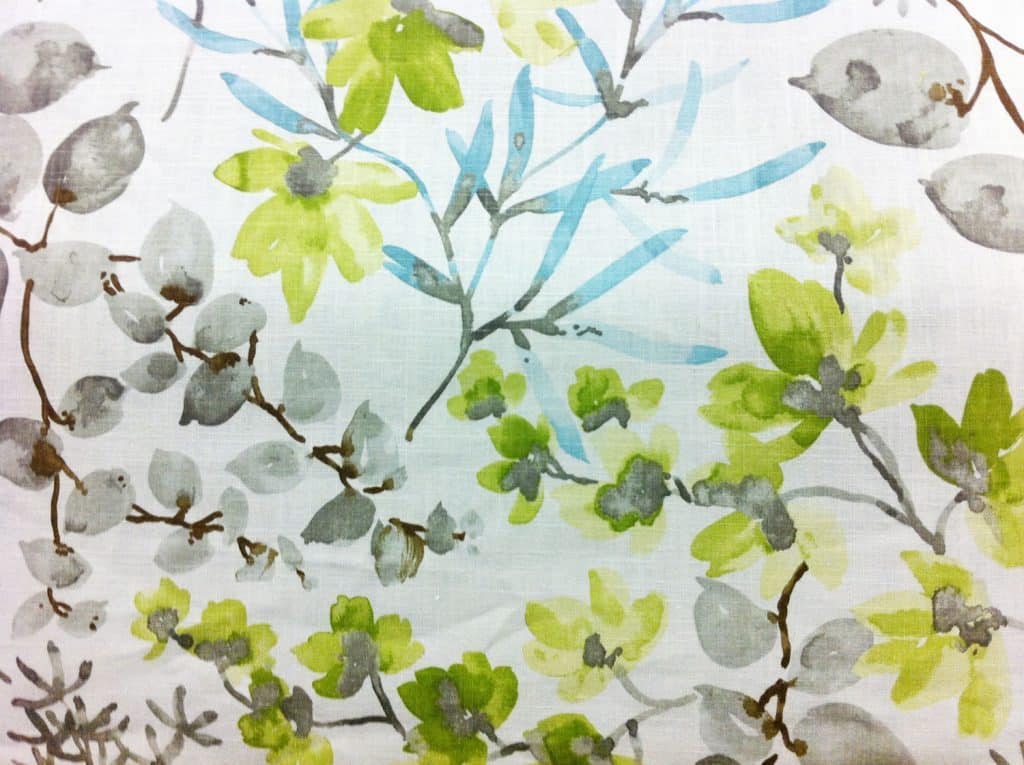
Then we flipped the headboard up to see it in all of it’s plush, tightly upholstered glory. Bing, bam, boom. The whole upholstery step took less than forty five minutes to complete. Is it weird to call it one of my favorite fabric projects to date? I just love love love the pattern.
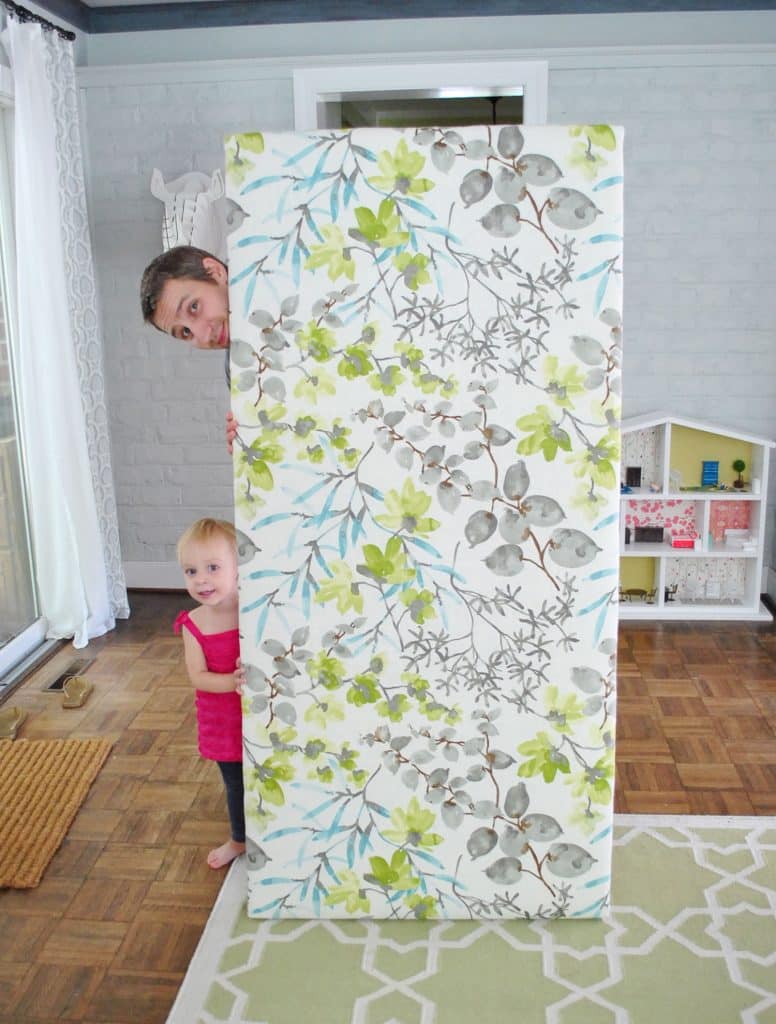
It’s hard to tell above, but in this angle you can get a sense of how plush it is. It’s cushy, but still tight – so we won’t worry about it getting baggy with everyday lounging against it.
Step 4: Hang Your New Headboard
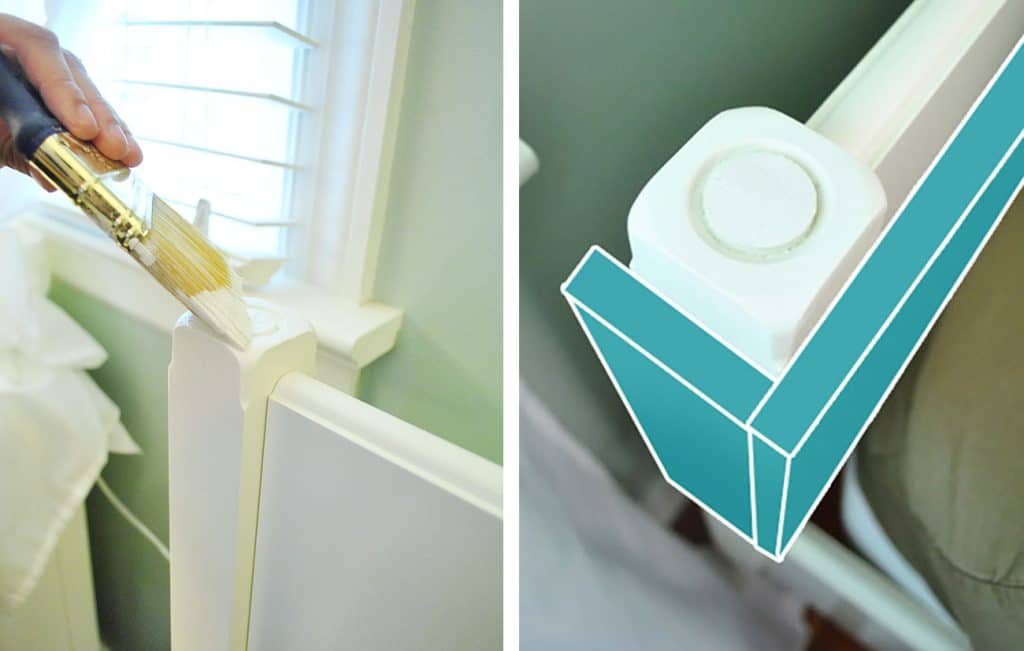
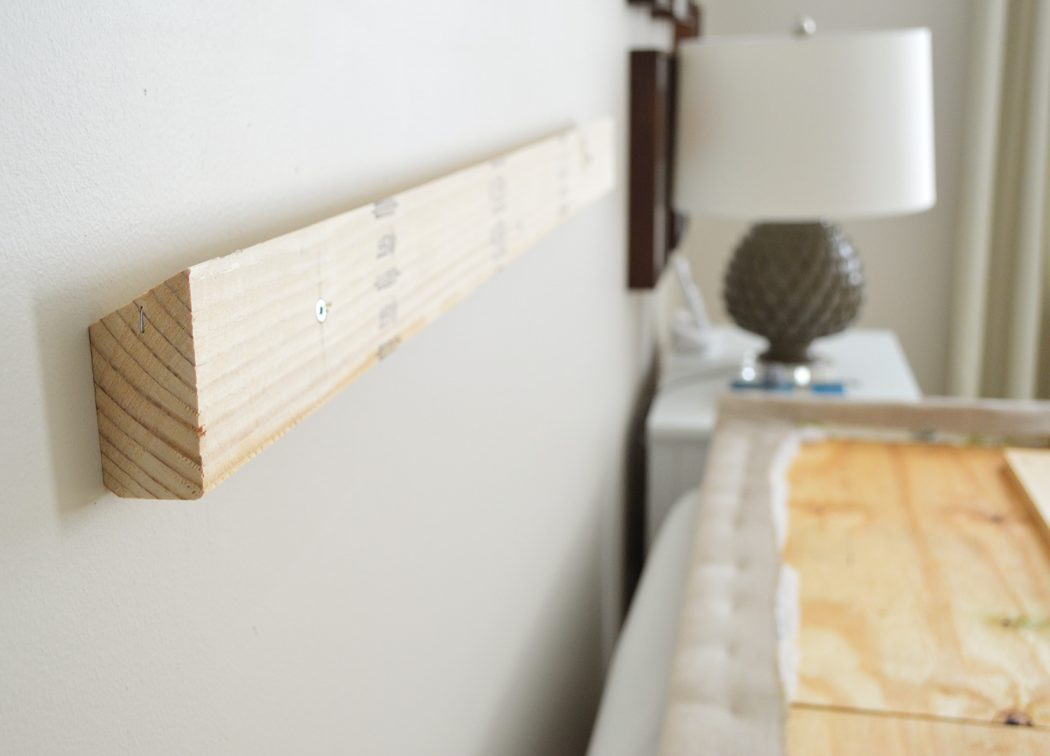
Now you’re ready to attach your headboard to your bed. This can be done in a few ways, depending on your bedframe. When typically like to install a headboard directly into the wall, since it’s often sturdier than attaching it to the bedframe. To do that, usually a french cleat works great. We cover how to DIY a french cleat in this post.
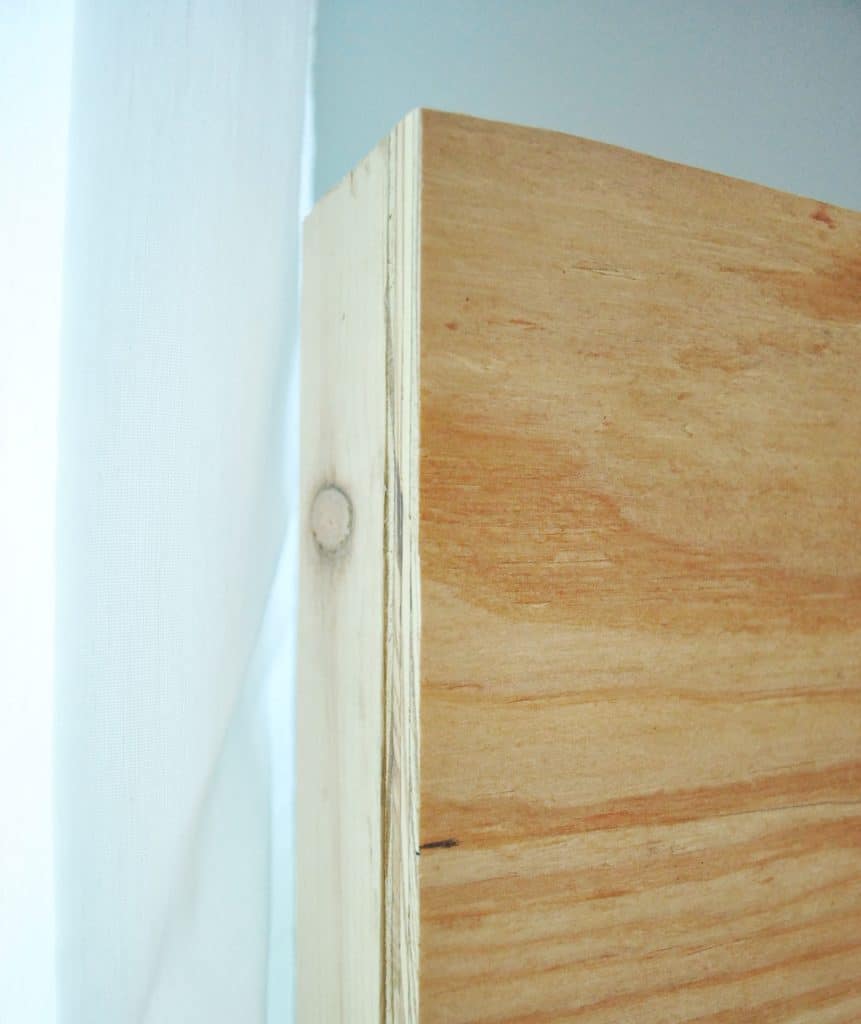
Actually, the headboard pictured above is the same one constructed during this tutorial – a few years later we just updated it for our new home with new fabric and a new top piece (just like we had added the sides pieces in this post). You can see the french cleat below, which is essentially two 2×4″ cut at an angle. One goes on the wall, the other on your headboard. You can also purchase pre-made metal cleats for just a few dollars.
TIP: Try to hang your headboard so it hits the top edge or slightly below the top edge of your mattress, that way there is no gap between the two.
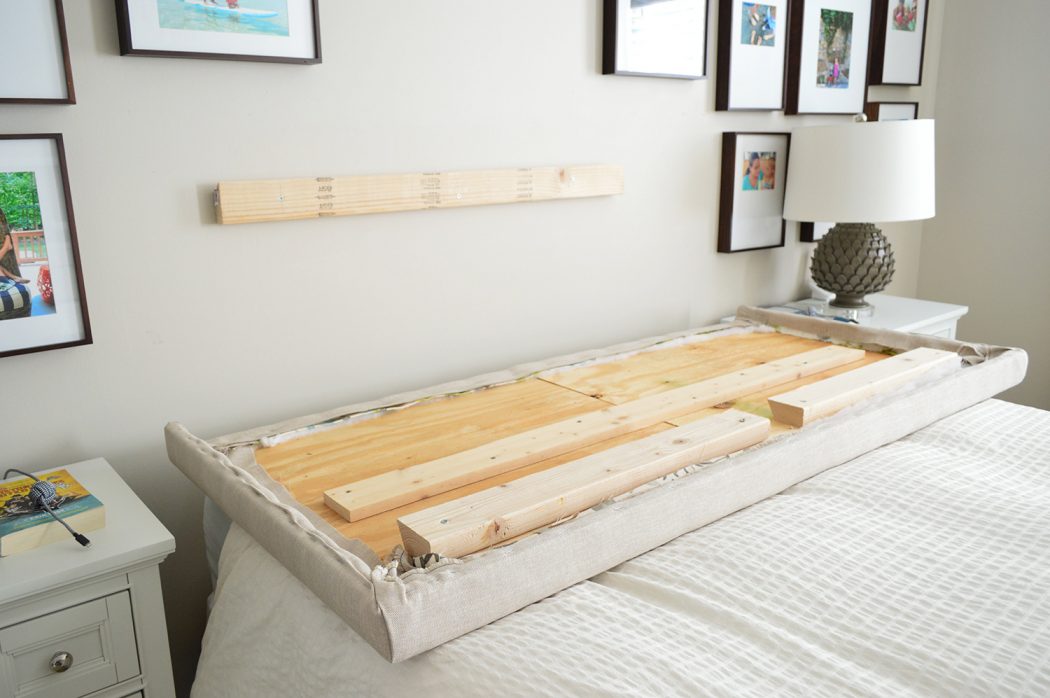
But in the case of our postless-four-poster bed, we chose to screw the new fabric headboard into old wooden one that was part of the existing bedframe, just careful to use screws that wouldn’t poke through the other side.
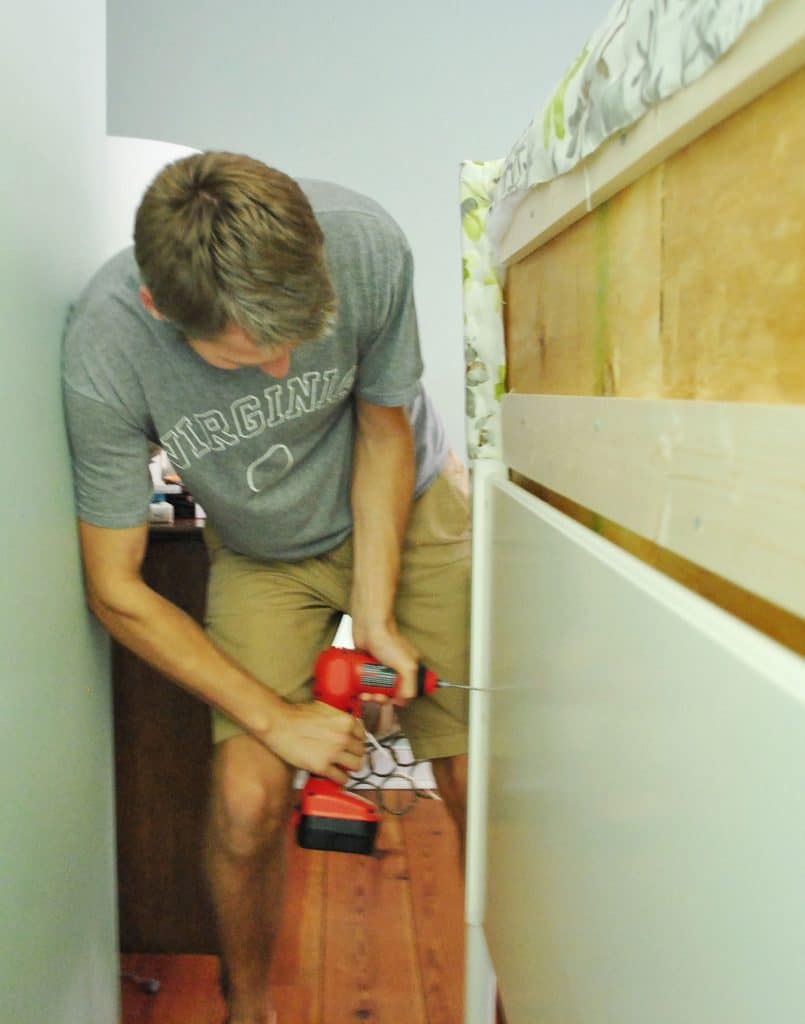
Here’s John putting the final screws in on the backside, pushing the new fabric headboard tight to the bedrame for a snug, secure fit.
Step 5: Enjoy Your Handiwork
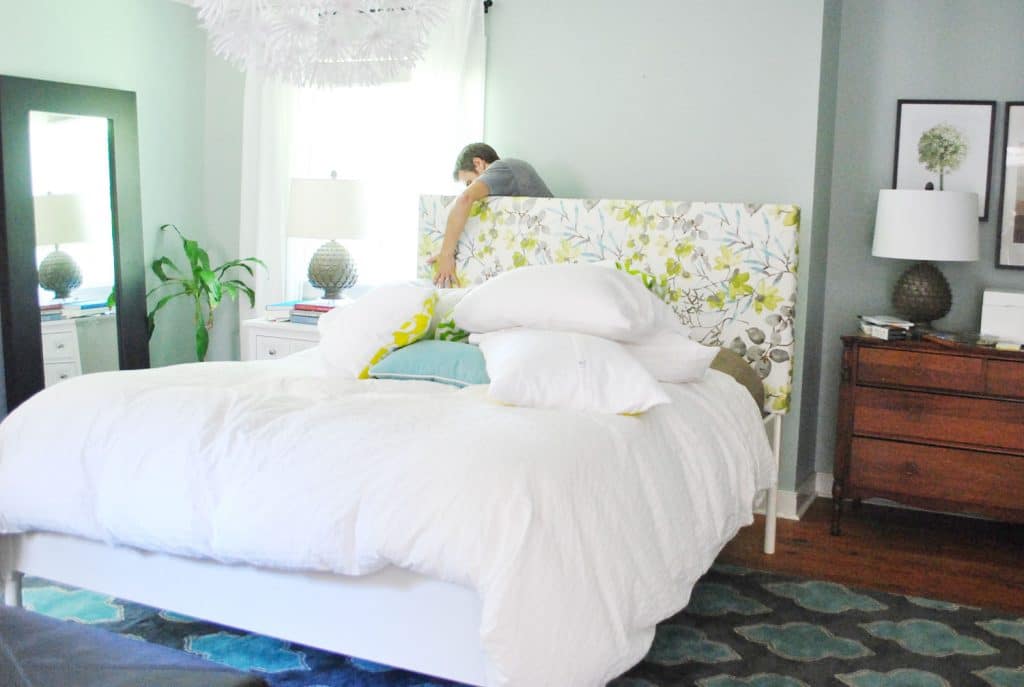
Once it was attached, we just pushed the bed back into place and beamed at it. If only it had been bedtime already that so we could immediately enjoy it’s plushness!
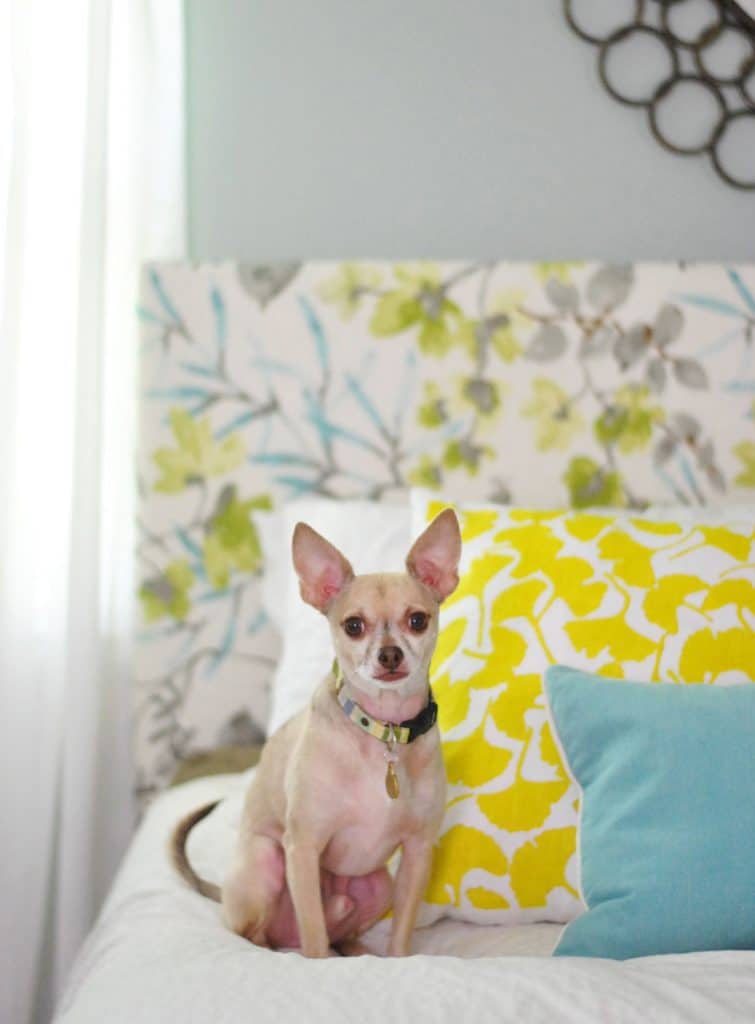
We loved how the fabric is sort of like the bridge between the yellow ginko pillows (since there are greeny-yellow flowers in the headboard fabric) and the turquoise in the rug (thanks to those subtle leafy sprigs of turquoise in the headboard).
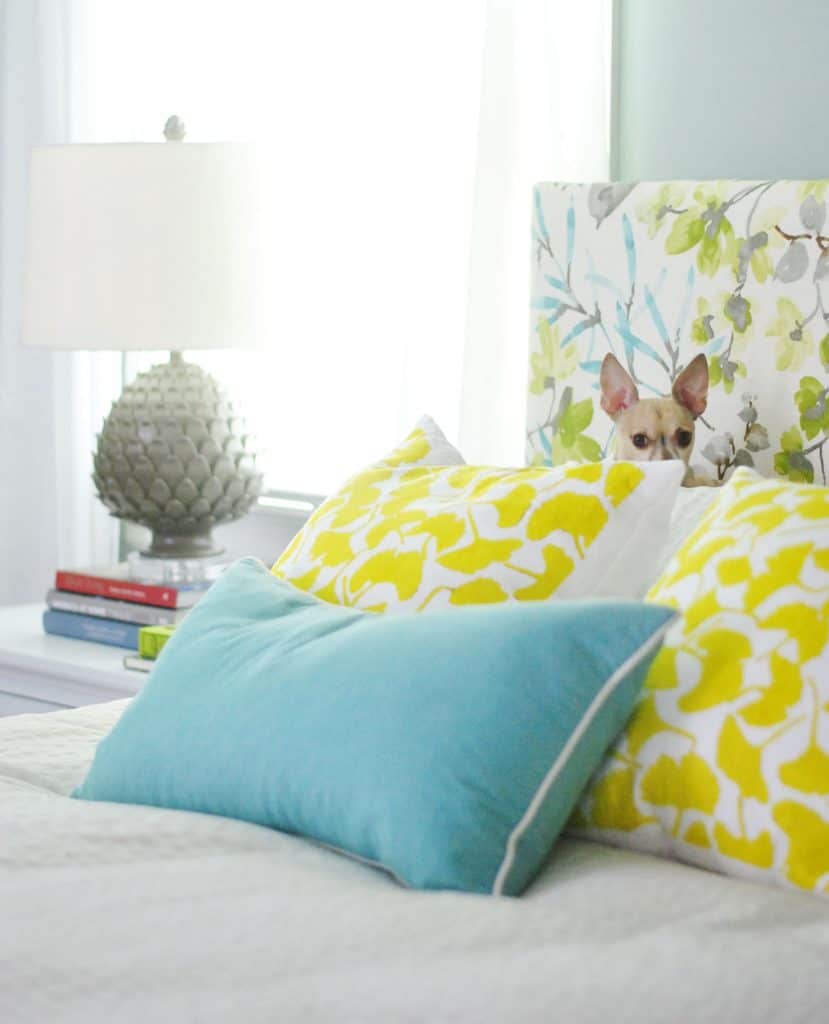
I even think Burger looks especially dapper in front of this new backdrop.
DIY Upholstered Headboard Cost
As for a budget breakdown here we go:
- Wood frame (plywood and some bracing boards from Home Depot): $22
- Two layers of extra loft batting (from JoAnn thanks to a 50% off coupon): $4
- Discount designer fabric (from a local fabric outlet called U-Fab): already owned – but it was originally $20/yard ($40 total)
- Total spent: $66 (if you add in the fabric we previously bought for a book project and reused for this)
Sixty six bucks isn’t pennies, but compared to upholstered headboards that are sold at places like Overstock, it’s at least $100-200 cheaper than even the most basic types. And considering places like Ballard Designs charge around $400-$700 for custom headboards (where you get to pick the fabric) it was awesome to get to choose the fabric and whip this up ourselves.
*This post contains affiliate links, so we may earn a small commission when you make a purchase through links on our site at no additional cost to you.

kate says
I’m new to your blog but love everything, you guys are so talented!!!! It looks like you’ve repainted since listing the benjamin moore bedroom wall color (gray), would love to know what that new pretty aqua color is called. Thanks so much!!!
YoungHouseLove says
The gray color is actually the newer one, but this one is Caronlina Inn Club Aqua. Hope it helps!
xo
s
Amanda says
I’m in love with that green rug! May I ask where it came from?
YoungHouseLove says
It’s from joss & main a while back. Hope it helps!
xo,
s
Lauren says
Since it’s been a while since your headboard has been completed, how has it held up? Do you have any indentation from where your head rests against it everyday? We’re going be upgrading to a bigger bed soon and I want to make a headboard for it instead of purchasing something. Just curious how it has worked out for you guys. Anything you would have done differently now that you’ve had it for a while? Thanks!
YoungHouseLove says
Still looks great! I’d say that the best thing we ever did was use the super thick/dense batting (don’t go for the cheap stuff, it’s like tissue paper, so there’s no density at all) and to apply so many layers. It probable also helped that our fabric was upholstery grade (nice and thick) and that we pulled it really tight to staple it (so it wouldn’t get baggy).
xo
s
Pam F says
I’ve had this page bookmarked for over 20 weeks – thanks to Pinterest and today we’re off to shop for my new headboard supplies!! Thanks for the great tips and inspiration. I’ll send a pic when it’s done :-)
Karla says
Hi! Just discovered your site. I love your presentation and ideas. What is the name of the original light color of the bedroom? We just moved to a new apartment and that fits my idea for our bedroom walls. Thanks!
YoungHouseLove says
That’s Valspar’s Carolina Inn Club Aqua.
xo
s
Pily Dispa says
Thank you. I dio it today with my teenage kids. It was fun and great results!
Katie says
What is the current color on the walls and who is it by?
YoungHouseLove says
It’s Valspar’s Carolina Club Aqua.
xo
s
Carol says
What a gorgeous room! I love the light/happy colors and the wooden dresser brings in the floor color…very nice! The only thing I might do is to raise the pictures that are above your night stand to above the top of your lamp line and just a smidge below the height of your mirror that’s above the bed so that your back drop doesn’t look cluttered on that side wall. That mirror is absolutely gorgeous by the way but what is more beautiful is that your family is working on these projects together….what wonderful memories and values you are instilling in your little one….EXCELLENT JOB ON ALL!!! Blessings!
Corai says
I just love the fabric motifs for this headboard, just beautiful.
amy says
The headboard is fab, but it looks like a teenager’s room.
JJ says
Hi,
Looks great, where did you get the rug?
Thanks!
YoungHouseLove says
Thanks! The green living room one is from Joss & Main and the blue bedroom one is from a local outlet called The Decorating Outlet.
xo
s
blair allison says
i pinned this article about a year ago and the idea has NEVER left my mind. so this weekend, i’m attempting this! i don’t have a headboard to attach a new one to and i live in rental (didn’t wanna have HUGE holes in the walls). so we’re gonna try with corogated plastic board and fabric and attach it to the wall. fingers crossed it looks as cute as yours!!
YoungHouseLove says
That’s awesome Blair! Hope it turns out awesome!
xo
s
Callie says
Hi there! I am sure you have been asked this and I tried to find it on your blog before I asked but can you tell me what the blue gray paint color was in your master bedroom before you painted it gray in your second house? Thanks!!
YoungHouseLove says
That was Valspar’s Carolina Inn Club Aqua.
xo
s
Allison says
I am trying to look for the Extra Loft Batting on JoAnn’s website. I typed it in and it came up with different sizes in bags, such as 72×90, Queen size, 36×45, 45×60 and a few other sizes. You mentioned that you purchased 4 yards (I believe)…am I looking at the wrong thing or did you purchase one of the above sizes in a bag? Thank You :) Your headboard is gorgeous by the way!
YoungHouseLove says
In the store you can buy it on the bolt I think, so that’s how I did it (by the yard).
xo
s
Shannon says
Where is the mirror from? Thanks!
YoungHouseLove says
It’s from Hobby Lobby a while back.
xo
s
Kelli Barnett says
I’ve been meaning to write a thanks for this post for awhile now! My handy husband and I are avid diyers and we created this headboard to attach to a bed frame that he built. The upholstery fabric is what originally caught my eye about this post and I followed your source and bought it- it was exactly what I had been searching for. I love that it has such a fresh look! We recently began a long overdue blog after a lot of urging from our friends and family. It’s a baby- only one post in. One day we would like to post our version of this bed included in a post about our master bedroom makeover, but we would like to get permission from you first. We would certainly give credit and link to your post. Thanks for consideration and happy blogging and diying! Thanks for the awesome inspiration! We will keep reading! -Kelli & Aaron Barnett
YoungHouseLove says
You’re so sweet! Of course, feel free to link to any of our posts and borrow a pic or two with a credit back to us (we just ask that no copy is cut and pasted since it can hurt google rankings). Good luck and happy blogging!
xo
s
Kelli Barnett says
Thanks so much for your kind words! Here is our post. Please let us know if we linked it correctly to you. We’re new at blogging and the technical part is tricky for us to navigate! We’re learning… Thanks again for your kind words and for the inspirational post!
http://unconventionalfarmhouse.com/2014/03/22/recover-it/
YoungHouseLove says
Thanks for the sweet shout out Kelli!
xo
s
Melissa Mathews says
Hi! I was wondering if you could tell me if the fabric you used to upholster your headboard (which I LOVE) would actually be durable enough to sew into a duvet cover. My fiance and I have been looking everywhere for one we both like, but so far, it’s been a bust. He really liked this fabric though.
YoungHouseLove says
Oh yes, it’s nice and thick for drapes and stuff so I think it would work for bedding too. Good luck!
xo
s
Schreiner Heidelberg says
Schreinerei Mannheim
I love what you guys are up too. Such clever work and
coverage! Keep up the awesome works guys I’ve included you guys to blogroll.
Shannon says
Hi!
Love this! Can you tell me where you found the white flower type “ball” hanging….on your light???? I really like that. Thanks!
YoungHouseLove says
That’s a light from Ikea. They still sell it I think!
xo
s
Joe P says
Have a cheap IKEA headboard wondering what your thoughts if liquid nails would work versus screwing into the existing headboard. I’m afraid once I screw into the particle board it will all go to heck?
YoungHouseLove says
You can definitely give it a try! Would love to know how it goes!
xo
s
Holly says
I’m not sure if you bother with these sorts of things, but several of your pictures are being used in a Craigslist ad in my area: http://stlouis.craigslist.org/fuo/4513873684.html
YoungHouseLove says
Thanks for the tip Holly!
xo
s
Tara says
Hi Guys,
How would you attach this, sturdier headboard made with the plywood rather than the one with the frame, to the wall? We’re considering this project, but only have a simple metal frame…
Thanks!
YoungHouseLove says
I would make a french cleat. Just google that term to see what I mean!
xo
s
Tara says
So helpful, thanks! I just had a look at our (very) old simple Ikea bed frame (you know the pine one with the metal bars on the headboard), and we might be able to do what you guys did with yours. If we can’t tho, I can share this info with my (newly) handy hubby. Thanks!
Brooke says
This is so cute! Its so fun and mature at the same time, great touch! I recently rearranged my room and desperately want a headboard; I was wondering the what the dimensions of your headboard were and what extra loft batting you purchased! I love it!! :)
YoungHouseLove says
So sorry I don’t remember offhand but I think if you scroll back through the comments you can find that info :)
xo
s
Alice Crawford says
My DUH MOMENT!! Now I know how to get that much plywood into my little Honda Civic trunk….cut it into two manageable pieces. Goes to show, age is starting to make a difference…it must be drying up with old age. Boy, do I feel stupid. I can’t believe that never occurred to me. Too much going on can be my only excuse. BTW, you’ve done a wonderful job on your BLOG, great description and good pictures: but who’s that funny little thing peeking out from behind those pillows? How cute! What a little poocker doodle.