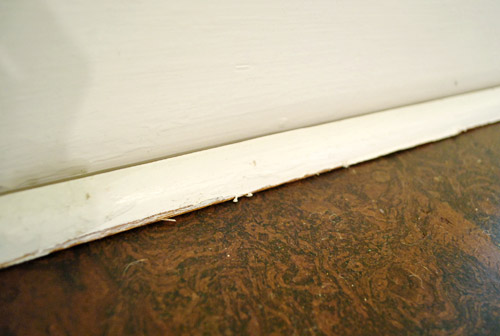
When we last talked floors in the kitchen, they looked pretty much done.
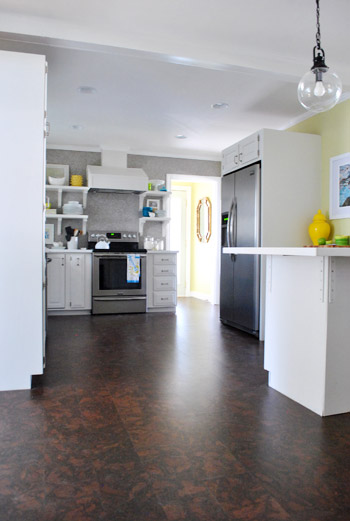
But if you looked closely, they weren’t. They still needed some finishing touches – namely shoe molding to cover the gaps around the edges (which are intentional to allow for temperature expansion and contraction) and some coats of sealant (to keep moisture out of the seams and provide some added durability).
The short version of the “adding shoe molding” step goes something like this: Now you see a gap…
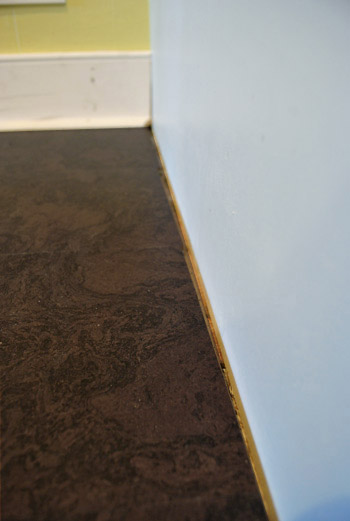
And now you don’t…
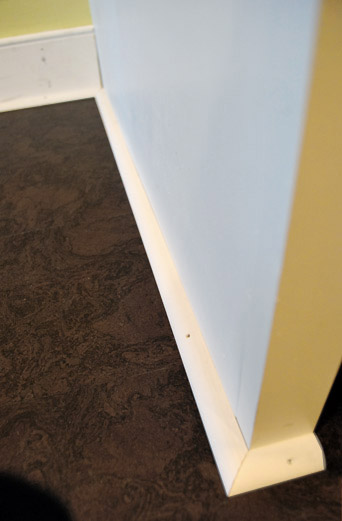
Of course then there’s caulk and paint involved (to cover the nail holes and any seams like where corners meet).
But let’s go with the longer version of the story – which has a few more twists and turns – for folks who like details. The first twist was that we actually ended up ditching our plans to reuse our old shoe molding, despite having saved (and meticulously labeled) all of the old pieces when we removed them a few weeks ago:
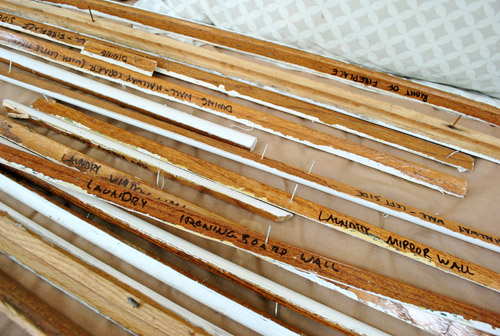
We initially thought that reusing it (after all that meticulous labeling) would make our lives easier. You know, not having to re-cut shoe molding for each span of wall. But when we tried to put some of the old painted pieces in place, they didn’t look so hot. The paint job was a little scrappy looking, and even with touch ups we worried the less than crisp edges wouldn’t look as finished as they could (especially since there’s such a high contrast between the white trim and the dark floor).
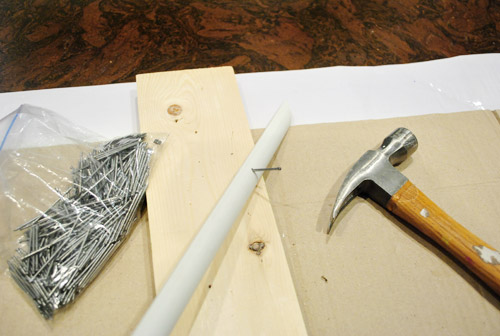
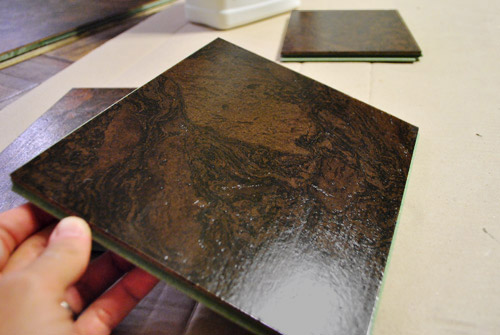
So we opted to install all new shoe molding. We had to buy some new stuff for around the cabinets anyway (like the peninsula, which didn’t have old shoe molding for us to reuse since it was newly added), so it wasn’t a bit deal to pick up a few more pieces of it. We figured it wasn’t worth “finishing” our pretty new floor job with rough looking trim. So in total, it was about $35 worth of shoe molding for a nice clean “like new” (because it is new) look.
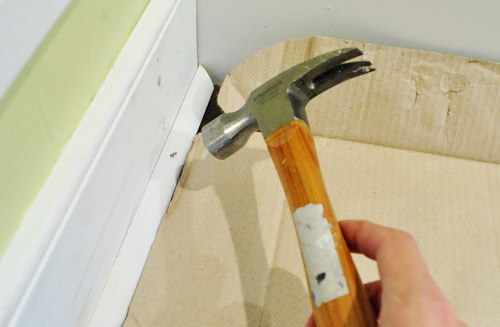
Since we don’t own a pneumatic nail gun, we installed it old skool style (although we’ve talked about getting one – maybe for Christmas this year?). After cutting each piece, we’d pre-hammer our nails against a piece of scrap wood to get them in a ways, which minimized how much hammering we’d have to do against the floors.
Even when it was ready to nail into place, we still put a piece of cardboard under the work area to keep from banging up the floor too much. Oh, and forgive that piece of baseboard for looking a bit beat up. It was new too (the previous piece was too short since we switched the fridge and pantry location) so we hadn’t painted it yet. It came pre-primed but a bit scraped up.
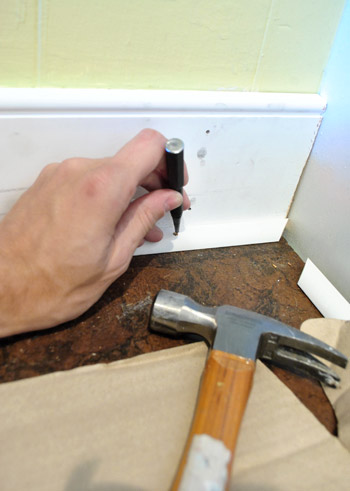
Once the nail was in as far as I could get it with my hammer, I used a manual nail punch to get it in even farther, just beneath the surface. Love that thing. It’s basically just a metal peg with a tiny head that you place right on the nail and bang the end of it to sink the nail in (without leaving big dings in the wood like hammering the nail directly could cause).
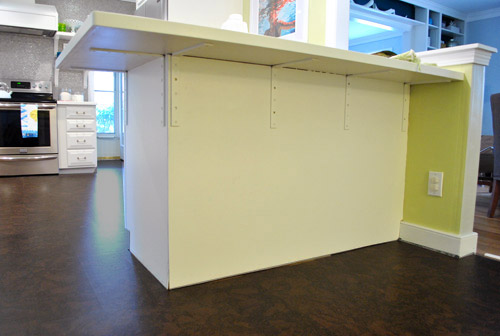
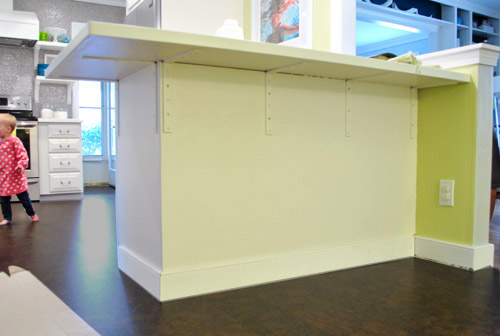
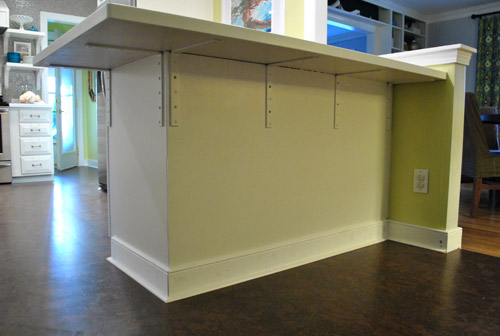
I wouldn’t say there were any “big” transformations as part of this step, but if I had to name one – it would be the area around the peninsula, which was lacking both shoe and baseboard:
Here it is with baseboard, finally. I’d been dying to add it, but we always figured it didn’t make sense to add until the new floor was in.
And here’s what it looked like once we had cut the shoe:
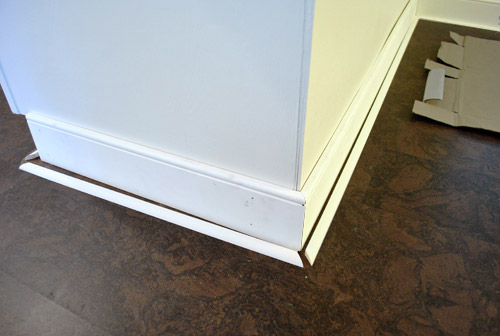
…and now here it is with the shoe all hammered in. It still needs some work (we’d love to add wood molding to hide the metal brackets and add interest to the back of the peninsula someday), but at least it’s looking a bit more finished. When the stools are in there (and you’re looking at it from a normal height instead of squatting in front of it) you actually don’t notice the brackets too much.
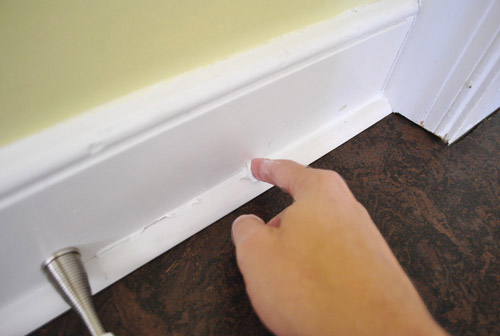
Oh and that picture above is after another important step of the shoe-ing process: Caulk! We always go over all of our seams (including the corners) with a bead of caulk to make everything look more polished. So here’s us gunning a line of it on:
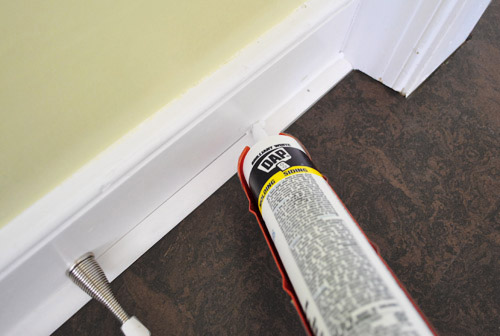
And here I am using my finger to smooth it out. We like to dip our pointer fingers in a cup of warm water to help keep it smooth as we go (and to help keep the caulk from sticking to our hands).
The step after this… well, after the caulk dries… is to paint. We still have to do some of this in a couple of spots, but overall it’s looking much better. But before any “after” pictures, let’s talk about sealing the cork. Even though our cork planks already came pre-sealed, experts recommend sealing them with three additional coats of water based poly after they’re installed to add protection and effectively seal the cracks between the boards (which aren’t sealed even if the tops of each plank come pre-sealed). This also should keep dust and crud from settling into any seams so it’ll hopefully look nice and smooth for the long haul.
We had trouble finding much good info about how this step should go, so we called Lumber Liquidators (where we got our cork) and got to speak with one of their installers. He actually installs and seals the Lisbon Cork that we purchased, so he was able to give us some very clear instructions:
- Hand sand with 100 – 150 grit sandpaper to remove some of the existing finish (“anything higher and you’re just polishing them”).
- Apply a layer of the poly with a 3/8th nap roller
- After that has dried (about four hours according to our poly manufacturer’s label), repeat steps 1 & 2 again… and then a third time.
So yeah, those were his explicit instructions… and we veered off course pretty quickly. But we’re so happy we decided to test things first, because even when experts recommend something, after you painstakingly install something, you want it to look awesome. Not scratched or purple. Yikes.
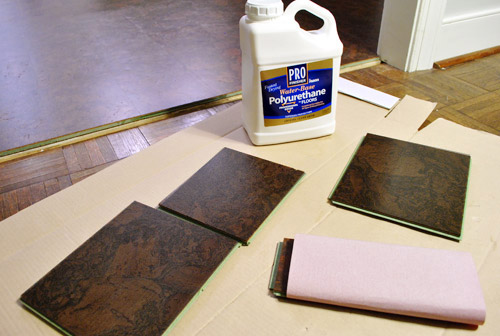
When it comes to what we used, we got some PRO Water-Based Polyurethane from Home Depot since it came highly recommended. We were so glad we didn’t have to use oil-based stuff since when we refinished our first house’s floors it stunk for months- especially on a hot day. Thankfully this stuff has no odor after the four hour drying period. So hooray for water-based stuff.
But our deviations off course began after we picked up the recommended poly. It all started at the sanding step. The sound of that very step made us nervous. Sand our pretty new floors?!? So we did some tests on scrap pieces first. On the first piece we sanded just as instructed with the exact grit he recommended. We even watched the guy demonstrate his hand-sanding technique and replicated it exactly, but it left some very obvious (and ugly) swirly scratches on it. And even after applying a layer of poly it didn’t disguise them. Bummers.
So we thought that maybe sanding in a straight motion might be less terrible looking. Nope… just a different brand of scraped-up-yuck (in person it’s really clear that the surface is scratched, although in this pic it looks sort of like wood grain). Not good.
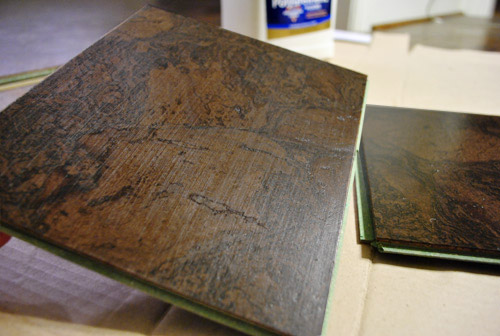
Since sanding seemed to only make things worse, we gave it a go without any initial sanding. We feared it might bead up or slide right off or something without roughing up the surface first. But nope, it worked just fine – and even made the color of the cork really pop. And that, my friends, is how we decided to skip the sanding step. Thank goodness for testing (if we had sanded a corner of the room instead of a test plank, we’d probably be pretty ticked off).
Having opted out of sanding, we went straight to applying it with a 3/8th nap roller, as per the second instruction. Enter “Yikes” moment number 2. This purple party certainly didn’t look right:
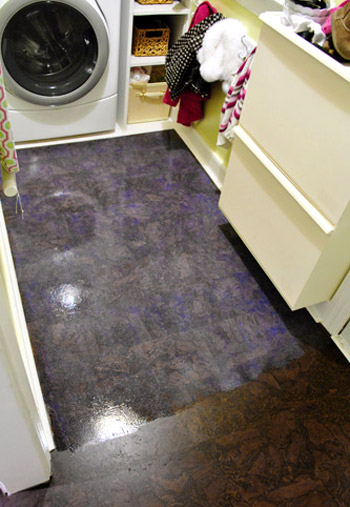
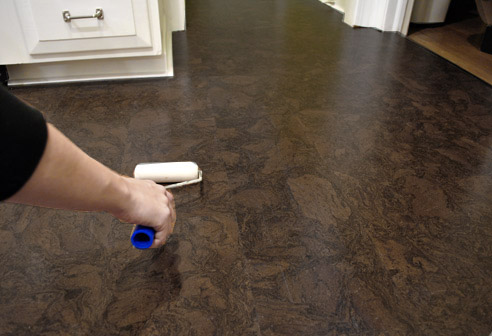
So in a total and complete panic (yes, there might have been some cursing) we quickly wiped up the thick-ish layer of poly that the 3/8th nap roller left with paper towels. It just didn’t feel right. The part of us that lives by the “thin and even coats” mantra (which is how we always apply water-based poly to seal things like wood furniture) decided that we needed to revise this instruction, pronto. So we broke out the least nappy rollers that we had: ultra smooth small foam rollers (the same thing that we use to poly furniture when we stain or paint it).
Worked like a charm. No more glowing purpley-blue haze, just nice thin and even coats to protect things and seal our floors for the long haul. Because just like when you seal furniture, the rule is that thin and even coats adhere better and last longer (anything too thick can crack or peel right off). So it actually makes sense that this works on floors too – all without the purple haze. Whew.
Our revised technique seems to have worked just fine. We can’t even begin to guess why the installer’s detailed tips didn’t work on our sample planks (perhaps he installs lighter cork more often since it’s more common, so maybe the scratches or purple haze aren’t as apparent on that color?).
Thankfully, after three coats (one applied on Friday night right before we went to bed – so we wouldn’t have to avoid the kitchen all day – followed by one on Saturday night and one on Sunday night) it didn’t discolor and it seems to be sealed. Not that we tested it out by dumping water on it or anything. But we have had some small spills that were really easy to wipe up (one even involved boiling water that a friend was using to sanitize her bottles). And it seems to standing up to Clara just fine so far, dump trucks and all:
So now here are some “after”-ish pictures of the floors all trimmed out and sealed, with Clara doing some quality control exercises.
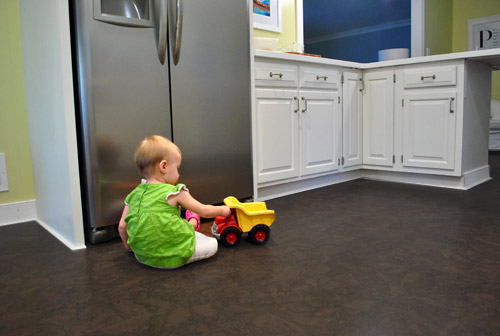
We even dropped a plate (which miraculously didn’t break thanks to the soft cork that cushioned the blow) and there was nary a ding or a dent. And Burger’s nails don’t make any marks either (we heard from someone on this post who has cork floors and a 70lb dog and still doesn’t have any nail scratches, which is pretty cool since we weren’t sure how a larger dog would work with cork).

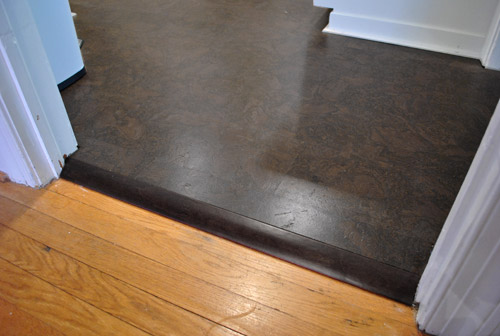
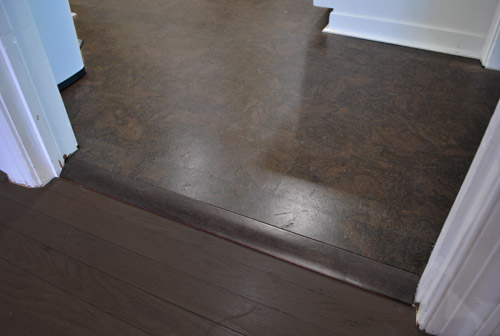
Oh and there was one other thing that are required to “finish” the floors: transitions. We have four doorways in this room, and each needed its own “reducer” – which is a piece designed to join two rooms where one floor is slightly higher than the other. Ours is only about a half-inch higher in the kitchen (due to the asbestos liner under our original vinyl tile, which meant that we couldn’t tear it up and would have to float the cork over it). The guy at Lumber Liquidators suggested getting oak transitions since cork, being a slightly softer wood, could get more beat up on an edge like this where things can catch. LL sold transitions for about $45 a pop, but I found similar options at Home Depot for $29. So after measuring, cutting, and nailing them in – our floors were officially transitioned. Okay, well, I’m actually waiting for two longer length reducers to come in on special order at Home Depot (they only carry 47″ lengths for $17 in the store), so our floors are officially mostly transitioned, to the tune of $140 total (including the special order pieces).
And once we get around to having our other floors stained darker, we might have something that looks more like this (the cork and hardwoods will never look identical, but the same rich mocha tone will unify and help with flow, so our rooms don’t feel as chopped up and disjointed). Ahh, if only getting floors refinished were as easy as Photoshop…
So we’ll call that a wrap on the kitchen floor. And since it was the last big project in the kitchen, we’re thinking we owe you guys some real after pictures and a full-on budget and time breakdown for the entire project. How does that sound? We have some photos to take and some receipts to tally up, so let’s say Wednesday. Same time, same place. In the meantime, what did you guys do this weekend? Any shoe molding installation or sealing going on?

Margaret says
My husband and I moved 2 cubic yards of topsoil and many more cubic feet of peat moss, compost, and vermiculite to build our very first raised beds. Turns out 2 cubic yards of topsoil weighs 2 TONS and we did not have a wheelbarrow, so we hauled it one five gallon bucket at a time. I just kept telling myself that hauling dirt is cheaper than a gym subscription.
We finished one bed: http://imgur.com/bFEGj which I have since planted with salad greens and sugar snap peas.
YoungHouseLove says
Oh man, that sounds like so much work! Looks awesome!
xo,
s
Thad says
Spent yesterday installing laminate in our hallway upstairs to (nearly) finish the floors … just have one small closet to go before I am finished.
Cheers!
YoungHouseLove says
Wahoo! Go Thad! Good luck with the rest.
xo,
s
Michelle says
The floors, as well as your entire home, looks FABULOUS! No surprise there :) My husband and I are closing on a home next month. We would like dark laminate “wood” floors. We find they stand up pretty well against our crazy dogs and baby. I am concerned I will be sweeping the entire house 10x’s a day. As one of our dogs, Harper, is 75lbs of thick white fur… Suggestions? Scarp the dark floors :/ I really love how it looks.. Also, I wanted a matte dark floor but husband is loving more of a glossy dark floor. Which in your opinion appears more realistic?? Thanks a million! Love your site!
YoungHouseLove says
Hmm, I would think that if you really love how dark floors look you should go for it! Maybe just brush your dog outside once a day to keep his coat thinner? As for glossy vs. matte, I think matte might hide a bit more but I’m not sure. Maybe bring home samples and see!
xo,
s
Jillian@TheHumbleGourmet says
They look great!
Karina says
This looks amazing!!! I have following you just a bit before you started the kitchen. I wish I had found your blog before I did my kitchen….I have learn so much from you guys…. Thank you!!!
Netty says
Oh my goodness! You two and the lack of nail gun! Cracks me up every time! I feel so bad because installing molding must take so long! We ripped out all the lead painted molding in our entire house and replaced it all….nails guns ROCK!!!! If you do decide to get one you won’t be disappointed! We have a Bostich…works great. Pick up a 10% off coupon for Lowes from the post office moving packet. :) The kitchen is AMAZING!!!! Great work you two! :)
YoungHouseLove says
Thanks Netty! So many folks have shared links to inexpensive ones so I think we’ll have to take the plunge!
xo,
s
Lori says
Oh boy, we did not seal our cork floors. So obvious now that I see it in writing. Another project to add to our list. Thanks for the thorough how to on applying poxy. Glad to have that figured out for us!
YoungHouseLove says
Good luck Lori!
xo,
s
Louise says
Guys, Love what you’ve been doing, esp. your kitchen. Question: I just put floating cork in my basement and didn’t poly coat it…it’s a pretty dull finish and seems to show every grain of dirt and minor scrape. So I’m wondering if the manufacturer didn’t bother to tell me that I needed a poly coat to protect it.
When I saw that you guys did a coat I wondered how you determined that you needed to do so since it looked good before this step. My finish is really dark – think espresso – so having a sheen of some sort to deflect some of the dirt is a good idea. Any advice you can offer is most appreciated.
cheers to your hard work & congrats on finishing! -Louise
YoungHouseLove says
Oh yes, we have heard from lots of people who have had cork for 20, 40, and even 100 years in older homes and their tip was always to poly it to give it more durability and seal the cracks. Our manufacturer didn’t tell us to do it either, but every contractor and installer that we talked to said it was the best way to keep it looking good! So I would definitely go for it! Hope it helps.
xo,
s
Amy says
Hi — we just installed cork floors in our kitchen remodel, as well, and I have a question for you: how did you know that you should seal the floor? Our floor person told us we don’t need to seal, but now I’m wondering. Our dog has already left some (not very noticeable) nail marks in the floor — do you think sealing would prevent more of that?
Thanks!
YoungHouseLove says
We just did some research and learned that most of the folks that we knew who had cork for 20, 40, or even 100 years have sealed it regularly. We also asked the installers at the place where we bought it and they said “oh yes, it’ll make it much more durable!” We also read that no matter if your cork is presealed, by sealing it after it’s installed you’re sealing all the cracks between the boards, which can’t be sealed before you install it since they don’t exist, so that helps keep them looking better over time! Hope it helps.
xo,
s
Lauren says
I showed this to my husband and I’m trying to convince him to let me do a wall of penny tile and open shelving! Love it!
Can you tell me what type of paint you use on your baseboards? Our home’s previous owners painted ours with flat paint and they look horrible and are impossible to keep clean! Thanks!
YoungHouseLove says
Oh no- just say no to flat paint for trim! Semi-gloss or even high-gloss is the way to go!
xo,
s
Beth says
Great floors! I wish you could have posted this about, oh, 6 months ago when we were re-doing our own kitchen and installing cork floors, would have been very helpful :) Oh well though, we go through it. We installed a lighter floor from Lumber Liquidators as well that has kind of a brick/cobblestone patter. I ended up sealing ours using a wool pad and I ended up with a few spots (around corners mostly) where the poly kind of pooled up a bit (because turns out it is harder than expected to apply evenly) but it is not too noticeable. You mentioned the dog possibility of dog scratches…I will say that we have a 75lb spunky lab and if you look closely you can see some indentations but the natural variation of the cork hides them well, and all of the dropped glass items that have not broken and softness under feet make it all worth it. And I love the penny tile! Might be my next project…. :)
Jessica says
I love the moulding you picked – I’ve been looking for exactly the same pattern but can’t find it anywhere! At home depot they carry it in maple, but we just need pine, mdf – or pre-primed. Where did you find it?
YoungHouseLove says
That came from Home Depot. We got it pre-primed. Hope it helps!
xo,
s
Nikkidd says
hey guys! We are just getting to the sealing stage (TONIGHT!) for our own dark cork floors and want to make sure that you did, indeed, not sand or buff at all between coats of the finisher?
We’re thinking we’re going to follow your instructions, but just want to make sure we’re not missing any steps!
YoungHouseLove says
Nope, we didn’t do that just because it looked like it was going on smoothly (no bumps) and we did it super super thinly. Hope it helps!
xo,
s
Mimi says
Hi guys, so I know this post is super old and don’t even know if you reply to comments on it anymore but how do you think the cork at the door will hold up with so much traffic and wet snowy shoes over time? Thinking about putting cork throughout my condo except the bathrooms and the entry is connected to the laundry room like yours.
Thanks!
YoungHouseLove says
I think it’s not good for super wet environments but if you have people step onto a welcome mat and remove their shoes and put them into a boot tray or something you’ll probably be ok. Oh and seal it for sure after it’s down! That helps water from getting into the seams and messing things up!
xo,
s
Ashley says
I know it’s only been a few months- but how is the cork floor holding up? My husband and I are trying to decide on home floors and I’m between cork, wood, or wood-look tile. Just wondering about the durability of the cork. Thanks!
YoungHouseLove says
So far we have loved the cork! It’s softer underfoot than hardwood, so we love that (of course if you drop a hammer on it you might get a small ding, but it’s textured so it blends in for the most part – and that’s probably true with wood floors too). Hope it helps!
xo
s
Layne says
Hi guys, we are working on rehabbing our out dated kitchen & are in love with the cork floor you put in yours. My question, though, is about pets & cork floors-particularly pet accidents. Our pup is a bit larger than Burger. He’s a Great Dane. ;) And he’s a rather old guy who, at times, doesn’t make it outside before nature calls. His kitchen accidents are rather infrequent, but they have happened in the past. My question is, has Burger ever had an “oops” in your kitchen & if so, how has the floor held up to that. I am sure that sealing it is a definite must for us!
Thanks! :)
YoungHouseLove says
So sorry, we haven’t had any accidents in there so we’re not sure how it would hold up. We know it says it shouldn’t get wet very much (wouldn’t be a good choice for a bathroom unless it’s a half bath) so maybe try something else? Of course it might be ok, I’m just not sure since we haven’t had any wetness sitting on the floor in there for a while to let you know how it fares. Hope it helps!
xo
s
Erin says
As always you guys are my go to reference in my own personal home improvement endeavors. :-) Just wondering how you went about painting the shoe molding if you painted it after installing it? I worry about getting paint on the wood floors. Might it be easier to paint before installing it? I was looking to see if you did a blog entry on this very topic, and did not see one. Thanks!
YoungHouseLove says
In our house some of the shoe molding isn’t painted (it’s all natural wood to go with the flooring) but in this room it was already painted white when we removed it to add the floor so we just nailed it back into place and did touch ups with a small brush :)
xo
s
Steve says
Thanks so much for the ‘skip the sanding’ tip! All the DIY instructions include sanding but I preferred not to, and keep some of the odd imperfections. So thanks and good luck with your house!
Steve
jim sadler says
This floor looks fantastic. It could not be nicer. But I am against it as I don’t like any floor that can’t take a flood easily. Too many hurricanes and too much chance of the creek rising or even a hot water heater bursting and a major repair and large expense will occur. I wonder why insurance companies will even consider homes with flooring so easily destroyed.
Chris C says
Hiya…your posts about the cork flooring have been a great resource! I’m planning to rip up the old carpet in my new place to replace with cork, so hopefully it will go smoothly! About the sealing, did you just use a paint tray with the foam roller? How saturated should the roller be, and did you just use regular painting technique? I would assume not to go over the same area too many times…
YoungHouseLove says
Yes, just a paint tray with a regular roller and try to move fast and not go over stuff too much or revisit any areas when it’s starting to dry. Good luck!
xo
s
Michelle says
Thanks for the tips about the poly. EXACTLY the advice I was looking for!!!
YoungHouseLove says
Good luck!
xo
s
Heather says
I know I’m a little late to the party, but my husband and I are researching cork floors. I was just wondering if furniture or heavy appliances left marks or dents in the flooring?
Thanks!
Heather
YoungHouseLove says
Ours didn’t seem to (no issues with stools or the stove) but I think different cork has different densities and stuff.
xo
s
Ashley says
Are you considering putting cork into the new house eventually, why or why not?
YoungHouseLove says
That’s a good question! We really liked the cork floors in our second house, although for this house we’re enamored with the idea of doing a heated tile floor that runs all the way from the foyer and half bathroom into the kitchen to unify all of those spaces (the heated feature sounds so cozy and really functional for the entryway since cork isn’t great around water/wet shoes/etc). Maybe we could work cork into the TV/media room down the line (when we finish the unfinished storage room upstairs – that’ll need flooring). We’ll just have to see where we end up…
xo
s
Jess says
We’re about to use the same floor polyurethane that you did! Question for ya: it will be on the floor in our basement. That occasionally, during the worst of rainstorms, floods. Now, we shop vac up any water as fast as we can, but would the poly stand up to that? Or would it become soupy? Is that a thing poly does? Can you tell I’ve never done any flooring before? For reference, we’re going to do a paper bag floor on cement basement floors (with about 10 coats of poly). What do you think?
YoungHouseLove says
I think as long as it’s oil-based poly it should hold up to wetness for the most part (definitely do a ton of coats like you describe). Maybe ask at the paint counter to make sure they agree?
xo
s