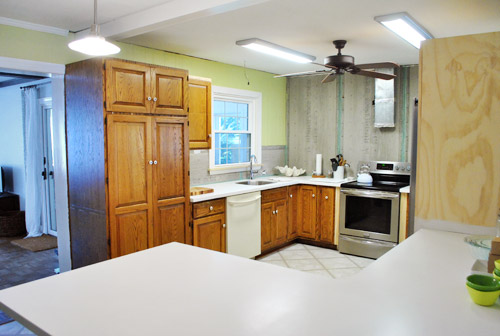
We’ve long disclaimered pictures of our kitchen with “oh, and we still need to add crown molding.” But that stops today! The unfinished edge where the wall/tile meets the ceiling…
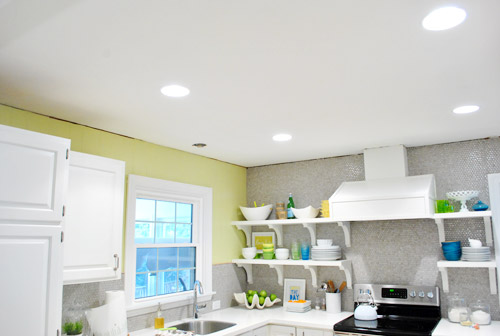
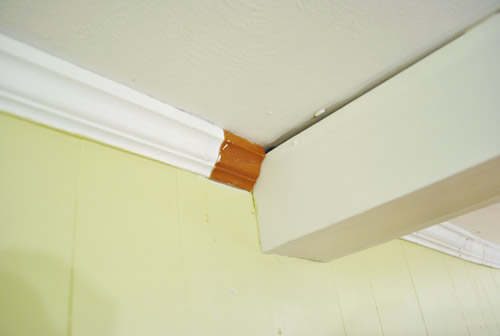
… is no more!
Let’s get a little closer…
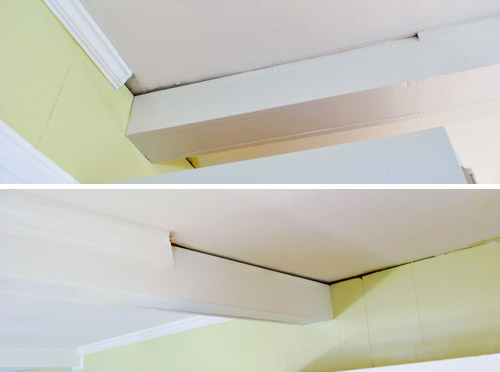
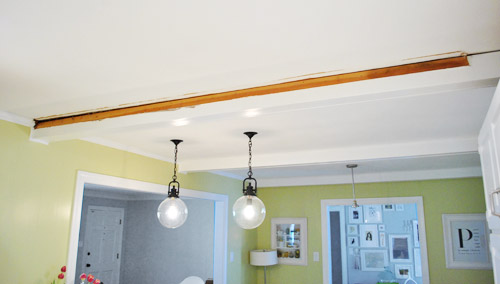
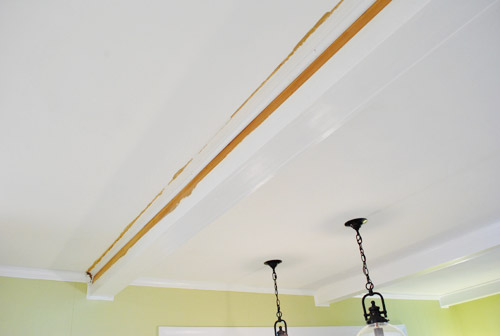
Wait, let’s rewind so I can attempt to tell you how we got there. For all of those who have been wondering about that dark line above our pantry (a few folks asked if the beam was sagging or if there was a hole) – it’s just another spot where we’ve been missing crown molding. Since there had originally been cabinets to the ceiling along that entire side of the kitchen (including one that wrapped around that beam), we’ve been stuck with a few crownless areas since we took those cabinets down in November. So they look dark and crag-y without trim to lend that finished look.
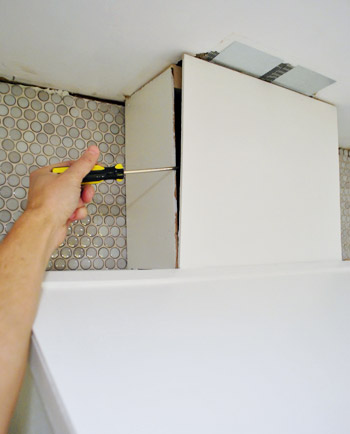
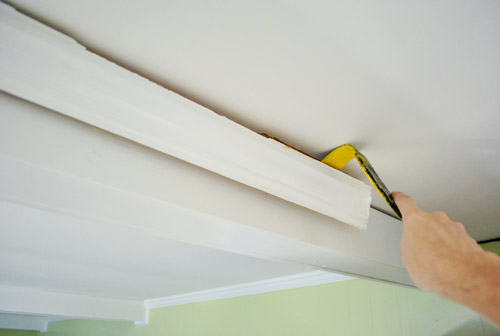
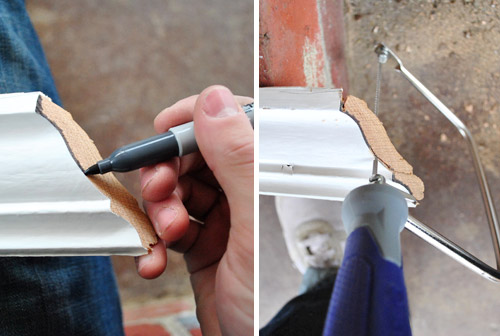
But before we could start installing crown molding, we had to make a quick fix to our hood. In a rush I had used some regular duct tape to seal up the vents on my hood. Hey, it’s called duct tape, it has to work in ducts, right? Wrong! A few smart commenters expanded my tape knowledge on my hanging post (and kept me from having some ventilation issues down the road) by reminding me that I needed to use the real metal foil tape stuff instead. So I took a moment to pry off a few pieces from my wood cover…
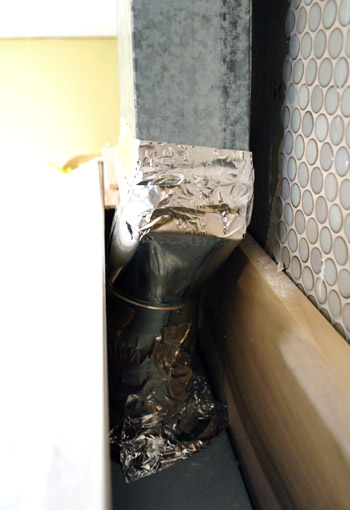
…and shimmied my hand in there enough to remove the bad duct tape and rewrap everything in the legit foil stuff.
But enough about tape. Let’s talk crown molding. This will be a bit hard to explain (and the fact that I took less-than-stellar pictures of this process won’t help me), so bear with me:
Our kitchen has three types of crown for some weird reason. There’s traditional crown around the perimeter of the room – except that it’s very very slightly smaller on the fireplace half of the room (nothing you’d ever notice with the naked eye unless you were literally holding them up next to each other, but thanks to the beams they never touch so we didn’t even detect this phenomenon until we tried to fill in a few crown-less areas and learned it was slightly different). Meanwhile, the beams just have a thin cove molding on them except for one side of one that randomly has thick crown running across it – so strange!
So our challenge was that we had to replace small bits of all three and remove the way-too-thick trim on that one mismatched beam. Because redoing the entire room from scratch would actually have been a big project and a pretty pricy undertaking since all the beams that would have to be trimmed out on each side would add up to the equivalent of about four rooms’ worth of trim.
Further complicating things – none of the molding seemed to be the standard stuff you can buy at Home Depot, so we couldn’t just fill in the gaps with fresh pieces from the store. The only thing saving me from having to re-crown the entire room? I had carefully saved every single piece of crown that we took down with the cabinets.
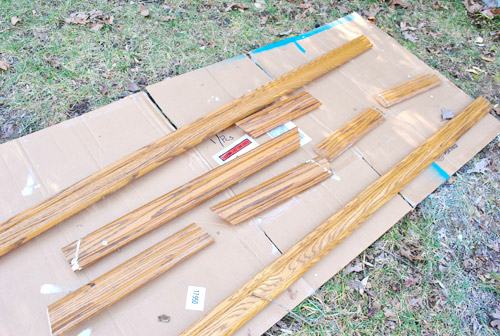
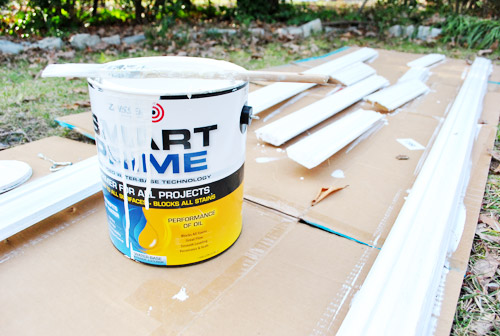
Of course it needed some primer and paint to keep flashbacks of our old woodsy kitchen at bay (we like Zinsser Smart Prime when it comes to painting wood trim since it can bleed through and ruin your paint-job if you don’t use a stain-blocking primer first). Then we followed that with a few coats of off-the-shelf white from Behr (the one with paint + primer in it, so it gave us great coverage with stain-blocking primer underneath it). Why did we use that paint? It was what we used for the rest of the trim in the kitchen back when we painted the paneling. It’s a really nice crisp white color that layers in nicely with our white Corian couners.
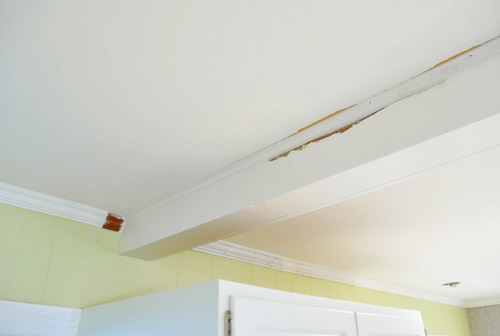
Now for the bad news: I was short a few pieces. Wop wop. My leftovers of this large sized crown weren’t enough to fill the gaps around that side of the room. Then I had a flash of brilliance (or used ordinary common sense that any human being would possess) and realized that the odd mismatched beam with the thick trim on one side was the right size for the job. So I could steal it from there and replace it with store-bought smaller trim (which exactly matched the stuff on the other beams- or was at least really close). Then the whole room would have trim that actually appears to make sense and I wouldn’t be short on trim to finish the job. Talk about lucky breaks. That weird mis-matched beam actually saved us from having to re-crown the entire kitchen.
So the good news was that I had another big, long piece of crown to use to fill in all the spots that needed filling in. And the bad news was that the kitchen was actually looking a lot uglier at this point:
Now this is where my photos start to get terrible. I don’t know where my head was (actually I do – I was in a post-book photo shoot fog). So forgive me that this isn’t really a “how to install crown molding” post and more of “here are fleeting snippets of how we did it and some pics of the finished product.” Maybe next time I’ll be a better documentarian (we’ve always wanted to put crown in Clara’s room along with the other two bedrooms on that side of the house, so we promise to take better photos and actually share a step by step rundown when we do). And in the meantime, here are links to some of the tutorials that I learned from (since this was my first time and all). I read the ones here, here, here and here.
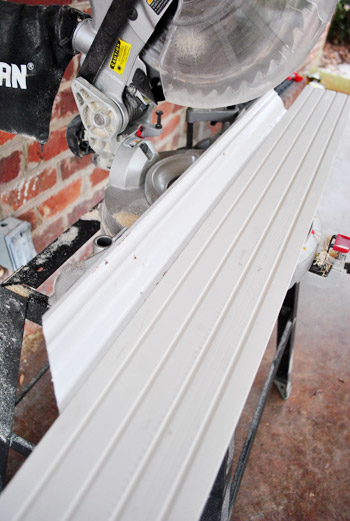
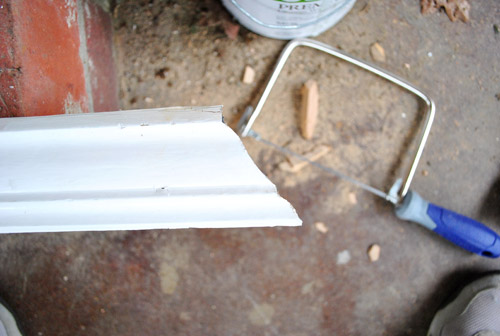
Cutting was interesting, to say the least. You have to cut crown at the same angle that it will sit against the ceiling – i.e. not laying flat. One of the tutorials suggested temporarily gluing a piece of guide wood to your saw table to help hold the piece of molding at the angle. I took a picture of myself starting to try this, but it never really worked for me (I didn’t want to use heavy duty glue and ruin my saw, and the lighter duty stuff I had wouldn’t cure thanks to the cold temps).
And even once I figured out how to make those cuts (just by holding things by hand), I still wasn’t done cutting. I still had to use a coping saw to get rid of some extra overhang that would prevent my corners from sitting flush. See that going on below? All of the tutorials suggested marking the edge with a darker marker to help ensure that I was cutting as close to the edge as possible. I guess it helped.
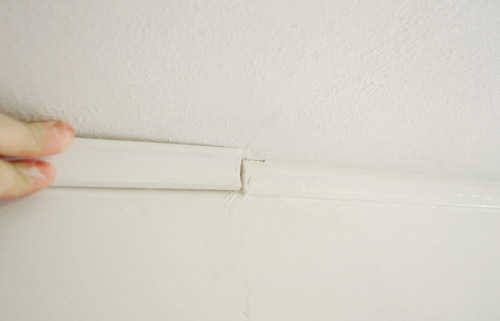
Being my first time, things went okay – but I’ll admit my cuts weren’t perfect. Nor was my ceiling perfectly flat (oh the joys of an older home). But everything was sufficient enough that a little caulk and paint ended up finishing it off really well. Whew. So here are my first few pieces in place (without caulk and paint yet, obviously).


Despite having primed and painted all of the pieces, the general banging around that happened during the cutting / coping / hammering process got them fairly beat up.

No biggie, I knew we’d have to break out the paint anyways for nail holes and more obvious spots (like where we would be replacing the big crown on that one beam with smaller cove molding).
Speaking of cove molding, remember how I was missing just a small section on the other side of that beam? Well, I had hoped the new stuff that I got from the store would match… but I wasn’t so lucky. Turns out our existing stuff wasn’t a standard size. So that one whole of the beam ended up needing to be replaced with something slightly larger. Thankfully since each side of the beam runs into thicker crown around the perimeter (and doesn’t meet other beam trim on the other side) the difference isn’t detectible at all (it’s one of those you-can’t-tell-unless-they’re-next-to-each-other-things). So although it might sound annoying to replace one side of a beam for a small missing piece of not-standard cove trim, it was muuuuch better to replace the side of one beam instead of six sides of beams and ten perimeter pieces between each beam and around the rest of the room. In short: it could have been much much worse.
And I did get lucky when it came to the small section of missing crown on that side (remember how it’s slightly smaller than the rest of the crown in the room?). In a last ditch effort to keep from having to replace all of the crown on this half of the room, I found a single piece of matching molding in a trash bucket in the basement. I was never so happy to see old orange-y trim in my life.
So here are those pieces installed and caulked over. The shot below sort of demonstrates how the thinner trim along the beams meets the thicker trim around the room, so I hope that makes sense now. And yes, this is the only picture that I ended up snagging of the whole caulking and painting process that Sherry and I tackled over the course of a few hours. Basically we just used white paintable Dap caulk and a caulk gun to run some beads wherever we need to fill things in, smoothed them with our finger, waited for it to dry, and painted it to keep it all looking seamless.
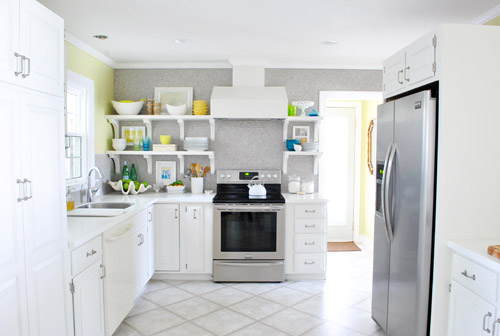
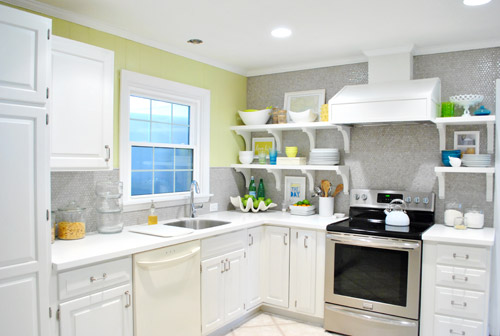
So let’s just fast forward to some afters, shall we?
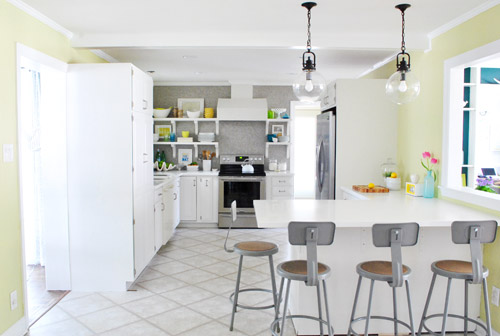
It’s a small change, but it makes a pretty noticeable difference in our opinion. Minus the empty fixture hole in the ceiling above the sink (and mismatched dishwasher) you could almost be tricked into thinking this was a finished room now. Although the real game-changer will definitely be those cork floors – which we’re more anxious than ever to get in there so we can call this kitchen done-zo. Slowly but surely.
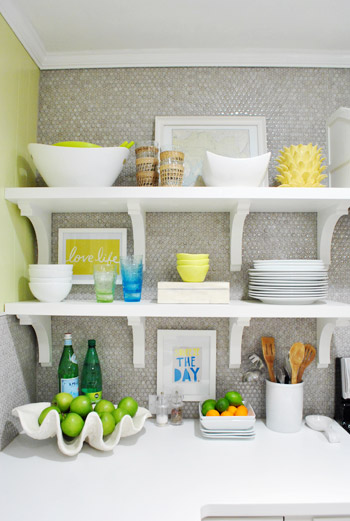
Oh yeah, and since everything came off the shelves when the trim went up, of course it didn’t all go back up in the same way. In other words: Sherry had a grand ol’ time playing around with a few things – like adding two more frames, eliminating some stuff that we realized we weren’t using very often, and just playing around because it’s her idea of a good time). As for a few of the frames that are actually hung, we used 3M removable picture hanging strips (which meant no holes in our tile and an easy-to-remove-whenever-we-want result).
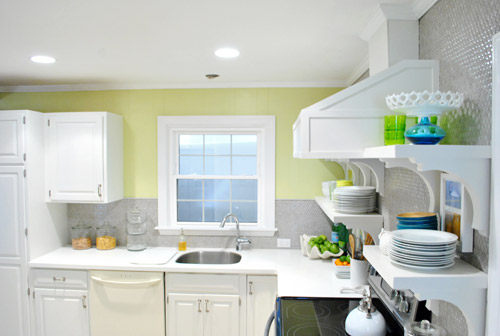
Oh and since some of you requested a photo of the window to see the slice of “breathing room” on each side that finally makes it looked balanced, here it is. Once we have a nice gleaming pendant light hanging down in front of the window it should be pretty darn charming. It’s a nice little airy spot since the wall of shelves is a pretty big focal point, so not filling up every square inch of every other wall feels like the way to go for us. We’re also toying with something on the window (roman shade or blind) so we’ll have to keep you posted.

We’re thankful that it’s a far cry from the crazy off-centered deal that we had going on for a while before the tile and shelves went up to restore the balance:
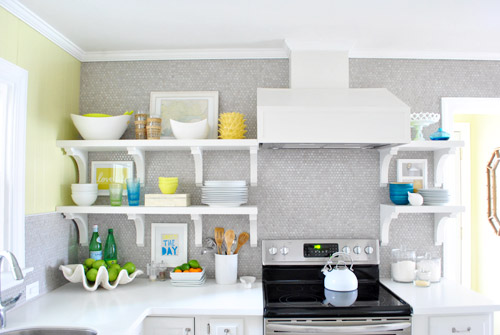
Here’s another shot from a similar angle where you can see more of the crown.
And another:
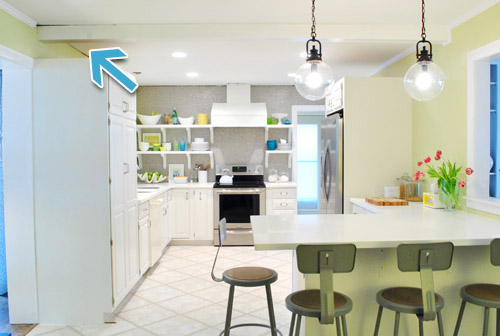
So that’s where we are. Next up: finding/hanging a pendant over the sink, finishing the peninsula with some decorative wood molding, installing the dishwasher, and finally adding those cork floors so we can call this 3.5 month marathon done! Oh yes, and doing something to the side of the pantry and possibly altering the stools is at the very end of the list (not sure how the cork will change things so we don’t want to jump the gun on either of those things).
What did you guys do this weekend? Any trim hunting/cutting/hanging? Or open-shelf tweaking? Or metal-foil-tape using?

Melanie Hoffert says
That crown molding makes the kitchen look 29382938 x’s more amazing.
YoungHouseLove says
Aw thanks Melanie!
xo,
s
Ali says
This!! It totally makes the room. I love how molding does that.
sistersunnie says
Looks wonderful! I have enjoyed this 3.5 month marathon….and watching your kitchen unfold. Better reading than a novel.
YoungHouseLove says
Haha, you’re sweet!
xo,
s
Kristen @ Popcorn on the Stove says
Amazing! The kitchen looks so much better with the molding (almost cleaner looking without those spots up at the ceiling.
Amanda @ Our Humble A{Bowe}d says
The crown really does make such a big difference. The kitchen looks finished. Haha. I thought the same thing about our crown, too: http://ourhumbleabowed.wordpress.com/2012/01/17/cap-and-crown/ Not trim hanging or such for us, but we did make our own stove legs. More about that soon. :)
YoungHouseLove says
Looks great!
xo,
s
The Mrs @ Success Along the Weigh says
It looks wonderful and the perfect finishing touch!
It must’ve been in the air because that’s what we did this weekend too! We had a friend install it in our bedroom and the new office. We have stippled ceilings so there’s a slight gap but I can live with it. Scraping that part down on the ceiling just wasn’t an option. We also got granite countertops installed. The kitchen looks brand new!
YoungHouseLove says
So funny that you were up to it this weekend too! It sounds like your kitchen is amazing! Congrats on all the progress!
xo,
s
Elisa says
Wow, that really does make a huge difference! We finally added hardware to our kitchen! (Which you guys totally inspired us to paint white!) — http://theselflife.com/2012/02/harrrrdware/
YoungHouseLove says
Gorgeous! Amazing job!
xo,
s
smith207 says
Are you planning to finish the exposed panel on the side of the pantry?
Just looking for some ideas for my own kitchen using trim. I don’t want to purchase one of those expensive door fronts/covers for the end cabinet.
YoungHouseLove says
We’re planning to do something fun with it (not sure if we’ll chalkboard it since once we lay the dark cork floors it might be too dark- but maybe magnetic paint or a message board or lighter-than-black chalkboard paint? Not sure yet but we’ll keep you posted!
xo,
s
Maureen @ This (Kinda) Old House says
Looks great! I want crown moulding everywhere in our house!
I had a question. We have painted paneling in our bedroom. In the corners of the room, there is moulding running from floor to ceiling. Did you guys have this in your kitchen? I would like to eventually remove it, but I don’t know how i would even go about covering the seam it is probably hiding.
YoungHouseLove says
Oh yes, we just prime and paint that! We also caulk any holes or cracks around it first, just to make it blend in like a regular drywalled corner would!
xo,
s
Maureen @ This (Kinda) Old House says
Ok, thanks!!!
Suzy Smith @ Suzy Home Made says
It looks GREAT! I love the pops of color mixed with the white.
ellie says
guys, seriously. your kitchen looks amazing. well done! :)
Tressa Meacham says
I am always inspired by your resourcefulness and creativity. Your kitchen before and afters are jaw-dropping. Have the previous owners seen them? I can’t wait for your book to come out!!
YoungHouseLove says
Aw thanks! We think they read along – they’re very sweet about saying how they like seeing the changes to the house without having to break a sweat! Haha.
xo,
s
Rhiana says
A little bit of trim and caulk makes a such a big difference! It looks fantastic! It has been so much fun watching this transformation! I can’t wait to see the floors, light and new dishwasher!
Heather says
This is absolutely gorgeous. I don’t think anything makes a room look more finished and polished than trim & molding. It made all the difference in the world in our living room.
http://www.bakecreatelove.com/2011/12/im-in-love.html
I am so in love with this kitchen and I am waiting on pins and needles to see the floors and the dishwasher replaced.
You guys just constantly wow me.
YoungHouseLove says
So pretty!
xo,
s
Jennifer says
I am just enamored with the gray penny tile and the white display shelves! I love that you sprinkled framed art amongst the kitchen pieces. Do you ever worry about keeping the things on those open shelves clean?
YoungHouseLove says
We have framed art out in the open on all of our walls, so we hope it’s not any different than that! We also use the plates and cups so often so far we haven’t had any issues! I’ll definitely let you know how it goes!
xo,
s
Amy L. says
Looks like you also painted those small pieces between the tile and the drywall, which makes it look instantly like the wall color is supposed to be there. :)
YoungHouseLove says
Oh yes, we finally used some gray paint that we had on hand (Moonshine) which happened to match the grout and now they fit right in!
xo,
s
Stephanie Phillips says
Looks great! The shelves looked a little heavy at first, but the molding seems to have visually lightened them! Love it!
Could you guys add a picture of the left side of your pantry to the to do list? I remember that pantry being a tight squeeze and was wondering how it’s all coming together now.
You’re almost half way through your book month. Hang in there!
YoungHouseLove says
Oh yes, doing something to the side of the pantry and possibly altering the stools is at the very end of the list (not sure how the cork will change things so we don’t want to jump the gun on those things!).
xo,
s
Mel says
I hate to say it but I really don’t think your cooker hood looks right, something about how it is too lined up with the shelves! I think it needs to come down a little lower.
YoungHouseLove says
We just hung it according to the manufacturers recommendation for it to work most efficiently (they offered a range and we went right in the middle). We love how it looks but it’s definitely one of those personal preference things! Some folks love to have them staggered and some folks love when they line up (in our case, lining them up allowed the hood to be hung at the right height according to the manufacturer and allowed me to reach not only the bottom shelf but the top shelf too!
xo
s
Ami says
I thought the same thing that it looked too high. I work for a contractor and asked him and he thought maybe you measured from the top range where the dials are and not from the cooktop; think he said 36in is standard (but don’t quote me on that!) But as its a personal thing, as long as you love it that’s all the matters.
p.s. Cannot WAIT for the book!! Dying over here…
YoungHouseLove says
Ours is at 34″ above the cooktop (not the dials – though good guess on your boss’ part). It may also be the fact that there’s no person in there for reference. It’s just high enough so that I don’t crack my head on it when I lean over to get something off the back burner, so I don’t think I’d survive with it any lower! :)
-John
Brandi @ His Shabby Her Chic says
It looks so good! It’s amazing how small changes can have such a big impact.
PS – I can’t get over how bright your kitchen is now!
Brittany says
Love it! You two are an amazing inspiration, truly! My husband thinks I’m nuts with my DIY attitude but when I show him how awesome it is (and rewarding) to do it yourself and cheaper, he loves it! Thanks for giving me the confidence to keep DIY-ing!
Marie says
What is the name of the green paint you used on the window wall?
YoungHouseLove says
That’s Sesame by Benjamin Moore!
xo,
s
Amy says
Nice job! How about a little crown moulding around the tops of the tall cabinets? They look a wee bit stumpy to me at the moment.
YoungHouseLove says
We actually held some up and didn’t like how it looked! Since there are just a few upper/tall cabinets it felt sort of weird to accent them (it was our plan the whole time but then holding it up made them somehow not fit anymore- so straight and square like the chunky square counters seems to be our favorite choice! We’ll keep you posted if we change our tune of course!
xo,
s
Melissa @ HOUSEography says
Wow. That was definitley worth the effort!! You were soooo lucky to not have to replace all of the crown because that is a ton of work with a lot of angles!
Bonita says
Grey, Gray, Grai,
Very nice craft(wo)manship, but how about painting those boring shop stools and adding a bit more color to this grey/stainless steel room?
YoungHouseLove says
Absolutely possible! We’re just waiting for the rich brown cork floors to go in (they’ll definitely change the room!) and then we’ll make the call!
xo,
s
heather s. says
Isn’t it amazing how trim finishes a room?!? It looks like you needed to add trim around the bottom of that beam to match the rest of the beams in the kitchen but you didn’t – any reason why not?
YoungHouseLove says
Oh yes, that little piece of shoe molding along the bottom 5″ of the beam still has to go up in that one spot! We didn’t have any that matched on hand but it’s thankfully a very standard size so the next time we’re at Home Depot we’ll grab it and add it! Thankfully it’s an easy retroactive little thing!
xo,
s
Allyn says
It’s crazy what a difference a little piece of wood can make.
And I seriously LOVE how the tiles gleam softly in your pictures. I think I’d spend a whole day in there just seeing how the light changes on them.
YoungHouseLove says
Aw thanks Allyn! Come on over!
xo,
s
Jess @ Little House. Big Heart. says
I haven’t been able to read lately and holy cow! You guys have made some serious progress since the last time I was here!
The kitchen is looking gorgeous! I’m seriously falling for the pendants over your peninsula!
YoungHouseLove says
Aw thanks Jess! We love those guys! We got them for over 50% off at a local lighting outlet!
xo,
s
Ainhoa@ALittleBite says
Crown molding really makes the room! I’m sure I’ll say the same thing about the dark cork floors though. I love white kitchens with dark floors.
Kristen says
The crown looks beautiful!! It really does finish things off a bit more. I’m dying for the floor install!!
Kate says
Have you guys thought about adding a few small maybe rounded floating shelves to the left of your sink on that smaller single cabinet? For some reason I thought that was part of your original plan (and apologies if it’s been mentioned and I missed it) I think it would be adorable – could toss daily bowls and such after drying them at the sink. Who knows!
YoungHouseLove says
We just wanted some breathing room on both sides for now (it’s the same amount of space on each side, so adding small shelves to one side and not the other might make the window look lopsided). You never know where we’ll end up down the line though! Although when we add a pendant light and a window treatment it might be nice to have a sliver of wall on each side to keep it from feeling too crowded since the wall of shelves and tile is really the focal point!
xo,
s
Alyssa says
Metal foil tape using here!! Well not me exactly…the hubs, he started running duct work in our basement for our big basement finish project aka Project: Make Room for Baby as I’m calling it:) he had a hard time with it at forest, but only one more vent to add and he’s done with that part, I’m Sooooo proud of him as this is the first he’s done most of these things and he’s is doing great! :)
YoungHouseLove says
Go hubby, go!
xo,
s
Julia @ Chris loves Julia says
This looks awesome! We have such tall, vaulted ceilings in our split-level, I don’t think crown molding would work in our house. Boo-hooo. But the bedrooms! For sure. It really makes things look so finished and gorg.
Shana says
It looks great, can’t wait to see it with the floors :) I think the finished producted is going to get pinned 100’s of times!!
Lori says
The finishing touches really do make a big difference! You’re almost at the finish line and it’s looking better and better. The floors are going to be a huge game-changer. Can’t wait!! :-)
Karen says
Looks gorgeous!
How did you finish up the edges of the penny tile along the window wall?
Looking at the finished shelves and all the pops of color… I’m wondering how the stools would look painted turquoise.
YoungHouseLove says
Those were small pieces of wood that we used as “caps” – we mentioned them a while back. We just finally painted them gray to match the grout with paint we had around from the dining room and living room (Moonshine by Benjamin Moore).
xo,
s
Knitandmake says
Looking great the moulding just finishes it all off, love how you have arranged the things on the shelves :)
Lesley L says
Wow! The kitchen looks awesome! Excellent job! You guys inspired me to paint my bathroom cabinets white. They were the same color as your original kitchen cabinets. I got Paint + Primer from Home Depot. The salesperson said that would be cheaper. But I am now on the 5th coat. I am thinking I should have just purchased primer separately. Do you guys ever use paint + Primer? Looking forward to your book. Oh, PS. My husband and I just rented Season 1 of Dexter from the library. We are hooked.
YoungHouseLove says
We usually hear from cabinet painting pros that the separate primer + paint usually works best, but hopefully you’re close to the end! Five or six coats should hopefully completely cover yours when you use paint + primer. Good luck!
xo,
s
Danielle says
WOW. . . you guys keep saying the cork floors are going to be a game changer, but this crown moulding totally polishes the kitchen off—amazing!
P.S. Reading your new posts always motivates me to get stuff done at my house. I have a 6 week old daughter, but when I see everything you have managed to do with Clara around (even when she was teeny), I figure there’s no reason I can’t do it all too. . . hahah (If only I could find time to also finish my Uni reading and assignments every week—life with a newborn and distance education, yikes!)
YoungHouseLove says
Aw thanks Danielle! You can do it!
xo,
s
Marie says
Wait a sec–install the dishwasher? Are you guys blogging, doing book craziness, taking care of a toddler, and hand-washing dishes??
If it were me, that last little thing would be the one that left me crying in a heap in the corner. Or with a counterful of dirty dishes. Or eating from paper plates for a month. :)
YoungHouseLove says
Haha, we actually have the old non-matching off-white dishwasher still installed, so that works and we use it all the time. Thank goodness!
xo,
s
Jen @ The Decor Scene says
Crown molding really finishes off a room. Love it! I couldn’t live without my paintable caulk. We will hopefully be caulking some trim this weekend to finsih off our Laundry Room project. Fingers crossed that we can get to it and then of course paint the trim. It is a very rewarding feeling in the end. ;)
Nicole L says
Did you guys end up hanging those pictures on the wall? The bottom one looks like it’s no longer resting on the counter and I know you guys change things around too much to drill holes in the tile. What did you end up hanging them with?
YoungHouseLove says
Oh yes- we used 3M removable picture hanging strips! Love them since they won’t hurt the tile!
xo,
s
Heather W says
I spent the weekend watching Season 4 of Dexter. I was so sad about the ending!!!! Waiting to get Season 5 from the Library soon. I have got to caught up so I can actually do some work around my own home!
YoungHouseLove says
Oh yes, that one’s a doozy!
xo,
s
Nancy Powell says
Beautiful…love these transformations, and look forward to each episode of your progress!!! Wow, crown moulding makes such a difference..it’s all in the details!
Love your penny tiles!!!!
Nancy
http://www.powellbrower.com/2012/02/last-chance-for-our-giveaway.html
Tamara says
I cannot wait to see those cork floors in, everything is coming together so beautifully!
erika m says
What a difference…you guys amaze me with how you “get ‘er done”!
erika m says
I wanted to add…I think its so cute/funny how your kitchen matches your blog colors
YoungHouseLove says
Haha- isn’t that weird?! Subliminal messages.
xo,
s
emansfield says
Ooooh! Kitchen window treatment suggestion: plantation shutters. I’m in the process of measuring for 2 bathrooms. Check out http://www.theshutterstore.com for info!
YoungHouseLove says
Always a possibility!
xo,
s
jennifer says
This looks amazing….I still can’t get over it. I LOVE it, not that I expected anything different from you guys! Stilllll sooooo totallllly jealous you could do it all DIY!! You guys have the patience of saints!
Excellent work!
Bethany says
wow guys – looking GOOD!!!!!!!!!
Bethany
http://www.powellbrower.com/2012/02/last-chance-for-our-giveaway.html
Ashley says
Well, I spent my weekend house hunting, in hopes that I can have a place to do all the things you guys have inspired me to do! No luck yet, though. :-( How long did your first house hunt take? Ours seems like it might never end…
But, even if we get a place, I doubt my kitchen will ever look that much like a kitchen in a showroom. Nice work, guys! :-)
YoungHouseLove says
Aw Ashley, I bet you’ll find the perfect house! You’re just seeing bad ones so that when you see THE ONE it’ll scream your name! We looked at a lot of duds and then found the one we love when it came to this house (our first house was a whirlwind and we found it in one weekend, but the second one took a much longer time). In the end, all that searching will be worth it though! Good luck!
xo,
s
Lyndsay @ Mr and Mrs says
our first house took only a weekend and then our second one took over 5 months! Don’t give up hope…i got SO discouraged and then, just like Sherry says, the right one will slap you right back to happiness :)
Ashley says
You know, we house hunted for over 3 months, saw probably 100 houses…and I found it about 3 hours after you guys said that! Thank you for the encouragement; I was scheduled to see a bunch of houses later that day, and I wasn’t looking forward to it at all, but you guys made me a little more optimistic, and there it was!
Hopefully, I’ll have some fun before and afters to send you guys soon! :-D
John@Our Home From Scratch says
It’s crazy what a difference that little molding makes. Painting them before they go up is a huge time/mess saver too.
maia says
i’m so happy for you and your new kitchen (now you can eat your cheerios in peace!)
by the way, where did you get that glass stacking thinggy to the left of your sink?
we have a 6 month old and running out of space for all the little doohickies and whatsits that accompany our little nugget!
YoungHouseLove says
That was from HomeGoods about a month ago!
xo,
s