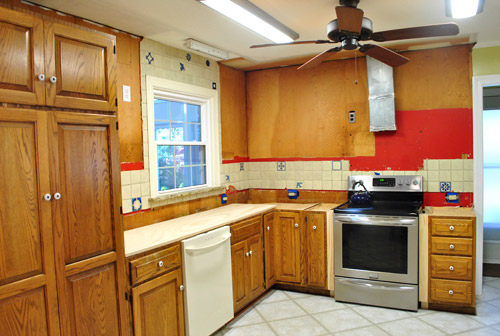
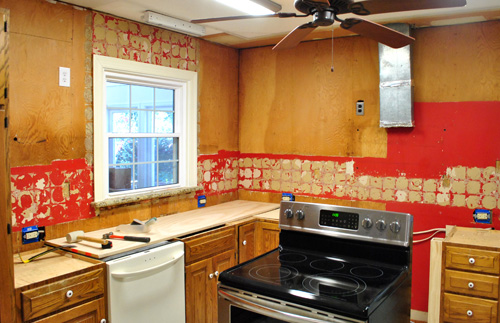
In case all of that turkey and stuffing made you forget, allow me to remind you that our kitchen was looking something this after the upper cabinets came down:
Since the clock was ticking on our new counters (in around 2 weeks we should no longer be sink-less and counter-less), we had to get the walls prepped for the new backsplash. Not that the backsplash would be going up before the counters (we’ll get a snugger fit if we install it afterwards, plus we don’t want it getting damaged during the whole counter install), but because wall prep = demo (aka: a mess) we didn’t want to worry about scratching our new counters if they were in during that step. So it was time to say adieu to the old “random blue things” backsplash:
We have a weird soft spot for this old backsplash. It’s kinda quirky, and feels very handmade. But it also feels all wrong for our idea of a dream kitchen – and the penny tile that we found had us at hello. We keep saying that the existing backsplash seems more suited to an adobe style home in the Southwest, but since we’re softies, we have an idea to keep a few of the accent tiles around for old time’s sake (more on that in a bit).
When it came to the whole removal process, it went ok. Some of it even came down in 3 or 4 (or 6!) tile chunks at a time. And all it took was a quick pry of the screwdriver.
But then again, most of it came out one-by-one… or in chipped pieces and broken chunks. Still, I can’t complain. It was maybe a 45 minute job from beginning to end? I did about 80% of it (Sherry loves demo too, but she was on Clara duty after she woke up from a wish-it-was-longer nap).
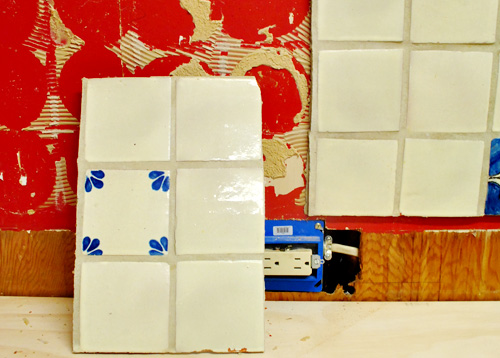
We wanted to save a bunch of the blue tiles for nostalgia’s sake, and actually came up with the idea of adding little felt feet to make them into coasters (could be fun to tell people about their past whenever we break them out), but these three were the only ones that survived in one piece:
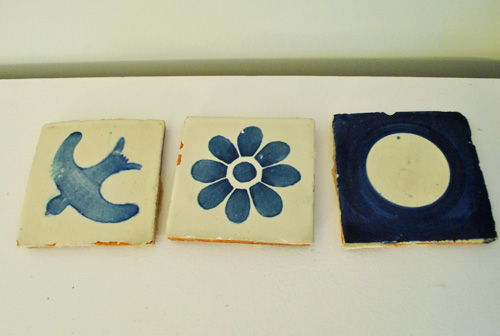
Kinda sad, but three coasters are better than none – so we’re thankful for these lucky three survivors. Still a little bummed that we couldn’t donate more whole tiles to the ReStore or give a few of the fun blue ones to friends of ours who requested ’em though. They were just so brittle (they were made from red clay) so they shattered and collapsed really easily. Our three survivors were kind of miraculous.
Oh, but to make sure that we never forget the other random blue tiles that graced our now-gone backsplash, we threw together this little tribute video. You may want to have a box of tissues handy…
Sorry. That was just us being weird. Sort of like this bow-chicka-bow-wow console video from a while back. Can’t help ourselves.
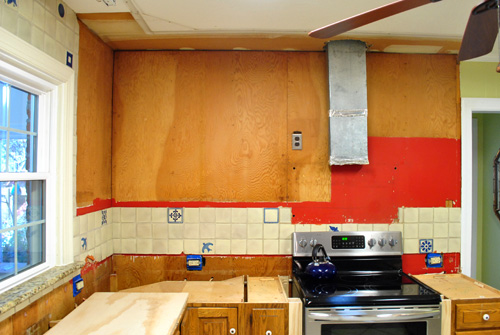
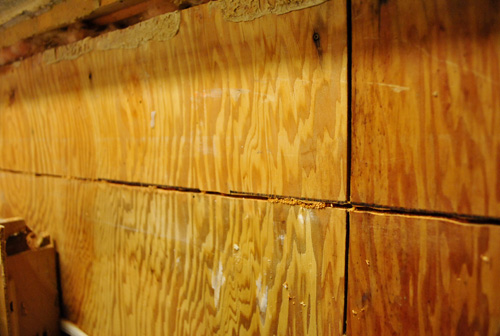
But back to the serious stuff: the rest of the kitchen demo. As you saw in the video, here’s what the room looked like sans tile. Pretty ugly and not exactly ready for the new backsplash.
Between the plentiful bumpy leftover glue and the fact that plywood isn’t an ideal surface for holding tile in the first place (especially the weight of penny tile all the way to the ceiling along the stove wall) we resigned ourselves to the fact that we should probably demo it out and replace it with something more suitable. Sigh.
So we called The Tile Shop (they’ve pretty much been our go-to resource for tiling ever since we asked them a million questions while we gutted and retiled our bathroom a few years back) and they confirmed that we really ought to install cement board. We had a mild panic attack when we realized that the counter guys templated against the 1/4″ thick plywood walls (so if our cement board was any thicker or sat too low on the wall, our counters might not fit correctly). Thank goodness they actually sell 1/4″ cement board, so we can seamlessly sub out plywood for cement board without affecting the counters.
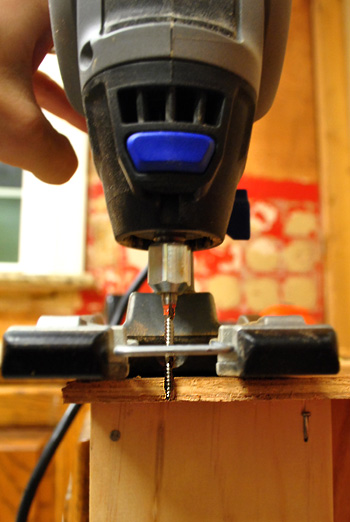
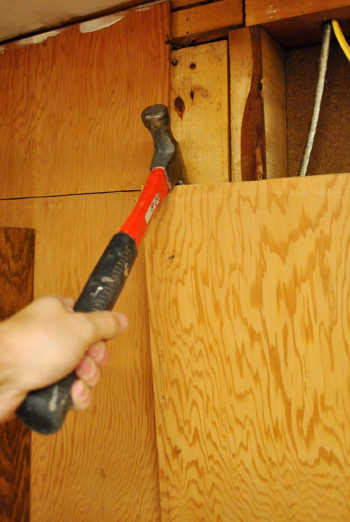
But I still had the challenge of cutting the plywood along a straight seam right above the lower cabinets, so it could be pried off the wall and replaced with cement board. I don’t really own a great tool for this, but I figured my Dremel Trio was my best shot since I could control the depth at which it cut (since I wanted to cut through the full depth of the 1/4″ plywood, but not the studs behind it) – which I’m demonstrating in the photo below:
Though had I seen the commercial that I saw the very next night for this thing I probably would’ve bought it as an early Christmas present to myself. Oh well, you know we like to use what we have.
My main struggle with the Dremel Trio is that it’s not very steady when cutting. Since it cuts using a spinning motion, it constantly wants to spin off in different directions. So I fashioned a makeshift guide by loosely nailing a piece of scrap wood into the wall. This way I could press the Dremel against it as I pushed it along the wall, keeping my cut perfectly straight:
Well, straight enough. Oh and I turned off the power to the kitchen (and used an extension cord from another room to power my Dremel) even though I was only cutting the depth of the plywood – just in case there was a wire in my path. Luckily all wires were a lot deeper into the wall, so I didn’t come close to anything with my shallow cuts.
It took me a bit longer than I’d like to admit to make all of my cuts (maybe 90 minutes?) because of having to move (and double-check) my guide placement. But once I had sliced the plywood, it was easy to pry it off of the wall from there.
See? Look how fast I’m moving now. Oh wait, these photos aren’t time stamped…
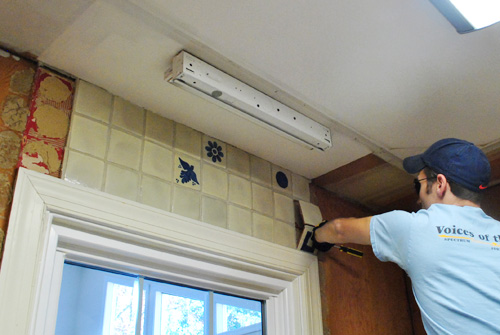
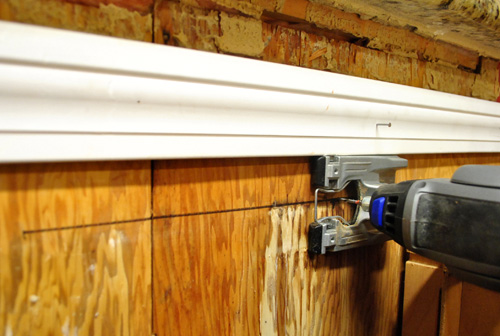
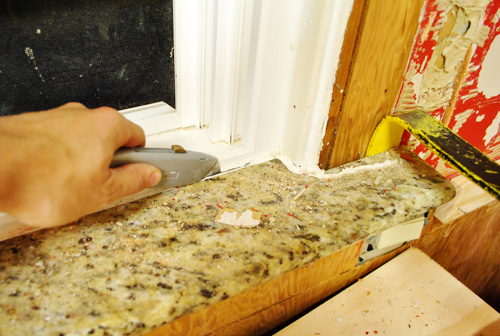
I did hit one other speed bump when I realized that I needed to remove the trim from around the window (it was nailed in on top of the plywood).
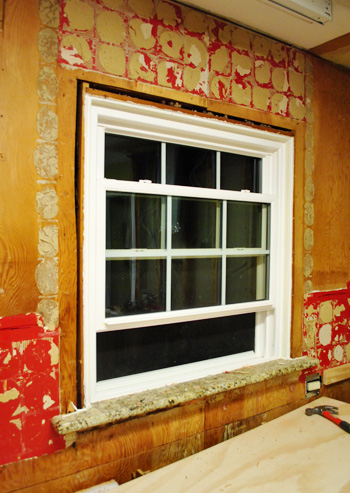
This also meant removing the last remaining piece of granite in our kitchen: the window sill. But like its granite-y brethren before it, we just had to slice its caulk seal and pry it away. Easy peasy. We’ll replace it with a regular old white wood sill like we had right above the sink in our first kitchen (white Corian would have been nice, but we’re too cheap for that, and semi-gloss paint on a wood sill holds up nicely in our experience).
Voila. So long granite. Sayonara plywood.
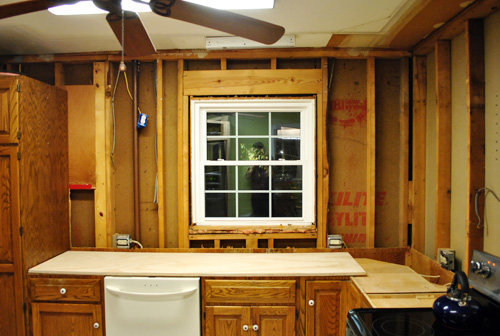
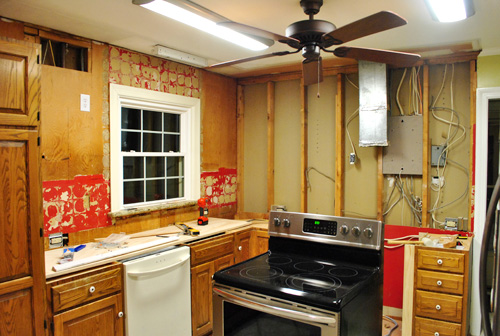
So there we have it: all of the demo’s officially done. And our kitchen is officially looking more disastrous than ever:
Not that where we started before demo was much to look at anyway:
Next up is the fun part. Okay, not really. Next up is hanging the new cement board walls along with some leftover paneling from the wall-opening project on either side of the window (since that wall won’t be tiled all the way to the ceiling and we want it to match the rest of the painted paneling in the room). And I’m going to be real here: this is not a process that I think we’ll particularly enjoy (at least we didn’t when my dad helped us do it in our old bathroom). But it must be done. And it also must be blogged about, so stay tuned for all the details as we go. In the meantime, I’d love to hear what you guys did around the house this weekend. Any tile stuff or demo going on? Does anyone have a fun demo story for us?

Leave a Reply