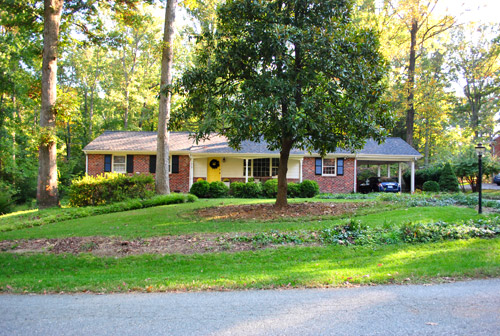
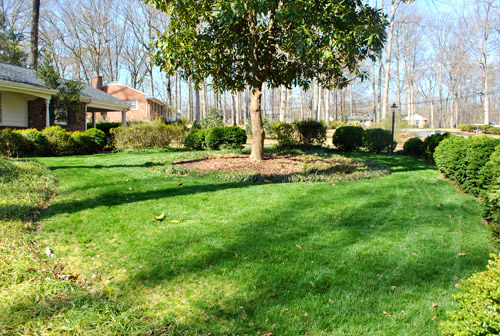
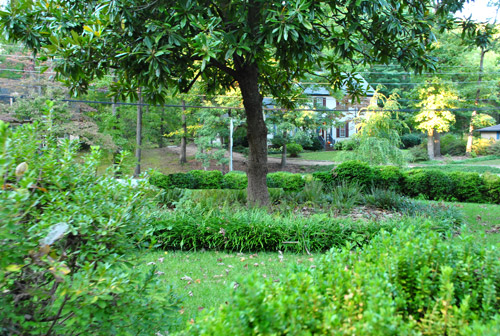
We did it! Over the course of two nice long Clara naps (and with a little help from a friend) we managed to open up our front yard in what we like to call “Phase Two Of Ten Million” when it comes to slowly transforming our front yard. Why so many phases? Well it started out looking like this:

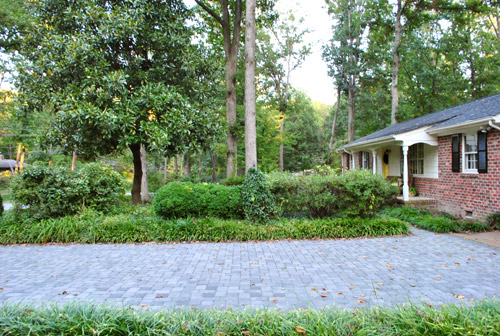
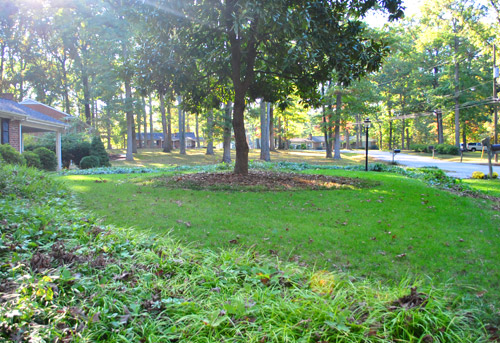
Much like our first house’s yard, we figure it’ll take a few years of tweaks to get it where we want it, so this phase was just about clearing things out for a you-can-actually-see-the-house-now effect (Phase One was limbing up the magnolia). In short: we dug up/transplanted/removed a ton of bushes (with the help of a friend of ours who took home some boxwoods in exchange for helping us get a bunch of them up). This post is full of photos, so I’ll let them do the talking. Without further ado, here are the before and afters (we tried to take photos from the same angle for comparison). First there’s the AFTER to the before above (don’t mind the black feather wreath out there on the door for Halloween):
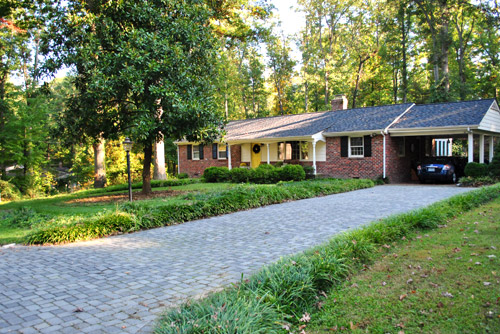
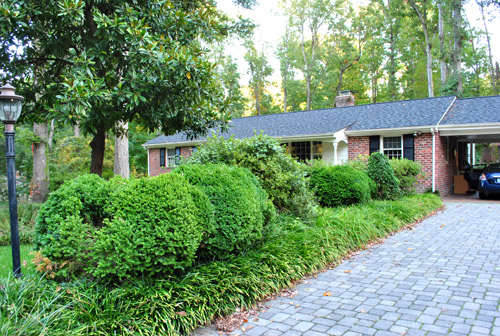
Here’s another BEFORE for ya from the driveway:
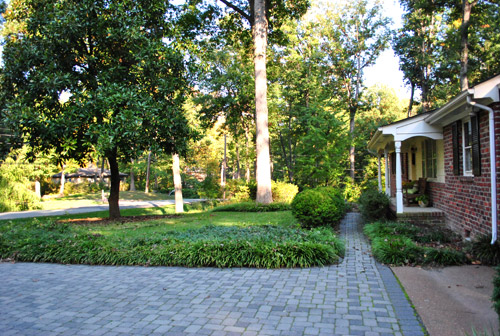
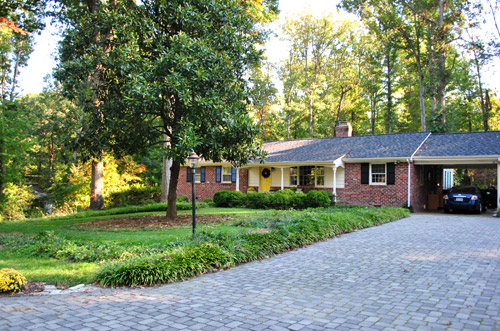
And another AFTER from the same angle (a little further away):
Another BEFORE:
And the AFTER:

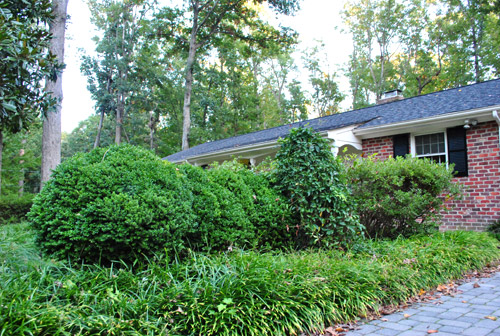
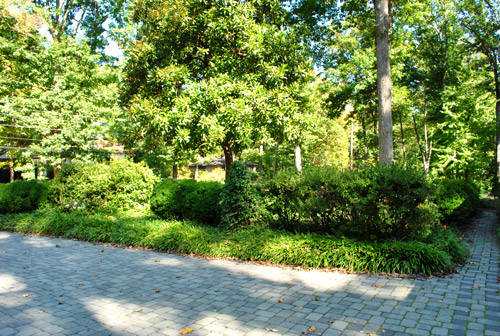
Here’s a side-angle BEFORE:
And an AFTER from the same POV:
Another BEFORE facing more towards the street:
And the accompanying AFTER:
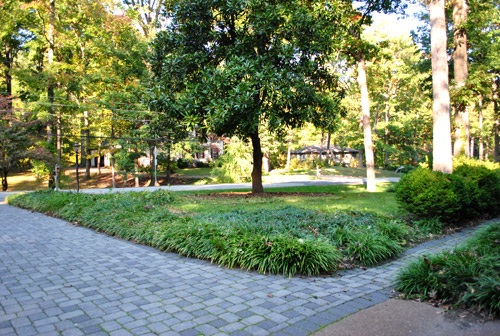
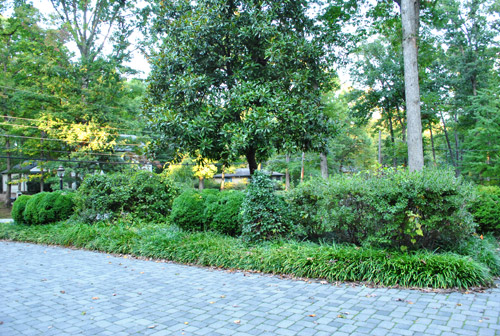
Here’s a BEFORE from the other side (the bushes used to completely stop the eye so our yard felt way smaller):
And here’s the AFTER from the same angle:
Yet another BEFORE:
And another AFTER:
Here’s how it looked from the front porch BEFORE:
And AFTER:

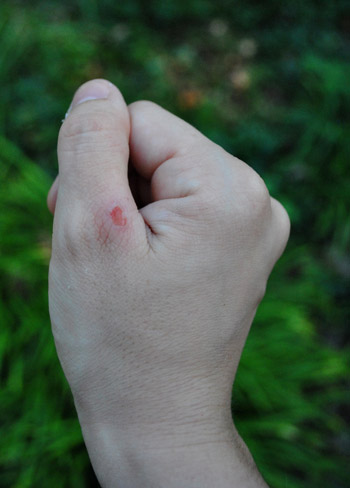
The only drawback? I got me a blister. So in that aspect it was exactly like Phase One (seen here). Totally worth it though. No pain, no gain.
As for where we put the bushes that we transplanted, we just dug them up…
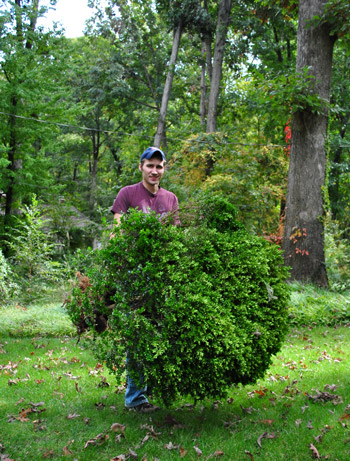
… and planted them in the naturalized parts of our side and back yard (and our friend who helped us dig made off with the rest of the healthy ones). Sadly some of the bushes were dead…
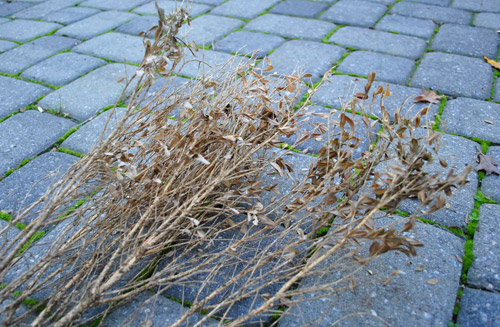
… so those just got removed with a sawzall (aka this reciprocating saw by Skill). Which was probably more fun to use than it should have been (it was actually our first time sawzalling, so we took turns and grinned like fools the whole time). And you know we loved the fact that this big curb appeal makeover was f-r-e-e (well, I guess it cost us a few boxwoods in return for some helpful friend labor, but it was foliage well spent).
As for our future lawn plans, we’re definitely just getting started out there – so there are a lot more phases on the over-the-next-few-years agenda. We’ve got plans to:
- dig out some ivy/monkey grass
- lay down some grass seed in certain areas
- layer in some low maintenance native (and less vinyl fence-like) plantings to soften things up around certain areas of the perimeter
- landscape around the front of the house (there are hardly any plants on either side of the porch – so it’s just sort of a mud pit in those areas)
- do a million other things that are slipping my mind at the moment (one big one: convert the carport to a garage)
So this step was just about clearing things out to make way for some less house-obscuring choices and opening things up to let the eye travel a bit further in certain places. Feels nice to let the house breathe a little. And the neighbors have all been saying such sweet things about the change. Whew! Has anyone else been up to a few exterior tweaks? Do you do them during baby naps with the monitor outside on full blast so you can run in at a moment’s notice? Do you hold your breath until the neighbors approve? We totally do.
Psst- We’re over on BabyCenter talking about a Halloween surprise that we discovered on Sunday night. Let’s just say Clara’s in love. Here’s the story.

Jenny says
Amazing!!!! My goodness!
Dee says
Great job guys – the blister was worth it! :)
Thought I’d share a totally eco, child and pet friendly solution with you instead of using chemicals if you dont feel like ripping up that ivy / monkey grass.
1 Litre of white vinegar mixed with 1 cup salt. Mix until dissolved and brush on weeds. It kills them super quick (I’ve had great results so far with weeds between the pavers); you can spray it on of course, but you’ll need to be careful that it doesn’t land on any plants you want to keep. It can also change the PH of the soil too, thats why it can be better to paint it.
Dee says
Can I just add… I’m not a Vet or Dr so when I say its “totally eco…” its only my opinion. I just wanted to mention that so people stay safe :)
YoungHouseLove says
Thanks for the tip!
xo,
s
Ashley M says
so I try not to comment too much b/c I know you guys get pounded with comments daily. But that one deserves some love y’all! It looks awesome! What a difference! you guys put some hard freakin work into that! nice job :)
Karla says
What a dramatic improvement!!! For free too! Doesn’t get much better than that!
Katie says
WOW! Looka heeeeaaaaps better! Well done!
Amy says
That is an AMAZING improvement, and from experience I know that it is long hours of back-aching work! Great job!
Julia says
OMG that looks so much better! I wish my husband and I could figure out something low cost to do to the front of our house.
Kim says
I have the same dilemma with our magnolia. Nothing but dirt under it, drops cones all over, and tons of leaves. The leaves are spotty with no brown velvet on the undersides, not at all pretty enough for a wreath. Ours was limbed up so it’s even worse because when they aren’t trimmed like that everything underneath is covered. That’s why limbing up isn’t recommended. Our back yard would be so much more open without it, but we are tree lovers, so we feel bad about it. And the kids LOVE climbing it. At this point it comes down to expense-it is a big tree.
ashlee says
oh.my.gosh. you guys! i honestly can’t get over how much you accomplish day to day. it’s unreal. & this yard looks INCREDIBLE. your hard work definitely paid off.
ashlee says
also, can i ask you for some advice? how do you balance housework with house WORK ie picking things off your to do list and accomplishing goals? it seems that when i attempt a project, the rest of the housework (bathrooms, vacuuming, etc) goes to the wayside :(
YoungHouseLove says
We definitely try to stay on top of housework as we go instead of saving it all up so it’s a huge list of things to do each week! Here’s a post about our clean-as-we-go method: https://www.younghouselove.com/2009/09/email-answer-clean-freak/
Hope it helps!
xo,
s
ashlee says
check out my blog for MY yardwork today, lol. sure as heck doesn’t even come close to matching yours!
MDmomof3 says
Can’t you just hear the house saying “Aaaaahhh” now I can breathe.
Nora says
I know it has been said (er, typed) hundreds of times but I love what the removal of the bushes did for your yard. It looks very tame now.
Becky says
Wow! What a great difference. Who knew REMOVING things could have such a positive outcome. It seems like most times things need to be added to change the look of a home. But I suppose you guys will be adding more beauty now that we can actually SEE your home! ;) Looks great!
Emmanuelle says
Hi! Just to tell you that your house is way more welcoming with the bushes out. But also, that here in Quebec, trees are yellow and red and that Virginia looks like Heaven to us ;-)
YoungHouseLove says
Aw that’s so sweet! Come visit! Richmond is an awesome city!
xo,
s
Emily says
Ahhhh, I bet you guys loved the instant gratification of this project! Those are always the best, kinda gives you the energy to keep on keeping on in slower projects, a la kitchen reno’s :)
YoungHouseLove says
Yes! The kitchen will take us the next few months- so it’s so nice to get quicker things like this done (they take a lot less brainpower- haha- just sweat but that’s about it)!
xo,
s
Haley says
The new yard looks amazing! It’s crazy what removing and moving a few (okay, maybe more than a few) bushes can do.
Jackie says
Love it!! Great Surgery Doctor. I wish I would have thought to save some of my shrubs … I’m learning to save some of my demo items. Lesson learned.
Tiffany T. says
It’s aaaaaammmmaaaaazzzzing!!!
Cassie Helwig says
I cannot get over how great that looks! I have a deep hatred for those bushes and plan on finding new homes for any that end up being in our yard when we buy a house… glad you were able to save some!
Noelle says
I’ve got boxwoods up front that I would love to transplant, but when I started on the first one, I couldn’t figure out how to get it out in one piece, so it ended up being torn apart. :( I don’t want to do that to any more, but I’d like to clear out my front bed and use them elsewhere. Any tips for keeping them whole and getting out all those thick roots?
YoungHouseLove says
We dug around 8″ from the base I think all around it. And we jumped on the shovel to get it into the ground. Wetting the ground a little with a hose the night before can help loosen up the soil. Oh and we used a branch cutter to snip some of the super long roots at the very ends so we didn’t have to dig up the whole yard to get to them. They seemed to do ok since it wasn’t that many that we snipped (just a few stubborn ones). Hope it helps!
xo,
s
Kacey says
wow…that’s an awesome transformation. I really like it. Your house really seems very charming now.
Erin says
Wow – what a difference! :) Looks great! That would be so rewarding – if it were my house, I’d be sitting at the end of the driveway, just gazing lovingly!
Lena G. says
Amazing! Isn’t it crazy how a perimeter change can make the yard seem bigger? We just finished our fence and the yard looks so much bigger even though we actually lost a foot or so on that side. Can’t wait to see the other changes!
Crystal Powell says
Wow much needed !!!! The house looks great !!!!!
Amy Knisely says
Heh, in Binghamton we do our yard-work when it’s not raining, which is just about never because it’s always raining here when we’re not at work.
We recently did a ton to our front yard. We had a huge blue spruce cut down (it was dying and a hazard), filled the area with grass seed, ripped out a ton of dying and planted too-close-to-the-foundation shrubs and replaced them with shrubs that are better suited for that area. (We ended up with white rose of sharon, blue star juniper and varigated euonymus). We have two other shrubs that are pretty established and happy so we left them alone. We’re planning on adding some other perennials and annuals around the shrubs so it looks more lush. Right now the shrubs are kinda puny so it could use some more color too.
We also had a huge slate planter that was entirely overgrown with weeds. We pulled up as many as we could, tilled it, added some potting mix and topsoil and put landscape cloth over top. In the spring we’re planting a few white rose bushes and I’ll be planting a few perennial bulbs (iris, tulip and hyacinth) next weekend.
There are still a few shrubs that need to be “taken out” because they’re growing in places that could be a problem with the foundation, but we’re working on it. We have huge plans for our yard and front facade (including painting the house!), but it will take at least 3 years to get there.
Jen @ Domesticated Nomad says
Wow! You guys kept claiming you had neighbors, but I wasn’t sure I believed you. Now you can actually see that you are part of a neighborhood and not just isolated on your own. :)
Brandan WH says
What a difference! It looks amazing! Who needs a gym membership when you’re chopping down the forest that was the front of your house ;0 Excellent work!
Laura says
I love this post! I am just getting started in blogging and so far I have only blogged about my DIY projects. But my yard is definetly something I can talk about too. It’s nice to know I can do that on my DIY blog!
Thanks
Nicole says
Looks great! I’ve got to say though, seeing the before and afters reminded me of our own lawn transformation a few years ago. When we moved in, there was not an ounce of grass in the yard. In its place, was an entire yard – front and back – full of ivy. I’m pretty sure the previous owners planted it back in the 50s, and hadn’t maintained it since. It took months to rip it out, turn the dirt a hundred times to get rid of all of the roots, and seed, but having a yard full of grass was so worth it. So many of our neighbors came over during those few months to congratulate us on our efforts, and couldn’t believe how different the house looked without it. Victory!
Felicity @ Our Little Beehive says
It’s coming along so nicely and definitely opening things up! We’re just the opposite as we plant, water and wait for stuff to grow up to give us more privacy.
amber p says
WOW! That is a lot of work! It looks great! I love all the tall trees in your neighborhood. We live in a new development and that is one thing I miss! Mature trees – and leaves for the kids to jump in in the Fall.
Leslie says
Looks like we had a similar weekend. Check ours out … http://thedearmanblog.blogspot.com/2011/10/this-weekend-our-family-came-down-for.html. I’m a little sore this week :).
YoungHouseLove says
Wow- looks great!
xo,
s
Rose says
Love what you did with the yard. Although still ok to put seed down this time of year- you really should consider sod. Brookmeade Sod Farm in Hanover county sells Fescue sod all year-round.
YoungHouseLove says
Thanks! We did the entire front and back yard of our first house from seed (it came out awesome!) – but sod is tempting for the instant gratification!
xo,
s
Shannon says
Wow, it looks fantastic! What a lovely yard.
Natalie says
Hmmm…I noted that you had a “friend” help out with the removal of all your bushes…would that be JEREMEY BOWER??? You sneaky sneaky Petersiks!!
YoungHouseLove says
Haha, it actually wasn’t Jer! We had a local friend help us (although trekking a bunch of boxwoods back to GA would have been funny!).
xo,
s
Jeannee says
WOW! Very big change, indeed! Love what you said about letting the house breathe! Reminds me of a story …
My Dad’s house – the side door and carport faced the neighbor’s side of their house, which was up on a little hill. Said neighbor had huge bushes so you couldn’t even tell there was a house on that side. Said neighbor, sadly, passed away. Ah, nice new neighbors! One of there first projects was to pull down all these bushes on the side – WOW! It literally made as big of a difference as in your pictures BUT WAIT – there was an unusual and interesting for the both of us, addition … I noticed it the first time I came out the side door and realized that – as I was standing there at five foot ten inches tall – I was now eye level with their basement windows and – oooh, they have a house church service going on there! I don’t know who was more startled, me or the lady whose eye I unfortunately caught! ;- Um … they installed shades ;)
YoungHouseLove says
Haha, too funny!
xo,
s
Jo @ Jo In the Kitchen says
What a difference!! That looks great!
Suzanne says
Hi, it looks awesome! So, how hard is it to remove old boxwoods? We have three huge ones that really block our front walkway and we want to dig them out but not sure how to do it. Any tips?
YoungHouseLove says
It took some serious sweat! We did things like jump on the shovel to dig it in. Also you can wet the soil beforehand so it’s softer. Lots of work but worth it!
xo,
s
jennette says
150% better! I LOVE IT!! Great job guys. I know how tough of a job it is moving and digging and pulling. UGH, painful. But wow the reward is so GREAT!!!
Kathy S says
CAMEO ME
I like some of the bush removal, but the house looks too exposed from the road for my liking.
Christine B says
LOve it!
We have been working HARD on our grass/lawn this fall and I have actually learn a few things. 1. Planting grass seeds in the fall. We planted seeds in the spring & it began to grown and then died. Laying it down now in the fall it has not only grown but come in thick and long! We still have a few patches we want to cover but its getting cold so we are hoping the old soak the grass seeds in water before laying them down will help jumpstart the process. P.S We are from RVA so our spring & fall tempatures are the same. Happy Planting!
Ange says
Hi John & Sherry
The yard looks amazing! You can see there is a house in there. I love following your blog from Australia and can’t wait to see your kitchen transformation finished.
Melissa M says
What a huge difference! No wonder your neighbors are pumped. I would be too!
Kelly says
We moved into a new house in Southside Richmond in July, and it is CREEPY how you’re tackling similar projects ahead of us! We just painted a knotty pine room, and are tackling boxwoods (former owners must have been obsessed – imagine rows in the front and back plus random clumps in the middle of the yard where a swingset should be) this weekend. If anyone in the Richmond area is in need of boxwoods, drop me a line – [email protected] – because we’ll have plenty to give away! Sheri and John, great luck! We’ll keep reading for instruction and inspiration!
Vicki says
This looks so great! I love the abundance of before and afters. haha I’m telling you, if anything can convince me to buy a house, it’s this website. :)
Heather U says
Can I just say how gorgeous your yard and neighborhood are!! It is my dream to live somewhere so luscious and green. Sadly Las Vegas doesn’t even come close, but maybe some day. Great job on clearing things out. It looks amazing!
Natalie says
This looks absolutely amazing!! You guys did such a great job, what a difference. Your house looks like a million bucks!
Autumn @ iNet Flavour says
Wow. Such a dramatic improvement. You guys really did live in a forest. ;) It looks 1000 times better!
Calgary Pavers Source says
Green and simple! Beautiful yards.