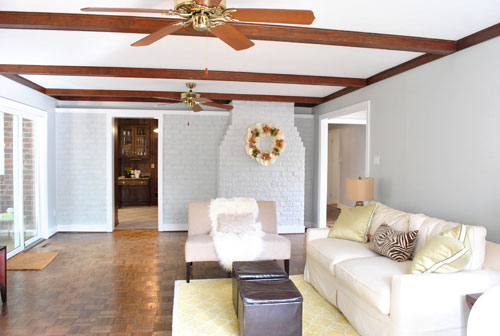
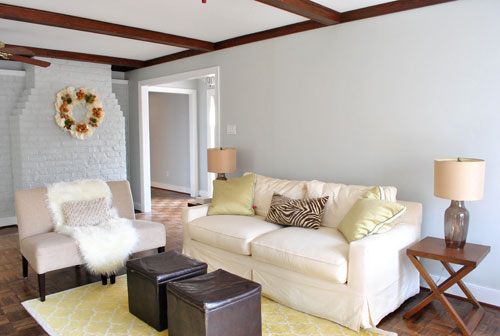
Glad that’s out of the way. Painting the trim was as long and tedious of a process as we expected. Maybe more-so actually, but it’s done! Wahoooo! And it feels pretty darn good. Seriously, there was more than one happy dance (one on Friday night when we finished, and another one in the morning when we saw the room in the light). What is it about certain annoying home improvement jobs that make you want to ugly-cry while doing them but happy-cry when you’re done? Talk about roller-coaster emotions. In the end, we never regret them, and we’re happy we got ‘er done. We’re just not ready to “do them all over again” the next day or anything. Haha. Anyway, it’s looking pretty good. Here’s the view in the living room now (ignore the beams, we’ll get to that later):
As far as the process went, experts recommend using oil-based primer to block potential bleed-through when it comes to painting wood trim (followed by latex paint). We threw caution into the wind and went straight to white semi-gloss latex no-VOC paint (Olympic Premium from Lowe’s). I had gotten some gray wall paint on the trim a few days back when we tackled that project, and it seemed to cover well without any signs of bleed through. So I went for it. Could have been a terrible plan. Could have resulted in having to go back and repaint all the trim with primer if I did see some bleed-through. And possibly pulling 60-80% of my hair out as a result. But it didn’t! Oh happy day.
So we saved the nastiness of working with oil-based primer and all the VOCs that come with it. Call it a baby-and-eco-friendly risk that happened to pay off. If it hadn’t we would have sought out the lowest VOC stainblocking primer that we could find, but it was pretty sweet that it didn’t come to that. That’s about where the words “pretty sweet” stop with regards to this project. We vowed to keep it real with you guys, so although we’re eternal optimists who generally love nearly every project that we tackle (even the ones that don’t work), we promised to tell you if something sucked. And painting the trim totally did.
It wasn’t that it was very hard (I used this brush, which I swear by for “staying in the lines” and going a lot faster that I used to move with a traditional long-handed brush). It was just that it took for.ever. I started at around 10am on Friday and went it alone until about 3pm (while Clara took her morning nap and then John watched her and tended the blog), then around 3, out of sheer desperation, I asked John to help while Clara was taking her afternoon nap (he traditionally rebuffs detail work since he’s the “big picture” guy who rolls while I cut in, so he claims he has less control when it comes to fine motor skills with a brush). At that point I was on coat #2 though, so I just asked him to go down the middle of the trim and baseboards with the second coat while I followed him and added a second coat to the top and bottom of the baseboards and trim (which requires a bit more control since that’s where the brush can meet the floor or the wall).
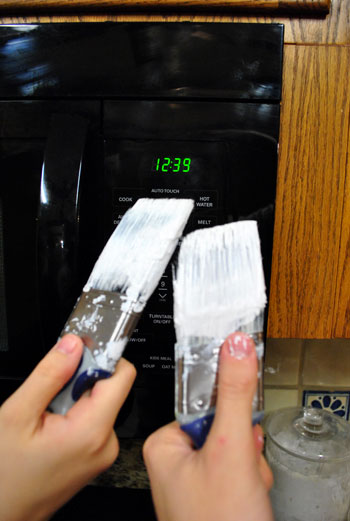
By coat number three it was around 7pm (thanks to a lot of blog, Clara, and food breaks among other things) and that’s when we realized that it wasn’t going to be a three-coat process like we thought. It was going to take four full coats to cover that dark dark trim. Boo to the hoo. There may have been a temper tantrum (not by Clara) but no actual tears were shed (which I consider to be a semi-mature response to such devastating news). But we pressed on. And it was actually past midnight when we finally finished (and snapped this victory shot of our paintbrushes “toasting” in front of the microwave clock). Klassy, right?
If we had used oil-based primer it definitely would have only been a 1-2 coat process (after the coat of primer was applied, which would add up to 2-3 total applications) so it may have taken us until 5 to 7pm instead of 12:30 in the morning. But those 1-2 extra coats were worth it to us in exchange for a completely zero VOC result. Even if it meant dragging a little bit the next day. So for those who are looking for the expert recommendation for tackling this project, use oil-based primer applied with a brush followed by 1-2 coats of latex gloss or semi-gloss paint also applied with a brush (and tape things off if you like to work that way). But if you wanna know how we did it, I used my trusty short handled brush and we applied 4 coats of semi-gloss latex paint (without taping off, since over time I’ve gotten nice and steady without tape). We actually painted all of the wood trim in our first house (including the stuff in the bathroom and kitchen) using this method (no sanding or primer) and we luckily didn’t have any chipping or bleed-through issues after 4+ years there. Fingers crossed for the same luck here!
As for the paint choice, we used the off-the-shelf white stuff that comes without any tint from Olympic Premium called “Base 2” (since “Base 1” is also known as “Ultra White,” and we wanted something crisp and white but not crazy white with a glowing blue tint to it). We love the color, and plan to use it for the rest of the trim in the house. When we finally work up the energy to tackle a project like that again in a few years. Har har.
Oh and the beams. We promised more details about those. We left them au naturale to be 100% sure that we don’t prefer them that way (we don’t). But now that the trim is all painted, we’ve decided that we definitely want to stain or paint them a deeper gray color for some richness and dimension. And of course those fans have to go. So for a vague idea of what that might look like, picture this…
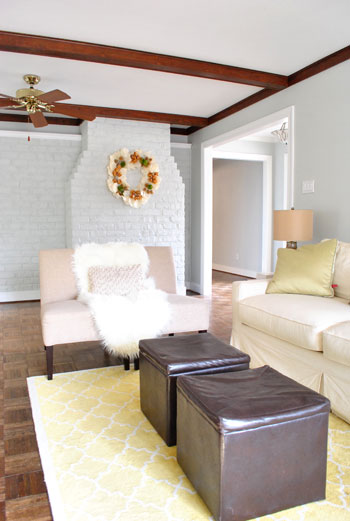
… looking something like this:
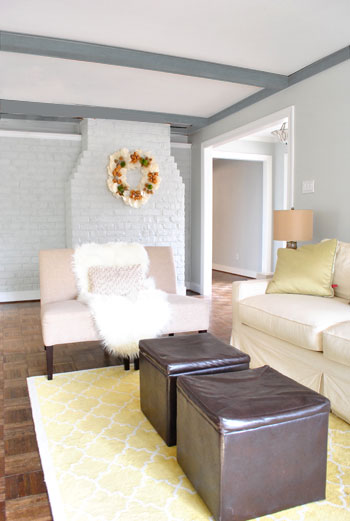
They definitely would have looked gorgeous in white just like the trim, but we want to take a risk and do something a little unexpected. We love that it’ll hopefully be just the right amount of drama without looking too heavy (we have standard 8-foot tall ceilings so we didn’t want them to feel like they’re closing in on you). But we think it’ll have a nice not-too-top-heavy look in the end, especially since we’ll be bringing in a large charcoal sectional to ground the room and add balance. Then we can start layering in some bold colors in the curtains, art, rug, accessories, etc. Should be interesting.
And why not end with a nice little flash-back to what the space looked like a little over a month ago when we moved in?
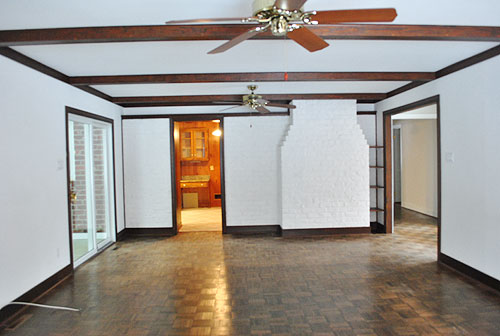
Oh the memories. Change is good.

Leave a Reply