After a bunch of people wrote to us asking how we upholstered the green headboard in our guest bedroom…
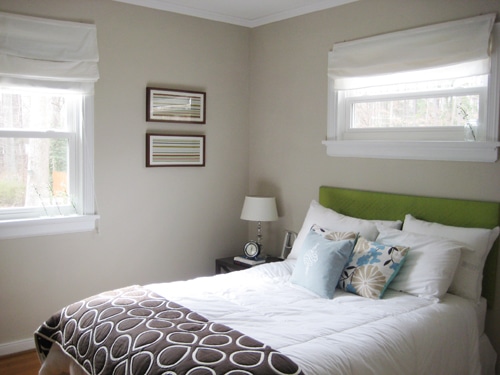
… we thought we’d invite you to join us for a quick tutorial. And since John’s sister Emily was itching to make a pink headboard for her daughter Olivia’s bedroom, we got to show her how simple the process can be as well. And don’t be nervous, it’s truly a super easy undertaking. If you can wrap a present, you can upholster a headboard. Honest.
First, visit an art store and purchase a wooden frame that’s meant to stretch canvas. A craft store won’t carry these, but any true art store will. As for the size, you should aim for the exact width of the bed but the height is up to you (you can use painter’s tape on the wall to experiment until you find a height that you like). You’ll also need enough fabric to cover the canvas frame with a few inches to spare, the same amount of batting (the thickness is up to you- the plusher the batting, the plusher the headboard). Then all you need is a regular old scissors and a staple gun (you can purchase a manual one for about $12 at Lowe’s) and you’re ready to roll. *Note: You can substitute a piece of plywood for the canvas frame if you’re looking to create a headboard that’s extremely durable (ie: for people who lean against it all the time to read or for a boisterous child’s room) – it will be stiffer, heavier and a bit trickier to hang, but virtually indestructible.
Step 1: Cut your batting a few inches larger than the frame, wrap it around the back of the frame and staple it in place. I like stapling things at twelve o’clock, three o’clock, six o’clock and nine o’clock first to keep things tight and straight (sometimes starting at one end and working your way around can cause it to slowly shift or loosen, and you want a straight, tight fit). Continue to staple the batting around the frame every two to three inches until you’ve worked your way around the frame and the batting is snug and secure.

Step 2: Cut the fabric a few inches larger than the frame and follow the same stapling steps outlined above. Be sure that your fabric is straight if it has any sort of pattern (line it up carefully and be sure to check for any shifting as you go). When it comes to the corners, just treat them as if you’re wrapping a present and fold them over so that they have a seamless look from the front. (Note: staples can be easily removed, so if you need a do-over or two it’s no biggie).

Step 3: Hanging this type of headboard is easy-peasy since it’s super light (thanks to the canvas frame construction) so it’s just like hanging a picture frame. All it calls for are two nails placed on the wall for the frame to hook over. Using a level can insure that your headboard hangs straight- and look how cute this step can be. Adorable.

Step 4: Enjoy your swank new headboard. Olivia loves her plush pink palace and the polka dot headboard is the perfect punch of personality (say that three times fast).

So there you have it, headboard upholstery 101. And here’s a bonus fabric tip for ya: visit the fancy fabric store in your neighborhood. Every town has one (it’s where the interior designers go) and in Richmond it’s called Williams & Sherrill. This may seem like a surprising suggestion from bargain hunters like us, but you can often find fabulous deals in the remnant section of the store. There’s usually a table full of remnants (leftover pieces of fabric that have been marked down dramatically)- and most are still one to two yards, which is more than enough fabric for this project.

In this instance, Emily and I snatched up two yards of this thick woven swiss dot fabric (originally $24/yard) for around $19 total. Score.
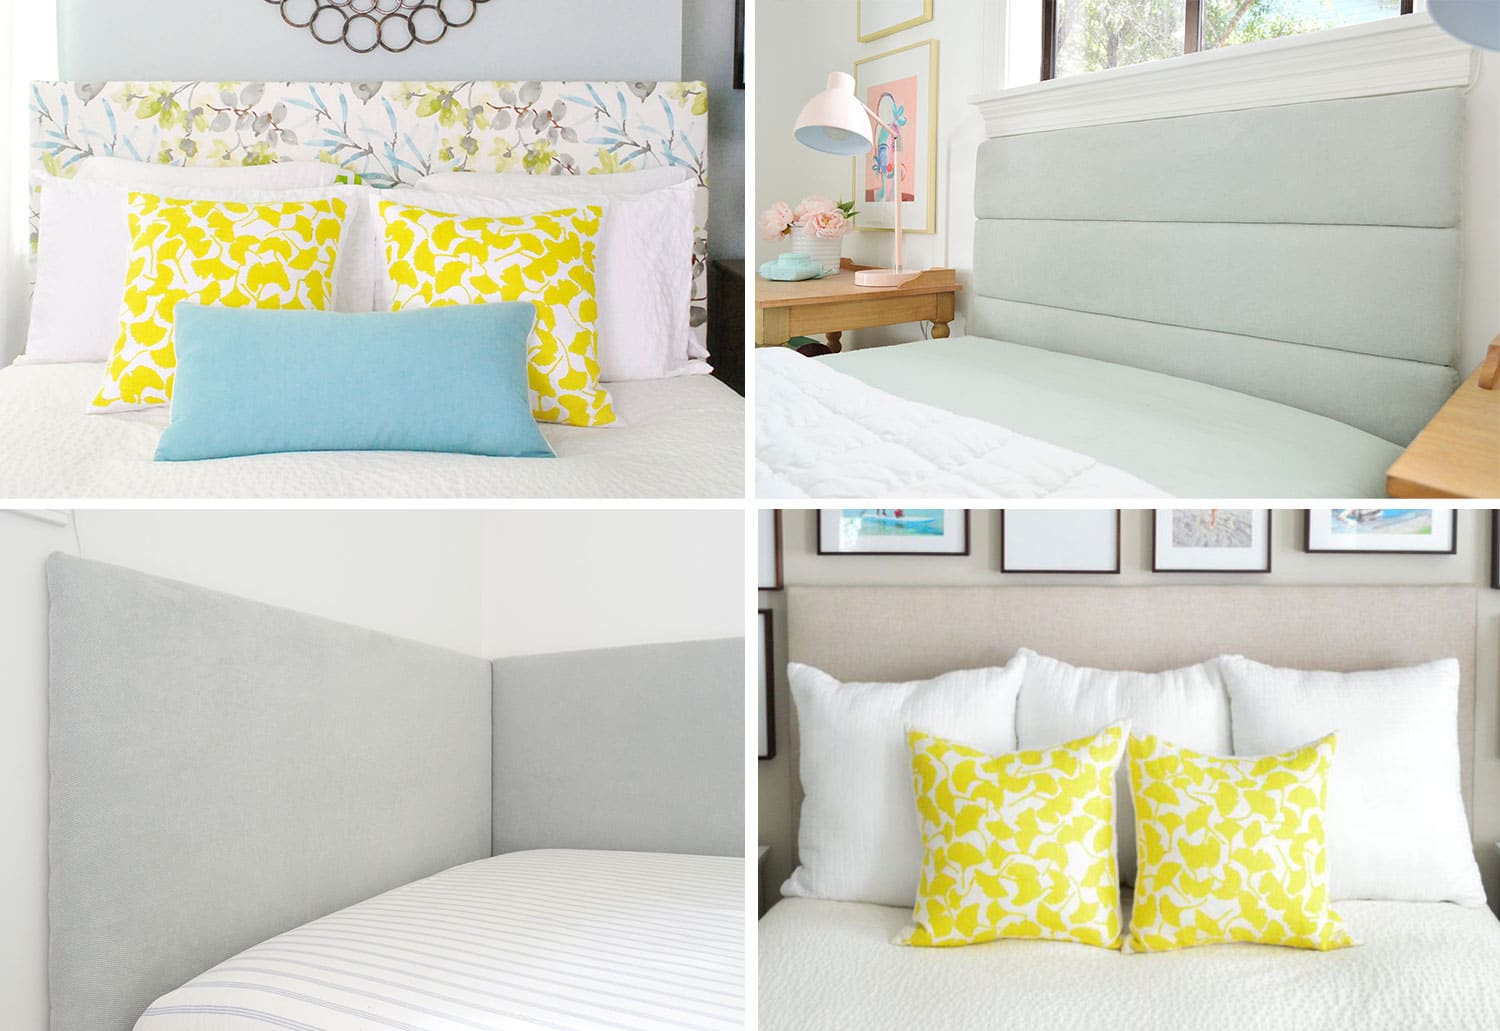
More DIY Headboard Tutorials
Want more DIY headboard ideas? Check out these other projects we’ve made using the same basic techniques:

Cindy says
We are currently deciding what sort of upholstered headboard we want, and will be taking this project on ourselves. I’m just wondering if you think this one would be sturdy enough as I typically sit up in bed, reading. Or would you suggest using a solid piece instead of just a frame??
Kathryn says
I was just going to make the same comment- the advantage of the frame is that the headboard is light, but if you do tend to lean against it to read (and I sometimes have to sleep sitting up because of sinus issues), the fabric *may* loosen- due to the fabric stretching, tearing, or the staples pulling out.
We had to rip out our frame headboard and upholster a sheet of plywood to make it work.
The Rauths says
THANK YOU …I posted about ya’ll again today and I’m going to make mine this week. Thank you, thank you, thank you! =) Oh and I got the name correct this time, sorry about that.
Lauren says
I was thinking the same thing about it being flimsy. I’ve seen these made with plywood, covered in batting and fabric. I think that would be much more sturdy for everyday use.
Very pretty fabric choice for the little girl’s room. I love it!
I plan on making one of these myself. Very inexpensive way to add some color and finish a bed.
Katie says
Thanks for the instructions! Thanks too for the link to One Project Closer…they featured our new kitchen this week!
YoungHouseLove says
Hey everyone,
I made the green upholstered headboard in our guest bedroom over four years ago and it’s still going strong (no loose fabric or staples) and it served as our own headboard for a few years before we moved it to the guest bedroom so it definitely got some heavy use (we read leaning against it for years). But I can see how it might seem less sturdy than a plywood one.
I guess since we had no problems with the durability/longevity of ours I assumed that the frame method was better than plywood because it’s lighter, easier to hang, and easier to move… but I can see how people only wanna do something like this once so if plywood seems more like your cup of tea I’d definitely encourage you to go that route.
Maybe the flimsy/durability issue comes up with a frame if you use cheap or thin fabric and batting (or fabric with a lot of stretch). That would probably explain why the two headboards I’ve made are so strong (I always gravitate towards thick, woven upholstery fabrics with some major heft) and when paired with some rather plush batting they are very tight and strong once stapled to the frame. Yup, now that I think about it, fabric is probably a very important factor, so I’d definitely suggest selecting strong, thick, non-stretch fabric for a more durable and longlasting result.
Happy stapling everyone!!!
xo,
Sherry
p.s. Great kitchen transformation Katie! We know how hard it is to live with all that dust and chaos- congrats on your shiny new kitch!
Kristen says
I was wondering how durable these headboard are for leaning against. We don’t have a headboard and I would love to make one like yours, except that we spend a lot of time propped up reading in bed. Wouldn’t leaning against it press the fabric back toward the wall and create tension/ripping?
Mrs.Limestone says
Super cute but I’d caution about using this in a small childs room. Those stretcher frames aren’t meant for any kind of pressure so if a child is playing around on their bed or leans on the frame in the wrong way, it will collapse.
YoungHouseLove says
Kristen,
There was much debate about your question (see above). My headboard has been leaned on for years, moved from NY in a packed minivan, hung in four different rooms since the big move and still looks great 4+ years later. I’ve had the experience that as long as you use thick fabric and batting along with a good amount of staples to secure everything, it’s extremely durable and stays tight. However many people have suggested subbing out the canvas stretching frame for a piece of plywood which would be stiffer, heavier, and a bit trickier to hang but would definitely be super durable. Good luck with your headboard and feel free to send us pics of the transformation!
xo,
Sherry
Bryn says
I really love this post and idea! (I even blogged about it on my own blog, I hope you don’t mind.)
I do have a question for you – Do you remember what size frame you used for your green headboard and how much it was? Thank you!
Katie says
It sounds like the general fear is that the frame will fall. Sherry – since the frame itself has proven its durability in your home maybe you could suggest different methods of hanging it. Instead of just two nails, maybe a small board the width and depth of the space in the back of the frame could be more securely fastened to the wall and/or use of liquid nails would be more child-proof. Love to hear what you think.
Jessica says
Thank you so much for posting these great instructions for a DIY upholstered headboard.. I’m getting married in 2 weeks and I’m trying to finish up as many projects around our new house as I can before then… I’ve been wanting a headboard, but we can’t spend the money on one right now. I always thought it would be more complicated to make an upholstered one, but you made it sound easy! I might have to wait till after the wedding, but I’m now convinced that this is what I’ll do. I’ll let you know how it turns out! :)
p.s. loved your wedding week – I only wish I had been able to see all your great tips and ideas earlier… it’s a little late to change anything with the wedding since it’s 2 weeks away!
YoungHouseLove says
Hello again chicas,
For those afraid that the frame will fall I think there are a variety of approaches to attach the headboard to the wall in a more permanent way. As Kate suggested, a piece of wood could definitely be screwed into the wall behind where the headboard will hang and then liquid nails can be used to attach the headboard’s frame to the wood that’s screwed into the wall. The headboard could also be intentionally made taller than necessary so about 5 inches of it would be hidden below the line of the bed, which would allow you to hook it over some nails at the top but screw right through the frame and into the wall on the bottom edge of the frame. You could also probably add some 1x2s at the bottom of the frame to serve as legs which can be screwed into the wall and hold everything steady so I guess there really are a few ways to skin this cat. Hope that helps Katie!
Bryn, As for your question about the dimensions and price of mine- we made ours 54×24″ which seems to work pretty well with a full sized bed. As for the cost, I’m not sure of the exact price but somewhere around $15 for the canvas stretcher frame sounds right. I do remember that the addition of some nice thick fabric and batting along with a $12 staple gun made the whole project come in at around $45-$50. Happy headboarding!
xo,
Sherry
Elizabeth says
Hi! I am so thrilled to have this how-to. I was wondering if you knew how we might be able to attach this to our existing metal frame – any thoughts?
YoungHouseLove says
Hey Elizabeth-
Well, we have a few ideas for working with your existing metal frame:
1. You could slipcover the metal frame by sliding a snugly fitting pillow-case-like pocket of fabric over the metal frame itself (forgoing the canvas stretching frame completely).
2. You could glue-gun or crazy glue a piece of fabric around the metal frame (gluing it in the back). Or you could glue gun or crazy glue the wood-framed headboard you create (using our tutorial above) to the existing metal frame.
3. You could use velcro (affixed to both the fabric and the back of the metal frame) to secure the upholstery to the metal frame directly. Or you could also use velcro to hold the wood-framed headboard to your existing metal frame.
Hope that helps!
xoxo,
Sherry (& John)
Elizabeth says
Thanks! That is a great help :)
Katia says
Has anyone used / thought of using masonite as the backing for a more substantial headboard? It would be lighter than plywood, but still strong. Plus it is a “green” material, since it made by pressing wood chips without nasty glues or formaldehydes.
Sara says
I also made a headboard but from an old door. We have a local store that goes into the historical homes around here (before some of them are torn down unfortunately) and pull out anything they can. I was able to get an old pantry door for $15. I stripped the paint, sanded, restained and it looks great. We added two 1×4’s to the back of the door and then bolted them to the bed frame. It is super sturdy using the 1×4’s if you are concerned about hanging it on the wall.
*A little late on the discussion, but I just thought about it!
Aliya says
I really want to make one of these BUT we have chair molding going all the way around our MBR. Thoughts on this? I’m not sure how to hang it against a non-flat surface.
Thanks!
Linx says
So how do you hang the headboard if you decide to use a heavy piece of plywood?
YoungHouseLove says
Hi Linx,
Similar to what Sherry describes in her comment above, there are probably two best approaches to attaching a heavy piece of plywood just like you’d secure the framed version for permanently:
1. First screw a small, long board (like a 1×2) horizontally into a stud in the wall, a couple inches below where the top of your headboard will go. Once that’s secure, add a similar board to the back of your headboard, about an inch below the top. That will act as a lip which will sit on the board in the wall. Then you’ll want to secure those together with a nail or wood glue. We’d also recommend making the headboard taller than you need so a few inches can extend behind the bed on the bottom. There you can screw directly through the headboard into the wall for extra hold.
2. The alternative is, rather than hang from the wall, attach some 2×4″ vertically to the bottom as legs. That way you can rest the weight of the headboard on the floor, rather than the wall. You can screw through the top of the legs directly into the wall to be sure it doesn’t slide or topple over.
Hope that helps!
-John
Jessi Scurte says
I’ve become a recent fan of your blog and being a young homeowner myself, I have huge plans for the future. But today I was wondering how you could tuft the headboard so that it looks like this:
http://modernnova.com/library/LUDLOW.jpg
Any suggestions or tips would be much appreciated!
Jessi
YoungHouseLove says
Hey Jessi,
To tuft a headboard, you’ll want to use a piece of plywood or MDF as the base of the headboard instead of a canvas frame. Then you’d carefully measure a grid on the back of the headboard (before you upholster it!) to determine where your buttons will come through to create the tuft (we’re unsure how to tuft without buttons, but using sleek buttons can keep things looking chic and not country).
Once you have marked off your grid with spots for each button (perhaps you’d want four buttons on the top row, four directly under those for a middle row, and four under those for a bottom), use a small drill bit to make tiny holes directly through the MDF or plywood where each button can be threaded through (again, you’ll do this before you upholster it).
After your grid of drill holes is made, you can go ahead and upholster the piece of wood with batting as instructed in the above tutorial. Then thread each button onto some strong thread (the stuff that’s meant for jeans is much stronger than normal thread) and put the needle through the hole in the lack of the MDF that you drilled and poke it through the fabric that now covers the front of the board. Then, just like attaching a button, you’ll want to sew the button securely in place which should create a tuft thanks to the fabric that will bunch in that area of the board. Repeating this step for every hole that you drilled should result in a tufted headboard in under an afternoon.
For a super shortcut you can also look for quilted fabric (the green headboard that we made in our guest bedroom has a sleek grid pattern on it) to recreate this tufted look without any extra effort. Since the fabric already looks tufted, there’s no need to drill holes and use buttons. Hope it helps!
xo,
Sherry
Jessi Scurte says
Thanks so much Sherry. I’ll send a photo when I’m done.
Melissa Breau says
For anyone like Jessi that wants to tuft w/o buttons, you should be able to use fishing line and go from the back through the hole you’ve drilled & through the fabric. Once on the “front” side, leave a small gap (about the width of the button you “would” have used) and go back the other way (fabric, then board). Pull it tight and tie the ends together. It should create the tufted look w/o buttons ….
Toni says
Another solution for a sturdy upholstered headboard: buy an ugly, cheap headboard that you can’t wait to cover up. I found one at a store that sells returned rental furniture for $25 then covered it with batting and denim. After 5 years in a my son’s bedroom, it still looks like new. No need to drill any holes in the wall because it attaches to the bedframe.
YoungHouseLove says
Hey Toni,
Great idea! Gotta love that long lasting durability!
xo,
Sherry
PJ says
If you use a canvas (instead of just the frame), could you create the tufting you mentioned above? Or, do you have to use MDF or plywood?
By the way, you guys are absolutely awesome! I’ve passed your site on to all my hip, young co-workers and they love it, as well. Thanks for sharing your lives and inspiring us!
YoungHouseLove says
Hey PJ,
Thanks for the kind words! You probably need something a bit more substantial than canvas to create tufting (plywood or MDF is great because it creates the tufts when you thread the buttons through it). Hope it helps!
xoxo,
Sherry
emorie says
this post is amazing and is truly solving a major project dilemma for me! my parents made my sister a beautiful headboard and used the plywood method discussed by some above. when i asked them to make one for me for an upcoming move, they said it was such a headache hanging/ mounting the headboard that they’d rather just buy me on.
since i wanted to do a custom fabric, i was disappointed. this method is perfect and will be totally do-able on my own–plus, i already have the staple gun! and there won’t be any (major) damage done to the wall from mounting. thanks again! i’m really looking forward to this one!
Olga says
Has anyone created a headboard that they want to send pics? I would love to see some.
YoungHouseLove says
I second that idea. Send away!
xo,
s
Sharon says
I just came across your site yesterday after searching ‘DIY upholstered headboard’ (your site was the first noncomercial site listed). I am so glad I’ve found it! My initial idea was to use plywood, however after reading your tutorial and the readers comments I’ll be going with the canvas frame. Your project here was perfect for me since it is for my daughters room and hopefully will turn out something like your niece’s.
The fabric I have my eye on is quilted like your green headboard, what specific qualities should I look for to make sure it is a fabric that won’t stretch over time?
Thanks much for the tips! Love your site.
YoungHouseLove says
Hey Sharon,
Using batting under the fabric will help keep it from stretching, so anything that feels a bit thick and durable-ish (as most quilted materials feel) should be perfect! Good luck…
xo,
s
Tina says
I love love love your blog. I’ve gotten some great ideas. We also made our own upholstered headboard for our king bed but used an old hollow door that we had removed from another area of the house. Covered it with foam and batting, staple-gunned muslin and periodically make new slipcovers for it. I put two legs on it and bolted it to the bed instead of the wall though. Great re-use of an old door that would have just ended up in a landfill and a very cheap comfortable headboard.
YoungHouseLove says
Now that is a fabulous idea! Love it.
xo,
s
Jodi says
Your DIY tips are so great! I’m glad I stumbled upon your website. I’d love to incorporate the upholstered headboard to our bedroom, but I’d also like a high profile bed to go along with it. Do you have any suggestions for finding a high profile bed without a headboard or with a detachable headboard that won’t affect the sturdiness of the bed?
Thanks,
Jodi
YoungHouseLove says
Hmm, good question. I would definitely check out some local bed stores and see what they can offer. And don’t forget to negotiate and ask “is that your best price?” to score a deal. You also could get plastic “risers” that college kids slide under a regular bed frame to raise it up on the cheap (it’s still a remarkably sturdy solution- after all it works for rowdy college kids). That would be a super inexpensive means to an end. Hope it helps!
xo,
s
Robin says
Sherry and John,
I have 2 questions for you.
1st: If I wanted to make a headboard and then have lines of nails (like the bottom of your ottoman in your bedroom), how would you suggest I do that? Use the plywood method and then just hammer and nail the detailing where I wanted?
2nd: I read your comment above on how to tuft the headboard. You say to go in through the back with the needle and then sew the button, do you ever come back through the fabric and out of the back of the plywood? I’m just trying to figure out where you knot the thread and get the “pull”/tuft look from.
Thanks so much!! I hope my questions make sense!! Love your site. -Robin
YoungHouseLove says
Hey Robin,
I would definitely go for a plywood base to apply nailheads more easily. And as for tufting, we’d guess that one way to get a nice pulled look is to somehow pull the thread and attach it to the back of the plywood (perhaps with duct tape or even a nail or two to tie your button tufting string around), so you can tug it to get that tufted look. Hope it helps!
xo,
s
Taylor says
I’ve seen where you thread the button through then tie the string at its “tuft-length” to a washer that is bigger than the hole you drill so it holds it in place.
Robin says
Thanks so much!!
Khia says
Hey Sherry,
thanks for the advice. I used it during my vacation, and i finished it, we love it!
YoungHouseLove says
So good to hear! Thanks for the update!
xo,
s
Marianne says
Hi guys !
(in response to Olga’s comment)
Today, I’ve created my first new upholstered headboard out of 3 pieces of MDF. I’m new at this kind of project, but I’m quite proud of it. You can check it out on my blog if you’d like … http://nocesdecoton.canalblog.com/archives/2009/09/17/15103854.html. I try to write in French AND in English, so please forgive me for if there’s any mistake in the writing …
Thanks again Yougsters for sharing your ideas !
Marianne from France
Olga says
I made an upholstered headboard, with plywood and about 3 inch foam, and a little bit of batting. The material on top is a microfiber/suede something. I did drill holes in the back of the plywood and tried to use wire, thread, needle etc to tighten the foam/material and create a tuft look.. but nothing works! It doesn’t get tight enough, doesn’t create the tufed look. Now I’m thinking of just screwing in scews from the front to back, from the material, thru the foam and screw it back into the plywood. this would be stronger.. would that work?
YoungHouseLove says
Hey Olga,
It sounds like you already did everything we would recommend (trying wire, thread, etc and pulling as tightly as possible). So sorry we don’t have any more ideas for you! Maybe you can google “tufted headboard” and see if anyone else has other steps for you to try. Good luck!
xo,
s
Jenny says
Olga,
I’m not sure if you’re set on sewing the buttons on but I’ve read somewhere else that you can staple exactly where you would want the button after you’ve already added the fabric. The staple pulls the fabric tightly to give it the tufted look. Then you could super-glue a covered button on top of the staple to give it a tailored look on the cheap. Hope that helps!
YoungHouseLove says
Great idea Jenny! Thanks so much for sharing!
xo,
s
Jaya says
Hi Sherry- I love reading your blog- after trolling around here for so many many weeks I feel like I know you! Thanks for being such an inspiration! I need your super expert opinion! I am getting ready to hopefully make a headboard for my daughter’s new full bed. I called our Denver area arts store and what they tell me is that they have stretcher bars but not put together frames. Should I go with those? It is a full bed so I am thinking your 54X24 measurement should apply to her bed too- The 54 inch is $13 per bar and for the 24 inch $4 per bar. Should I take the plunge and get these strecher bars? what do you think? please help! Thanks so much- Jaya
YoungHouseLove says
Yes! That’s what the ones we used for our guest bedroom headboard were: stretcher bars that you snap together in the corners to create a frame. It’s DIY at it’s finest (and also a heckova lot cheaper than already assembled frames). And to be sure of the correct size we’d just double check things by measuring the bed before grabbing the stretcher bars, just to be sure. Hope it helps!
xo,
s
Jaya says
you are supersonic fast! thanks so much!
Zahra says
I cam across your blog by accident – and absolutely love it –
I recently moved on my own – and can’t wait to create this head board !
thanks xx
Jane says
This is the best blog! I am going to try and make this headboard but I have a question. Since I love to sit up in bed and read and I would be leaning against the headboard, do you think the batting will keep its shape?
YoungHouseLove says
Hey Jane,
If you use pretty thick batting and staple it a ton around the edges (not just a few times each side) it should have some pretty great resistance. Maybe you can even use two layers of batting for even more strength. Then as long as you lean up against pillows so it’s not just your body pressing directly into the headboard all the time you’ll probably be just fine, even over time. If you’re still doubtful you can use a piece of plywood instead of the canvas frame, which would definitely not have any sagging issues. Hope it helps!
xo,
s
Meg says
I recently found your blog, and I’m going through some of your older posts to get *great* ideas on making some DIY upgrades to my condo. I love this idea for the spare bedroom!!! Thanks!
katie says
So so cute. Thanks for the tips! Whats the best way to hang a headboard if you’re making it out of plywood? I think I’m going to go that route!
YoungHouseLove says
Hey Katie,
If you scroll back through the comments I think you’ll see some more descriptions on that very subject. It’s called a “cleat” so you might want to google it to get more images and info. Hope it helps!
xo,
s
juliet says
Hi – I just saw this on AT and I LOVE the hot pink throw on the bed! Do you think you could find out where that is from, pretty please. Thanks a million!
YoungHouseLove says
It’s actually from Ikea! Hope it helps!
xo,
s
juliet says
yes! thank you!
Lauren says
This weekend my boyfriend and I are moving my parents old guest bedroom bed into our spare room. My parents want to give us their old squeeky brass headboard which is definately not our style! I can’t wait to make this headboard! Thanks for the directions.
Cassie says
I swear your blog covers every topic I ever look up! Thanks for such a helpful, and fun, resource!
I will be giving my daughter a big girl room sooner than I’m ready; and love the idea of a custom headboard. I will be buying her a full bed and mattress as well. Do I just need a basic frame if I’m making my own headboard? Suggestions on places for cheap ones since it won’t be seen?
Also, completely random, but the bedding I’ve had saved for two years is that french poodle on a vespa bedding that is in your neice’s room! I spotted it on overstock and had to have it. Do you have more pics of her room with that bedding? (I think it’s since been changed.)
YoungHouseLove says
We would look on craigslist or even at thrift stores for a cheap bed frame and if that doesn’t turn anything up a mattress store like Sleepy’s should sell them for around $29-49. Hope it helps! And it’s so cute that you picked up the same bedding that Olivia had in her bedroom- unfortunately we don’t have other pics of her room with that bedding for ya.
xo,
s
katie says
just followed your tutorial, but instead of a frame or plywood, i used pegboard (you know, with the grid of holes already drilled). hanging it is simple–thanks to all the holes, there’s no need to add a bracket as is necessary for plywood–and tufting will be easy also. i don’t even have to use buttons on the front (just a cross-stitch to tuft it down) but i’ll put buttons on the back, to brace against the holes. simple and awesome, and definitely a project i will repeat in the future. breaking in the staple gun was fun, too. =)
YoungHouseLove says
Awesome tip! Thanks for passing it along.
-John
kitty says
I’m thinking of using pink foamboard from Home Depot to make a headboard. It comes in a 4×8 sheet in 2 different thicknesses. Lightweight!
YoungHouseLove says
Another great idea! Let us know how it works out.
xo,
s
AM says
Is there any reason not to use 1/8″ wool felt instead of cotton batting? I know it will retain more heat as we lean up against it, but can you think of anything I am not thinking of? I happen to have some extra yards of 1/8″ organic 100% wool felt and I would love to use it on this clever project instead of spending more on cotton batting. What do you think? Thanks!
YoungHouseLove says
Nope, 1/8″ wool felt should work just as well so go for it. There’s definitely more than one way to skin a cat when it comes to DIY!
xo,
s
Melissa says
I too came across your blog by accident. You two are TOO cute! Love your house, style and ambition! Can’t wait to see more. You guys are now in my favorites!