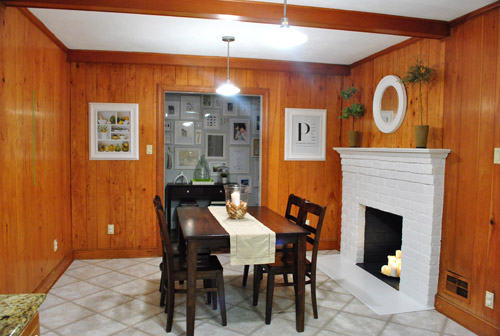
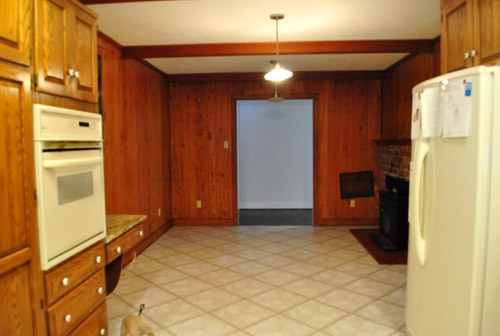
About a week ago (after we painted our brick fireplace) our kitchen looked like this:
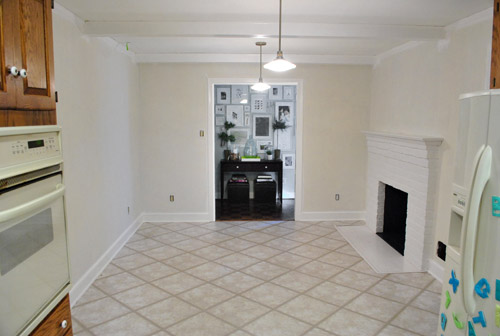
Then we removed the desk and upper cabinet (that will be in the way of our big future doorway to the dining room) and after one coat of not-covering-at-all primer it looked like this:

Then we finally got the primer thing right after dealing with maddening bleed-through issues thanks to two days of applying coat after coat and three different types of primer (more on that here):
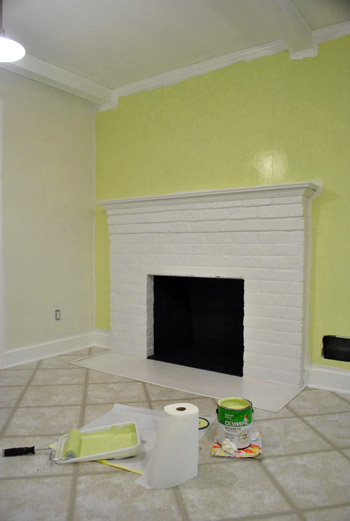
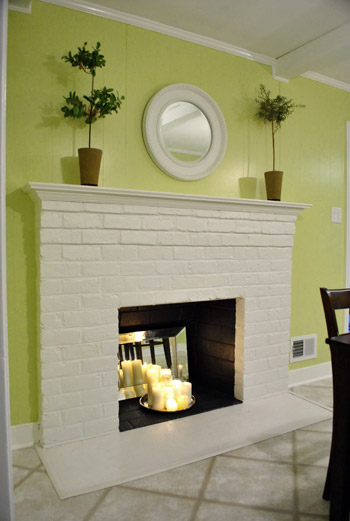
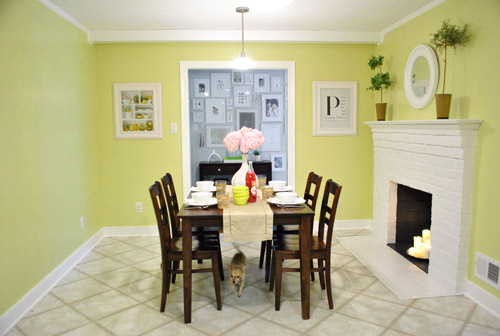
And now it looks like this, although it reads a bit more yellow in these photos than in person (it’s a smidge greener in real life).
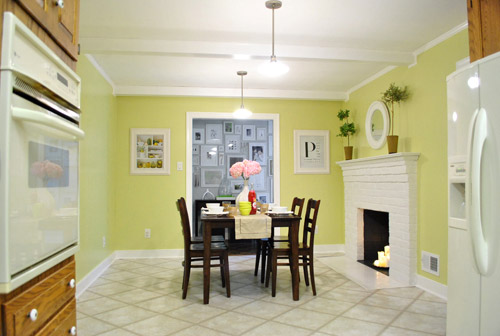
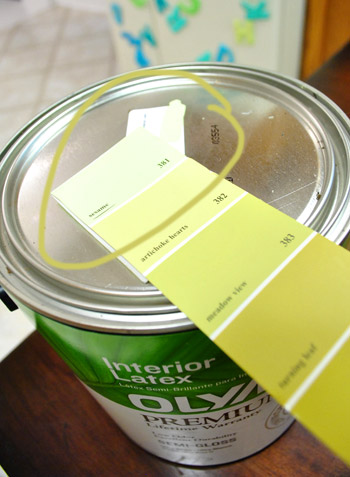
It’s definitely a warm golden green tone (aka: grellow). Sort of like the color of an artichoke heart.
There’s definitely a lot more to do in there, but we’re so glad to have the whole prime-and-paint-the-paneling thing checked off. Here’s a fun little video that encapsulates the entire process in three short minutes. Which is more than a little ironic because it took us just a wee bit longer in real life (you know, just a smidge). Just convert those minutes to days. See it below or here on YouTube.
As for the paint color, after a decent amount of debate (and some pretty thorough consideration of the adjoining rooms that will be seen along with the kitchen) we opted for our new favorite color, which turned out to be Sesame 381 by Benjamin Moore (color matched to Olympic No-VOC paint in semi-gloss).
We were inspired by this kitchen (found here via Pinterest) since our cabinets will eventually go white, possibly along with our backsplash.
We chose this warm yellow-green color because we want the kitchen to be bright and happy (there aren’t any windows to the outside world – just one that looks into our sunroom) and it was suuuuuuper dark before we painted that paneling. We also knew the room could take a decent amount of color because:
- it won’t have any big long walls remaining when we add the extra-wide doorway to the dining room across from the fireplace (just slivers of wall here or there will remain, so the color won’t be overwhelming)
- we’ll be painting the cabinets glossy white later in this phase of our little kitchen makeover along with un-busying the backsplash (which will further temper the color on the walls)
- we’ll be adding an island in the place of our too-small table someday (with a different countertop and most likely a non-white base color to keep things interesting and layered)
- this room is surrounded by the dining room, the hallway, and the living room, which all have soft gray walls (so we wanted this space in the middle of them all to have some cheerful color going on)
When it came to our swatch-selecting technique we just hung up a ton of them and looked at them at all times of day to see which one we preferred. As for why we chose this swatch specifically, we decided:
- this golden-green tone will tie into the chartreuse curtain tones in the dining room and the cheerful green tone in our shaggy living room rug without being too matchy-matchy across the board (we didn’t want the exact same tone of green everywhere for fear that it would look a bit too “orchestrated”)
- a warm yellow kitchen is always a classic choice, but this color feels modern and crisp with the green undertones (and it’s not completely terrible with the oak cabinetry, which will stay for a little while)
- this tone is in Sue the Napkin – albeit a bit darker (a sure sign it’ll work with our whole house palette really well)
- unlike some of the other softer greens and greeny-gold tones that we considered, it really makes the white trim pop (lighter swatches didn’t have the same crisp effect next to the fireplace or the trim)
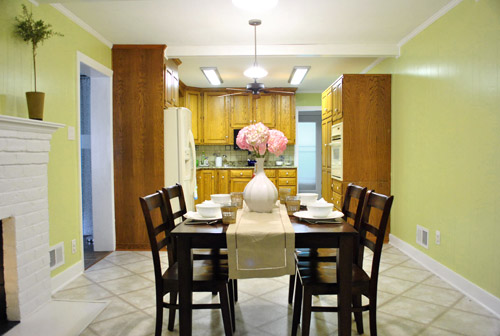
Here’s how it looked with the first coat going up around the fireplace (thanks to all that primer prep– we had really awesome coverage). Again, it’s looking more yellow and less green than it does in person in these photos, but you can really see how the white pops and how it turned a dark and brown-everywhere space into a sunny and bright room in the middle of the house.
We also decided that it was high time we switched out all of the “bisque” colored vents, outlets, and light switches.

So we grabbed a bunch of crisp white ones from Lowe’s, turned off the power, removed the old ones, connected the new wires the same way they were connected to the previous switches, added the outer switchplates, and turned the power back on. The whole switch swap took about twenty minutes. So much better:
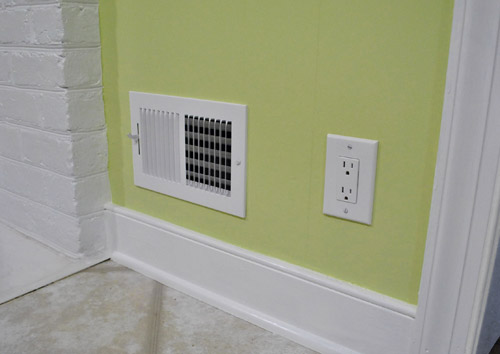
Some people opt to paint their vent covers so they blend in more, but for now we’re happy to leave ours crisp and new since we’re so used to old drippy painted-over covers (clean paint-free ones kind of feel like a luxury). Who knows if we’ll decide to add a few thin and not-drippy coats of paint to blend those vents in later though. We’ll keep you posted.
Oh and it’s really fun to go back and look at our fireplace, which originally looked like this:
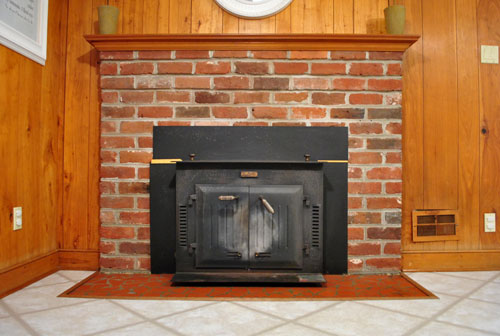

Then we removed the old unused wood stove and painted the brick, and it looked like this:
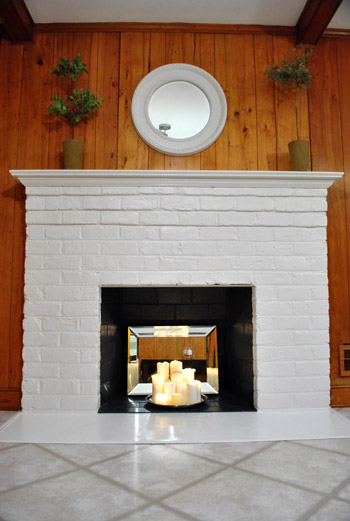
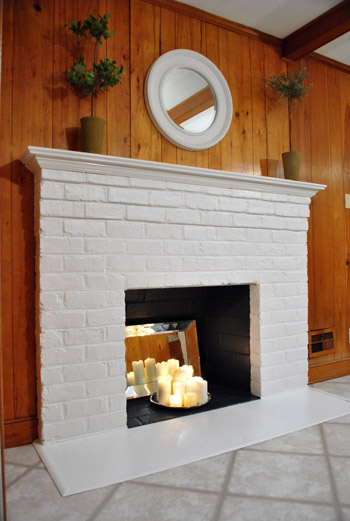
It’s amazing how much painted paneling can freshen things up even more:
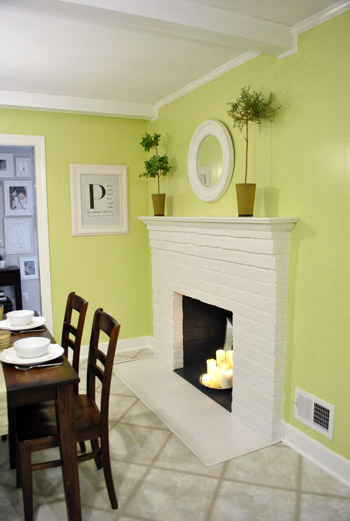
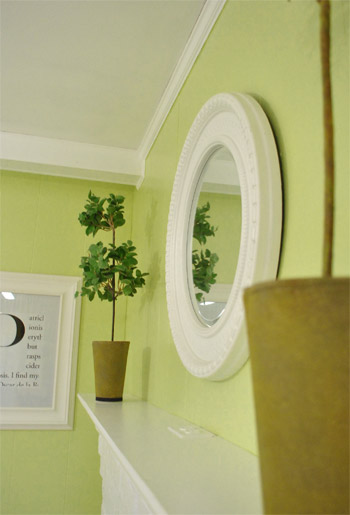
And we love how things like the white frames and the round mirror above the fireplace layer right in with the glossy white trim and beams:
Burger likey (he knows how to work that runway):
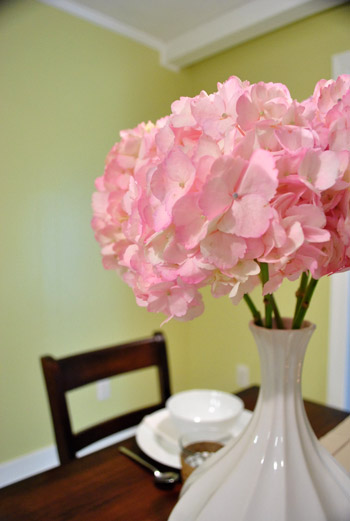
Oh yeah and see those pink hydrangeas? I wish I could say that we grew those, but they’re from the store. We figured to celebrate all that priming and painting we could spring for something soft and sweet, so these little pink snowball-looking-guys had me at hello (that’s an old vase from Target btw):
As for the opening to the dining room, here’s where it’ll be (it will line up exactly with the dining room window on the other side for balance):
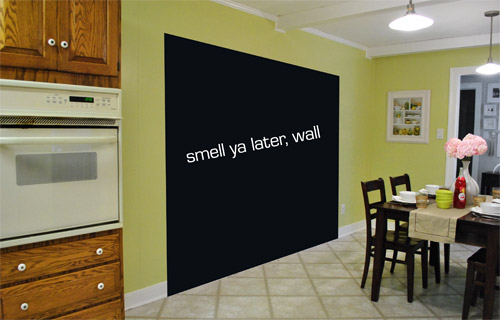
We learned that we’ll need a permit to knock out so much of that load bearing wall, so it sadly won’t be anything we can do very quickly (and we’ll definitely be leaning on some pros for help). But we can’t wait to tackle it as soon as we can get through all the permit business and hunt down the right expert for the job.
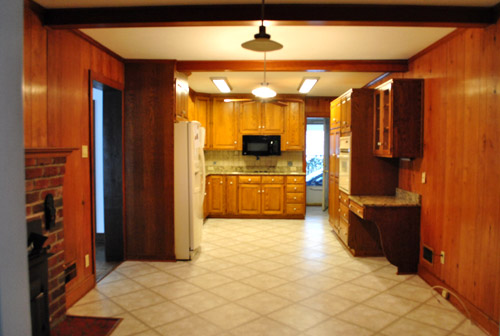
Now for some before & after bid-ness. Just because that’s my favorite part. Here’s the kitchen as it looked on moving day about six months ago:
And here it is now (still can’t wait to add that island, paint those cabinets, and upgrade the floor & appliances someday though):
Moving day again (yes, one of those lights was out):
And now:
The crazy thing is that these photos were taken around the same time of day so it definitely demonstrates how much lighter and more cheerful the space feels now that the dark paneling is a thing of the past. Oh and here’s the budget breakdown:
- Olympic Premium No-VOC primer from Lowe’s: $12
- Behr 2-in-1 Primer + Paint (in semi-gloss white): already owned
- Kilz Clean Start No-VOC Primer from Home Depot: $20
- Olympic No-VOC paint (in Sesame by Benjamin Moore) from Lowe’s: $22
- New vent and outlet covers from Lowe’s: $43
- Brushes/rollers/tape/paint tray: already owned
- Total: $97
So there you have it. The kitchen madness has officially begun. As we mentioned here, we’re definitely going to do this in phases (gotta save our pennies and just take things on as we can afford them). But it should be a whole lot of fun. As in, more fun than a barrel of monkeys. And definitely more fun than priming that paneling five hundred times. Do any of you guys have long term kitchen plans like painting the cabinets or adding an island or upgrading the flooring or making some overhead lighting switches (we’re definitely in need of some of that too)? Oh the possibilities…
Psst- We announced this week’s giveaway winner. Click here to see if it’s you.

Caity says
Love the song choice for the video! And the paint looks fabulous!
Leigh Anen says
Wow, the change looks absolutely amazing! You have definitely inspired me to get started on my kitchen. Unfortunately, mine will take more than just paint as everything is laminate – walls, cabinets and countertops!!
Karen says
I’m so in love with that space! It looks fabulous. I think an uplifting, bright kitchen is such a great way to start your day and enjoy breakfast. Amazing job guys!
Miriam says
What an amazing inspiration. That color choice was perfect: a sunny spring day just sprung up in the middle of your house. It even makes the oak cabinets look better!
Thanks so much for sharing all the long (painful?) steps of priming the paneling. It’s good to see you tackle the job right, as I sometime’s look at the wall and think “the package said it only needed one coat . . .” I’m now inspired to re-do some painting projects that ended up sort of half-a– the first time around.
Thanks for the great video too!
Miriam
Jodie says
You guys!! It looks GREAT! I absolutely love the color – very nice job. :D I still can’t get over how much brighter and cheery the room is. Yay!
Melissa@Julia's Bookbag says
This color is Fantastic! The whole thing is Fantastic! Random question, but this is now twice I’ve seen cool plants on a fireplace mantel — what kind of plants are your little topiaries?? I want some tall plants for my family room mantel. Do those plants you have do well without too much sun?
YoungHouseLove says
They’re fakers from Crate & Barrel a while back! Haha.
xo,
s
Christine Schwalm Design says
Fantastic job! For the island, may I humbly suggest either a charcoal (similar color to the sectional) or…a navy blue? With a butcher block top?
YoungHouseLove says
Love the charcoal idea with butcher block! We’ve totally talked about that (and even pondered a small splash of the same deep teal color on the built-ins in the dining room- but maybe just with accessories).
xo,
s
Jordan says
What a big difference! And I totally agree that once those cabinets go white the color on the walls will look even crisper!
Jenn says
I am so happy to have found your site! It’s so encouraging to see what some paint and elbow grease can do to a space. I am looking forward to more updates. Great work!
Chelsea in Richmond says
WOW. What an amazing transformation. The room looks so much bigger! I just don’t understand how anyone thought paneling was ever a good idea lol!
Great work guys!
and btw, I pinned that same exact kitchen on pinterest haha. Love that site!
Megan says
LOVE it! It’s so inviting now!
D'vine Living says
What a massive difference paint makes! So wow now! Well done! Makes we want to jump into our kitchen reno immediately.
Ashley @ Spite Or Flight says
You guys, it looks amazing!! We have the same color in our kitchen, and I love it. We have cherry cabinets that I’ve been itching to paint white, but I’m afraid once I do the countertops and floors will look terrible and dingy, and we don’t have the budget to take those on for a while. Can’t wait to see the finished product!
Lisa @ Life in Green says
Looks great! So fresh and so clean ;)
Chris says
Every time someone paints brick, an angel cries.
Mallory says
All I can say is WOW! I have to admit that I was a little skeptical about the grellow. Not something I would have been brave enough to try, but it just goes to show how great you guys are at picking the right colors because it looks amazing! And while white cabinets will look awesome, in the interim, the oak looks good too.
We bought a house a year ago and while we have plans to completely gut and redo the kitchen, I knew I couldn’t live with it in the state it was, so I convinced my boyfriend to let me spend $100 to spruce it up. (http://our1stnest.blogspot.com/2010/05/100-kitchen-makeover.html) Well, I only spent $89 total and am so happy with the results! It was even recently featured on Apartment Therapy’s Re-Nest as a green way to update your kitchen! I think paint can fix anything!
YoungHouseLove says
Amazing! What a fabulous change. And that budget= awesome.
xo,
s
Melissa (The Dominion Project) says
Ok, you guys must be super talented painters. No drop cloths AND you’re using a nice kitchen chair to stand on? At our house, it would all be splattered with paint. I can only dream of one day being that skilled! :)
YoungHouseLove says
Haha- we have some drips but we just wipe as we go. And anything that dries can be scraped off when it comes to wood or vinyl (not carpeting though – then we use dropcloths).
xo,
s
Jo says
First time of posting, but have been following your site and blog for about a year and absolutely love it!!!
Just wanted to say your kitchen looks … absolutely fabulous!!!
Abby says
This is freakin amazing! Love the color. And the white.
Chels says
Can you explain how you “color match” to other paint lines? Do I just take the swatch up to the paint counter and say “we want this in XXX brand/type of paint?
I once took a swatch from one store to another, and was told at the paint counter that they couldn’t mix it for me. Apparently they can’t mix anything that’s from a paint brand they don’t carry in the store?
YoungHouseLove says
Yup, you take the swatch to the counter at Lowe’s or Home Depot and they look up the name in the computer for the formula (and sometimes scan it if they can’t find the color in their system). So far they’ve been able to match every swatch we brought (they like matching competitors at our store since they get the sale). Good luck!
xo,
s
Laura says
Any chance you’d mind sharing the brand and color you used?? I just painted my kitchen yellow and I think it’s a little lemon creamsicle for my liking. I really like the looks of yours though! We are going for the same look. We already have white cabinets and are doing a counter refinishing kit this weekend in black. The dining area is part of the kitchen so we want that to be bright and cheery. Thanks!!
YoungHouseLove says
It’s Sesame by Benjamin Moore color matched to Olympic No-VOC paint. Hope it helps!
xo
s
loquaciouslaura says
Hi John & Sherry — I love the color, but I’m having a hard time seeing it in the room in its current state … the inspiration photo rocks, but with the dark table and the oak cabinetry it’s hard to envision.
I was wondering, though, what you’re planning on doing with the flooring? Something about the flooring makes me wonder if something darker-toned will set off the white fireplace and grellow walls more. Is that part of the near-term kitchen redo or long-term kitchen redo, or are you happy with it?
YoungHouseLove says
We found hardwood floors under at least part of the kitchen (we’re hoping it goes all the way through and plan to reveal those in Phase 2 – since we have to remove and reinstall all the cabinetry to get to them). And of course the oak cabinets and dark table will be switched out in Phase 1 so it should be fun to see how it changes!
xo,
s
Rachel @ The Avid Appetite says
I adore this color Sherry! It looks beautiful!
Anna says
Oh wow, this looks amazing! And thanks for sharing your 6-month waiting period rule. Hubby and I just bought our first home in April (in sunny South Carolina) and we’ve undertaken a lot of upgrading work (old dog-nasty carpet HAD to go) but the kitchen is still waiting in sadness. So good to know that it’s okay to wait and see how the house “fits” before changing anything. Keep up the great work y’all, and thanks for always inspiring us to love our older home!
Rebecca says
Beautiful color, I need to find a place to use it in my home; the transformation is amazing!!! So much work that’s so worth all the effort.
Have you ever considered tinting your primer? I painted my cavernous, ugly paneled basement a couple years ago and it definitely made the process much faster because there was already color on the walls. It required fewer coats of paint as a result.
Kudos to you! I’m excited to see more of your kitchen renovation.
YoungHouseLove says
Oh yeah- tinting is always a great shortcut – we do that when we go dark (like in the guest room).
xo,
s
Sherry F says
WOW! It looks amazing. I love the color you chose. Definitely cheerful. I love the idea of an non-matchy island too. Very chic. I want to re-do my island to give it some standout appeal.
Gina @ Running to the Kitchen says
Wow! It looks amazing! And, I love the song in the video :)
Jen says
WAY TO GO!!!!!!!! You are spot-on with the inspiration pic! You both never cease to amaze me.
Kat says
Love love it! We must be on the same wavelength – I just painted my dining room practically the same color (Behr’s Dried Palm) with white trim.
Looking forward to seeing how you accessorize the room as I am attempting to accessorize mine!
Nancy says
UH-MAZING transformation!! I’d say the hard work definitely paid off. Great job!!
Michelle says
Oh My GOSH!!! It looks AMAZING!!!!!!! What a difference a coat…. or 5…. of paint can make!!! Great job you too! I loved seeing ya paint in warp speed… ya’ll are funny….
I’m loving that color…. Oh, I soooo need to repaint my house… but I think I’ll start with kilz ;)
Emily A says
Amazing what paint can do!
Love it!
Bonnie says
What an inspirational and beautiful transformation!
Victoria C says
Wow! Its amazing that a few coats of paint can update scary out of date panelling into something quite beautiful.
Chrissy Henry says
It looks amazing!! And I totally saved your inspiration picture into my “kitchen re-do ideas” folder!! I LOVE IT!!
I totally think that you should take a picture of the dining room and photo shop it into the “smell ya latter wall” photo of where the big doorway will be. I am so excited to see how much of a difference the more open floor plan will make. I know it may be a ways off but I am still excited about it ;)
Vonda says
Sherry, the new Bon Air folks will be around Janke and Buford.
YoungHouseLove says
Cool! That’s a great little area!
xo,
s
Cyan B says
Tried watching your video on Vimeo and it says that i do not have permission to watch this private video. Am I doing something wrong?
YoungHouseLove says
I think I fixed it. Hope it works now!
xo,
s
Cyan B says
It’s working now, thanks!
Megan W. says
Oh my goodness! I love this makeover! You two (well three, I mean…four including Burger) are awesome! Beautiful wall color that really pops against the white, and it’s such a great way to take care of that paneling without taking it all off and starting from scratch. I am soooo looking forward to the rest of your kitchen remodel!
Jessica says
Totally off the subject….how do you get Clara down for naps and bedtime? Do you just lay her down and she goes to sleep? Or do you have to cuddle her to sleep then lay her down? My 14 month old only goes to sleep on her own like once a week. Sometimes she will be playing and just lay her head down in the middle of the floor and take a nap, but for the most part, we have to give her some milk and hold her til she falls asleep….just curious how people get their babies to sleep without “babying” them too much?
YoungHouseLove says
We have a short little routine of saying goodnight to Burger and going into her room and turning on her sound machine and closing the blinds and turning off the lights and giving her Gee (her favorite stuffed giraffe) and laying her in her crib. Then we wave and say goodnight and walk out of the room and close the door. Nine out of ten times we hear her babbling or squealing for a bit but then she drifts off to sleep. We know we have it easy though! We just got lucky I think. Although Clara has been sleeping in her crib in her own room from day one (there wasn’t room for a basinette in our bedroom) so perhaps that’s why she feels so at home in there?
xo,
s
Jessica says
Wow…that’s amazing! My peanut has been sleeping in her crib in her room since day 2 (Day 1 we tried the bassinet in our room and she hated it.) And she used to just go to sleep when we laid her down, but not for the last 6 months at least. We have a routine of giving her milk around 8pm and reading her 3 bedtime stories. She usually goes right to sleep after book #3, but if she wakes up when we lay her down in her crib, she totally freaks out. I’m so incredibly jealous of you guys…haha! I need to work on letting her cry it out til she gets used to just going to sleep, but it breaks my heart to think she might be scared or something….anyhow, thanks for the insight! Appreciated!
YoungHouseLove says
Aw good luck! Your book routine sounds great.
xo,
s
Joy says
A new bright WOW room. You must be doing many happy dances.
– Joy
JZB says
Goosebumps! I have goosebumps! You two are amazing. It looks great. Love love love the color.
Lesley H says
S-T-U-N-N-I-N-G!!! Awesome job after much perserverance! This is the best example yet of what an amazing difference paint makes! Pretty good bang for 100 bucks. Relax those arms now :)
Michele says
It looks amazing!! How will you restrain yourself from starting the cabinet-painting project this afternoon?
YoungHouseLove says
Haha, I think we’ll be ok. Our arms are numb. We’re calling it a forced hiatus from any painting for a little while. Haha.
xo,
s
Kim says
I love the transformation! Great job. I also can’t believe you paint without drop cloths & such. Do you guys not drip, spill, splatter, splash? I hate painting because of all that prep work but every time I see your transformations it lights a fire under my bottom and I want to do it to our house.
Keep up the great work!
YoungHouseLove says
We definitely have a drop here or there but we just wipe as we go (we use drop cloths on carpeted rooms though!).
xo,
s
Annie says
I love your before and afters, even if they’re afters-in-progress. The difference is huge!
Nadia says
Looks great! We are just now finishing our big kitchen reno and were thrilled to get rid of our ugly overhead “doctor’s office” lights! The new can lights just look so much neater and cleaner and bring in so much better light! Above our table we went with the Firefly light by CB2…love it!!
Nicole says
Oh my goodness guys, I am speechless. What a transition. You two never cease to amaze!
Abbi says
Every time you guys paint something you inspire me to try painting things with out the dreaded blue tape and tons of drop clothes. Putting up that freaking tape always takes SO much time and then I end up having to go back and touch up anyway when I pull off some of the paint when I take it off. Trying your method next time!
Here is a link to your inspiration room from Southern Living just for some more sourcing info.
http://www.myhomeideas.com/room-galleries/crsip-green-kitchen-00400000050789/index.html
YoungHouseLove says
Love it! Thanks for that link Abbi!
xo,
s
Meredith @ La Buena Vida says
I bet you guys are totally loving the difference! It looks great! I can’t wait to see it all with the cabinets painted!
I’m thinking about tackling OUR kitchen cabinets this weekend–but I’ve been saying that for years, so who knows…lol!
Nicole says
Looks great!! How many hours of babysitting did you end up needing in total from John’s mom?
YoungHouseLove says
Haha- probably around 10 total? Thankfully Clara took a nap for the entire painting process (about 2 hours) so it was just the two days of priming that we needed help with (about 5 hours each day). Grammy is the best!!!!
xo,
s