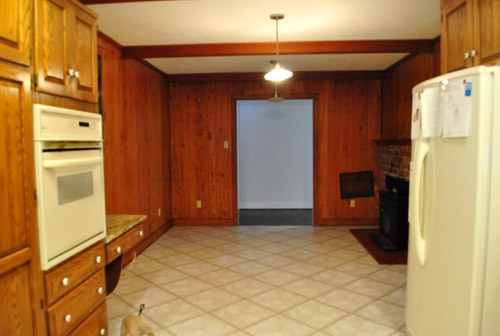
About a week ago (after we painted our brick fireplace) our kitchen looked like this:
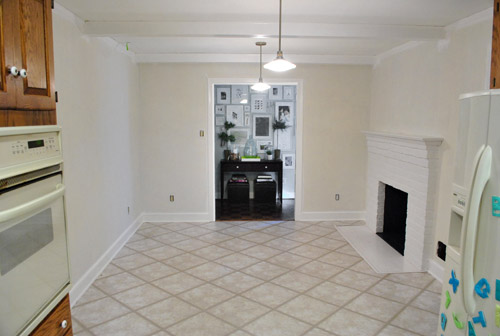
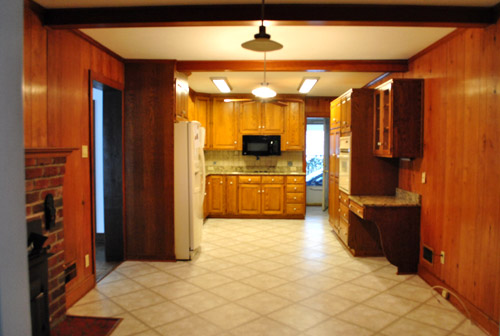
Then we removed the desk and upper cabinet (that will be in the way of our big future doorway to the dining room) and after one coat of not-covering-at-all primer it looked like this:

Then we finally got the primer thing right after dealing with maddening bleed-through issues thanks to two days of applying coat after coat and three different types of primer (more on that here):
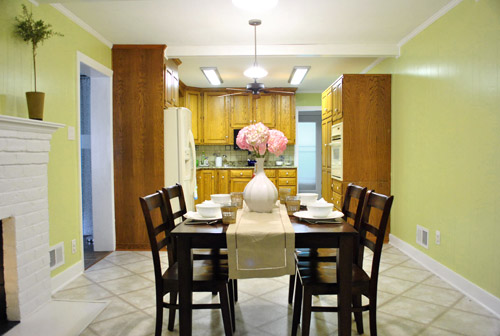
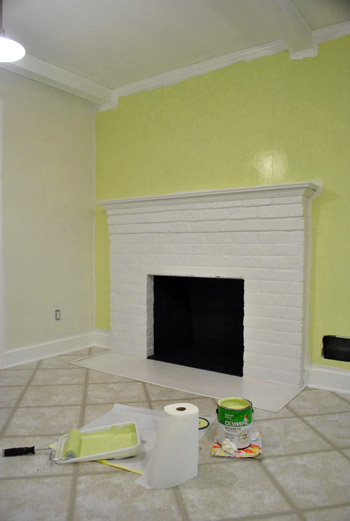
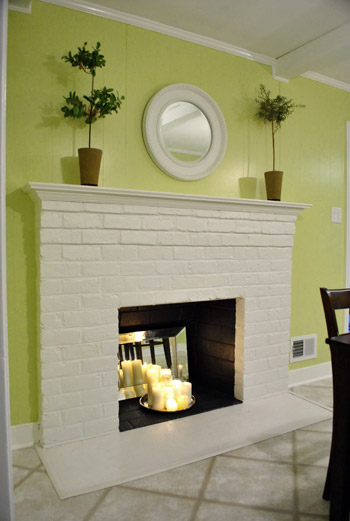
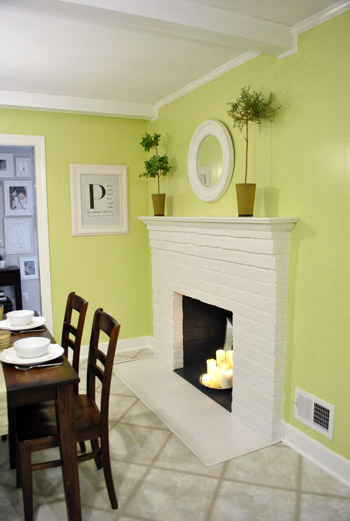
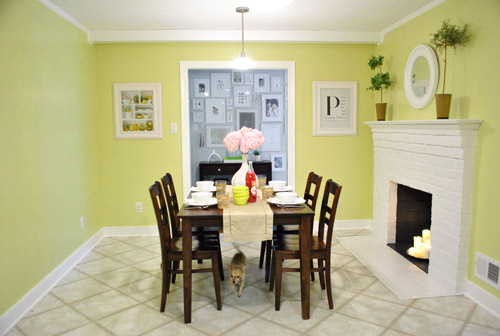
And now it looks like this, although it reads a bit more yellow in these photos than in person (it’s a smidge greener in real life).
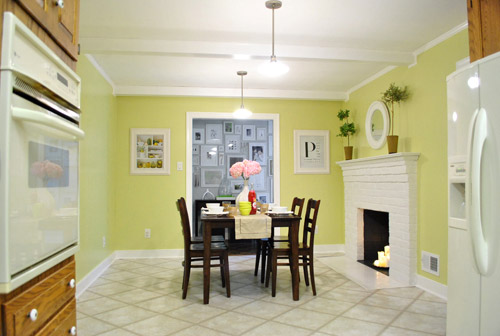
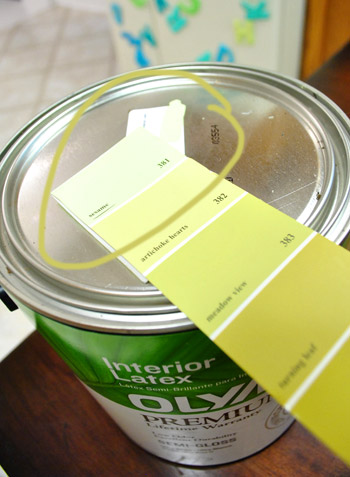
It’s definitely a warm golden green tone (aka: grellow). Sort of like the color of an artichoke heart.
There’s definitely a lot more to do in there, but we’re so glad to have the whole prime-and-paint-the-paneling thing checked off. Here’s a fun little video that encapsulates the entire process in three short minutes. Which is more than a little ironic because it took us just a wee bit longer in real life (you know, just a smidge). Just convert those minutes to days. See it below or here on YouTube.
As for the paint color, after a decent amount of debate (and some pretty thorough consideration of the adjoining rooms that will be seen along with the kitchen) we opted for our new favorite color, which turned out to be Sesame 381 by Benjamin Moore (color matched to Olympic No-VOC paint in semi-gloss).
We were inspired by this kitchen (found here via Pinterest) since our cabinets will eventually go white, possibly along with our backsplash.
We chose this warm yellow-green color because we want the kitchen to be bright and happy (there aren’t any windows to the outside world – just one that looks into our sunroom) and it was suuuuuuper dark before we painted that paneling. We also knew the room could take a decent amount of color because:
- it won’t have any big long walls remaining when we add the extra-wide doorway to the dining room across from the fireplace (just slivers of wall here or there will remain, so the color won’t be overwhelming)
- we’ll be painting the cabinets glossy white later in this phase of our little kitchen makeover along with un-busying the backsplash (which will further temper the color on the walls)
- we’ll be adding an island in the place of our too-small table someday (with a different countertop and most likely a non-white base color to keep things interesting and layered)
- this room is surrounded by the dining room, the hallway, and the living room, which all have soft gray walls (so we wanted this space in the middle of them all to have some cheerful color going on)
When it came to our swatch-selecting technique we just hung up a ton of them and looked at them at all times of day to see which one we preferred. As for why we chose this swatch specifically, we decided:
- this golden-green tone will tie into the chartreuse curtain tones in the dining room and the cheerful green tone in our shaggy living room rug without being too matchy-matchy across the board (we didn’t want the exact same tone of green everywhere for fear that it would look a bit too “orchestrated”)
- a warm yellow kitchen is always a classic choice, but this color feels modern and crisp with the green undertones (and it’s not completely terrible with the oak cabinetry, which will stay for a little while)
- this tone is in Sue the Napkin – albeit a bit darker (a sure sign it’ll work with our whole house palette really well)
- unlike some of the other softer greens and greeny-gold tones that we considered, it really makes the white trim pop (lighter swatches didn’t have the same crisp effect next to the fireplace or the trim)
Here’s how it looked with the first coat going up around the fireplace (thanks to all that primer prep– we had really awesome coverage). Again, it’s looking more yellow and less green than it does in person in these photos, but you can really see how the white pops and how it turned a dark and brown-everywhere space into a sunny and bright room in the middle of the house.
We also decided that it was high time we switched out all of the “bisque” colored vents, outlets, and light switches.

So we grabbed a bunch of crisp white ones from Lowe’s, turned off the power, removed the old ones, connected the new wires the same way they were connected to the previous switches, added the outer switchplates, and turned the power back on. The whole switch swap took about twenty minutes. So much better:
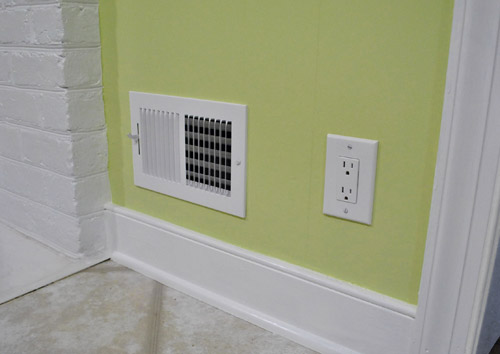
Some people opt to paint their vent covers so they blend in more, but for now we’re happy to leave ours crisp and new since we’re so used to old drippy painted-over covers (clean paint-free ones kind of feel like a luxury). Who knows if we’ll decide to add a few thin and not-drippy coats of paint to blend those vents in later though. We’ll keep you posted.
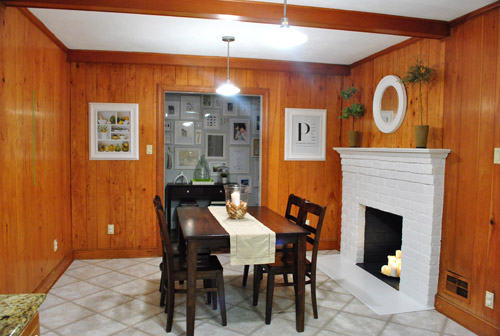
Oh and it’s really fun to go back and look at our fireplace, which originally looked like this:
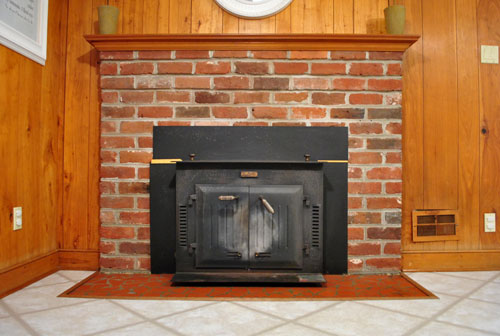

Then we removed the old unused wood stove and painted the brick, and it looked like this:
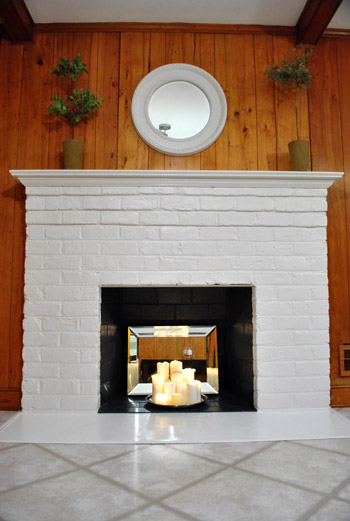
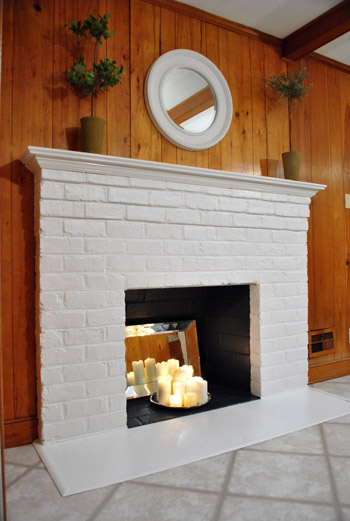
It’s amazing how much painted paneling can freshen things up even more:
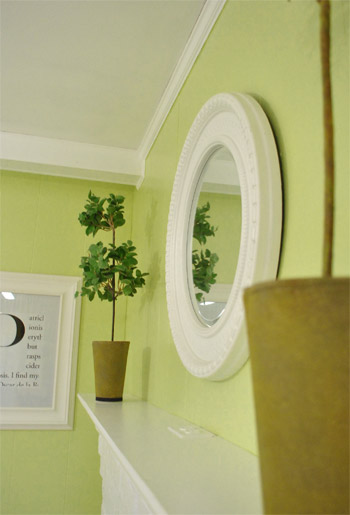
And we love how things like the white frames and the round mirror above the fireplace layer right in with the glossy white trim and beams:
Burger likey (he knows how to work that runway):
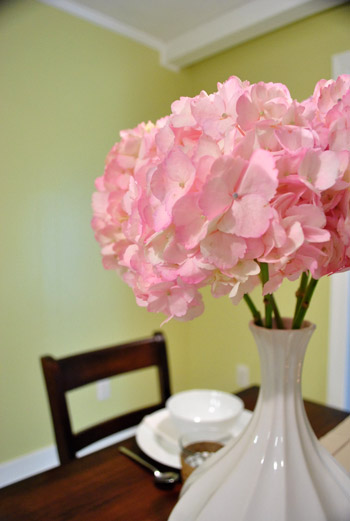
Oh yeah and see those pink hydrangeas? I wish I could say that we grew those, but they’re from the store. We figured to celebrate all that priming and painting we could spring for something soft and sweet, so these little pink snowball-looking-guys had me at hello (that’s an old vase from Target btw):
As for the opening to the dining room, here’s where it’ll be (it will line up exactly with the dining room window on the other side for balance):
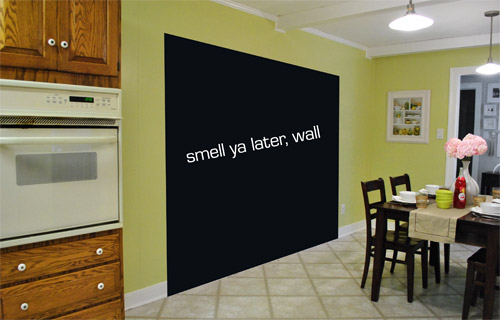
We learned that we’ll need a permit to knock out so much of that load bearing wall, so it sadly won’t be anything we can do very quickly (and we’ll definitely be leaning on some pros for help). But we can’t wait to tackle it as soon as we can get through all the permit business and hunt down the right expert for the job.
Now for some before & after bid-ness. Just because that’s my favorite part. Here’s the kitchen as it looked on moving day about six months ago:
And here it is now (still can’t wait to add that island, paint those cabinets, and upgrade the floor & appliances someday though):
Moving day again (yes, one of those lights was out):
And now:
The crazy thing is that these photos were taken around the same time of day so it definitely demonstrates how much lighter and more cheerful the space feels now that the dark paneling is a thing of the past. Oh and here’s the budget breakdown:
- Olympic Premium No-VOC primer from Lowe’s: $12
- Behr 2-in-1 Primer + Paint (in semi-gloss white): already owned
- Kilz Clean Start No-VOC Primer from Home Depot: $20
- Olympic No-VOC paint (in Sesame by Benjamin Moore) from Lowe’s: $22
- New vent and outlet covers from Lowe’s: $43
- Brushes/rollers/tape/paint tray: already owned
- Total: $97
So there you have it. The kitchen madness has officially begun. As we mentioned here, we’re definitely going to do this in phases (gotta save our pennies and just take things on as we can afford them). But it should be a whole lot of fun. As in, more fun than a barrel of monkeys. And definitely more fun than priming that paneling five hundred times. Do any of you guys have long term kitchen plans like painting the cabinets or adding an island or upgrading the flooring or making some overhead lighting switches (we’re definitely in need of some of that too)? Oh the possibilities…
Psst- We announced this week’s giveaway winner. Click here to see if it’s you.

Rhiana says
Amazing transformation! Love the color! It is just so amazing what a little paint and effort can do! And all under $100!
Michele says
I love it. So weird, but I tore your same exact pinterest picture out of a BH&G about two years ago. I love the color, but I’ve been told no before
on color matching at Lowes which is sad because it’s actually hard to find that chartreuse color…everything I look at has a tad too much green and not enough yellow
jeannette says
wow, guys, what a marathon. but of course you’ve made it look about 70 years newer. panelling of that kind really is the pits. and the color is excellent.
crissy says
Gosh, it just looks so natural that there should be a pass through right there.
Marie says
OMG that looks amazing! I have been waiting with bated breath for the results. I myself just removed paneling and dry-walled, I love how much brighter it is, but it cost beaucoup more for a similar result. Two thoughts 1) John, have you ever considered using an extension pole to paint walls? I use one and it is much easier because you get one solid even stroke from ceiling to floor with very little effort; and 2) Please for the sake of your limbs, please get a proper step ladder. I would hate to see anything bad happen. I like the Cosco 3-step with tray, for the large standing service and tray. I very much enjoy your blog and your fun and fresh design ideas. Thank you for being a place for this mommy to escape for moments each day.
YoungHouseLove says
We’re definitely overdue for an upgrade in the rod and step-ladder departments. Thanks for the suggestions!
xo,
s
Jen says
Here’s a secret that my favorite employee at Lowes told me – any broomstick handle that will unscrew from the base of the broom should be able to twist into the base of your roller (as long as the roller is threaded and will accept an extension rod). This will save you the cost of buying the rod!
YoungHouseLove says
Smart!
xo,
s
Sara says
I use the broomstick handle trick all the time. I’ve used various broom handles and they all will screw onto the bottom of paint rollers or even trim painting pads.
Isabella says
Another vote for a taller step-ladder… Cutting up high and painting crown molding is easier (and doesn’t need taping) if you’re up there at eye level too.
Rachel says
Wow! Love the difference! I recently had my own primer debaucle.We live in base housing on an Air Force base and recently found out we are being re-stationed.I had painted one wall in my super white house about 5 months ago.So now I have to paint it back.It took 4 coats of primer and 2 coats of regular paint to cover one yellow wall.Arrrrggggg.I think next time I will try the primer you guys used.Can’t wait to see the cabinetry and the new hole-in-the-wall.:)
Hollie says
Holy guacamole! This looks AMAZEBALLS! Looking forward to seeing the next phase of your kitchen transformation.
Kate @ Savour Fare says
My only question is what took you so long? I don’t think I could have lived with that paneling.
YoungHouseLove says
We weren’t 100% sure what we wanted to do with the kitchen for a while, so we just took our time. We’re slow poke chickens that way. Haha.
xo,
s
Kirsten says
Beautiful!!! FYI, I painted a tile backsplash (orange and brown glass) a few years ago with a white epoxy paint and it is holding up great! Maybe think about that when you move on to the kitchen proper – definitely a lot easier than trying to put up a new backsplash and great for testing out a look.
jenny says
wow it looks so much better!! I LOVE that color!! I wonder if the old owners still read your blog? If so, i bet they’re looking at this and wishing they’d done this a long time ago!!
Gina says
AWESOME transformation! Your kitchen looks fabulous now. Just beautiful!
What a beautiful home you are creating! Love your blog!
Rebecca says
Awesome! It makes me inspired to go paint (more!) of my trim- especially since it goes so quickly! :)
Crystal says
SO much better! I love it!! Every time I saw a picture of your kitchen before I cringed! =) I hate paneling with a passion – our whole house is full of it…but fortunately I was prego when we moved in so no one made me do one stroke of the painting!
Oh and that Kilz primer is great! I just used it to paint this week also and it does a great job!
Now if I can just convince my husband that we need a green kitchen… =)
Andi says
What’s the best way that you have found to save up money for your at home projects. We have a checking acct where our bills come out from and a savings acct for emergencies (which we recently used from to paint our living room) not an emergency lol
YoungHouseLove says
We just always try to save as much money as possible across the board (I cut John’s hair, we have one car, we cook at home for breakfast, lunch and dinner almost every day, etc). You can check out more money saving tips on our Projects page in the Money section. Good luck!
xo,
s
T.D. says
I love the video, its kinda fun to watch you guys move so quickly. Comments on the video:
1. Wow, John can really reach the ceiling without a stool- that has to be very handy.
2. You guys look like you don’t talk/laugh/joke/dance at all. Maybe those were the ‘cut out sections.’
3. The song is very fitting and cute.
4. It’s nice to see it really only took 3:09. Haha.
In all seriousness, it must have gotten old pretty quick with how many coats you all put the walls. It definitely showed because the kitchen totally rocks! I never realized how much ‘newer’ a space could feel by simply upgrading the vents, outlets and light switches- or as I like to think of them as the ‘fresh manicure’ for walls.
YoungHouseLove says
We were joking how antisocial we look in fast motion! We sing along to the radio and talk about random things the whole time (ex: who do you think will win The Voice? Do you think the same judges will come back in season two? How does this color look? What’s for dinner?) but I guess since we don’t actually stop for a long time and look at each other (we sort of talk to the wall) it’s hard to see that we’re chatting in fast motion. Haha.
xo,
s
KathyG says
I love painting with my husband for that very reason…the only thing I’m competing with for his attention is a paintbrush! It’s very nice time to talk about stuff.
julianna says
You need a platform ladder! We got one at Tuesday Morning for $35 (not sure how much they are regularly), and it makes painting so much easier. It’s a few feet long, so I can paint a large area before I need to get down and move the ladder. Much easier than a stepstool (or a kitchen chair).
Love the new paint color!
YoungHouseLove says
Sounds like fun!
xo,
s
Lauren says
did you guys use any painter’s tape?! Please tell me you’re not THAT talented to free hand too?
YoungHouseLove says
We did! We actually mentioned it in the breakdown (just around the ceiling since I can’t reach that well to have control and around the baseboards to keep it fast- but I has happy to freehand things around doorways and the fireplace).
xo,
s
Paula M. says
WONDERFUL job and a HUGE difference! Love the before and after photos (my eyes do a happy dance over before-and-after photo sequences).
One question: they’re not visible in the photos, but does the sight of the lines or “gaps” between the paneling boards ever bug you after they’re painted?
I’ve always wondered about that when I see pix of painted-over paneling. …I don’t have paneling in my place now, but some of the other condos in my complex do. At least one of the condos has a kind of unintended “beachy” look due to the whited-over still-visible paneling (which actually would be a great look if they riffed off that with similar decor, but that’s not necessarily the case).
(In my condo, prior owners had removed the paneling that originally existed along the longest living room wall and then — gasp! — didn’t refinish the wall afterwards, so now I’m stuck with that job. Because the wall had been paneled over, the original builders didn’t bother to float mud over the vertically hung drywall panels, but now that the paneling is gone, the joins are visible, so either I or someone else gets the job of retexturing that wall before repainting. Oof! So that’s the downside in some cases to removing paneling.)
YoungHouseLove says
Nope, we like the look of the grooves since it’s really subtle (like a soft texture and not like stripes or super obvious lines). I guess it’s like the texture of painted brick to us. But it’s definitely a personal preference thing!
xo,
s
Jessica C. says
Hi guys,
I just found your site 2 weeks ago and have been trying to catch up on many of your projects. It’s very inspiring! Glad I found it :)
This may be the wrong place to put this comment, but it does have to do with painting and trial and error.
I have an ENTIRE house to paint by myself and it’s been 3 weeks and I’m not past the prep work of only TWO of the rooms, and that’s b/c I’m running into unforeseen problems, and am now just generally overwhelmed. I wanted to keep my rooms low VOC, put landed up having to use a paint stripper and it looks like the bookcase I used it on still needs another coat and then I have 5 door frames and doors to strip using the same method b/c there’s too many layers of previous paint and some if it is peeling.
Right now, I cannot bring myself to do it. The chemicals plus the intensity of the labor is making me feel hopeless at the moment.
Do you have any experience with these kind of problems?
I have pictures and some explanations on my blog too: http://www.himynameisjessica.com
If anyone can help with ANY advice, I would be very grateful.
Thank you,
The Lonely Painter
YoungHouseLove says
So sorry for your problems Jessica! We haven’t had that specific issue but maybe if you post a photo and a link to your blog asking if others have ideas on our Facebook page you’ll get some advice? Or you could ask around at the home improvement store or google around for some tips? Good luck!
xo,
s
Ashley says
WOW! What a transformation!! I’m glad all your hard work paid off. :)
Lynette says
Your kitchen looks amazing!
Kristin (Australia) says
LOVE it!! It looks wonderful, so crisp and fresh… Do you just put a picture in your mind of how it used to look in there before you walk into the room, so when you turn that corner it just overwhelms you with how fantastic it is now (and you can secretly pretend you forgot and get a big surprise?) I would be doing that like 10 times a day in that kitchen :)
YoungHouseLove says
It’s still really weird to glance into the kitchen from the living room or the hallway since we’re so used to seeing brown! Our brains haven’t adjusted yet. Haha.
xo,
s
bethany says
Just wondering what the awesome count in all these comments adds up to?
Your kitchen does, btw, look awesome! Strong work, Peterisks.
Amy says
Maybe you already answered this but are you gonna reuse/repurpose the piece of granite from the little cabinet area you took out?
YoungHouseLove says
We have held onto it to see if we have any ideas for it, but if we can’t find a place/project for it we’ll donate or craigslist it.
xo,
s
Heather M. says
LOVE IT!!! It looks sooo good!! I literally gasped when I scrolled down to the first colored wall pic! And from a fellow blogger/neighbor who calls 20 miles west of Richmond VA her home, if you want some help painting those cabinets I’m in because I cannot wait to see how it all comes together!!! I’d even consider chipping in for paint! : ) Keep up the great work team Petersik!!
Amanda Wells says
I LOVE IT! The room looks so,so,so much bigger! I’m house hunting currently and paneling terrifies me.
I finally tried my hand at painting a lampshade – http://www.amandadovewells.com/?p=824.
Haley @ Nick&Haley says
love love love! it looks like a totally different room!
Tamsyn says
Oh my goodness, another out of this world transformation!! You guys are 100% inspiring :)
Becky :) says
Best make over in the new house yet! LOVE the color choice! Bright and sunny-just as a kitchen should be! You guys are worker bees!!
Matter of fact, you are the bees knees! YAY!
Charlene says
Wow what a difference! I’m looking at Sesame on my fan deck and it looks more greeny on the deck. In fact from the swatch alone I would not have picked it. On your walls its FANTASTIC! Just goes to show you that you have to paint a large swatch to see what the real color will look like right? I use foam core boards/school project boards, paint them and leave them all over the place to drive my hubby nuts! lol! Man I feel so boring thinking of painting my kitchen Manchester tan. ;-)
Michelle N says
Ohhh…yummy! Looks great!
Sheri says
You guys! You did a fantastic job! Love, love, love the color. It’s fresh and sassy!
Lindsey says
Wow. I just recently found your blog and I am in love with how you redo your houses!!! It’s so neat that you BOTH enjoy doing it. And as for the previous home-owners of the house, I bet they would buy it back from you after seeing the updates and changes. Great job!
Amanda says
Wow! What a change! Isn’t it crazy what some paint can do? I recently painted all of our wood cabinets white and the yucky brown walls a similar green color to the one you chose and it’s just a completely different room. Your kitchen is so much more bright and fresh! I can’t wait to see it when your vision is complete! Another great job!
Jasmine says
Oh my goodness!!!! It looks absolutely amazing!!!! :D Way to stick with it. I think I would’ve started crying after all the primer issues. Inspirational as always guys :)
Delaney says
Looks good! I saw another kitchen redo today that was based off the same inspiration photo!
Melly says
I’ll bet it feels like you can breathe in there now. It looks amazing.
kathy says
I LOVED the video! Videos like this will be nice to have later on when you look back at your YHL adventures. You two are so cute–and a great team– as the video shows. You guys should have a “TV Blog” on HGTV or something. The kitchen is adorable. Once the cabinets are white and the open wall lets in light from your diningroom window, you’ll need SUNGLASSES in there! <3
Darcy says
It looks so great! We just bought our first house and just smoothed out all of the textured walls and redid the hardwood floors. It took almost a week but everything is looking so great. As for the kitchen I am going to start with painting the cabinets so I am really excited to see how yours turn out and what your process is
.
jbhat says
Oooh! Love it! Ah, I am just a fool for a good before and after, and this one is perhaps the ultimate one. You Youngsters have done it again. And my, you have such a knack for making hard work look easy and fun. Well done!
jbhat
Shayna says
If you’re thinking about painting the outlets, etc. to match, why not paint the bisque ones you’ve taken out? Then you can put one up side-by-side with your new whites and decide which you like better.
YoungHouseLove says
We’d never paint the outlets or light switches, we just mentioned that we might paint the two vent covers someday (since they’re so big and obvious, and some people prefer to blend them in that way). We’ve tried painting our outlets and light switches and it never works- they always looks scratched and junky within a month or two. We definitely could paint the extra vent covers but they’re sort of drippy and gross with old paint (they were painted over a few times I think) so it might not look as crisp. Something to think about though- thanks for the idea!
xo,
s
Kara says
I am addicted to these after photos. Can I put in a request for more detailed shots?
YoungHouseLove says
We’ll probably have about five million more shots of the kitchen to share as we go (since there’s a whole lot more on our list- haha).
xo,
s
Rebecca says
Wow! Talk about a breath of fresh air!!!
So much less cave like = So much more you guys!
Blessings~
Rebecca
Jerri says
LOVE IT! Thanks to you, I am now a pinner, and your inspiration kitchen is on my board! It is one of my most favorite kitchens. Our kitchen is white and boring. One day, I hope to make it just as beautiful as your and the inspirational one! Great job guys!!!
Karla says
WOW! What a transformation. It looks amazing.
My very first thought was, “what a happy colour”!
Love it!
Erin @ Out on A Limb... says
Wow! From the 70s to the new millenium! What a transformation. Incredible work. You must feel so much lighter now walking into that space. Isn’t it amazing how much a color can change your mood? Thanks, as always, for the inspiration.
jeannie says
Could you post a “how to” for switching out plug outlets? Thanks!
YoungHouseLove says
Check out youtube for a few awesome ones! Sadly we tried to take pics and make a video but it’s so dark with the power off that it’s just not possible. So sorry!
xo,
s
Simone says
Wow! I love you new kitchen:) the colour is so fresh and happy looking! I cant wait to see what you guys do next, I am addicted to your blog!
Lindsay says
I can’t wait to see the cabinets white! I’m actually about to take on that same project and could really use the pointers.
Gina @ Temporary Nest says
What a long haul guys! I love the final outcome!! My boyfriend and I are moving in to our first house together and he left me to choose the master color all by my lonesome (talk about heart attack! needless to say there were picture texts galore…) and I actually ended up with a similar color to yours. Ours is a hint more green I suspect. But our furniture is going to be dark wood like your dining set so it really gave me confidence that it will all come together! YAY! Thanks guys! <3