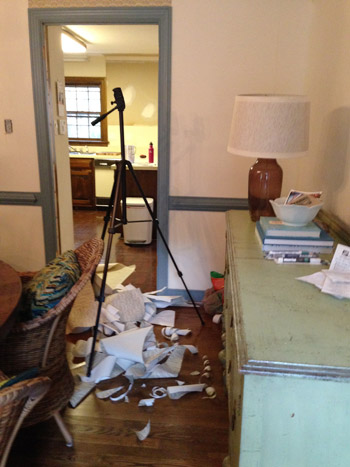
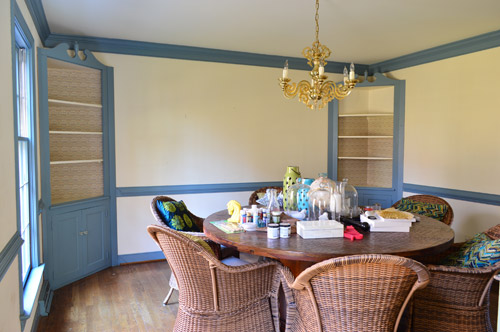
The wallpaper in our dining room is gone. Phew! Hooray!
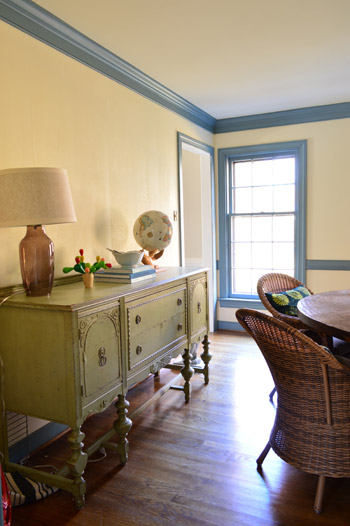
Ahh, fresh ready-to-paint walls, you make my heart sing. (And seemingly endless blue trim, you make my eyes twitch).
You might remember that each time I tackle wallpaper removal I’ve tried out a different method so I can report back to you guys on who’s the fairest of them all what’s the most effective of them all. Yes, I’m the Anderson Cooper of wallpaper. Except less handsome and more pregnant. Up until this point, I had tried boiling water sprayed on with a spray bottle for method #1, a steamer for method #2 (the one that’s in the lead so far for the easiest), and warm water mixed with Dr. Bronner’s soap along with a wet rag to get the underlayer as method #3.
This time’s method was recommended by a former professional painter named Sarah (who did her fair share of wallpaper removal before many a paint job) and her suggestion was “the dry stripping approach” which was followed by a round of “wet stripping.” Sounds saucy, eh? Don’t worry, it’s rated G. Essentially she said she just peeled the paper by hand without spraying it or scoring it with anything, and then used a large damp sponge to saturate the underlayer and peel that off as a second round. So I gave that the old college try…
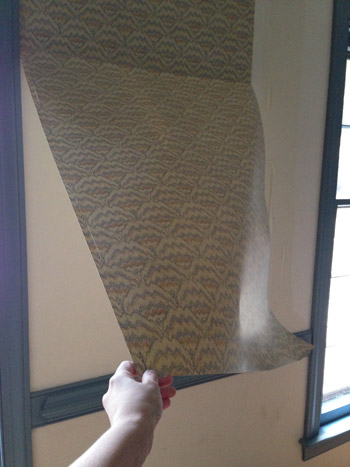
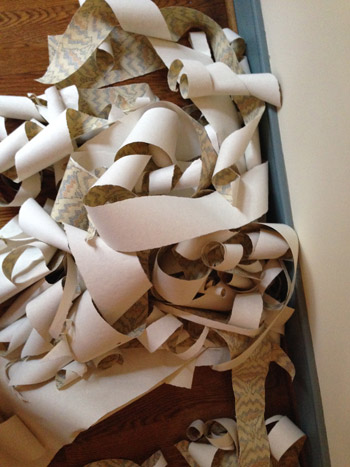
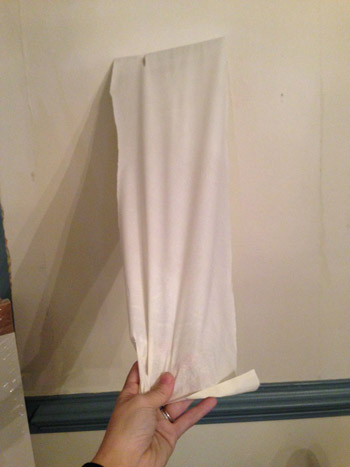
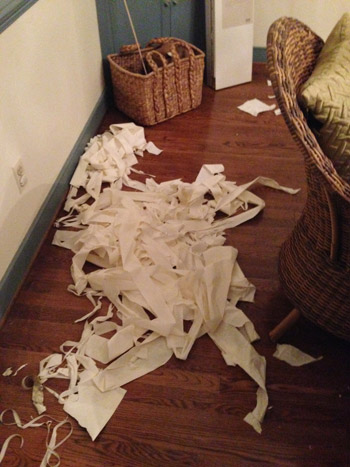
A lot of it actually came off in big sheets like the swatch above. Although you can see from this pile that there were a fair amount of thinner strips and leftover corners that I went back in for. It was by no means fast, but not super slow either. Surprisingly, I’d rank this dry stripping method as taking the same amount of time as spraying it all down, waiting for it to soak in, and then peeling it. Maybe even slightly faster because there’s not that spraying and waiting step. Obviously this won’t work for all situations, but if you have drywall that seems to have been properly prepped for wallpaper (as ours was) then you’ll hopefully have the same luck (especially if it’s old – this stuff was 30 years old and at some of the seams it was already loose and ready to be yanked).
This “dry” approach only took off the top layer of wallpaper for the most part (some other methods, like steaming especially, took care of both of them in one fell swoop if I was lucky) so I just ignored the white papered/glued underlayer and just pulled off the glossy top patterned part of the wallpaper, slowly making my way around the room over the course of a few days.
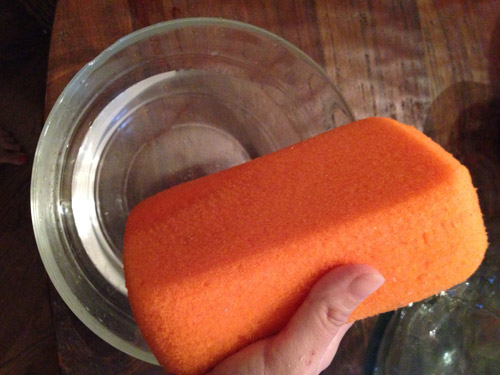
This is that underlayer I was talking about. As for how I loosened that up and peeled it off…
… I just dunked a large sponge in warm water…
… and wiped down the walls with it. That seemed to deposit enough water to soak through that underlayer so it started to loosen (see how it’s bubbling away from the wall on either side of the sponge in this picture?).
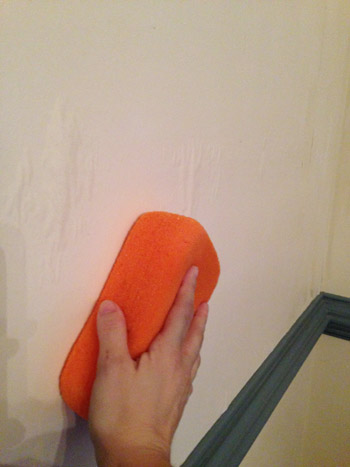
Then I could just peel it off. This was the slow-going part. You can see from the pile below that it came off in tiny slivers for the most part, so each wall took about an hour and a half just to free it from this clingy glue-riddled film.
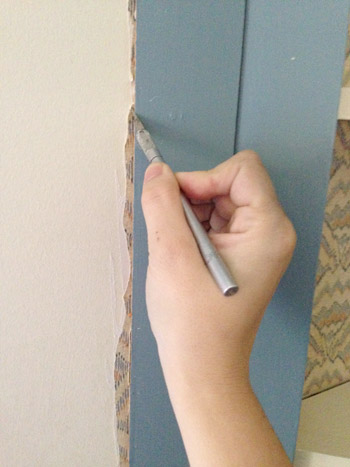
One challenging area that this room had were the seams next to those corner built-ins, which appeared to be installed after the wallpaper was in place (meaning the wallpaper was pinned down behind the sides of each one). My solution was to use an exacto knife to slice the edge of it. I scored it a few times to be sure I got all the way through, running the blade right against the trim so I could get the closest cut possible.
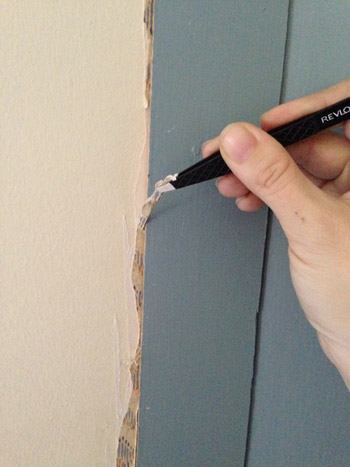
Then I used a tweezers to grab each of those strips, and slowly I could work my way down each side of each built-in to get a nice clean look.
And now for my nemesis. The wallpaper inside of those two built-in bookcases. It was wasn’t properly prepped like it was on our primed walls – instead it was glued with some sort of permanent adhesive to the unprimed and unsealed plywood backing of those built-ins, which pretty much made it a permanent application. Which I discovered after spending about two hours on just one of those cubbies (with seven more to go) and getting a lumpy and rough looking result in the one that I was able to sloooowwwly strip. So at that point, I called John in and we made the executive decision to OBI (officially bag it).
We figure we can either paint, re-wallpaper, or even add some starched fabric right over those stubborn wallpapered areas since getting them down to the bare wood is next to impossible (and they’re actually a lot smoother and better as a foundation for any of those options with the existing wallpaper in place since that one cubby got a lot rougher and bumpier when I tried to remove the paper).
So that’s sort of a bummer, since there’s technically still a little bit of wallpaper in there mocking me from inside those built-ins, but I’m so relieved to finally have the actual walls of the room completely free of paper, and ready for some paint – along with that blue trim!
Oh and to prep the walls before paint after removing wallpaper, I’ve had luck in all of the other rooms just by spraying them down with a vinegar and warm water mixture and scrubbing them with the nubby side of a sponge to make sure any residual glue is gone before painting. I’ve heard that there are some primers that are great after removing wallpaper to block leftover glue, but so far we haven’t had any issues with glue surviving after my vinegar rub-down, and it’s nice to save that priming step (and that money on specialized primer) and just use the vinegar that we have in the pantry.
Aaaand, just because I like to cross things off, here’s how my before-the-baby-comes goal of no more old carpeting/no more blue trim/no more old wallpaper is coming along:
- de-blue-trim-ify the dining room
de-wallpaper the dining roomfinish Project No More Graph Paper in the kitchen- strip the bold blue master bathroom wallpaper
rip up the old carpet runner on the stairs- paint the blue trim in the office
Slowly but surely! Can you believe we still have another whole room full of wallpaper laughing at us from upstairs? What do you think our final method should be? Maybe fabric softener? We keep hearing good things about that…
So far the steamer has been the fastest and easiest, although every other approach that we’ve tried has been 100% free using stuff we have around (we borrowed the steamer from John’s sister so that was free too – but it does involve renting or borrowing or buying something if you don’t have access to one in your house). Have you ever tried to remove wallpaper that was seemingly super glued to plywood? It’s enough to make you shake your fist at nobody and mutter “this is the most fun I’ve ever had in my life” while rolling your eyes so far back into your head that they make actual sound affects as you roll them. Not that I’d know…
Psst- John’s over on Young House Life chatting about the half marathon he ran this weekend for the folks who requested a post about that.

Sara R. says
When I met my husband (at the time boyfriend) his house was in major need of some help. There was a old, ugly wallpaper border up in the kitchen (luckily it was only a border and not the entire wall!) and I used the water and fabric softener method. I found that using a cheaper softener worked best versus Downey or Snuggles. Good luck tackling that last room!
YoungHouseLove says
Thanks Sara!
xo
s
Sandra says
Oh, I feel your pain! Our home has several rooms with woodchip paper. I stripped the kitchen last year, and it had been painted over at least twice. It was almost impossible to remove, although I agree that he steam stripper is the best method. It made the most horrible gloopy melted paint mess everywhere…and next I have to get it off the living room! Gah!
Jen Keane says
Ah, woodchip. From hell’s heart I stab at thee.
When my house was built, it was all the rage to woodchip the walls (probably to hide sloppy, imperfect walls!), so almost every upstairs room in my house had woodchip.
Marie says
Considering the time it took to remove the paper I honestly can’t understand why you didn’t put some cover-up/restore wallpaper over it? I don’t know the price in the US, but it’s not that expensive and you would have been set to paint straight away.
I have one small wall where I want to remove the wallpaper and I’m considering using it even for that.
Also a second question: I know this is your work, but at what stage/time do you feel like the man hours is more than the money spent? For example, does it ever feel like you could have used those 12 hours to get a new sponsor (or something else that generates money) and earn enough money to both use a quicker alternative and make some extra? Ie how do you value your time?
YoungHouseLove says
Good question! I think we’ve learned that’s the wallpaper over wallpaper is a cultural thing! So many other countries just have wallpaper (and if they don’t like it they wallpaper over it) but here the method seems to be to strip/remove it and then have nice smooth walls you can paint any color (painting seems easier than re-hanging wallpaper to me, and it’s so much cheaper than buying wallpaper here, so it’s more time spent removing it, but it’s free to remove and then a lot easier/cheaper to paint/redo the walls after that). As for what we’re happy to hire out vs. what we tackle, in our case we are stubborn DIYers, so we hate paying someone to do something we can do for the most part. On the other hand, we’re happy to hire someone who does something we can’t (ex: major plumbing or electrical, dealing with load bearing walls, etc) since those tasks are those “what’s the worst that could happen” ones that make us say “the house could catch on fire or collapse” so we typically hire those out!
xo
s
Jessi says
Do you even understand how much I loathe you out of jealousy? Out of 7 wallpapered rooms, we’re not even done with one (granted, we both work full-time and saw family a lot since the June move). The previous owners laid wallpaper on untreated drywall, then papered OVER that about 10 years ago! Needless to say, the paper came off in tiny chunks and damaged the drywall all over…hopefully we can finish skimcoating this weekend and actually get this room (well, the walls) done!
Hoping to try some of your methods in future rooms, thanks for the posts.
YoungHouseLove says
Oh Jessi, I’m so sorry about that! It sounds like the worst thing ever. Hope you can finish this weekend and it looks so good it’ll (almost) make you forget that nightmare to get there.
xo
s
Sherri says
Hi guys! This is off topic, but I have a question about the Polyshades Espresso Satin. Did you try to figure out if your stair rail and bathroom vanity were finished with polyurethane or some kind of shellac, or did you just sand and go for it?
I have a vanity I’d like to cover with the same thing, but the Polyshades website says not to use it if it’s not going over polyurethane.
Thanks for any advice!!
Sherri
YoungHouseLove says
I just sanded them and John tried it out on a subtle out of the way spot to make sure it didn’t bead up or anything, but since it went on well in those covert places he just did a full coat and let it dry. Seemed to work!
xo
s
Jenna says
We’ve been working on our nursery wallpaper project for weeks now – probably 50 man hours at this point and no end in sight. The walls were definitely not properly prepped – think builder paint on drywall with no primer, and then permanently and incorrectly glued paper to the builder paint. We’ve tried a mixture of solution + water, plain water, steamer, dawn + water, dry striping… we’ve used sponges, plastic scrapers, and puddy knives… it’s a mess.
And at this point, there are soooo many places where we’ve gone into the drywall (you’re going along and it just happens. for no reason at all.) — we are either going to need to skim coat the entire thing (not sure we have the skills to do that well), or just put wallpaper back up. It’s so deflating working this hard on a project, only to know that the end result may not be what we want.
Fortunately, the baby doesn’t arrive until the end of March, so we have some time, right?!?
YoungHouseLove says
Oh Jenna, my hands hurt for you. I’m so sorry it’s such a hard road! Hope it’s all over soon! You totally have time until March, haha!
xo
s
Alicia says
It’s too bad I don’t live closer to you guys…I literally love ripping wallpaper! It looks great so far; I can’t wait to see it without blue trim and some color on the walls! I’m also looking forward to future posts about the next method of wallpaper removal you guys try!
YoungHouseLove says
Oh man, come on down Alicia!
xo
s
Stephanie O says
Just saw this and thought of you guys…should probably show up in someone’s stocking this year!
http://www.swiss-miss.com/2013/11/clampersand.html
YoungHouseLove says
LOVE IT!
xo
s
Mia says
What are your thoughts for keeping the built-ins? Are they part of the original build? You guys could replace them by building something more your style and more functional, so is that a possible phase 2 project? (Or, yikes! did I just insult you?)
YoungHouseLove says
You’re so sweet! No worries, we’re not insulted. We don’t think the scrolly tops are our style, but we’ve seen some great inspiration images with ones that are built to the ceiling or just have a nice chunky flat piece of crown molding at the top, so we might try that as well as painting them white and going for a dark and dramatic color on the walls to make them pop. Here’s hoping we can turn them into a fresher looking room addition, since they’re nice for storage.
xo
s
schmei says
My in-laws are all fairly polite people who generally don’t use foul language, but they have a rule: the word sh*t is allowed for use in two instances: watching Cubs games (they’re all in Chicago) and dealing with wallpaper.
So I say: hey! You’re almost done with this sh*t! Awesome!
YoungHouseLove says
Haha! Cheers to that!
xo
s
Brittney Saffell says
I feel your pain with the wallpaper! My whole house was covered in it, including the CEILINGS!!! And it wasn’t just one layer of wallpaper, some rooms had four to five layers ON TOP OF BEAD BOARD. Crazy town. By the end of my trial and error, I vote steamer!
You can see our not-so-lovely-wallpaper here – http://younganddomestic.wordpress.com/2012/09/24/adventures-in-wallpaper-the-steamer-method/
It makes your wallpaper almost look attractive. Almost ;) Hang in there! I have one more room to go, too. Hopefully this preggo (May baby) will get the energy to tackle it soon. Good luck!
YoungHouseLove says
It’s funny to hear from so many others who vote steamer as the best method too. That might be the one to try first if you’re attempting wallpaper for the first tine. It could even work on something painted over perhaps…
xo
s
Megan says
Can’t wait to see what color you guys paint!! I LOVED your last dining room. We just converted our classroom into a dining room ( I sent you pictures :) and since then I’ve been so in love with seeing what people do with theirs!!
YoungHouseLove says
Thanks Megan!
xo
s
Sarah says
I got a real kick out of reading this post. Glad ‘my’ method worked out pretty well for you! I love the idea someone else mentioned about adding Murphy’s oil soap to the water mix for the second stage. If, heaven forbid, I’m ever up against wall paper again I will definitely be trying that myself! =) Good luck with what ever you choose for your final method, and all the other crazy projects you’ve got going on right now!
YoungHouseLove says
Thanks again for the tip Sarah! It was nice to have a totally different approach (the dry peeling thing) to take for a spin!
xo
s
Janine says
Congrats on removing so much wallpaper: what a tough job. :( I’m so impressed with how much work you’ve done, you mus have upper arms of steel by now!
On the subject of trying out fabric softener as your next wallpaper removal helper, I’ve heard some seriously bad stuff about the chemicals in fabric softener. Maybe you should let John handle it, because you’re pregnant?
Anyway, thanks for doing this giant experiment!
YoungHouseLove says
Thanks Janine! We use eco stuff here (Seventh Generation) so it’s all plant based, although I’m not sure that would work as well as the Downy or other stuff, but I wouldn’t use that pregnant (my nose can’t even handle the scent) so in that case I’d try another method! So far we have just used Dr Bronners soap, a steamer, vinegar, hot water, etc – so everything has been nice and chemical free.
xo
s
Kate says
Ugh, wallpaper! I managed to escape having to do much/anything with it in our new-to-us house (our daughter was 7 weeks old when we closed on the house) , but our entire (14’x13′ or so) dining room was COVERED in wallpaper over unprimed plaster board… We ended up bringing in a professional painter to skim and patch things because it was a hot mess! http://forums.vwvortex.com/showthread.php?5921785-First-time-refinishing-wood-(both-hard-and-soft)-floors-advice-requested!/page3 <– My husband (Benjamin. in this forum) posted some pics of the progress on our first floor. The living room/stairwell paper came off much more easily, but we still have an entire wallpapered bathroom/laundry room upstairs to tackle, and we just. don't want. to.
YoungHouseLove says
Oh man, that sounds like such a challenge Kate! Good luck with the bathroom/laundry room!
xo
s
Tania says
My house had a bunch of ugly wallpaper and it made me want to cry. Luckily, my husband bought a steamer and it cut the removal time down in half. Don’t feel bad about using tweezers, I used them in the kitchen to get around the cabinets. I greatly feel your pain throughout this de-wallpaper process.
What white paint color do you use for your trim throughout your house? I’m in the process of installing trim and crown molding, and can’t decide on a white paint color. Ultra Pure White by Behr is a contender. I just want a basic white that would go with both warm and cool paint colors.
YoungHouseLove says
I love hearing that someone else broke out the tweezers too! As for the trim, it’s Simply White by BM in a semi-gloss finish. In our house it read nice and neutral (not too blue or too yellow).
xo
s
Shani says
It’s looking great Sherry!
Your built-ins made me remember seeing this: http://www.pinterest.com/pin/203858320604492876/
They took cardboard or plywood cut to fit the back of the shelf tightly and it doesn’t look like they nailed it in…which gave them the option of easily changing the color/pattern using fabric, wallpaper, or wrapping paper.
YoungHouseLove says
Smart! We did something like that for our book and loved the outcome! It’s cheap (we used wrapping paper) and easy to change too!
xo
s
Adrianna says
Any tips on how to remove wallpaper that has been painted over?? Seems like just about all my rooms have this nightmare going on in them!
YoungHouseLove says
Someone asked that earlier in the comments and people have been sharing tips with her under her thread. Hope it helps!
xo
s
Sandra says
Weep a little bit. Then sucre it, soak it (steamer or spray or sponge, I think steamer worked best for me) and scrapscrape peel scrape. Weep a bit more. Oh, wear a plastic shower hat, a cheap one from a hotel – gluey paint splatters are no fun to pick out of your hair!
Sandra says
Stupid autocorrect! That should have read score it, not sucre it. Sacre blue!
YoungHouseLove says
Haha!
xo
s
Arli says
I would do whatever’s easiest, safest and least toxic to get that stuff off as quickly as possible…especially since you’re pregnant. What a difference your “stripping” has made!
Kee says
Maybe I have missed it, but I have not heard of you guys washing your walls after removing the wallpaper. We are currently going through the wallpaper removal process in 7 rooms! The paper comes off very easily, and the walls APPEAR to be smooth and ready to go, but if you wash down the walls we found there was TONS AND TONS of glue to remove (it was disgusting and oh so hidden before we wet it down AND started scrubbing). It didn’t feel like glue or anything amiss once the paper was off and we would have painted over it, except that I am an extreme rule follower. Painting over glue could cause major bubble issues down the line. Have you guys really gotten so lucky as to not have ANY glue residue on the walls, or are you just not blogging about the tedious, awful, wall washing stage?
YoungHouseLove says
Oh yes, the washing stage is no fun… except that it’s at the end (which makes me start to perk up, haha). Those details are in this post at the end (the paragraph right under the last picture mentions our preferred method). Hope it helps!
xo
s
Kristin says
Have you thought about using a texture mud over the wallpaper in the builtins? I have put it over wallpaper before and it worked great. You can add your own texture design and then paint it any color you want.
YoungHouseLove says
Thanks for all the built-in ideas everyone! So helpful!
xo
s
Andrea H says
We are even more sick of wallpaper than you! Every room (9 rooms) in our house had wallpaper. Thankfully the rooms downstairs had nice white plaster walls behind them and peeled off in large sheets. (although the walls one room hadn’t been prepped properly before the wallpaper, so my husband had to mud them before we could paint.) Upstairs (two rooms), however, there were/are three layers of wallpaper glued directly to unprepped blueboard! and they had painted over the wallpaper on the ceiling so it hardly absorbs any liquid. We finally had to spread a thin layer of joint compound over the wallpaper, let it soak in and then scrape it up as the wallpaper came with it. Now my husband is working on mudding over the unprepped walls in that room, and after this we still have one more of the upstairs rooms to tackle. We are very thankful the downstairs wallpaper was not like this! You guys lucked out, having all the walls prepped properly pre-wallpaper, and having fairly new wallpaper that comes off in large sheets!
YoungHouseLove says
Holy cow, that sounds so hard core! You’re like a professional wallpaper remover at this point!
xo
s
Jamie says
After removing room after room of wallpaper I feel your pain. I now loathe wallpaper, and can’t say I would ever put it up, no matter how awesome it is. But I would love to hear how the fabric softener method compares, that’s what I ended up doing 80% of my removal with. I found it went even faster if I mixed up the whole concoction in one of those big home and garden sprayers. I used a new one & we later used it for yard work, and it’s come in handy–a bonus that it wasn’t a throw away when the wall paper was gone.
I would love to know how you think it compares to the steamer. I found the steamer more of pain with rental, and needing to keep my little ones away from it, and then trying to get it back by a deadline when maybe I’d had a crying baby (or other crises) and wasn’t able to finish when planned.
YoungHouseLove says
Good to know Jamie!
xo
s
Abby says
I kind of hate you for that picture of that big strip of wallpaper coming down. We bought a house this spring full of wallpaper. And… they had put it DIRECTLY ON UNPAINTED DRYWALL. So every tiny piece pulled off the first layer of drywall. We have done more spackling/sanding than I care to mention.
YoungHouseLove says
Yikes! That’s the worst Abby! So sorry about that. Sounds like a true wallpaper nightmare – complete with a scary movie soundtrack.
xo
s
Michelle says
As much as some are tired of the wall paper posts, I can’t imagine how tired you all are for removing all that wallpaper.
I have a large looming basement remodel and am totally freaked out by that there seems to be wallpaper under layers of paint. I can see it poking out along the windows. My husband seems to think the whole house is probably wall papered and painted over. What a headache…..
Cheers on your wall paper extermination project. Now if only I had a plain wall papered wall to work with (:
YoungHouseLove says
Oh no Michelle! Best of luck with that!
xo
s
Leanne says
Oh, Sherry, I feel your pain. When we bought our 100 year old house from an older woman two years ago, wallpaper was the bane of my existence. We started with fabric softener in spray bottles, then vinegar in spray bottles, then a steamer. Finally gave in and bought some chemicals from Lowe’s called Piranha and that was a godsend. And we ditched the spray bottles for a garden sprayer thingy. I also bought FOUR of these Kobalt brand scrapers that look like hamburger flippers and I can’t tell you how many times we’ve loaned them out to friends who were also cursing wallpaper in their homes.
Of course, being pregnant, you don’t want to use chemicals, but try the garden sprayer for a bigger area and if you run to Lowe’s I’m telling you you will make a shrine to these scrapers.
YoungHouseLove says
Thanks for the tips Leanne!
xo
s
Louisa T. says
I feel every freaking step of your pain, girl. Every room, and I do mean EVERY room, in our house had wallpaper when we moved in. This is a 3200 sq ft house. Only ONE wall was prepped properly. Everything else was slapped on drywall. Nightmarish was what it was. We did four rooms and I had had it. Called in the pros and even they couldn’t get it off without damaging the drywall. Last resort was simply drywalling over it. It really didn’t cause us to lose any space. I mean were talking about 1/4″. No big. It’s amazing how much better that worked. Smooth, glue free walls to paint! I haven’t read through all the posts so someone might have beat me to this, but, have you considered beadboard in the dining room built-ins? Wouldn’t be able to paper or fabric over them, but, with the right color, could still be stunning and give you some texture as well. Actually, now that I think about it, you guys are the pros and whatever y’all decide will look fabulous. It always does!
YoungHouseLove says
Love the beadboard idea for the built ins!
xo
s
Louisa T. says
You guys a-m-a-z-e me. You truly read every single post. With literally tens of thousands of readers, I don’t know where you get the time. And then with one of you always being with Clara, are y’all like in some parallel universe where there’s 30+ hours in a day? You make me feel so totally lazy with what I manage to accomplish in a day. *that was meant with total respect and awe!*
YoungHouseLove says
Aw thanks Louisa. You’re so sweet!
xo
s
Megan @ The Brick Bungalow says
Way to go! I feel your pain (proof: http://thebrickbungalow.blogspot.com/2012/05/before-photos.html) in both the wallpaper and painted trim. And now that I have lived here for over 6 years, I wonder why I didn’t paint everything sooner. I still have the avocado green trim going on in the kitchen but a *fingers crossed* soon to happen kitchen remodel with remove it all. Good luck with painting, I’d definitely have to just on the trim at least so my eyes wouldn’t go crazy.
YoungHouseLove says
Oh man, avocado green trim sounds like it’s cousins with our williamsburg blue trim! Good luck Megan!
xo
s
Grace says
I was definitely surprised by your wallpaper stripping enthusiasm at first! I have all kinds of memories of stripping wallpaper with my mom as a kid. It was terrible. Nothing worse than getting a layer off and finding MORE WALLPAPER. :/ Way to get it almost done.
Carmil says
I love reading that one more room that has been “de-papered”! I sent applause your way from Northern Kentucky.
I am officially in the same club Sherry, we purchased a home with 7 rooms of wall paper in 2008. Sad to say, the basement bathroom still sports an outdated navy plaid, but one of these days–that too will be gone! Like you, I tried several methods while tackling the other 6 rooms, and I have bad news for you. I know–it’s risky sharing bad news with a pregnant lady. Promise me you won’t go over the edge…..but….
The widely proclaimed fabric softener method was the worst! I know– you have plenty of replies highly endorsing it–however my experience was quite the opposite. After a two foot attempt on one wall with slow progress and a horrible outcome, I madly ran to the garage to retrieve my best friend– the wall paper steamer. The paper I was stripping had been placed directly on unpainted dry wall, perhaps that had some effect, but I will never use the method again. I finished 3 1/2 walls fairly quickly compared to using the fabric softener.
So, your second promise should be…..if it works as poorly for you as it did for me, then say “you tried” and go back to any of the more successful methods. This is not the time to persevere on our behalf. Let’s just “get ‘er done”!
Best of luck! You are in the home stretch!
YoungHouseLove says
Aw man, thanks for the tip Carmil!
xo
s
Tanya says
So much better! I would get a sheet of 1/4 inch MDF and cut to fit into the cabinet. Super cheap and easy!
YoungHouseLove says
Thanks Tanya!
xo
s
jessica says
nothing to do with this post but are you doing quarterly Clara photo updates? I’m having withdrawal…
YoungHouseLove says
We’re doing annuals from here on out I think! But with baby #2 we’ll be starting all over with weeklies and then monthlies I think, so those will be here soon!
xo
s
Tyra says
What about the phantom carpet on the garage stairs? Gone?
YoungHouseLove says
Still there mocking me! I hope to attack that well before the baby comes though. Need to add that bullet to the list!
xo
s
Marie says
Oh, pal, I feel you–my house only had wallpaper on the backsplash of the kitchen so it was a small area (but also, why??) and it drove me BONKERS in a few short hours leaning over the countertops.
Charlotte @ Ciburbanity says
John and Sherry, We just finished a one bedroom addition and I feel like I need to confess that we’re putting UP wallpaper in the new foyer! :) (I am planning to remove the first wallpaper attempt I made a few years ago so I guess we’re even on the wallpaper front.) Thanks for the suggestions! And tune in for my ‘removing dated wallpaper from our foyer’ post in 5-10 years…. xx
YoungHouseLove says
Hahah! I bet it’s going to look amazing! I still love wallpaper (we’re talking about wallpapering the ceiling of our bedroom with the textured tin-roof looking stuff and maybe doing some grasscloth in the half bathroom) so I’m with you – it can be used for good… or for evil. Ha!
xo
s
Jennifer says
We have a family friend who does professional wallpaper and swear by windex. She said to saturate the paper with it then pull. We had a large wall paper forest mural in our first house, I did the method you used it your dining room.nnit was only one wall, but it was easy, toxin free and easy!
YoungHouseLove says
Thanks for the tip Jennifer!
xo
s
Cair says
I am so impressed that you were down to peeling tiny bits off with tweezers. It looks so good, but I’m pretty sure I would have left the rough edges.
When I moved in my house it was about 70 years old. The master bedroom had painted over wallpaper that wasn’t in good shape, so I decided to strip it. It turned out that it had a total of three layers of wallpaper intermixed with 5 layers of different colored paint. I scored, I steamed, I scraped. I could get about a 4 x 4 foot section done after work each evening. It took a month or more. When it got to the next bedroom I happily painted over the wallpaper/paint mixture. I tell myself it makes the walls stronger.
YoungHouseLove says
Oh my gosh. 5 layers = total nightmare. You have my deepest sympathies.
xo
s
Baditude says
The correct answer to the question up top is
E: My husband and I.
We purchased our first home at the end of September. It’s a 1922 bungalow with a lot that we love. But it also has wall-to-wall floral print wallpaper in every. single. room. Except the kitchen. We started with the dining room two weekends ago– after about 14 hours of both of us working with a steamer, we got all the paper off. But there was a super thick layer of glue left on and lots of little bits of backing. So we’ve now put in an additional 10 hours or so trying to scrub that off.
Your beautiful clean walls underneath make me laugh maniacially. Ours are plaster and were in no way prepped. Lots of old paint and bits of plaster is coming off with the paper. Its… a mess. And we still have all those other rooms to do! Eek.
Anyway, it’s fun to see your progress! I am envious!
YoungHouseLove says
Oh Baditude! I’m so sorry! I cringe thinking about how we’d deal with unprepped walls, and am bowing to you for your patience with those steamer sessions! Good luck with those other rooms!
xo
s
vicky s says
You are so courageous and patient!!! I have a secret: Fabric softener! I read that somewhere and tried it with my own walls after trying every other method. It worked so well taking the glue off and it smelled nice.
YoungHouseLove says
Thanks Vicky!
xo
s
liz says
I feel your pain with all the blue trim. Our house is from 1901 and all of the trim is painted with a faux wood grain paint. Dark brown all over the place and at least 4 coats of white to cover it!
Glad to hear about your wallpaper removal tries. we have 3 floors of wallpaper over plaster (think brown tall ships everywhere) and are debating our best course of action.
Any tips for wallpaper removal from plaster? the wallpaper is really old and brittle in some spots but very stuck down at others.
love the blog!
YoungHouseLove says
That sounds rough. Anyone have brittle plaster tips for Liz? Maybe a steamer so you don’t do as much scraping and just sort of mist it with steam and try to delicately remove it?
xo
s
Ally says
Me! I’m more tired of wallpaper than you! 3-5 layers of wallpaper under paint that I’ve been working on for a couple hours a day for over a week! We borrowed a steamer, thankfully. Almost there!
YoungHouseLove says
Wahoo! Go Ally!
xo
s
CC says
Oh wow! My parents had a custom bedspread made out of the accompanying fabric EXACTLY MATCHING your dining room wallpaper. I know it was made before 1985…
YoungHouseLove says
That’s hilarious! This wallpaper is from the late seventies/early eighties we think! So funny that you could buy matching fabric/bedding!
xo
s
Jennifer says
When I was about 7 months pregnant, I used fabric softener to remove wallpaper from the walls in the nursery and I do not recommend it for pregnant women! The smell was overwhelming and my family was constantly kicking me out of the room to get fresh air. We were doing this on one strip around the room and with the windows open. It also didn’t work very well for me. We had to spray several times and it peeled off in very small chunks and slivers. Please find another way, I know you are very conscientious when it comes to your work and products. Good luck.
YoungHouseLove says
Thanks for the tip Jennifer! I think some sort of unscented eco fabric softener (like Seventh Generation) would be what I’d try – although I’m not sure it would work very well!
xo
s
Marissa says
Kuddos to you, I don’t know where you find the energy!
Kathy L says
Voting for Fabric softener, every time.
Brandyn says
Wallpaper is trending right now and this is a great reminder of what a commitment it can be. It may look great in a glossy magazine, but… after 5 years… when it looks dated, it will require serious labor and elbow grease to take it down. I have much respect for your hard work and removal process. Can’t wait to see those fabulous walls when you’re finished!
Jeannie Marie & Company says
I feel your pain! We had some foil wallpaper that would not come off in our foyer and staircase and 2 hallways. The pieces were the size of coins and we tried all your methods. It took weeks of hard labor! Another room had wallpaper that pulled the wallboard off. We had to repaper it with a system of torn strips to cover the ripped wallboard. Nightmare. I will never move into a place with wallpaper again!
YoungHouseLove says
Oh man, that sounds horrific. So glad you figured out a way to work with it.
xo
s
Alexis says
You are dedicated to your wallpaper removal investigation! If I found one option that worked better than others, I wouldn’t be able to resist using in all the rooms.
YoungHouseLove says
Dedicated or stubborn. Haha! You decide.
xo
s
Rachel says
Screw the wallpaper removal, I’m most excited to see that beautiful buffet table made an appearance! I was wondering where it went :)
YoungHouseLove says
Haha! Someone else said that too! Apparently we just plopped things down in the dining room and have hardly shared any photos of that room!
xo
s
Julie says
You guys do a fantastic job writing, planning, updating, linking, DIYing, demolishing, ungluing, scraping, painting, staining, decorating, blogging, etc. I wouldn’t even dare criticize a thing you both do on this blog. I could never even touch your proficiency in this new remodel you have. I can’t believe how much you get done! I’m thinking you have a hidden helper stowed away somewhere in those blue trimmed built-ins. Your loving approach working together as a family is inspiring and evident as well. Don’t change or second guess a thing you have done. Also, I can’t wait for the reveal on the new paint in this room. Your eye twitching comment cracked me up.
YoungHouseLove says
Aw thanks Julie!
xo
s