Favorite project ever! Ok, I probably say that to myself every month or two, but this one might reign supreme for a while. Especially in the small/easy division (our sunroom reno and Teddy’s built-ins might have given it competition if it fell into the heavy-duty upgrade category, but there’s no way it belongs there because it was so simple). Ladies & gentlemen (gentleman?), I give you… Clara’s closet:
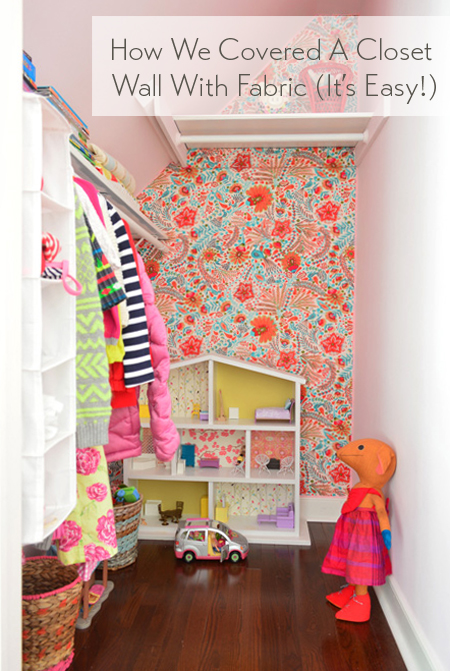
I’ve been obsessed with the idea of covering the back wall of Clara’s closet with something fun for a while, especially since images like this inspired me to add some playful to make it feel more like a little hideaway within her room. Right after we moved in she proclaimed her closet her favorite spot in the whole house. She plays in there a ton since there’s a lot of space in the back for her dollhouse and a few other favorite toys since we store most of her clothes in her six-drawer dresser with the exception of a few hanging items – and it’s a super deep closet, clocking in at 6.5′ feet deep and 4 feet wide.
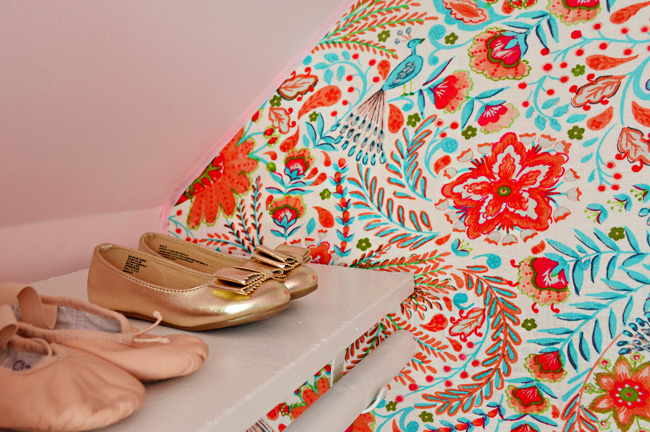
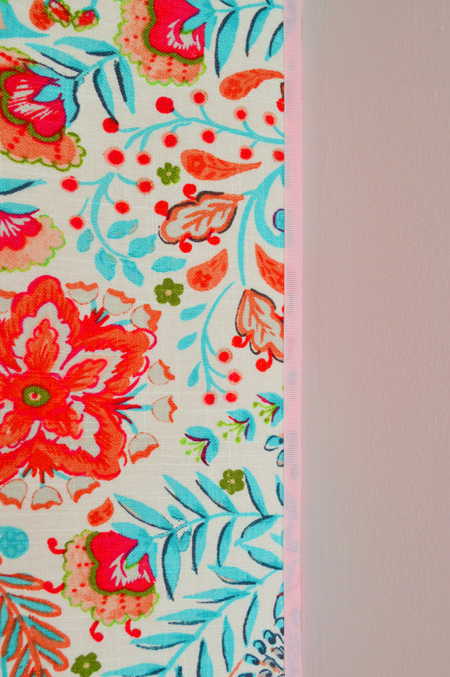
I thought we would end up using wallpaper or a stencil for some back-wall pattern, but then we came across this fabric (called Peaceful Perch by Waverly at a local fabric shop called U-Fab – but here’s an affiliate link to the same fabric on Amazon) and just KNEW it was the one.
Clara was with us and before I could even say “what do you think?” she was rubbing her face all over it (she’s her mother’s daughter) and saying she loved the birds. Jackpot. I was going to cover that back wall with that fabric if it was the last thing I did.
So I bought three yards of it (enough to go from floor to ceiling with a little wiggle room to spare) and rejoiced that the bolt’s width was easily wide enough to cover that back wall. When we got home Clara went to color something in the office and I fed Teddy in the living room and then she walked into the living room ten minutes later and screamed “YAY! DID YOU MAKE MY CLOSET PRETTY?! I can’t wait to see it!!” Needless to say the girl never covered a wall with fabric. But neither had I.
The surprising news is that it only ended up taking about an hour and a half to adhere the fabric along that back wall and another half hour to trim it all out for a finished look, so it can’t be done in the time it takes to feed a three month old, but it can be done between feedings (even if your son is on an every-two-hours schedule). In other words, it was way less intimidating and time consuming than I initially expected. And all it set us back was the cost of the fabric, some fabric glue, and some ribbon.
The first thing I did was empty her closet.
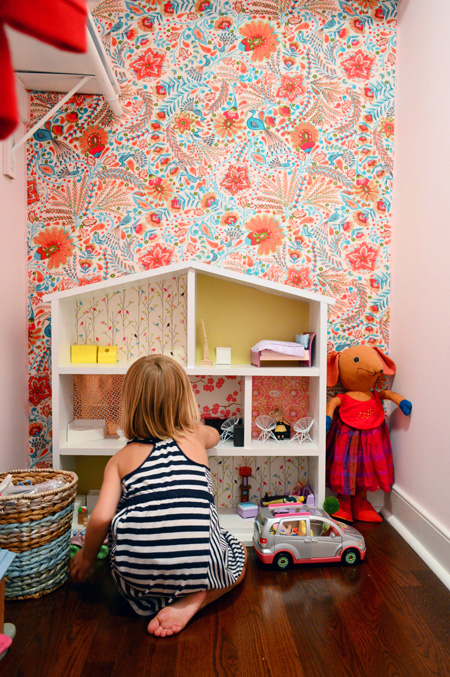
Everything came out, including the shelves and hanging bars that you see here which I removed as I went (I needed free access to all of the nooks and corners along that back wall).

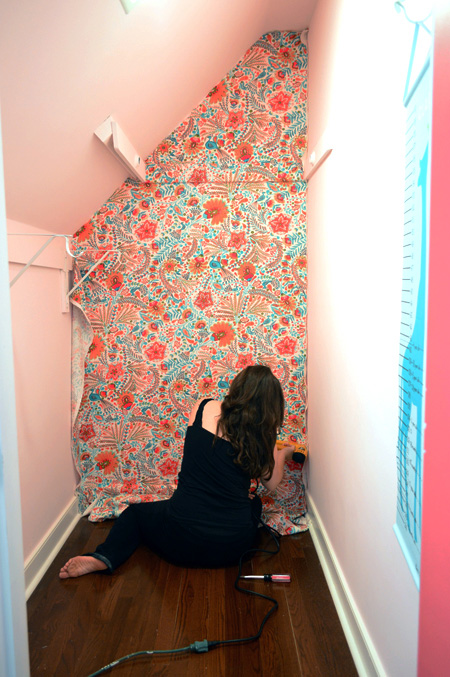
I stood on a step ladder with my staple gun and started in the top right-hand corner, stapling it nice and tight around the perimeter of the back wall. Every few inches I shot a staple in, making sure they were nice and tight against the wall, and that the fabric wasn’t wrinkled or folded. By starting in that top corner with my completely untrimmed three yards of material, I knew I could work my way down and across, keeping things tight and straight as I went, without running out of fabric. It really was that simple.
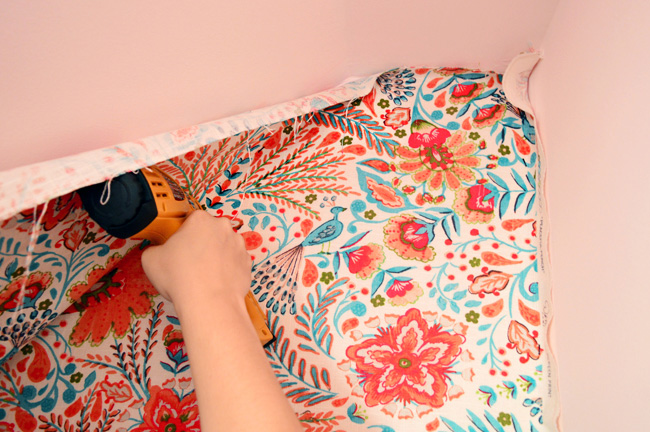
I think if I had been working with something striped or geometric in a the-naked-eye-can-tell-if-that’s-not-level way, it might have been more of a challenge, but since this print is so wild and free, I really just focused on keeping things pulled taut, and stapling them every few inches around the edge.
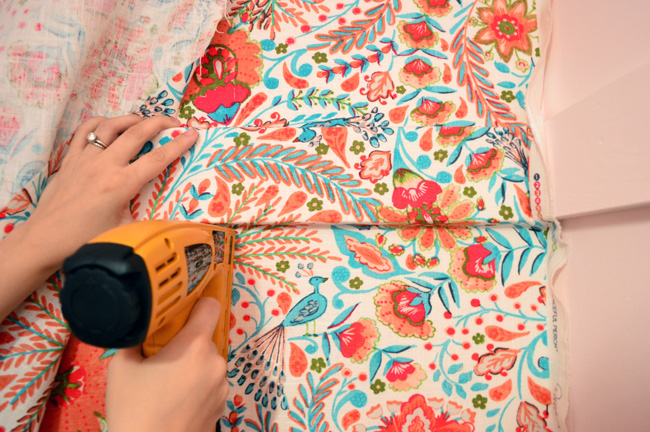
I even realized that I could wrap the fabric around the shelf board on the back of the closet with a few staples on either side of it so it was nice and clean looking.
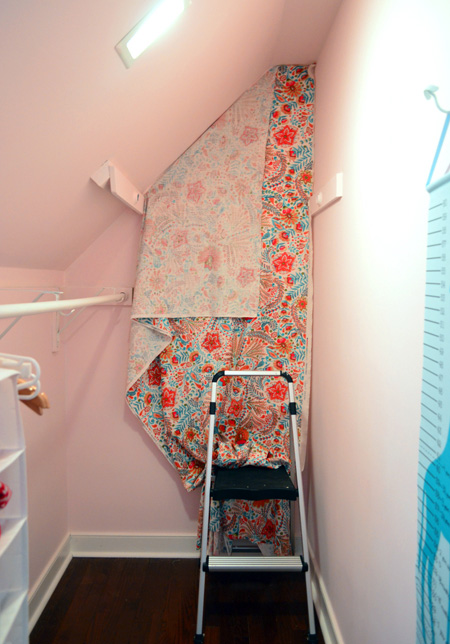
My only real warning would be that if you have a big flap of extra fabric going on like I did on that angled part (I didn’t trim the fabric at all before hanging it for fear of cutting it off at the wrong angle or taking too much off that would make the entire remnant unusable), just be sure you don’t staple it behind itself or something. I never did that, but almost did a few times. If you did it wouldn’t be the worst thing because you can just pop staples out with a flat-head screw driver if you mess up anyway.
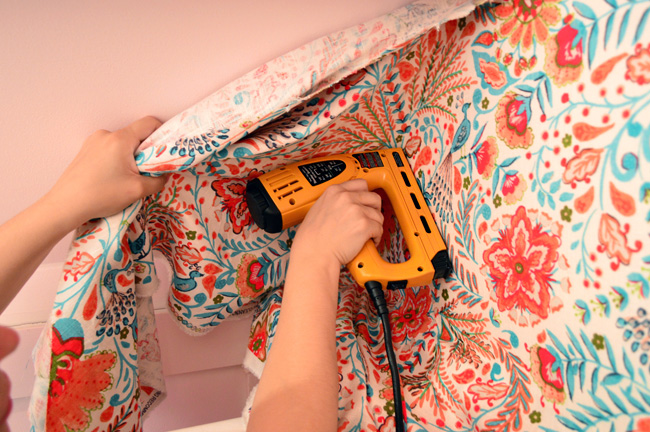
I did that a few times if I thought I hadn’t pulled something tight enough, or when I got to the bottom of the wall and felt like the corner had a crease or a bubble it shouldn’t have. You just sort of undo a few staples and re-pull things and re-staple until you like the look.
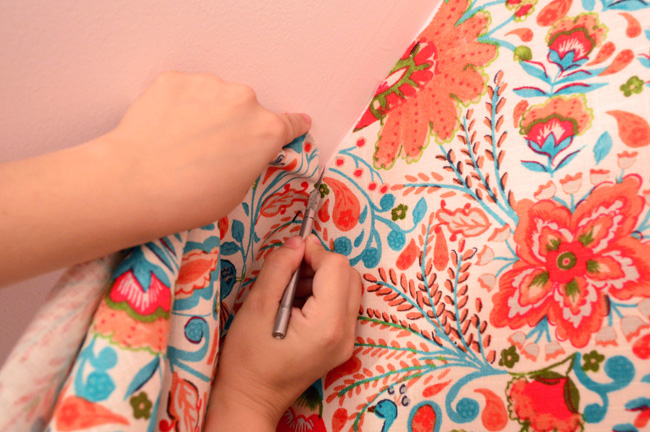
When I finished with all of my perimeter stapling, after the obligatory victory dance with the unplugged staple gun (unplugged is the key word), I ran an exacto knife along the entire perimeter of the back wall to cut off the excess. You’ll want to put a nice new blade in there to get as clean of a cut as possible. I tried to push just hard enough to cut through the fabric but not hard enough for it to go into the drywall. Since it’s the corner and I knew I’d be adding a trim piece of ribbon for a finished look, even if I jammed it into the drywall a little, it wasn’t a big deal, but for the most part I could slide it through the fabric without digging into the wall itself.
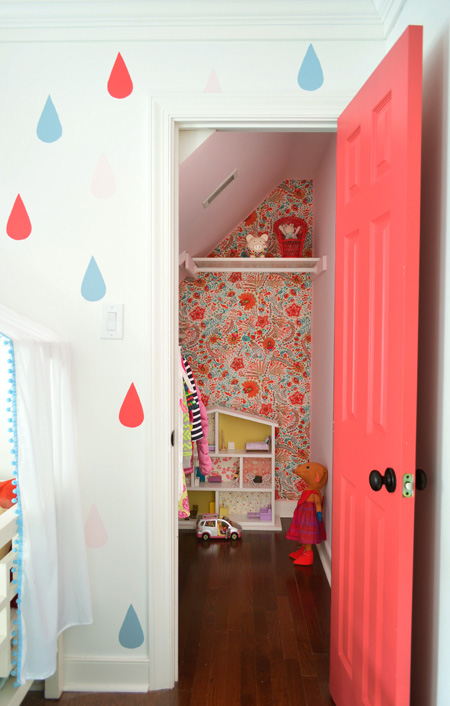
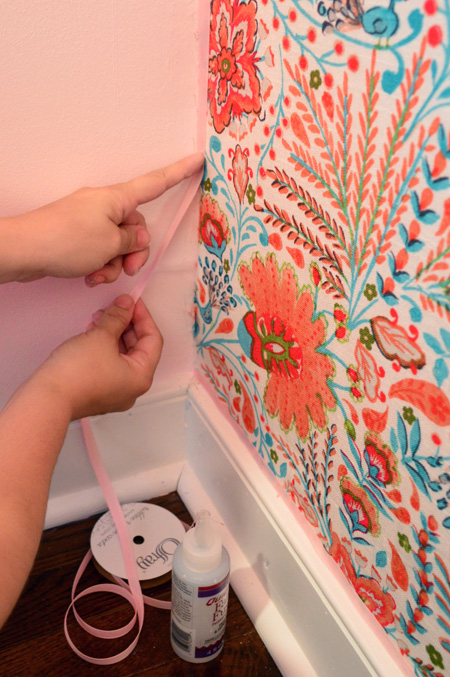
Next came the ribbon for that nice polished edge. I held up various ribbon remnants in red, pink, blue, and white that we had on hand and John and I both liked how the pink looked because it blended into the wall color (bold colors like red made it a little busy when combined with such a bold fabric, so we liked the more seamless look of the soft blurs-into-the-wall pink option).
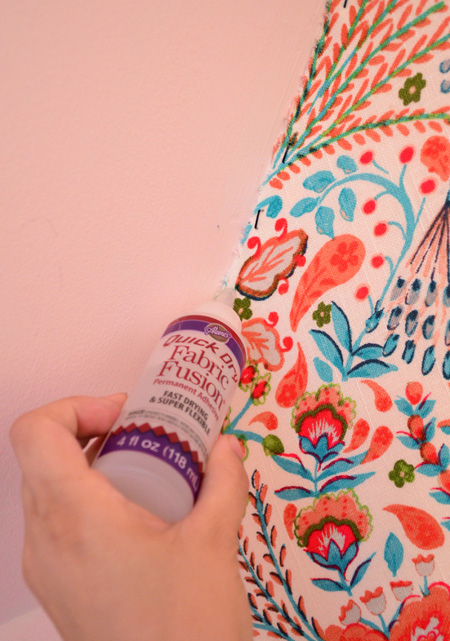
We didn’t have enough pink ribbon just laying around, so I ran out to JoAnn and grabbed two 6 yard spools (we calculated that we’d need around 8 yards to go around the wall’s perimeter) and also grabbed some Aileen’s Fabric Fusion glue to attach that all the way around. It was almost like clear silicone caulk, so I just ran a thin line of it down the edge of each wall…
… and stuck a pre-cut-to-size ribbon against it for each portion.
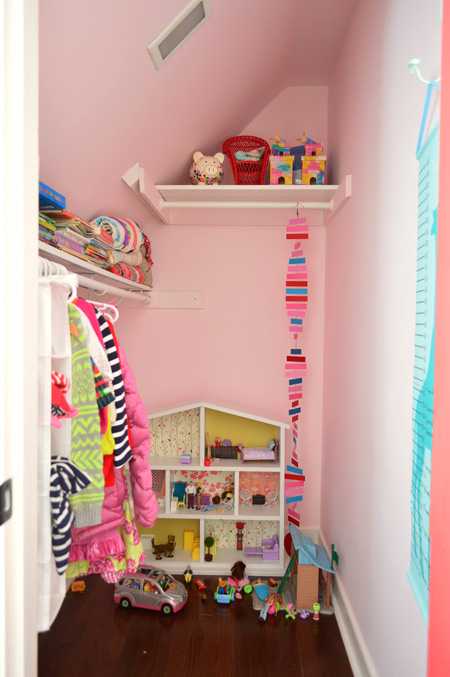
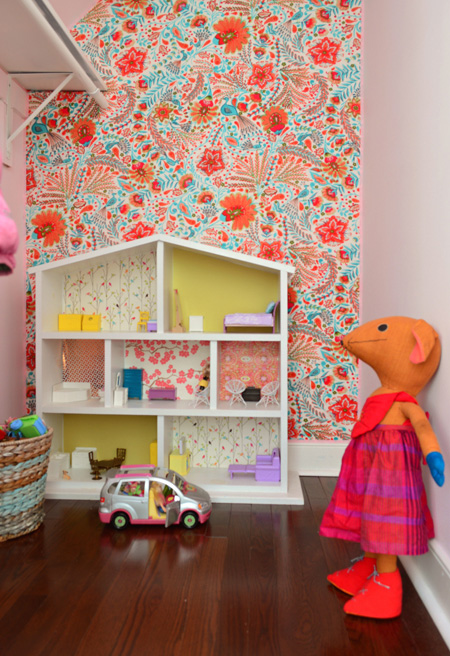
Here’s the finished result:
Once that dried (within about an hour) I brought back all the shelves and hanging rods I had removed, and put the closet back together.
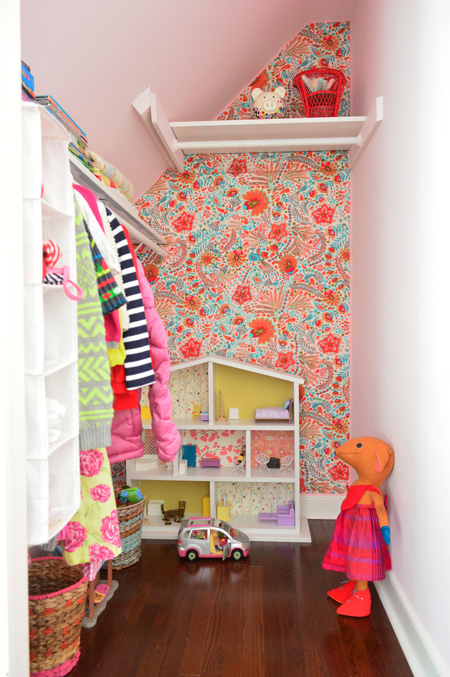
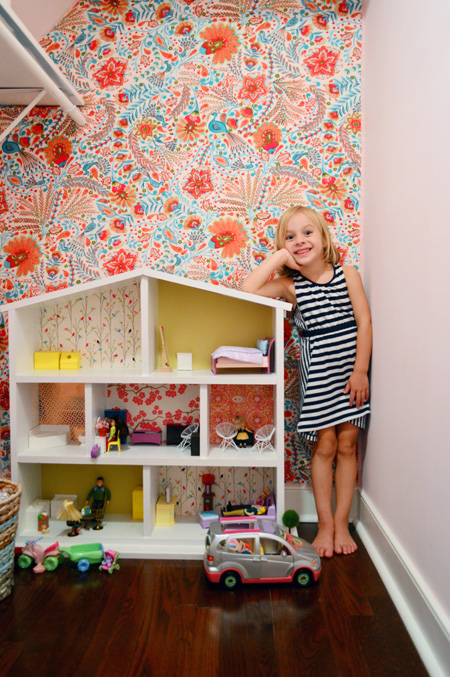
Clara’s PSYCHED about it.
So is momma. Dad’s pretty keen on it too. Burger and Teddy are ambivalent, but I’ll take it.
The coolest thing about this project is that I completely expected it to be one of those kinda-complex-and-tedious jobs that are worth it in the end, but it ended up being one of those surprisingly-simple-and-straightforward projects that make you beam because it looks way more expensive and complicated than it was. We already have had a few people over and all of them thought it was wallpaper until they touched it and said “no way, it’s fabric?!”
What did you guys do this weekend? Any kids-room stuff? Fabric projects? Victory dances with your 16 pound baby? Sometimes I feel like all I manage to get accomplished is to feed these kids and keep them semi-clean, so fun little projects like this are pretty exciting. Especially when I can squeeze them in between feedings. We also managed to get a little hiking in this weekend, and although it involved a particularly “memorable” port-o-potty visit with Clara, it was pretty awesome while it lasted.
Update – Wanna know where we got something in our house or what paint colors we used? Just click on this button:


Rosana says
I really really love it!! I usually love your looks and decisions about colours in your house, but this is gorgeous to the end!!
Kisses from Spain
Joseph@littlehouseblue says
It looks like you ended up removing the board for the lower shelf. Did you have to do something in place of it? It looks like it was unnecessary.
YoungHouseLove says
That support piece is still there, we just cut it back to be the length of the shelf (it was extra long) and I wrapped the fabric over it without stapling it on top and bottom (I just let the fabric sort of flow over it, so it’s less visible, because it was making the other side of the back wall look buckled and bubbled if I wrapped it around more tightly). You can kind of see where the shelf is resting on it in this photo (see how there’s a crease that’s in shadow right under the shelf?).
xo
s
Joseph@littlehouseblue says
Oh wow, I completely missed that. I assumed that it would need to be removed because it didn’t go all the way across and would cause the other side to ripple. That worked out well though.
YoungHouseLove says
Yes, we debated removing it and using some sort of metal bracket to hold up the shelf, but just cutting it back and pulling the fabric over it but not stapling it on the top and bottom of that beam kept it from rippling – I think since there was enough stretch in the fabric to just pull it on the other side to compensate :)
xo
s
Stephanie says
I LOVE this!!! I want to cover all the walls in my house in fabric now. My husband thanks you (not really!). ;)
Carol M says
Beautiful! A rotary fabric cutter would be great, too. Maybe faster than the exactly blade :-).
SassafrasNA says
I LURV IT!!!
You bring back memories Sherry, my sweet-momma w/childs!!!! I did this in the 70’s, only MY Mom wouldn’t let me cut up the sheet so I had to have it kinda ruffly to make it all fit.
Here’s a link to the Mod-fab fabric of those times!!
http://www.pinterest.com/pin/217298750745934317/
Clara the Lucky indeed!!! I would be beaming every time I walked by it, right after rubbing my face against it too!!!
~~Sassafras
YoungHouseLove says
So sweet!
xo
s
Iryna says
Looks awesome! I love the doll house too! Great idea for a small space!
I’ve been battling with paint stripper the whole weekend, not so fun, yuck!
Lissa says
What a great closet update! Our little girl’s closet is a very similar shape to Clara’s and I would love to try this. But our house was built in the early 1900s, so the walls are plaster instead of drywall. Do you think the staple gun method would still work? Thanks!
YoungHouseLove says
Hmm, that’s a good question. We had plaster walls in our first house but I never tried stapling into them. Anyone have tips/advice for Lissa?
xo
s
Kristi says
Beautiful! Sherdog, you look wicked hot in that barefoot pic, hair all down and wild, wielding a powertool. Go Mama!
YoungHouseLove says
Haha! Let’s just say if you got closer I’d smell like breast milk and you’d see all the knots in my hair ;)
xo
s
Leslie @ House on the Way says
LOVE it! Such a fabulous idea! Thanks for sharing.
Leslie
Afsana says
I LOVE this! I have toyed with the idea of creating an accent wall in my kids’ bedrooms using fabric, since we live in an apartment. I had only ever seen tutorials using liquid starch, which I was really nervous about. The idea of simply stapling and trimming is so much more appealing to me.
Jamie G says
I adore the paint color on your smiley daughter’s door, this is such a smart idea!!
xo
Jamie
http://snapginger.com
Jessica says
I have been reading your blog for years and this is by far my FAVE DIY crafty project to date. It looks so great! Thanks for sharing. :)
YoungHouseLove says
Thanks so much Jessica!
xo
s
AMoore says
Perhaps you have enough material left to sew her a sit-upon or a doll bed coverlet.
YoungHouseLove says
Yes! I love that! I was also thinking about a bolster pillow for the bed, and someone else mentioned that I could wallpaper a room in her dollhouse so it would match!
xo
s
Ms. Weatherbee says
Fun project – it turned out fantastic :)
Karen from Cord Controller says
Such a great idea! & It’s probably leagues cheaper than a wallpaper so kudos!
http://cordcontroller.com/
Pamela says
Would love to know the brand of staple gun you are using. Have you used others? Do you especially like this one? What has been your experience with them?
YoungHouseLove says
I love ours so much! It’s a Bostitch 5/8 inch staple gun. I don’t think it works for nails though.
xo
s
Carolyn Kelley says
I love this! I never would have thought to use fabric without any padding. I love this and am keeping it in mind for my old plaster walls. Thanks for the idea!
Reenie says
How cute ~ ~ love it!!! And look how tall Clara is. :o
Cyndi says
That is INCREDIBLE! What an awesome, awesome idea! I think it’s time I get me a staple gun. essential!
This week, I ORGANIZED!! Check it out http://decisivedecor.blogspot.com/p/organize.html
Cyndi says
This is INCREDIBLE! I love the flare it adds to the closet. Thanks for sharing! I think it’s time I get me a staple gun… totally essential.
As for me, this weekend was dedicated to organizing!!!!!!!! Check it out http://decisivedecor.blogspot.com/p/organize.html
:)
Jaime says
Oh my goodness – I absolutely love this! I just did a wallpaper accent wall in my office, but now you have me looking for a spot to try fabric. Love the pattern you chose – just perfect!
Ellen says
Where did you find the rat-doll-thingy-toy (if you know what I mean)? I have one, similar but smaller, that I’ve had for as long as I can remember – it’s always nice to learn new things, I’m getting curious. :)
YoungHouseLove says
It’s from an estate sale here in Richmond ($5!) but someone said something about it being made in Sri Lanka and organic?! I forget the name they said though! It was on Instagram a long time ago (back when we got it).
xo
s
shavonda@ahomefullofcolor says
Omg how fun is that!! Its perfect and so easy. I love it! I love the birds too!
Jane says
We have plaster walls in our old house. I wonder if it’s possible to staple gun into plaster?
YoungHouseLove says
Someone else asked that and I’m not sure. Anyone ever tried it with advice for Jane?
xo
s
Kristina says
Can you do no wrong?! In love with this idea and the results!!
Ili says
So when can I come over for a play date with Clara? ;)
Sherry, how do you fill in tiny holes from the staplers? I have thumbtack holes on my rental room walls…. Plenty of them….
YoungHouseLove says
Spackle and a nice wide spackle knife should do the trick! Although in dorms and rentals I have heard of people using white toothpaste!
xo
s
Jenn says
Love the closet, but fascinated by how tall Clara is getting!
Ana says
Love love love! Lucky Clara… :)
sherry says
Absolutely beautiful!
Sarah says
So cute! You can tell Clara is diggin’ it.
I have wanted to do fabric on the wall for awhile, but was nervous about it since all the methods I have seen use liquid starch to adhere it. For some reason, I have this irrational fear that the liquid will melt off the plaster walls in our 1932 house, lol. Now I can have my fabric without worrying about a meltdown :)
Ffion says
Hi – I would have loved a closet like this at Clara’s age! Could I ask where you got the shelves&hanger rail from? I’ve imagined this for my small closet but haven’t seen anything sold like that in the big stores here in the UK before. Thanks, Ffion
YoungHouseLove says
Aw thanks Ffion! That shelf and hanger rail were in the closet to start with, so I think they were original (added by the builder?). The shelf looks just like a few boards resting on a 2 x 4″ frame, and the rail is just a wood dowel that hooks into little circle-rests (holders) on each end.
xo
s
renee says
1. UHHHH-mazing. We rent right now & our decorating budget is low to non-existent (read: dave-ramsey-crazy-pay-down-student-loans). Can’t wait to try this somewhere with some leftover fabric… Maybe on the smallest wall in my daughters’ room?! Or the back wall of the half finished basement. Or both!
2. The comments in here (which I rarely read, but did for some reason today) crack me up! I love when you say “we’re on the case.” Very secret-spy-ish. :)
3. My 2 are 8 weeks and 19 months. I’m feelin’ ya on the whole just keepin’ them fed and clean thing (with clean being half optional)… We moved into this rental basically while I was having contractions, aka: technically while 38 weeks pregnant, and then we came home here from the hospital and most things were in boxes.) I hung a frame in our bedroom and curtains somewhere else last week and felt like I had conquered the world. Ha! Keep at it. Kiddos’ needs come first. There’s always time to decorate later, like when your newborn can go 3 or 4 hours between eating! haha :) Good luck!
Silke says
You should totally add one of these pictures to your home tour page, in the section of Clara’s room !
I love it !!
We are planning on doing fabric on the kids door, and ikea fabrik that the kids can colour themselves :) should be fun too!
YoungHouseLove says
Sounds really fun!
xo
s
Nicole says
I just love your ideas that brighten Clara’s room. I made my daughter a similar doll house as Clara’s for her 1st birthday. Then for her 2nd, I made her a lounge chair with a PVC pipe frame, and sewed the removable cover. I’m just waiting for my big inspiration for her 3rd birthday in December. I love this idea and can’t wait to pull it off, especially since I’m in a rental, and this is the perfect alternative to painting and wall papering which both need pre-approval. Thanks for the motivational inspiration that keep us DIY’ers going!
YoungHouseLove says
Thanks Nicole!
xo
s
Stacy {Woodsy Weddings} says
Oh, wow. I love this and the fabric choice! It could even be an easy DIY backdrop for a photo shoot or event.
Hayley Tanti says
Hi, my first read of your blog, I love what you did with the back wall of the cupboard, we’ve just bought a new house with dorma windows and lovely pitched ceilings. I’m searching for ideas to put to use in decorating for our 3yr old boy/girl room and have now after seeing what you’ve done decided to do the same but at each end of their bed heads where the wall has the pitch, floral for Lucy and suitable boyish patern for Oska (yet to be discovered) thanks for the inspiration Cheers Hale