Sherry and I are total water hogs. Between refilling our Klean Kanteens at least 5 times a day and rarely ordering anything else at restaurants (I gave up soda for 2009), we are certainly a well hydrated couple. And while our area has decent water quality, we’ve always talked about getting some sort of filter just to be a bit more thorough since we’re such big agua drinkers. We never took the leap because faucet-mounted filters tend to cramp our style and I couldn’t get in the habit of keeping a pitcher filter full (plus those pitchers are made of plastic and Sherry prefers glass and stainless steel).
So imagine how grateful we were when someone gifted us this under-sink filter from Filtrete (who knew they did more than air filters?).
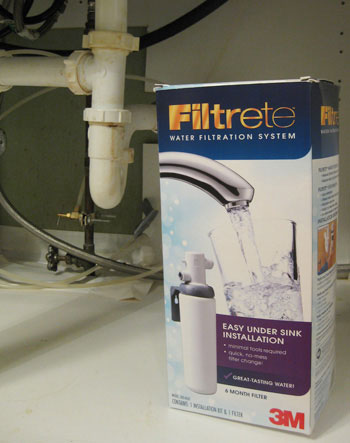
Hiding everything under the sink sure sounded like the perfect design for us. Plus, it promised “easy” installation with “minimal tools.” Since Sherry knew that “easy” plumbing projects were right up my alley, this became my Sunday morning assignment last weekend.
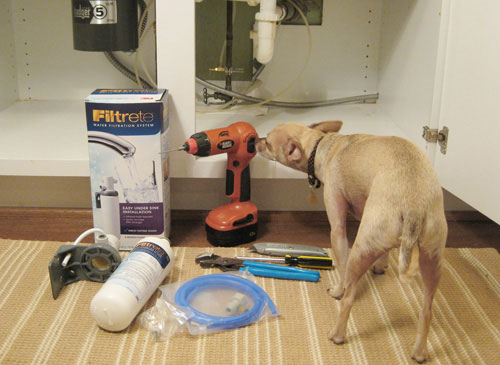
I started by clearing out everything under our sink, turning off the cold water and readying the “minimal” set of tools needed. These are all the items included in their box (filter, filter head, tubing and screws) plus the tools listed in their instructions (screwdriver, adjustable wrench, drill and knife to cut tubing), though I also found it helpful to have plumber’s tape handy (not pictured). Oh, and a curious chihuahua is extra credit.
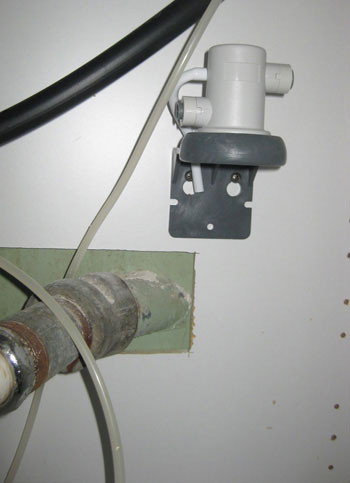
The first step was installing the screws for the filter head. After holding it up in place (with enough room underneath for inserting and removing the filter), it was easy to mark its placement with a pencil, drill a couple of holes and insert screws to secure it in place. This photo shows me testing my placement, but you actually don’t tighten the filter head into place until all the tubing is attached. It’s nice and pretty under our sink, eh? Not. (<– join me in the fight to bring “not” back).
The next steps were to remove the existing piping and begin connecting two lengths of cut-to-size tubing in its place. Well, our existing pipes were attached so tightly that it ended up taking four hands (mine and Sherry’s) to get them loose, leaving no one to operate the camera (Burger hasn’t quite mastered that skill yet). So all I’ve got to show you in the finished product.
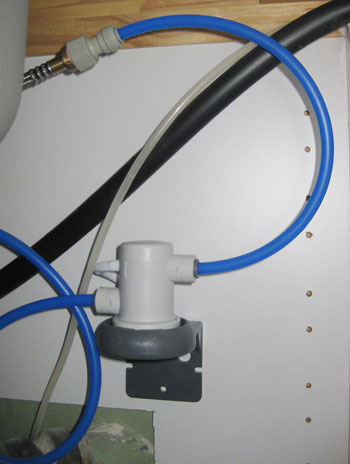
Here’s one length of blue tubing (cut using a straight edge knife) connecting to our cold water hook-up on one end and the Filtrete filter head on the other. The cold water end attaches using a hex-nut attachment included in the package. The filter head end slides right into the opening and holds using a “push-in fitting.” It was easy as pie.

Similarly, on the other end you connect another length of cut blue tubing to the filter head and to your faucet attachment. This again attaches to the filter head using the push-in fitting, and the other end attaches using a faucet adapter included in the set. No surprise here – very easy to do.
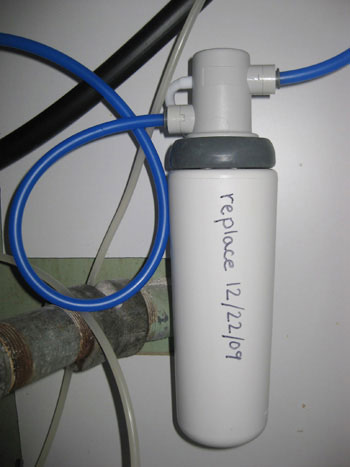
Then, once the filter head was tightened into place, we just had to pop in the water filter that’s provided. It simply slips into the head and locks into place with a small quarter turn. The filters are supposed to be replaced every 6 months, so we wrote ourselves a really big reminder on our filter using a black sharpie.
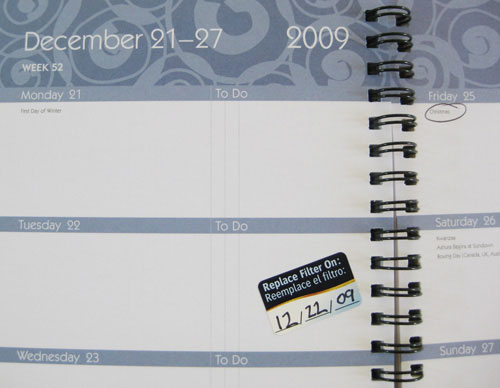
The package also included a reminder sticker (this makes organized people like Sherry smile like it’s Christmas) so we stuck it in her dayplanner. Now there are two reminders floating around our house. When it comes time to replace our filter in December, we’re thinking we might upgrade from our current Advanced filter (which reduces sediments, chlorine tastes and odors – just like a Brita pitcher would) to the Professional filter (which also eliminates parasitic cysts – like a Brita or Pur faucet-mount filter does).
But back to our little project play-by-play. Next we just finished up the installation by turning the water back on, running the faucet for about 5 minutes (to clear our the system) and checking for leaks (none – score!). Now we can enjoy our cleaner and purer water without any extra hassle or faucet attachments.
How ’bout you? Are you heavy water drinkers like us? Do you filter your H2O? If so, what system do you use to clear things up? Do you use an aerator to reduce your water usage? We’d love to hear every watery detail…

Leave a Reply