Alternate punny post title: The Updated Light Fixture Blues. That’s right, we’ve got the blues, but we’re far from sad about our “new” light fixture in the office. We just opted for indigo blue spray paint and added a giant drum shade to our old brass friend. Hence the blues joke. But you’ll get a closer look in a minute. Patience, grasshopper.
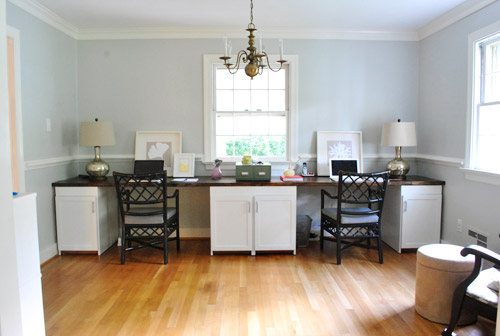
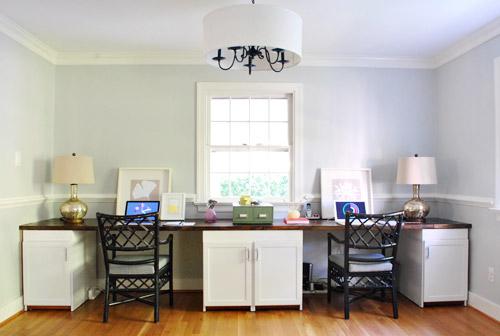
As a refresher, here’s what was there before (remember to ignore the lack of height due to the too-small frames leaning against the wall instead of proper hanging art and those we-probably-won’t-keep-them lamps on either side of our new desk). Our office was originally our house’s formal dining room, hence the whole formal dining room fixture feel.
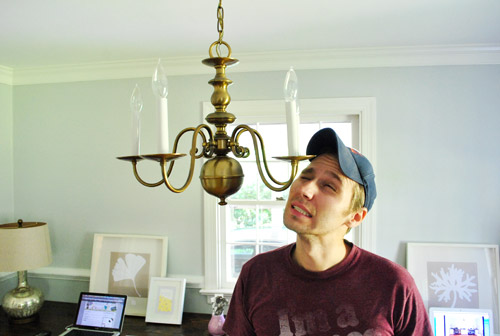
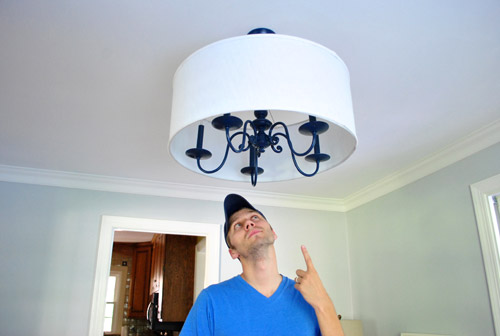
Speaking of its “feel.” Over the last nine months I’ve felt it a lot… with my head.
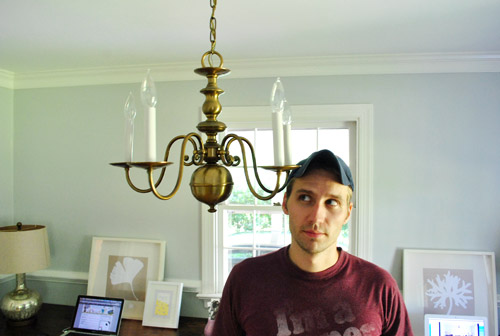
Though a more proper re-enactment of my many run-ins with the fixture would look something more like this. Just imagine a speech bubble with some expletives in it.
So even though the chandelier and I weren’t on speaking terms, after a brainstorming phone call with Katie B, Sherry convinced me that we should do our darndest to work with what we have. Again. See, we already spray painted a brass chandelier like this in our last dining room, so this time we wanted to do a bit more than just add a fresh coat of paint. So we decided to attempt to “modernize” it a bit by tweaking the silhouette, adding a big white drum shade around it, and bringing in some sophisticated-yet-kinda-unexpected color.
Luckily we had no trouble finding a jumbo shade at our first shopping stop, which is a local favorite of ours (The Decorating Outlet which we’ve probably mentioned ten million times – it’s also where we found Clara’s capiz chandelier and the shade for the pendant we made in our last office/guest room). The best part was that it was miraculously large enough (it had to be at least 24″ wide and it was exactly that).
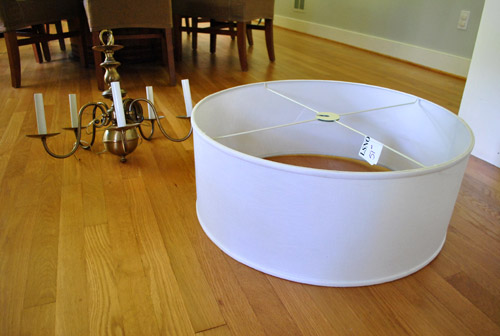
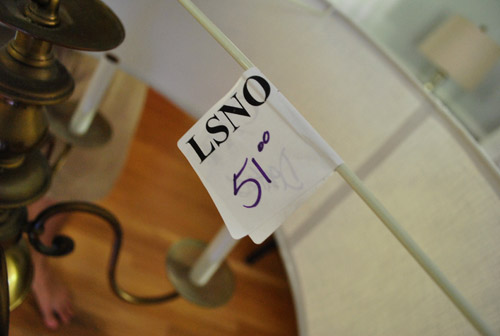
It was marked as $51, but after my better half sweetly pointed out a couple of subtle dents to the salesperson she was willing to sell it for $39. Score. I’ll point out the dents in a later picture – they’re not bad at all. But you know Sherry loves a deal. So even though $51 was a lot less than most 24″ drum shades like this $199 version that’s only 20″ wide (yes, ours is a full two feet wide), it never hurts to ask. And $39 was the magic number.
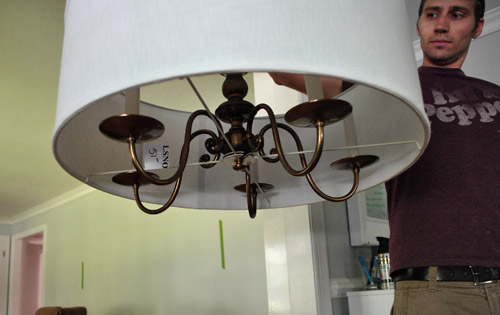
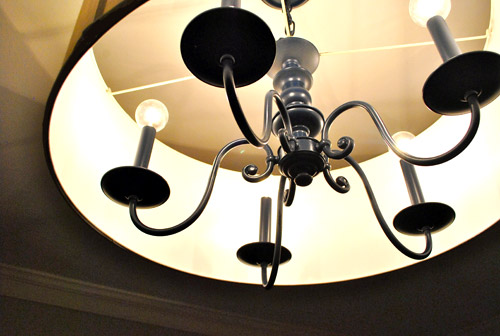
We also decided to eliminate the large ball on the bottom of the chandler since we felt like it would look funny sticking out of the drum shade (“like butt cheeks hanging out of a short skirt” as the wife so eloquently stated). Fortunately it just took a few twists of the bottom finial and the whole thing screwed right off (even the long rod that kept the ball part attached). We couldn’t believe it was hollow because we assumed it would be full of wiring or something.
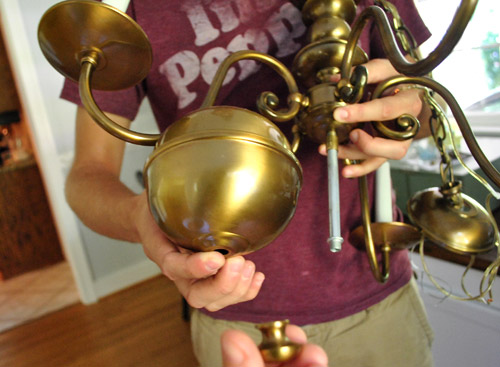
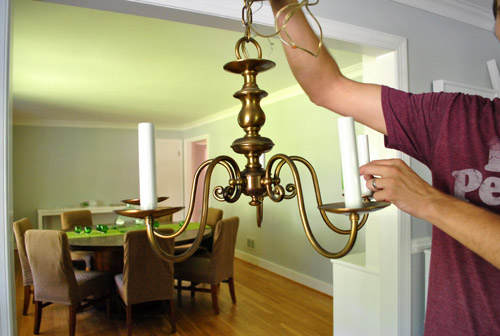
Here it is minus the ball (aka: with less junk in the trunk). We just reattached the finial to the shorter middle rod (since the extension rod that held the ball up screwed right off) and it was good to go.
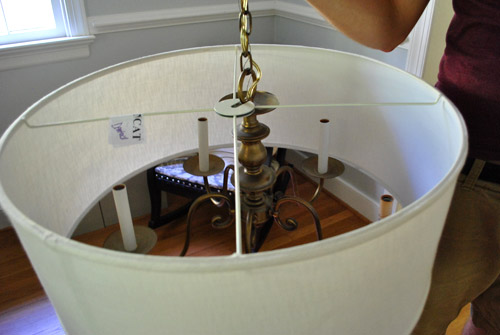
The next step was figuring out how to attach the drum shade, since it wasn’t exactly made for our old brass chandelier. The obvious choice was the bottom, since there was a nice little nub for the shade’s ring to slide on to (and the finial could be screwed back in to hold it up). It almost worked, but we didn’t like the idea of the shade’s straight & narrow crossbars being so in your face. They kinda messed with the original curves of the chandelier – ya know? So I gave it one of these faces and we moved on to the next idea:
The obvious alternative was to hang the shade from the top (so the cross bars would be in the background instead of the foreground). The only problem was that the shade’s top-attachment-thingie was too narrow to slide onto the top of the chandelier. Harumph.
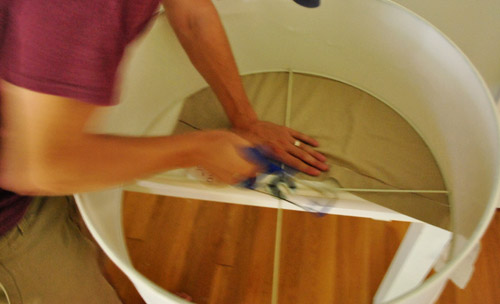
So we decided to improvise. The existing piece of notched metal had to go. Sherry was able to pry off half of it without a problem – just a little flick of the screw driver while steadying the “legs” so it didn’t tweak the shade.
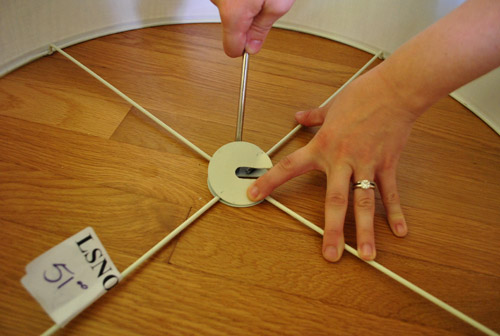
But the other half was more stubborn. We tried lots of tools, but it was requiring so much force that we started to get nervous about damaging the shape of the whole shade. (PS: You can see a couple of the small dents in the upper right of this picture – which are nearly impossible to detect from the outside of the shade).
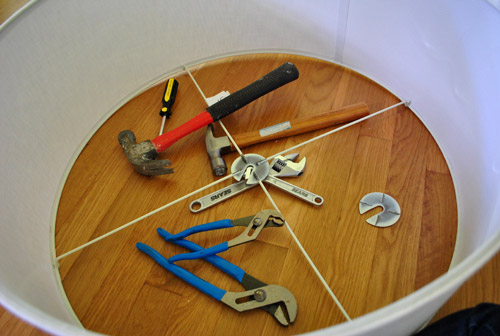
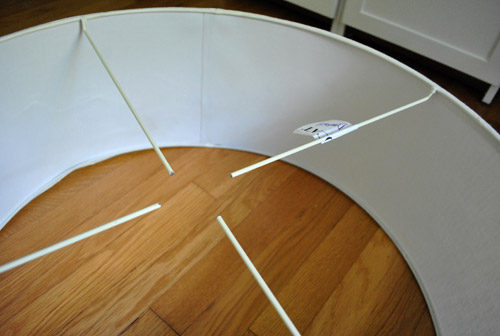
So we did what any demo-happy people would do. We broke out the hacksaw. Sherry was kind enough to photograph me looking like a sawing superhero, but it was actually she who did most of the sawing. Three out of four “legs” actually. She’s my hacksaw heroine.
Removing the rest of that ring thing was just half of the battle. Okay, maybe a third of the battle. Because these four rods floating in mid-air certainly weren’t going to solve our problem. They needed to be stabilized by something, and that something needed to somehow fit onto our chandelier.
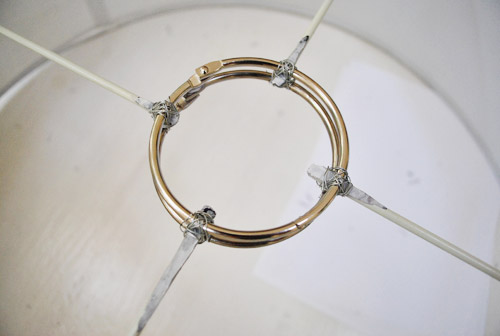
Luckily we found some spare 3″ binder rings in our office-supply drawer that were big enough to fit over the top of the chandelier. After a couple of attempts at super-gluing one to the four rods (and having the ring break off within seconds of trying to pick up the shade) I decided to try wiring it two of them together, thereby sandwiching the shade’s four rods. I just used some craft wire that we had around (pretty thin gauge stuff so it was easy to bend). The method was far from complicated. I just (messily) tied some wire round and round – sort of making a figure eight shape to secure things. I wouldn’t earn any merit badges for my wire knots, but they did the trick (and won’t be seen in the final assembly anyway, so… yay).
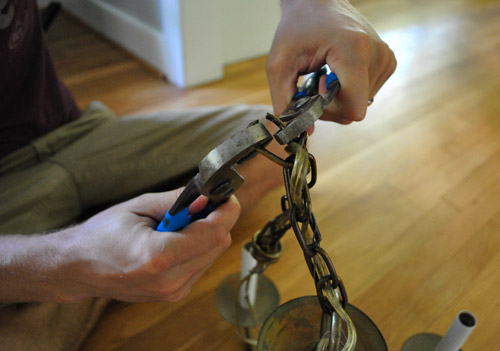
I can’t believe I haven’t mentioned one of the most important steps in our chandelier project: painting it raising it so I don’t hit my head anymore. This involved shortening the chain that it hung from and snipping the wiring to match the new height. Once we determined how many chain links we wanted to keep (by Sherry holding it up as I walked under it, a very scientific process) we just pried off the extraneous rings with two channel lock pliers. It was nice and easy – and a big step toward me (and my delicate man face) enjoying our final product.
Painting it was a pretty important step too. At first we thought about something smoky like an un-shiny charcoal grey (not quite black, but close – sort of like a matte gunmetal color). But we thought it might be fun to take a little subtle risk with a rich deep color. And while in the spray paint aisle evaluating our options (yellow, green, teal, and even orange – all of which we might bring in a few other ways with things like upholstery and art), a can of indigo blue spray (in a satin finish) caught our eyes. Perhaps a nice nod to the backs of the built-ins in the adjoined dining room?
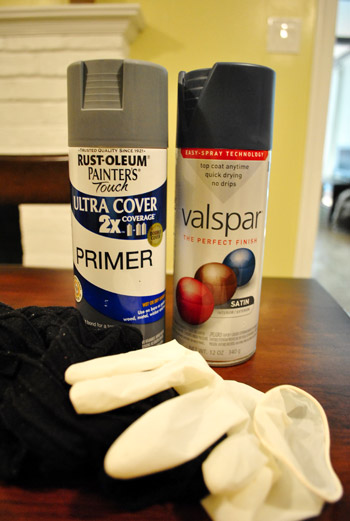
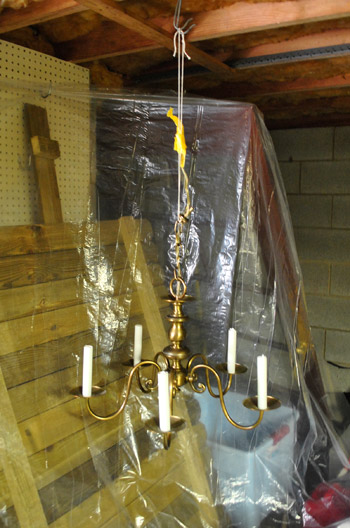
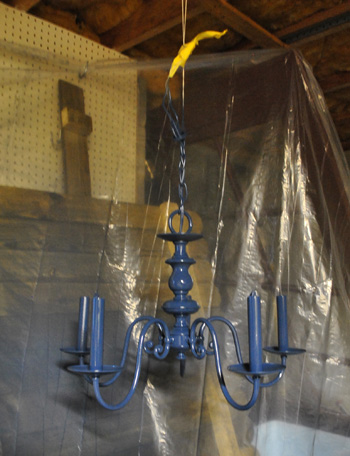
So Sherry gathered her supplies: spray primer, our freshly purchased indigo spray paint, rubber gloves, and some sexy black socks (you know, so she can impress all the neighbors with these legs). Because she needed to spray it while hanging (for the most easy-access) we decided to use the basement (with the door open and an equally-as-sexy-as-the-socks gas mask) where we could hang it from the ceiling and surround it with a drop cloth.
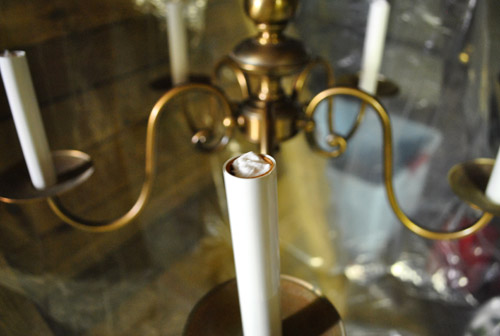
We were also sure to stuff some paper towels in the sockets to keep paint out of the interior part where the bulbs screw in (no sense in gumming up the works).
Sherry first did a coat of spray primer, which was a pretty cool color in itself. For a second we debated just leaving it…
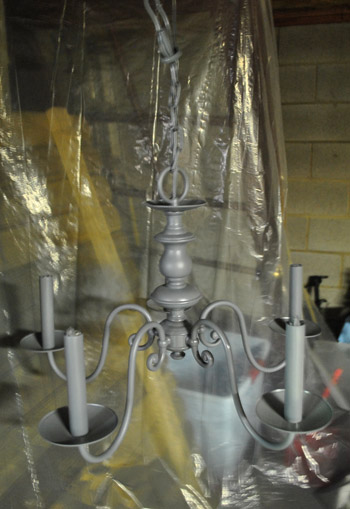
…but after going for the indigo we were immediately happy with the choice. It makes the whole thing look classic, but updated at the same time – at least in our humble what-the-heck-do-we-know opinion.
I don’t have many (okay, any) pictures of the process of re-installing it because it took all four of our hands (Clara’s hands were busy napping and Burger’s paws were probably partaking in a sleep-sesh too). But after sliding the shade down the chain so the rings rested on the top of the chandelier’s fluted center part (there’s a detailed pic of this coming up) Sherry held the whole thing up while I re-wired it to the ceiling in the same manner in which I had taken it down. That’s the extent of my electrician knowledge – just carefully redo what you undo. And I turn off the power to the entire house just in case things aren’t perfectly marked in the fuse box (they don’t call me John “Paranoid” Petersik for nothing).
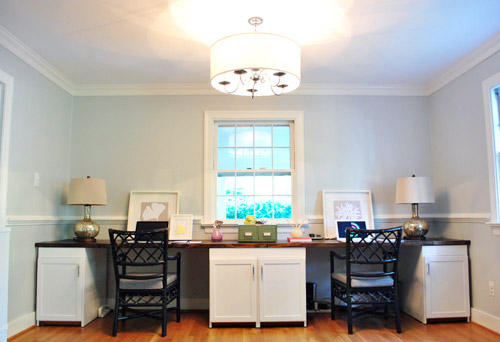
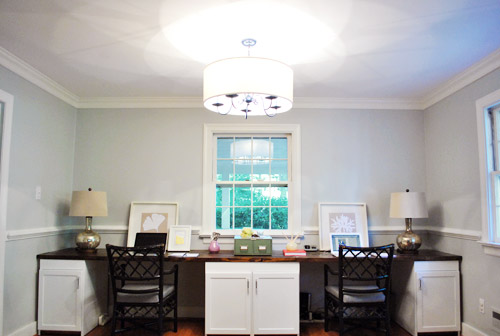
And voila. The rich blue color is sort of hard to see in pictures but it’s nice and clear in person.
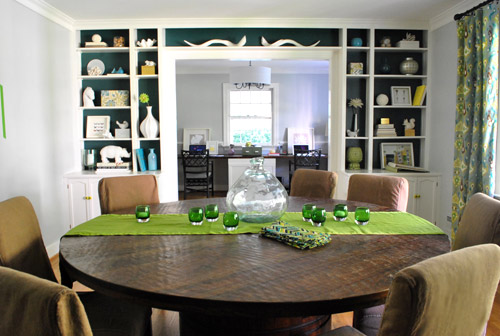
We love that it’s clean and understated from afar because we someday plan to drop a huge chandelier over the huge dining table (and didn’t want the office fixture to compete).
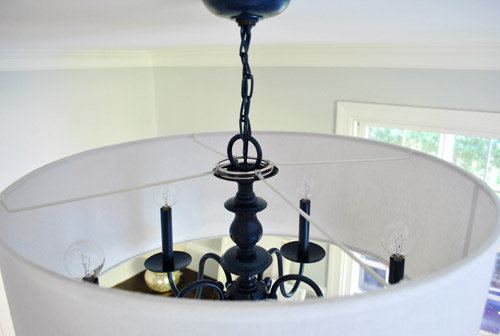
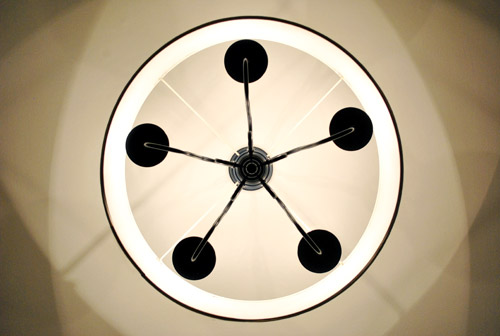
Here’s a shot from the top so you can see how the binder rings rest on top of the chandelier’s middle flute thing. Since the rings are smaller than the disk that they’re sitting on, they’re completely invisible from below. So only the flies on the ceiling get to enjoy this vantage point.
And of course, one of my favorite features of the new fixture is that I can walk right under it. Oh the simple pleasures in life. For you detail oriented folks, the bottom of the chandelier is 78″ from the floor.
As much as we love the light off, it really comes alive when it’s on. The room feels light and bright and the shade diffuses the light much more evenly, meaning the chandelier no longer casts creepy five-legged shadows of itself on every wall.
And we think the kaleidoscope pattern that it makes on the ceiling is pretty nifty.
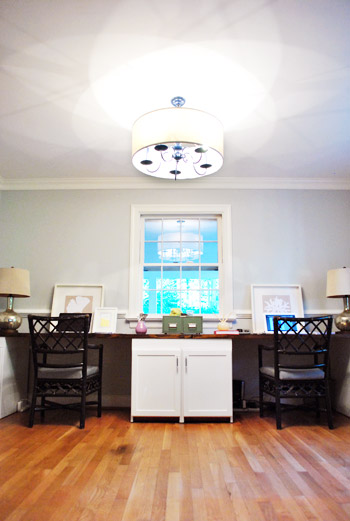
It’s also a really stellar size in person. The giant 13 foot desk could easily dwarf something smaller, but the light colored shade and clean lines keep it from feeling too heavy so it’s nice and airy – even with the deep blue tone on those ol’ brass legs.
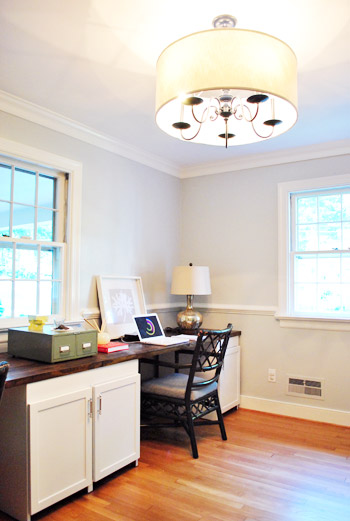
And oh yeah, we swapped out the traditional “flame” light bulbs for more modern globe-style bulbs (from Lowe’s). It’s a small detail, but we think it makes a big difference in crisping things up (we first fell in love with round bulbs around four years back when we used them on a similar dining chandelier in our first house that we spray painted white). We looked for CFL versions, but no dice- although we hear most things are going LED now, so here’s hoping they make little round chandelier ones soon.
In summary, we love it. Here’s the view from the floor (where Clara and Burger actually spend a fair amount of time). And speaking of the bean, she’s learning so many new words these days. It charmed us to no end when she woke up from her nap after we hung the “new” fixture and pointed right up at it and said “oooooh, light.”
Even though the update wasn’t totally free, it certainly beats the price of paying for a whole new fixture. Especially anything that’s two feet wide. Here’s the breakdown:
- Chandelier: $0 (already owned, but we’ve seen them for under $10 at yard sales and thrift stores)
- Drum Shade: $39 (from The Decorating Outlet, negotiated down from the already discounted price of $51)
- Binder rings & wire: $0 (already owned, maybe $4 if you had to buy them?)
- Tinted spray primer: $0 (already owned, but it’s around $7.50 from Lowe’s if you need some)
- Indigo spray paint: $3 (from Lowe’s)
- New globe light bulbs: $9 (from Lowe’s)
- TOTAL: $51
Not bad considering a nearly identical version (minus the deep blue color) was recently sold by Pottery Barn for $299 (looks like it’s currently out of stock).
I’m sure we’re not the only ones who’ve updated a chandelier or other light fixture, so we’d love to hear your experiences and even see pictures if you’ve got a place to link to them (like Flickr or your blog). Has anyone else gone for a non-traditional-but-surprisingly classic color? Or found another way to make an old fixture feel fresher? Who else hit their head on a light at least five times a week for thirty six weeks straight? Why the heck did we wait so long on this update anyway?

Evelyn says
Lucky! I have been searching for a large drum shade to do the same thing to my ugly brass chandelier. Unfortunatly– they don’t have the large 24 inch ones on their website. :(
Robin @ our semi organic life says
Do I spy your old desk as a hall console table? Very neat idea!
YoungHouseLove says
We tried it out there. Not sure if it’ll stay since we might appreciate the storage of a secondhand buffet or something there instead…
xo,
s
Jessica says
That looks awesome! I love the blue/white combination.
Caitlin says
I so wish you all had an email– or maybe you all do and my true blonde is shinning through! Anyway, my friend sent me a link to this blog and I have to say that I am so impressed with all that the two of you have done to each of your homes. The tutorials, the ideas– the fact that your house reflects something that looks so expensive but actually has been decorated with affordable things that the average consumer can afford is WONDERFUL. We bought a foreclosure last year and while it wasn’t beat up– it needs a lot of TLC. My husband keeps noticing pictures taped to the wall of my “ideas”. And, I keep telling him…”Look, we can do this. And, here’s my tutorial”. :)
We aren’t very handy…but with your help maybe he and I can learn something. Thanks again for your humor and work.
I’ll be back soon!
Jen says
Ooooh! So smitten with the update! It’s divine! xoxo!
Nora says
I love your sense of style. It’s so much like mine. My dining room and foyer lights are “disco” old. This is a great way to redo them without spending $300. Thanks!!
ErinJ says
So cool! I actually got bit by the ORB bug this past weekend and sprayed a light fixture….love it! I love how you always find interesting places to add color!
Hillary says
Love the combo of the modern shade with a more traditional chandelier! The blue looks awesome, can’t wait to see what you do with the rest of the room. I think it might pop even more if you raised the shade just a tad so more of the chandelier is visible at the bottom, a la http://designedtothenines.com/wp-content/uploads/2010/05/Photo_Video_7584631323955949525804_medium1.jpg
Either way, it looks great!
YoungHouseLove says
We tried it a little higher up and it looked a little wonky- but I love the one you linked to! So pretty!! I think the legs are longer and less wide- supah sexxxy. Haha.
xo,
s
Angela says
I love it w/ the shade! Nice job!
Jen @ The Decor Scene says
Love it!!! I kind of had a feeling you guys would paint the chandelier, but adding that drum shade really made it even more modern. Great job!!!
monica says
What a GREAT change! Love the color and the shade, and it totally helps with the getting rid of the dining room feel.
Along those lines, have you considered adding some chain and swaging the light a bit towards and maybe even over the desk? I think defining that part of the room as the office with the light might make it feel more like a more defined area, at least when you are looking at from the living room, entry etc and take away that lamp in the middle of the ceiling – this needs a table under it feeling (though I know that the whole change up has addressed that a lot!)
YoungHouseLove says
It’s probably just one of those personal preference things, but we actually like the big light in the middle of the room – and hope that once we add a rug and a chair with an ottoman and fill things in more it won’t look like it’s in the middle of nowhere! Since there’s a doorway to the kitchen that’s centered (and lined up with the light) and the wider doorway to the dining room that’s also centered (and lined up with the light), we think if we moved it forward it would look wonky from the kitchen doorway that’s lined up with it. Hope that makes sense.
xo,
s
Amanda says
Love it!
Did you have to do anything to rough up the finish before you sprayed on the primer? I am getting ready to ORB our front porch light, house numbers, and mailbox and have been trying to decide if I need to scuff them up first or just prime them and go from there. (Apparently your ORB fever is catching, LOL.)
YoungHouseLove says
I would rough those up since they’re outside and get more wear and tear from the elements. We sprayed a chandelier in our last house without sanding (we just used a spray primer and spray paint and it held up really well). I guess since the chandelier isn’t touched all the time (or rained on, etc) the added sanding step is ok to skip?
xo,
s
Kim Bernhardt says
Wow you to come up with amazing things all the time but I think this one just jumpped to number one in my book. But John why did you think of this earlier, it was right at the top of your head.
YoungHouseLove says
Haha- seriously. You’d think the chandelier would have knocked this idea into his brain earlier. Haha.
xo,
s
MJB says
Do you and John ever disagree about design decisions? As you say, things like indigo over gray are personal preferences. But what happens when you have different personal preferences?
My husband’s tastes run to “early 70’s basement rec room” and mine is more… OK, I don’t know what it is, but it’s not that!
Good thing we agree on kids, money, movie choices, toothpaste brands…you know, the important things.
YoungHouseLove says
We have a full agreement agreement. So it means we have to agree or we don’t do anything. It keeps us from holding something against each other like a color choice or purchase for years to come. So if we didn’t agree on any spray paint colors we wouldn’t buy any until we did (maybe we’d go to another store or look at google images until we saw some inspiration that we both loved, etc).
xo,
s
Susan says
Wow. That is a wonderful idea! I love how you figured out how to get the shade onto the fixture! Thank you for the inspiration…
Ami says
I cannot believe you did this post! We have a chandelier that we bought from Home Depot and though I like it, my taste has gone more modern so I was thinking of ways to modernize it so we didn’t have to replace it. I got an idea to add a huge drum shade from a fixture I saw at Shades of Light website, which I found through THIS blog. I didn’t know how I’d work it and now you guys are one step and did it! THANK YOU, THANK YOU. Now I’m 100% convinced this is the way too.
Heidi P. says
Wow! In the first picture, I couldn’t tell the chandelier was blue, but the last few pictures, it totally comes through and looks aMAAAzing! And I LOVE the round bulbs! So cute!
I read one of your reply comments about subtle stenciling and it made me think of something my sister-in-law told me about a NC home she saw recently – the lady had done a tone-on-tone stenciling to her ceiling, but the stencil was metalic. Totally subtle since the ceiling and the stencil were the same shade, but w/ a fancy feel from the metalic stencil! Have you already heard of that? It was new to me so I thought I’d share :).
YoungHouseLove says
Ooh that sounds really pretty! I’m much more a lover of metallics than John so I might have to work on him. Haha.
xo,
s
Amy says
Love the shade! And, I love your resourcefulness with the binder ring! I never would of thought of that.
Caitlin @ Desert Domicile says
GORGEOUS!!!
Upon first glance, I thought you had purchased the tuxedo chandelier from Z Gallerie (http://www.zgallerie.com/p-1462-tuxedo-chandelier.aspx) and was like there’s NO WAY they spent $800 on a light fixture!!!
YoungHouseLove says
Oh man, but that is one sexy chandelier!
Denise says
Love love LOVE it!!! And hate the fact that I just threw a brass chandelier EXACTLY like it in the dumpster because I had no idea what to do with it, other than paint it. Yeah. Wish I’d held onto that one!
Kayleigh says
OMG this is awesome. What a great fix. I have a similar problem with my ugly wannabe mod lighting fixture that the previous owner installed in the kitchen/dining nook. I don’t think I could pull this off bc well lets face it’s hideous so I need to replace it, but you guys did a great job!
Stefanie says
Love it. Though I am surprised you didn’t immediately go for ORB spray. I was pleasantly caught off guard. Go indigo!
Hannah says
I have been looking for an affordable 24″ drum shade for months now. I called the lightning outlet and retail store and they both said they have never stocked 24″ shades. Any other ideas?
YoungHouseLove says
Maybe an online shade store? Or etsy?
xo,
s
Kirsty says
Ah, I love it! I’m a sucker for white drum shades..and blue anything. It’s all coming together guys, can’t wait to see this room once it’s completed!
Chrissie says
That is fan-freaking-tastic and you guys are geniuses =) You are totally going to be my pinterest challenge next season because I have a light fixture just like that that is always in the way! I am so clueless about what to do about lighting, I just have no ideas of my own, so thanks for this!
karla says
I love it so much!! Thanks for the update!
sophie says
fun!
We found a lamppost style chandelier (five globes hanging down) on kijiji for 10$. It was beige and rather ugly. Few coats of cherry red spray paint and now it’s glorious, and also in the office (which is one of our darker rooms, so needed it). Now a beachy blueish for one wall and we’re set to go.
Tiffany says
Beautiful and Ingenious! What a great way to use the fixture you already had. Now I wish I had an old outdated chandelier to redo too :)
Gaidig says
Hacksaw genius! I just gave up when mine wouldn’t fit: http://gaidigt.blogspot.com/2011/04/attempt-at-light-fixture.html
YoungHouseLove says
Aw, I feel for you. Pretty flower though!!!
xo,
s
cate says
absolutely love this!! i have one of these lovely brass chandeliers laying in the closet (that i originally was going to redo for the nursery). i am totally doing this for somewhere in our house asap :)
Charmaine says
I found your desk chairs in indigo blue on an interior design blog!
http://cocokelley.blogspot.com/2011/09/pop-of-color-yeah-i-said-it.html
YoungHouseLove says
Love it!!!
xo,
s
megan @ a life's design says
Perfect…now I know what to do with the ugly brass one hanging in my foyer. Thanks! :)
Rhiannon says
Wow what a great transformation. I love the color, what do you think about putting it office chairs too?
YoungHouseLove says
It’s one of many colors we’re considering!
-John
Jamie says
Looks great, guys! I actually am jealous since we have an ugly chandelier that we have been wanting to do the same thing. I remember a while back you had a reader post her DIY in making a drum fixture…but sheesh, this looks way easier…so I think I am going to copy (not like it is the first time).
carolinaheartstrings says
Much much much better. We like that!
Karen says
I just moved into my new house and I run into the dining room chandelier, too….except I am 5’1″.
Maybe I can remodel the fixture, too.
Lindsey says
OMGoodness. I JUST blogged about updating light fixtures in my house last week… and you fine folks at YHL got a mention!
Enjoy!
http://thecarsonsblog.blogspot.com/2011/09/light-em-up.html
{love your lamp, btw}
YoungHouseLove says
Aw thanks!
xo,
s
Melissa @ HOUSEography says
Great solution. I had guessed that’s what you were going to do. Every time I see one of those big shade lights I alwasy think of those shiny brass fixtures that people are constantly tossing out. I updated my boob fan light in our powder room with a shade this week. LOVE IT! http://houseography.blogspot.com/2011/09/powder-room-bling-part-4-bye-bye-boob.html
YoungHouseLove says
So smart! Love it!
xo,
s
Melissa says
Your office has quickly become my favorite room in your house. Between the new wall color, the amazing desk, and this, I’m in awe. (And green.)
Pixie says
You guys truely amaze me! I love it and so inventive!
Anna says
How easy! My mom has two old chandeliers sitting in her basement. Now I know how to get them up-to-date! Love the blue.
ashlee says
sigh. forgive me if this is answered in the post and i just somehow missed it.
what is the purpose of tinted primer? i’ve purchased rustoleum 2x in white a few times..and it wasn’t all that great. i wonder if perhaps i should have chosen a tinted version for my projects (playroom chairs – originally solid oak, going green and blue).
also, that indigo spray paint ROCKS. what a fantastic colour choice!
YoungHouseLove says
Tinted just seems to help if you’re doing dark- so since we had it around from another project and were going dark again we just used it. But if we had white stuff on hand we’d use that. It’s not much of a difference. Maybe two thin misty coats do the same thing as one of the gray stuff?
xo,
s
ashlee says
i used your cutting in technique today! i watched your video online and i’m practicing in the play room, since it doesn’t exactly matter too much if that room gets torn to shreds :)
YoungHouseLove says
Love it! Good luck!
xo,
s
Sile M says
Looks great! And the blue really adds a little something different. Last year I struggled with our brass and glass chandelier and picked up a drum shade on sale for 9.99 at target with the hopes of making a drum shade chandelier. Well, after some sleepless nights with a newborn I realized because of the design of the chandelier I could just slip the drum shade over the brass/glass chandelier and voila i have a drum shade chandelier for 10 bucks and 3 seconds of work!
Laura says
The butt cheeks hanging out of a skirt comment has me laughing out loud. Such a hilarious way to describe that. And yet, everyone knows exactly what you’re talking about and how to picture it. Except, it’s not the best picture… Something I picture while walking around Wal-mart. Yeah, not pretty. Thanks for the laugh. Hahahaha!
Dawn says
Really nice. The best part is that you took what you had and gave it a little lovin’.
Lara says
FAB-ulous idea!!! Wish I’d thought of it :( But I just ORB’d my dining room chandelier. We still use the room as a dining/homeschool room, so it still works. But I’m really thinking about that shade!
Kate says
I would like to ask a question for your blogaversary, but I’m afraid if I do it on facebook it will show up in all of my friend’s feeds, and I’m crazy and don’t want that to happen. So here it is :)
I’d like to see a post (like this: http://www.healthytippingpoint.com/2011/07/5-miles-7-links.html) that links to old posts that you 2 feel are memorable in some way.
Kate
YoungHouseLove says
Thanks for that suggestion! I love it for a post idea in the future!
xo,
s
Late Night Coffee says
LOVE that light fixture! You make it look so easy….that just looks fantastic.
Katee Teng says
I love it!!
Sara says
I was actually just considering how to update our old brass and wood fan/light fixtures in our bedrooms. Have you ever spray painted a fan/light?
YoungHouseLove says
Yup, we did one in our first house. Worked great! Just remember to take it apart and use spray primer first. Then give it lots of drying time, reassemble it and hang it up!
xo,
s