Thanks for all of your thoughts and suggestions on the beginnings of our pantry project on Tuesday. We’re kind of swimming in ideas for what to do, but for starters we knew we wanted to take everything out (even the door off its hinges) to begin the process of priming and painting.
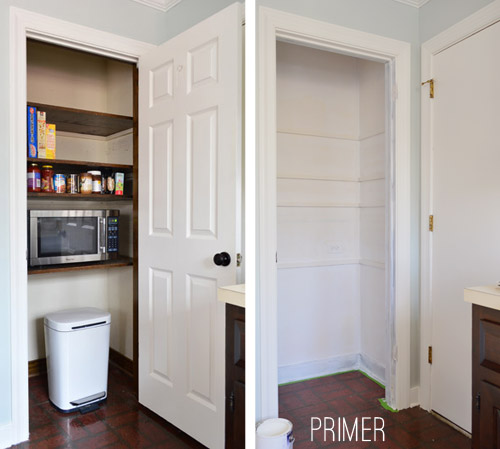
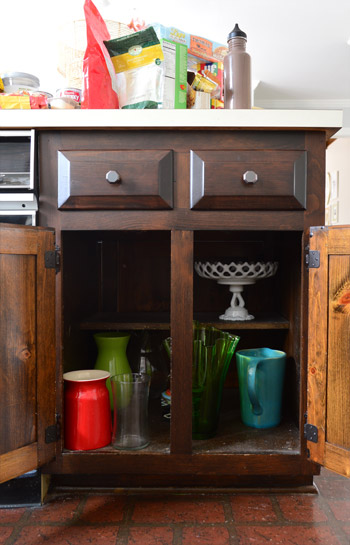
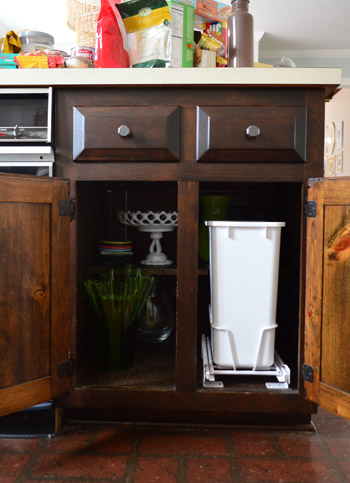
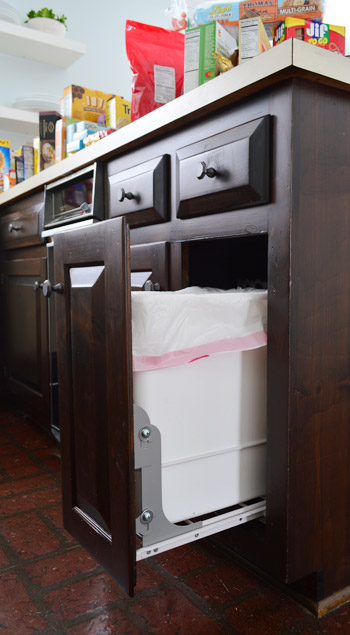
And, thanks to the conversation between Sherry and I that Tuesday’s post sparked, one thing that won’t be going back into the pantry is our trash can. Instead, it’s gonna go into this cabinet right here. This the cabinet on the end of our peninsula, facing in towards the prep area (as opposed to the eating area). Just ignore all of the pantry cast-offs on the counter.
Although we didn’t have any odor issues with our trash can in the pantry after a month or so of use that way (we initially worried about that and mentioned it here), our decision to move the garbage out of the pantry was three-fold.
- We knew that bottom space could be more functional for storing stuff if so much of it weren’t taken up by the trash can (and trash can lid-clearance).
- When we really thought about it, having a kick-step trash can wasn’t nearly as hands-free now that we had to open the pantry door and then get our foot in there to open it – so one of those moves (either pulling something open with our hand, or stepping on the can when it’s out in the open) would be more efficient than both.
- This cabinet wasn’t doing a whole lot except for housing a few vases. Hello missed opportunity. Nice to meet you.
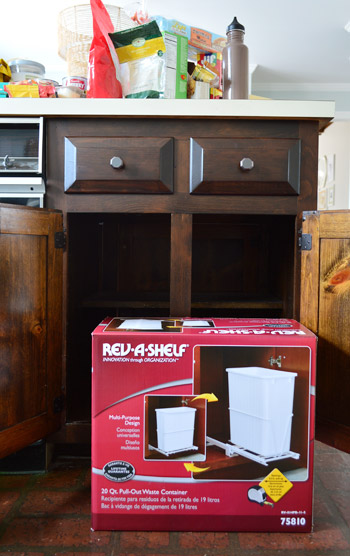
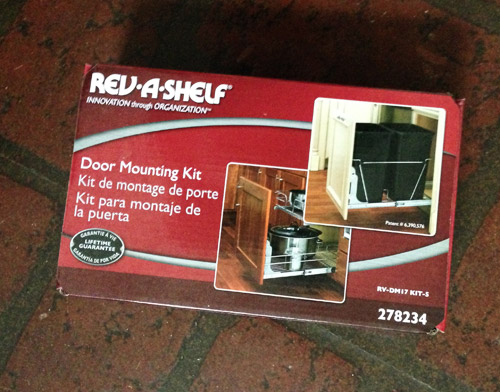
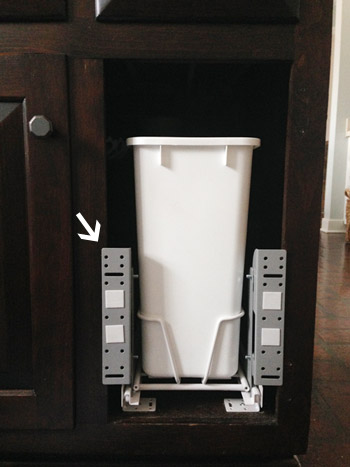
Rather than just jam a trash bin in there, we decided to purchase a product that many of you recommended in the comments on Tuesday – one of these Rev-A-Shelf pull-out containers. They also sell a larger version with two cans, but we didn’t have a cabinet that would easily accommodate that configuration – and we figure one small can will encourage us to empty it more regularly (we have a plan for our recyclables too, but we still need to flesh that out).
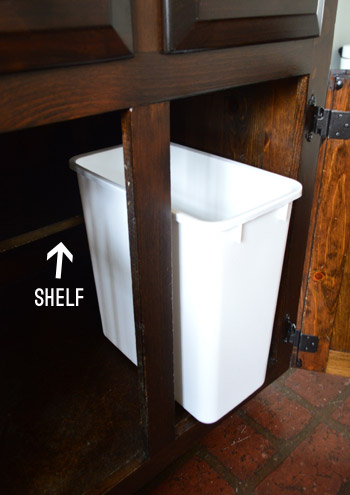
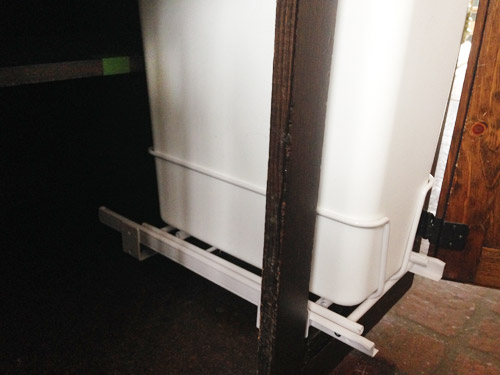
The somewhat frustrating thing about this cabinet was that it wasn’t a natural fit for the system, thanks to this barely visible half-shelf (it’s in all of our lower cabinets, and it prevented the can from sitting all the way back). That shelf doesn’t just slide in and out – it’s nailed in on all sides so it’s permanently built-in, as opposed to being removable or adjustable. Urgh.
But that didn’t stop me. I knew I’d just have some wood cutting in my near future. So I followed the instructions, lined up the paper template in my shelf, drilled some pilot holes, and then screwed the two tracks into the floor of the cabinet.
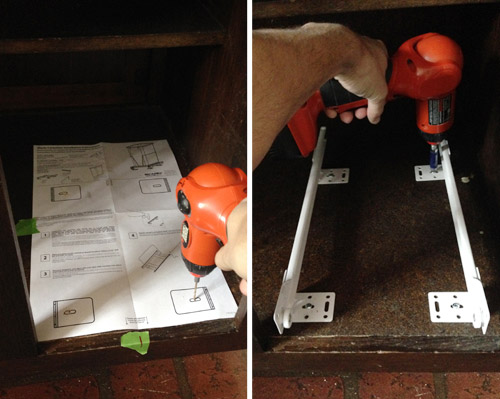
Then I snapped the other pieces into place, which took very little time. The entire conversion would’ve taken no more than ten minutes if I didn’t have my little half-shelf issue to deal with. But at least having the track in place meant that I could mark the shelf with where I needed to cut (note the green tape).
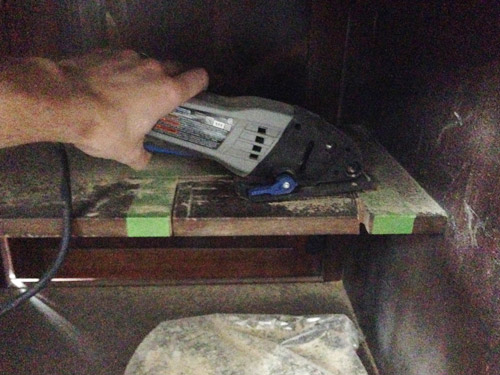
I only need to notch out a 3″ deep by 8″ space for the can to slide into, so I broke out my Dremel Sawmax (here’s the one we have) to do my dirty work because it’s fairly small and good at plunge cuts (i.e. I can plunge the blade into the wood at any point). It was a fast cut to make, but sure was messy. It spewed sawdust everywhere, as you can sorta tell from my awesome iPhone pic. You’ll have to forgive me. I was actively being sprayed with sawdust.
With everything cleaned up, the can slid back into place, and even the vases put back – I could’ve called this project done… but I wasn’t satisfied.
Next to the pull-out cabinet converter, I saw that Rev-A-Shelf also sold a Door Mounting Kit, which intrigued me because it meant that I could further make our old cabinet function like a newer one.
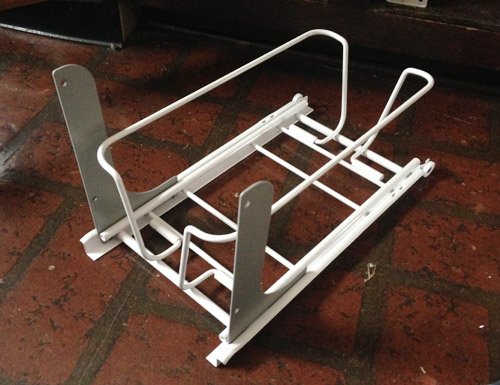
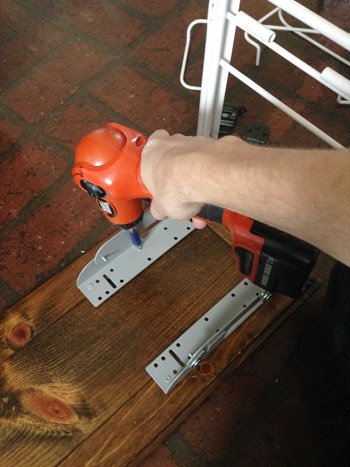
The installation of this was less straightforward – partly because the instructions were a bit vague. But the gist was that you had to install these two bracket “fins” to the sliding portion of the trash can tray.
This was easier said than done considering the nuts and screws were tiny and hard to hold in place. Made me wish I had tiny Kristen Wiig hands.
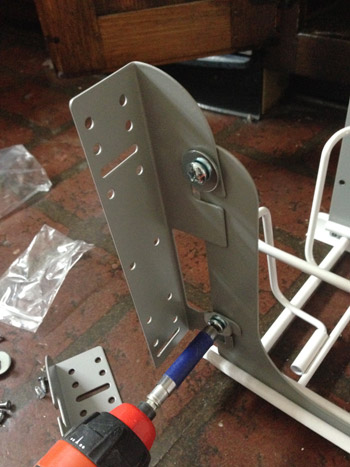
Once those were attached, you bolted on some larger brackets – which is where you’d eventually attach the cabinet door.
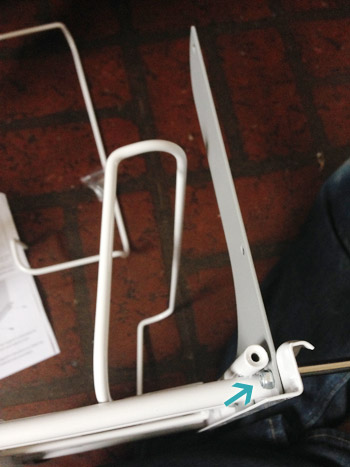
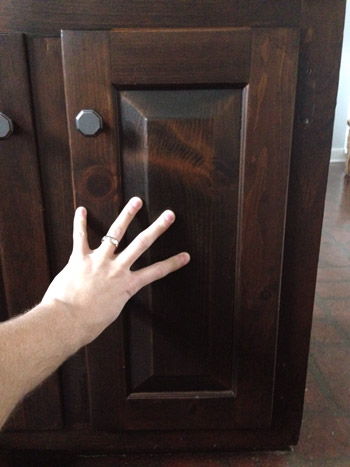
When I put everything back in place (except for the cabinet door, which I had removed) I immediately realized I had a problem. Although I followed the instructions, they didn’t account for old doors like mine, which sit half-recessed into the cabinet frame (they literally are half-sunk, so there’s a lip that rests on the frame and an inset area that slides into the opening for a tight seal). You can see from the picture below how the brackets were overhanging our frame, meaning this cabinet door wouldn’t sit flush like the rest of them.
So I improvised. I took the brackets off and switched them around so that they faced inward instead of out. Problem solved. Oh, and here’s the genius part. This whole time I was worried about attaching the cabinet door back in the right place. How would I keep it straight and lined up with the other door? With the double-stick tape they included, that’s how.
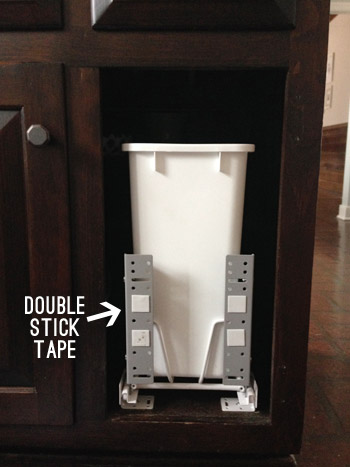
The tape wasn’t a permanent solution, but it allows you to hold your door up, get it right where it looks good and then press it against the tape.
Then you can gently pull the whole thing out – door still stuck in place – and screw it together more permanently from the back (just be sure you’re only putting screws into the thick frame of the cabinet, otherwise you might see some poking out the other side).
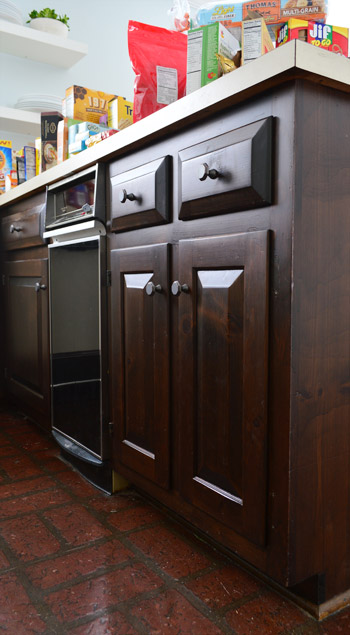
With the cabinet door secured to the brackets, things went back into place once more (can you tell there was lots of putting together and taking apart in this process?). But the end result was not too shabby, if I do say so myself.
Although I’m a little sad to give up the size of our old garbage can, I’m really impressed with how easy it was to install this new system. And how in some weird way it makes these old cabinets of ours feel a little newer. The nice thing about this is that we can reuse the system in our new kitchen, or even keep it in place in these old cabinets when we reuse them in the garage to make a little workshop down the line (won’t I be the fanciest man in town with a pull-out garage trash can?).
The only thing left to do is touch-up the screw holes where the hinges used to go on the right side. Although I’m secretly dreaming about a way to reinstall them as sort of “dummy hinges” so that both doors look symmetrical. But that’s a project for another day…
We picked up some other baskets, bins, and pantry organization gizmos on the same trip that yielded this trash can contraption, so once all of our priming and painting is done we’re excited to get stuff back in the pantry – hopefully in a much more organized manner. And considering all the snow that we’re getting, I think we’ll have plenty of time to futz around in there over the next few days. Then the pantry party is officially on.
P.S. Wanna see more home improvement updates? Here are a whole bunch to peruse.
*This post contains affiliate links*

Chris says
This is awesome!
The parents of my girlfriend got one installed when they bought a new cabinet, and to be honest, I was always envious of their new and shiny pull-out trash can system (because it has 3 different racks so you can collect your garbage selectively), but never thought that I could make one of my own.
I think I know what I’ll do this weekend! :D
Lynda says
Another idea for using the pull-out trash can insert mechanism is to store baking sheets, cutting boards etc in there. I put a wire organizer in mine to keep those upright and I love it!
YoungHouseLove says
Smart!
xo
s
Jem says
I’m not sure if it would work (you might be limited when it comes to style) but you could put a pin-hinge in and just take out the pin? That would make it look like a hinge is attached when it’s closed without ruining the sliding function…
Just in case you don’t call what I’m talking about pin hinges over in the states here is a link to a picture-
http://www.jebsupplies.co.uk/LOOSE-PIN-amp;-LIFT-OFF-HINGES/products/540/
YoungHouseLove says
That’s a smart idea too! Will have to try it out!
xo
s
Joseph says
“won’t I be the fanciest man in town” Hahahaha, now I’m picturing the “fanciest man in town” working in his fany workshop. Oh the hilarity.
Jamie B says
YES! This is the one thing I insisted we do when we redid our kitchen 4 years ago. The best part is whenever I’m cleaning up after a meal I can just pull the trash out and sweep all the garbage right in there! AND it isn’t nearly as smelly when it’s inside a cabinet than when it’s out.
MJ says
We had pull out shelves installed in the pantry and cabinets of our last house and the lost lost items became a thing of the past. Since they are pretty easy and much cheaper to build yourself, we’re getting ready to do that in the cabinets here in our new house. That should end the practically having to stand on your head to find things in the lower cabinets.
YoungHouseLove says
Those sound awesome!
xo
s
Lindsey says
We have the same sized garbage can! You’ve inspired me to see if this will work for our kitchen.
Melissa says
We were lucky enough to buy a house that already had one of the slide out garbage cans in it and it’s the best thing ever! I don’t know how I ever did without one before.
Amy G says
Did you see the kitchen re-do on design sponge yesterday? It kind of reminded me of what yours could be (with your own personal touches of course). I love the position of the island. Check it out if you have time!
http://www.designsponge.com/2014/02/before-after-a-cookie-cutter-kitchen-becomes-anything-but.html#more-192419
YoungHouseLove says
Really charming! Love that layout/island too! Thanks for sharing the link!
xo
s
Lee Lee says
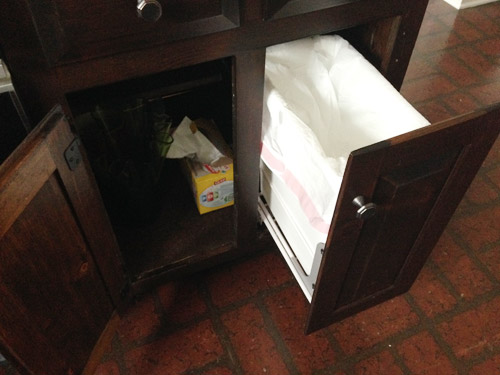
Just wondering what you have stored under the sink and why you chose that particular spot for your trash can instead of under the sink?
YoungHouseLove says
We have cleaning supplies on one side and a big garbage disposal hanging down on the other side with pipes/plumbing (it’s too large for much else to be there, so a bin wouldn’t have fit).
xo
s
Jennifer says
Love pull-out trash cans! We have had one for a year and a half and would not go back to any other kind. Ours is two deep and we use the back one for recycling. Because that cabinet had a drawer above it that started to get stinky, we ended up getting a lid for the trash. We did not need one for the recycling because we always rinse them really well. As others have warned you, the one problem is always when guests come over…. They invariably wander around the kitchen, checking all the “usual places” before wandering around some more looking awkwardly lost… Then they come and find you to ask and you try to explain which cabinet it is in. They get a look of fear in their face, wondering how they will ever find it. In the end, I end up giving into the kitchen to show them. The only situation that is slightly more comical is the second-time guest who knows it is in a cabinet but cannot seem to remember which one. They start opening every single cabinet in the kitchen in the hunt while first-time guests wonder if they are about to start trying to cook something or steal the silverware. Endless party amusement. I have, in all honesty, considered making a sign to hang on the cabinet door. :) When everyone finally finds it though, the reaction is the same; they love it and want one too. So glad you have one now. You will love it!
YoungHouseLove says
Oh man, that’s hilarious!
xo
s
(Mostly) Happy Homemaker says
When we moved to Richmond, leaving my dream kitchen, the one thing I missed most of all was the custom, pull-out, large, double trash cans. Not the huge and expensive Wolf range, but the trashcans!
When we did our kitchen remodel here (on a much smaller scale), I had the contractor build me one where the trash compactor used to be. It’s not as perfect as my old one, but it is a big improvement:)
YoungHouseLove says
That sounds awesome! So glad you could work them in :)
xo
s
Melanie says
We have a similar pull out for our trash can. Love having it hidden! Not fortunate enough to have a pantry so that wasn’t an option. Love your blog. Do y’all have any idea how inspiring y’all are?
YoungHouseLove says
Thanks so much Melanie, you’re so sweet!
xo
s
Cynthia says
I wondered how you’d ever manage with the trashcan across the room and behind a door — ours is under the sink and we probably open and close the cabinet door several hundred times a day. I had the perfect kitchen-trashcan solution when I lived in Brooklyn. A 3-shelf unit the same width as my refrigerator’s depth sat next flush against the side of the fridge in an alcove by my largest span of countertop. Three cans sat neatly on the bottom shelf, for regular trash, plastic-metal-glass, and organic waste. I lined the cans with plastic grocery bags and as each filled I disposed of it in one of the color-coded garbage cans outside. I always had hands-free access to my trash cans, there was never any odor, and the cans weren’t visible (although they were quite attractive — their orderliness always pleased me. It’s a configuration I’d love to have again some day.
Nichole says
Now that I know these exist, I have been trying to figure out which cabinet I could do without in my kitchen in order to put in a new pull out trash can! The pull out trash can is one of the things that I miss most from my old kitchen and I haven’t lived there in over two years!
Kelly says
I’d been imagining some sort of tilt out bin system in your pantry (Ana White version), but I suppose that’s kind of a pain when you need to quickly throw something away.
YoungHouseLove says
Ooh that’s a fun option though!
xo
s
Tricia S says
Could you screw the hinges into the back of the door and use the Dremel to cut the heads off the screws that attach the hinges to the cabinet frames? Super glue (or similar adhesive)the screw heads over the holes in the hinge and fold the hinge closed. When you close the pull-out door, the hinge should rest against the cabinet frame and the glued on screw heads should make it look like it is screwed to the cabinet frame. Any nicks in the screw heads can be covered with the appropriate color Sharpie. Use little binder clips as clamps to hold the screw heads to the hinge while the adhesive dries.
YoungHouseLove says
I’ll have to try that out to see if they’ll work without blocking anything (or wrap around that far). Thanks for the idea!
xo
s
Gwen, The Makerista says
Bril-liant. And pinned.
yobo says
i actually used the home depot version of that to hold my jewelry tumbler. i screwed it into my cabinet, but instead of attaching the trash can, i stuck a board in the bottom, and screwed my tumbler to it. now my tumbler hides in a cabinet, which cuts down on the noise, and it leaves my desk space open for other projects.
YoungHouseLove says
Smart!
xo
s
Grace says
We’re currently in a giant trashcan dilemma. Our trashcan is in a little cubby, but our stinker of a dog can still manage to pick it! The worst! I suggested your solution to my husband (in a cabinet), but with two boys we would be changing the trash like whoa! Still searching for a solution! Thanks for some fodder, though!
In the meantime, here’s a post about a recent crafting failure of mine!
http://teachlovecraft.com/2014/02/what-becomes-of-the-broken-hearted/
YoungHouseLove says
Aw man! It made me smile though. Sometimes it’s those weird little snafus that make you appreciate the next project, when it actually works ;)
xo
s
Kathee says
Were you able to purchase this at your local Lowes store, or is it only available online?
YoungHouseLove says
We bought it in person.
xo
s
Kayla says
Bravo on the trashcan cupboard! Looks amazing.
the 7msn ranch says
Just came home with the kit and the door mounting thing. I’m counting on your pictures to help me through the installation. #sundayafternooninhell
YoungHouseLove says
Good luck!
xo
s
Ali says
We had pull-out trash at our last house and I loooooooooooved it! I miss it in our new house. :(
Ashleigh says
I’m getting kind of excited. I think I have convinced my husband to let us install the two trash can one this weekend! Our current one sits in the middle of our kitchen, the lid always dirty, and my little girl likes to open and close it (gross). Not to mention, we are trying to sell our house so it’s one more thing I have to move in and out of the house with each house showing. Here’s to an easy install now with this post!
YoungHouseLove says
Good luck Ashleigh!
xo
s
Amanda says
Just a thought in regards to adding the hinges to look symmetrical with the left door:
What about reversing the direction of the door on the left so that it mirrors the other cabinet opposite from the dishwasher, and moving the knob from the “trash cabinet” to the top at the center?
Such a cool little update! Thanks for this post!
YoungHouseLove says
Thanks Amanda! Will have to look into that and see if it works!
xo
s