Alright folks, you know I have a love affair with fabric, so when I realized I had never attempted to make a roman shade (even a fixed one that’s just for looks) I knew I had to get on that. So here’s how I got my fake roman shade on.
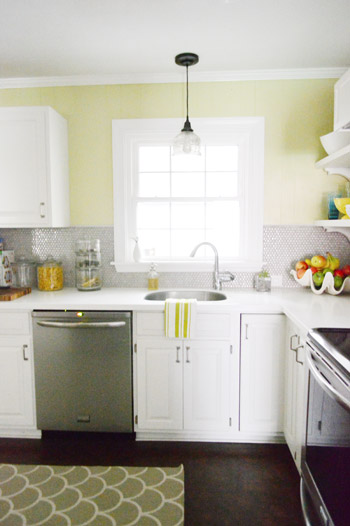
First of all, is this bare kitchen window begging for some fabric action, or what? It actually leads into the sunroom, so it didn’t need anything functional to draw/close, which is why I opted to go the faux shade route (actually all of the bamboo blinds in our first house remained open since I loved the light flooding in, so if you’re not a shade-drawer, a faux shade might work in any room for ya).
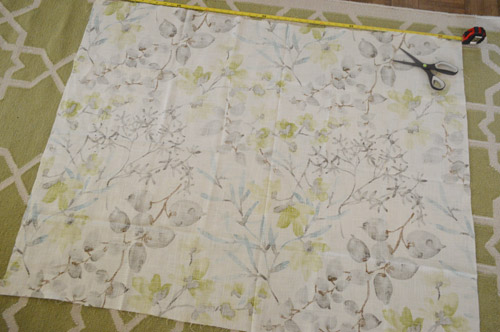
I didn’t follow any tutorial for this, I just sort of made it up as I went along, but here’s how it all went down. First I measured the window and realized that I wanted a finished shade that was about 47″ wide by x 18″ long, so I cut a rectangle of fabric that was 49″ wide (to account for an inch of hemming at the sides) and 30″ long (to account for the looping I was going to do with the fabric to make it look like a roman shade).
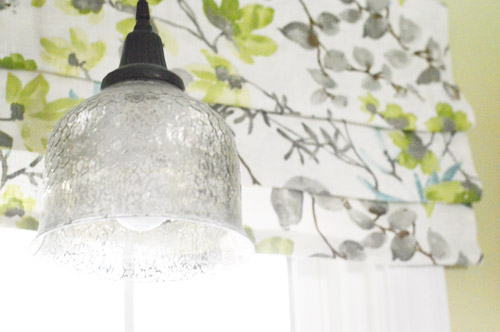
We used Gazebo Cloud by Braemore as our fabric (you might recognize it from here). We loved it so much, and it looked awesome in the kitchen, so we grabbed one more yard of it at U-Fab here in Richmond for $16 during a little store-expansion sale. Woot! Here’s an affiliate link to the same fabric on amazon for any non-locals.
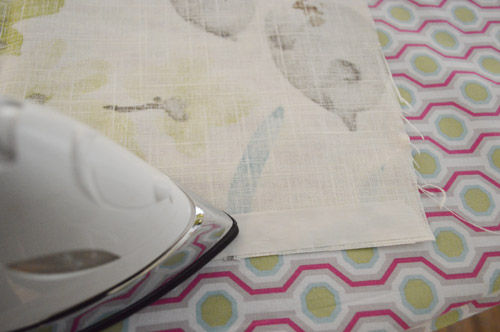
The first thing I did was hem all four sides of my 49″ x 30″ rectangle of fabric with no-sew iron on tape (I like heavy duty Heat N Bond, which I get for a few bucks at Michaels). Oh and there’s a little video tutorial on how to use no-sew tape here for anyone interested.
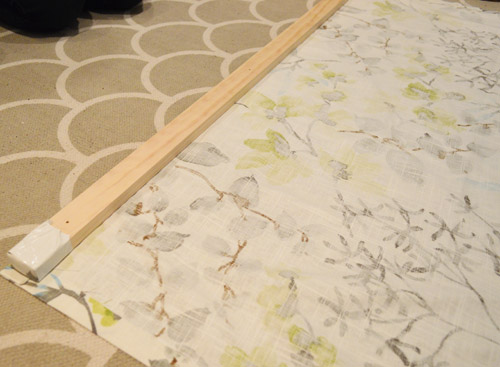
Then I cut a piece of 1 x 2″ scrap wood to the width of the fabric so we could hang the shade up (the finished width was 47″ wide). Although you could get them to cut you a piece of wood to the right size at Home Depot if you don’t want to whip out a saw yourself (I hummed the MacGruber theme song while sawing, BTW).
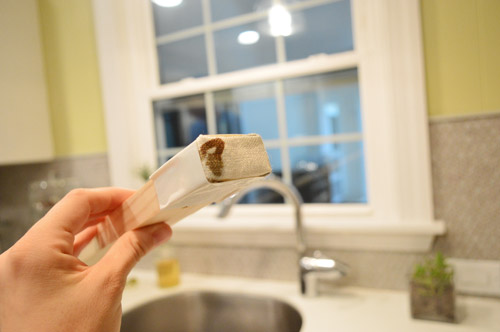
Next I wrapped scrap pieces of fabric around each end and secured them with white duct tape. That way once it was hung, you wouldn’t see raw wood from the sides.
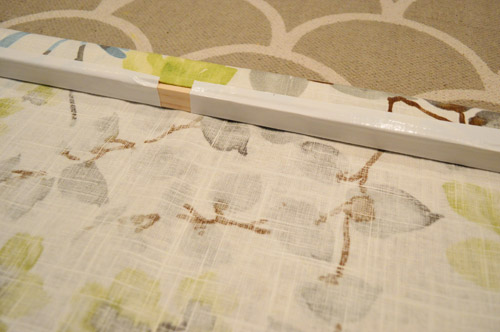
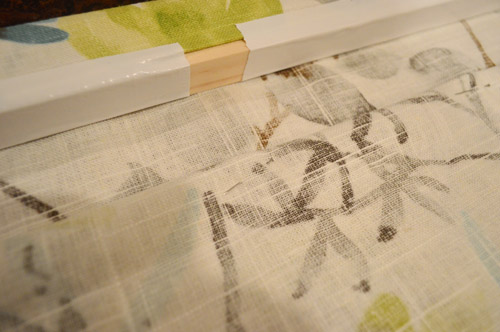
Then I rolled the fabric around the wood piece and secured it with more white tape (being sure the tape was on the back/bottom of the wood so it wouldn’t be seen from the front when the shade was hanging). See the flat 2″ part of the board in this photo (the part that’s facing up)? That will be the part of the board that is screwed into the wall to secure the shade (so the top and front will not have any white tape on them, it’s just on the back and the bottom of the board which won’t be seen).
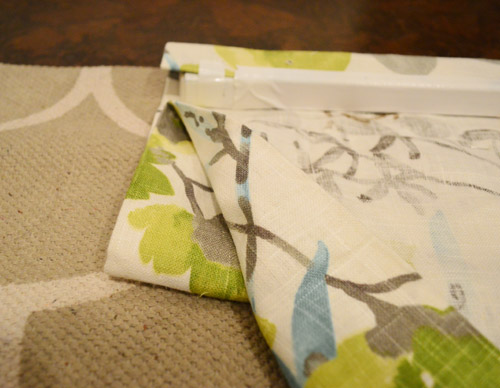
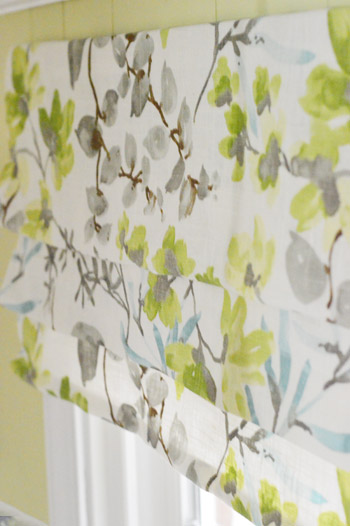
As for how I made the roman-shade-esque fabric loops, I just eyed things and tried to use a ruler where I could to keep things straight. Lining up the top of the shade with the top of our area rug in the kitchen also helped me try to keep things even (laying it down on the floor at an angle might have made it harder to eye things, so at least knowing it was straight on the floor and lined up with the rug gave me a nice frame of reference). As you can see from this picture, I made about a 5″ loop of fabric (which would show in the front of the shade) and then pinned that loop in place from the back of the shade. See how in this photo the fabric is folded back and comes to a point in the corner? That’s where the first pin went in. Then I followed that same line all the way across the back of the shade with pins, holding that loop in place along the entire front of the shade (and tried to keep the loop/pins at the same distance from the wood piece up top so it all looked even).
Here’s a shot where you can see two of my straight pins (see the one in the middle of the picture and the one on the right?). The key was to let them grab a lot of the fabric in the back (where they won’t be seen) but only grab a tiny bit of the fabric in the front since I didn’t want the pins to be super obvious.
I used rows of pins to make two folds about 5″ apart, along with pinning the bottom of the shade so it appeared to roll up/billow out as well. There definitely was some noodling when I turned the shade around and surveyed it from time to time (sometimes a row went up at one end so I repinned things to look straighter, etc). All in all the cutting and hemming process probably took about twenty minutes and the pinning/noodling/repinning process might have taken forty minutes or so. So it wasn’t a super long project, but I didn’t get all of pinning whipped out in ten minutes on the first try or anything. But with a little patience, I was able to get things looking a lot more lined up and then I could stop sweating so much. Haha.
Originally I had planned to pin each fold and later go back and “tack” each area where I pinned the fabric (tacking is basically doing a few manual stitches to hold things in place once you have pinned them and are sure that you like the look), but I worried that tacking might cause more puckering and the pins were holding very securely (and of course it was easier to call it done since everything felt nice and solid) so I did. Done ditty done ditty, done done done.
As for hanging it, we predrilled three holes in the wood piece and then hung it up with screws (nothing is drilled through the fabric to secure it to the wall, the fabric is pulled aside and the wood is just screwed into the wall directly and then the fabric in front can drape over it so it’s hidden).
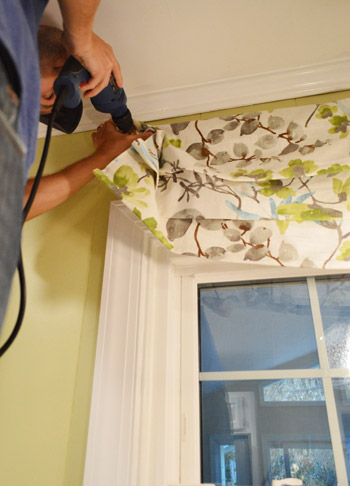
Maybe this shot explains it better. See how John is lifting the fabric up so he can drill right into the wood part to secure it to the wall? Then he let the fabric go and it fell back down in front of the wood piece so there aren’t any screws or wood that can be seen.
Like so:
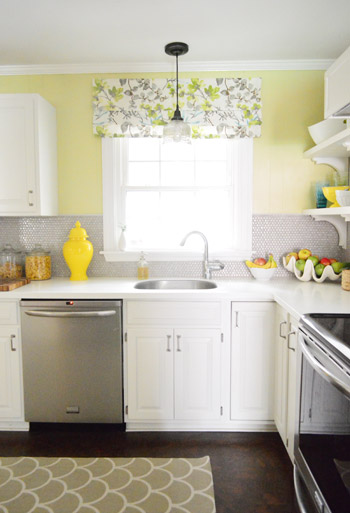
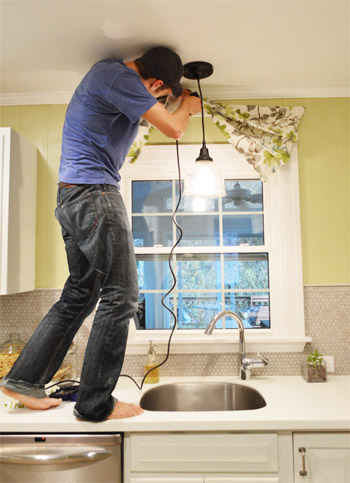
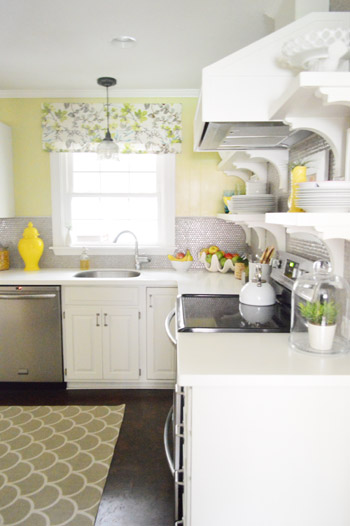
It definitely feels like it finishes that formerly naked window a little more, adds color and pattern, and even balances other things in the room like the range hood. The coolest thing about the fabric is that it ties the wall color into the gray tile, so it’s sort of like a bridge to connect the shiny penny tile and the gray rugs with the soft avocado walls.
Bam, detail shot. See how you don’t see any pickering or pins? I worried if I tacked things it might look more lumpy and bumpy. But if anyone out there has faux shaded a window and used another method, I’d love to hear what worked for you!
All in all, I definitely like how it makes the window feel taller, doesn’t block any light at all, but looks a lot more finished than the bare window did before. For about an hour of time and $16 worth of fabric, it was totally worth it!
What are you guys faking around the house these days? Any faux plants going on? Faux fruit? Faux shades? Faux cleanliness? That’s what I call it when we shove all of our clutter into baskets and closets so it looks like we’re not drowning in chaos. Haha. It’s all an illusion!
Psst- Wanna know where we got something in our house or what paint color we used? Just click on this button:


Stacie Rudy says
You guys are awesome and so cute!
I totally did this yesterday in my kitchen window you posted this in perfect timing to motivate me!!
I posted mine on FB and put a link to your sight and I have never been so popular on FB before. (thanks guys!! lol)
Everyone loves your work!!
Keep it up!!
Stacie
Nicole says
First, I love the fabric. It’s so fresh and inviting. I also love what it added to the space. Looks great!
N Shirley says
You know we will certainly forgive you if you take a few minutes to yourselves this week and don’t try to keep up with all your posts! Try and enjoy meeting your followers and seeing new cities. We will still be here when you get back!
YoungHouseLove says
Aw thanks! We love you guys too, so we don’t want to neglect our first baby: the blog!
xo
s
Grace says
Thanks for staying late at the Toronto signing last night!! You guys were tireless, and Sherry that was the shortest bathroom break in the history of all time. As one of the last people (I had you sign the page with the mirror), I think I can speak for most of us in saying we really appreciate you sticking it out to meet every last one of us, and come back to Canada soon!
YoungHouseLove says
Hahaha- I sprinted to that bathroom! Thanks so much for coming. We had the best time! Can you believe it, that was 700 people!! Mindblowing. We love Canada. Thanks so much for coming and waiting to meet us. We are so flattered and psyched to have gotten a chance to see you guys. And we loved signing the mirror page for ya!
xo
s
Lovey says
I was thinking this fabric look so familiar then I realized it. Its the same as my chairs that I got at target. Love it! http://www.target.com/p/avington-upholstered-armless-accent-slipper-chair-gazebo-cloud-floral/-/A-13916598#prodSlot=medium_1_4&term=slipper chair
YoungHouseLove says
So funny!!
xo
s
Megan says
Roman shade looks great. I like the hand, hand, fingers thumb you threw in. We read that book about, oh, eleventy times day.
And yay for making it to Canada! (Even though it is the wrong side of the country.)
Amy says
This looks great, and I love the way you mounted it right on the wall. I made a similar shade for a bathroom window recently, but made a loop at the top to slip it on a curtain rod.
http://escapefrombk.wordpress.com/2012/08/11/roman-shade-style-window-valance/
YoungHouseLove says
Really smart!
xo,
s
Paulette says
You are like the queen of doing things the easy way so you are therefore my HERO! I just get so tickled reading this blog, you remind me of myself back in the day when we had no money for decorating but lots of determination to make our house a home. Now that I (confession) am old enough to be your mom I still loovvve fixing things around here, changing paint colors, moving furniture, and happy-ing up the place! And I get lots of inspiration from you guys! Thanks bunches for all your hard work & for your incredible ability to share your passion!
Kim says
Love this blind! I’m stealing the idea for my kitchen :)
Sam says
That actually looks really cool!! It’s an excellent place to hang it, looks great in the kitchen!!
xx
Amanda says
Hey! So I know that you’ve probably shared this too many times to count but I can’t find it…I am IN LOVE with the fabric you used for the roman shade (as well as headboard and curtain) and have been searching for it and can’t find it anywhere. So I’m curious where you picked it up????
PS…your blog is so inspiring as we completely remodel our home – which is truly going to be a long process…but none the less, I’ll have to send pics your way as we make our way through it :)
YoungHouseLove says
It’s from a local shop called U-Fab, but it’s made by Braemore (called Gazebo Cloud) so if you google it you can usually find it online!
xo
s
Felicity @ ourlittlebeehive says
I don’t know why I always feel like I’ve got to go and make a full-on roman shade for windows I’d never close anyway. Just the thought makes me put the brakes on and run for a more interesting project. I should totally fake it next time!
Jessie @ Cape 27 says
Ohhhh you know we love this :) I really like the outside mount! Wish we had room to do that with ours!
Jessie
Sharon says
Beautiful! I love it all. Can you please tell me more about your backsplash (manufacture, color, where you purchased it, etc.)?
YoungHouseLove says
It’s penny tile from The Tile Shop and the color is miss (even though it’s gray and not green- so weird).
xo,
s
Meg says
Absolutely LOVE ya’ll’s website/blog. I went to Barnes and Noble yesterday and they didn’t have any books :( I just moved into my first house and am working on fixing it up, as it hasn’t been touched since 1970 :) I’m loving it. I had a question about your kitchen in this blog, love the roman shade but I was curious about the light fixture above your sink…remember where you got it? :) Good luck with your book tour! You’ll be in my home town in no time, Austin, wishing I could get down there for your book signing!!
YoungHouseLove says
Thanks Meg! I bet if you ask at the front desk at B&N they can order another one for you and hopefully just give you a call when it’s back in stock! As for the light by the sink, that was actually from the Pottery Barn outlet a while back (for $29!). Maybe try ebay?
xo
s
angie says
not sure if this was mentioned (i didn’t read through the comments) but if you stick a dowel the length of each loop it holds the shape well creating a more finished look.
YoungHouseLove says
Great tip Angie!
xo
s
Jessica M says
Love, love, love!! It ties everything together in your kitchen beautifully!
Jessica M says
And I am jumping on eBay right now to look for that Pottery Barn light fixture, ha! Love it too!
MV says
Hey guys, we’re hoping to do something similar in our kitchen, but we’re concerned about the fabric getting gross from all of the grease vents outside, so you would think we’d be covered, but someone (he is remaining nameless here) thinks that the curtains would still get gross if you can’t wash them. What are your thoughts?
YoungHouseLove says
Hmm, maybe make them attach with velcro or buttons or snaps so you could remove them to wash them?
xo
s
Lisa says
I am thinking of tackling this project. Do you think you could have used the heat and bond instead of pins for the loops?
YoungHouseLove says
Hmm, I think it could have worked! Good luck!
xo
s
Sloane says
Hi! So I tried this project…and all went according to plan until the pinning. I can’t see the pins when standing far away from it, but it puckers where each pin is and makes the fabric look wrinkled. Even when I make the pinning as small as possible. Any solution?? I have to admit the entire thing took me several hours so I don’t want the project to go to waste!
YoungHouseLove says
Hmm, I would try to unpin it all, iron it, and repin it taking even less of the fabric in the pin (just swoop the pin through one fiber from the back if possible, so it doesn’t even go all the way through to the front). Or you could try iron on hem tape to make the loopy rows instead of pins! Hope it helps!
xo
s
Sloane says
Ok thanks! I’ll try that. I’m determined to make this work :)
Annette says
If I did this for a half-bath and let the shade hang-down lower as to cover most of the window….do you think it would still look ok? It is not a large window.
YoungHouseLove says
Yes, I bet it’s really charming! I would just hang it and see what you think. Good luck!
xo
s
Kristin Lynn Connor says
Hi!
I love it! :) I plan on doing that for my kitchen! Thanks for the idea! However, I would like to know if U-FAB shares their fabric choices online? I haven’t been able to find anything from their site. Do you have any recommendation for different sites or stores that I can check out? I hope to find something that will look fabulous in our kitchen!
Thanks!
YoungHouseLove says
Ooh check out http://maryjos.com/ (love their stuff, and they have great prices!).
xo
s
Kristin Lynn Connor says
Awesome! Thanks! I’ll definitely check that out! :)
Thanks for taking the time to reply back!
jen says
love the fabric..i am getting it for my tv room!! i have to finish my other projects first before i start getting the evil eye from my husband in reagrds to all the other fabric projects i have going on but it has been waiting in the bull pen for about 4 months now begging to be brought into the game! i was doing a faux shade for my bathroom downstairs using another method {and another fabric} but i might like yours better! hhmmm…..
if you are ever in montreal drop a line! but no house crashing…i’m not “there” yet! ;)
YoungHouseLove says
Haha, deal!
xo
s
Lyndsey says
Love this idea! Lazy question but I noticed you hemmed all four sides of the fabric. Since you just wrapped and taped the top of fabric to the wood, do you think that piece can remain unhemmed (as long as its pretty evenly cut)? Let me know what you think. Thx!!!
YoungHouseLove says
Oh yes, as long as you tape it well it should be fine I would think :)
xo
s
Karen says
Am I the only one to get the Hand Hand Fingers Thumb reference? It was my baby’s favorite book (and mine) 12 years ago!
Charlie says
I want to create a fake roman blind, but put it “inside” the window trim like you did in your bathroom.
Basically, frankenstein-ing this post (https://www.younghouselove.com/2012/11/shady-business/) and this post (https://www.younghouselove.com/2012/11/pink-orange-for-da-bean/) …
Is there any reason why I should *not* put a fake roman inside the frame?
Thank you for all the inspiration~!!!
Charlie
YoungHouseLove says
That sounds awesome! No reason to not do it at all!
xo
s