I know, I know. The idea of puffy paint in most craft projects makes you skeptical. Me too. But a few weeks ago John and I were brainstorming about what we should do to our pumpkins this year, after painting them last year:
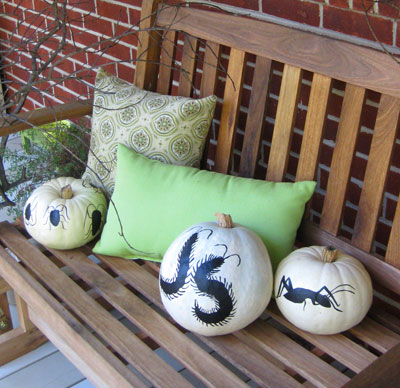
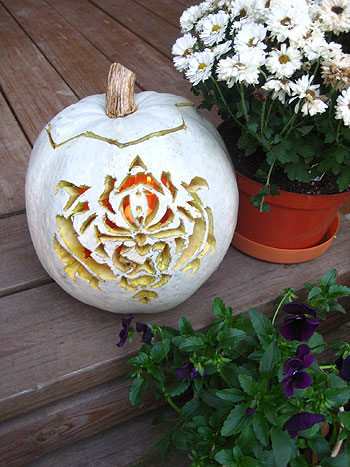
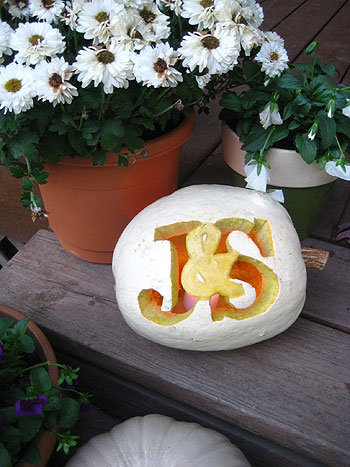
… and carving intricate designs into them the year before:
Anyway, so somewhere along the line John said “too bad we can’t use nail polish or something to build up shapes on the pumpkins.” I sort of looked at him sideways at the nail polish suggestion, but I liked the idea of somehow creating raised designs on them… and so the idea of puffy paint was born. We figured it was made for puffing (aka, building things up) and it’s super cheap so why the heck not. We even hoped that if we spray painted them after puffing them they might look sleek as opposed to cringeworthy and bad crafty. You know how there’s good crafty and bad crafty? We wanted to stay on the good crafty side of things.
In full disclosure, this was one of those projects where we had full expectations of failure. We could just picture the puffy paint sliding right off the pumpkins and creating a drippy mess (since pumpkins don’t exactly lay flat like paper or fabric). But we figured it was worth a try- and lo and behold it actually worked! Oh happy day.
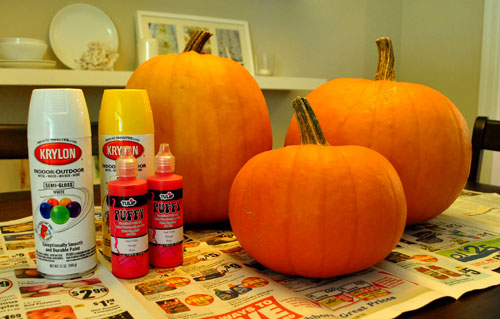
Here’s how it all went down. First we started with three pumpkins along with some puffy paint and some spray paint from Michael’s:
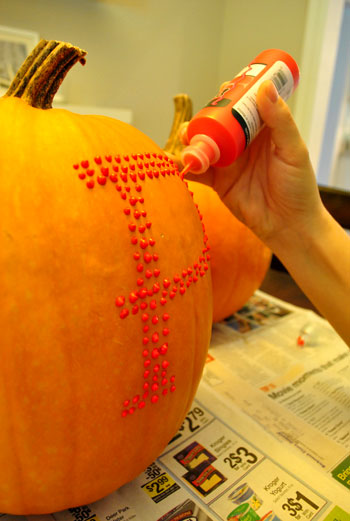
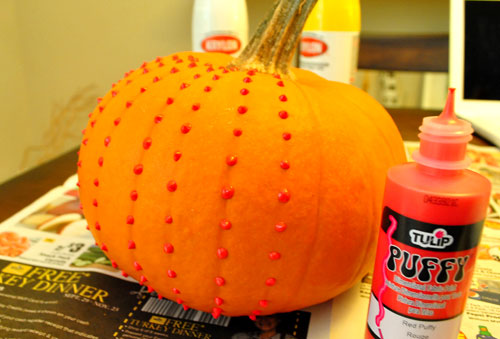
Then we just went to town on them with puffy paint. Here’s what things looked like in progress:
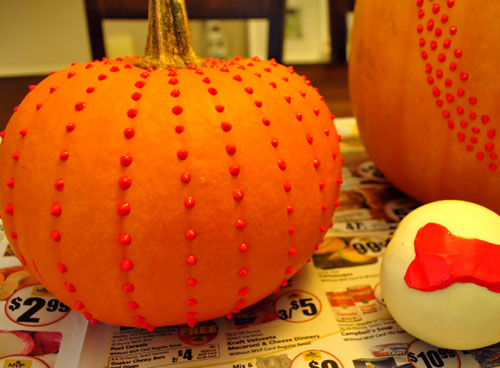
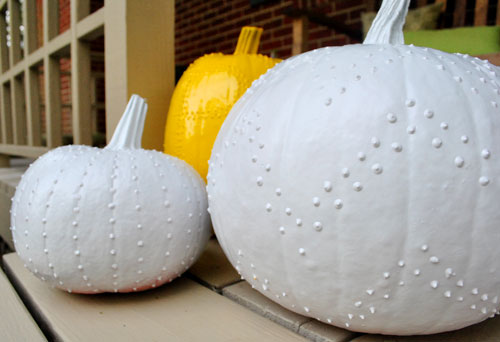
When we finally proclaimed them done (after about twenty minutes or so) here’s what we ended up with:
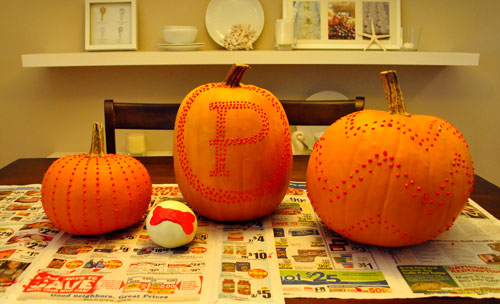
We decided to do a fun studded vertical stripe effect on one of them, a P monogram on the big tall guy, a chevron-inspired zig-zag pattern on the fat one, and a small bone on the tiny backyard pumpkin that we accidentally grew (you know, in Burger’s honor). We liked how everyone in our family of four was semi-represented thanks to ending up with four pumpkins- although I’ll be mad if you assume I’m the round one (even though John’s obviously the tall one).
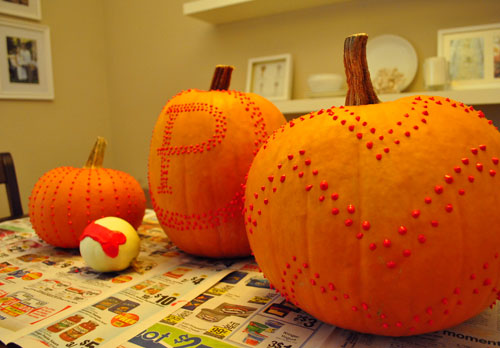
Oh and I chose that reddish-orange puffy paint color because I thought it would most closely resemble the color of the pumpkins, so when we sprayed them they would hopefully end up with even coverage and a uniform look (which did seem to work for us). Here they are with a few thin and even coats of marigoldy-yellow and pure-white spray paint:
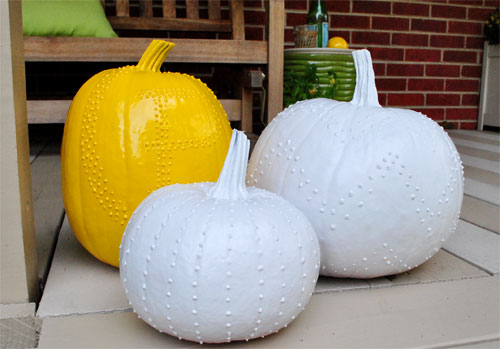
We went with those spray paint colors since we thought they’d work with the yellow mums and the light cream accents on our front porch.
Thankfully they fit right in.
Burger’s wee pumpkin is back behind them on the planter side table that we made a while back. I can’t believe John “farmed” that. It’s so round and perfect that it looks more like a superball than a pumpkin.
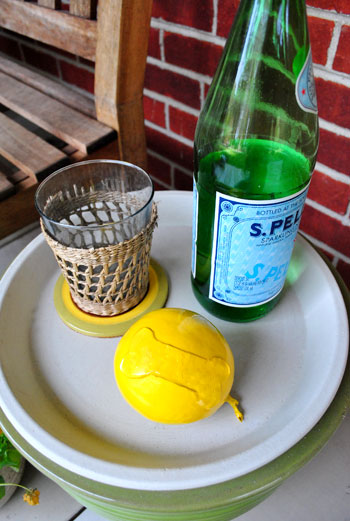
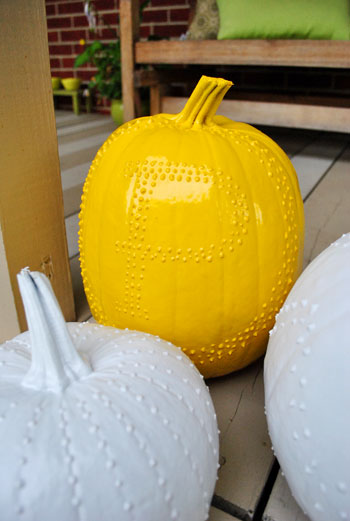
Oh and here’s a spray painting tip for ya: we balanced each pumpkin on an old quart-sized paint can before spraying them so we could get all angles of ’em except for the unseen bottom portion without having to touch them and ruin the finish. We used white semi-gloss and marigold yellow high gloss paint and we actually preferred how the semi-gloss looked a bit more. The more matte texture made the studs look cool – like hammered metal – as opposed to the slicker and harder to see high gloss monogrammed P. In fact if we were to do it all over again we’d suggest using semi-gloss or even satin paint for all of them instead of dealing with the super shiny stuff. Surprising, because going into it we thought high gloss would look better. Live puffy paint and learn I guess.
But we’re happy with how they came out for sure. And it was a really easy and fun project. Although we must admit that we’re craving pumpkin seeds so much that we might grab one more small pumpkin and get all traditional on it- you know, so we can scoop out the goop and enjoy the seeds for Clara’s first Halloween. What about you guys? Do you have any pumpkin carving or Halloween decorating plans? Were you totally cringing when we said we used puffy paint on our pumpkins? Admit it, you were.

Allison says
The puffy painted pumpkins look really cool, but nothing beats your painted ones from last year. I absolutely LOVE those!
Lonely Wife Project says
You definitely just proved to me that puffy paint can be chic. I wouldn’t have believed it if pictures weren’t proof. Great idea!
Melissa M. says
Reminded me of this post I saw awhile back on this blog… be sure to check it out!
http://psimadethis.com/post/213803164/im-seeing-spots-the-good-kind-beaded-details
YoungHouseLove says
Hey Melissa,
Yes- we love that project! Someone linked to it a few comments back and we couldn’t believe how genius it was!
xo,
s
Sarah@StyleandCentability says
Fun!! I love decorating pumpkins…Have a lot of ideas for this year.
This one may be my fave:
http://styleandcentsability.wordpress.com/2010/09/23/idea-galleryhalloween-decor-one-of-many/
Julie at www.downtimeweblog.com says
Love ’em! You guys are always so creative. The puffy paint is such a great idea!
Sarah says
What a fantastic idea! I love that! I tried painting my pumpkins this year and it just flaked off once dry. Should I use a specific type of paint?
YoungHouseLove says
Hey Sarah,
Well, spray paint worked well for us. And last year we used black craft paint (acrylic I believe) which actually worked well too. Hope it helps!
xo,
s
Jennifer says
I’m spray painting ours white, cutting the bottom off, scooping out the insides, drilling holes with the smallest drill bit my honey owns in a lace like pattern…I’ll let you know how it goes…tbd!!
Erin says
Absolutely gorgeous!
Now where are your puff-painted leggings and sweatshirts to match? ;)
Sharee A. says
The things you can do with a little spray paint!!! Magnifique.
Paula/adhocmom says
Those are cute! June loves sticking her hands in the pumpkin guts though. Carving is a must around here. . .
House Bella says
It looks so much like a stamped metal that I am SUPER tempted to do it with silver spray paint. Seriously. I think that’d be pretty cool! Though the neighborhood hooligans would *definitely* seek it out to smash!
Tara says
These turned out great! I’m so glad you’re taking the proper precautions though while spray painting. By the way, which gas mask do you use?
YoungHouseLove says
We can’t remember the brand name but it’s black and gray and sold at Home Depot (which also sells replacement filters). Hope it helps!
xo,
s
Katie says
Wow, very neat!!
Jenn L @ peas and crayons says
Genius!!! I now know what i’m doing to my pumpkins next year ;) I saw white porcelain pumpkins today at BB&B and totally thought of you guys today! love love love
maggi says
I am only considering this if it will prevent the squirrels from eating the pumpkins, otherwise I don’t want to allow them to eat spray paint.
YoungHouseLove says
Hey Maggi,
So far no squirrels have nibbled our pumpkins (we wouldn’t imagine they would willingly eat paint but you never know). They’ve been outside the past three days. Hope it helps!
xo,
s
Michelle says
So creative! They look beautiful! You could sell these :)
Jiye says
Seriously, I’m amazed at how you guys come up with this stuff. So genius and sooo easy! I might (might being the key word here) even try this with my 20 month old. ;)
Kay Marie says
Hi Sherry and John,
I just found your blog this morning and just wanted to say that I think your work is FABULOUS. Seriously. I am envious of your creative talents!
Also, your wedding looked AMAZING. I am recently engaged and am currently STRESSING something big about planning a wedding. What you accomplished in your backyard is something I would love to do, but lack the time and space. It’s something I can hope to aspire to.
Congrats on all you’ve done, and I look forward to following you.
YoungHouseLove says
Aw thanks Kay Marie! So glad you found us. Happy wedding!
xo,
s
Monica says
Oh wow, those turned out so amazing!
AnaLisa says
Wow, that J & S pumpkin is the cutest one I’ve ever seen. Great work!
the artist says
Oh puffy paint. We used to wear those puffy paint shirts like they were going out of style (which, as it turns out, they were). I love this idea! I wondered if there is such a thing as glow in the dark puffy paint/spray paint and how that would look (that way it still maintains the creepy halloween night feel that we all love).
gina says
Of course your technique and craft are impeccable as usual, I just don’t see the aesthetic benefit of taking a sustainable tradition and making it exactly the opposite. Not only can you not eat the seeds or toss it in the compost anymore, that spray paint won’t be biodegrading anytime soon!
(You guys are great though, don’t get me wrong. I love the budget blooms features and all the great ways you refurbish previously-loved items. Good luck on the Nate show!)
YoungHouseLove says
Just playing around and trying something different! We’ll definitely be carving a little pumpkin for Clara and baking the seeds (just as we mentioned at the end of this post). We love traditions like that- but we also love trying something new every year when it comes to pumpkins! We’re crazy like that.
xo,
s
Zoe Feast says
Love those pumpkins, your porch is a little more mature than mine which this year features Dr Dead and Nurse Corpse complete with a bowl of candy body parts!
http://www.ichicagowebdesigner.com/2010/10/creative-halloween.html
soul pretty says
Thanks for the idea…I’m heading pumpkin picking this weekend…and I have tons of puff paint lurking around my apartment…and I hate carving pumpkins so this is right up my alley…stop by my blog next week to see the finished product and your link…Enjoy the weekend..
http://www.soulpretty.blogspot.com
Tra J. says
Got my pumpkins. Got my paints. Let the fun begin!
Amy says
Waiting for my puff-painted pumpkins to dry right now! I tried the black paint with white pumpkins, and they look really cool. I also got some shiny silver brads from the scrapbooking section of Michael’s… you just stick them right into the pumpkin, and it looks like studs. This is so much easier than carving, I may never go back!
YoungHouseLove says
Sounds awesome! Post pics on our Facebook page for us!
xo,
s
paperdollmn says
I somehow missed last year’s pumpkins – seeing the centipede one just now made me shiver!
Love this year’s version. Very clever!
Melissa Stottmann says
ADORE! What a great idea <3
Tra J. says
Posted pics on your Facebook page. I had so much fun and got carried away with the dots. LOL!!
tori says
I am an Inn Keeper at a bed and breakfast in San Antonio … I will be doing this pumpkin painting!! i love it, and the parents who have kids that like to dig in carved pumpkins will love it too because we wont have any carved pumpkins to get their little hands into!
Thanks!
Checkout my creation at: http://www.toriloveworld.blogspot.com
Heather says
Just bought some craft pumpkins for 50% off at Michaels, some puffy paint and some champagne colored Krylon. I can;t wait to do this tonight and sit them on the porch with my huge put of deep purple mums from Lowes.
You guys and Pinterest are seriously the most inspiring websites ever.
Nancy says
I LOVE your style….you guys have a flair for the unexpected…simplicity & thoughtful VERY creative and FUN FUN FUN !!
Tonya says
cute idea