Note: This post features a heavy-duty, gas-powered pressure washer we rented from the store. To see how we now use a $99 electric version we own, please see this Getting Started With Pressure Washing post.
Guys. I have a new favorite thing. And no, it’s not a pint-sized plastic vehicle.
Yup, we took our spring cleaning to the proverbial next level and rented ourselves a 2000 PSI pressure washer (just got it at the Home Depot in their tool rental department). For 80 bucks and thanks to borrowing my dad’s Kia to haul it, this puppy was all ours for a day. I was happier than a hip hop hamster.
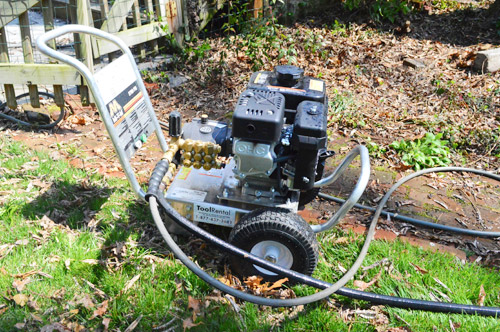
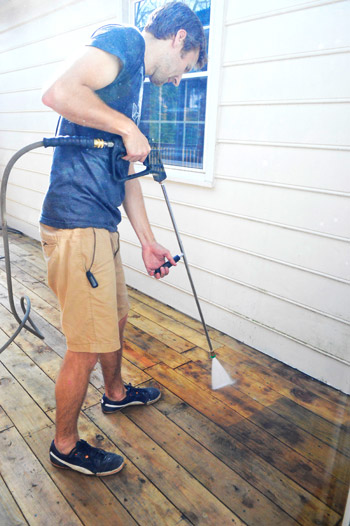
I had never used a pressure washer before (and I had the usual “don’t want to break what’s not mine” anxiety), but the guy at the store gave me a crash course. It was pretty simple. Hook up the sprayer “gun” to the hose, hook that hose to the machine, and then screw in your garden hose. Crank the motor (it runs on gasoline) and spray away.
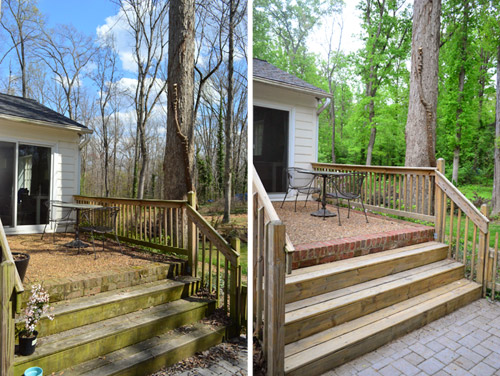
The main reason for renting it was our deck. It wasn’t looking so fresh after the winter so it needed some “rejuvenating” before we could stain it. We hadn’t stained it yet because, after finishing it in late August, we were told to give the pressure treated wood 2-3 months to dry out before sealing any of the moisture from the treatment in (apparently sealing or staining PT wood too soon can lead to terrible results). So by the time staining was advisable by the wood’s standards, it was no longer advisable by the stain’s directions because of the cold temperatures.
So yeah, we felt a little dumb for finding ourselves in that position, but ultimately it wasn’t too bad. There was just one area where some leaves and acorns had sat around longer than they should’ve, and it desperately needed some cleaning when spring rolled around.
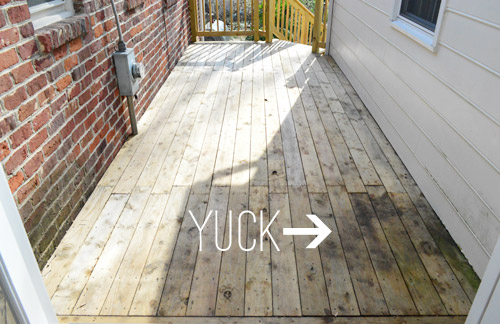
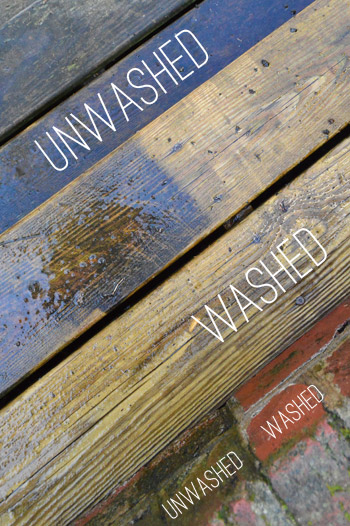
The pressure washer was pretty fascinating to use. It almost felt like painting as you watched the dingy color give way to something lighter with each stroke of the water jet. This is a detail of that nasty area above. Pressure washing it board by board was making a big difference, although it wasn’t 100% flawless.

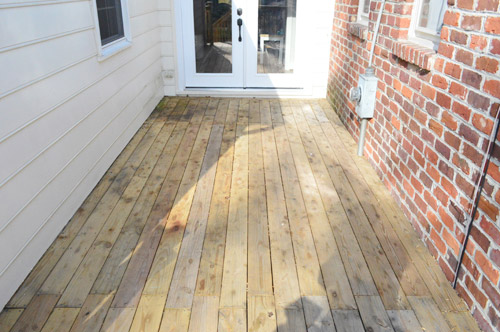
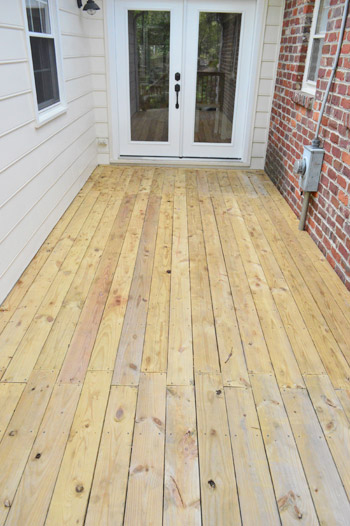
Here’s the whole deck once I gave it a once over. It was definitely looking a lot closer to it’s just-built days, although there were still some acorn cap stains in that one corner. I started to regret my decision not to use a cleaner (another option is that you can route your water feed through a cleaning solution so you’re essentially using pressure and soap to clean).
I did go back later with some cleaner (sans pressure washer) which seemed to do the trick, but I’ll cover that in our deck staining & sealing post. Right now there’s more power washing action to get to.
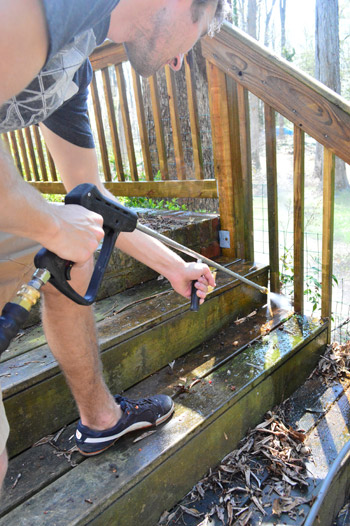
Since we had the thing for 24 hours, I kinda went crazy and aimed it at just about every piece of wood around our house. Fences, railings, steps. You name it, it got blasted.
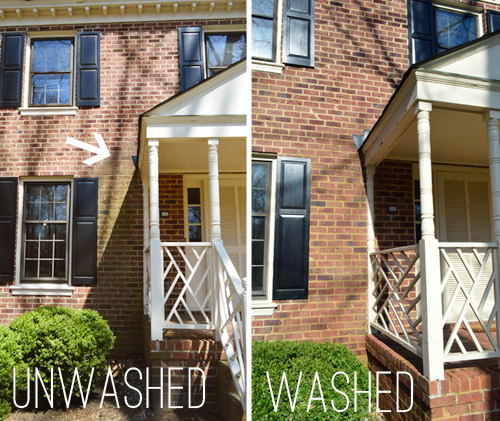
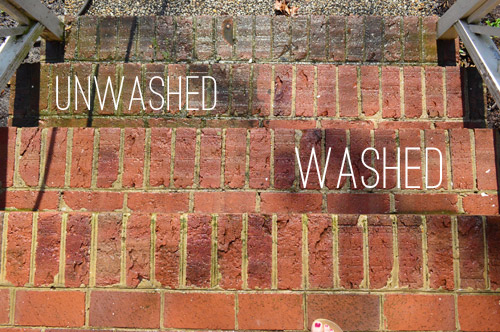
And somewhere around the patio I discovered it also made a huge difference on brick (update: we rented a lower pressure version than some of the stronger varieties, which can apparently damage certain types of brick, so maybe do some quick research before spraying yours).
I never realized how green and dingy some of our brick was until now. (I didn’t think to take a before, so that’s a shot from our vine removal post before everything greened up).
When nothing was left to spray at our current house, I counted my lucky stars that I had more dingy brick to spray at our new place.
As satisfying as the process was (somebody stop me!) the moderate amount of energy it took to wrangle the spray gun for hours was starting to wear on me (no really, somebody please stop me). But in an effort to get our money’s worth, the spray must go on.
Since Sherry was wrangling Clara and taking pics of the process (her toe’s pulling a Where’s Waldo above) and I was already soaked and dirty, I pressed on. Or should I say I pressured on? Har-har.
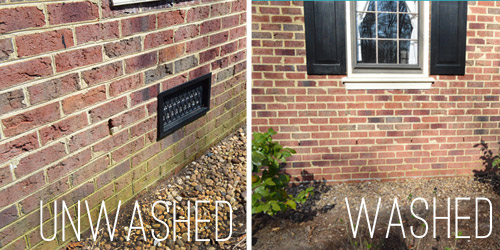
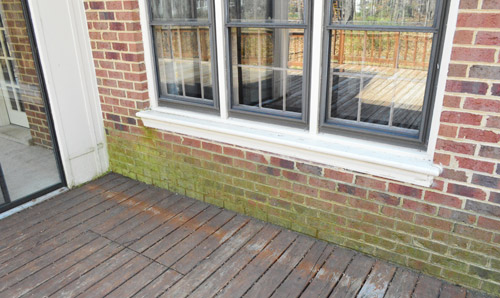
The new house’s worst spot was on the back right above the deck. Between rain splashing there and it being fairly shaded, it was a color that I’m affectionately dubbing Ninja Turtle Green.
Sherry actually shot a video of this part, so you could see the satisfying de-greening for yourself. It’s almost like painting with a bleach pen or something, since you can watch things lighten up brick by brick.
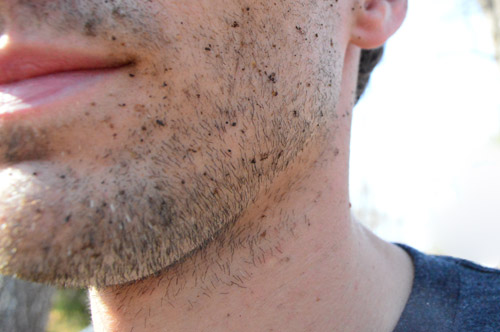
By about 5pm it was time to call it a day and return my new toy. I was worn out and pretty nasty looking (thanks backspray) but I’ll spare you the shot of my grody dirt-coated leg. Instead you get my dirt-speckled face. Thanks for this flattering angle, $herdog.
So, in conclusion. I love you pressure washer. You’re a beast, but the kind of beast that has my heart.
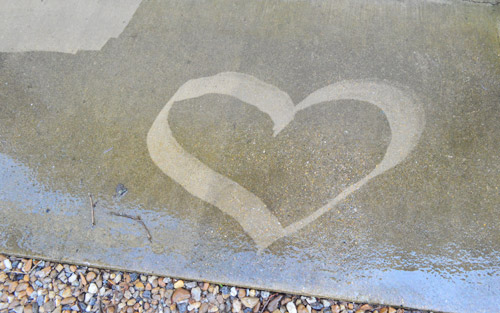
That’s concrete by the way. I wouldn’t have even thought it was dirty to start with had I not accidentally sprayed it while doing some nearby brick. So it got a little facelift too. Amazing this thing, I tell you. It’s right up there with pegboards.
PS: Next Tuesday, May 7th at 7pm we’ll be chatting with Kate Hall (aka: Richmond Mom) about parenting, decorating with your family in mind, and Mother’s Day gift ideas at the Barnes & Noble in Glen Allen (near Virginia Center Commons). It’ll be followed by a Q&A and a book signing, so we’d love to hang with anyone who can make it.

Leave a Reply