Let’s see… when we last left off on Monday, our open shelves had been primed in preparation for their big hanging debut.
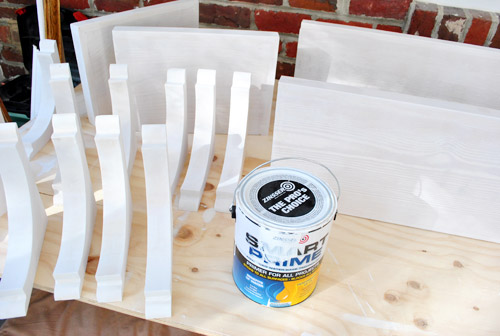
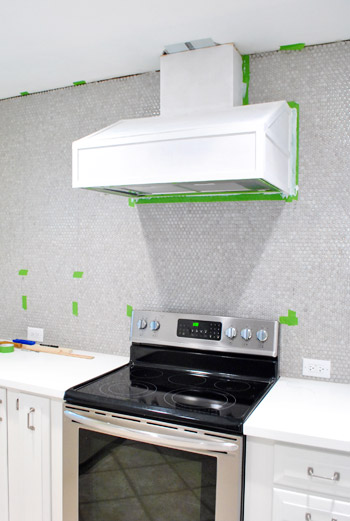
While we had the primer out we went ahead and slapped a coat on the hood cover too (using a 2″ angled brush in the cracks followed by a small foam roller to smooth everything out). Things were instantly looking less wood-sy on that wall.
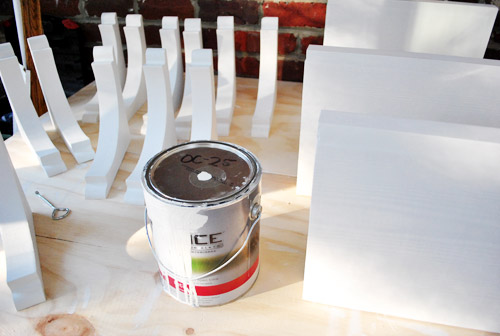
Once the primer dried on both – we used Zinsser Smart Prime which is low-VOC and was recommended by a few pro cabinet painters that we know – out came the same high-durability paint that we used on our cabinets (yes, there’s still plenty left!) and we gave the brackets, shelves, and the hood a couple of coats. Two thin and even ones over one coat of primer did the trick. We also applied those with a 2″ angled brush followed by a small foam roller to keep things smooth and even. Oh and the paint is Benjamin Moore Advance paint in Cloud Cover, bee-tee-dubs (which many pros use to paint the inside of their clients’ cabinets along with the outside, so it should stand up really well to everyday use once it’s nice an cured up).
But the exciting stuff really started to happen when we finally got to the point of ACTUALLY PUTTING STUFF ON THE WALL. Yowza. Sorry for the caps. I said we were excited, right? Excited might be an understatement actually. Luckily, since we had already drilled all of our screws into the wall, the hanging step was pretty easy. Up went the brackets on the short side…
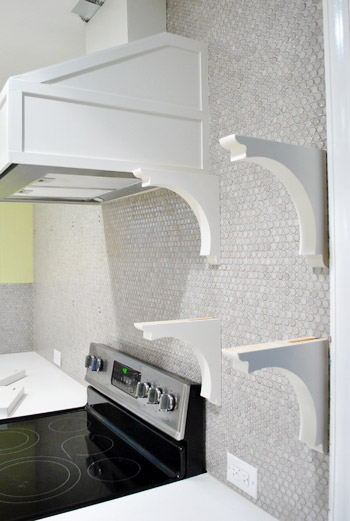
…followed moments later by the shelves themselves. Can I get an “Ooooh”? How about and “Ahhhhh”?

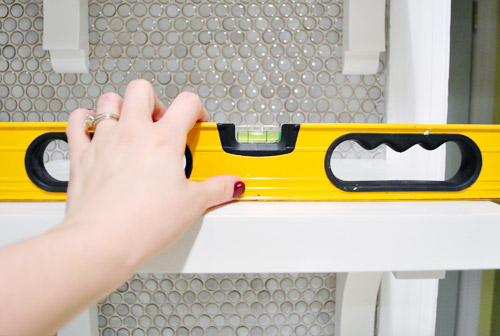
Don’t worry, we weren’t gonna just let them sit there unsecured. We just had some other things to do first – like making sure everything was still level. It was. Phew.
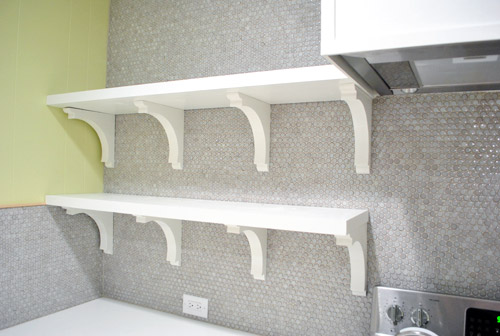
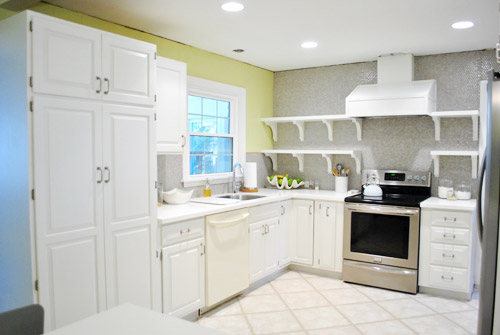
So then we put everything up on the long side of the wall.
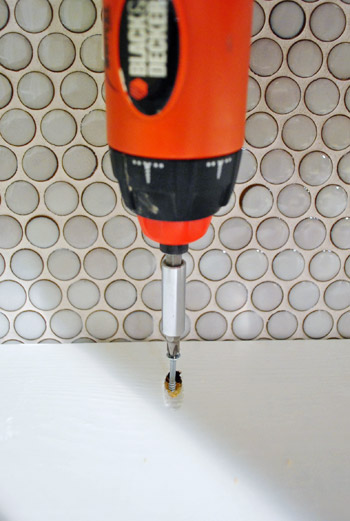
We had mentioned in the previous post that we had originally planned to screw the shelves into the wall (we even made some pocket holes in preparation for this step). Well, after feeling how solid the brackets felt (more on that here) and not really wanting to put 12 more cringe-inducing holes in our tile – we opted to just use those pocket holes as a spot to screw the shelves firmly into the brackets (so the screw actually went straight down, not at the angle of the pocket hole). In hindsight, we definitely could’ve skipped the pocket hole step, but at least now the screw will be hidden in a spot that we can easily caulk over.
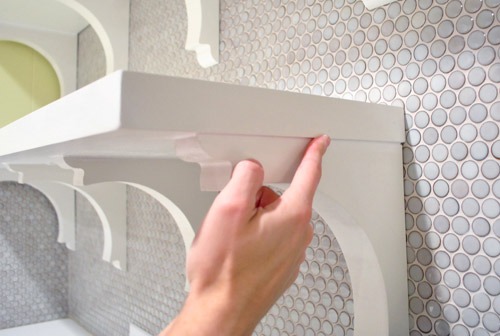
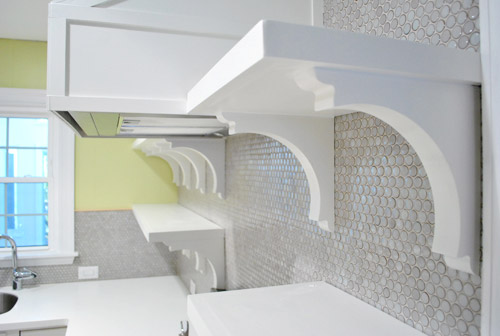
Speaking of caulk, that was our next step after everything was drilled together. Since there were some dark seams where the shelves met the brackets, we just ran a thin bead of white paintable caulk along the top of each bracket and smoothed it with our finger to make the shelves and brackets look more like one unit. Tedious? A smidge. Worth it? Totally. Then of course we painted over it so everything matched.
And with that folks, we were done! Except for more waiting. Booooo.
As eager as we are to immediately fill them with plates and bowls and cups, we resisted that urge in order to let all of the paint cure a little bit longer – just because we caulked those screw holes and around the edges which called for some touch up paint. We definitely don’t want to jump the “fully cured” gun (which could result in a bunch of dents and dings in our shelves during their first few days of use). So for now we’ll just have to enjoy these empty “after” shots thanks to following the full curing time on the paint can’s directions. But tomorrow – oh baby, it’s on. Sherry’s even planning to shoot a little time lapse video of the process of loading them up.
Oh and of course we still have to add crown molding to the ceiling to finish things off and make the top of the hood a lot more seamless. But slowly it’s all feeling a lot closer to “done” than “just started” – especially now that the hood is painted too (never mind the fact that we still have some patch work to do on the ceiling along with that aforementioned crown molding).
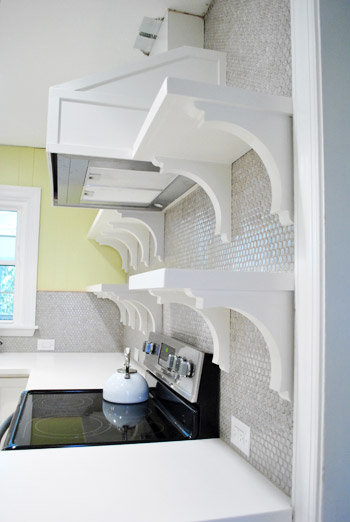
We’re really happy with how the brackets turned out, so we haven’t thought twice about our decision not to do true floating shelves. We think these are really charming – and they’re super stable so Sherry could probably hang off of them if she wanted. Instead she wants to fill them with ceramic animals. Same difference.
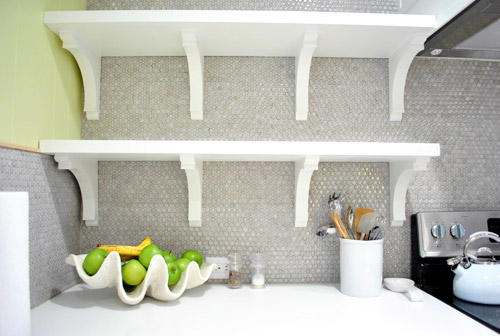
It’s nice that there’s still plenty of room to load them up and make them really functional, even with the brackets (no, they will not actually end up full of ceramic animals- not on my watch). Our shelves are deep enough for our 12″ dinner plates and the brackets are 15″ apart so we should have lots o’ room to put everyday stuff up there – which we hear from other open-shelf-having folks works really well, since it’s used often enough not to get dusty).
And even though it was a bit weird at first to see our wall of penny tile suddenly broken up by these bright white lines, it’s cool to see the thing we’ve always envisioned come that much closer to being a reality.
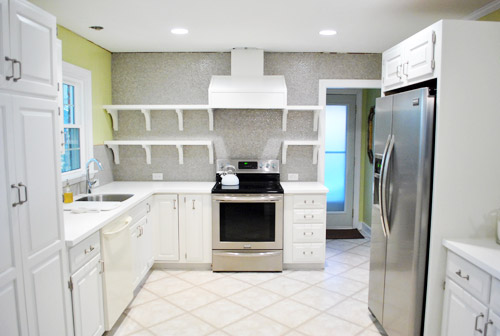
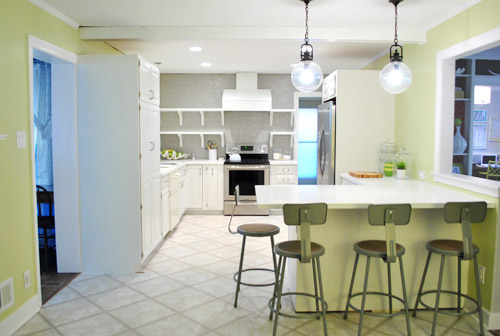
So we should have pics (and a video) of the shelves all filled for you tomorrow. Until then, we’ll leave you with this slightly-closer-to-after shot of the room. We’re definitely getting there. And we’re counting down the seconds to Operation Cork My Floor (along with adding that crown molding, patching the ceiling, adding a pendant over the sink, covering the base of the peninsula with some decorative wood planks, hanging some art to the right of the fridge, do something to the side of the pantry, etc).
We feel especially giddy when we look at old photos of the room back when it looked like this:
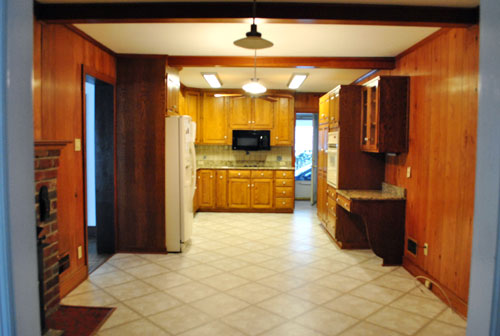
We can hardly picture that old room anymore. Isn’t it funny how quickly your brain replaces things? It’s so crazy that we lived with the room just like that for over six months before even painting the paneling. But once we finally got the ball rolling… well, it’s still rolling. Haha. Is anyone else in the home stretch of one of their home projects? Though I probably should knock on wood when I say that, since it sounds like a sure way to jinx myself into some last-minute wrench in the plan (he says as he gets up to literally go knock on wood while crossing his fingers and eyes).
If you’re interested in more ideas for adding shelving or vertical storage, this post has a bunch of DIY shelving projects and ideas for you.

Kathy says
Wow! What a transformation, the new kitchen looks so clean and crisp and I can’t wait to see your doodads on the shelves and the final final pics.
Courtney Rutledge says
Looks awesome y’all! You know, I did just see a really pretty white ceramic bird at Michael’s with their new Spring stuff. What kind of paint will you use when you do crown molding? Brand and type? Thanks!!
YoungHouseLove says
I think we’ll use Olympic no-VOC off-the-shelf white paint in semi-gloss since we have a big gallon of it from other trim. Hope it helps!
xo,
s
Robin says
Its looks great you too! Awesome job!
Btw. Do you have any “how to paint” posts? This dresser (my first ever DIY project I’m doing) is far from stellar :( LOL.
YoungHouseLove says
Yes, here’s one for ya: https://www.younghouselove.com/2010/09/email-answer-how-to-paint-a-room-yhl-style/
xo,
s
Leah says
LOVE the look of newly polished red nails working with a level.
YoungHouseLove says
Haha, thanks Leah!
xo,
s
amber p says
I’ve been waiting for this post! I have really enjoyed watching the process of the transformation of your kitchen. i can’t wait to see how you style the shelves!
tjack says
The brackets would have been a great place to add dashes of color! Did ya’ll think of that before painting them white? When I look at your images I picture the brackets a rainbow of oranges/yellows/reds. Just a thought.
Great job on the shelves and the kitchen in general! The penny tile looks really wonderful with the shelves over them.
YoungHouseLove says
Wow – that could definitely be fun! Never thought of that!
xo,
s
tjack says
PS. Can we see more behind the scenes of the photoshoots? Just a quick post of one photo would be fine. Maybe you already do this on twitter though. I’ll go check that out.
YoungHouseLove says
We’ll have to work in some more pics when we can!
xo,
s
Deb says
Oh glory day, the best kitchen post yet. I’ve been so excited each morning to open up my email and find your posts about the kitchen remod. I love it, awesome job dynamic duo:)
I am wondering about your big seashell looking bowl that is holding apples and bananas and sitting on your counter. I haven’t seen it in your photos before. Where did you find it so I can find one?:)
YoungHouseLove says
That’s actually a faux clam shell from ZGallerie a few years back. I think they still sell them though! Hope it helps!
xo,
s
Jerri C. TN says
You guys have great style. I love the open shelving and your tile is gorgeous. If I could add one constructive criticism it would be your wall color. I don’t think the yellow compliments the great style of this kitchen. I think a greige or grey would balance it so much more. I’m not a hater and I’m not hating on you two. Just giving my opinion as a color artist.
YoungHouseLove says
Oh yes, that’s definitely one of those polarizing things for sure! We love the grellow but it’s not for everyone! And with gray walls in our dining room and living room, white/gray cabinets, and white counters, we just thought greige or gray walls would be a little flat for color-loving freaks like us. Thanks for your thoughts though!
xo,
s
Sarah says
Amazeballs.
And equally amazing: your awesome reader comments. You just have to love a support network that uses terms like “y’all”, “squeal”, and “awesomesauce.” If it was remotely sanitary, I’d be sending a Minnesota hot dish to break in your new digs (but tatertots don’t travel well).
Great job! So inspiring!
YoungHouseLove says
Haha- isn’t it awesome. You guys make us giddy. It sounds lame to say we love you, but we really truly do. You’re like a big ol family or group of friends we have never met but have so much affection for!
xo,
s
melissa says
I cannot get over how much the kitchen has changed! I really love it. Sloooowly but surely we are going through changes through out our house. This is definately a blog I go to for inspiration for our place.
YoungHouseLove says
Aw thanks Melissa!
xo,
s
brandi says
So amazing! I can’t wait to see how you fill your shelves!
Sarah says
W.O.W. I bet y’all are flipping out in you ray-of-sunshine-kitchen! Great job!
erin says
what an inspiring before and after!!
Ariana says
came out so cute!! my dad’s an architect and has always used open shelves because they are SO practical. you will love them! p.s. if you ever need a babysitter in florida, i am right up clara’s alley. i have a large, gentle golden retriever and think she is the cutest bean in the whole world. <3
-ariana
YoungHouseLove says
Oh man, she would love that!
xo,
s
Ashley V. says
My husband & I have completely remodeled my childhood home over the past few years, which included converting a step down garage into a bedroom/bath/laundry room that is level with the rest of the house and its not easy work. We also have had to learn along the way… I LOVE that someone shared your site with me! We are in the process of buying a bigger and nicer home as ours no longer accomodates 4 kids, even with the addition. I am so inspired by your DIY projects and love the humor in your blog posts! I have a whole new house to gut & remodel and will definitely be scouring your pages of projects and pics! I love all the things you guys have done!! :)
Justin says
I was wondering if you could point me to a full picture of the wall you cut out in the kitchen??
Thank You
YoungHouseLove says
Sure! Here ya go: https://www.younghouselove.com/2011/11/and-all-the-trimmings/
xo,
s
Kristen says
Hi there! First of all I think your kitchen remodel is fabulous!!! My husband and I are in the middle of converting a hall closet into a mini mudroom and are searching for the perfect wooden brackets to support the shelf. I remembered that I admired the brackets you used to support your open shelving and I was wondering if you could P.L.E.A.S.E. tell me where you found them? We are desperately searching with not much luck. Thanks so much!!
YoungHouseLove says
Sure- they’re from Home Depot in the aisle with the wood and the other brackets. Hope it helps!
xo,
s
Kristen says
Thanks for the super quick response about the wood brackets!! You guys rock!!! Our store has some in stock and I’m picking them up tomorrow…yahooooo!!
Ann says
Hi guys! love your open shelving & am in the process (HAHA! it has been 2 months, and counting) of installing them in my *little* kitchen upgrade. My concern is what type of wood to use for the shelves so that they do not cup or warp with time. I have stood – stared – picked up, and put back – what seems like an endless amount of wood and still have no idea what will ultimately achieve what I am looking for. What thickness? composite or real wood? I have even had one lumbe company suggest cutting the wood into lengthwise stips and then re-joining them to make sure they do not warp, but then I would have to frame them like you did… Augh! help!
YoungHouseLove says
We purchased 2″ framing lumber (though it’s not actually 2″ thick) and I did have to sort through quite a pile to find boards that looked straight, but so far we haven’t had any warping issues. I think it helps that they’re secured into the brackets a few places and having primed and painted them also helps keep out the moisture that would warp them.
-John