Remember how we DIYed Clara a play kitchen last Christmas? Well, it was such a hit then (and still is – in fact it’s probably one of the only toys that she plays with every day) we immediately knew that we should add to it. More kitchen = more fun, right?
What can you add to a play kitchen like ours? Well, it was clearly lacking a frigid kitchen staple. You know, a refrigerator. So we quickly homed in on that as an easy way to upgrade Clara’s setup. And the decision was made even easier by the fact that we had another cabinet leftover from the kitchen remodel that we had been hoarding saving for nearly a year in the basement with this play-kitchen “expansion” in mind.
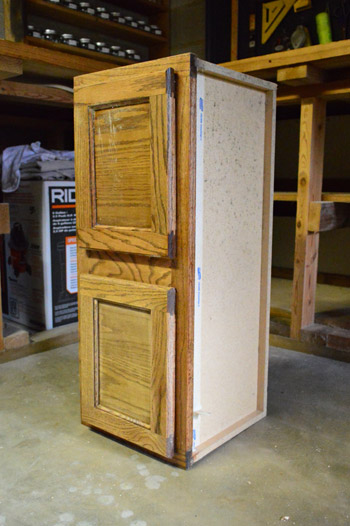
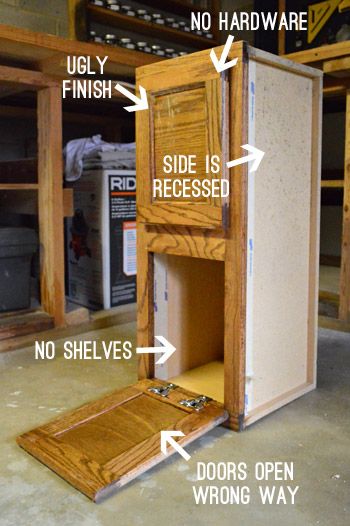
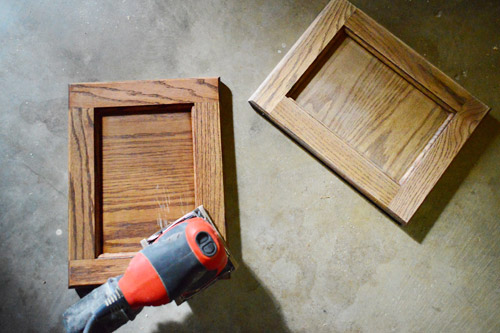
It was from the Habitat for Humanity Restore (maybe for $15? I can’t remember and the receipt is loooong gone) and we had considered using it for above our fridge, but then found one that was a better size. So this puppy has been sitting in our basement for over a year now, just waiting to be fridge-ified. But it had some obvious shortcomings before it was ready for its kitchen close-up. Observe:
But if it’s got a problem, yo I’ll solve it. Check out the look while my drill bit revolves it. (whisper this part: Ice, Ice, baby. Ice, ice, baby). Yup, $herdog isn’t the only one who can spit mad rhymes.
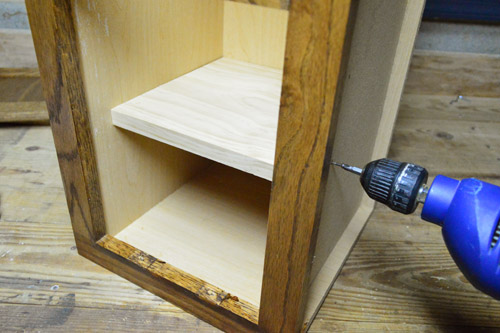
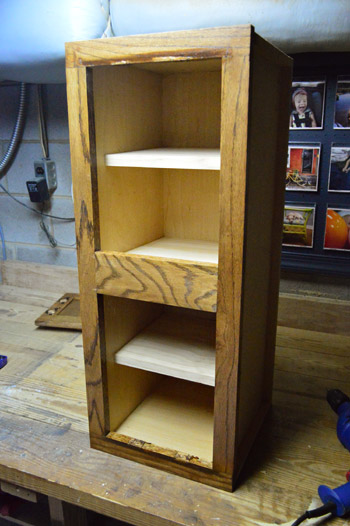
Fixing those aforementioned problems wasn’t too bad. First I removed both of the doors and added three shelves inside using one 10″ wide piece of pine board that I grabbed at Home Depot for $6 (which was the width of the cabinet). I attached each shelf with some simple screws straight through each side as you can see from the photo above.
Here it is with the shelves added. If I were doing a real “to scale” refrigerator I would’ve added more shelves closer together. But from Clara’s experience with her current play kitchen, the wide shelves are easiest for her to maneuver in (and some of her items are around 6″ tall, so spacing these shelves 7″ apart seemed to be the most functional. Neither of us had any great expectations that our creation would ever hit a super high level of fridge realism anyways… we just want the kid to have fun.
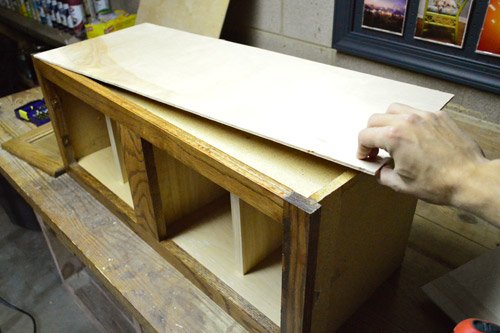
Next up, I wanted to cover the recessed portion of each side so that it would be a flat box (plus it would cover up my screw holes from the shelf-adding step). So I used my table saw to cut some panels of plywood to size and then used wood glue to secure them in place. These were the first items I purchased since I didn’t have them in my scrap wood pile, and they ran me $8 for all of the wood that I used on both sides.
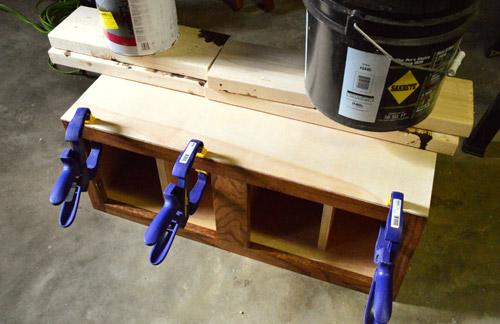
Here’s my fancy step of letting my glue dry, with the help of clamps and some heavy objects to keep the plywood pressed flush to the cabinet.
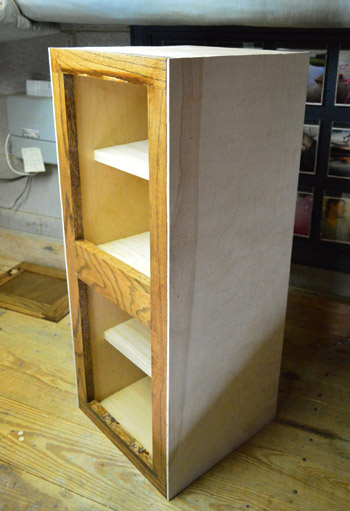
Here’s how it was coming along after both sides and a top panel were done. It was definitely starting to look less like the bedraggled old cabinet that we started with.
Before painting, we lightly sanded the finish off of the doors and the face of the cabinet – just like we do when we’re painting kitchen cabinets for real.
We also thought a fun feature of her fridge would be to make the front magnetic – just like the real deal. So I busted out the can of magnetic primer that we still have plenty of (even after this project and this project). We did three coats, since we’ve found that to be stronger than one (tip: shake the heck out of it before applying it so all the magnetized particles don’t settle to the bottom of the can).
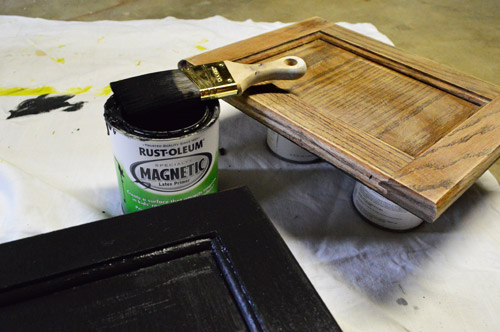
Here are the doors all primed with the magnetic stuff and the rest of it primed with just normal primer (Zinsser Smart Prime, which is low-VOC – it’s actually the same stuff we used for our real kitchen cabinets and we still had it leftover).
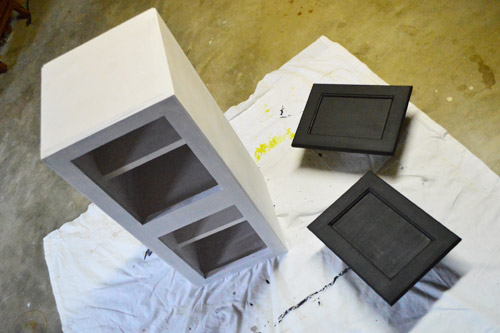
Once that was all dry, it was time to get our paint on. While some sort of silver or grey on the outside might have looked stainless-ish, we thought it would be nice if this guy fit in with Clara’s existing white play kitchen. But because we can’t resist a little bit o’ “fancy” we painted the inside a light blue with a small quart of paint that was leftover from a few book projects (Sylvan Mist by Benjamin Moore). You know, to lend an air of “cool” to the thing.
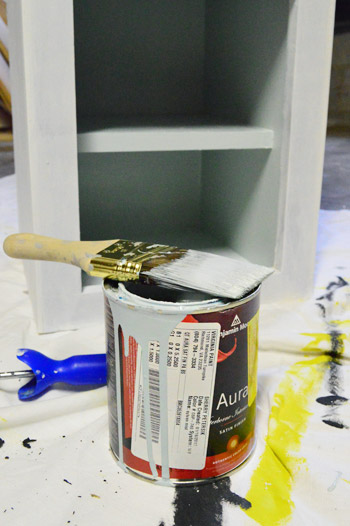
Once the inside was “chilled” with blue paint, we painted the outside surfaces semi-gloss white (Decorators White by Benjamin Moore – which we just always seem to have around for painting trim, the office cabinets, etc). It only took us one coat on the outside framing thanks to the white primer that we added first, but the doors took three coats to cover all of that black magnetic primer. But once it was all said and done, I reattached the doors with some new hinges and added some pulls that matched the rest of her kitchen. Those were the only other items that we purchased for the fridge-building project (also from Home Depot like the plywood) and they came to $5.25 for all the hinges and $6 each for the long fridge-ish hardware pulls – which were 7″ long for anyone wondering.

Then we thought it would be fun to give the fridge a logo of sorts, to help it look less like a cabinet and more like a fridge (we thought crazy-gluing them in place would help them stick for the long haul). So Sherry found these scrap-booking stickers at Michael’s that were as close to stainless steel as we could find. We thought one of the snowflakes could be a cool logo-ish-looking icon next to the name of our fictitious appliance brand.

We had a nice spirited debate as to whether it should be called “Cool” or “Chilly.” This is what happens when two former advertisers get into a branding discussion.
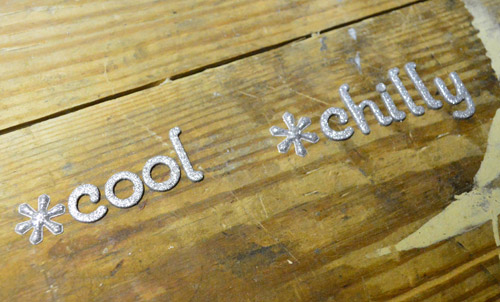
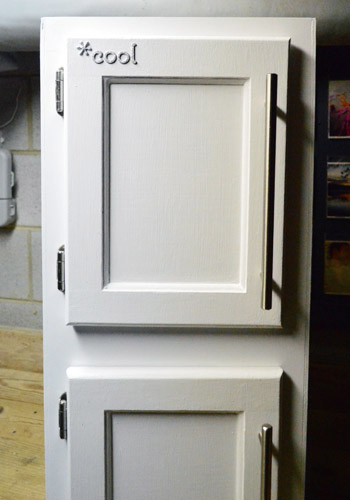
Ultimately we decided on cool… but we weren’t 100% sure so we just softly stuck them up there without any crazy glue on them quite yet. Just to get a feel for our little logo idea. Then we both stood there staring at it for a while and realized that it was a lot cooler in our minds. Hah. And in real life it just seemed kind of cheesy on the otherwise clean front (there’s not any lettering on Clara’s original kitchen, so maybe we were going overboard with this addition on the fridge). Plus, Sherry was convinced that Clara would peel them off in 2.2 seconds – even with crazy glue (perhaps ripping corners of them off, digging at them with blocks, etc). But here’s a pic of how it might’ve looked had we stuck with it…
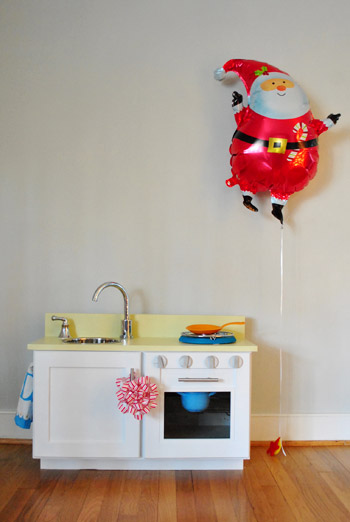
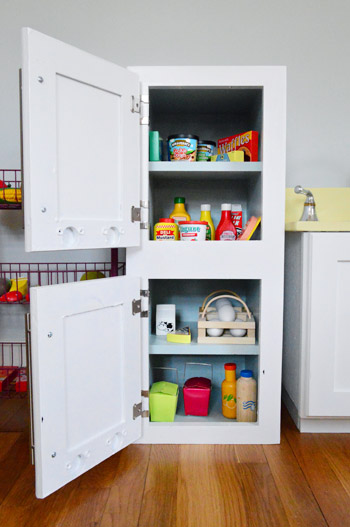
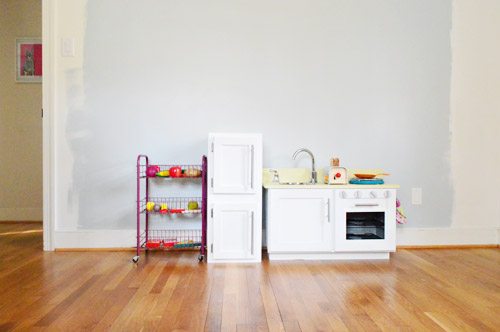
But now you get to see the whole shebang all finished and ready for Christmas morning. I hope you’re all gently shaking jingle bells and/or playing various holiday-songs, because here’s what Clara’s gonna wake up to Christmas morning:
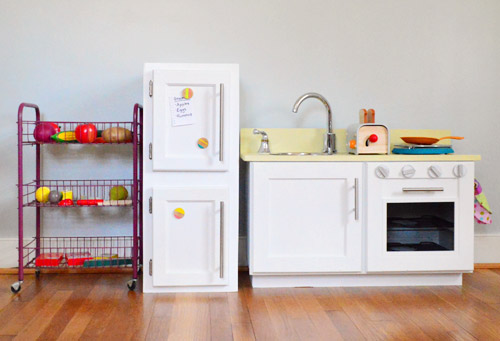
Yup, there’s Clara’s new fridge (okay, it sort of could double as a pantry too) next to her kitchen from last year, plus a little food cart that we’ll get to in a minute. And of course, you can’t give someone a fridge without stocking it full of food, right?
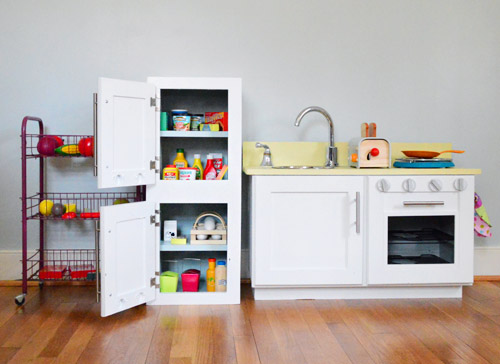
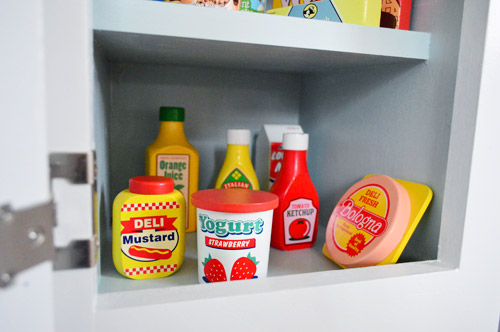
For the most part this is actually play food that we already owned. We’d purchased a bunch to give her last year, but after seeing how well the few sets of play food that she opened last Christmas had entertained her, we opted not to shove two more boxes down her present-riddled throat and instead planned to wait a while and introduce them later in the year when she was getting bored of a few other toys that we could phase out. Little did we know that those two boxes would sit unused in the spare room for an entire year. How did a whole year pass? Doesn’t it feel like we were just sharing Clara’s play kitchen a week ago?
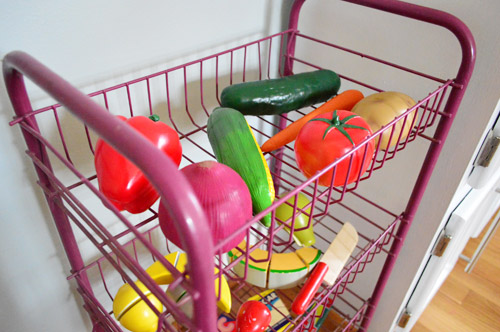
Most of it is Melissa and Doug stuff that we scored on Joss & Main at a nice deep discount. I personally love the bologna.
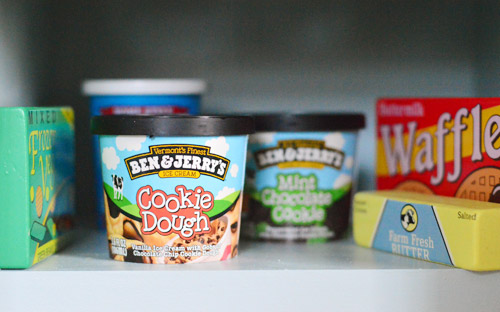
We also supplemented with a few “DIYed” items of our own. For example, we picked up (and emptied) a couple of these teeny tiny Ben & Jerry’s cartons. I took one for the team and downed both of them in about four scoops.
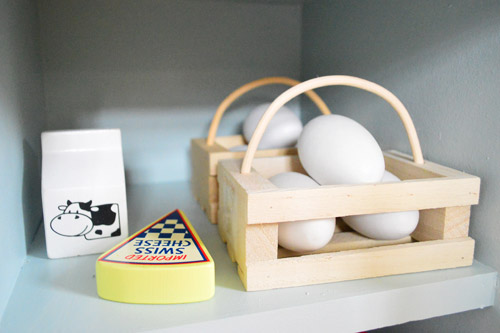
Sherry also found these wooden eggs and egg crates at Michael’s to fill out what apparently is the dairy shelf in her fridge. One day – maybe around Easter? – we might even decorate them with Clara as a fun holiday activity. The funny thing is that Clara met Santa a little while ago (yes, the real one who hangs out at community events) and asked him for “eggs for her kitchen” so we thought that was sweet enough to warrant an actual crate of eggs. Make that two.
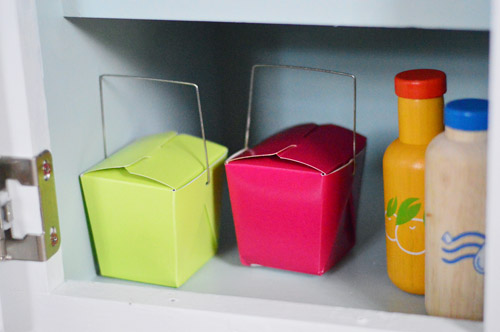
Also at Michael’s Sherry found these little Chinese takeout containers. You know, so Clara can pretend she has some leftover General Tso’s or something.
Oh yeah, and about that cart…
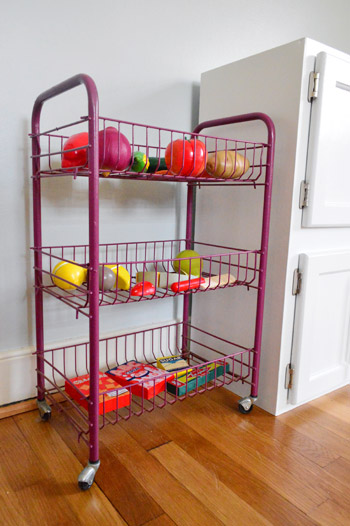
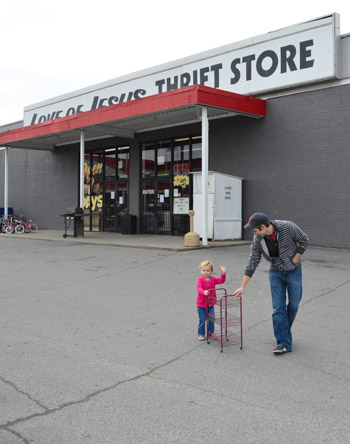
It was a thrift store find at one of our favorite local places. It was $5 and it was already this color, which was a pretty lucky break considering how many other strange colors it could have been. Clara actually helped us bring it home, so hopefully we didn’t just damage the illusion of Santa there.
We thought it’d be a great addition to the kitchen set because Clara has gotten a lot of fun out of a little wire fruit/veggie basket that she already has. And since this one is large enough to hold all of her produce along with some pantry-ish items on the bottom and it wheels around, hopefully it’ll add up to hours of enjoyment.
As for a budget breakdown, here’s how this little fridge & rolling cart full of food stacked up:
- Cabinet – already owned (maybe $15 originally?)
- Wood for shelves & sides – $14
- Primer & paint – already owned
- New hinges from Home Depot- $5.25
- 7″ hardware handles from Home Depot- $12
- Stickers that we never used – $5 (with 50% coupon from Michael’s)
- Thrift store cart – $5
- Wooden eggs, crates, & takeout containers – $6 (with 50% coupon from Michael’s)
- Tiny Ben & Jerry’s ice cream cartons – $2.50
- Other play food – already owned (about $30 originally)
- TOTAL: $50.75 (it would probably cost around $95 if you didn’t already have the cabinet and the play-food on hand)
Under $51 for both the fridge and the cart isn’t too bad, right? The play kitchen from last year rung in at 74 beans, so it’s nice to add two other kitchen items for less. The only thing that’s missing are some grocery store gift cards so Clara can take care of some of the items on her shopping list…

Oh and the magnetized doors are worth the effort, so we highly recommend those if you’re in the mood to add some “extra sauce” to your fridge. We can both picture Clara hanging little drawings that she does on Post-Its and someday writing her own lists in sloppy kid-handwriting.
We’ll be sure to share video or photos of Clara actually receiving her gift, just like we did last year, so stayed tuned for that. And oh yeah, if you were wondering what mystery room we shot these photos in… it’s the playroom, which still has walls painted in a bunch of random colors from shooting our book back in February. This particular wall is Sylvan Mist by Benjamin Moore (the same color that we used on the inside of the fridge, so we cracked up when we realized that).
So, are any of you other “Santas” out there whipping up something in your workshop for next week? Are your kids as obsessed with play food (specifically play eggs) as our daughter? Do you find it funny that play fruits and veggies are usually life sized but most of the “pantry items” are at least half of their normal size (even when they’re made by the same company)? I’ll pause while you ponder that.
Psst- I grabbed a quick video of Clara playing with her kitchen the other morning, so that’s over on Young House Life for ya.

Bea says
This is wonderful! I love y’all and your book! (it has found a new home on our coffee table ).
I had a smile on my face the whole time I read this post, so I am sure Clara will LOVE IT!
Happy Holidays!
YoungHouseLove says
Aw thanks Bea!
xo
s
JG says
Probably someone already suggested it, but the doors would be awesome if they had fridge shelves on the inside of the doors! Maybe some wire or plastic organizer baskets that wall mount that would be small enough to still let the doors close?
YoungHouseLove says
Love that!
xo
s
EngineerMom says
Love the fridge! The kids miss our play kitchen – it had to stay at Nana’s house in Ohio when we moved out to Seattle.
I’m using duck cloth and permanent markers to make a Royal Rummy board for my 4-year-old. Daddy has been teaching him how to play on a quickly-whipped-up construction paper version of the board, and it’s… well, it’s getting pretty rough! We only have one deck of cards, too, so with the board will be his very own deck of cards to play with whenever he wants (instead of the current deck that is only for when Mommy or Daddy is right there).
YoungHouseLove says
That’s sweet!
xo
s
Rainey says
What a great idea! And it turned out super-cute.
Amanda C says
How did Clara like her new fridge???
YoungHouseLove says
She loved it! Video to come!
xo
s
Christy W. says
Have you guys posted photos or a video yet of what Clara thought of this new stuff? I’ve been searching everywhere!
YoungHouseLove says
That’s coming up tomorrow!
xo,
s
Becky says
So cute! Very funny that Clara likes eggs so much, Ethan loves them too!
We actually made a “manly” play kitchen for Ethan’s birthday and plan to add on next year…maybe a microwave and/or mini-fridge college dorm room style?
YoungHouseLove says
So cute! What an awesome job!
xo
s
Marquea says
Awesome fridge. I found your site from pinterest. Cheryl Tidymom (she has a great site) posted your project. I am going to follow your blog now because it is detailed just how I need things. LOL I attempted my own play kitchen project not too long ago. I love the fruit/veggie basket on wheels. Happy Cooking Clara. Our daughter Gracelyn loves her kitchen. Need to make her a fridge. I have a narrow book case that I picked up from a garage sale that is needing sanding and repainted anyway. It is perfect size to be a fridge. It won’t be nearly as cute as this one though.
Amanda L. says
Clara’s kitchen looks amazing! But was browsing the web and came across this play hardware store over at kate’s creative space and thought of you guys (which is weird since we have never meet):
http://katescreativespace.com/2013/01/06/welcome-to-harrys-hardware/
could there be a Clara-depot in her future!?!?
YoungHouseLove says
Oh yes, isn’t that amazing?! LOVE it!
xo
s
Make and Do Girl says
I LOVE that For the Love of Jesus thrift store! I can remember the first time I went there, I cracked up that there’s a “Jesus Couture” store in the same parking lot.
That play kitchen is adorbs! I must make one when my little one gets to play cooking age.
Lauren says
Do you know who makes the fruit and veggies you have pictured in the top of the food cart?
YoungHouseLove says
Those are Melissa & Doug I think!
xo
s