When we bought our house, the deck was in ROUGH shape. Before we could revive it with a fresh coat of stain, we had to strip off the old stain first. It definitely took some time and effort – our deck is nearly 700 sq. ft! But it was totally a doable weekend project for even a first-time stripper. Sorry, I couldn’t help myself.
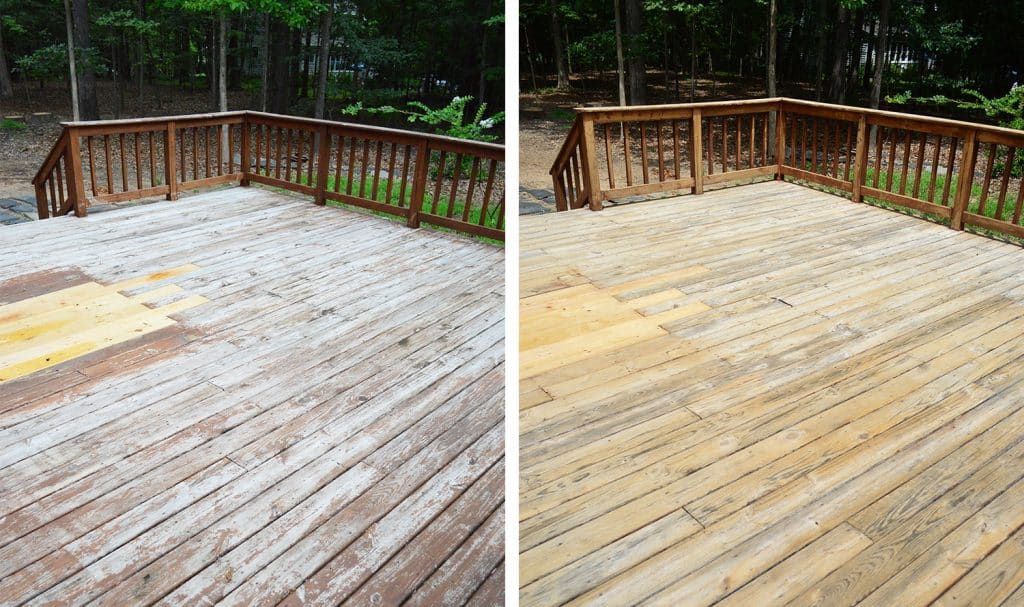
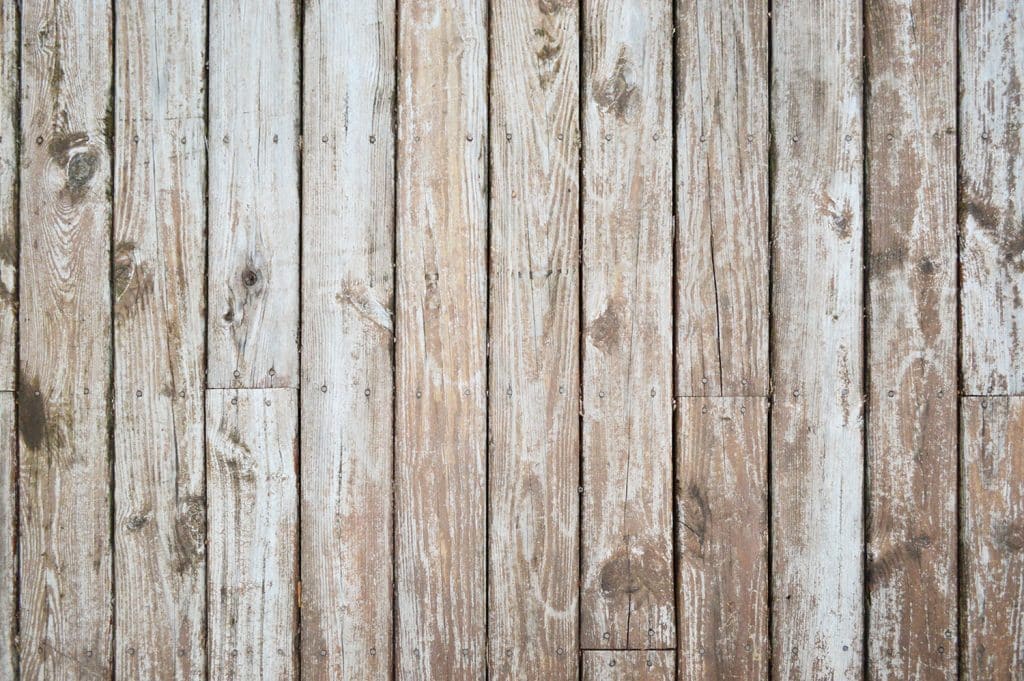
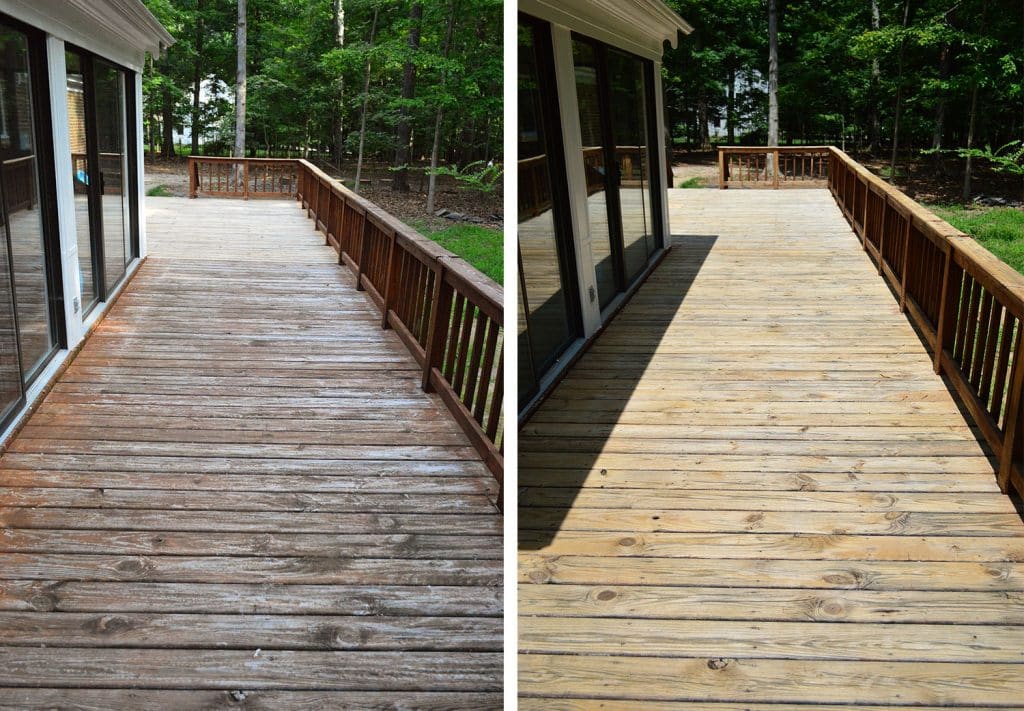
That’s the before-and-after of the stripping process, but if you’d like to see how it turned out with the new stain, check out our How To Stain & Seal A Deck tutorial.
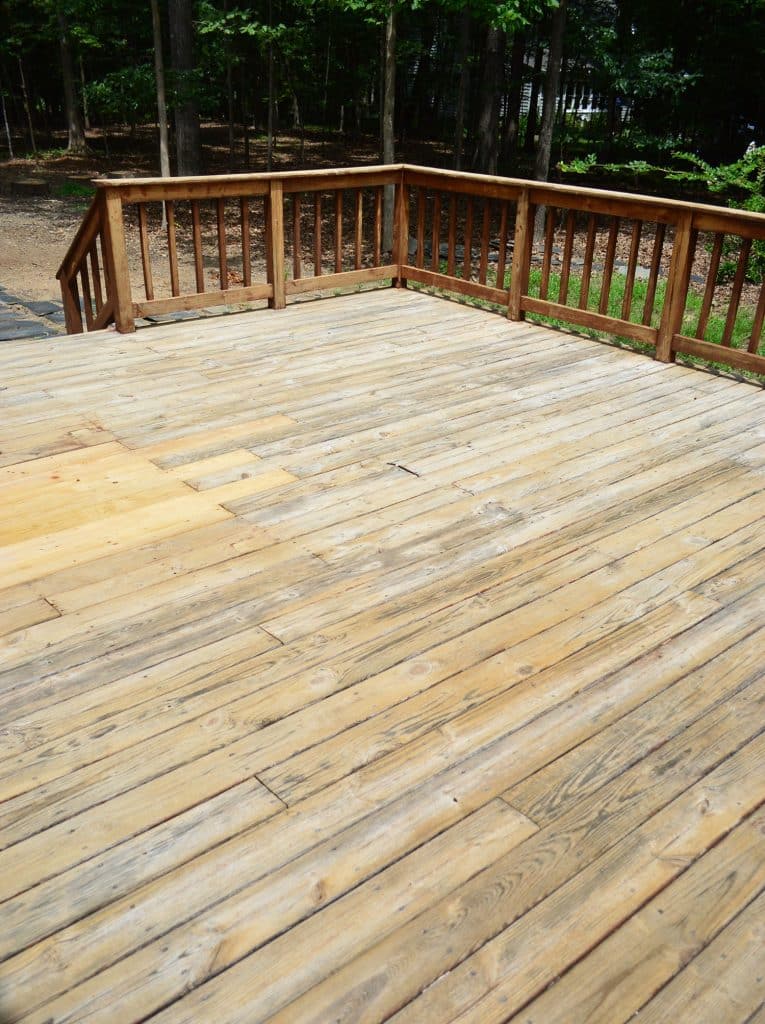
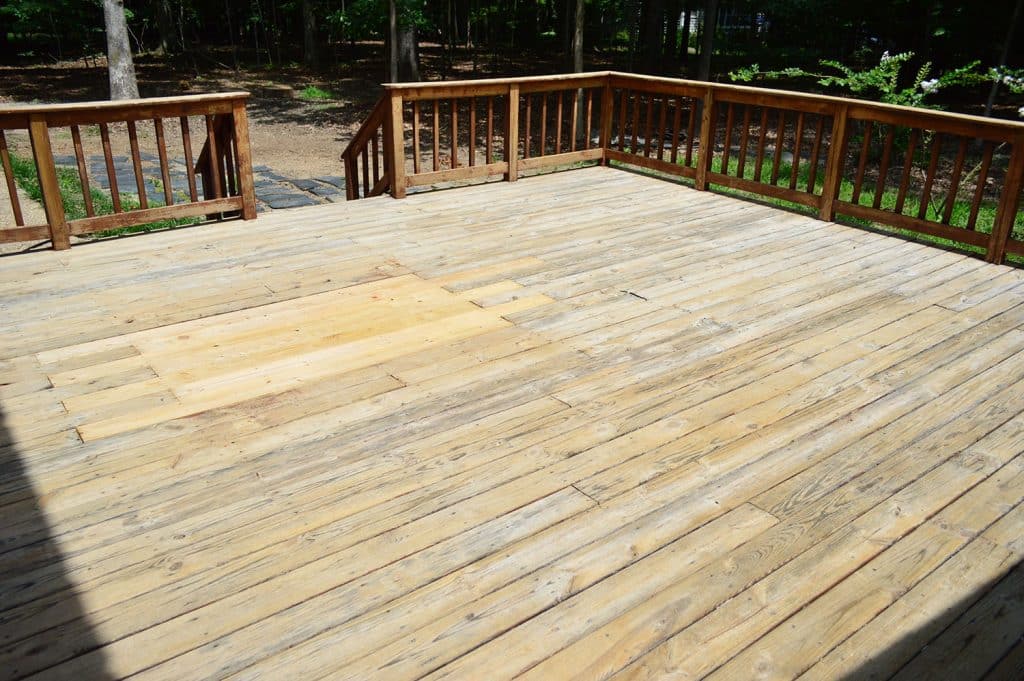
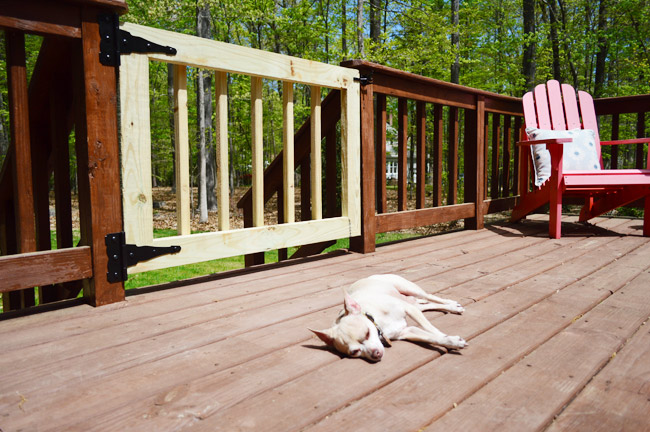
And ignore the patch of new wood. We had to repair a section where a tree had been growing through the deck. We also have a tutorial for Patching a Wood Deck if you need it!
Can I Skip The Stripping Step?
If you plan on restaining or repainting you wood deck, you need to remove the old finish for the best, more durable bond. However, there ARE some products that are designed to be applied directly over your existing coat. Both Rust-Oleum Restore and Behr DeckOver create a thick layer of paint over your deck for almost a plastic-like end result. We personally didn’t like the rough texture of Restore and, while DeckOver was smoother, it would’ve been pretty costly. We also wanted a more traditional stained wood finish in the end, not the thicker coat those products would’ve given us. So that’s why we chose to proceed with stripping our deck.
Can I Just Use a Pressure Washer?
Maybe! Power washing CAN be a really quick and effective way to strip old paint or stain from a surface, especially when combined with some of the chemical cleaners listed below. In fact, we used our pressure washer to help revive the wooden outdoor shower at our current home. We weren’t removed stain though, just layers of dirt, grime, and mildew, so we didn’t use any chemical to clean it.
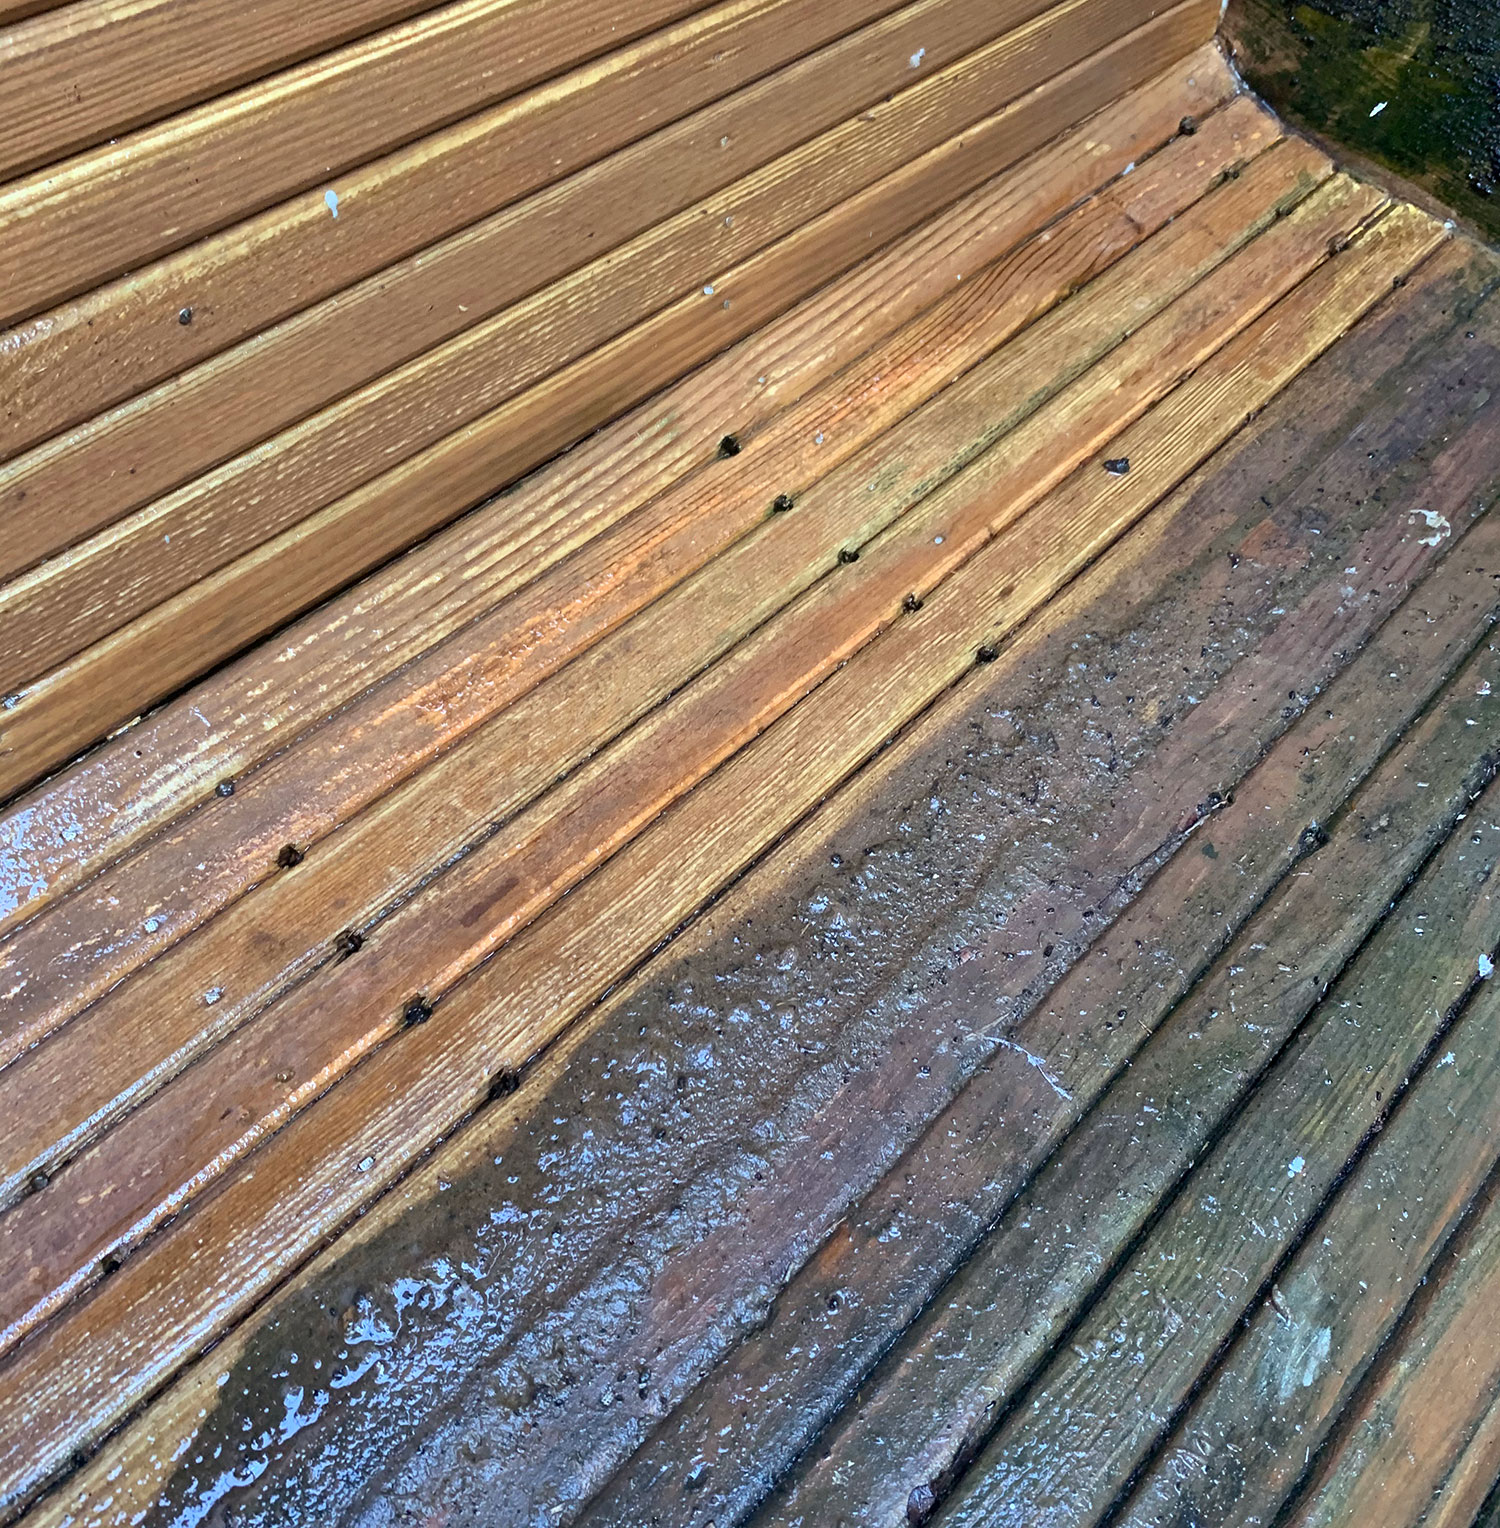
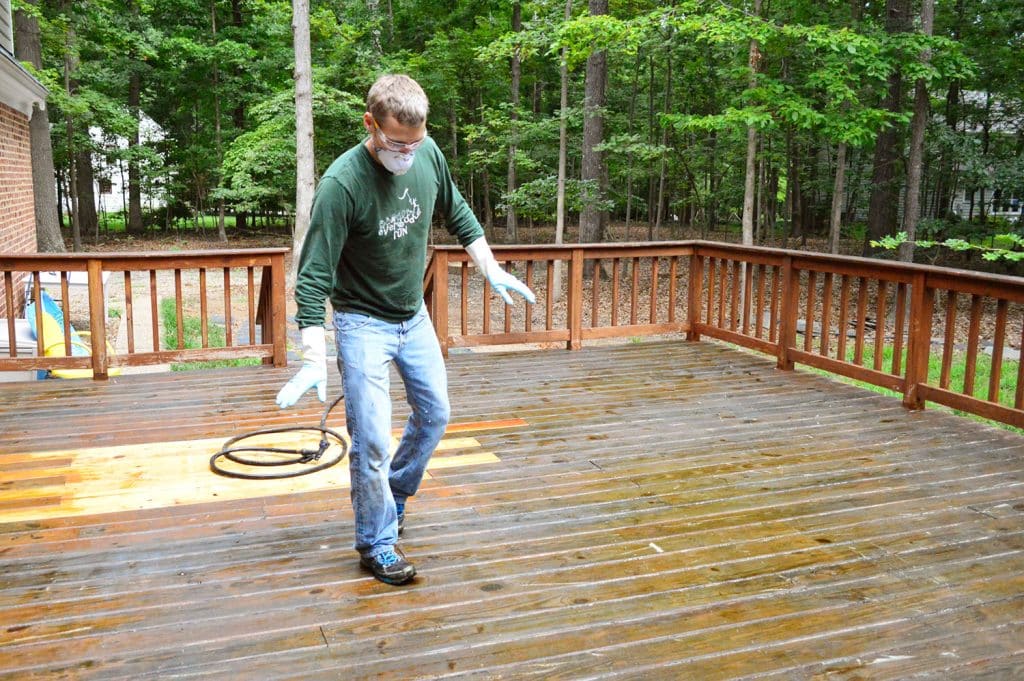
For the deck shown in this post, we chose NOT to use a pressure washer because the wood was in such rough condition. It was soft in some spots and rotting in others and we feared the pressured water would damage the wood too much. We knew the wood on this old deck was way past its prime, so our goal in refinishing it was to extend its life another couple of years before we could afford to replace it.
But if you want to try using a power washer, you can read our Pressure Washing Guide here and grab our favorite power washer for just $99!
How To Strip Your Deck Yourself
Here’s a quick overview the 6 steps to stripping the finish off your old deck, porch, stairs, or railings. Depending on the size of your deck, it can easily be completed in a day or maybe a weekend.
- Ready You Deck
- Wet Your Landscaping
- Apply Your Stripper With A Roller
- Scrub Off The Old Paint Or Stain
- Neutralize The Deck Stripper
- Enjoy Your Results!
Tools & Supplies To Strip Your Deck
Here are the materials we gathered to strip the old finish off our deck:
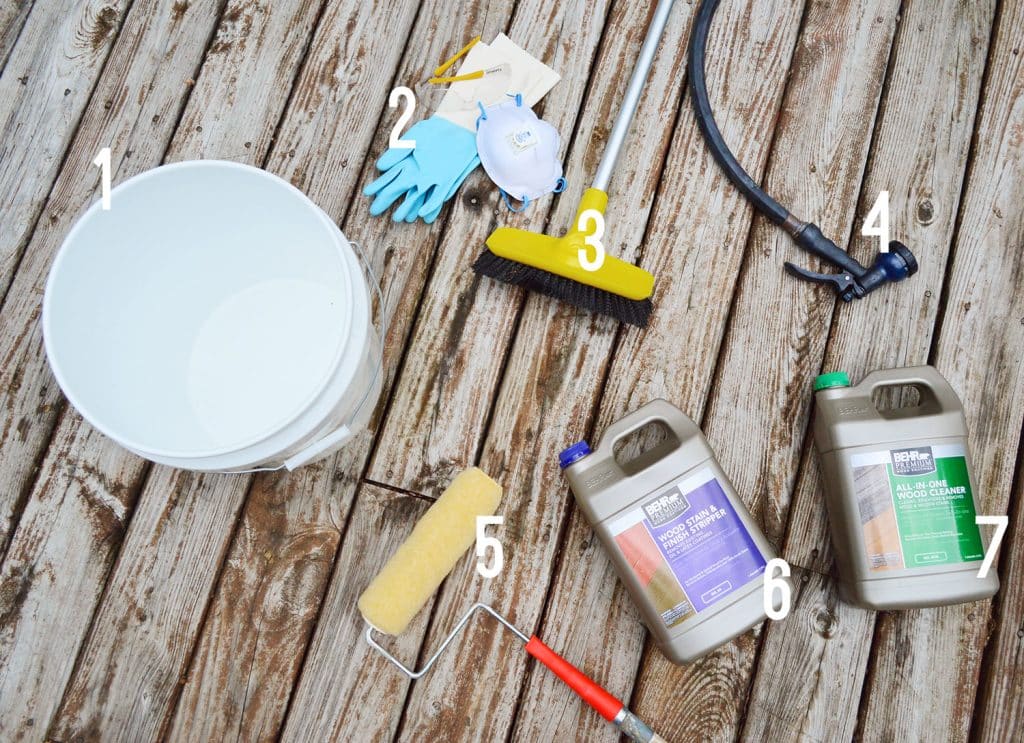
- Bucket – to pour the stripper into for easy dipping of my roller
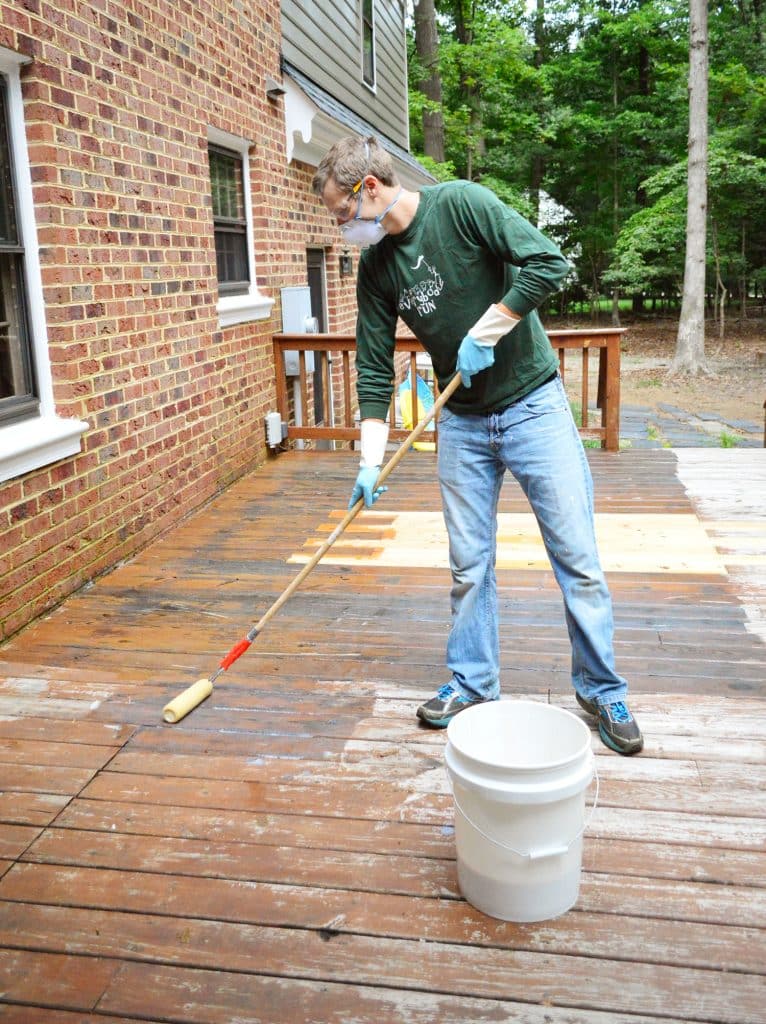
- Protective Gear – rubber gloves, goggles, and a mask (this stuff STINKS)
- Stiff Bristle Brush With Pole
- Hose
- 1/2″ Nap Paint Roller With Extension Pole
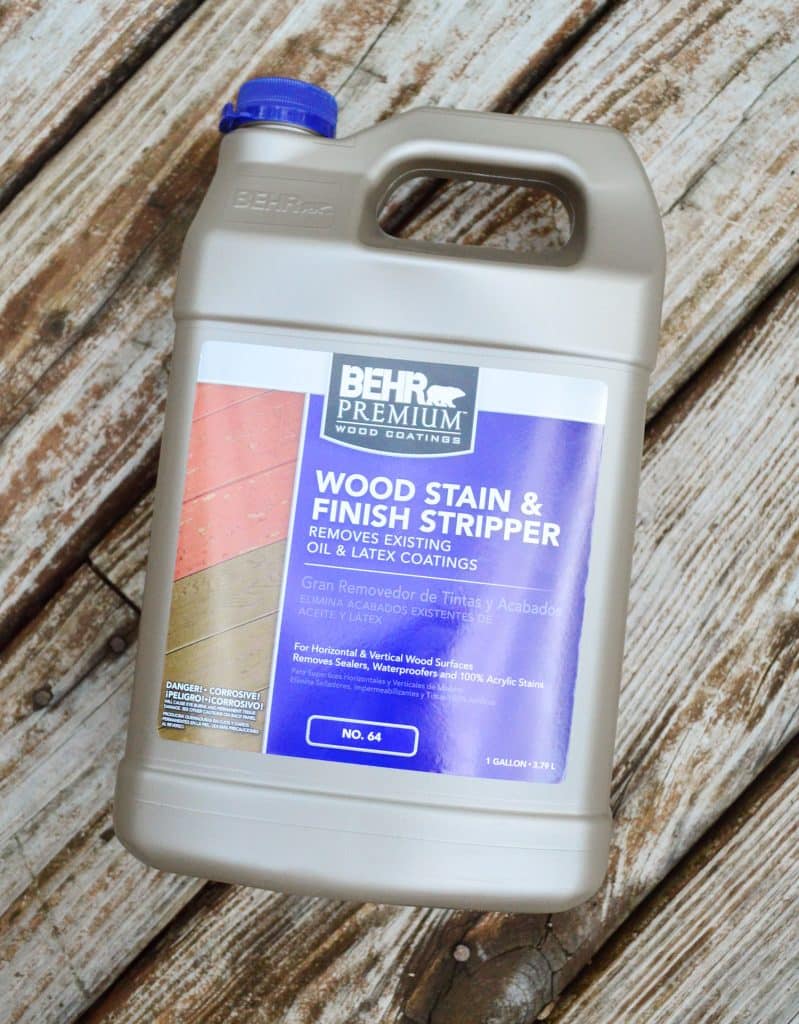
- Wood Stain & Finish Stripper – we bought 4 bottles (at $19 each) but ended up only needing 3
- All-In-One Wood Cleaner
- Pump Sprayer (not pictured) – we still had this one leftover from cleaning our last deck
Step 1: Ready Your Deck
Prep your deck by removing any furniture or obstacles that may prevent you from accessing the whole space. You’ll also want to check your weather forecast to make sure you have time to complete your entire deck without interruption from rain. Preferably it’s a cloudy, cooler day too because you don’t want the stripper fully drying during the application process.
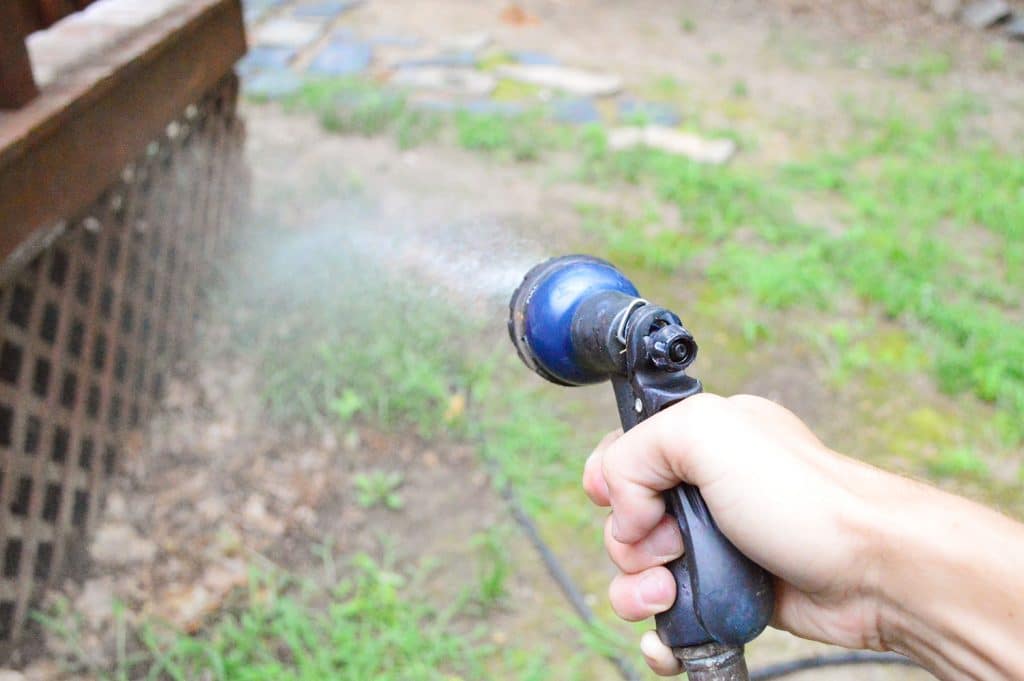
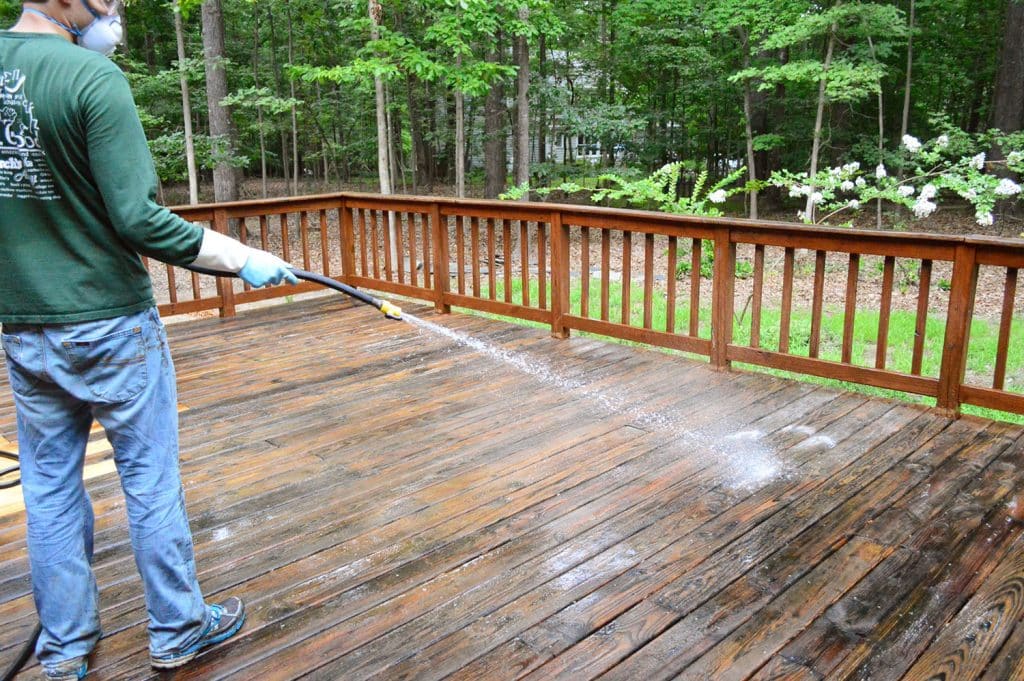
Step 2: Wet Your Landscaping
Before you begin, use your hose to wet down any surrounding plants to help protect them from the runoff. The stripping agent is “biodegradable with easy water clean-up” but you still don’t want it sitting on your bushes in high concentrations. We don’t have much greenery worth saving around the deck, but I did it anyway. You know me, I’m a rebel rule follower without a cause.
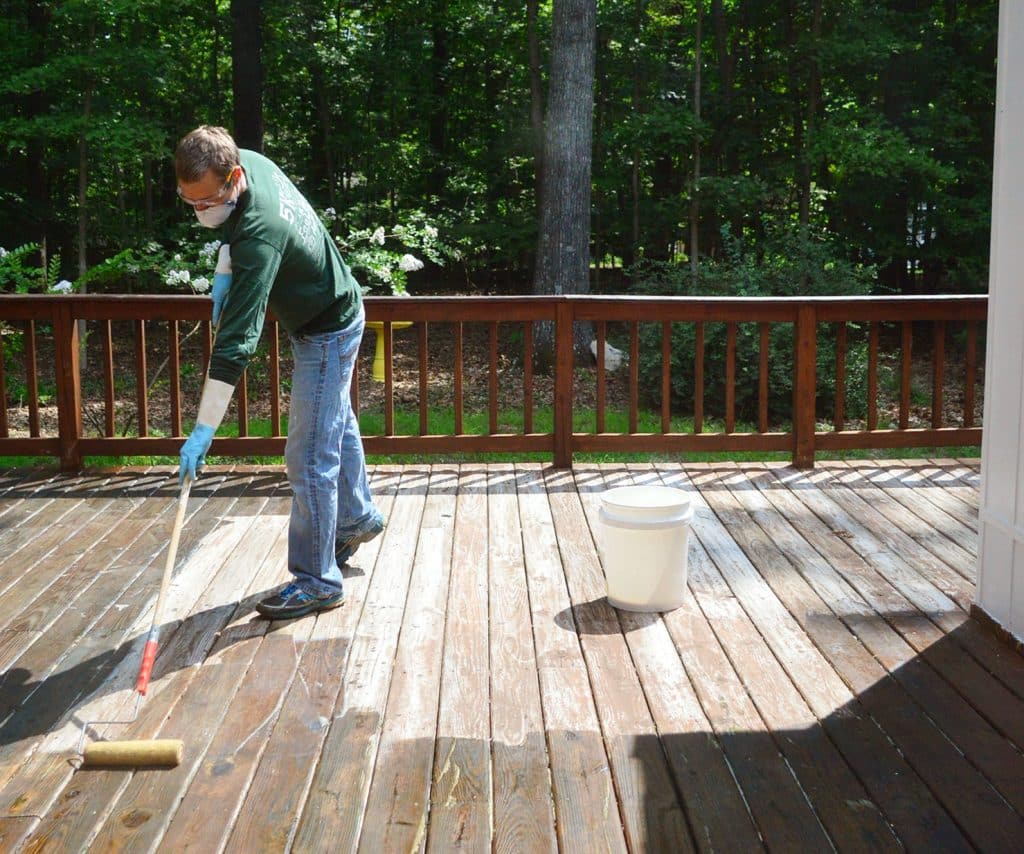
Step 3: Apply Your Deck Stripper With A Roller
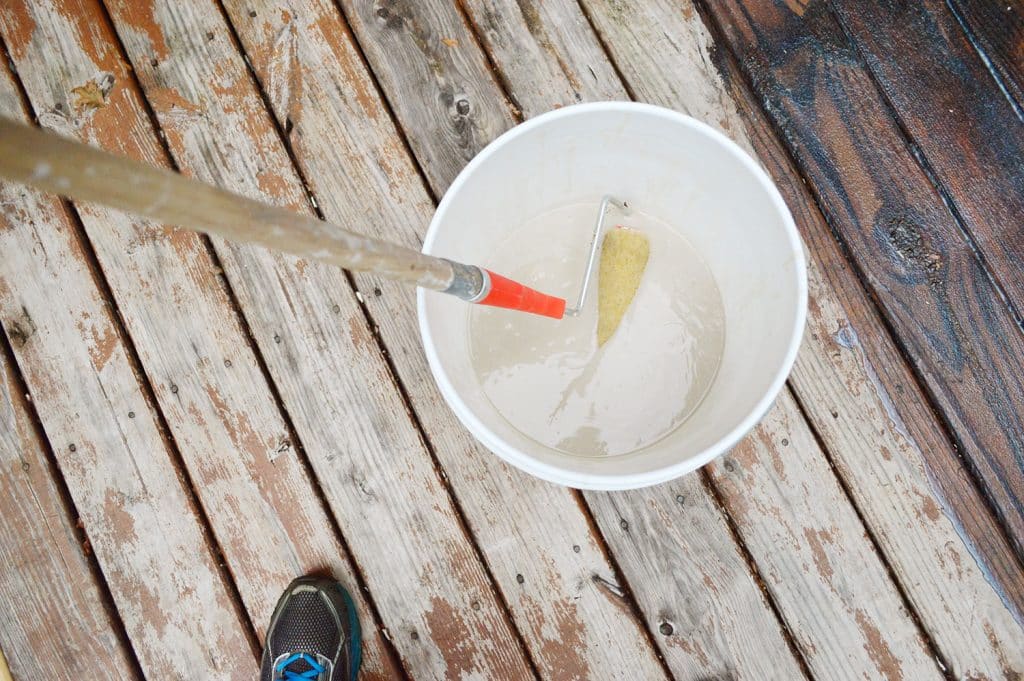
Since we’d be applying this stain stripper with a roller, I combined a couple of bottles into the bucket for easy dipping. A deep paint tray would work as well, although I found the bucket really helped me get my roller saturated.
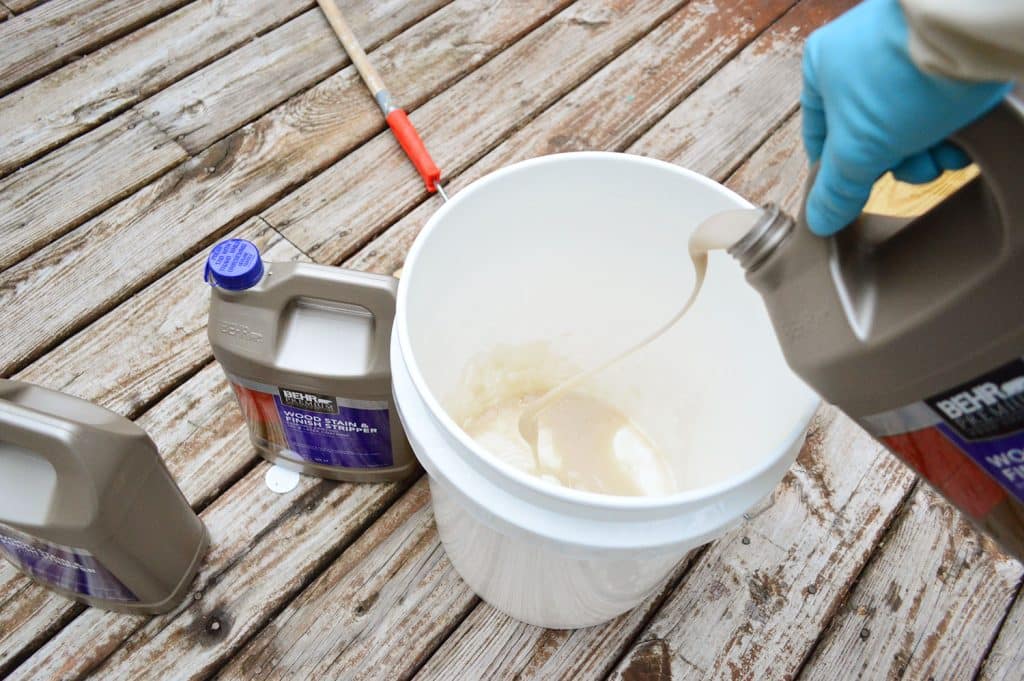
The deck stain stripper is pretty gloopy (a technical term). Almost a gluelike consistentcy. I imagine it to be what porridge looks and feels like. But hopefully not what it smells like. Otherwise Goldilocks has terrible taste in stolen snacks.
The consistency actually makes it really easy to apply. It’s thick enough not to drip off your roller too wildly, but thin enough to spread nicely. We just worked methodically to make sure we coated every board.
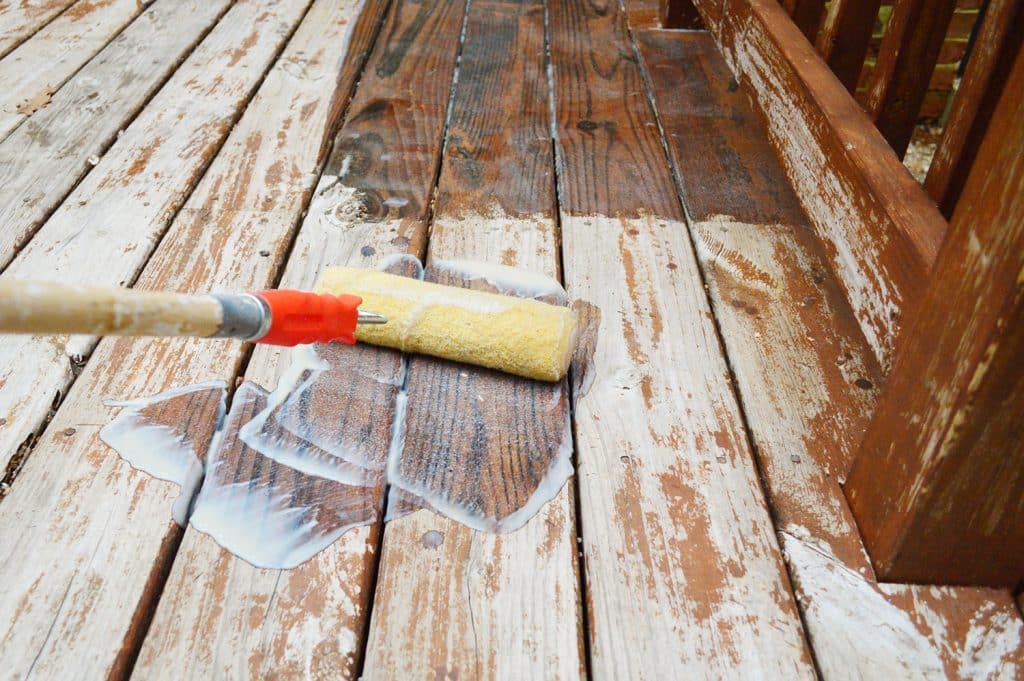
The instructions tell you to spread it “liberally” over the surface and let it sit for 5-45 minutes. In that time you’re supposed to not let it fully dry, which is why choosing a cloudy, cool day is best.
I waited a good two weeks for the “perfect day” and even then it turned out to be to sunnier than I had hoped. Stupid clouds never stay put, do they?
Luckily, the instructions tell you to just lightly mist any spots with water if they are drying out before you can finish your application.
One warning – this stuff is also pretty slippery. I did my best not to walk on it at all, but when I did it felt like it was almost moving under my feet.
That’s when I realized it WAS MOVING UNDER MY FEET. It was slippery because the finish was literally coming off under my feet. Suddenly my caution turned to excitement. It was working!
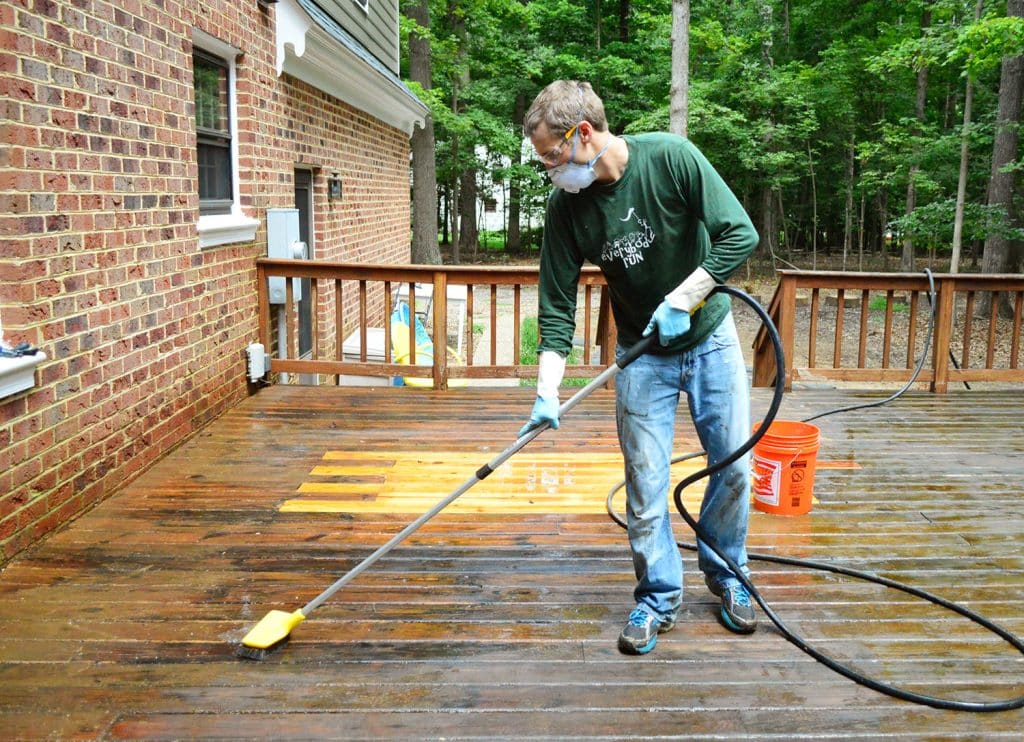
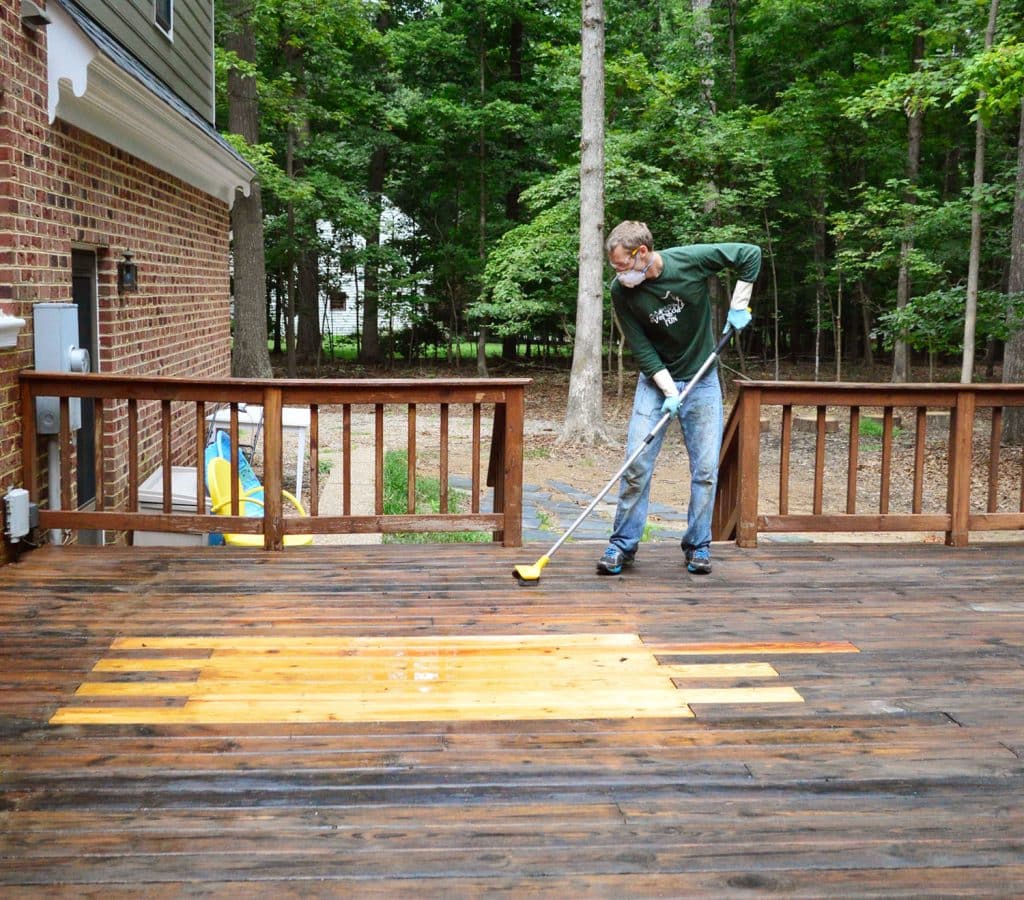
Step 4: Scrub Off The Old Paint Or Stain
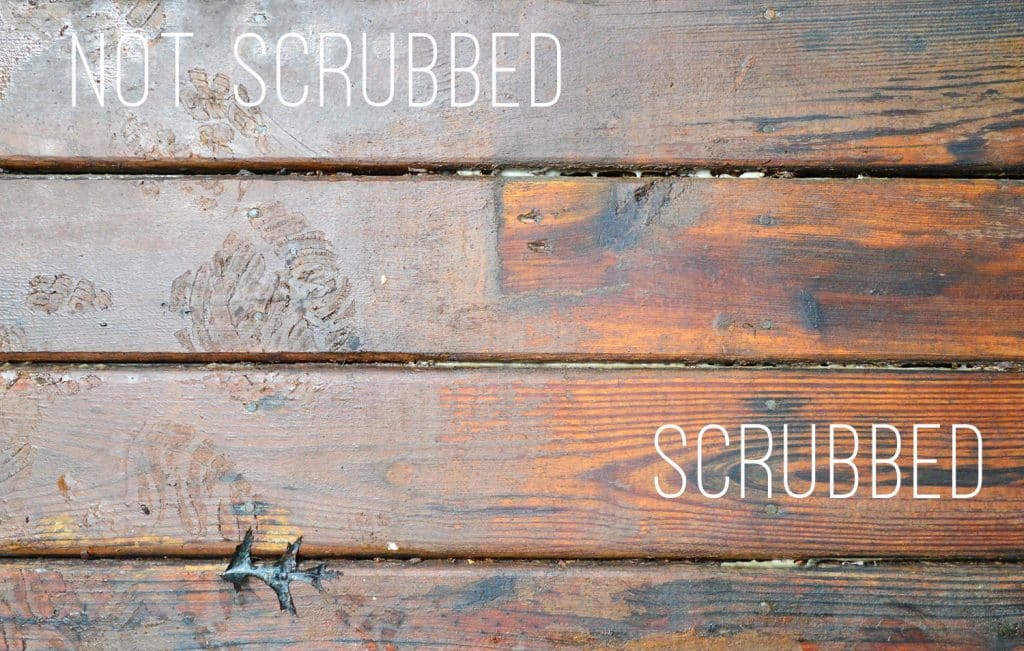
The stripper will help lift the old finish, but it needs some friction to actually remove it from your deck. It had been about 25 minutes since we started and, since it was literally coming off under my feet, we took that as our cue to move on scrubbing!
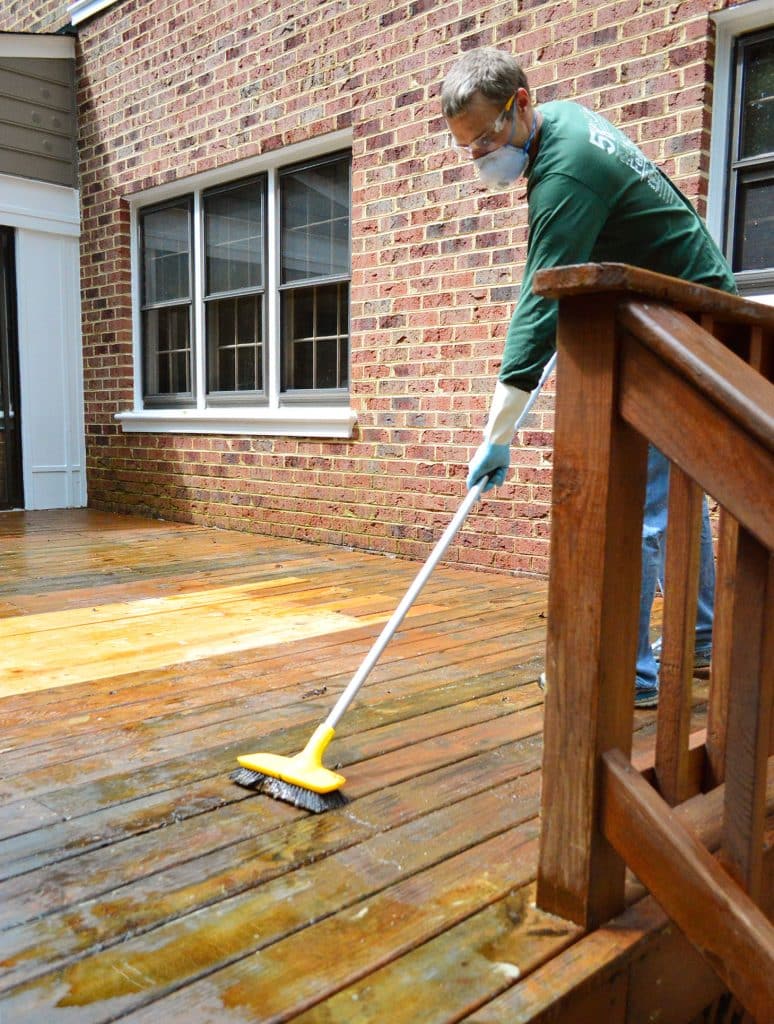
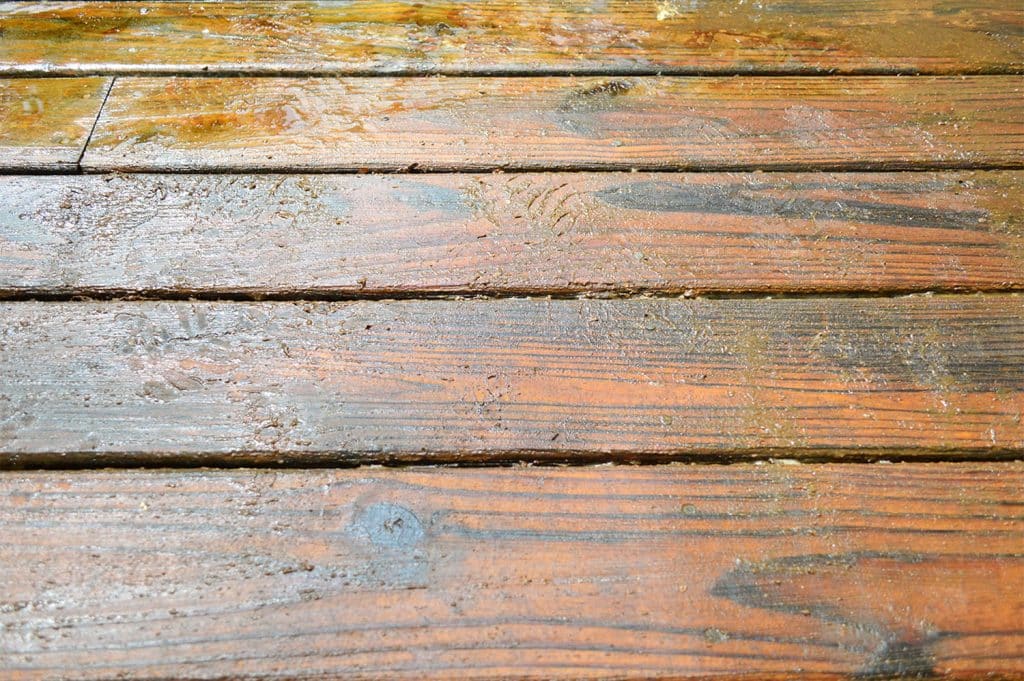
This stiff-bristled broom did a great job, but it did take a little bit of force/pressure. In most cases I could get the finish off with just a couple of swift strokes on each board. It came off in sort of a brown sludge, but after a rinse you could really see how the wood grain was reappearing.
The job went a lot faster once I realized I could hook up my hose to the back of the brush I had bought. It meant I could kinda scrub and rinse all at the same time, which made it easier to see the progress I was making.
The scrubbing part was definitely the longest part of the process. It took me about 45 minutes to do my first pass, and then I went back and spot scrubbed parts that I had missed or that took a bit more oopmh. Even then it took two or three rinses to make me feel like I had actually gotten all of the sludge off.
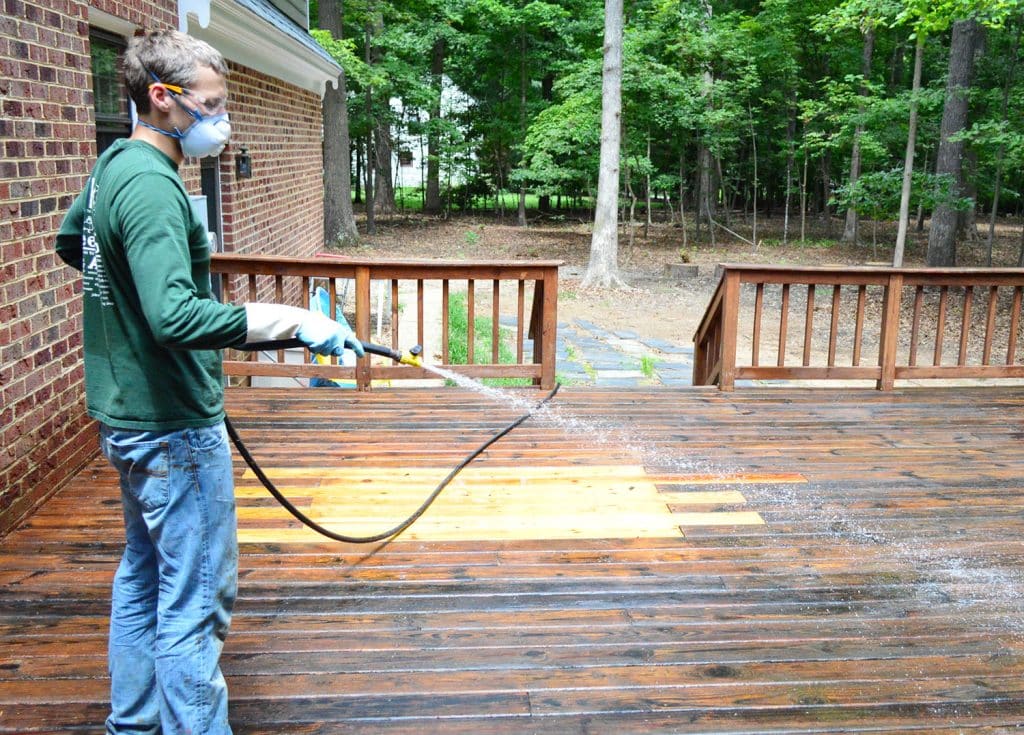
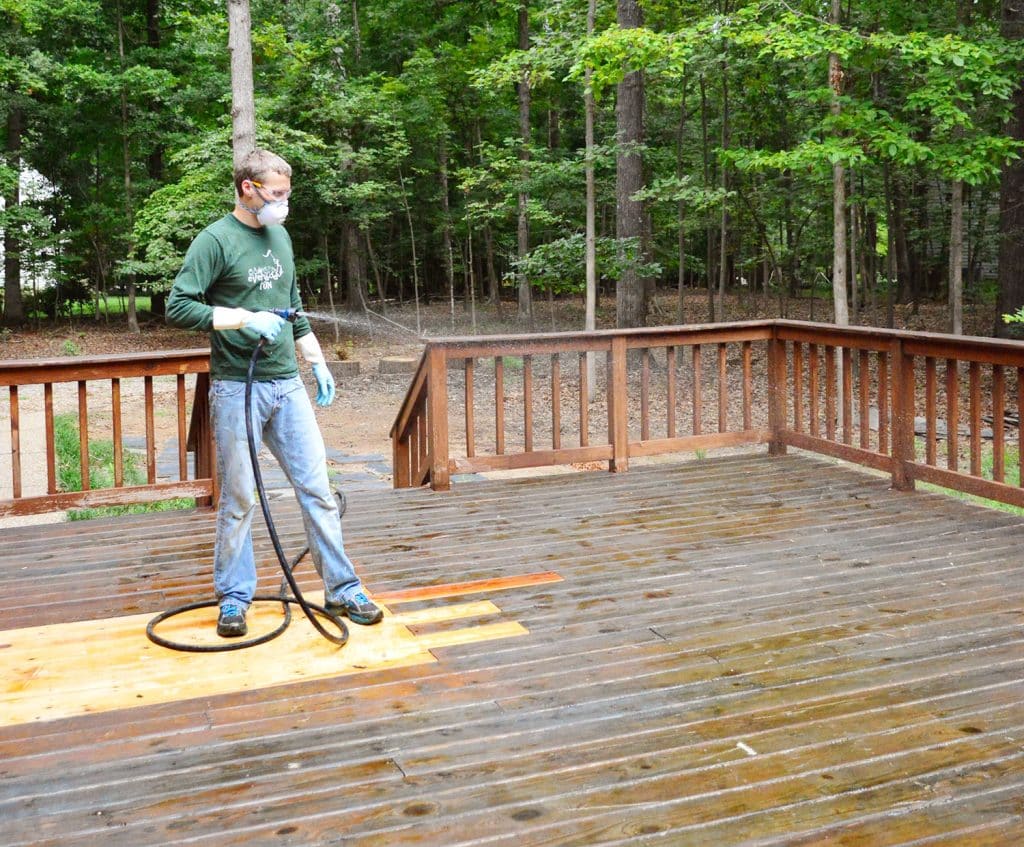
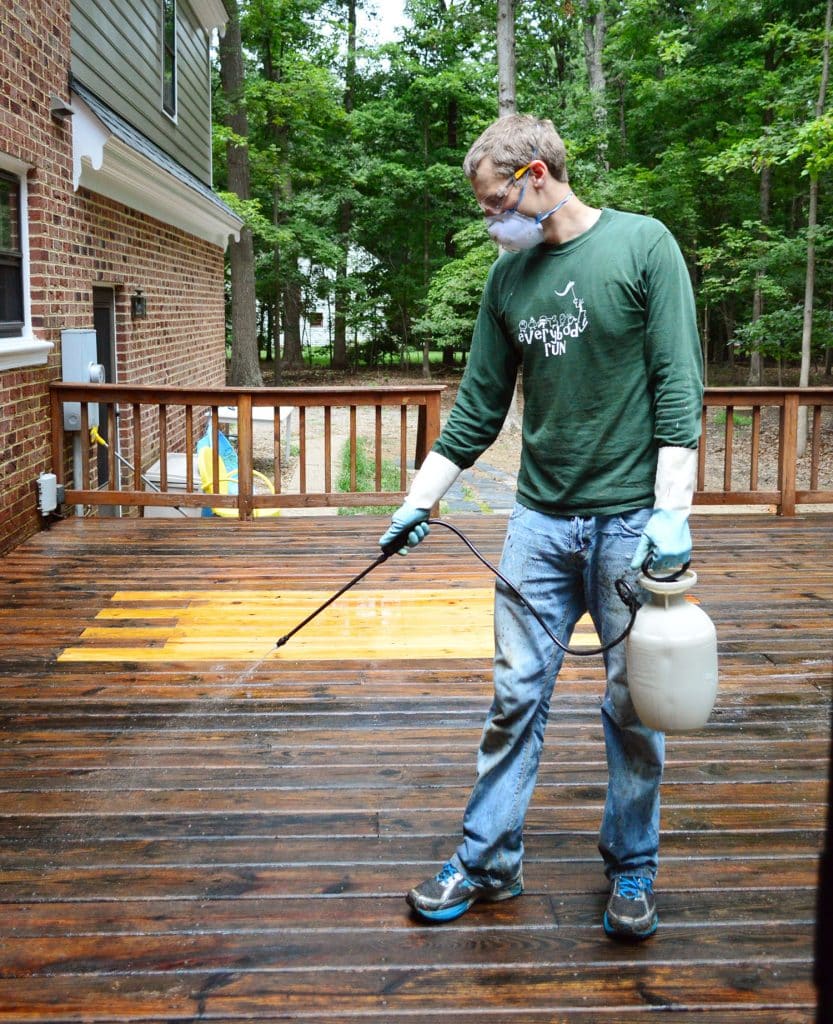
Step 5: Neutralize The Deck Stripper
To finish the process, you need to apply a deck cleaner to brighten the stripped wood and, more importantly (to me at least) neutralize the stripping chemical. We applied this with a basic pump sprayer filled with 1 part water and 1 part cleaner. You don’t need a thick coat, just be sure to get every spot you applied the stripper.
The Behr cleaner recommends that you scrub the deck cleaner into the wood after letting it sit for a few minutes. So after thoroughly cleaning our brush, went spent about 20 minutes or so of brushing our giant deck again. It said it would “foam” but I didn’t get much foaming action.
But foam or no foam, I proceeded by giving the deck one last good rinse down to hopefully rid it of any residual deck stripper and cleaner.
Step 6: Enjoy Your Results!
We were VERY impressed with the results. It seems to have gotten rid of not just the peeling paint, but a lot of the gray weathering too. It almost looked like new, albeit bleached, wood. It almost blended perfectly with the new wood we added where we had to have a tree removed.
Here’s that before and after again so you can see how much better it looks, even without the new stain coat applied yet!
The whole process took me about 3.5 hours and I was pretty tired and sweaty (okay, and hungry). Wearing pants and long-sleeves in 85° will do that to ya. So we actually did our deck in two sections, and we completed the next area the following day. But at least my half-attempt makes it easier to see the difference the stripping made. See that obvious line where the sunroom ends?
Our plan now is to stain it with a semi-transparent stain that’s similar in color to the previous rich brown color. It must have been glorious in its day, before it started to wear away. In fact we didn’t go through the trouble to fully strip the small vertical railings (because it would’ve taken a million years, but also because we liked their color and they were in much better shape). So we’re hoping using something close in color that will make the whole thing look seamless when we’re done.
UPDATE: You can see how the stained deck turned out here!
So yeah, that’s the stripping story. I guess the lesson is that even if you have a rough-looking deck, some elbow grease (I think I scrubbed this thing thirty times) might just save it. Either way, we’re pretty pumped about being one step away from breathing new life into this baby. Deck stain, here we come!
BONUS: More Deck Posts
We’ve got more tutorials for making the most of your deck (or, at least, how we made the most of ours). Here are some other posts you might be interested in!
- How To Build A Gate For Your Deck
- How To Stain & Seal Your Deck
- How To Build A Deck
- Why We Decided To Tear Our Deck Down
*This post contains affiliate links, so we may earn a small commission when you make a purchase through links on our site at no additional cost to you.

Cathy says
It looks amazing! Re: the pressure washing alternative I see mentioned in the comments, I can attest to the fact that pressure washing older deck boards could result in fuzzy wood. Our house (and deck) look to be around the same age as yours, and when we pressure washed our deck (frankly we were not even aware of any other alternatives!)the wood got all fuzzy. Sealing it (we used a clear sealer) helped a bit, but it definitely lost the smoothness that it had before the washing. We’ll try this method next time it needs a good cleaning!
YoungHouseLove says
Oh no! So sorry Cathy! That’s what we feared after hearing about it happening to others with older wooden decks trying the pressure washer thing.
xo
s
Heidi P. says
YAAAAAAAAAAYYYYY!!!!!!! I seriously LOOOOOOOOOOOVE you for this!! Thank you thank you thank you!!
Laura Wilson says
Wow- looks great! We are trying to figure out what to do with our deck which was painted (its a rusty-coloured red) but is looking pretty rough these days. Any thoughts or ideas?
YoungHouseLove says
Maybe repaint it the same color just to give it a richer look?
xo
s
Ashley@AttemptsAtDomestication says
Looking much better! It’ll look really good once you get that stain on it! Can’t wait to see!
You’re totally giving me deck envy!
Heather says
FYI, the “small vertical rails” are called balusters – just like you see on staircases ;) The decking looks nice all stripped down! If we have time this summer one of my goals is to sand down and re-seal our cap on our deck, it took a beating in the crazy weather this year!
YoungHouseLove says
Thanks Heather!
xo
s
Gabby {Cookie Cutter Unique} says
I still can’t get over the fact that your deck is about the size of my apartment! It’s looking great, even now all gritty and natural, I like it.
Laurie says
Interesting, so it must have been painted rather than stained? Here in Oregon, I (am supposed to) stain every year but I don’t have to strip; just give the deck a good scrubba.
With a big deck like yours, I wouldn’t want to stain every year!
YoungHouseLove says
Haha, I love “a good scrubba.” We definitely don’t want to stain every year, but thankfully there are 5-year products that we’re hoping will perform well in our milder climate.
xo
s
Lacey says
My husband and I bought a house in June, with a small 10×20 wood deck that was in need of some TLC. We decided to go with the Rustoleum Restore, and ended up spending almost $150 on product that is already starting to peel off the edges and tops of the boards. I think we will be looking for a way to remove it and start over.
YoungHouseLove says
Oh no! So sorry Lacey! We read so many split reviews on that and the DeckOver stuff. Such a bummer that it’s not working for you!
xo
s
Eric @ AddSomeCharacter says
Can’t wait to see the finished look! We are debating on whether or not to go the wooden deck or salvaged brick patio route. Any thoughts? It seems there is a lot more maintenance on a wooden deck opposed to just having to kill weeds between the pavers.
YoungHouseLove says
We love a patio or a deck, so maybe it’s just about which one you prefer? A deck is slightly softer underfoot (we worry less about Clara bashing her head on the deck floor than we did on the patio in our last house) but she still had tons of fun on that and zero head bashing incidents so we’re just worrier first-time parents. I think my answer is: have both! Haha! How’s that for not helping?
xo
s
Blaze says
Wildlife and the neighbor’s cat can’t do it’s business or have babies under your brick patio. On the other hand we’ve had wasp nests, baby skunks and plenty of cat poop under our deck.
Taylor says
Great, informative post. But, seriously, the dramatic chipmunk made my morning!
Heather says
Have you guys ever oxidized wood? Although your new patch of wood on the deck is ever so close to blending right in, it made me think of a furniture project that I recently did using an oxidized finish. I followed the tutorial on the Friendly Home and I really like how the finish turned out. You may not need it once you stain but it was a super easy and quick solution to making newer wood blend in.
http://thefriendlyhome.blogspot.com/2012/07/how-to-oxidize-wood.html
YoungHouseLove says
GORGEOUS!! I’d love to do that for a console table!
xo
s
Kelly says
This has nothing to do with stripping, or decks…ha, but was wondering if you know/remember the color of the kitchen in your first house?
YoungHouseLove says
That was Gentle Tide by Glidden.
xo
s
donna says
We actually get the same results from bleach and a power sprayer. the bleach has never killed our grass or plants. We never have fuzzy wood afterwards.
YoungHouseLove says
Congrats Donna! It sounds like some folks did have the fuzzy issue when using a power washer (you can scroll back through the comments for that – and we also talked to a few friends who had it happen and advised against it) but I’m so glad yours is all good! Perhaps your deck is newer or in better shape? Could have something to do with where you live too (perhaps wood is more brittle in certain climates, etc).
xo
s
Jill says
Do you think this would work with a wooden, screened in porch? We are moving into an old farm house with an old, painted and screened in porch and need to redo the floor (among many other things!)
YoungHouseLove says
I’d imagine it would. Just follow the directions to the letter and be sure to rinse it all down so it can be “deactivated” and start breaking down (it’s biodegradable, but I think the rinsing step is extra important).
xo
s
Lesley says
I am just wondering if the wood on your deck is pressure treated and if you have considered its age and the possibility that it might contain arsenic. We had an old deck on the back of our house (built using pressure-treated wood in the mid 1980’s)and were advised to replace it because the wood most likely contained arsenic. Sealing the wood will help a little, but it is still a concern.
YoungHouseLove says
Great question! I remember reading about arsenic in wood a while back here which seemed to suggest that planting edible food in wooden raised beds with arsenic could pose an issue (along with burning old wood), but staining/sealing an old deck should “seal it in.” So as long as you’re not eating food off of your deck, allowing children to ingest the wood itself (this would be an issue if your deck was really splintered, sort of like peeling lead paint), or growing food in the dirt directly nearby you should be ok I think? I’ve also heard that sanding/power washing it can be dangerous since it opens it up/makes it more airborne, but staining/sealing helps keep it contained (like how you’re advised to paint over lead paint to seal it in). We’re not sure that our deck has arsenic, but since it was only banned from playsets in 2004, we assume all older wood structures have it – so sealing them and only using new arsenic free wood for raised garden beds or children’s playsets is probably the way to go.
xo
s
Ash says
I am a loyal fan of your blog since I discovered it 2 years ago and I work for Behr! Deckover is a new product but the great thing about Behr is that if any of our products aren’t satisfactory you can contact our customer service department to find a solution – just keep your proof of purchase to make the process as easy as possible. Good luck with the deck!
Oona says
It looks great! It’s amazing what a few hours of hard labor can do. I love that you guys continue to encourage people to try need projects by showing them how simple it can be. Hard work, but simple. :)
Kate says
IF you were to strip the railings, how would you guys tackle that? Just bought a house were they flipped the boards on the deck, but the railings desperately need to stripped and stained.
YoungHouseLove says
I think we’d use a small foam roller to coat them and let it sit and then use a short handled wire brush or scrubbing pad thing to scrape them down on all sides. Then be sure to rinse, rinse, rinse.
xo
s
Megan @ Rappsody in Rooms says
Looks great! Can’t wait to see it with stain! It’s also good to know your thoughts on the other decking possibilities. We have a rough wood on our deck that we are thinking is past stain saving.
K. Moore says
Hi all! We just finished doing the same thing to our 1200 sq ft deck! (also known as “How I spent my Summer vacation!!”) We highly recommend Deckscapes Deck Stain by Sherwin Williams! It’s an oil based formula but the water beads up on it like it is a waterproofing finish without the shiny overcoat that always peels off! We used cedar toner # 6403-59428 and it looks ahhhmaaaazing! They were having a 40% off sale when we bought it so that helped! Still expensive but so worth it! We also recommend that you buy 5 gallons for the first run…..but use 5 one gallons for the second coat. That way if you have unopened leftovers you can return them to the store!! They won’t be any good in 3 years when you have to recoat it anyway!
Enjoy! <3
YoungHouseLove says
That sounds great!
xo
s
Nicole says
Just wanted to agree and say we had a great experience with DeckScapes. We went with the Spice Chest color in a semi transparent. Our deck was in rough shape, and after power washing, deck wash, and sanding down rough spots, we put the DeckScapes on. It looks great, and the water beads up like on a windshield treated with Rain-X. Great work guys!
YoungHouseLove says
Sounds really cool!
xo
s
Theresa says
This looks awesome, I can’t believe the difference! New decks are outrageously expensive, and with a little hard work, your deck basically looks new again! I can’t wait to see how it looks once you stain it.
Rebecca says
Have you considered a solid wood stain? I have a back deck that was in terrible shape when I moved in and the solid stain was the way to go.
Which reminds me, I have been meaning to send you in pictures of my backyard makeover. I don’t see you post many of those from folks and its a good one. Lots of new vegetation, hardscaping and such . Time to get it done I guess!
YoungHouseLove says
We definitely believe in considering all types of stain and trying to balance durability with the look/maintenance we want. As for your backyard makeover, we’d love to see it!!
xo
s
Ginny @ Goofy Monkeys says
Looks great!
Mary | Lemon Grove Blog says
That is going to look amazing stained! What an awesome outdoor space!
Whitney says
So we had some workers recently use behr’s deck over paint on our deck to cover up some spots where they got white paint spray coming down from repainting a window box on our house. I wish I had been insistent about them stripping it down or sanding off the white paint instead of using the deckover. It looks nice and smooth buts its so opaque and you can’t see any of the beautiful wood grain! I’ll probably just finish the rest of my deck with the deckover after I clean it, but in a few years, I think I’ll strip it down and go with a semi-transparent stain so it actually looks like real wood again. So the deckover looks nice if you don’t mind an opaque look, but I guess it depends on your personal preference.
Frannie says
Has anyone (readers) used any of the deck paints yet? We are thinking of using one too- and we JUST cleaned our deck. Wondering how they hold up. Our deck is old and not pretty but structurally sound. With a toddler, we like that the paints cover splinters, etc. Anyone?
YoungHouseLove says
Anyone have tips for Frannie?
xo
s
Kate C says
We’ve used the Deck Over. Our wood was in bad shape and I wouldn’t let my toddle crawl/walk out there. Since using it, we live on the deck again.
CALI says
THAT LOOKS AMAZING!!!
Ellie says
I would be so nervous about making it match, but I’m excited to see the finished product because I am sure you guys will nail it!
Julianne says
Thanks for sharing your (and others’) advice to avoid power washing. I would have never thought about that and just washed away in the spring, attempting to spruce up the area when we put it on the market. Saved my skin!
The deck looks great, John! The amount of work you did will be nothing but a fond memory, once it’s all stained and gussied up. ;O). Great job!
Vivian says
Wow, the difference is amazing! We are in the process of using Restore on our small deck … hopefully it will last until we’re ready to tear the deck off and pour a stamped concrete patio.
I was concerned about the roughness too, but we hear that you can either smooth it out with a paint brush/roller or wait and let nature do it for us … I’m voting nature!
YoungHouseLove says
Haha, go nature!
xo
s
Sarah says
Oh man, too many “that’s what she said” moments in this post. By the way, I was watching Sunday’s episode of Dexter yesterday and your door color looks just like his! Well, his and the rest of his apartment building.
YoungHouseLove says
How did I never notice that?! Love me some Dexter.
xo
s
Diana Buchanan says
Oh man! It looks awesome! All of that hard work was totally worth it, in my opinion.
So, what are you guys planning on doing with the deck? Will you do a table and chairs like your last deck project, or do you think that would get swallowed up by your GIANT deck? It’s thrilling watching all of the changes happen! (yes, deck stripping is thrilling. Why wouldn’t it be??)
YoungHouseLove says
We’re hoping to work with what we have for now and I’m sure as we go things will evolve. Perhaps we’ll find an outdoor sofa on craigslist and make two living areas on the deck since it’s so large?
xo
s
Sarah M says
A friend of mine posted this link on facebook the other day and thought y’all might want to check it out for deck furniture!
http://goodshomedesign.com/recycle-pallets-turn-unique-pieces-furniture/
YoungHouseLove says
Thanks Sarah! Off to check it out!
xo
s
Gwen, The Makerista says
That does not look fun, but the results are beautiful! Nice work!
em says
I was wondering if you could give us a preview of what product you plan to use to stain the deck. We are about to embark on that process and I would love to piggy back off your research and wisdom!
YoungHouseLove says
We’ll definitely cover all of that in our next post!
xo
s
Shannon [Our Home Notebook] says
It looks so much better now! Thanks for sharing what worked. Can’t wait to see it all stained.
Barbara says
John – before you stain, weather the new wood. It’s easy!
http://www.youtube.com/watch?v=qugVIOYi1xc
Baking soda and water. Period.
Shaunna says
Both my neighbour and I used these same products two years to re-stain our decks. The stripping process worked great, but the semi-transparent stain did not hold up. The vertical surfaces look great, but it’s flaking badly on the flat surfaces (and we followed the manufacturer instructions to a T!). I hope yours turns out better if you are going with the Behr stain!
YoungHouseLove says
Such a bummer! We’re definitely all about researching a bunch of options to see which one grabs us most!
xo
s
Laura & the Shell says
Wow, what a difference! The repaired spot is hardly noticeable in the ‘after’ pictures. I bet it’ll all look great once you stain it. Can’t wait to see!!
Ryan says
This is one of those posts that, while I’m reading it, I’m all like, “here it comes, Petersiks: prepare for the onslaught of opinions!” :)
“Don’t use chemicals!”
“You should power wash!”
“John should have done this with his shirt off!”
(Okay, I added that last one…sue me.) :)
I think it looks great and we used a similar method on a deck last summer with great results. No plants or animals were harmed. However, we power washed a fence in March and the wood looks like it took a beating. I would definitely go with the stripper versus power washing in the future.
The deck looks awesome!
Britt says
If you wanted to wash/stain/seal a deck is late summer / early fall the best time of year to do it?
YoungHouseLove says
As long as you follow the recs on the can you can do it whenever those “optimal conditions” are met. So for us it means we need a not-too-rainy partially-shaded and not-too-hot day or two to get ‘er done! Haha!
xo
s
Blaze says
Your giant To Do List mentioned removing a chuck of railing and adding wide steps down off the deck. Will you be adding them now so they can be stained along with the rest?
YoungHouseLove says
We think that’ll be a phase 2 thing, since we think while Clara’s young (and perhaps if we grow our family to include another little one down the line) it would be harder to gate off such wide stairs. So perhaps later after we add french doors outside from the kitchen we’ll also widen the stairs during that step.
xo
s
Camilla @ Something Is Done says
Oh wow, you guys aren’t afraid of a bit of hard work! Good job!
KIm says
Just a few months ago we refinished our deck – again. Half of the deck is 30 years old and the other half was added about 12-15 years ago before we moved in. Obviously, they did not match and the older section is much rougher than the newer. Pressure washing was the ONLY way to get all the mold and algae off the wood.
Previously, we’ve sealed it twice and each time it would need it again in a year or two. (That gets expensive.) This time we were faced with retreating again or replacing. We decided to use the Behr Deckover in an effort to postpone replacing at least half of the deck. (We decided against the Rustoleum product because of the texture.) Although our finished product is not exactly as advertised (you can still see the rough texture in the old wood), it is definately an improvement.
YoungHouseLove says
Sounds awesome!
xo
s
Emily says
Bizarrely, we seem to be tracking exactly where you are with our new house. It’s old and was never updated much (the seafoam green shag carpet is TELLTALE). We have a huge deck and we are considering the DeckOver – I hadn’t considered stripping the old reddish stain (or what’s left of it) instead…
Can I ask, though, how bad were your boards? Ours are so dried out that painting them with something thick to fill in the deep cracks and gouges seems the only way to go. We live in fear of splinters – the deck is super rough. I’m guessing yours was in much better shape? Were you dealing with any really rough stuff and if you are, do you expect the stain/sealing process will smooth some of it out?
SUPER WORDY COMMENT, sorry. Yours looks great!
YoungHouseLove says
Oh man, if it’s rough I think DeckOver is perfect! Ours is really smooth, just super worn down and faded. Hope it helps!
xo
s
Kate C says
Yes, Deck Over will be perfect for you! We used it this summer and love the results. It really does smooth out those splinters and rough spots. We went from not allowing our crawling baby on the deck to practically living out there this summer, with no fear of letting her play.
Kristal says
Looks great! Someone else may have already asked this but I’m too lazy to read through all the comments…lol. What are you planning to do with all the railings? Will you stain those too? Or do you plan to paint them?
YoungHouseLove says
That’s in the post for ya – towards the bottom :)
xo
s
Holly says
Have you thought about painting the railings? Maybe white? Would look nice against the stained decking, almost like baseboard to hardwood floors….
YoungHouseLove says
We did think about that but worried they’d look dirty/spider-webby since we’re in such a wooded area. Would be great for someone with a large open yard that gets lots of sun and doesn’t have leaves and plants dropping on it I think!
xo
s
Tiffany says
Looks great! We found the same product to strip off old stain and it worked wonders! Can’t wait to see the final product! :)
Lauren says
I didn’t read through all of the comments, so I apologize if it’s already been mentioned, but I remember seeing a show on HGTV a few years ago where they “aged” a patch of new wood to match the old wood on an existing fence. I think they used some kind of liquid mixed with steel wool? Anyway, it did the trick and you couldn’t even tell they patched the wood. You may want to look into it!
YoungHouseLove says
Oh yes, I think that’s vinegar! Such a cool trick!
xo
s
Krystle @ Color Transformed Family says
I wish we could do this to our deck but unfortunately it is past repair. It’s good to know about the dangers of pressure washing because that is what we have done in the past. I guess we were just making our bad situation even worse.
Kate C says
You were right not to pressure wash. I, unfortunately, did not know that. Last May, while 9 months pregnant, I pressure washed our old, flaking, rough deck. It was the wrong decision and I tore up the wood even more. Then the baby came and the deck didn’t get touched all winter. It was in such bad shape this year that we couldn’t let the baby crawl around out there.
We went the route of Behr Deck Over, and love it. It has seriously saved our deck and made it a wonderful family place again. The only issue we have is that it is extremely time consuming to take a brush and paint between each board. The roller only gets the top, so the light edges between boards show through. When we’re done with that, though, our deck will have a new life for many years to come.
YoungHouseLove says
Oh no! I’m so sorry Kate!
xo
s
Kate C says
No worries! Honestly, I’ll take the extra brush work in exchange for not having to replace the deck. I’m perfectly happy with the results we’ve gotten out of the Deck Over :-)