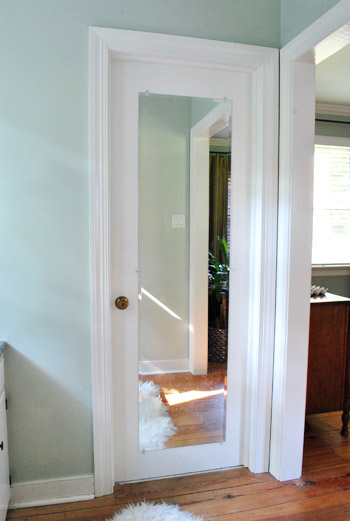
Let’s talk about a mini makeover that involved a whole lot of hiccups. It was alllllll the way back in January that we decided that this mirror on our master bathroom door could stay (unlike the one on our guest bathroom door, which got the heave-ho since the person on the toilet could see THEIR ENTIRE BODY in it). But we figured the bedroom mirror could stay (since it doesn’t force you to stare at your reflection while on the porcelain throne) on the condition that we’d create a thicker frame around it to give it more presence so it looked less like one of those big flimsy $5 mirrors that you bring to college. Not that there’s anything wrong with those (we were both very happy to cart them off to school), but we like to think we’ve since graduated from that look. But yeah, even though this plan was hatched in January, it has taken us until September to actually do it. Oops.

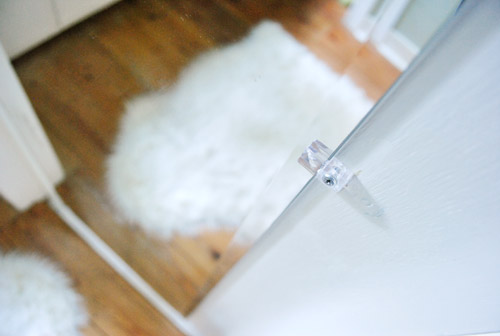
We’re glad we kept it, since it has been very functional (double-checking outfits, fixing hair, flexing – you know, the usual) but the basic plastic clips weren’t much to look at.
Having seen lots of other bloggers upgrade their mirrors with trim (like Layla & Kevin, for example) we were confident that it’d be a pretty easy task (FYI, this is what I like to call “foreshadowing”).
First I took the door of its hinges so I could work with it laying flat. The basic plan was: remove mirror, reattached with glue (so plastic clips wouldn’t be in the way of trim), cut molding with miter saw, and glue to door around mirror. Simple, right?
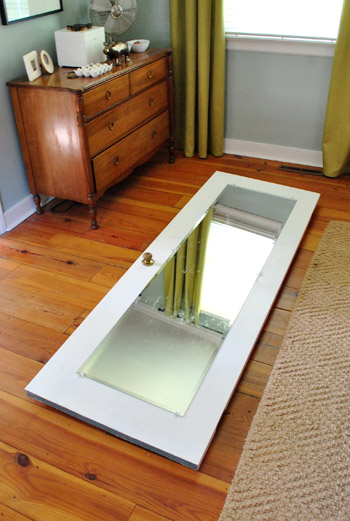
Before removing the mirror I traced the outline with a red pen so we would be sure to glue it back on in the right spot. I didn’t care about marking the door since this part would eventually be covered by trim.

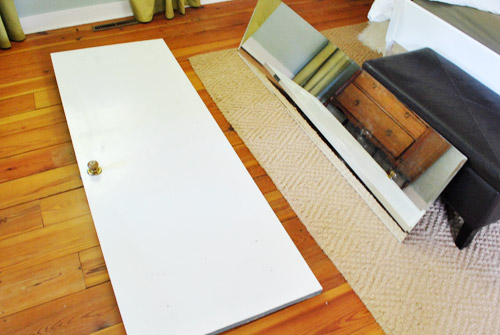
With the clips unscrewed and removed, the mirror came off no problem (though part of me secretly hoped it had already been glued in place).
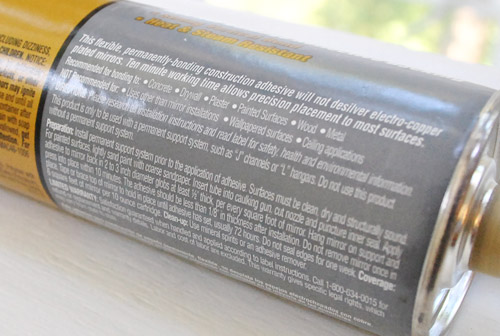
We picked up this Liquid Nails Mirror Adhesive at Lowe’s for about $5. It’s apparently designed not to damage the reflective coating on the back of the mirror (which is why we used it over other adhesives, which could cause visible-through-the-mirror marks over time). Oh but before we used it we sanded the back of the door where the mirror would be glued (since it recommended doing that to rough things up before gluing any painted surface).

Since it was kinda stinky, we moved our mirror-gluing operation into the sunroom where I happily got to squirting blobs of adhesive as I remembered the instructions suggested (hint: more foreshadowing).
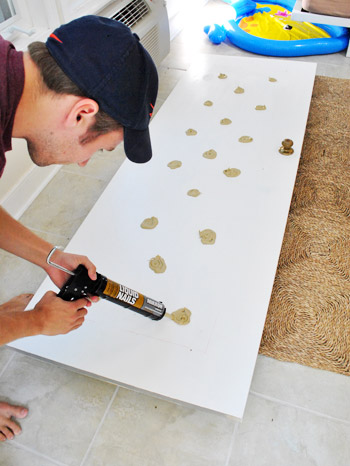
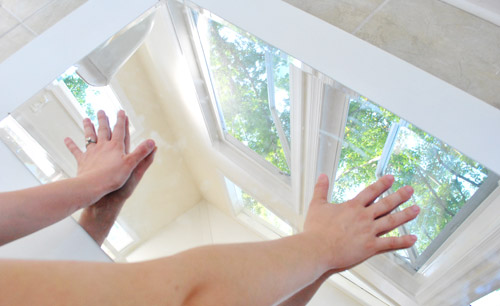
With Sherry’s help, we put the mirror in place, pressed it down and left it alone to dry for 72 hours.
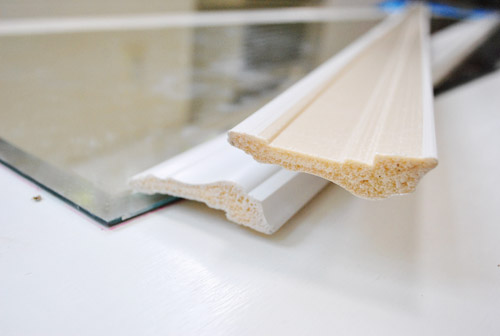
At Lowe’s we also picked up some trim that looked made for this job (though I think it’s actually meant for the top of beadboard). The groove in it was perfect for laying flat over the edge of the mirror.

Well, long story short, after measuring and cutting all of the pieces (and just moments before gluing it down) we stepped back and realized it really wasn’t much of an upgrade. At all. It just looked even more like one of those cheap $5 college mirrors. Oh, accidental regression – I love how you sneak up on us.
So with about $10 in trim down the drain, I went back to Lowe’s and found some heftier stuff that still sported enough of a lip to sit nicely over the edge of the mirror. Instead of about an inch and a quarter of width, this trim was nearly three inches wide. We landed on that size because anything thicker would potentially run into the doorknob, but it was almost twice as thick as the too-thin trim that we tried first.
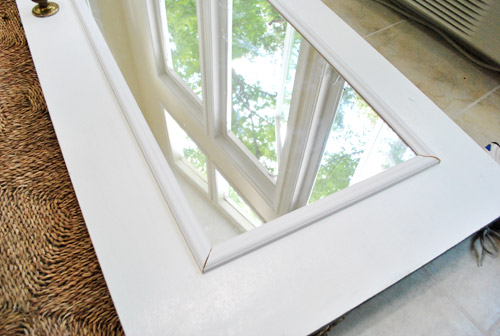
We obviously wanted the mitered corners to match up with the beveled corner of the mirror. So to help me find my cut lines, I placed a piece of painter’s tape along the line of the bevel to effectively “extend” my corner. Then I marked where I wanted to make my 45-degree cuts using my miter saw.
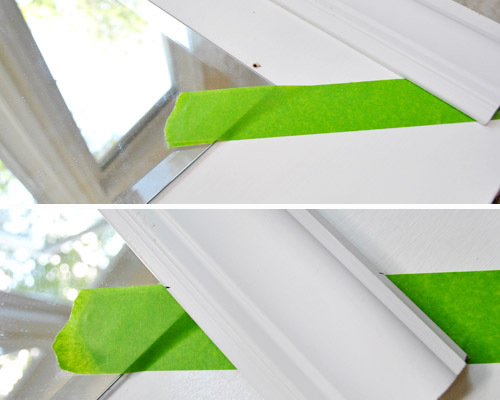
With all of my cuts made, I double-checked to make sure everything lined up nicely…
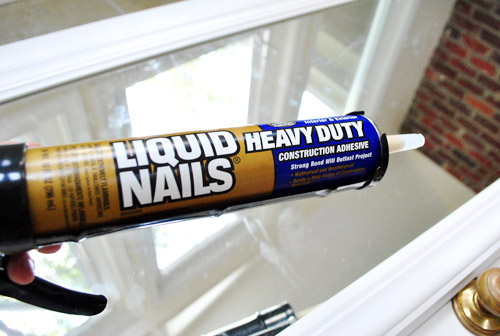
…and then broke out some heavy duty Liquid Nails to glue all of the trim in place. Normally I prefer nails or screws over glue, but I went out of my comfort zone on this one since screwing or nailing next to a mirror made me nervous and everything on the Liquid Nails tube insinuated that it could handle the job.
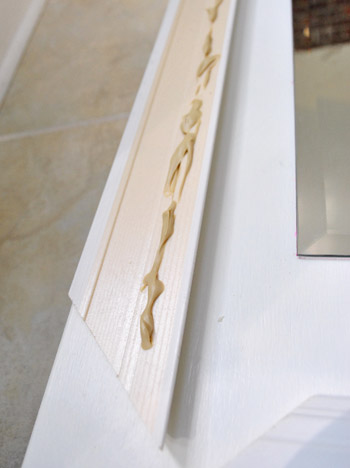
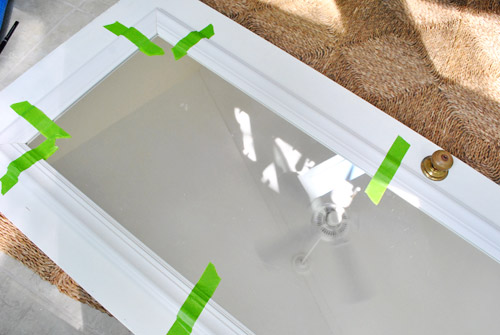
I squirted out a thin line of adhesive on each piece of trim (on the side that would sit against the door, not the mirror) and carefully laid all four pieces in place.
Just to be sure nothing shifted during drying, I taped each piece down. Can’t be too careful, right?
Well apparently I could’ve been more careful. After letting the trim dry for a day (the mirror had set for 72 hours at this point), I eagerly reattached the door (keep in mind that we’d been living bathroom door-less for about four days thanks to the false start with the too-thin trim) and took a celebratory shower.
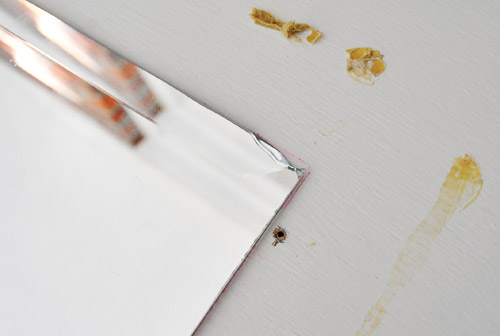
Maybe it was the steam from the shower? Maybe it was re-hanging the mirror too soon before things fully cured? Whatever it was, moments after I finished get dressed after my shower – the mirror slid off the door, busting off the bottom piece of trim in the process. The other three pieces stayed in place, which thankfully kept the mirror from toppling over onto the floor. So the only damage to the mirror was a chipped corner that would be covered by trim anyway. But Sherry and I did nearly hyperventilate when we heard a crash from the bedroom and ran in to see what happened.
I didn’t take many pics of the “aftermath” because I was kinda grumpy about the whole thing. Not only did I have to redo everything (including having to scrape off all of the old glue), but I wasn’t quite sure where I had gone wrong.
Well, re-reading the directions on the back of the mirror adhesive offered some clues. Like “Do not use this product without a permanent support system. ” Oops. Plus some parts about letting the glue set for a full week and applying it to the mirror back, not the door (though I doubt that second tip made much of a difference since it gets on both surfaces when you mash them together) might have come into play too.
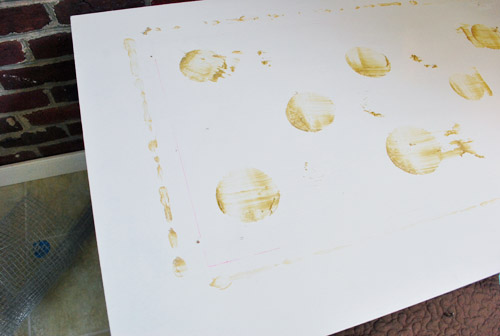
So in doing this a second time, I was determined to follow the directions. This time the adhesive was applied to the mirror… generously but in less large globs (Sherry called the first ones “cookie sized” but I’d describe these more as golf-ball-sized (and not as thick, so it could cure more easily). In addition to the blobs described in the directions, I criss-crossed some lines too, just to be safe a crazed man who couldn’t handle another mirror failure.

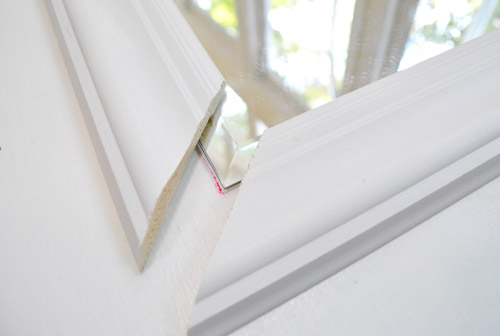
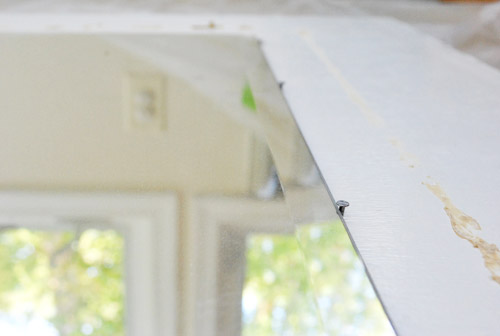
As for a permanent support solution, I wasn’t about to re-install the clips since the point of this whole glue/framing method was to avoid them (and the trim wouldn’t look great with big lumpy clips under it). So I improvised and carefully added some small finishing nails around the edges of the mirror. They went into the door nice and solidly, and the head provides a nice little rest/stop for the mirror. They might not work as a support solution all on their own (if there weren’t trim and glue also coming into play) but I was banking on them being enough to keep it from sliding as easily as it did after just two days of setting without any other support going on.
So with the mirror re-glued and nailed in place, Sherry and I started to countdown SEVEN FULL DAYS of letting the glue set. Even though it meant a full week of a door-less master bathroom, it felt like a necessary sacrifice if I didn’t want to do this a third time. And that’s how Captain Careful rolls.
On the seventh night (I feel like I’m telling a bible story all of the sudden) I actually stood the door up in the sunroom to do an overnight test (before putting the trim on again). To be extra safe, we placed the door on a big pillow so the mirror would have a soft landing if it decided to detach itself and slide down towards the floor again. Luckily, it didn’t. It passed the seventh night test! So the next morning I reglued all of the trim in place, let that dry flat on the floor for about five nights (more than three recommended in the instructions because we were out of town) and FINALLY put the door back on its hinges… just in time for Clara to resume her favorite activity: gazing at herself and shouting things like “sah pretteh!” and “iss baby!”
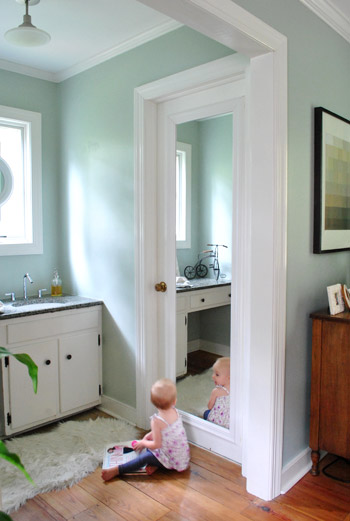
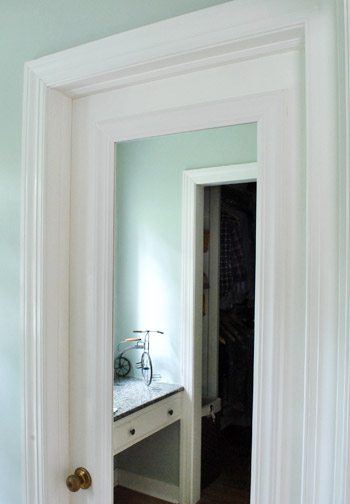
After all of the trouble that went into the project, I’ll admit that it doesn’t feel like the biggest and most life-changing payoff, but it’s definitely an upgrade. The white trim on white door doesn’t really “pop” in photos, but in person it’s a nice layered architectural detail that ties into the big quatrefoil mirror that we hung in front of the nearby over-the-sink window. And the goal of this project was just to finish the raw mirror edges more nicely, not draw lots of attention to it or anything (so painting it a color would just make it compete with other things like the mirror over the sink which, no offense to our newly trimmed fella, is much more interesting). So we’re kinda glad this update is of the subtle variety.
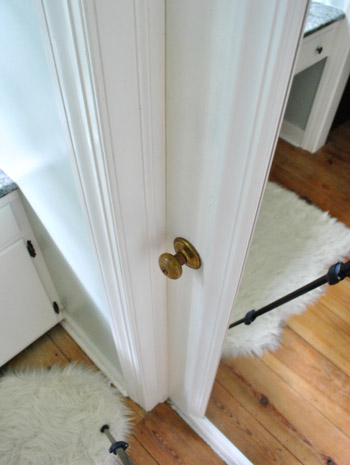
More than anything, I’m just glad to have the project successfully completed, to have some privacy returned to our bathroom and to no longer have to stare at those clear plastic mirror clips. Yep, now we can stare at more important things… like the doorknob that needs updating (probably with a can of ORB since my wife is so smitten).
As for the total cost, the second batch of thicker trim was $12, so the entire cost of the project with mirror adhesive should be around $17 if you don’t mess up and buy ten bucks worth of too-thin trim (which we hope to repurpose someday in some capacity…). Update: we just learned that Lowe’s & Home Depot will take trim back (even if it has been cut, as long as it’s over 12″). So here’s hoping we can recoup the $10 that we spent on that too-thin trim.
Have you guys make any subtle changes lately? Or encountered an “easy” project that had more hiccups than you ever thought possible? I’m happy to report that as of this posting, the door has survived five nights without falling down (even with a handful of steamy showers). Success! At least for now. We’ll keep you posted if things take a turn for the “ahhhh, I just heard a loud crash in the bedroom.”

Kristen @ Popcorn on the Stove says
I think the mirror on the door looks great and makes that vanity area seem much bigger! I’m surprised you guys didn’t ORB the doorknob while you had the door off the hinges! Are you going to swap it out for something fancier?
YoungHouseLove says
Nah, I plan to ORB every interior doorknob someday. Just have to work up to taking them all off…
xo,
s
Kristin @ everythingZamora says
So glad you went with the thicker molding. It looks great. See, now the rest of us have learned from your er….hiccup. Thanks for sharing.
Julie B. says
“On the seventh night (I feel like I’m telling a bible story all of the sudden)…”
Maybe I’m a huge dork but I cannot.stop.laughing at this sentence! Thank you for making my day begin with laughter!!! This is hilarious.
Kim says
Do you think this idea would work on a paneled door? We just put in new doors with 2 panels. But we are missing our door mirror! There’s just not a better place for it in the bedroom.
YoungHouseLove says
Oh yeah I think so! The key is to reinforce the mirror with nails or clips and then let everything lay flat and set for at least seven days. Direction following is key. Haha.
xo,
s
rachael says
Looks really good!! Much better than before! Love any posts that have Clara in it :)
Jess @ Little House. Big Heart. says
Now that’s what I call stick-to-it-ness. It does look great though!
So the budget breakdown question… would it have been more cost (and time) effective to have just bought a new, framed mirror?
YoungHouseLove says
I don’t think so. The thick framed mirrors that we’ve seen are mostly in the 50-100 range (at places like Ikea). So other than the $5 college mirrors with the tiny frame, you might have to spend a good deal more for a chunky frame. Hope it helps!
xo,
s
Anna says
This is completely unrelated to this post, but I’m getting ready to paint a room. I know you have a favorite brush for cutting in, but do you have a favorite roller/any suggestions? Thanks!
YoungHouseLove says
Yes! I love this one: https://www.younghouselove.com/how-to-paint-trim-like-a-pro/
xo,
s
Lauren says
Can you still see the beveled edges or did the frame cover that?
YoungHouseLove says
We lined the frame up with the bevel, so they’re flush with the frame (just because in order to use thick trim and not hit the doorknob that placement made the most sense.
xo,
s
Katie @ explanationrequired says
Such a timely post. We have a mirror with clips in our upstairs landing and I’ve been trying to decide if it needs to come down or just be gussied up. We also have a little girl (exactly two years to the day older than Clara actually) who likes to look at herself in it, so I imagine it’s here to stay.
Anya says
Looks great.. glad it all worked out in the end. One reason why I don’t have a full length mirror in my bedroom is that I’m scared to put one up because I think it will fall down!
As far as the doorknob needing replacing, do you just mean ORBing it? :)
Amanda Wells says
Love the mirror! You guys may appreciate our weekend of home improvement disaster – http://www.amandadovewells.com/?p=1073
bridget b. says
i like it. at first i wondered about the white on white, but it does tie into the mirror really nicely.
did you place the finishing nails all the way around or just at the bottom?
YoungHouseLove says
All the way around, just to be careful. But be gentle when you do it so you don’t hit the mirror for sure!
xo,
s
Reenie says
Wow….you were lucky the whole thing didn’t break. :o Spray paint that doorknob.
Cute pic of Clara :)
Amanda @ Our Humble A{Bowe}d says
Ahh, I hate when a seemingly simple project turns into an adventure. I’m glad to see it worked for you, even if it did take longer than anticipated. The chunky trim really does add character.
About your door knob, I just tried using Blue Magic and steel wool to update the brass knobs we have (I’ve done it before on other brass items with success: http://ourhumbleabowed.wordpress.com/2010/09/09/how-to-update-brass/ ) Sadly, no dice. Just a slightly less obnoxious brass knob. I really thought it would be a better option than replacing all 10 door knobs on our main level. Are you guys planning to ORB the existing one? I can’t convince my hubs that spray paint will be durable…
YoungHouseLove says
Yeah, we’ll definitely give ORB a shot first for sure. So far our sprayed doorknobs exterior doorknobs are doing great!
xo,
s
Stephanie Phillips says
Sometimes it’s the little things! Even if they turn into quite a process… ;)
Meaghan says
Love the trimmed look. We’re thinking about adding trim to the hall closet doors to spruce them up a bit.
I can totally relate to your “uh oh” moment. Our bathroom mirror fell not once, but twice in the past month! Both times in the middle of the night. Talk about a rude awakening.
We ended up going the more is more route and used super heavy duty hooks and picture hangers to try to keep it on the wall. I think Captain Careful would approve :)
PS: Here are links to our “uh oh” moments :)
http://diybymrc.blogspot.com/2011/08/mirror-mirror-on-floor.html
http://diybymrc.blogspot.com/2011/09/great-mirror-debacle-continues.html
YoungHouseLove says
Oh man, we can totally relate! Haha, thanks for commiserating.
xo,
s
John@OurHomefromScratch says
That came out awesome. I guess wood screws on the bottom trim piece might have worked as well, but it would be more visible. Screws can be difficult to hide.
Cristina says
Good job, I love it! :-)
Veronika says
That door knob needs some ORB love! haha!
Rebecca @ the lil house that could says
My husband and I painted our powder room on Monday night. When he removed the mirror just to paint around it, he assumed it was glued AND clipped but apparently it wasn’t. Mirror went down, took out the caulk behind the sink and gave us 7 years of bad luck. Now I need to re-caulk and buy a new mirror, all because of a small paint project! I feel your 7 day pain (thrown in some 7 year pain too…)
YoungHouseLove says
Oh man, so sorry to hear that! We can totally relate to mirror surprises!
xo,
s
Katie @ The Inspired Life says
Is Clara reading Naturally Thin!?
YoungHouseLove says
Haha, that has been on my nightstand for five months. Still have yet to crack it open, but Clara “reads” it all the time. Haha.
xo,
s
Maureen @ This (Kinda) Old House says
This is something that would happen to me. It really came out great though! I made a minor change this weekend by painting the trim around our front and side door. Makes a huge difference!
Ruth says
Hey Guys!
You know what would look great on that door knob?
…ORB!
You could do the same as here: https://www.younghouselove.com/how-you-like-them-handles/
xo
YoungHouseLove says
But of course! That’s the plan. Just have to work up the energy to take all the knobs down at once so I can do them all at one time.
xo,
s
Pamela says
Hi John & Sherry,
How about a glass doorknob with dark hardware from The Schlob? (Hobby Lobby). :) I saw this glass doorknob recently in person there & it’s sooo pretty. Maybe just for your master bathroom area y’all could go for a glass doorknob with dark hardware vs. painting your current knob (since the glass is colorless, it wouldn’t compete with other items, but play off your nice upgraded mirror that it’s next to & the hardware would also complement your other dark hardware).
Hobby Lobby’s next 50% off sale in that dept. could score ‘ya a cool & unique doorknob with interesting hardware. I have an unusual fascination with knobs (hardware, too). Is that wrong?? Don’t answer that. Ha.
http://shop.hobbylobby.com/search/default.aspx?CFID=1692053&CFTOKEN=a641bd7d8f4c12bc-444DE002-C6E8-8533-DA33C6832EBBBBCC&searchTerm=door+knob&F_All=Y
YoungHouseLove says
Ooh pretty. That could be fun too! Love that you called it The Schlob. Hilar.
xo,
s
Sayward says
The Schlob! Dying!!!
heather says
In the words of Uncle Jesse, HAVE MERCY. I had *no idea* you could schop the Schlob online?! We don’t have them up there. Me and my Full House references are schpening our lunch hour schopping the Schlob.
YoungHouseLove says
Haha, have fun!
xo,
s
Charmaine says
it was really worth all the trouble (like waiting over a week, and showering with no door -would be a strange feeling im sure) because the trim really works wonders to that mirror. great job
Jenn says
LOL. I love that Clara is reading Bethenny’s book. She already has an appreciation for a good sense of humor :) BTW, I highly recommend the baked good recipes in there- they are delicious.
Veronika says
Just a quick question. Do you guys have any weatherization how to posts? I keep researching lately and would love some tips!
YoungHouseLove says
So sorry, we don’t have anything like that yet. Anyone else have tips or links to share?
xo,
s
Rachel says
I’m glad it worked the second time around! There’s nothing more frustrating than a “simple” project gone wrong!
Heather Andrews says
You guys always improve on things that some people would never think twice about. That’s a good thing! I probably wouldn’t think of doing something like that, but it’s amazing what a difference it makes. You guys are so helpful for pointing little details out. Thank you!
No subtle updates here, just sitting and patiently waiting for baby to arrive. However, sometime before baby becomes mobile, I have to tackle a giant mirror project. There used to be a GIANT mirror above our fire place (seriously, it’s like 6 feet tall). It had been there since the 50’s (so says the stamp on the back). We removed it to make way for a permanent projector screen (because that’s how we roll when it comes to tv). I refused to let my husband throw it out, because pieces of glass that huge are crazy expensive! SO it’s sat upright in the hallway as a giant “outfit testing” mirror for 3 years. It’s kind of like the one in your bedroom (I think), except with no frame. The plan is to secure it to a piece of wood, build a frame around it, and secure it somewhere. It’s going to have to lean probably, and we’re going to have to use some kind of anchor system for it, because it already weighs a bajillion lbs without a wooden frame. It will be a doozy.
I think, secretly, my husband still wants to throw it away.
Katie @ The Inspired Life says
LOVE Bethenny!!! Ive read her books- yummy recipes.. and guilt free! Maybe you have a future hilarious chef on your hands?
YoungHouseLove says
Haha, it’s true!
xo,
s
ErinY says
I’m pretty sure you guys should create your own Halloween costumes this year and go as $herdog and Captain Careful. Just a thought! lol
YoungHouseLove says
Haha, you have no idea how much I love that idea.
xo,
s
clampers says
Nice update! I’m just wondering…are the doors original to the house and painted? Or are they new doors? If they are new, are they solid core and if so, where did you find them?
(Sorry for the weirdo-specific questions; I am trying to find plain solid-core doors with no panels for my 1968 rambler. Current doors are original, hollow-core and pretty beat-up.)
Thanks in advance!
YoungHouseLove says
They’re original to the house and hollow core, but pretty dense and thick hollow core ones, if that makes sense (the mirror was held up with clips in the hollow core door for what we can guess was at least a few decades, so it’s pretty good about holding nails and screws for the most part).
xo,
s
Mary says
haha for some reason I can’t get it out of my head that a 1968 Rambler is some kind of car…
YoungHouseLove says
Haha, it totally sounds like that.
xo,
s
clampers says
Thank you!
dana828 says
Nothing like learning as you go, huh? ;)
On a totally unrelated note, I am curious as to how the horse prints are holding up. I seem to recall you moved them out of the bedroom, but are they still holding up OK? I’m thinking of attempting to mount a huge Jackson Pollock poster I got on a great sale on art.com several months ago. I bought it with the intention of getting it framed…but I can’t bring myself to shell out $175 to frame a $25 print (and that’s with the 50% + 25% off sale at Michael’s)! So…would you recommend that mounting method you used? It will go in my dining room, so wouldn’t be subjected to any steam/moisture issues…
YoungHouseLove says
Still holding up perfectly! Thank goodness! One pony is in the playroom and the other one is still in the bedroom, both looking happy and horsey as ever. Haha.
xo,
s
Kristi W. says
Oooh did you guys get a new camera lens? Starting to notice some wider aperture shots, and I’m digging it. Nice job on the mirror too! I think it looks great. :
YoungHouseLove says
We did get a new lens, mostly for Clara photos (it’s in our “we’re digging” section in the sidebar) but also use our original camera lens a bit more deliberately these days (so we’re learning how to play with aperture a bit more). So flattered that you noticed!
xo,
s
Kelly @ Corner of Main says
The mirror looks great! We just had a mirror catastrophe in our bathroom update, but ours ended in 7 years of bad luck =( We are still trying to fix our broken mirror issue that resulted in removing a medicine cabinet, patching a wall, painting, and now replacing corroded plumbing…all because we wanted to tighten a hinge on the medicine cabinet! Ugh!
YoungHouseLove says
Oh no! I hate when things snowball like that! Good luck with everything.
xo,
s
Stephanie says
What fun is life (or blog) without a DIY fail every now and then?! At least it turned out great!
Allyn says
Love the use of “foreshadowing”. Makes me feel like I’m back in school. Vocab tests…goodtimes
Love the difference the trim makes.
Oh, and you’ve successfully brainwashed my hubs. His impulse purchase at Home Depot? ORB
YoungHouseLove says
Haha, it’s contagious! I love it.
xo,
s
Allyn says
It really is. He’s off today, so I’m wondering if I’ll be coming home to any miraculously new hardware. Or a tree branch that he just couldn’t resist trying it out on.
These things happen.
Good thing we don’t have a cat.
YoungHouseLove says
Haha, now I’m dying to know what he uses it for. Keep me posted!
xo,
s
Amanda says
We had the same problem, but it didn’t end so happily. After gluing carefully and taping to secure, we trotted back to the garage to start cutting the frame. A few minutes later we heard what sounded like a big “Wooosh!” sound. “What was that?” we wondered innocently. After cutting, we hauled the trim back down to the basement to find the mirror in smithereens. In our defense, it was being glued to a wall, so lying flat wasn’t an option. And it did get us to learn to use our router as we routed out the plain wide trim to have a “permanent hold” lip on it. The funniest part was our son was asleep in the room next door, and didn’t even roll over when it all came crashing down, yet we heard it from one floor away and through an exterior door! So what to they use to glue those massive bathroom mirrors to the wall? The ones with no hardware that are about 1/4″ thick? Curious minds want to know (and want some of that mega glue!)
YoungHouseLove says
I know, right? I had the same thought. Why sell heavy duty mirror glue that in very small letters says that it “needs additional support”???
xo,
s
Theresa Kennedy says
Yeah, you guys need to fix that doorknob STAT! I can’t focus on how great the trim is because the doorknob is a hot mess! :)
(said with love)
Shari @ The Daily Dish says
I think it looks great! Hope it sticks. :)
Rachel Tatem says
Looks great! I always have a hard time with the angles on molding… I get it right when I plan it out but then some how cut it wrong
Alison says
Is Clara “reading” Naturally Thin? Hilarious!!
YoungHouseLove says
Haha, yes. That’s been sitting on my nightstand waiting to be cracked open by someone other than Clara (who loves to play with it).
xo
s
Bob says
John,
You’re killing me bro! Why do you make things so hard. The taped angle for the mitre cut? Are you serious? I gotta get down there for our slumber party and show you easier ways to do things. :)
YoungHouseLove says
Don’t worry Bob, it only took me a second. Rip tape, place tape, mark wood. I think I spent more time responding to this comment about it, actually. Haha.
-John
Bob says
If you say so, Captain.
Heather says
I love the way trim makes a mirror look SO much more finished. Looks great!
(And I’m just getting around to this, but I LOVE the new header!)
Robin @ Our Semi Organic Life says
How many faux sheepskin rugs do you have? I am so jealous!
YoungHouseLove says
Hmm, I think we have three from Ikea and one that I DIYed a while back (from faux fur fabric).
xo,
s
Blythe says
I know that Home Depot will take back trim that is at least 12″ long (even if it’s been cut). Maybe Lowe’s does too? I found this out after framing a bay window —got almost $40 back with the “extra” trim!
YoungHouseLove says
No way! Thanks for the tip!
xo,
s
Emily says
I just heard this week that Lowes will take it back (again if it’s over 12″) ~ from our Lowes contractor, so hopefully that’s a reliable source :)
YoungHouseLove says
Wahoo! Thanks so much for the tip!
xo,
s
Cheryl says
Hahaha the bible story reference made me laugh out loud. Sounds like someone very familiar with bible stories. Which brings me to an off-topic question…I know Katie Bower is a Christian, so was just wondering if you guys are too? If you don’t want to bring up religion on your site, I won’t be offended if you don’t approve this comment ;)
YoungHouseLove says
We’re both Christians, but thanks for understanding that we like to focus on home stuff for the most part (we shy away from politicals too, haha).
xo,
s
Staci @ My Friend Staci says
I had the same question, but was too shy to ask :)
Mary says
Haha I’m reading along lalala, and I come to one of the first photos, of John tracing the mirror in red pen- and immediately thought for half a second that the pen was the biggest needle I had ever seen and thought to myself, “Well that just took a weird turn…” lol
Love the mirror and I’m so glad you guys went back for the bigger trim. I would have made the same mistake, and now I won’t. Thanks as always! xo
YoungHouseLove says
Haha, that would have been quite a weird turn. Too funny.
xo,
s
Kacie says
It looks great. What a pain in the butt for such a little project! You guys impress me!
Kacie
http://www.acollectionofpassions.com/
Cathy says
Funny – I actually framed out the plate glass mirrors in our master bath a few months ago, and came here first when I was trying to figure out how to do it to see if you guys had tackled it yet! I think my project was much easier, though, because the mirrors were already firmly glued on the wall (no clips), so all I had to do was paint/cut/glue the molding (although those things presented enough of a challenge for me!) I think your mirror looks great – I’ll say a prayer to the liquid mirror glue gods that it stays firmly in place for ya!
carolinaheartstrings says
Even the “little” projects like that always make me feel like I have done something big. It looks really nice.