Happy New Year y’all! Who’s making resolutions? We’re mulling ours over today (you know Sherry loves a list…). But let’s get to the subject at hand. Being last minute “elves” for Santa. See, Clara’s play fridge wasn’t the only homemade gift that she opened this year. Because the weekend before Christmas we decided to make her a little latch board of her very own. And now we’ve finally gotten our act together to share the tutorial with you. So oh snap (pun intended), here it is.
We first learned about latch boards when Clara’s cousin Elsa got one a year ago – she’s a year older – and we heard how much she loved it (they basically tap into kids’ innate need to turn, twist and flip just about anything that’s shiny). So it’s pretty much been a waiting game until we jumped aboard the S. S. Latch and hooked Clara up (we wanted to wait until we thought she could master it without getting frustrated and wanting to throw it through a window).
Now that she’s adept at other stacking/twisting games, we decided the time was right to DIY one so we hit up our favorite local place when it comes to handware and hinges. They’re basically a warehouse full of hundreds of old skeleton keys, latches, knobs, and other random things. In other words: the adult version of a candy store for people like us.
We came home with quite an assortment of things and eagerly spread them out to see how everything might fit together. Well, eagerly as soon as Clara was napping.
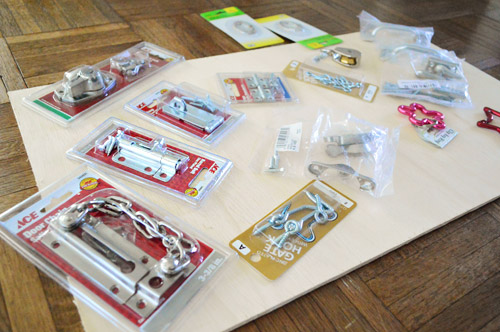
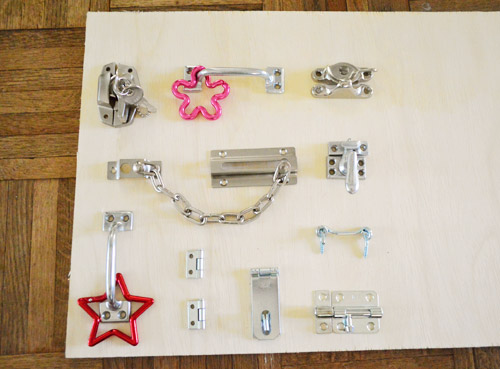
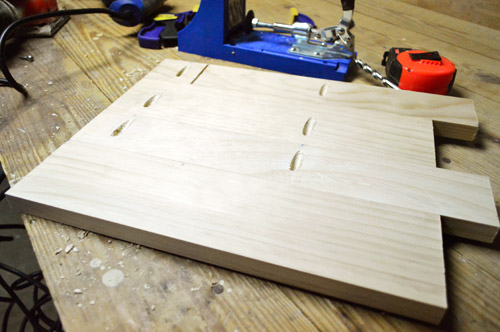
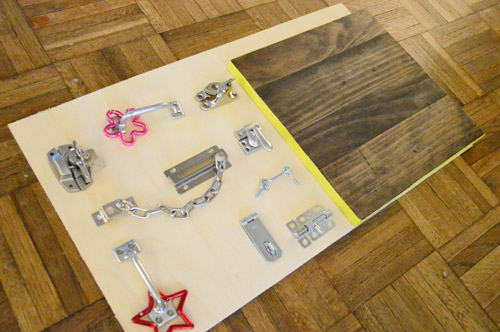
Eventually we landed on this arrangement. We didn’t use everything we bought (we returned some of it) since some of it started to feel redundant. Plus, we wanted to keep it at a manageable size. Basically you’re seeing some hinges, a bunch of window latches, some door bolts, and a couple of decorative carabiners attached to simple drawer pulls.
The wood piece shown above was just a scrap piece of plywood that we were using to temporarily figure out our desired board size. The actual board itself needed to be thicker (to screw the latches into, so the screws wouldn’t come out the bottom and scratch the floor), so I found some spare 1×4″ and 1×3″ boards in the basement that I could jig together with my Kreg. Nothing like using whatcha got. We also liked that it would look sort of weathered and authentic that way, like the top of our console table, thanks to using the same method. But of course you could get a single board cut down to your desired size at Home Depot to avoid needing a jig at all for this project. I was just using what I had.
I waited to cut them to the same length until everything was all jigged together so I’d be sure to get an even edge. Then I just flicked on my table saw and made one quick cut down a line I made once we determined the desired size.
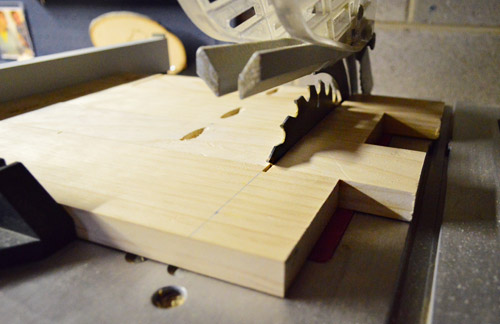
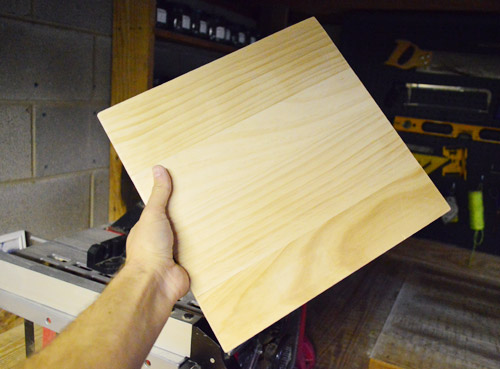
Here’s the final 12″ x 12″ square piece of board that I whipped together. Oh yeah, and I sanded down the edges and corners to make them a bit rounder / safer for small hands.
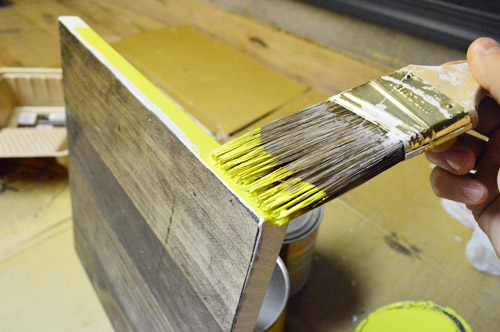
To spice it up a bit, we decided to give it a little stain and paint treatment. Definitely not necessary, but kid-projects like these are our favorites, so we like to have fun with them. I taped off the edges with painter’s tape and then used some leftover Dark Mahogany stain to give some color to the top (I also beat up the top a bit beforehand to make it look a little weathered).

Once my stain dried, I peeled off the tape and primed the edges very carefully. Once the primer was dry, I repeated that step with a coat of paint just to give the edge a little slice of color. We used Benjamin Moore’s Citron, which is one of the colors leftover from book projects last January (it’s also the same color we used on the back of our giant chalkboard). I think Sherry and I both liked the combo of nearly-neon grellow + stained wood on that project so much that we subconsciously wanted to repeat it – this time so the grellow was actually visible instead of hidden on the back.
You can see from this pic that after I edged with a brush I rolled over with a small foam roller just to make sure my paint was evenly spread. It’s pretty easy with a roller to not mess up your edge on a piece like this.
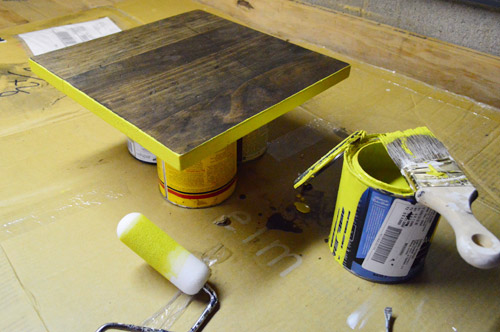
Once the paint was dry Sherry slapped on a quick coat of Acrylacq polyurethane to give it some added durability (it’s low-VOC and non-toxic so we love using it on the kid stuff that we make). After the topcoat of sealer had set overnight, it was finally time to attach the latches. Mind you, it was 40 hours before Christmas morning at this point. Oh, and don’t mind the missing hinges. We decided to ditch two small ones and get one bigger one, which we hadn’t picked up yet (time crunch = my middle name).
Thank goodness Lowe’s was open the next day (Christmas Eve), which meant we were able to attach the last piece just in time to get it wrapped for “Santa to deliver it” the next morning.
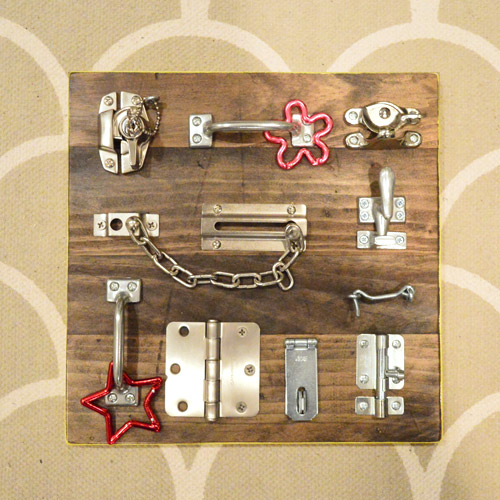
All-in-all, it cost us about $35. So, unfortunately, it was more than some of the store bought versions. Most of the expense came from the two decorative carabiners (the red star and the pink amoeba looking thing were $9 total) and the locking window latch in the top left (it was $4). Had we ditched those or found less expensive versions we could’ve come closer to this version’s price tag. But the carabiners actually seem to be Clara’s favorite part, so I’m glad we “splurged” on them.
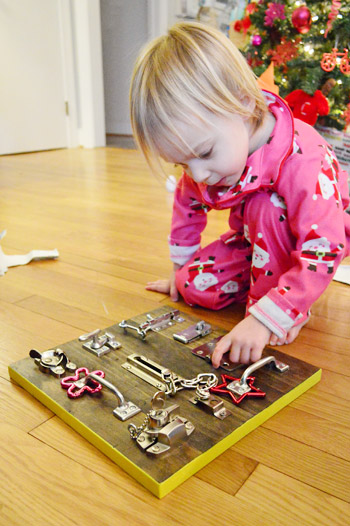
Update: As for if it’s too heavy for Clara, if there have been any pinched fingers, or if we’re teaching her how to bust locks, thankfully she has dragged it around for a week and doesn’t seem to have any issues (it’s about the same weight as her wooden Melissa & Doug puzzles) and there haven’t been any pinched fingers (we tried to picked things with smooth edges). The board is also full of external latches/hinges (nothing like the internal medicine cabinet locks or door locks that we use to keep Clara safe). We’ve actually heard from a few teachers who have these in their classrooms and say kids love them and they help with fine motor skills :)

And if you want to see for yourself, here’s a short clip of Clara opening her latch board on Christmas morning.
I think we got the reaction we wanted. What parent wouldn’t like an “Oh wow, man”?
Is anyone else out there making latch boards? Or just tooling around in an old hardware store like a kid in a candy store?

Leave a Reply