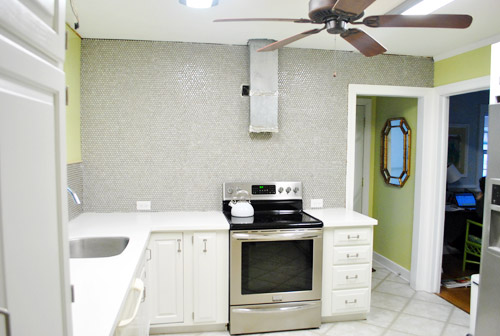
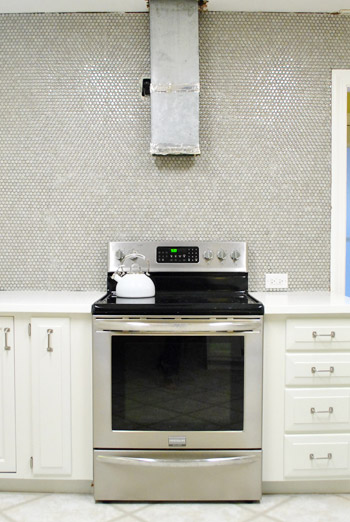
We did it. We tiled the entire back wall of our kitchen in a counter-to-ceiling backsplash move that we like to call Project Crazy, and we lived to tell the tale.
We still have to grout, add a big ol’ industrial range hood and chunky open shelves (those will just be screwed right through the tile with a special drill bit) but when we squint we can almost picture it…
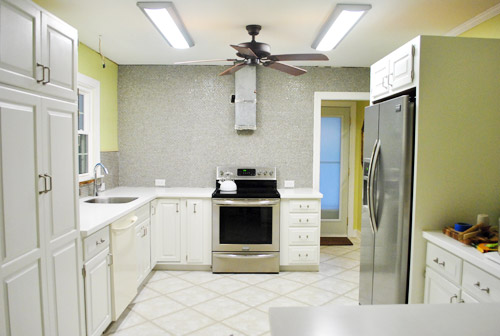
As for the top seam where the tile meets the ceiling, there’s crown molding that runs around the entire room (although we removed some of it on the window wall) so we’ll be adding that back around the whole room so the top of the tile will look nice and finished once we get to that step.

The black box next to the range hood is an outlet for our range hood, so that’ll be hidden once we install ours. We tiled a few inches behind the range hood duct, but didn’t remove it since once we install our industrial hood that area won’t be visible.
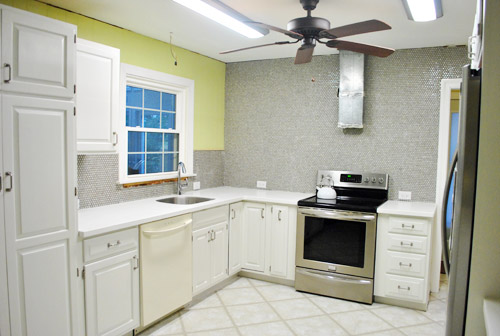
Once we add our floating shelves (which will be 12″ deep) along the oven wall, the space on either side of the window will be 14″ – so it’ll finally look balanced again! I mention this in every kitchen post because I. Can’t. Wait. For. That. Moment.
This entire backsplash process took us around 14 hours total. We tackled it mostly in 2-3 hour chunks in the evening after Clara went to bed or on weekends while she napped (so it’s a good indication of what anyone with a day job might be able to follow). That includes a few hours of figuring out how to cut the tile, which we summarized in this video for you (read a lot more on that process here).
We also shared an in-progress post about prepping the room for tiling, mixing and spreading thinset, and placing the penny tiles here. So that might come in handy if you’re at that stage of the project and could use some reassuring.
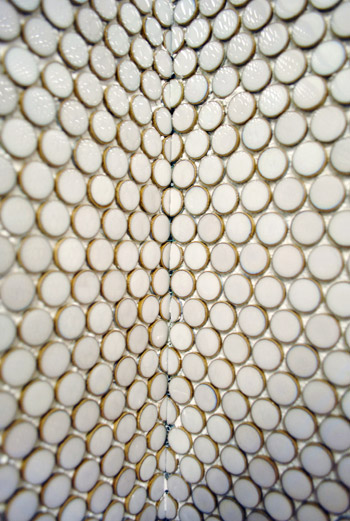
It’s really important to place penny tiles in a way that makes the line where each sheet meets less obvious, so we found that a staggered pattern was the best method for us to achieve a seamless result:

That way your eye doesn’t catch one seam and follow it all the way across the room (more on that here). We also played around with each sheet of tile after squishing them into the thinset, scooching them a bit to the left or the right or higher (since they were on a sheet of mesh it was pretty easy to manipulate them) until they looked evenly placed so the seams weren’t obvious.
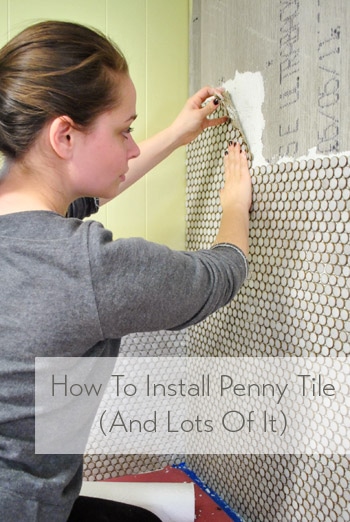
Just wanted to recap that stuff for a second so anyone looking for an exhaustive post about installing penny tile would have those pics and links all in one place. Anyway, when we last left you, we were just beginning the back wall, which we knew would be tedious (but hoped wouldn’t make us rue the day that we picked penny tile). The good news: it didn’t. We made it all the way across that wall, baby! Without wanting to poke our eyes out with penny tile once (well, maybe once…).
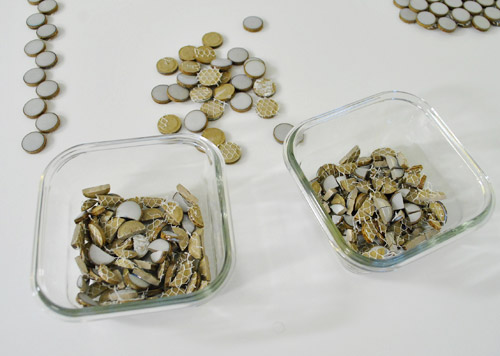
Thankfully, there weren’t many cuts since we could slap a ton of full sheets up in that giant expanse of wall, so although we took our time placing them to keep seams from showing up, we did move faster than having to cut a bunch of tiles. It probably took us three days of 2-3 hour sessions each time. We found it helpful to use little glass dishes to divide full tiles, half tiles, more than half tiles, and less than half tiles. That way if we needed to quickly back-fill an area, like the edge of the wall, with half-tiles or slivers or almost full tiles we already had a little dish of them separated out that we could dig into quickly.
Here’s a video about spreading the thinset and placing the tiles, complete with how to back-fill any tiles that you need to add and how we slid them around and adjusted them to look more seamless. Oh and in the video when I describe it as a brick-layers pattern, I create a horizontal one with my hands, but it’s really a vertical one (two tiles on top of each other and one staggered in the middle of that next to it). Oops. Hope that makes sense when you see it!
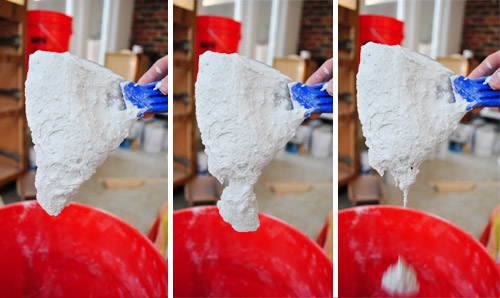
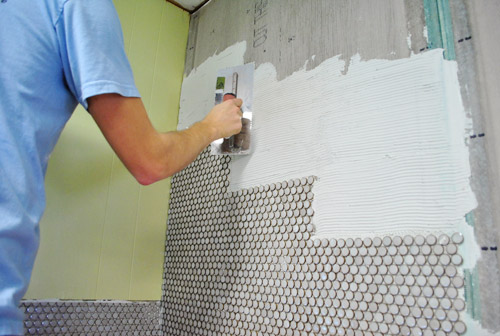
And here are some pics of us making our way across the wall. John applied the thinset with a putty knife (and sometimes a trowel). We mixed enough thinset to set about four to six tiles at a time (so it didn’t dry out before we could set the tile). You can see John applying the thinset in the video above.
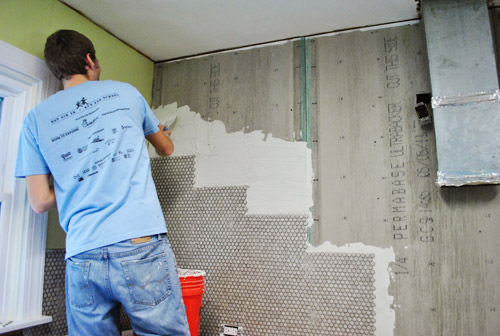
Then John scraped it with his trowel to make little ridges to help the thinset grab the tile and stick for good. Our trowel was a 3/16th notched trowel since penny tile is small, so we heard that smaller ridges were recommended (you can also see this in the video above).
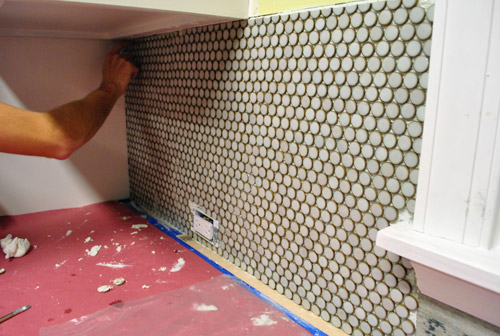
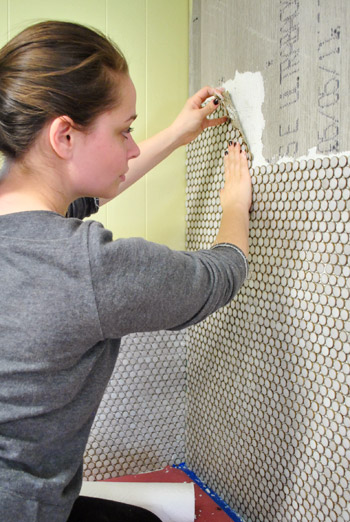
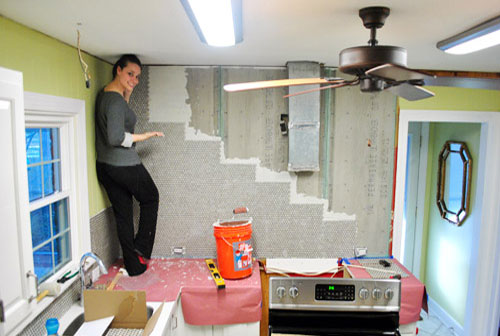
Here I am placing the top tile on the left side of the wall. John got a kick out of the fact that I could comfortably stand on the counter without having to crouch (oh the perks of Team 5’2″). You can see how we worked from the bottom left corner and went up and out to create a staggered staircase effect. This allowed us to build things slowly without having much of a problem with keeping things level since each tile interlocked down the staircase on two ends to keep it from skewing.
Day by day, we inched our way across…
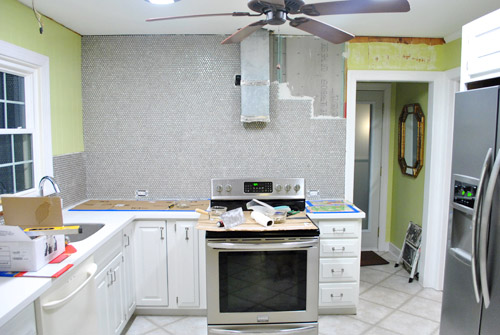
Here we are in the very last corner, finishing things up. You can see that we scooted the oven out while we were working (to gain more access to the wall and keep from getting thinset on it).
Since a few of you have asked for a shot of the corner to see how the tile meets, here ya go:
Let’s get a little closer…
Basically whatever would be placed next to the last tile on the wall where the wall ends just wraps around and gets placed on the new wall. It’s not 100% perfect but once it’s caulked/grouted we think it’ll look pretty darn good (we’ll snap another pic for you then).
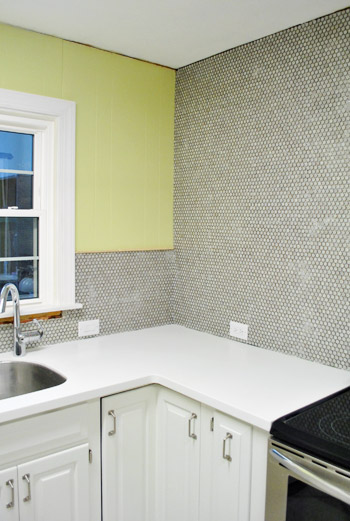
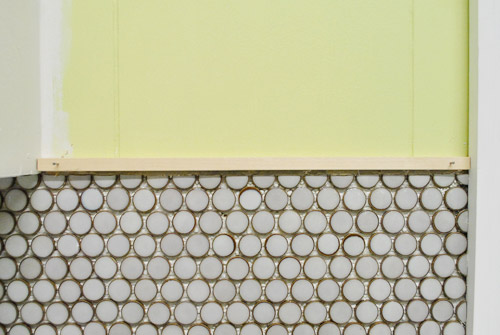
Oh and some other folks asked how we’d be “capping” the 14″ of tile that will be exposed on each side of the window wall, so here’s a detail shot for ya:
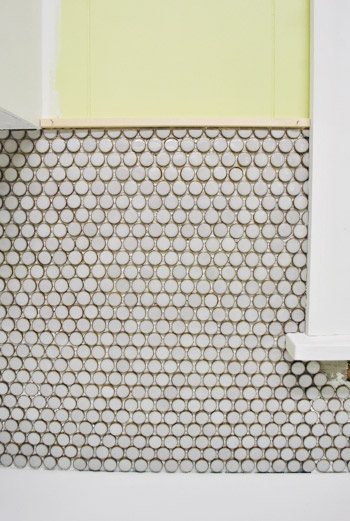
We actually got some thin glass tiles that we thought we’d like, but they just looked too brown and sort of competed with the penny tile, so we decided some thin thin thin pieces of craft wood will make great simple and clean little borders that don’t compete for attention. They’re not hammered in completely yet, since we’ll be pulling them out and painting them white like the rest of the trim in the room after grouting (just to avoid getting paint on the grout).
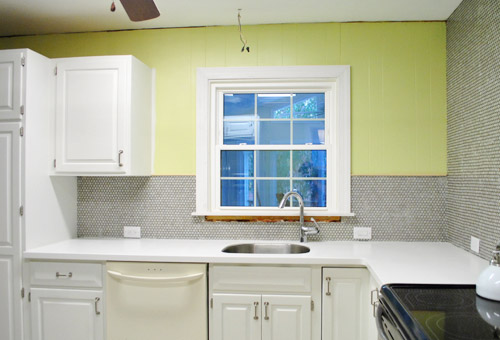
Grellow note: the picture above is probably the most true to life shot of our wall color (in some of the far shots it looks darker/greener/brighter than it is). In real life it’s a soft avocado color (although it can read quite differently on different computer monitors). Here’s a link to it on BM’s site if that helps, since the bad lighting in our kitchen hardly does it any favors. We think once we tackle the new lighting and add the open shelving and some pretty colorful accessories up there (and on the counter) it’ll all tie together really sweetly. You know we’ll share those pics as we go!
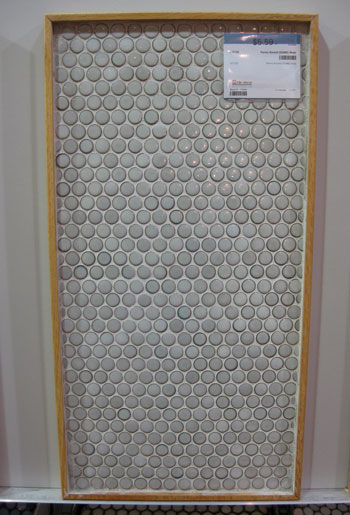
Obviously we still have to spread all that grout, but we’re giving our arms a day of rest before picking up the trowel again (well, I guess in this case it’ll be the grout float). As for the specifics, we picked a soft creamy-gray grout that’s a smidge lighter than the tile. You can see it in this sample shot snapped at the store back when we chose our tile (more on that here):
Oh and see how you can kind of see the seam in the picture above (there’s a horizontal line of grout in the middle of the photo that seems a bit thicker/bolder). That’s why scooching things around and stepping back to see how it all looks before moving onto the next tile is so important! We were sticklers about it, but we’re so glad we took the time to keep everything as evenly placed as possible.
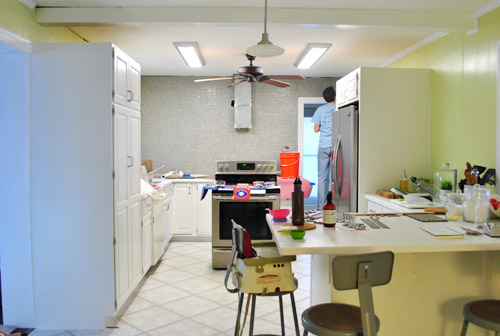
Now we just need to grout, get new lighting (and kill that haven’t-used-it-in-13-months fan), add crown molding and some sort of decorative treatment and baseboard to the back of the peninsula, lay our cork floors, install our new dishwasher, and add shoe molding around the room. And probably some other stuff that our tile-drunk minds are forgetting. So we’ll be back with grouting progress in the next few days or so- probably on Wednesday. We’re hoping we can knock it out pretty quickly, but you never know until you’re knee deep in grout… we’ll keep you posted!
What did you guys do this weekend? Do you all have off today in honor of MLK?
Psst- Oh yes there is a Clara vs. Santa wrestling match going on over on Young House Life…

Eva says
If you had a penny for every pennytile you have installed… how many pennies would you have by now? And does a wall covered with pennytile cost more or less than a wall covered with actual pennies? I don’t expect an answer but I’m an economics dork and if this was my wall I would probably count and to the math… :)
YoungHouseLove says
Haha- that’s a great question! Anyone know? Haha.
xo,
s
Anna says
Wow! I love, love, love that! It’s gorgeous!
I spent the weekend making an upholstered headboard for my bedroom. So excited (that my pillows will stop falling down between the bed and wall)!
Marian says
The tile looks beautiful. Especuially that corner! Art, I say! I spent MLK day priming over my daughter’s 18 in horizontal fuschia stripes. The rest of the room is white, so I am sure you can imagine how hot the cotnrast was. I sanded down the tape ridges first, then primed the whole wall in gray primer, to even out the tones. I’ll follow that with a soft, lime green paint and creamy white trim. I still have to cut in around the top of the room, so I feel your pain in having to do things in installments, but the 6 hours I put in yesterday was enough for a while. I don’t know how you guys do this all day, every day.
YoungHouseLove says
That sounds like so much work but an amazing result! Congrats!
xo,
s
Melissa says
Looks amazing. I would not have had the patience
Rebecca Pitt says
I cannot believe the boundless energy you two have for renos! Question: Why did you decide to paint the panelling in your kitchen rather than put up new drywall? Cost? Style? Time? Just curious…
YoungHouseLove says
We just don’t mind painted paneling! We had it in our last house’s den and we thought it gave subtle vertical texture so the room felt tall yet cozy. It’s definitely one of those personal preference things though!
xo,
merry says
Your backsplash looks amazing! I have always loved penny rounds… classic but with a fun twist. I work in a tile and stone showroom and I wouldn’t even think of attempting my own tile project but you make it seem {somewhat} possible! ;)
Brittany says
Looks awesome guys!! we are undertaking our 70’s kitchen this spring any advice on an order of what to do first?? Cabinets, counter tops?
YoungHouseLove says
We did counters than cabinets since we were painting ours (and didn’t want the counter install to scratch them) but obviously if you’re replacing cabinets they go first and then you get new counters!
xo,
s
Apes says
Super impressed with your corner. Wow. Always impressed with how quick you guys are with your projects. Jealous! Wish my hubby didn’t work so much.
Emily says
Great work! I wish I had the patience to do something like that. I’m curious; do y’all plan on keeping the “green” paint…I think it’s green…the tiles seem to have a bluish tent. So, I was curious.
YoungHouseLove says
Oh yes in person we love it! It’s a light avocado green so that looks really pretty with gray and white.
xo,
s
Lolita says
It looks great! Thanks so much for all of your awesome posts! You’re such an inspiration!
YoungHouseLove says
Aw thanks guys! You’re all so sweet.
xo,
s
Emily says
Great job, as always! Have you guys considered taking off on federal holidays like MLK as part of your life-balance goal? I mean, it’s awesome that you post ALL THE TIME, but I actually feel a little bit bad reading it, knowing you didn’t take a day off the blog!
YoungHouseLove says
We actually didn’t realize it was MLK Day until Sunday, and we had already written Monday’s post! Haha. One of the drawbacks to not working in an office is that we never really realize those days very much in advance- but we are planning a vacation to Hawaii for our five year anniversary (the first real trip we’ve taken since getting married and going to Alaska) so we can’t wait to do that! It’ll be the first time in four years of blogging that we’ll take a blog vacay! And you’re right! In order to focus on balance we should take federal holidays off! Goodness knows we did back when we worked in advertising and it kept us sane!
xo,
s
Wrenaria says
Gorgeous! I love the texture it gives the wall. Good work you two!
As for me, I spent the weekend sanding and drilling and priming the old dresser I’m renovating. With a little feline help, of course. http://wrenariantroves.blogspot.com/2012/01/dresser-renovation-prep.html
YoungHouseLove says
Haha- love the feline help!
xo,
s
Kim Davis says
I love you guys, love your work, love your penny tile. First time commenter. But I have to tell you (has anyone else?) that the height of the pantry cabinet is driving me crazy! Everytime I see a photo from that view I mentally cut the pantry cabinet down to counter height and open up your space. Have you all ever considered cutting that cabinet down, given that you added storage space with your breakfast bar?
YoungHouseLove says
That’s so funny! It never bothers us at all and we love our pantry since it has pull out drawers and shelves- it’s the fanciest cabinetry we’ve ever owned!
xo,
s
Jessica says
This looks amazing! I cannot wait to see the final transformation – it’s going to be so great!
Trude says
It looks amazing!! Love how its quietly reflective. It’ll bring that much more light into the kitchen. So gorgeous, congrats on your hard work!
Jillian says
Hi! I am loving how your kitchen is shaping up!! I am also in the middle of a kitchen reno! Taking forever!!! :-/
Anyway, I have looked at the same penny tile (moss) for my master bathroom. However, on the website, it looks so GREEN, and in your kitchen it looks so GRAY. I am wondering what color is it?? I would prefer if it was more gray than green. Though the description on The Tile Shop scares me…”EMERALD circles with a glossy finish that reveals lighter shades like turquoise when viewed from different angles.” Please help!! :-)
YoungHouseLove says
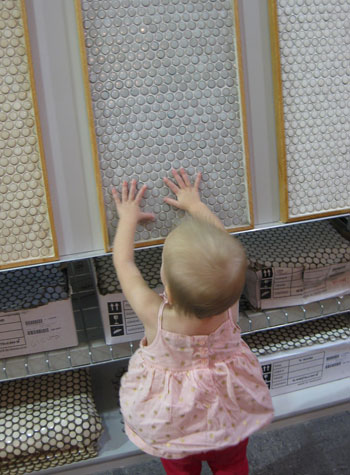
It’s so crazy that it’s called moss because it’s so gray in our house. Really not a hint of green! And you can see from the picture of Clara stroking it in their store that it looked gray there too!
xo,
s
Jillian says
Thank you so much! You have eased my mind! :-)
Valerie says
Wow!!! The penny tile looks so great! I love that y’all did this on your own. Gives me inspiration for when we finally buy a home. Thanks for sharing, as always! :)
Ashleigh P says
Just wanted to say, I LOVE the way the penny tile looks. It’s so CLEAN looking! Best of luck as you push to the finish line. (And you’re not alone…I kinda want to pet it too, lol! We’ll call it a texture thing…)
chris says
where did you get your ottoman in your living room? love it and it looks large.
YoungHouseLove says
Thanks! It’s from jossandmain.com a while back but maybe try overstock.com or wayfair.com since jossandmain.com is a flash sale site so the deals change a lot?
xo,
s
Jade says
Thank you thank you thank you! Our penny tile arrived yesterday and I started searching for advice on how to install them online and came across your site. We bought this gorgeous mosaic green tile (http://www.overstock.com/Home-Garden/SomerTile-12.25×12-in-Penny-3-4-in-Lite-Green-Porcelain-Mosaic-Tile-Pack-of-10/4564996/product.html?rcmndsrc=4#) and are watching your videos this weekend and I’ve printed out your instructions. Great resource!
YoungHouseLove says
Happy to helps!
xo,
s
Kelly Neville says
LOVE IT!!! Can you give a source for your penny round tile, I have been shopping it for a few days and am trying to find the best color fit.
Great job!!!
Whitney says
I love how you’ve opened everything up. Were you worried you would morn over the loss of cabinet space? lol. What color penny tile did you end up going with?
YoungHouseLove says
The color of the tile was oddly called Moss even though it’s definitely gray and not green. We did eventually add floating shelves (you can see those here) so we have lots of storage space and unloading the dishwasher has never been easier (no more doors to open and close).
xo,
s
sara says
Love the penny tile! Please tell me what color tile you used because I want it :)
YoungHouseLove says
We used Moss. Which is funny because it’s totally gray and not green at all!
xo,
s
Kelly says
First time poster, long time blog stalker. First) You guys are awesome. Second) I ordered (and plan to install this weekend) some really cool penny tile.
http://www.overstock.com/Home-Garden/SomerTile-12.25×12-in-Penny-3-4-in-Lite-Green-Porcelain-Mosaic-Tile-Pack-of-10/4564996/product.html
This is my first tile job and your site has pointed out some great tips but I do have one question that I can not find the answer to on your site. How did you guys deal with the outlets? The tile seems so thick I am not sure how or if the face plates will go back on. Any tips or resources on how to deal with outlets/face plates when installing tile?
Thanks!!
YoungHouseLove says
You can see in this post with the shot of the tile laid out on the counter that we just popped the tile out in the shape of the outlet (sometimes extra penny tiles came out around it and once we slipped the tile over the outlet and smushed it into the thinset, we just picked up individual tiles and pressed them in to fill in the area around the outlet so it would look seamless once the outlet cover is slipped back on. You can see us pressing in individual tiles in the video, so that should help!
xo,
s
Cristy says
Sherry,
What color penny did you guys choose from The Tile Shop? The picture shows Moss, but I feel like that should be green. But yours is grey, right? We are looking for the perfect penny tile and so little tile shops have it so I thought I would ask to see if I can order online.
Thanks!
YoungHouseLove says
Oddly enough it’s called Moss but it’s 100% gray in our house and in the showroom. Not a tint of green to be seen!
xo
s
Rhonda Griffin says
John and Sherry,
Your penny tile for your kitchen from the Tile Shop what color is it? Is it the Moss? It looks light gray but I am not sure what color you went with. Also, what color grout did you use (white)?
I love it and I looking to do my kitchen backsplash and the price is so…good compare to most of the glass tile out there.
Oh, and I must tell you I received your book as a Christmas present from my mother-in-law (it was on my list) and it was the best gift I got my favorite! Thanks the book is spot on and sitting on my console.
Keep up the inspiring work from one Virginian to another.
Rhonda
YoungHouseLove says
Yes, it’s 100% gray (no green tint) but the color we ordered is called Moss. Isn’t that funny? Hope it helps!
xo
s
Jenn V says
Ok so I’ve been obsessing over this post for a YEAR and we are finally tackling our own penny tile kitchen backsplash extravaganza on this long holiday weekend. Thanks for the inspiration and tips/tricks!! I’ll have to try to get you a picture (if it looks good) after :)
Also – SO SAD I missed you when you were in Wilton CT on your tour. I actually work right in Wilton Center! Walking distance from the library! Just couldn’t get away :( Hopefully I’ll do a better job of prioritizing next time you’re in town.
Thanks again! Love your blog!!!
Jenn
YoungHouseLove says
Aw thanks Jenn! You’re so sweet! So sorry we missed you, but goooood luck with the penny tile! I bet it’ll be gorgeous!
xo
s
Nancy Esmade says
I love penny tiles!..
wall tiler
Jenn @Home Style Report says
Oh my gosh! I just finished up my first tile job Friday night and I have no stinking clue how you managed to stay that clean while tiling!!! I think my husband found mastic in my hair the next day!
Thanks for all of your tips! I’ve gone back and re-read your tiling posts before this kitchen project. So helpfully!!!!
YoungHouseLove says
Oh yes, I was just the sponge wench, but applying the thinset/grout is definitely a dirty job!
xo
s
Tanya says
Hi :)
Im doing some splash backs in my new house with this exact penny tile!!! What colour is the Mobe pearl grout? Is it a kind of beige or a light grey??? Hard to tell on my monitor… but I LOVE what you have done!
Thanks
YoungHouseLove says
It’s sort of a very light gray tone (grayish cream I’d say). Hope it helps!
xo
s
Tanya says
Thank-you!!! :)
Jessica says
John and Sherry-
Just wanted to thank you for maintaining your wonderful blog. What an inspiration! My husband and I recently tiled our backsplash with a Tile Shop 3/4″ hex tile very similar to your penny tile (yay for the YHL10 discount code, btw). We gained a lot of confidence from reading your blog posts about how to cut the tile and putting the various sized cut pieces in separate containers. What a time saver!
You two rock!
Jessica
YoungHouseLove says
So glad! Congrats Jessica!
xo
s
Molly Wipperfurth says
I’m pretty late with this post, but I absolutely love this penny tile! So much – that I’m going to try it myself in our kitchen. What shade/color of penny-tile did you use? I love the gray/silver look.
YoungHouseLove says
The tiles are called Moss (we bought them at The Tile Shop) which is funny because they’re gray and not green.
xo
s
Genevieve says
curious about something…somewhere in your blog you mentioned about taking the tiles all the way down to the counter without that piece that is usually put in around your countertops…I love that look; however I’m worried about taking that piece out and what may be (or not be) under it… the countertop is fine (for now) so I don’t want to really mess with it… what do you suggest?
YoungHouseLove says
I would suggest prying it away just to peek. You can always put it back on, but if it’s great under there (in most cases it should be) then you can remove it cleanly. Good luck!
xo
s
Katie says
I’m planning to do my tile backsplash this weekend, and I need to get behind the stove. How do you recommend moving the stove, and what scary things (electricity? other tubes and hoses?) do I need to keep in mind?
I don’t know if I receive a notification if you respond, so I’ll try to check back here!
YoungHouseLove says
I think you can just pull it out a few inches and nothing scary should happen and you’ll have enough space to get in there. That’s what we did and it seemed to work! Hope it helps!
xo
s
Ann Marie @ Twice Lovely says
Just bought some penny tile for a small backsplash project (just between the counters and the upper cabs along 8ft of wall), but since it’s my first tiling project, I was nervous. Your tips and videos took away my anxiety. I got this! Thanks for the help!
YoungHouseLove says
Go Ann Marie, go!
xo
s
Aletta says
A stunning job done with tegels (tiles) decor. I am amazed to see the creativity. Each aspect of it is a piece of gem. Specially the round small tiles, they are just perfect! Nice job done. Glad I visited your blog to see this splendid creativity with tiles
Alexis says
Hello–we have had carrera hex go awry twice in our shower and we love the look of your penny rounds with mottled white/grey color. Can you please tell me who makes them? Thank you!
YoungHouseLove says
They’re by The Tile Shop (it’s their penny tile in the “moss” color).
xo
s
Lisa H. says
I am working on a little backsplash on our new bathroom vanity and cannot for the life of me get a clean even caulk line on the top because its glass and stone tile (ie – uneven!). It looks like you have the perfect solution with the thin craft wood!! Can you tell me everything you know about it? Where did you get it and what is the dimension if you remember? I think you just saved mine and my husbands sanity!!! Thank you!!
PS – Congrats on your new precious bundle of joy! He is absolutely perfect!
YoungHouseLove says
We got it at AC Moore, which is a craft store. It was probably a half inch by half inch square dowel. I think you could also find it at a place like JoAnn or Michael’s or even Home Depot. Good luck!
xo
s
Lisa H. says
You are a lifesaver! Thank you!
Jennifer says
What brand of Penny tile did you use?
Thanks, Jennifer
YoungHouseLove says
It’s from The Tile Shop (color = Moss, although it’s gray and not green).
xo
s