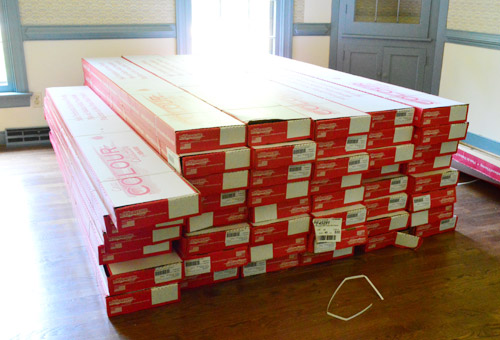
Particle board subfloors aren’t always great under hardwoods – especially when you buy nail-in flooring like we did. Some folks install right over it without any issues while other folks have big problems down the line. Because it’s so unpredictable, hardwood manufacturers void the warranty if you install them that way – which was definitely not a risk we were willing to take. According to our initial research, we were left with three not-so-hot options.
- Return the meant-to-be-nailed flooring and buy a meant-to-be-floated floor instead. But after falling hard for the one we picked and our adventure getting it home, we weren’t eager to take it back. Especially since none of the floating options were as close of a match to our existing wood stairs and hardwoods downstairs.
- Remove the particle board subfloor to (hopefully) reveal plywood underneath. This would’ve been time-intensive (the particle board was laid under all of the door jambs and everything) and it would’ve lowered the level of the floor (making door heights and transitions into the bathrooms weird). It would also cause us to lose the sound deadening effect that this particle board was installed to create in the first place. And we definitely didn’t want a loud and echo-ey floor upstairs.
- Install plywood right over the particle board. This was most the promising option, except that it too would’ve been time intensive, would’ve raised the floors (requiring us to cut down all of the doors and live with a noticeably high top step of the stairs). It would also carry an extra material cost.
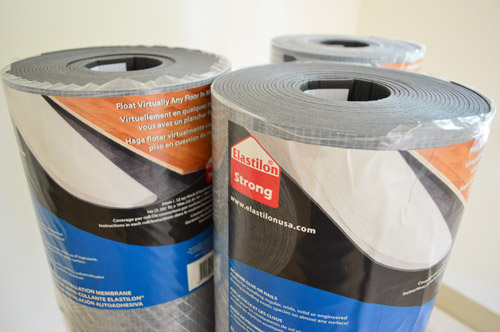
- It has a lifetime warranty, and is guaranteed to last as long as the hardwoods
- It’s elastic, so it stretches along with your boards during seasonal changes in temperature (this helps to prevent cracking, gapping, or warping)
- We only needed an exacto knife to install it, which saved us the expense of buying or repeatedly renting a nailer (although we were a little sad not to get to try one)
- It’s non-toxic, has no-VOCs, and no odor – which is great considering it’s an adhesive product
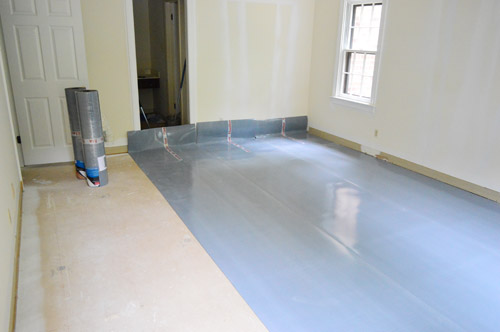
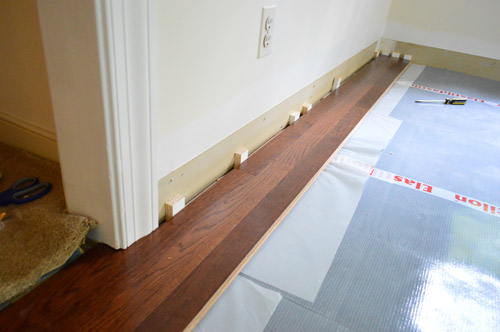
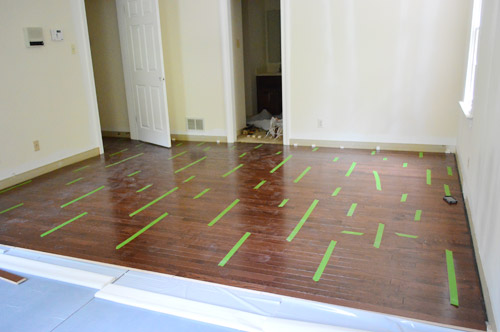
Laying the first row is a tricky step, since it sets the tone for how straight your entire floor will be. And you can’t always trust your drywall to be straight. So we started building our floor using some of the longest, straightest boards we could find to help overcome any curves in the wall. Oh, and those are scrap wood spacers against the wall that help leave an expansion gap around the edge (for when changes in temperature may make the floor expand).
Another thing that helped us feel more confident about our first row being straight was laying it across as long of a wall as possible. For us, this meant taking our first row all the way out into the hallway. Which also meant rough-setting a lot of boards before anything was actually ever stuck down – just to make sure they didn’t look wonky.
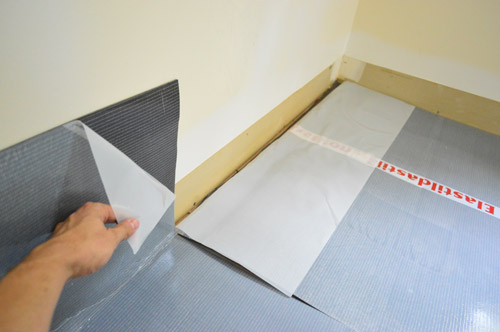
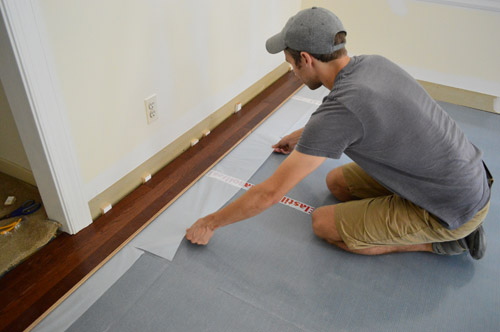
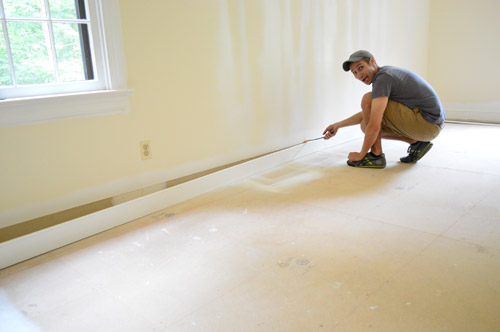
Once we felt good about our first few rows being straight, it was time to permanently secure them in place. Here’s where that extra flap of plastic comes in handy. You pull on it slowly so that it exposes the sticky Elastilon beneath the floor boards, so the bottom of the boards can be joined to the underlayment, permanently holding them in place.
Once those boards touch the Elastilon, boy are they stuck. It takes a good yank (and sometimes even a pry) to get them loose. So that makes us feel good about the long term hold of this stuff!
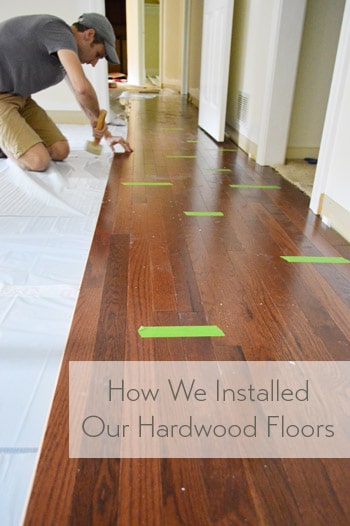
From there, it was pretty much the same process – lay a couple rows, bang them in tightly, peel back the plastic so they’re secured, and move on. Laying the boards was just like any floor – the boards have a tongue and groove that slide together, and we used a rubber mallet to tap them snugly into place.
We also used a bit of wood glue on the groove at the end of each plank as suggested, just to further secure everything.
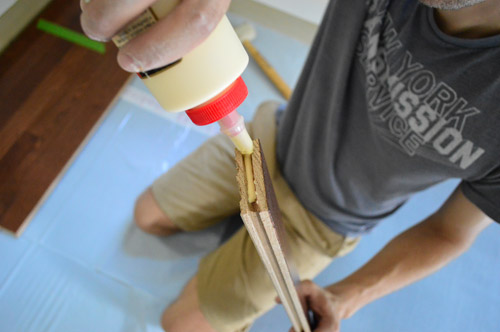
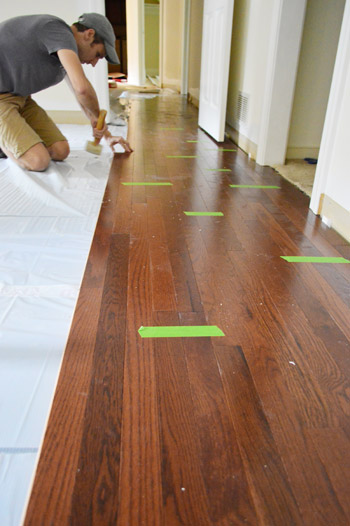
Oh and we periodically taped the boards together, which was also recommended – just to discourage slipping or shifting during the install. If there are two of you working on this project, one person might grab boards, run a bead of glue along the end grove (seen above), and hand them to the other person who’s clicking them in and hammering them into place. The person on glue duty can also pull the Elastilon every few rows and toss down some tape as you go. That’s the grove that Sherry and I got into (and every few hours we switched jobs to keep from getting too sore/tired).
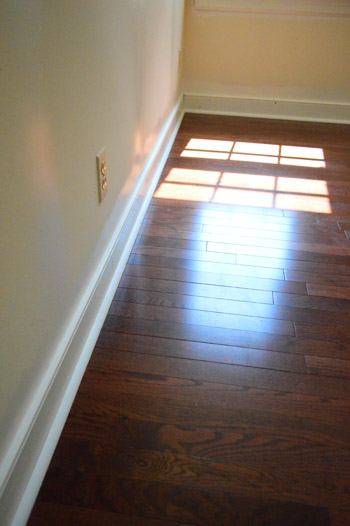
The result? A super tight gap-less floor that will still flex with fluctuations in temperature without cracking or warping – and it should outlast us. Huzzah!
Except… as simple as the process was, it still was not a quick process. I think our bedroom took us 10 hours to tackle together (across two days) while my parents watched Clara. Granted it was the largest room and it was our first one, but boy did it not inspire much confidence in how quickly this could get done.
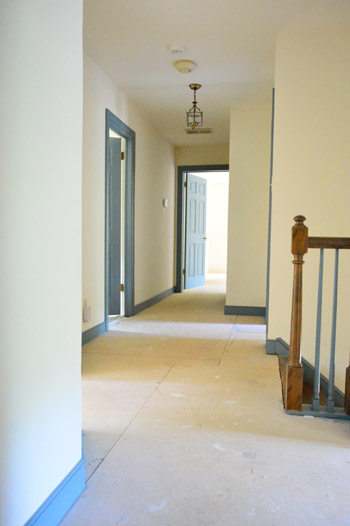
As is the DIY way, there are always little curve balls. For example, we originally had hoped to not have to remove our baseboards. But when we looked at things more closely, losing 3/4″ of the baseboard behind the floor made them look dorky-short. And we learned that neither quarter round alone (nor baseboards alone) would cover the expansion gap that our hardwoods required in order to keep the warranty in tact. So we pried all of our baseboards up and resigned ourselves to later having to reinstall them with quarter round. Le sigh. At least they’re already painted so we’ll just have a few small touch ups to take care of.
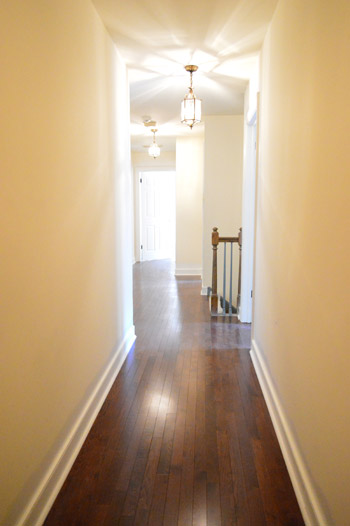
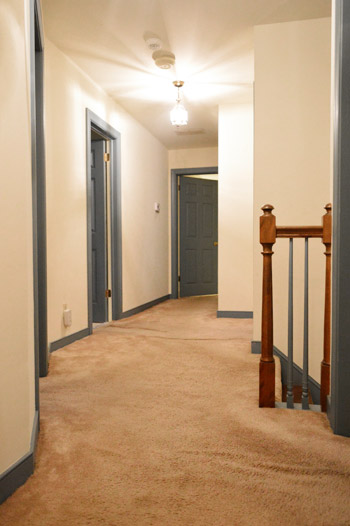
The good news is that we made lots of progress over the long weekend and yesterday evening we finally finished. We even got around to adding the baseboards back and placing the quarter round in most of the rooms already. The floors are looking awesome and feeling super solid.

So much better than the carpet.
More Flooring Projects
If you would like to read about other flooring projects we’ve done, please check out the posts below: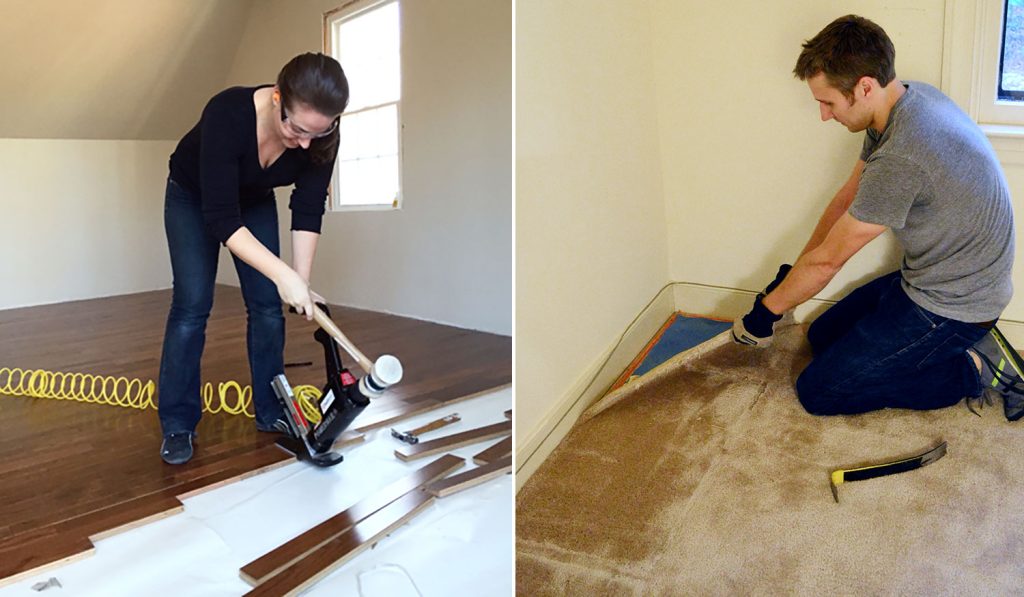

Heidi G. says
Oh guys, it looks so great. I have to admit that it’s nice to see that even seasoned DIYers don’t always get it right the first time. Thank you for keeping it realz! :)
Stephanie says
What a transformation. Wow. Your hard work looks to have been well worth it! Congratulations on having one massive project behind you-ish.
I realized when my husband and I went to our local Lumber Liquidators this week to finally select and pay for our flooring that you’d influenced the decision. I thought, “If Jon & Sherry went with them, they must be a competitive price!” Their Memorial Day Sale was just the boost we needed. Now I’m wondering if all my fantasizing about our new flooring (we’ll do the installation w/ a friend) was also inspired by you guys. What to motivate your readers! That’s what the blog is all about, baby! (read this line like Buddy from Cake Boss)
YoungHouseLove says
Aw, good luck Stephanie!
xo
s
Julia says
Hmmm, had to take a second look at this post again, I can’t get over the change. I did catch site of the blue spindles on the staircase (lovely I might add), and am wondering what you’ll do with those. Perhaps a white staircase eventually? Or perhaps stained to match the wood floors? Or maybe another take on the board and batten look up the stairway and down the upstairs hallway? Can’t wait to find out what the next steps are to your new house reno. Good luck moving this weekend, and hope the weather plays nice for you!
YoungHouseLove says
Oh yes, there are a million blue surfaces that still need to be painted, we just ran out of time before the move so we’ll tackle it over time as we live here!
xo
s
Jenn R. says
Fantastic! Such a huge improvement. Well done!
Erin says
It’s amazing how different the hallway looks without the blue trim and carpet! Beautiful! I wish we had been able to refinish our hardwoods before we moved in 2 years ago, but unfortunately the bank kept pushing the closing date back and we weren’t able to do it. I hear you about transitions in doorways. Ours drive me CRAZY!!! My husband is completely oblivious to them but I see the crappy work every time I walk into a different room. I think for the most part, the wood in the hallways, living room (under the carpet) and bedrooms runs the same way, but for some reason when it was put in they didn’t line things up. There is maybe a 1/4″ difference between the bedrooms and the hallway and the boards are just butted up against each other where the door lines up when closed. Does that make sense? Whenever we end up refinishing them, I think I’m going to have some of the wood chipped out and put in a board to make a transition between rooms. That way something will be breaking up the fact that the boards don’t match up.
betty says
im interested in, when you take the runner off, will you need a new one. my stairs are a complete different carpet than the upstairs (which will be replaced) and i hated carpeted stairs. everyone is making me nervous about not having anything on the stairs after i strip the carpet, but i don’t like the way runners look.
YoungHouseLove says
We’re not sure where we’ll end up but we’ll keep you posted as we go for sure!
xo
s
Amanda says
You’re not the only ones dreaming about floor-laying…I had a dream I house-crashed you guys to see how the flooring was coming!! LOL! You guys were super-friendly and Sherry showed me a bunch of blog posts in advance. Had to laugh when I woke up. :) You guys are doing a great job!
YoungHouseLove says
Hilarious!
xo
s
Susannah Brown says
Hi guys! I know you’re super busy but I would love a tutorial/more info on the installation of the quarter round you mentioned! We were lucky enough that the previous owners of our new place refinished the hardwood floors before we moved in…but one year later they’re still missing quarter round! Yikes!
YoungHouseLove says
Will try to cover that in our follow up post!
xo
s
Jill Stevens says
Crazy how the white trim makes the old wall paint look yellow. You can’t see that in the before photos.
Heather says
Wow, the floors look great! Just painting the moulding and ripping out the carpet made a huge improvement.
Trude says
Looks awesome! Isn’t it great when the perfect solution presents itself out of nowhere? Glad it all worked out!
Katherine says
It looks so good! You all should give yourselves a pat on the back …if your arms aren’t too sore.
ShellyP says
I am slack-jawed at the transformation! WOWZAAAHHHH!!! I had to pin this post on my Pinterest Board to inspire me to do the same to my second level. I’d love to rip out the carpeting, spray all the 1970’s dark wood an appealing shade of white semi-gloss and install beautiful hardwood floors. You two are beasts. You’ve gotten so much work done. Truly beautiful.
Laurie says
Wow. Just – wow. Congratulations on an amazing job … Looks awesome.
Karen says
Amazing! You guys are such an inspiration. Are you petting the floor as you ascend toward the top step? I would be.
I was sad to hear that there would be no more “old” house posts but I am so excited to read the new house posts! I was looking forward to seeing a flooring post probably more than anything in the old house. I think I’m having a brain fart but did you guys decide on the flooring for downstairs? I can’t remember…? Or will it be the same as upstairs? I look forward to reading about it, good luck!
YoungHouseLove says
There’s already hardwood downstairs in many rooms and some other rooms (like the kitchen with bad linoleum!) will get a redo as we go. No idea what we’ll pick yet though :)
xo
s
Evelina says
These are so so so beautiful! I just want to sit on them and pet them.
You guys are so open to such humungo tasks.
Elizabeth @ Real Inspired says
Looks great! Our floors are awful and I love hardwood with a passion. I’m jealous ;)
AJ says
Ahhh! I wish I had known about Elastilon! Our house also has particle board subfloor. We were told we couldn’t do hardwood at all unless we replaced the entire subfloor ($$$!) What a bummer. The floors look amazing!
sara says
hi sherry –
did i miss something? what’s the reason for only posting once a day lately? just too crazy with the move?
YoungHouseLove says
Our schedule since New Years has been twice on Monday and twice on Wednesday with a single post on Tues, Thurs, and Fri. Here’s the post with that info for ya :)
xo
s
ajira says
haha. I’ve been missing the second posts as well but totally understand the choice to take more time for non-blogging stuff.
YoungHouseLove says
Thanks Ajira!
xo
s
Liz says
Is the expansion gap thick enough that you might be able to feel the floor moving underneath you, since it’s a floating floor? Do those little squares stay in after installation?
YoungHouseLove says
Those blocks come out (they’re just spacers that you take up as you go) but it’s thick and solid oak (3’4″ thick) and the subfloor is nice and level so the weight and the level flooring under it keeps it from moving underneath you.
xo
s
HK says
Love you guys so much. I have wanted to know how easy/hard Elastilon was to use since I found it on the Internet. Amazing product. Great job! The difference between before and after breathtaking. I have a two story house and can’t wait to see what happens next.
PS Elastilon sounds like a super hero name. Looks like it works like a super hero. =)
YoungHouseLove says
Haha! Totally! Like elastagirl!
xo
s
Cristy says
Wow, you guys! It looks great!!!!!
Quick questions.. you said the master took 10 hours. How much time do you think you put in for the whole 2nd floor? Also, about what square footage total would that be? Trying to work up the nerve to do this in our living room and hallway…. and *maybe* in our dining room. (Dining room would require removing tile, and it is an open floorplan so it would be a MESS to grind that mastic down)
YoungHouseLove says
Our follow up post full of details and pics that many folks have requested will cover that for ya!
xo
s
Annie says
Holy cow, that is a beautiful floor! You two are forever impressive!
I imagine the floating plank dreams are like Tetris dreams after playing for 12 hours straight! /still plays Tetris like I’m being paid
Karen Q. says
Gorgeous! Awesome job you two! :)
Michele says
“You can’t stop looking at me . . . get on the floor!” I LOVE that commercial and your floors. You guys are truckin’ on!
Debby says
Looks beautiful. I just started following your blog. Where have I been???? Now you just need to paint those blue spindles……. Good Luck with your move. You are very inspiring and funny
Claire says
Off to a great start in making this home look as awesome as your first two.
Livvymom says
Looks great! You mention a quote of $4K for the labor. Can you describe how they come up with $4K? Is it a flat fee and then a square foot charge? Any other adjustments? Am thinking of doing hardwood in my living, which is a much smalller area than you covered. Thanks if you can help!
YoungHouseLove says
It sounded like they charged by the square footage since they didn’t come out to our house and look around or anything, they just said that would be their install range when we asked.
xo
s
ajira says
It’s remarkable how much better it looks just after painting the doors and trim, and replacing the floors. It’s gorgeous!
Cindy says
Thank God your new floors look so beautiful, because that was painful to read, let alone do the work! I would have been terrified. Wonderful job, you guys. xo
Christa M says
WOW!!! So fresh and so clean clean! I would have given up after the carpet removal and just painted the darn subfloor…please tell me you were tempted
YoungHouseLove says
Haha! I can just picture piles of dog hair and cheerios getting ground right into it. Yummy!
xo
s
Serina says
Way to go, you guys! Y’all rock!!! Looks beautiful :)
Evie says
John, I can totally sympathize. The floor looks fantastic! Kudos to you and Sherry!
LavandulaLady says
I see some carpet in a few of the photos (in doorways to another room?). I thought you’d pulled up all the carpet upstairs. Sorry if this has already been asked; too many comments to look thru all of them…
YoungHouseLove says
That’s the bathroom nook of our bedroom, which we plan to tile when we renovate that area, so we didn’t want to lay hardwoods only to later remove ’em.
xo
s
VickiP says
You guys never cease to amaze! I hope you have a nice long vacation planned after you move into the new place. You deserve it after this non-stop year of WOW!
Joy says
Have you ever wondered how many rooms you’ve inspired and wanted to take a peek? Found this ad for an ottoman coffee table on Craigslist Baton rouge. Sure looks like an “inspired by YHL” living room to me, with Karl and green shag rug. I can’t post a pic, so here is a link to the post if you’d like to see someone who admires you.
http://batonrouge.craigslist.org/fuo/3835313449.html
YoungHouseLove says
So funny! I love it!
xo
s
Amy S. says
Was the only reason you chose nail-in flooring over a floating floor due to the color?
YoungHouseLove says
We wanted it to look (color) and feel (thick, chunky, same sound underfoot) like the stairs and the rest of the oak flooring in the house already, so going with the same type of 3/4″ oak (which we also had in our first and second house and loved) made us feel most confident :)
xo,
s
Stephanie says
WHOA! What an extraordinary difference the floors and white trim make! It looks like a completely different house already!
Kara says
I was wondering how you were going to deal w/the subfloor… should have known you’d come up with a new product to solve the problem. Love it – thanks for sharing! Good luck on the move this weekend.
YoungHouseLove says
Thanks Kara!
xo
s
AnnMarie says
Looking forward to seeing info about all of the cutting….we’d like to take this project on, but I’m the most worried about that step!
Meghan says
Wow what a difference painting the trim and the hardwoods make! I love what you’ve done so far and can’t wait to see the rest! I wish my husband and I were handy so we could buy a house that needs some work!
Christina says
Floors look great! I hate to be that person but its groove, not grove. Sorry but it was driving me crazy :) I can’t wait to see what you guys do with this house! How do you not get burnt out?
YoungHouseLove says
Haha, how did we miss that typo? Thanks Christina! As for not getting burned out, we try to just hop around and do whatever we’re excited about instead of drilling away at one room until it’s 100% done. I think we like to let things simmer and hop around since it’s more exciting and feels less rushed/stressful.
xo
s
Kylie says
The before pic looks identical to our upstairs … So inspired!! Wow!
Sherri says
The floors look gorgeous,the white trim makes everything so bright, & even the light fixture looks pretty darned good! But what I admire most about you two is that you do everything possible to achieve perfection in your projects. You think things through & if you encounter a detour, you take the time & expense to make it right. Your attention to detail is inspirational & puts you in a league of your own among DIY bloggers.
YoungHouseLove says
Aw shucks, thanks Sherri!
xo
s
Jessica says
Was it your intention that I sing Jennifer Lopez as I read the title of this post?
YoungHouseLove says
Haha! Get on with your bad self!
xo
s
Danielle P says
You might have already answered this, or intend to (but I am just too excited to wait!)– are you making any changes to the stair banisters? Painting, beefing up, etc? Also will y’all use the same color paint as the current house for the most part or whole new color scheme? It looks so great already!
YoungHouseLove says
Oh yes, the blue isn’t staying! Right now we’re thinking of going ebony with the railing that’s already wood, and those blue ballisters could be glossy white. Who knows where we’ll end up though! And as for the color scheme, I think we’ll have to see where we end up, but we love white and neutrals along with pops of every color of the rainbow so that should be fun!
xo
s
DB says
The new floors look amazing! I’ve pointed a friend to this blog because she is hankering to do something to her house and yanking the old nasty carpet and installing wood floors is on her dream list, but she’s a little leery of taking it on.
Selina says
If I had seen this post last weekend, I might have really considered this, but we went with a floating floor instead. Its still in the boxes but will be beautiful and hopefully durable. We had particle board in two rooms where and plywood in 3, it made no sense. But we had ripped up particle board out of 3 bathrooms for tile and were NOT going to do that for 2 big rooms! Your floor is beautiful and there is nothing like the sound and feel of real hardwood!
donita says
Beautiful floors!! Great job! I cant wait to see all of your projects in the new house. Those floors are my dream!!
Willow says
Looks completely different and AMAZING!!! I love hardwood a thousand times better than laminate! Congrats!