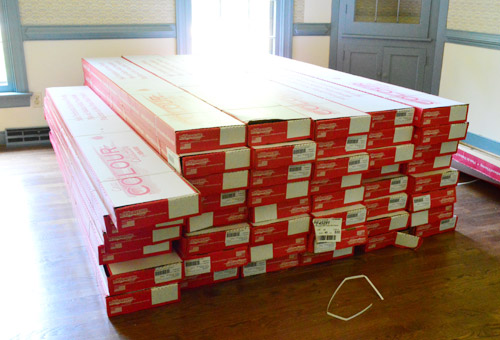
Particle board subfloors aren’t always great under hardwoods – especially when you buy nail-in flooring like we did. Some folks install right over it without any issues while other folks have big problems down the line. Because it’s so unpredictable, hardwood manufacturers void the warranty if you install them that way – which was definitely not a risk we were willing to take. According to our initial research, we were left with three not-so-hot options.
- Return the meant-to-be-nailed flooring and buy a meant-to-be-floated floor instead. But after falling hard for the one we picked and our adventure getting it home, we weren’t eager to take it back. Especially since none of the floating options were as close of a match to our existing wood stairs and hardwoods downstairs.
- Remove the particle board subfloor to (hopefully) reveal plywood underneath. This would’ve been time-intensive (the particle board was laid under all of the door jambs and everything) and it would’ve lowered the level of the floor (making door heights and transitions into the bathrooms weird). It would also cause us to lose the sound deadening effect that this particle board was installed to create in the first place. And we definitely didn’t want a loud and echo-ey floor upstairs.
- Install plywood right over the particle board. This was most the promising option, except that it too would’ve been time intensive, would’ve raised the floors (requiring us to cut down all of the doors and live with a noticeably high top step of the stairs). It would also carry an extra material cost.
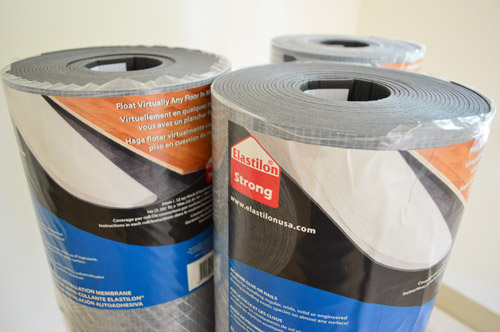
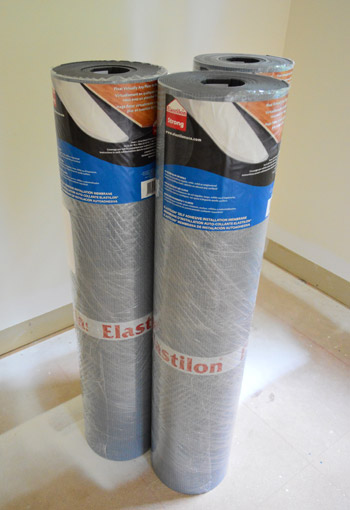
- It has a lifetime warranty, and is guaranteed to last as long as the hardwoods
- It’s elastic, so it stretches along with your boards during seasonal changes in temperature (this helps to prevent cracking, gapping, or warping)
- We only needed an exacto knife to install it, which saved us the expense of buying or repeatedly renting a nailer (although we were a little sad not to get to try one)
- It’s non-toxic, has no-VOCs, and no odor – which is great considering it’s an adhesive product
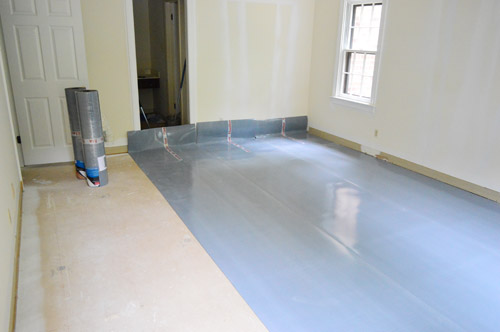
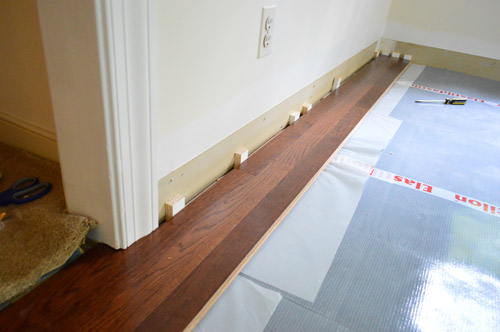
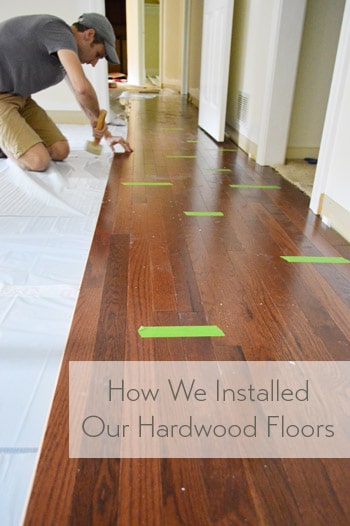
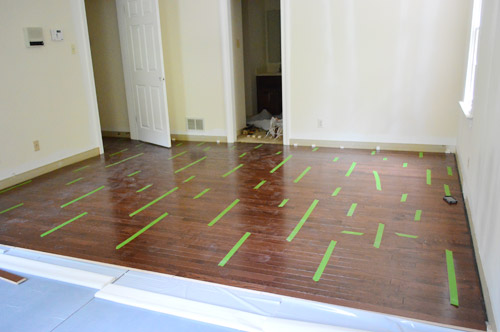
Laying the first row is a tricky step, since it sets the tone for how straight your entire floor will be. And you can’t always trust your drywall to be straight. So we started building our floor using some of the longest, straightest boards we could find to help overcome any curves in the wall. Oh, and those are scrap wood spacers against the wall that help leave an expansion gap around the edge (for when changes in temperature may make the floor expand).
Another thing that helped us feel more confident about our first row being straight was laying it across as long of a wall as possible. For us, this meant taking our first row all the way out into the hallway. Which also meant rough-setting a lot of boards before anything was actually ever stuck down – just to make sure they didn’t look wonky.
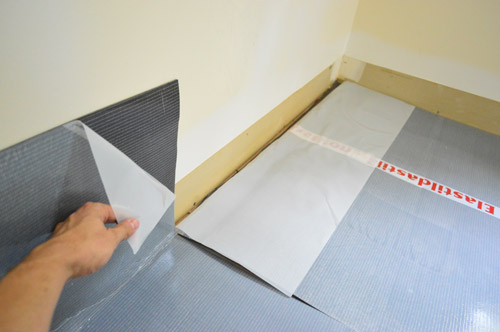
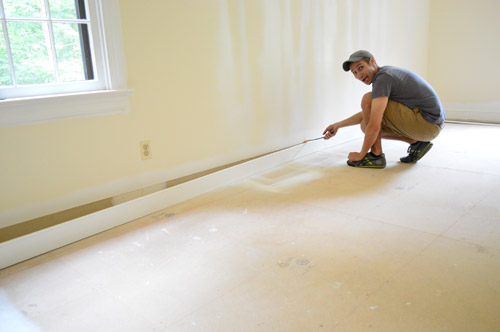
Once we felt good about our first few rows being straight, it was time to permanently secure them in place. Here’s where that extra flap of plastic comes in handy. You pull on it slowly so that it exposes the sticky Elastilon beneath the floor boards, so the bottom of the boards can be joined to the underlayment, permanently holding them in place.
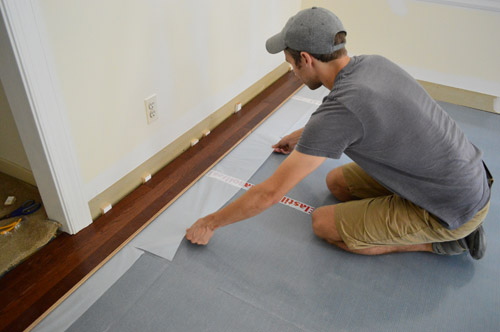
Once those boards touch the Elastilon, boy are they stuck. It takes a good yank (and sometimes even a pry) to get them loose. So that makes us feel good about the long term hold of this stuff!
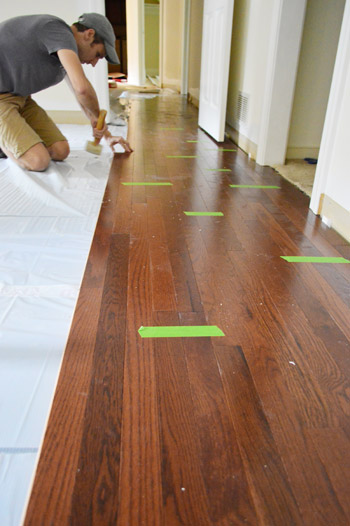
From there, it was pretty much the same process – lay a couple rows, bang them in tightly, peel back the plastic so they’re secured, and move on. Laying the boards was just like any floor – the boards have a tongue and groove that slide together, and we used a rubber mallet to tap them snugly into place.
We also used a bit of wood glue on the groove at the end of each plank as suggested, just to further secure everything.
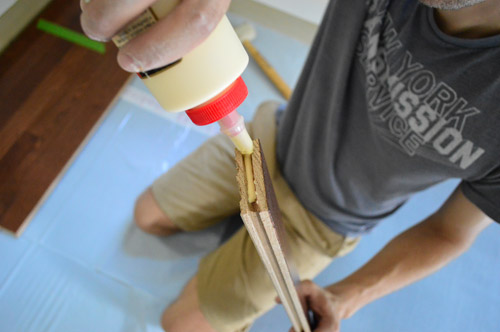
Oh and we periodically taped the boards together, which was also recommended – just to discourage slipping or shifting during the install. If there are two of you working on this project, one person might grab boards, run a bead of glue along the end grove (seen above), and hand them to the other person who’s clicking them in and hammering them into place. The person on glue duty can also pull the Elastilon every few rows and toss down some tape as you go. That’s the grove that Sherry and I got into (and every few hours we switched jobs to keep from getting too sore/tired).
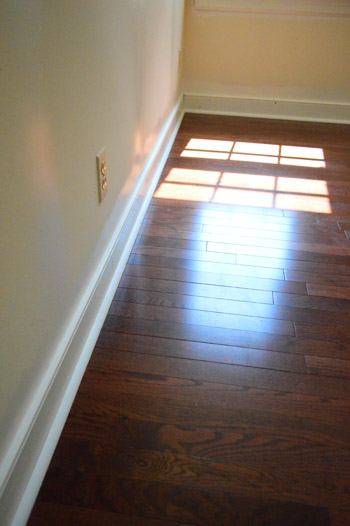
The result? A super tight gap-less floor that will still flex with fluctuations in temperature without cracking or warping – and it should outlast us. Huzzah!
Except… as simple as the process was, it still was not a quick process. I think our bedroom took us 10 hours to tackle together (across two days) while my parents watched Clara. Granted it was the largest room and it was our first one, but boy did it not inspire much confidence in how quickly this could get done.
As is the DIY way, there are always little curve balls. For example, we originally had hoped to not have to remove our baseboards. But when we looked at things more closely, losing 3/4″ of the baseboard behind the floor made them look dorky-short. And we learned that neither quarter round alone (nor baseboards alone) would cover the expansion gap that our hardwoods required in order to keep the warranty in tact. So we pried all of our baseboards up and resigned ourselves to later having to reinstall them with quarter round. Le sigh. At least they’re already painted so we’ll just have a few small touch ups to take care of.
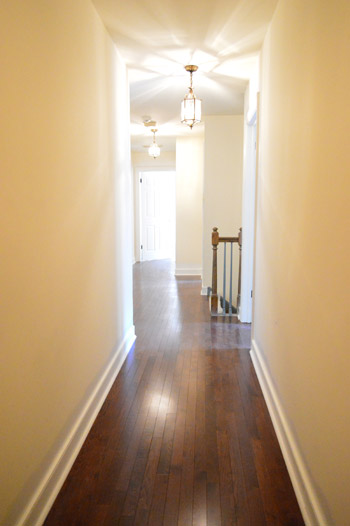
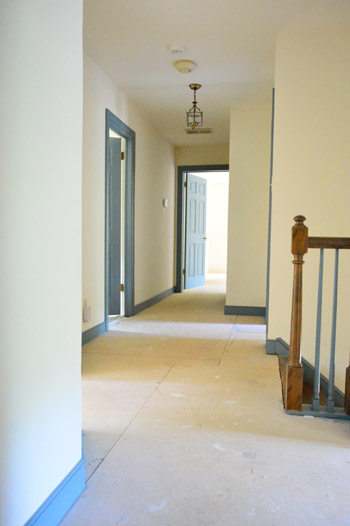
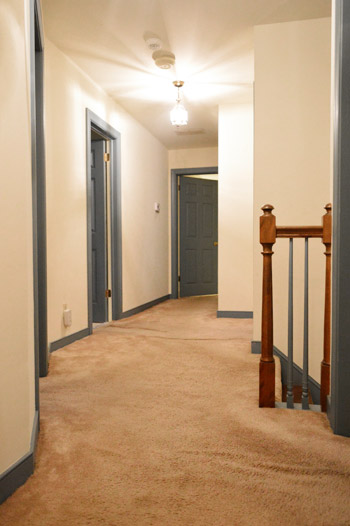
The good news is that we made lots of progress over the long weekend and yesterday evening we finally finished. We even got around to adding the baseboards back and placing the quarter round in most of the rooms already. The floors are looking awesome and feeling super solid.

So much better than the carpet.
More Flooring Projects
If you would like to read about other flooring projects we’ve done, please check out the posts below: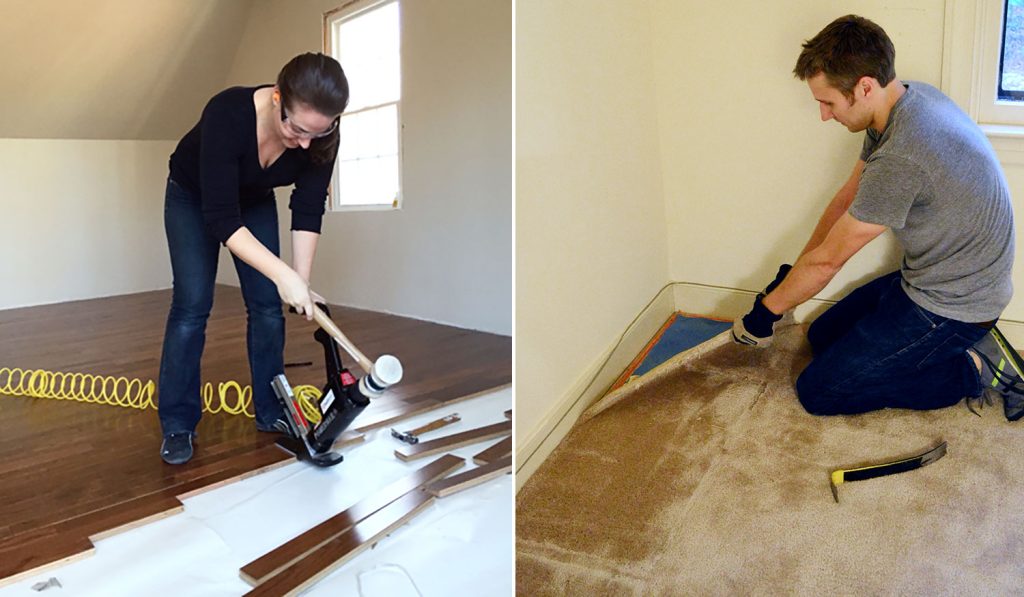

Jenn says
Did this new flooring replace your penny tile in terms of being your “baby”. Because, man, it seriously looks gorgeous. The before and after is insane. I would be rubbing those floors like Smigel and his ring whispering “my prec-ioussss”.
YoungHouseLove says
Oh yes, there was heavy petting. HEAVY.
xo
s
Karen F says
wow, the floors look amazing! you should both feel very proud of what you accomplished – what an improvement! Good luck with the packing and moving!
on the subject of dreams, I used to work in a supermarket when I was in high school, and I used to hear the *beep* of the checkout scanner all night in my dreams! so annoying!
YoungHouseLove says
Hilarious! I mean not for you, but it’s funny after visions of hardwoods dancing in my head.
xo
s
Karen F says
yeah, it’s funny now, not at the time :)
These floors are SO gorgeous, you need to do the Tom Cruise/Risky Business slide across the floor!
YoungHouseLove says
I better get on that!
xo
s
Kellee says
Haha! I worked at Target while in college and woke up after I had scanned my pillow and comforter off of my lofted bed.
YoungHouseLove says
Hilarious. Comment of the day.
xo
s
Beth says
The floors look AMAZING!!! I can’t even begin to imagine how tired you all must feel. Good luck with your move. All of your hard work is paying off and I am excited to see what plans you have for the rest of your house!!
Laura says
Alrighty then….you answered my question about learning to use a nailer! That is a neat product. Makes me ready to pull up all our flooring on the first floor and get to work.
Katherine says
The transformation is beautiful. Just this alone has added so much value to the house.
I applaud you both – I don’t know anyone else who could install floors for ten hours straight and then produce a blog.
Lindsay J @ jensoncrew says
Awesome job! I know it was hard work, but your outcome makes me want to install wood floors! The upstairs already looks so much better! I’m so excited for y’all!!
Celia says
Wow!!! That is impressive. The floors look great. Good luck with the move this weekend.
Lara says
Holy hotdog is that so much better!!! WOW you just increased the beauty and value of the house drastically. Nicely done folks, nicely done.
Corinne says
WOW! The flooring looks beautiful! You guys did a great job. I’m contemplating wood flooring for my upstairs as well, so I’m glad to find out about that fourth option you had with the Elastilon. Something to keep in mind for a few years down the line! I haven’t peeked under my gross, stinky carpet yet to see what I’m dealing with underneath, but I have a feeling it’s particle board subflooring like yours. It’s hard to wait until I can get the flooring installed for that surprise!
Leiann says
Wow, those look great!! Excellent job! I can only imagine how tough that was to lay.
Good luck with the move. :)
Leiann
Skye says
I love these floors – I was honestly a little skeptical about the color of them at first but now that they are all laid and in the home they look gorgeous! And that Elastillion stuff – that sounds legit. 2 legit. Does it stick to the particle board subfloor or just the underneath of new hardwoods? (which I am assuming would allow it to both float and float as one solid piece). I think that would work over our linoleum which is something I’d be interested in looking into! Anyways – gorgeous! And I know you are so relieved to have it DONE!!! Do you guys ever just take a day off to sleep?? :)
YoungHouseLove says
It just adheres to the hardwood, which then can expand and contract with temperature changes (more than nailed down floors can, which is said to help with cracking or warping). I definitely think it would work over linoleum!
xo
s
KathyG says
WOW! Good Job! This is pinned for me, thanks for doing all the research for me! haha. We have concrete flooring, and we are just starting to think about laying hardwood. WOW. Again.
Katja @ Shift Ctrl Art says
What a great solution to use that sticky mat. Thanks so much for all the detailed documentation. I am having so much fun following along in your adventure.
The hardwoods are a terrific upgrade.
Jessie says
I am in LOVE with your new house! We are looking for a similar one in the next year to fix up….and I adore the floors you all picked out! we installed laminate floors in our current house (wood in the next for sure) and we had some trouble with gapping so we are gong to redo them before we sell, does that fancy underlayment work for laminates as well do you know?? It seems like a dream way to install them so they wont move (and the added tip of using wood glue:), genius!)
YoungHouseLove says
I would think it would work for laminate, although I’m not sure if they have something else made for that (this seemed to be used with hardwood a lot). I know they could go over laminate if you were using hardwoods though!
xo
s
Vanessa says
Those floors look great. It makes the upstairs area look even bigger. What a difference you guys are already making there. I am so excited to see what else is in store. Good luck to you during your move- all of your readers are there with you in spirit :)
Take a break- get some rest- you deserve it! :)
Kate @ This Wandering Life says
What a TRANSFORMATION!!!!! It looks so good you guys. Hard work is already paying off- I am so impressed. Good luck packing!
Whitney says
Such an amazing difference! It looks soooooo much bigger!!!
Brittany D says
You guys are incredible! I have no idea how you have the stamina to push through DIY projects of this magnitude. Bravo! The flooring looks AMAZING!
Angel says
Holy crap this first big “reveal” for the new house is a doozy! I can not believe that is the same hallway. With some crown and paint… I seriously do not think I would believe you that it is the same space. The before looks so dingy and gross. The after… looks like a brand new house! Totally worth all the hard work you have obviously done.
Angel says
By the way… I dont know what the title was supposed to reference but I keep thinking:
Open the door, get on the floor!
Everybody do the dinosaur!
YoungHouseLove says
HA!
xo
s
Jenny says
Looks great! We’ve never used that particular underlayment-very intriguing and we’ll keep it in mind for our next house! So the boards were pre-finished? That is a huge timesaver. I somehow thought you were going to finish them yourselves and I was having trouble wrapping my brain around how you were going to stain and seal them and still move in this weekend, haha!
YoungHouseLove says
Oh yeah, that would’ve been rough!
xo
s
Leslie says
It’s like a whole new house already. You guys rock.
Julie says
Looks great!!! I installed wood floors at my in-laws recently and we used a laser level on a tri-pod to make sure the first row was straight, even though the walls were not. We had slightly bigger gaps in some areas, but nothing that was wider than the baseboard so it got covered up. Really helpful to make that first row perfect, but still time consuming!
betty says
the title of this post makes me think of the commercial with the cow singing in the shower.. its my fav and i’m not singing that song in my head at work.
i LOVE how seamless it looks!!!! its already SUCH an amazing transformation with the white trim and floors! cant wait to see it furniture, new fixtures, and paints colors!!!!
tracy says
The new floors are stunning! That is really an amazing transformation. Don’t worry about missing out on using the floor nailer – it is back-breaking work that suuuuuuuuuucks. (at least the manual kind with a mallet is)
I would love to see a picture of the transition of the new to the old wood by the stairs. Good luck with moving!
Sarabeth says
It’s crazy what a difference white trim and new floors makes!
Alisa says
Those look AMAZING!!! I love love love it. We just put down oak laminate and we had no idea how big of a difference it would make getting rid of the dingy shag *yes I said shag* carpeting. We did it in the bedrooms because we are moving, but it now looks like we are going to become landlords so hopefully after a couple years, we can continue it throughout (where the floors were replaced before we moved in and not in bad condition so we had no non-aesthetic reason to replace it now). I wish I had known that tip about the tape! That would have prevented many a freak out moments.
Sarah says
Love the floors! They are absolutely beautiful! Can you travel to Iowa and do the floors in my house next? :)
YoungHouseLove says
Be right there!
xo
s
Laura says
I did not know you could just stick it down. Now I feel brave enough to put in a floor because the nailing part and the expansion of the wood were my only concerns.
Lori says
Wow! You guys must be secret super heroes! That is pretty amazing stuff that you accomplished. Bummer about having to lay out the extra money for the underlayment, but I’m sure it was worth it in the long run. Oh, did I forget to mention that it looks GORGEOUS!!!
Katie | deranchification says
The new floors look awesome, seriously awesome! I think you two must have super powers…
Jodi says
it’s amazing how the wood floors and white trim instantly make this look like a petersik house vs. the dodgy 80s faded blue awfulness.
good luck with the move!
Brittany says
wow it looks great!! we have old carpet upstairs and can’t foot a bill to have hardwood installed – I’ve been much too scared to think about doing it myself to this point, but your step-by-step is super helpful, and love the details on options over particle board. My only issue stopping me from trying it myself now is that the stairs are also carpeted and that’s a whole other fear………
Evie says
I love it! What a great job! When you get a spare minute LOL would you be able to post a pic and talk a little about fitting the hardwood around the decorative uhm bumps on the door frames? Did you have to notch it and fit it in like puzzle pieces? Or did you cut off the bottom 3/4″ or whatever of the door frames and slide the flooring underneath? Thanks in advance!
YoungHouseLove says
Oh yes, John wants to do a details post in a little while that outlines five tricky spots and how we did those areas. We took photos as we went so hopefully they’ll help!
xo
s
Deb says
Can’t wait for that post! The floors look fabulous!! Happy Moving!!
Devon @ Green House, Good Life says
Undercut saw!
JG says
Also oscillating saws do a flush cut really well. Harbor Freight has a decent cheap one that works well for most purposes…
Kimberly @ Turning It Home says
Wow! It looks great!
Rachel says
Wow! Your new home already looks a million times better! I am also super impressed you decided to lay the floors yourselves and that you did a great job.
Alan Green says
Wow! Just the floors and the painted trim makes a huge difference! So excited to see what you guys will do next!
Donna says
We had new floors installed upstairs last month (by someone else, thank goodness!) and I was so thrilled to see that old carpet gone and the shiny new hardwood down that I had to pet it! Still do, when no one is looking!
Grace says
It seems like the Elastilon really cut down on your overall work time. It took three of us (two experts, one novice– me!) three 14-hour days to lay hardwood down in just one small bedroom, since we used a manual flooring nailer with the plywood subfloor. It’s such slow and physically grueling work, I wasn’t sure you were going to be able to finish the whole upstairs in just a few days, but you did! And it looks fantastic! I’d bet the Elastilon is worth the extra cost just to get it over with and not have to deal with all the nails.
Laura says
Hi. This is totally unrelated, sorry. How is your Savvy mattress holding up after 4 years?
YoungHouseLove says
Great! Still very happy with it. Only downside is it’s crazy heavy, so moving it sucks!
xo
s
Laura says
Are you going to get one for Clara’s big girl bed?
YoungHouseLove says
Since we’ve had that mattress for years (around 4) we don’t worry about any off-gasing or anything anymore, so we’ll just use what we have. Maybe when she’s a teen and wants a double bed we’ll get her one…
xo
s
Nancy says
Hi Laura,
I have the same mattress and after four years it shows significant sagging (although it is still quite comfy). It comes with a 20yr warranty though, so I’m contacting the company to see about replacement.
Laura B. says
Thank you for your replies, Sheri and Nancy. I am hesitant about these things. Little things called dollars. He he. One of our mattresses is over 40 years old and it is not sagging. The newest is probably 20 years old. I know, no one can relate. We have five boys and boys stink so I hate to get new stuff but really, poor kids. My body isn’t getting any younger either. I have always kept quality mattress covers on them so they aren’t gross.
Sophia says
Laura, I’ve had my saavy for 2+ years, and I can tell you that I have never slept better or more comfortably in my life. Seriously. It’s a dream and worth all the pennies you have to save to buy one.
Aska says
I’m not sure if it was posted but I wanted to ask how you finished the floor around the top of the stairs. We need to do our floor upstairs and I would have no clue how to finish the floor with the stairs. Let me know how that would work. Thank you.
YoungHouseLove says
John wants to do a “5 tricky flooring obstacles and how we solved them” post full of details for you (we definitely had a few tricky spots) so we hope to get that to you guys soon! We took lots of photos of those areas, so we hope they help.
xo
s
aska says
Thank you so much. Can’t wait for the post and congrats on the floors looking so good!!!
Gwen says
WOW! Nice work, guys! Really, really beautiful. I know you’ll be enjoying the fruits of your labor for years to come.
This line cracked me up:
“All that’s left on the agenda is to finish packing and get all moved in this weekend.”
… as if that’s such a quick and easy thing. It probably seems like it after all your hard work on those floors!
Way to go!
Susie says
Looks lovely.
Quick question…How exactly did you remove (& then re-attach) the skirting with minimal damage to the paintwork? Thanks!
YoungHouseLove says
We just tried not to touch the face of the board at all, so we carefully inserted a flathead screwdriver behind it, pried a bit, then got the crowbar in that gap and pried some more. Only the back of the molding was being touched by the tools, so that seemed to help.
xo
s
Sophie says
Amazing what white paint and a new floor can do! Good job guys!
Hope you get moved in quickly and smoothly! Moving is the worst, but the new house is so worth it =)
Katie says
Gorgeous! Gorgeous! Gorgeous!
Thank you for the inspiration. I’m anticipating replacing our old carpet with hardwoods or laminate sometimes this year. Check out these pics to see just how in the same boat we are.
http://suburbanfervor.com/2013/04/15/cleaning-out-my-carpets/
Good Gravy. You’ve shown me the light at the end of the tunnel.
YoungHouseLove says
You had me at “Eminem reference.”
xo
s
Katherine says
The floors look great! How close of a match are they to the stairs and existing floors downstairs? Can you show us a pic?
Are you guys planning on putting a new runner on the stairs, or leaving them bare?
YoungHouseLove says
There’s a pic of that in this post for ya: https://www.younghouselove.com/2013/05/would-wood-we-do/ but we’ll have to snag more photos once we pull the runner off the stairs. We’re not sure if we’ll add another runner (depends if we all keep slipping, haha) but the current one is so stained and baggy that it has to go.
xo
s
Katherine says
I saw it in that post but I was more curious about how seamless it looks with a large area of new flooring next to the old flooring. Hopefully you’ll pull off the runner soon!
YoungHouseLove says
Oh yes, we want to wait until after the move (we figure it’s protecting the stairs for the moment so if we drag something up the stairs they’re less likely to scratch! But that guy has to go soon!
xo
s
Shan says
Congratulations on getting those floors done so quickly!! They look fantastic! I have installed nailed hardwood before, and I don’t think I would have the guts to do a whole upstairs.
A few questions:
1) Did you have to cut the door trim shorter in order to slide the wood under? If so, did you use a dremel or take the trim off and re-install?
2) How did you transition the wood at the stairs? Did you buy nosing for the top step or was there something there already that you could tie into?
Good luck with the move!
YoungHouseLove says
In short, yes we cut the trim and we used a Dremel and as for the stairs it’s complicated but we took photos to help. John wants to write a follow up about 5 tricky spots and how we solved those issues with photos and info for you guys soon!
xo
s
LauraC says
Looks great guys! I so very badly want to get our upstairs floors refinished, but it’s at the bottom of our list, and will be several more years before it happens; our kitchen is at the top. Btw, I love how the quarter round got painted to match the baseboards. Unpainted quarter round always jumps out at me in pictures and makes me twitchy. Though I understand it’s a regional thing.
Stacy says
Your floors look wonderful. My husband and I are in the process of buying a home. The one we like was owned by smokers and I want to pull up all the carpet downstairs and put in hardwoods and eventually do the same upstairs. Love how your floors came out – maybe I will get up the courage to do them myself instead of hiring out… maybe.
Crystal says
Wow it already looks like a completely different house, love it! Quick question, if money wasn’t a factor now that you’ve used the sticky installation method which would you recommend if nail down was also an option?
YoungHouseLove says
Definitely. We’re very happy with it! At first we were like “uh… a sticky mat?!” but it’s awesome. And reading all of the good reviews and seeing that lifetime warranty definitely helped.
xo
s
John @ Our Home from Scratch says
Awesome. Looks beautiful. I’ll keep that underlayment product in mind. Do you know how long your entire upstairs will take you? I think we have similar sized upstairs…
YoungHouseLove says
John’s going to add up all the time we’ve spent so we know how many hours total it took :)
xo
s
heather says
I had never heard of that product before. It’s interesting to see flooring laid in a different fashion. We’re laying ours upstairs and taking the traditional route. We didn’t do any underlay and yeah, you can hear a little walking noise upstairs from downstairs but we don’t mind. We’ll be able to hear the future kids if they’re watching TV when they should be in bed. Mama’s gonna stomp that floor and yell at them to get in bed!
YoungHouseLove says
Haha!
xo
s