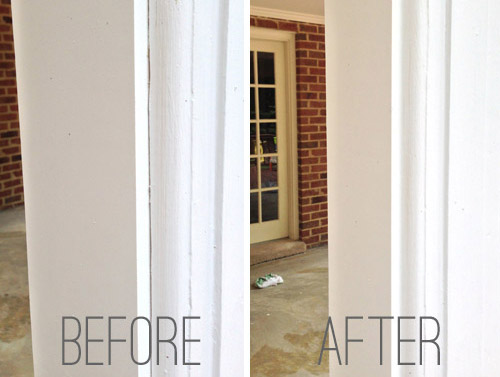
As exciting as it was to remove the sliding glass doors from our sunroom, it left a very unexciting task (by comparison) next on our list.
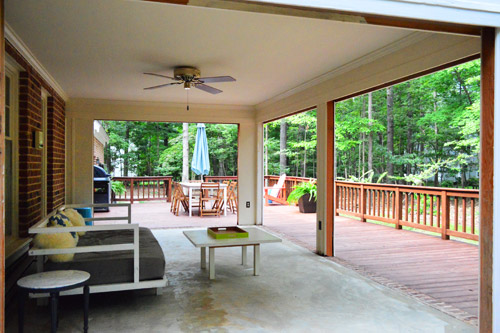
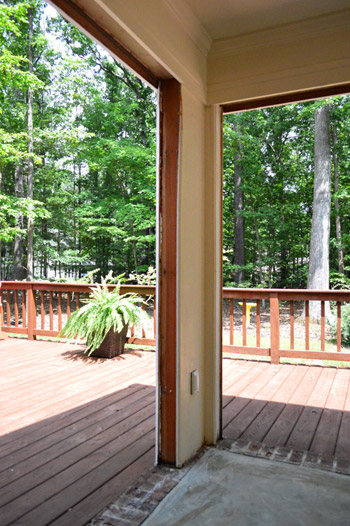
Removing all of the metal door frames left lots of exposed raw wood along the edges of each opening. Not only did it look unpolished, but it was recipe for rot (that recipe being rain water + raw wood = rot). So we jumped on this to-do right away.
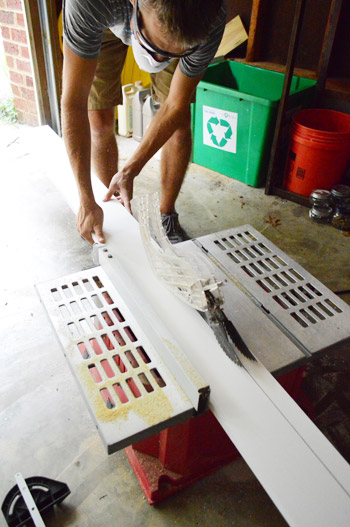
When we got our house painted, this room had a lot of rot repair on the outside so we’re hyper-vigilant to the issue right now. So instead of filling those areas with wood, I splurged on PVC (i.e. plastic) since it holds up better to moisture. It was about $5 more per piece, but I figured it was worth knowing that it would last for decades without any rot. I did save about $25 by buying the pre-primed wood for the tops of the door openings (since they won’t likely come in direct contact with standing water).

Each of my boards measured 1″ x 6″ x 8′, which was just a smidge too wide for the gaps that I was filling. So in addition to cutting them a bit shorter, I had to rip a little off the sides using my table saw. Once I set my guide to the right measurement it made for pretty easy work.
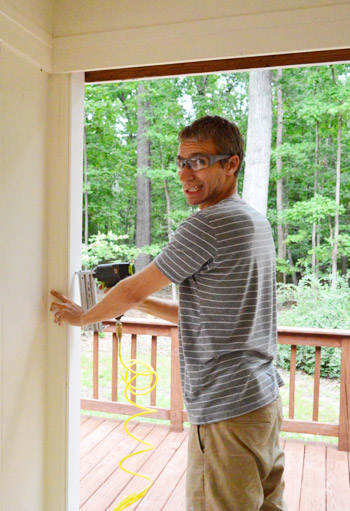
Once everything was cut, I put some construction adhesive on the back of my board and the nail gunned it into place. It had been a while since I had a date with my nail gun, so it felt good to be back in the saddle. I made super handsome faces like this.
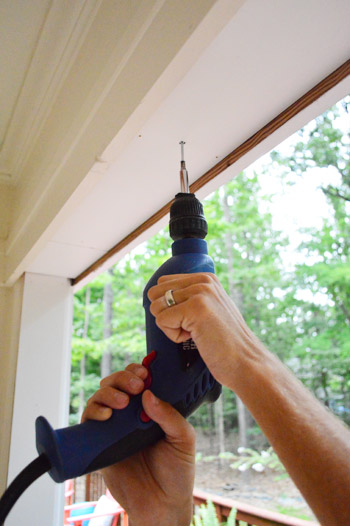
For the ceiling boards I also reinforced the hold with a few screws. I just didn’t totally trust adhesive + nails to keep it from falling on our heads at some point.
Installing the boards took me a couple of hours, only to be followed by an equally fun few hours of caulking. #YOLO
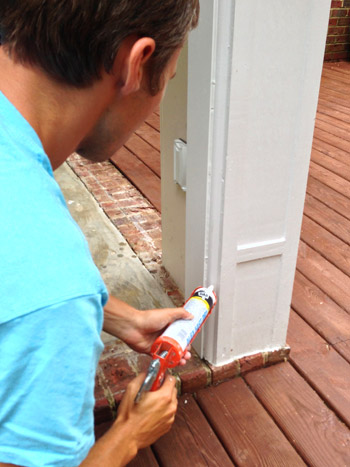
Our main mission was to caulk the gaps around the new boards (just say no to moisture creeping in there!) but we took the opportunity to fill any other cracks or gaps that we saw around the room. In addition to its rot-prevention benefits, this step also made the new frames look more finished.
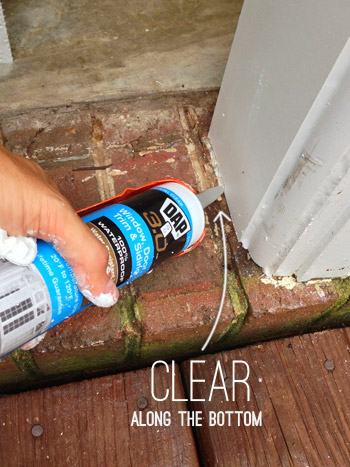
When it came to caulking the bottoms, I learned from a similar experience on our last home’s porch makeover that I should use clear (not white) silicone caulk here. When caulking against brick it’s nearly impossible to get a straight looking line because the caulk gets smushed into the ragged surface of the brick. So clear caulk allows us to still seal things tightly, while the straight edge of the board still acts as the visual edge. Obviously it looks lumpy here since I didn’t smooth it with my finger yet, but once you do that it’s pretty clean looking.
I know, I know, riveting stuff. But at least it made the room look a little less unfinished.

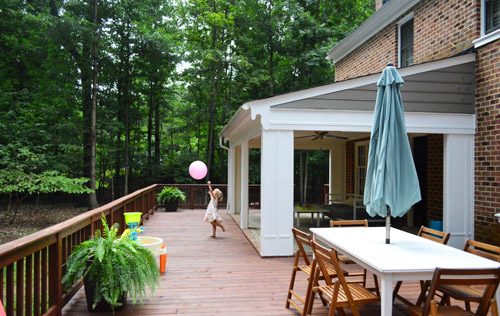
And as you can see, someone is enjoying the new open space quite thoroughly.
We still need to paint the inside of the room (right now it’s cream, while the outside is white) but before we broke out our paintbrushes, we couldn’t keep ourselves from breaking into the ceiling…
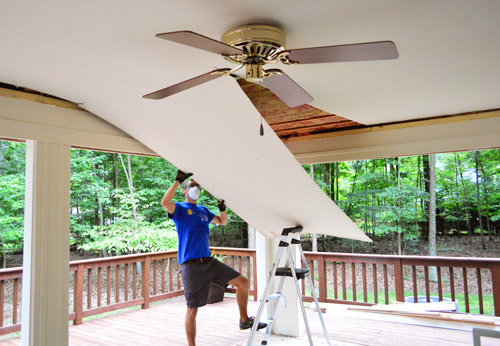
More on that once we finish poking around in there. Here’s hoping we can actually loft this baby!

Bethany @ Dwellings By DeVore says
who would’ve thought removing those doors would make such a huge difference! It looks so high end already!
Julianne says
Looking good over there! Amazing eye to have the vision for this space & see the potential! Can’t wait to see more!
jenny says
i don’t know why, but i’m crazily excited about this project and to watch it unfold… what a great idea! glad you were open to sherry’s vision, john. :) makes for a great team…
Phyllis from Beantown says
Hi S & J,
I love watching all the progress you are making on your new home!
I was reading an article on Oprah.com and your book was on it. I wasn’t sure if you knew so I added the link below…
http://www.oprah.com/money/Affordable-Room-Makeovers-Decorating-Ideas/4
YoungHouseLove says
How crazy is that?! Thanks so much for the heads up Phyllis!
xo
s
Maggie says
As others noted, the picture of Clara throwing the ball up in the air is so perfect! Excited to see how this project turns out – great work so far!
bethany says
dude just had a hilarious thought: One of these days that day bed is going to look like an inviting place for bambi to take a little snooze….
YoungHouseLove says
That would MAKE MY LIFE. Right now I get excited when I see a squirrel on the deck…
xo
s
Annie R says
Hehe! That would be great!! We have squirrels that think our swing set is theirs! They go up and down the slide and ladder- it’s hilarious!
Evie says
Ooh, so I just learned the meaning of #YOLO! I needed that when I accidentally poked my hammer through the wall on the rebound (pulling a very tough nail) and then did a first time patch job on it all by myself. Very excellent work, too! LOL Figure at my age I better get in all the #YOLO I can!!
Verandah question, Sherry and John. What is supporting the cement floor? It’s up quite high…but no cracks, so that’s good… I wish I had an UNDER THE DECK photo!
YoungHouseLove says
There’s actually foundation under the sunroom (it’s bricked to the ground under the deck)! But there’s crawl space under the deck (just posts for that).
xo
s
Maria@TheBrooklynFig says
Ahh I see the planks on the ceiling your ripping down and my head is spinning with awesome planked ceiling ideas! Hope that you can get your dream of vaulting it.
Cristy says
Wheeee!!! Can’t wait to see more!!! More! More! More!! :)
Krystle @ Color Transformed Family says
Wow! This already looks amazing… a complete 180 from before. I would love an area like that. Here’s hoping you can vault the area.
Alex says
(Hey youngsters! A floaty-slidey ad from vizu.com (http://www.vizu.com/w3c/policy.htm) is cropping up on your pages! I think it was asking something about Texas tourism. Just FYI!)
YoungHouseLove says
Argh! Thanks for the tip Alex! Anyone else see one of those? We hope we’ve blocked it but let us know if you see one!
xo
s
Christine says
Wow– cannot wait to see how the ceiling turns out! How cool would that be, especially if you can paint the ceiling some lovely light blue color.
oh Holland says
Extreme Verandizing is the most brilliant thing you’ve done to you new home so far. Can’t wait for the full reveal!
YoungHouseLove says
Haha, thanks Oh Holland!
xo
s
Jude says
Wow! Your home looks awesome! The picture of Clara and the ball is SO adorable! She really looks like she is in Heaven :) The veranda already looks awesome, and will be nice when you want a break from the sun. I am trying not to be jealous, but a LOFT! Come on, now I don’t know if I can control myself! You guys rock, all four of you!
Ashley says
I think this may be one of my favorite YHL projects ever, even though you just started. I’m in love with this idea and I can’t wait to see how it turns out for you. It’s going to be a fantastic outdoor space, I’m sure!
Carrie says
Two words about furniture: KILLING MACHINES
#YOLO
http://youtu.be/z5Otla5157c
YoungHouseLove says
BEST LINE OF THAT WHOLE SONG!
xo
s
Stacy Snook says
What a wonderful space to lounge, read, and relax! I’m excited to see if you’re able to loft it. So much fun.
Ann says
I love it!! Great call on opening the space up. No need to mention who’s idea that was. The photos of Clara are adorable. :)
Jackie says
Totally laughed out loud at the #YOLO. Looking fantastic out there!
BarbOutsideBoston says
I would love to see a picture of the exterior of that side of the house now. I bet it looks more traditional.
Wendy G says
I love love love this project so much!! I’ve been toying with the idea of building a pergola on the back of our house but now I want to go all out veranda!!
Tara says
Love you guys, your site, your book…very exciting watching what you do to your fabulous new place. Thought you might want to be aware of issues related to PVC products. Here’s a good source (for this but also many other issues related to environmental toxins). Keep up the great work! http://healthychild.org/easy-steps/reduce-your-use-of-pvc-in-plastics-and-other-household-products/
YoungHouseLove says
Thanks for the tip Tara! Off to check it out!
xo
s
Sara says
Oh! I think you would love this book for some great ideas! :)
http://www.amazon.co.uk/Vintage-Crafts-Do-It-Yourself-Decorating-Projects/dp/1626361037/ref=sr_1_1?ie=UTF8&qid=1377108701&sr=8-1&keywords=clara+lidstr%C3%B6m
Clara is her name ;) and she is a big blogger here in sweden! I have the book myself right next to yours! :D <3
Here's a link to her blog with english translation. :)
http://networkedblogs.com/OlEUC
Lots of Love!
YoungHouseLove says
It sounds awesome! Thanks so much for the tip Sara! Just added it to my wish list.
xo
s
Sharon says
Hi! I looooooovvvveee your new found veranda!! It completely changes the feel of your deck. It’s so funny how taking away that glass makes you deck one big open room that still feels cozy. Enjoy it!
Sarah says
Cool! What a great idea! I’m loving the transformation of your backyard and deck space.
Kathryn says
I keep thinking of this project as ‘you’ve not lost a daughter, you’ve gained a son’ except in my mind it’s ‘you’ve not lost a sunroom, you’ve gained a carport’ – er… what I mean is you mentioned one of the unexpected perks of the carport v. garage in the last house was that it was great to have an indoor/outdoor space for parties, and people just seemed to naturally gravitate to it.
So… veranda schmeranda. Congrats on carport 2.0!
YoungHouseLove says
That son/daughter analogy is hilarious. I love you.
xo
s
Lynn says
I LOVE, LOVE, LOVE your veranda! :) We have a split entry….so there’s not enough height for us to have one off our deck. So we haev decided to build the next best thing…a gazebo.
LOVE LOVE LOVE watching Clara dance around outside as well. We have a 1 1/2 year old, Sarah. Watching Clara grow gives us a little insight into what’s to come in the next year or two. :) Plus great ideas of things to do with her! Thanks!
Lynn says
PS: The moments you’ve captured this summer in the yard and on the beach are so framable and georgeous. *tear* :)
Heidi says
I’m sure you guys probably know this, but I just bought some more trim and baseboards for my old house at Home Depot- it was almost 50% cheaper to buy online (since they have way more choices), pick from tons more styles and have it shipped to my local store for free. Ridiculous, and I waited a few extra days (I think 3 or 4) and yet, awesome for being on a budget!
YoungHouseLove says
That’s an awesome tip! I’ve never heard that or even thought to look. Thanks so much for sharing!
xo
s
Jennifer says
Opening up that room makes such a difference in the feel of your home! You guys are fearless when it comes to demo! Can’t wait to see the ceiling.
Gwen, The Makerista says
This is so exciting! What an amazing transformation it will be. Like your own cabana! Now you just need a pool and a boy to fan you and bring you drinks!
taria says
Looks really wonderful but please get out your table saw manual and do some reading. Your set up is really scary, especially with a kiddo around. I grew up with a carpenter dad. There was one particular accident that was not pretty. You guys are all to sweet to deal with a bad table saw accident. You inspire me when I am not worrying about your safety. : )
Ian says
Looks like you need a stand for the table saw John! Save your poor aching back and be easier and safer to use.
Outdoor areas are so worth the work, the better it is out there the more likely you are to actually use it!
Stay well
SassafrasNA says
I’m on the edge of my seat as usual with you guys!!!!!!!!!!!!!
On the daybed mattress…how about sewing some elastic onto the corners of a large vinyl tablecloth to cover it and make it weatherproof?
YoungHouseLove says
Love that idea! Someone else said they sell zip-on plastic covers for daybeds so that might be helpful too!
xo
s
Mandy says
I love you guys, and this project! It makes me long for my own home so we can do awesome stuff to make it really ours – I love the individuality you put in each of your homes!
However, I’m one of the annoying picky people – typo alerter! Usually you get them fixed before I comment, but this one is still there – when you’re talking about using clear caulk on the brick you put “cailk” (“So clear (caulk) still allows us to seal things…”).
YoungHouseLove says
Thanks Mandy! All fixed!
xo
s
sarah @makingitmyhome.blogspot.com says
what a fun extra space!we dont get rooms like those in the northeast
Natalie says
You guys are freaking amazing!!
Seriously, it was genius of you to turn the sunroom into a covered deck {or whatever you call it!}. I love it already! Keep up the GREAT work! :)
Penny Smith says
Before you were talking about staining the concrete. Now I see tiling on the list. Did you find out stain won’t work (I swear I tried to find it before asking the same thing as 50 other people!) I DO love the brick edge though… do you not like that in person?
YoungHouseLove says
We LOVE the brick edge but the concrete is so slick (Clara has slipped on it a few times) so we worry stain or paint wouldn’t help with that, but some exterior tile would have more grip and cut down on how slick it is.
xo
s