Today we’re going to show you how we constructed an easy DIY deck gate to help keep our dog Burger from escaping. He loves laying in the sun out there, but we wanted an affordable and attractive way to stop him from running off after a squirrel or something. We also have a newborn and a toddler, so the gate will help with them too. And the whole thing only took a couple of hours and cost us less than $30!
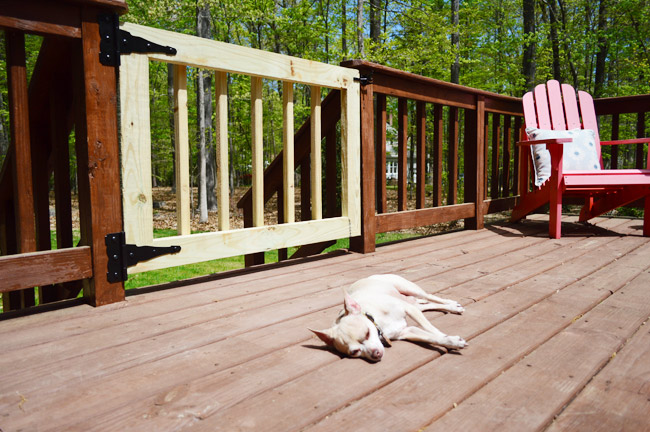
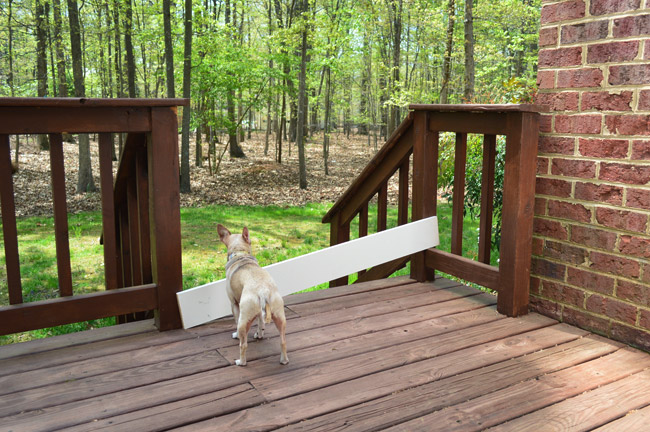
We don’t have a fence on our property, and he has gotten more brazen lately and may even wander into the neighbor’s yard. So far our solution has been this very classy plywood boards we’ve been leaning against the opening. It works surprisingly well, but it’s flimsy and ugly.
And while we could’ve bought a premade, freestanding gate. We wanted something that was integrated into the deck itself.
Material & Supply List
I read a couple of tutorials online that were particularly helpful (this one), then I took some measurements, sketched out a game plan (I modified the plan), and hit up Home Depot. Here’s what I came home with:
- 2×4″ pressure-treated boards
- 2×2″ pressure-treated balusters
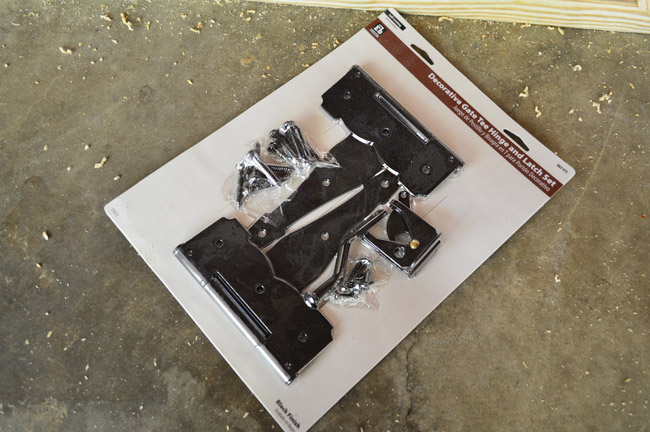
- Gate hinge and latch set
- Miter saw
- Screwdriver
- 2″ deck screws
- Measuring tape
- Clamps
- Pocket hole jig (optional)
- Carpenter square (optional)
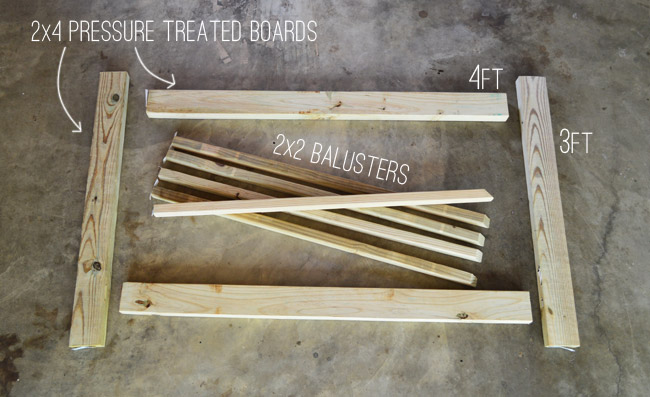
You can see the basic arrangement of the deck gate build above. I was able to save money by purchasing some longer 10′ boards that they cut down in store to fit in my car (that’s what you see above). I was building too gates, so my materials were double what you see in that photo.
Step 1: Measure & Cut Your Wood
The width of each gate should be 1″ shorter than the width of the opening. This leaves room for it to swing easily once finished. The height should match your existing deck railing. This particular gate was 44″ wide and 29″ tall. We also chose to miter the corners of our gate for a cleaner look, but that’s up to you.
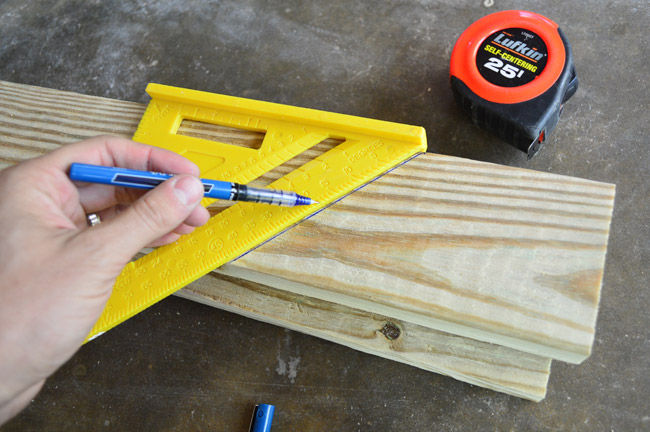
Using a carpenter’s square to mark your 45° cuts is recommended to get the most precise cut. We also suggest cutting your boards in pairs: the top & bottom boards together, and the two sides together. This ensures that the pairs were identical lengths and will help keep your gate square in the end.
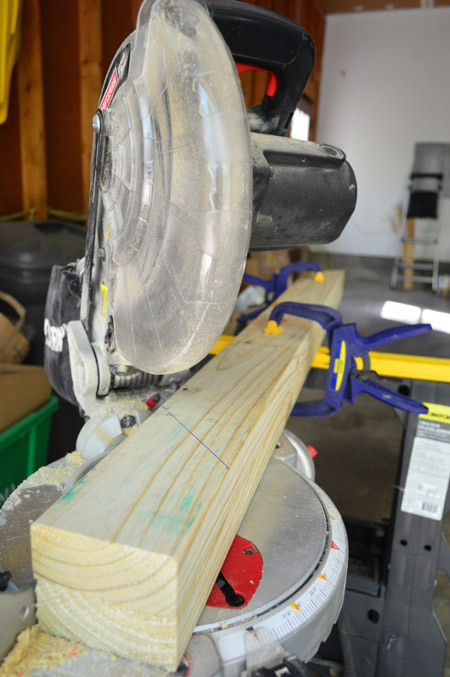
You can see we clamped the board together as we cut to keep them lined up as we cut them on the miter saw.
Step 2: Screw Your Gate Frame Together
To join my deck gate together, I used my Kreg Jig to create two pocket holes on cut end of the 2 vertical boards (you could do the horizontal boards instead, but there’s no need to do all 4). These are holes I’ll later fill with wood putty.
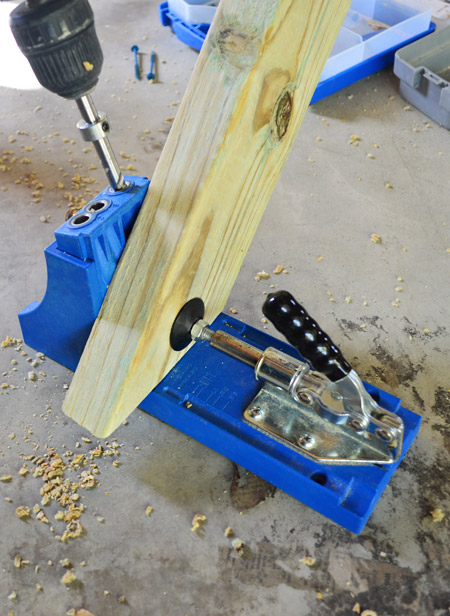
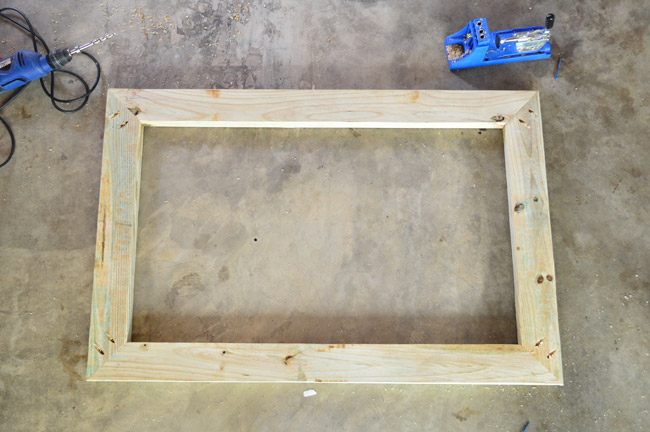
If you don’t own a pocket hole jib, you could also just use long screws right through the sides of the boards. We just find the pocket hole system is a tighter, more precise system. Here’s my frame after everything was screwed together using 2″ deck screws.
Step 3: Add Balusters To Your Gate
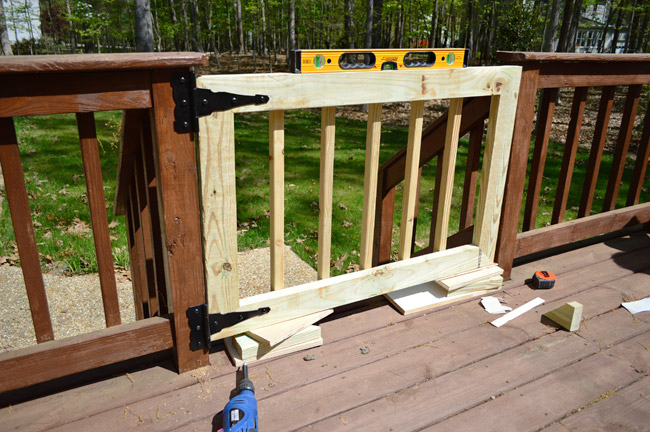
Next we attached 2×2″vertical balusters to mimic the look of the rest of the deck’s railing. We measured the spacing between the existing balusters and determined I’d have space for five of them on my gate. So after cutting them to length, I attached the first one at the center point of my gate on both the top and the bottom using two 2″ decking screws.
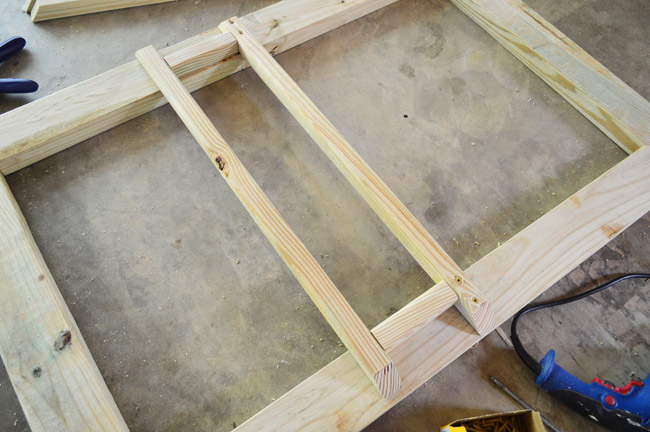
To make this task easier, we recommend creating a spacer out of scrap wood to make sure your balusters are evenly spaced. You can see ours in the photo above.
Step 4: Hang Using A Gate Hardware Kit
With the gate constructed, we just needed to attach it. Home Depot sold a $15 kit that included two T-hinges and a latch. Your hinge should stretch about 1/5th the length of your gate, so these 8″ hinges were just about perfect for our project.
To hang the gate, I used some scrap wood to prop it in place and (with Sherry’s help) determined the best spots to attach all of the hardware with the provided screws. We couldn’t center the top hinge (it ran into the existing deck railing) so it rides a little low. But once the light wood is stained to match the rest of the deck we hope it won’t be too noticeable.
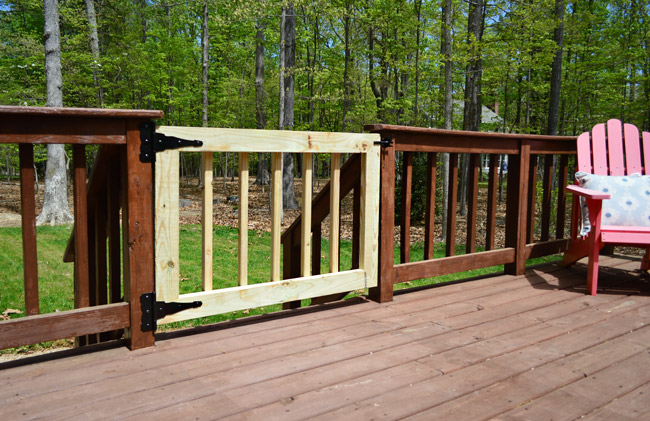
Then we just attached the latching mechanism to the other side, and we were in business.
Some people also choose to install an anti-sag kit on their gates to keep them square over time. We opted not to at this point because we preferrred the cleaner look. It’s always something we could add later, but luckily our gates aren’t very big or heavy.
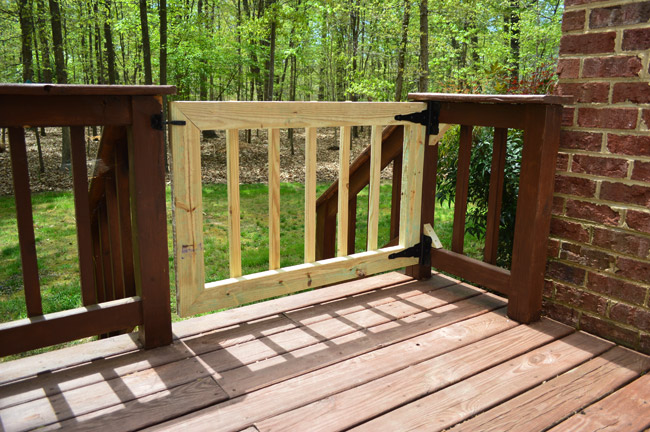
The gate above was a bit challenging because it was attached at a corner of the deck. Since we couldn’t screw into the post, we had to use the horizontal rails instead. The hinge was too tall to fit entirely on each rail so we screwd in some blocks (the initial mitered corners that I had sawed off) to give the hinge a place to attach.
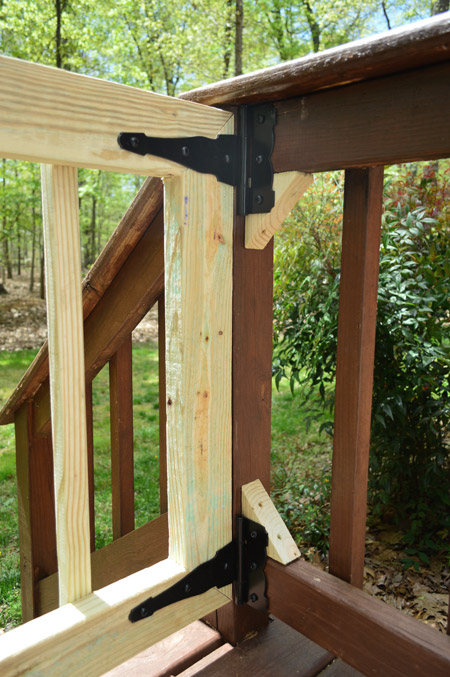
Once everything is stained, the blocks should blend right in with everything else.
Step 5: Stain And/Or Seal Your Gate
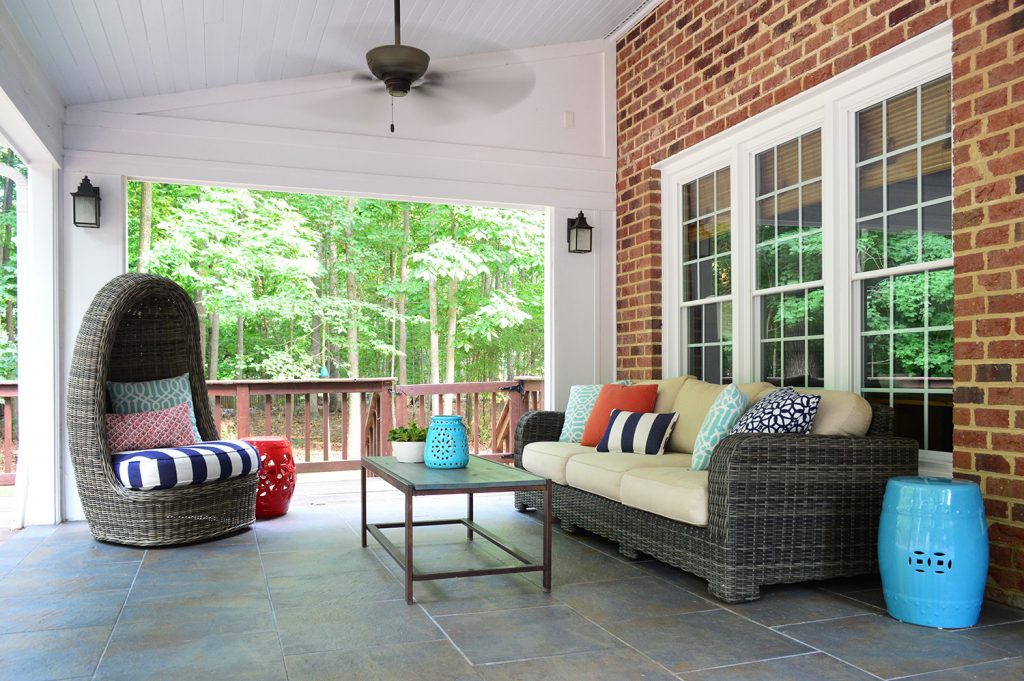
Depending on the look you want, you’ll likely want to seal or stain your new deck gate. Just be sure to wait about 2-3 weeks to let your pressure-treated wood dry out first. If you seal it too quickly, some of the pressure treatment chemicals can cause bubblnig or peeling. We used the same stain we’d used months prior to stain and seal our whole deck. You can see one of the finished gates in the background of this photo.
It took just about three hours to make both deck gates and my total cost was $53 ($23 for the wood and $30 for the hardware). And it’s been HUGE help in keeping Burger on the deck. Sure, he could squeeze his little chihuahua body through the gate if he really wanted, but he’s just not that adventurous. Remember: this is the same dog that was stopped by a small plywood sheet before.
And even though our kids don’t play out here unsupervised at this point, we know thes gates on the deck will be extremely helpful in preventing falls down the stairs. Especially once our newborn reaches the learning-to-walk age.
Want More Deck DIY Projects?
We’ve tackled a lot of builds and home improvements to our various decks over the years, so be sure to check out these posts too.

Katherine says
Thank you so so much for this post! My husband and I decided we really needed to build a deck gate just 2 days ago! The stairs leading down to our backyard are a death trap for anyone with less than perfect walking abilities AND we have a baby on the way. This tutorial is exactly what we needed.
Also I think it is high-larious that all Burger needs to stop his roaming is a short piece of plywood. Our mutts could escape from Alcatraz if they put their minds to it.
Margo says
The piece of plywood used at my parent’s house when we come visit with the pooch is looking a little sad now in comparison.
I never thought of building them a gate because the plywood is meant to be used only when we are visiting; though I have a suspicion they leave it up all the time haha. Maybe there’s a way to do a temporary or removable version?
Congrats on everything! So excited to see the finished show house (that this weekend right?)!
http://www.rentovations.weebly.com
YoungHouseLove says
Yes! It opens this weekend and runs for the next three weekends. Ahhh!
xo
s
Brittany M says
This is exactly what I needed in the exact moment I needed it! I LOVE when that happens! My husband and I have been looking for gate options for a while and when I sent this to him he said he MIGHT be able to pull this one off. Crossing my fingers!
Hope all is wonderful for you guys. :)
<3 Brittany
Lesley says
Nicely done, nicely matched up!
My concern about a cross brace or another horizontal piece to keep wee ones in or the gate from sagging is the ability for them to climb it. When my dad added a gate to the upstairs of his boathouse to keep pets and kids upstairs on the deck it took 6 adults to design it and consider all of the possible mischief the kids could get up to. Before determining it needed to be solid surface on the inside/kid side, and anything else on the outside so they couldn’t climb/swing/pull/squish pinch fingers/or otherwise break it.
7 years and 4 grand kids later and it’s still hemming them in.
Bonnie K (BornInaZoo) says
I did a similar project a couple of weeks ago for my dogs.
https://www.facebook.com/media/set/?set=a.10202865362266423.1073741835.1572932232&type=1&l=a11db03c58
Aria says
This is such a great idea! We have a similar solution to let our kids play on the patio while I watch from the kitchen (read: getting things done) andir has been a life-changer. It should help corral kids now that you have two to watch!
Side question… Do you do your text and arrows in Photoshop or with another App? They look great! Always on the hunt for a great solution to quickly editing photos.
YoungHouseLove says
We use Photoshop (the text is Ostrich Sans and the arrows are from the shape tool in PSD).
xo
s
Jennifer says
The gates turned out great! I use a piece of scrap plywood to keep our dog out of the kitchen. He’s a great dane/rottie mix. He could easily step over it but he won’t.
You can see him standing by it here:
http://owenfamily6.blogspot.com/2014/03/gates-are-up.html
Burger looks very happy sunning on the deck!
Leah says
My husband made me a very similar gate for our deck for mother’s day a few years ago. Just last summer, we used Home Depot’s Deck Over on it and the rest of the deck – looks awesome now! (and does its job keeping kids and animals from roaming).
Dana@chocolateandsunshine says
You are too talented with power tools!
I had a deck gate added to mine and it immediatley started leaning to one side. It has been repaired twice and still continues to do this. I’ve given up for now but some day, assume I will just have to start over with it.
Hope you are getting some sleep with new baby boy.
Allison says
Just moved into a house with an upper level deck that thankfully already had a gate. (Actually, the gate was originally at the bottom of the stairs, so all we had to do was move it and reattach the hardware). I love it because my almost 2 year old has extra play space and my indoor cats even like to get out in the fresh air and I don’t have to worry about anyone escaping! Win-win! You’ll really enjoy it once Teddy gets moving!
Maggie says
Your gate looks nice, but I know there’s building code requirements for how apart your vertical rails are for child safety and you may be okay with the mitered corners, but you might need the Z-brace to prevent racking of your gate.
I hope you’re getting some sleep with your newborn!
Sonya says
The verticals look too far apart to me, too. If I remember correctly, the code says that a 4″ ball should not be able to fit thru. I would add one between each of them before the little one starts crawling out there. The code is so they don’t get their head stuck.
Love your blog! You are my motivator to get busy!
YoungHouseLove says
Thanks Sonya! We’ve chatted about this in a few other comments, so we’re trying not to repeat things as much :)
xo
s
Traci Martin says
I am in GA using Firefox. Tried your suggestions, but still no content for the post. I can see the comments. I hate to be the bearer of bad news!
YoungHouseLove says
Oh no! It’s still going on? So strange! Others have seemed to be in that general area so maybe it’s slowly clearing up in that region and will be fixed in GA soon? You also might want to try Chrome or IE or some other browser just to see if that helps? You tried refreshing a bunch of times and clearing the browser’s cache, right?
xo
s
Kerry says
This is great & looks so well made! I need one of these for inside ;p
danielle says
awwww burger is the best! we use a section of that awful, white-plastic-coated wire shelving to keep our dog on our deck… classy!
Courtney says
Love this!!! So timely as I was wanting to put a fence on our back deck to let our one year old son play on the deck without constantly worrying he would bee-line for the stairs!! We’ll definitely be following this tutorial.
trish says
Do you guys get deer ticks in your area? I’ve been wondering since I’ve been seeing all those deer in your yard. I’m glad you can keep burger gated in and away from the woodsy area. I always worry about Lyme disease in our area in New England.
trish says
http://www.vdh.virginia.gov/news/LymeDisease.htm
YoungHouseLove says
Thanks Trish! John and I grew up in wooded areas so we know all about daily tick checks (we all do them) and also have Burger vaccinated for Lyme disease as well :)
xo
s
Erin says
You guys always manage to have the same projects going on at your house that I had in mind. This deck fence is perfect timing!!
Leslie C. says
In one of the rentals that we lived in, we had a 3ft tall fence that our Great Dane could have basically just stepped over, he never even made an attempt! We also use a small baby gate that is just propped up to keep him from going in the living room at night and laying on the couch. All he would have to do is bump it and it would fall right over!
Some dogs are too funny!
Lynne says
I was really happy to see this post. It’s something I’ve wondered each time you did an ‘outside’ themed post and I couldn’t see any fences. Having two dogs myself (one is a chihuahua, the other a ginormous wonder-what’s-in-him breed), I guess I automatically look for those things lol. Our wee Chihuahua, Darcy, would be through those spaces in a heartbeat though.
Athena Perry says
We did the same on our previous deck (so we could use it as a large/safe play area for the kids…without having to constantly be watching them). We added a wheel under the latch side of our gate…b/c my boys loved to stand on it…this definitely helps with sagging prevention :). It was the best part of the whole deck in my opinion!! Yours looks great!!
Deborah HH says
I wouldn’t have noticed the off-centered hinge if you hadn’t mentioned it! Excellent gates—very well done (except for that slightly off-centered hinge ;)
Chihuahuas are such fun. Every day mine would scooch across the floor, following a little lozenge of sunlight.
Joseph says
These turned out great. I’m going to have to come back to this and your deck post in the not too distant future since I want to put railing on the front porch and a deck on the back of the house.
Jane Stoa says
The gates look great but how about adding the matching top rail (even if you have to leave a small space to allow for opening and closing?)
YoungHouseLove says
Sounds nice!
xo
s
Krista Ash says
ahh this post is perfect timing for me! I was just researching deck plans (and subsequently gates to keep my pooch in!) I’ve got a few months before execution though… still 3-4 ft of snow here in Labrador :)
Evelina says
Awww you updated your little sidebar blubs! Love!
Evelina says
What is blubs??? I meant blurb.
Lizzy says
Just FYI, I can’t get your site to work properly in Chrome. I’ve refreshed a million times, but nothing. It works just fine in Internet Explorer.
YoungHouseLove says
Ugh, so sorry! Can you send us a screen grab (or post it to our Facebook page)? That should help us diagnose it!
xo
s
SherryB says
Those corner blocks to fit the hinges were a stroke of genius – on less sleep even! Way to go, John!
s says
You guys will probably need to brace those gates or they will sag and be difficult to open/close–especially the one that’s open a lot. We were able to use inexpensive cables that you tighten to brace ours without adding a bunch of wood to the clean look.
YoungHouseLove says
Thanks S!
xo
s
yalanda says
Looks great! And I’m super jealous that you have leaves on your trees already :(
Sarah says
The gates look great! If you post about staining them, can you share how you safely dispose of your stain rags? I always feel like mine are going to catch on fire and burn something down! Thanks :)
Bex Crowell says
What about if you attached a heavy-duty screening material across the back side of the gates… no going thru the bars then!
Katie says
Awesome job on the gate! By the way, your choice to scale back on the blog is refreshing. Thank you for setting an example for grounded, genuine living- I can use the occasional reminder and you provided an excellent one!
I noticed your use of pressure treated wood and thought I’d pass along this link: http://www.epa.gov/oppad001/reregistration/cca/cca_consumer_safety.htm
Such wood is impregnated with arsenic, and this leaches into the surrounding soil. The sawdust is considered toxic and the wood should never be used as a surface for eating or playing. I mention this because your whole deck is likely made of the stuff. I hate to preach- I just read “Raising Elijah” by Dr. Steingraber and I was surprised by the chapter on pressure-treated wood. You probably know all this, but I thought I’d pass along the info just in case. Ciao!
YoungHouseLove says
Thanks so much Katie!
xo
s
Bethany @ Dwellings by DeVore says
it looks so nice and blends in so well with your current deck railings. I would love to use something like this for my toddler too, way better than the store bought baby gates!
Leslie says
That last shot of Burger is too cute! My dog is afraid of fences and barriers too. If the opening isn’t big enough for her whole body to fit through cleanly, she won’t go.
John the Builder says
I just forwarded this post to John the Trim Carpenter ;)
YoungHouseLove says
Haha!
xo
s
Cindy Lyon says
Hubby rebuilt our deck last year with Trex products but the one thing he didn’t do was make a gate for the top of our stairs. Our dog isn’t a wanderer so that’s not an issue but the safety of our young grandchildren is. Your gates look like just the ticket and will match the style of our railing well. I’ve pinned this post for a future weekend project. :)
Vicki says
We originally saw these type gates on the front porches of beach houses in NJ. A few years ago we added them to our deck at the lake (no way to fence in the yard). We added a small caster wheel to the bottom on the opposite side of the hinge to keep everything level. Works like a charm!
Also wanted to say that for a small dog like burger you can put up a chicken wire fence that would be mostly hidden in the woods..
Aimee @ Irresistible Pets says
LOL at that last pic of Burger . . . “I give up!”
Michelle says
A word on safety: we used bird netting (the kind used to protect fruit trees from birds) stapled to the inside of our deck railings to keep the kiddos from sticking their heads thru. Would work for more adventurous dogs too as long as the weren’t chewers! Used the same method for the upstairs railing in the house…tied with ribbon or yarn rather than stapled.
Walter Fuellbrandt says
Nice looking, matches the railing of the deck, I will give it lees than 1 season before you are fixing it. I have been a carpenter all my life and a gate needs to be braced from the bottom hinge to the opposite corner (where the latch is. First person that leans on it to heavy will deform it otherwise. Do your research and you will see that I am correct. It’s a great looking project just lacks the structure that is required for longevity.
Walter
Melissa says
These puppy bumpers are designed to keep small dogs from fitting through railings. Made in Richmond! The dog in the blue and white polka dot bumper does helmet safety demonstrations for kids where he rides a skateboard wearing a helmet. He comes out to SPCA events sometimes, and his person Ann, who invented the bumpers and runs the business, is also a volunteer trainer for the shelter dogs.
http://www.puppybumpers.net/
Kendra says
This post was so helpful! My hubby was able to make our pup a gate for our new deck and get a new tool out of the deal (kreg jig!!!YAY for pup and kid safety!!
YoungHouseLove says
So glad!
xo
s
Dianne says
Just a suggestion but once Teddy is toddling around (next Spring) you may want to use one of those locking shower curtain hooks through the hole in the gate latch to prevent him from opening the gate. Not the prettiest solution but it worked great for us.
YoungHouseLove says
Thanks Dianne!
xo
s
Lindsey Bedford says
Hi guys! Yesterday my husband made a gate for our deck to keep our 1 year old safe. The latch totally opens at the slightest touch of the gate, so it’s not safe at all! Yikes! Not sure what latch you used? Any help is greatly appreciated!
YoungHouseLove says
Oh no! Our latch was from Home Depot. Don’t remember the brand, but it nests into this little tooth thing, so you have to lift it up a certain way to get it to open.
xo
s
Jacob says
Only recently found your blog and it’s so impressive! I love the step-by-step approach here.
My wife and I are considering purchasing our first home and it will likely need serious renovation. We’ll be checking in frequently for inspiration (but no dog for us)!