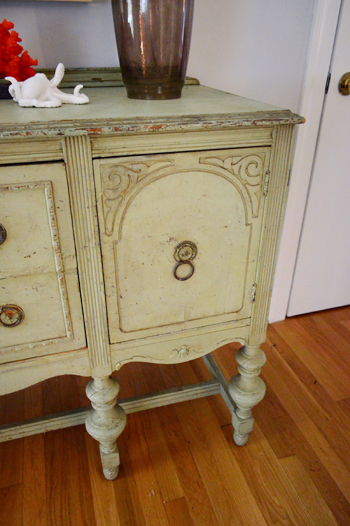
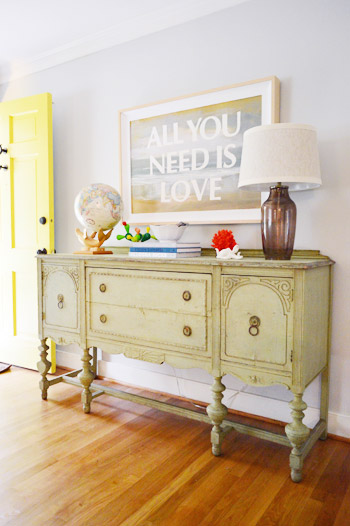
Let’s talk about the buffet again. Remember the one that we got for a steal off craigslist and parked in our entryway? Here he is now to jog your memory (sidenote: I think everyone should always pronounce jog as yog and jogging as yogging – it’s infinitely funnier).
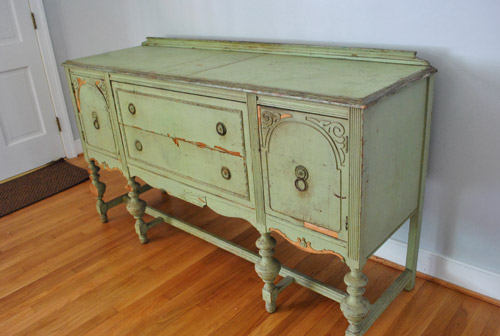
Dude was gorgeous, but he had a few little bumps and bruises that I wanted to heal. I wanted to play nurse with the buffet, ok?
So file this under super speedy quick fixes – heck the whole thing only took about half an hour and ran me under $3. As for my materials list, here it is:
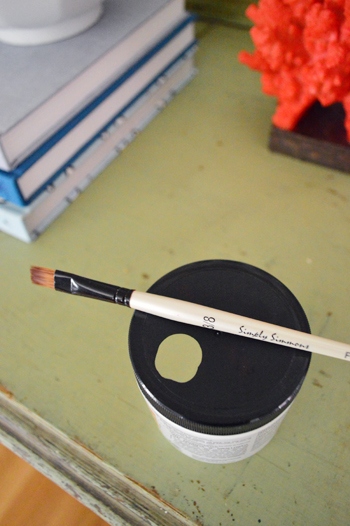
Yup, all it took was a small craft brush that I already had and a $2.99 test pot of paint from Home Depot in the closest possible color to the buffet (I brought home a ton of swatches and held them up to see which ones melted right in and looked nearly identical). Oh and the winning color was Cricket by Behr for anyone who’s looking for a soft moody green tone).
As for my technique, first I prepped the entire buffet by:
- using Gorilla Glue to secure any loose trim pieces or small wood carvings to adhere them for the long haul (I noticed some wiggly things that I feared might chip or fall off with daily use, so I stuck it to them and gave everything a full day of curing time before moving on to the next step)
- giving it an awesomely cathartic scrub-down with a Magic Eraser (there were some dingy areas that were sort of smudgy and gray, like a lead pencil rubbing, and they came up with some scrubbing, so it looks a lot less muddled)
Then it was paintin’ time…
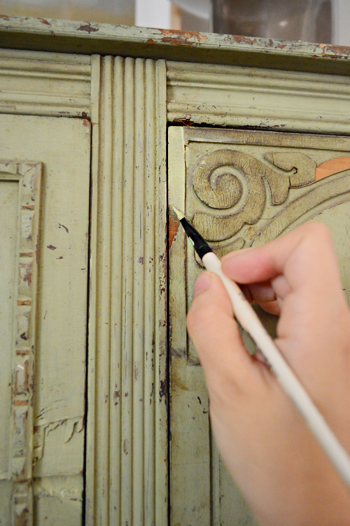
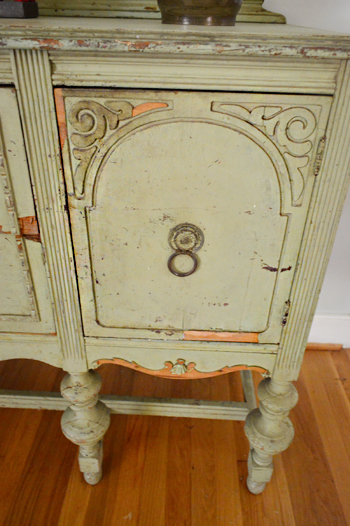
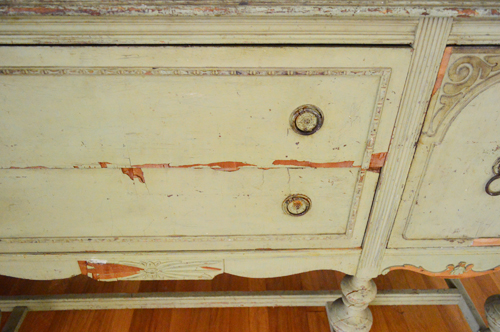
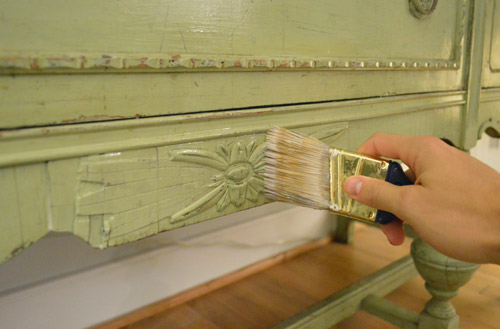
I just used that small brush to paint wherever I saw big chunks of bare wood. First I brushed it on and then I blended things with the swipe of a paper towel. I didn’t want things to be thick or perfect, so that paper towel swipe helped to sort of “distress” that area so it blended right in with the rest of it (which is definitely not pristine at all). We love all of the little imperfections and rough spots – so this process was really just about filling in those big gaping holes where something clearly broke off or was much more damaged than a little timeworn distressing.
Here’s a little side by side comparison to help you see what I mean. I didn’t fill in all the dark spots or scratches, just the big gaps. And once the paint dried (it always looks too light when it’s going on) it looked pretty darn seamless.
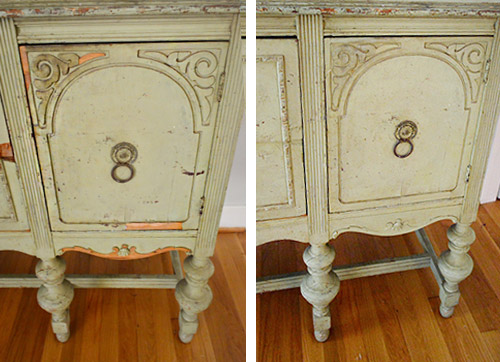
Here’s another detail to show you the difference. Before:
And after:
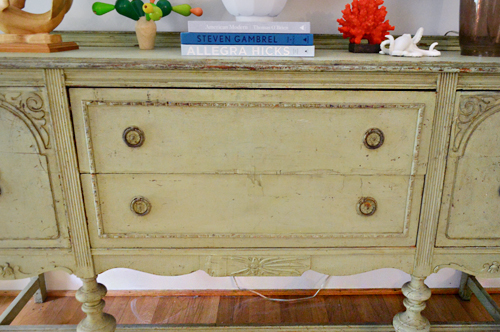
So now she still looks old and loved, but doesn’t put out that dinged-with-a-baseball-bat effect that she was subtly broadcasting before. Boom. Quick, easy, and cheap. Oh and you might notice that our snake-riddled pumpkins aren’t up on the console in this pic (they moved outside to the porch), but I have some plans to do a little fall-a-fying to this surface soon. Oh yeah, momma’s feeling a case of crafty comin’ on…
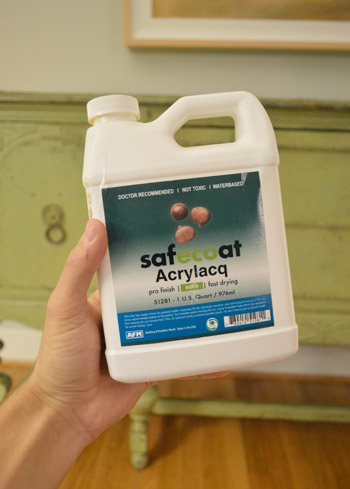
Anyway, after gluing, scrubbing, and painting this bad girl, all that was left of Operation Buffet-mou-flage was to apply three thin and even coats of SafeCoat Acrylacq (it’s my very favorite non-toxic sealer, which comes in a satin finish so it’s not all shiny and obvious).
We like to apply it with a small foam roller so it’s nice and thinly spread (thick = gloppy).
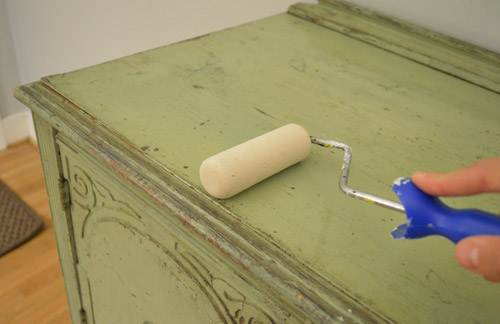
And as for the more detailed (aka: bumpy parts) a small brush works to get into those grooves. Thin and even is the key though. Otherwise you’re veering off into gloppy territory again.
Now this baby deserves a “lovingly restored” sticker. Except please don’t put a sticker on my buffet or $herdog will get feisty. Thankfully Clara just contains them to various body parts:
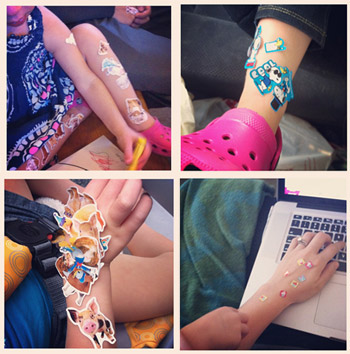
Atta girl.
Anyone else out there showing some love to old pieces of furniture without straight up stripping them down and starting over? I gotta say, it’s a nice four-hour project instead of spending a full weekend on something. Those are always nice, right? It gives you more time to gorge on candy corn and then royally regret it about an hour later. Or is that just me?
Psst- Clara’s at it again with her hilariously random conversations here on Young House Life.

Suzanne says
I know this is an older post but I wanted to ask you about the sealer. On many of the sites that sell the SafeCoat brand they tell you to first apply 1-2 coats of the Gloss before you apply the satin. Is this really necessary? Can I just purchase the satin and use that without any problems?
Thanks!
YoungHouseLove says
We have never done that (didn’t even know they said that) and it has been great!
xo
s