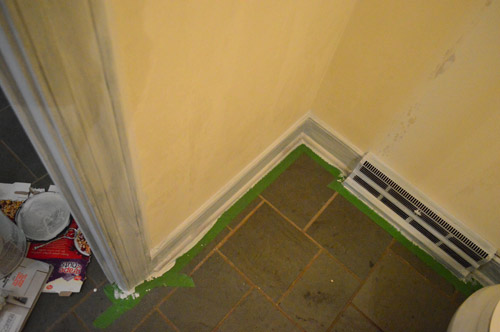
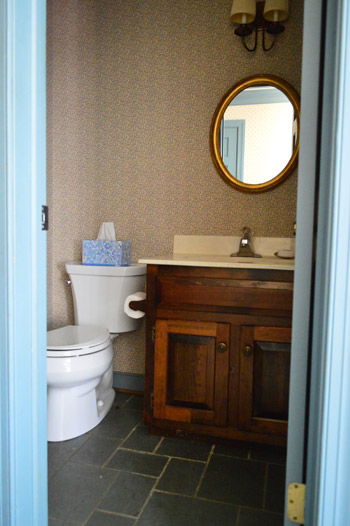
When we last shared our hall bathroom adventures, we had removed the old wallpaper and were left with this:
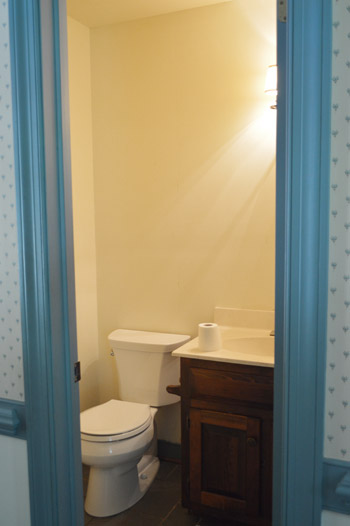
Not only were the yellowed walls crying out for a fresh coat of paint, the mirror had some functional deficiencies. As in, John couldn’t see his whole face when he looked into it. Just about anything from the nose up was cut off, so while he could still perform is-there-something-in-my-teeth checks, if he was having a Something About Mary hair moment (uh, but not for that reason) he wouldn’t have even known.
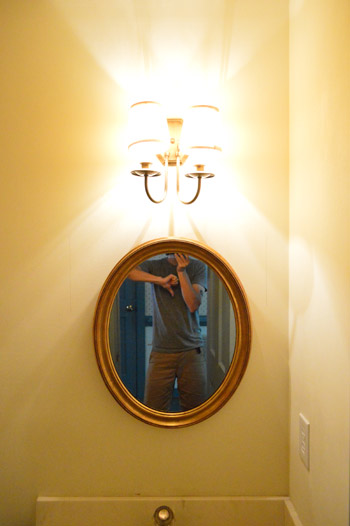
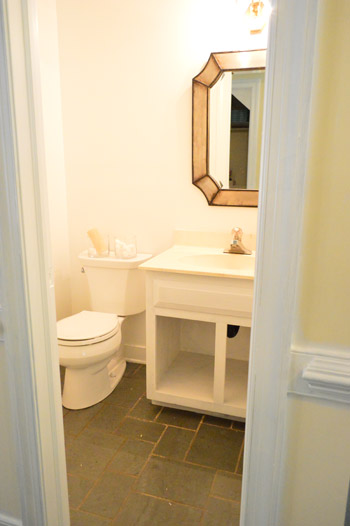
Beyond having a too-small mirror, the other issue was that the light fixture drooped about 8″ from the area that it connected to the wall, so a larger mirror would be hard to cram into that space without bashing into the… legs?… of the fixture.
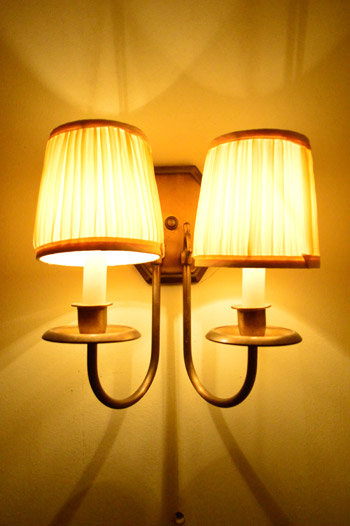
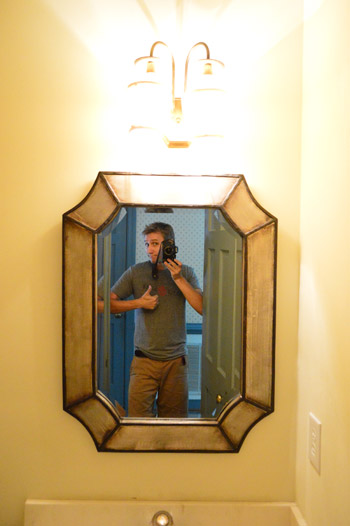
What did we do? We turned our frown upside down. Along with the light fixture. It’s definitely not a permanent solution, but that in-the-meantime 180 degree spin freed up a lot more space to hang a larger mirror that we grabbed at HomeGoods. We love the shape of the mirror and aren’t sure if we’ll paint the distressed silver-ish frame down the line, but for now it’s a huge improvement just to see full faces. Look how much more of John you can see when he’s standing in the same spot!
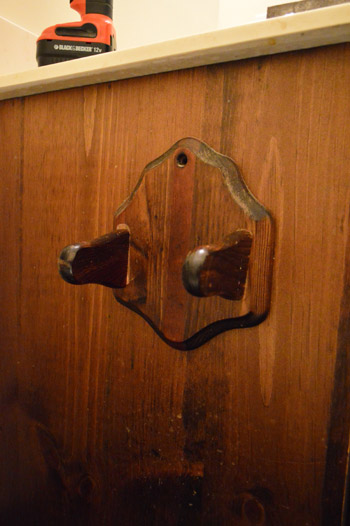
We also made a few other quick updates, like removing this wooden toilet paper dispenser that we plan to replace with a simple oil-rubbed bronze one.
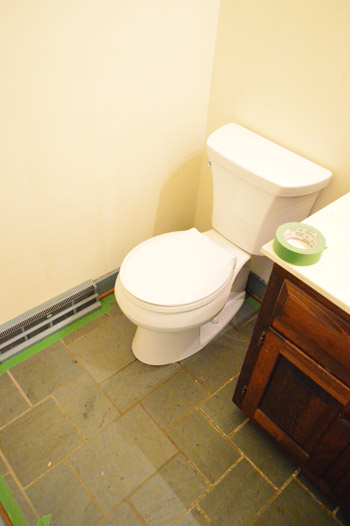
Then it was time to do something about the blue trim that ran around the bottom of the room and the bathroom door frame, so we taped off the slate to protect it.
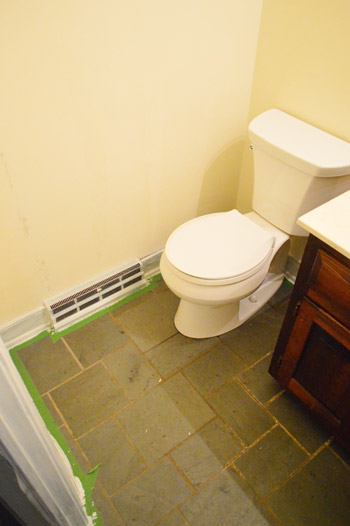
It took four coats (two of primer and two of paint), so this is after about two primer coats I think.
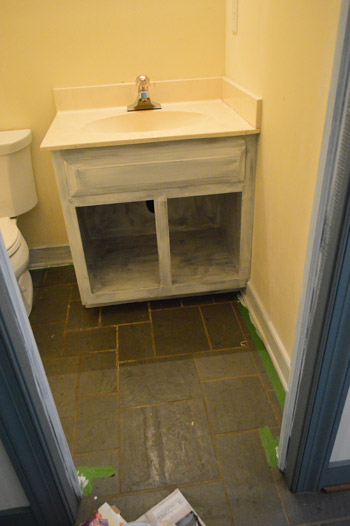
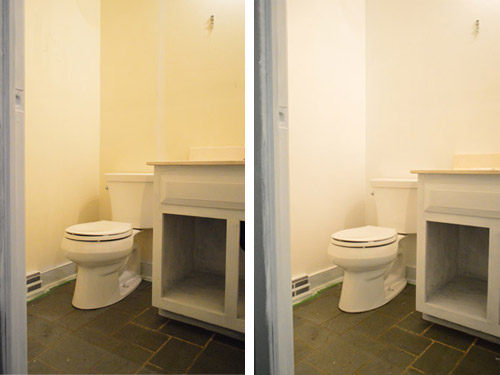
While we were priming and painting, we decided the vanity could use some primer and paint as well. It wasn’t great wood (sort of reddish and dulled/scraped in a few areas) and there was an odor issue. As much as I scrubbed it I couldn’t shake the scent, but I knew a nice coat of odor-blocking primer + paint would do the trick. I also thought it was a fun opportunity to bring some color into the room with a bright coat of paint on the vanity, paired with clean white walls. Sort of like this.
So on went the primer to the vanity as well as the trim (I did two coats of it on the inside as well, just to squash that smell issue once and for all). This picture is just of the first coat I think though.
Then it was onto those two coats of paint (this is coat #1). We used Simply White (OC-117) by Benjamin Moore in semi-gloss since we loved how it came out on the trim upstairs that we already painted.
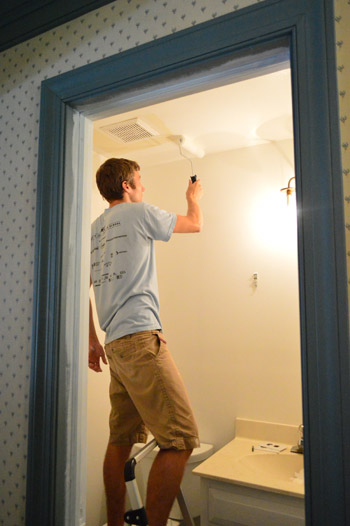
We painted both the walls and the ceiling the same white tone (Simply White in an eggshell finish to allow the trim to look glossy by comparison). I cut in and John rolled.
Two coats and a day later, we had this…
In person it’s a nice clean-feeling difference. And although white is certainly more classic than risky, we think it’ll be fun to bring in color with art and a brightly colored vanity instead of just defaulting to putting color on the walls.
We’d still love to update things like the light and the sink along with possibly doing a more major upgrade down the line (grasscloth wallpaper? tiled accent wall? pedestal sink?). So you could call this first take on the hall bathroom Phase 1, which will just be a combination of a few cheap tweaks to make it more comfortable to live with until we save some money for a more “deep tissue” update later on.
It’s definitely a far cry from what we started with a few weeks ago already…
Oh and you’ll notice in that second to last picture that we’ve started stripping some of the wallpaper in the foyer as well as attempting to de-blue all of the trim out there, but it’s taking forever (this time we discovered a second layer of wallpaper and of course that crazy trim takes four coats) so we hope to be back with an update on those projects someday. You know, if we’re not found hiding under the table muttering “blue trim…. blue trim… it’s haunting my dreams… it’s eating my soul…”
*****************************
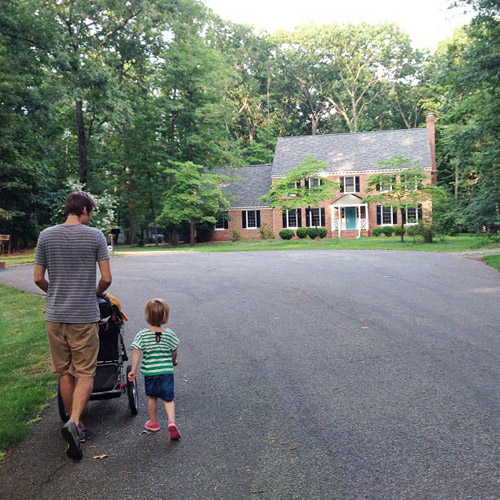
P.S. Last night I quickly snapped this instagram picture on the way back from our evening walk, and it one captures the green undertone in our teal door so it finally looks like real life. Leave it to the ol’ cell phone to take a more accurate picture than the fancy camera. #nofilter #instagrambeatsDSLR

katalina says
that photo you linked with the green bathroom cabinet is the green I like for your door color. I kept seeing this beautiful green used with brick in England!
Beckie says
After ripping all the trim out of our livingroom, kitchen, dining room and hallway last month and sanding, priming, painting I can fully appreciate your painting face lift here. I LOVE that you painted that vanity. Looks so fresh and clean now!
Megan T says
I love that you went the clean-white route and can already see your punches of color with art and painting your vanity. Most people don’t have decorating skills (like you guys do) and just throw up a wall color. I think what you are doing is so much more fresh and I cannot wait to see the finish product!
lisa says
Love it! I can see that you’ve removed wall paper in the hallway and started painting the trim in the hallway…I can’t wait to see the progress!! You are inspiring me to paint my natural wood trim…..I’ve got it all over the place in my house. I’m growing tired of it…
Patty says
Hi Sherry,
The bathroom is looking great cant wait to see this version of “finished” : ). I see with your tile the grout has seen better days, as did the one in my house. After trying everything over the course of 20 years, I found the miracle cleaner for floor grout on Pinterest. I sprinkled baking soda on the grout then poured vinegar (I put them each in their own plastic bottle with a pouring spout) it bubbled like crazy, I scrubbed, rinsed and once it was dry, it was like a miracle happened — It looked new! I am really enjoying all the updates on the new house, its keeping me inspired. Thanks so much!
YoungHouseLove says
That’s awesome!!
xo,
s
Freda says
I am so thankful for this post as Im about to do the same…quick question, adhering issues with paint and primer to trim…Do I need to sand first? Im concerned about paint chipping after all my work.
YoungHouseLove says
Ours was matte/chalky so we didn’t sand but if it was glossy I would have sanded and used a liquid deglosser and then moved on to primer and paint.
xo,
s
Ashley Carmody says
Can you show us how you stop with painting the trim? Do you stop in a particular spot, do you go room to room? But then how do you stop painting in a door frame? I want to do this but it just seems like you’d have an unfinished look for quite a while!
YoungHouseLove says
I just go up to the little piece of wood where the door shuts, but since we’re working on the foyer I can just pick up there and keep going. Houses always look crazy with half painted trim but it can take a while to knock it all out. I try to embrace the chaos :)
xo,
s
Marie says
I think you could do wonders on the tile grout of the floor that look “not so fresh” with peroxyde and an old toothbrush! I did that at my place and it is unbelievable the difference!
YoungHouseLove says
Thanks for the tip!
xo,
s
Megan W says
The bathroom looks great!
I have a random painting-related question for you. My husband painted two of our bedrooms himself prior to my moving in, and while he did a great job overall, he managed to get paint on the ceiling in several spots (half-dollar-sized amounts). What would be the best way to cover these spots? Do I need to sand the spots down first or would a stain-blocking primer and fresh coat of ceiling paint do the trick? Thanks in advance!
YoungHouseLove says
Just ceiling paint over it should work I think!
xo,
s
Cassie @ LittleRedWindow says
Did you sand before priming the sink cabinet? I did a similar project about a year ago, on new-ish builder grade cabinets, and apparently didn’t sand enough and after two coats of primer (which claimed to stick to ANYTHING) it all scraped right off and I had to start over. It was a total nightmare. But I guess by now you guys have this cabinet painting thing down. It seems like you’ve mostly painted older cabinetry, I wonder if the new stuff is really just shinier and harder to work with? Looks good so far!
YoungHouseLove says
Ours wasn’t glossy or sealed so the chalky/matte wood made me skip to priming and painting, but if it was super shiny or glossy I would sand and then use liquid deglosser and then go to primer/paint.
xo,
s
Needle little Balance says
I like what you did with your bathroom so far! After experimenting with color I came to the conclusion that I like white walls best. They look clean and modern and then it´s so easy to completely switch the feeling of a room with changing a few colorful accessoires/pictures when the rest of the room is neutral: white/linen/wooden colors. Like in danish modern homes.
P.S. Your new avatar is nice, too!
Krissy says
It’s funny that you flipped your light fixture around. When we bought ours from home depot, I originally looked at the box upside down (the way yours was originally positioned) and liked it, so that’s what looked “normal”. It worked out well in the bathroom because the light bulbs were glaringly bright when we tried spinning it around the other way.
pam in illinois says
It looks great!
Please tell me that you have cleaned the grout in that bathroom since you have painted!!!! I have to say that I might have had to clean it before I painted. I don’t know if it is just my view but it really looks nasty. Sorry for that comment but I have wondered this since your post about stripping the paper. pam
YoungHouseLove says
I scrubbed it with vinegar and a stuff brush right after we moved but it’s just oddly flaking around the sink. Got lots of great tips in this post for what to try next though :)
xo,
s
Erin says
Such a cute closing shot of John and Clara! And love the teal front door. The earlier photos made it look baby blue, but the teal looks fabo!
YoungHouseLove says
Thanks Erin!
xo,
s
Cristy says
Simply White… that’s the color I painted my bookcases and am in the process of painting the inside of my front door. Both areas were orange wood and now look beautiful being white. I spent last night adding the third coat on the front door and am thinking I am going to need a fourth. Ugh.
How long did you wait between coats? Even after a day the paint is still a little sticky, so I tend to wait 2 days between coats. Is my waiting really necessary or can you paint it again when the undercoat is still a little wet?
YoungHouseLove says
It’s really smart to wait because I think when something is tacky your brush can drag and it won’t be as smooth. We only needed about 9 hours between coats but I do really thin ones (keeps it smoother and cures up faster).
xo,
s
Cara says
I’m usually a color kind of girl, but I think that little bathroom really needs the white. Plus, I can’t wait to see what you do with the vanity. My first flash was to a glossy red vanity, but I’m betting it will be more in line with a sunny yellow.
Also, I wasn’t sold on the teal door until I saw this photo. Now I get it. Nice!
Barb says
You two motivate me to no end, as I sit on my couch with my laptop watching my thighs grow as we speak. Love what you have done so far!!
I also love the slate. I grew up with slate in the big foyer in my parents house and I remember how cool is was to the bottom of my feet in the summer!! Are you keeping it?
YoungHouseLove says
Thanks Barb! We hope to keep it assuming we can deal with some grout issues and a few damaged tiles.
xo,
s
Andrea says
As I read this post I think about our home, which we’ve painted once, and then again. We’ve reverted back to white bathrooms, and I love them. The idea of re-doing with art instead of paint is our way of life these days.
Bella says
I painted a wall and the backsplash in my kitchen last weekend, not thinking much about it but today reading your blog i realised it is pretty much the same colour as your old guest bedroom which i have been loving for the longest time!
I had been admiring that colour for quite a while now not thinking about you guys but was always like yeah nice but where the hell do i paint this? and now i moved into a tiny studio apartment and absolutely love it in the kitchen, the living and sleeping area is light green which kinda reminds me of what your kitchen used to be like, yeah i said is, it is that tiny :)
Subconscious paint color picking, anyone? or are you guys influencing me after well… look at how big clara is that is for how long i have been following you :)
YoungHouseLove says
So funny! I love it.
xo,
s
caroline [the diy nurse] says
You guys never stop do you?!?! I love the changes- paint goes such a long way.
And did someone mentioned a colorful vanity top?? Crazytown excited!
Catherine says
Love the door color!
Gabby @ Cookie Cutter Unique says
The bathroom looks a million times better, I love the idea of leaving it white. I never considered white walls appealing until I saw how beautifully designers like Emily Henderson and Morgan Satterfield make them look. I am sure it’s going to look great with some art and a few more tweaks.
Kathy says
Nice! Hope it takes care of the musty smell for you. I inherited some saltillo tile years ago with cracking yuky grout, and what I did was mix up new grout with an admixture to make it sticky and then apply a coat right over the top of the old stuff. (clean and dry of course). I might be worried about the slate absorbing the grout, so you would need to take precautions with that (I used a presealer on the old saltillo). But it made it like new, and I never had any problems with it coming off. I stained my old orangy saltillo too, wonder if you could stain the slate? I bet you could. Good Luck!
YoungHouseLove says
Thanks for the tip Kathy!
xo
s
Tara says
Looks so clean and fresh. I can’t wait to see how you add pops of color!
Chelsea says
Who knew white look so good! You should get some World Market (or somewhere similar) knobs for the cabinet doors to add a pop of color. Knowing you, I’m sure you already have plans to get some color poppin’ in there.
P.S. if you are interested in cute/cheap knobs, I bought some at Michaels just the other day for $1.59 a pop! Some were chevron and some had a diamond pattern. I stocked up.
YoungHouseLove says
That’s awesome!
xo
s
Tamara says
Ugh, I feel your pain with that trim. The house we live in right now had forest green rooms, complete with forest green trim (which continued even into the rooms that were not green…). Coloured trim is a beast to get rid of. If I see another thing painted forest green I will scream :P
Brandi says
I love how nicely your bathroom is coming along. Your house looks great. I love the new color on your front door. I bet it feels good to come home each day.
Ann Marie says
Love, love, LOVE that mirror!!!
K says
I love that you updated your avatar pic!!
Ange says
I just love the instagram photo of your house. It’s so pretty!!!!!
mribaro says
Your book about accessorizing became the accessory itself! http://www.apartmenttherapy.com/bridget-amp-matts-coastal-style-in-the-midwest-house-call-192017
YoungHouseLove says
Aw, that’s awesome. Thanks for the link.
xo
s
kelly @stayingonbudget says
I am always amazed at what a little paint can do! It reminds me of my 1970s bathroom and I am trying to bring into the 21st century!
Jovan says
That picture is perfection. Those are the great things in life =)
Sassafras says
Bathroom=So…much…less…DE.Press…ing!!!!!!!!!!!!!!! LOVE IT!!
Chasity says
I am so inspired by this post and by the original of Sherry tackling the bathroom wallpaper with just some hot water! We have UGLY wallpaper in the vanity area of our master bed/bathroom and in our kitchen, both of which are fairly small areas. We’re renting so I don’t want to spend too much of our own money updating the place but we do plan on staying several more years and I’d like it to look good. We painted (with permission) before we moved in and it made a world of difference. I really want to take down the wallpaper but I’m afraid that if I start it’s going to end up being a bigger project than I anticipated or I’m not going to be able to get it all off and it’ll end up looking worse than when I started. Please reassure me that it can be done and let me know if you have any recommendations for a better way of doing it than how you did the bathroom. I know you’ve got more wallpaper posts to come but I don’t want to wait that long! Thanks :)
YoungHouseLove says
You can do it Chasity! And I have another wallpaper removal post today with another method, so I hope it helps!
xo
s
Ann Sato says
Hi guys,
I’m wondering what finish of paint you will use on the vanity? I can’t believe how easy it is to prime the vanity and then change the color. I had a total “duh” moment when I saw this.
Thanks.
YoungHouseLove says
I think we’re planning on a satin or semi-gloss since those seem to be wipeable without being as unforgiving about brush strokes as high gloss is.
xo
s
sarab3 says
What about doing small mosaic tile on the mirror, instead of painting it? could be a fun project?
YoungHouseLove says
Sounds fun!
xo
s
Yvonne says
I cannot wait to see the progress!! I loved your last home!!
Yalanda says
I had to laugh when you said a creepy smell was coming from the bathroom cabinet! Such an odd place for something smelly! But the bathroom looks great so far:)
Ann Marie says
Hey, can we get a close up of that wallpaper? I think my parents had that in their kitchen when I was growing up. They sold the house my senior year of high school and I was so sad to leave the house I grew up in, even though we moved to bigger and better. That wall paper made me nostalgic… now I need a tissue…
Ann Marie says
woops….meant to post this on the foyer wallpaper post!
YoungHouseLove says
No worries Ann Marie! Here’s a close up of it (scroll to the left box on the row second to the bottom) http://images.younghouselove.com.s3.amazonaws.com/2013/03/house-peeks.jpg
xo
s
Jane says
I love the blue trim. Not the color of course, but the structure. Will look awesome when all painted white.
I’ve cleaned/renewed a lot of grout in my time. Very effective products are (1) Stain Solver (concentrated oxygen bleach) combined with a grout brush on a pole, which is very gentle to the grout and tile and cleans like crazy and (2) R-Teez, it’s like a big eraser. Takes time and elbow grease but it’s cheap and really brings back the original grout color. Kind of addictive once you get going.
Nicole says
Clara is like a real little person now. I just love it! She looks like a mini adult. :)
Amanda says
I had a question about oil-rubbed bronze fixtures…our new house came with all ORB stuff, so when we started adding things like coat hooks and such we obviously wanted the same look. On many of the packages, however, there’s a label that says “WARNING: This product contains chemicals known to the State of California to cause cancer and birth defects or other reproductive harm.” Research shows that this is a Proposition 65 thing, but since this label appears to show up on some cans of spray paint as well I was wondering if you guys had looked into it at all?
YoungHouseLove says
Oh yes, it’s oil-based so we always use a mask when spraying, and do it outside so it’s well ventilated (not in a garage, etc). It’s nothing to mess around with!
xo
s
Lee says
What’s the plan to tackle the grout on the slate floor in the bathroom?
YoungHouseLove says
There are lots of tips for us in this comment section so I’m planning to try them out and let you guys know what works.
xo
s
Nicole says
I have a question… I’m in love with the rustic look of your wood cabinets and have the same type in my new (30 year old) house. I would like to keep them the wood tone and make the rest of the room white, crisp, and modern but the countertop, bathtub, and floor are both a creamy beige color :/ how would you mask that? Any suggestions?
YoungHouseLove says
Oh man, that’s tough! I’m actually going to be tackling that in this bathroom as we go (the counter is cream) so stay tuned to see what I figure out. Haha!
xo
s
Penny Smith says
This angle also makes the lil trees look so perfect out front! :) Symmetry lovers unite!!
I tend to “BAM” the lil bathrooms in our house with color, since it is less risky than a big room, and a fun surprise. I am surprised you didn’t at least get “moonshine” out! :)
DO you think you will reuse some of your favorites from the last house?
(I need to do a blog post “Discovered on YHL”… from my backsplash tile to my hall paint (moonshine), you have creeped in here and there!)
Also-email me a way to send you the vintage dollhouse furniture I like a crazy bought with Clara in mind! Seriously-If I don’t send it to you, it just sits in a drawer. You have a PO box for things from “better be careful of crazy followers that insist on sending us stuff?” :D
YoungHouseLove says
Haha, you’re so sweet Penny! I’ll email you. And as for reusing colors, we’re open to whatever we like best in this house (whether it’s new or an old favorite) so we’ll have to see where we end up!
xo
s
Autumn says
So funny! At our last house, we had to lower the bathroom mirror when we moved in, so that I could see more than my forehead!
Leah Kerbs says
Looks great!! Did you have to sand the vanity at all or use a liquid deglosser or just prime it? I’m going to paint our vanity soon too as a phase 1 project in our bathroom and wondered! Thanks in advance :)
YoungHouseLove says
Ours was matte and chalky so we went right to priming.
xo
s
Carey says
Hi,
Can you tell me if you used a roller or brush for your cabinet? I can’t seem to get away from brush strokes when using a paint brush. I have an identical cabinet am ready to give it a try! Thanks so much.
YoungHouseLove says
Small foam roller will get rid of brush strokes!
xo
s