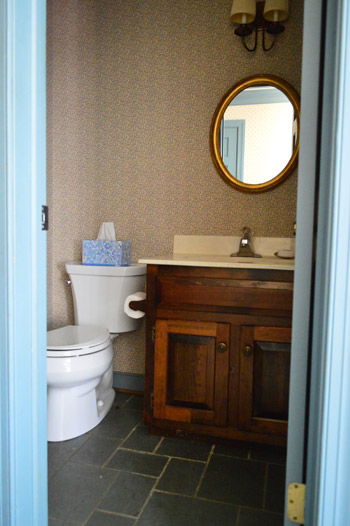
When we last shared our hall bathroom adventures, we had removed the old wallpaper and were left with this:
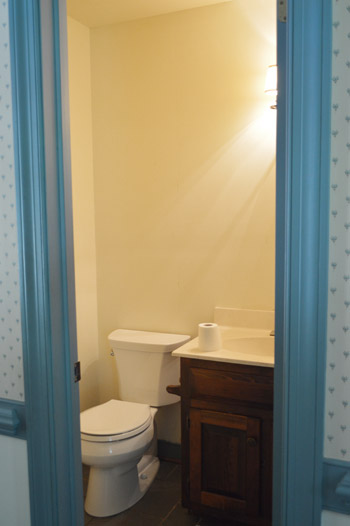
Not only were the yellowed walls crying out for a fresh coat of paint, the mirror had some functional deficiencies. As in, John couldn’t see his whole face when he looked into it. Just about anything from the nose up was cut off, so while he could still perform is-there-something-in-my-teeth checks, if he was having a Something About Mary hair moment (uh, but not for that reason) he wouldn’t have even known.
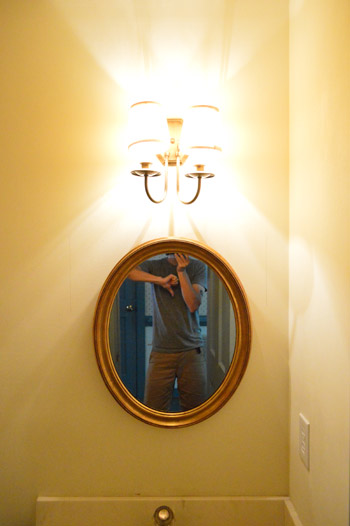
Beyond having a too-small mirror, the other issue was that the light fixture drooped about 8″ from the area that it connected to the wall, so a larger mirror would be hard to cram into that space without bashing into the… legs?… of the fixture.
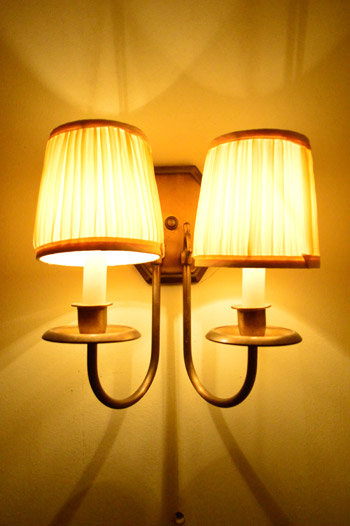
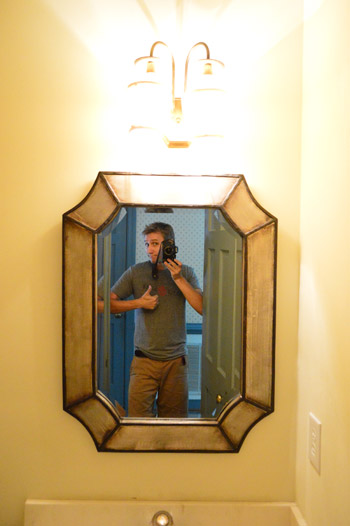
What did we do? We turned our frown upside down. Along with the light fixture. It’s definitely not a permanent solution, but that in-the-meantime 180 degree spin freed up a lot more space to hang a larger mirror that we grabbed at HomeGoods. We love the shape of the mirror and aren’t sure if we’ll paint the distressed silver-ish frame down the line, but for now it’s a huge improvement just to see full faces. Look how much more of John you can see when he’s standing in the same spot!
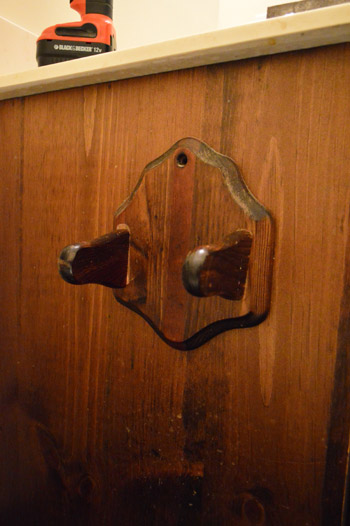
We also made a few other quick updates, like removing this wooden toilet paper dispenser that we plan to replace with a simple oil-rubbed bronze one.
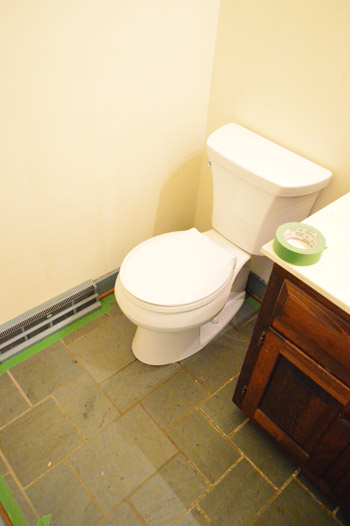
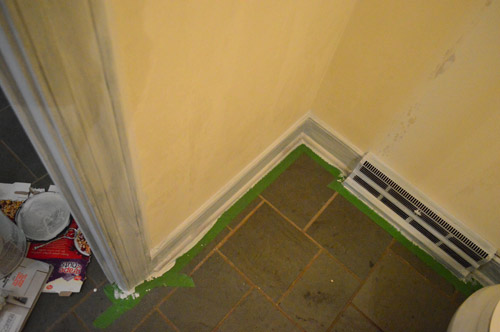
Then it was time to do something about the blue trim that ran around the bottom of the room and the bathroom door frame, so we taped off the slate to protect it.
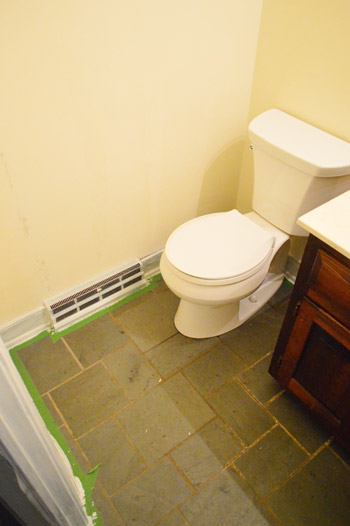
It took four coats (two of primer and two of paint), so this is after about two primer coats I think.
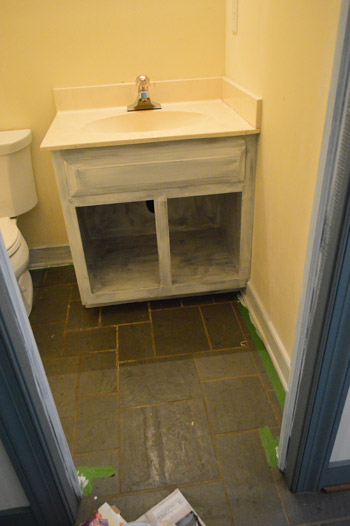
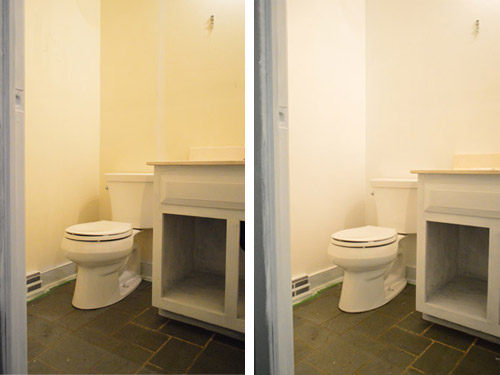
While we were priming and painting, we decided the vanity could use some primer and paint as well. It wasn’t great wood (sort of reddish and dulled/scraped in a few areas) and there was an odor issue. As much as I scrubbed it I couldn’t shake the scent, but I knew a nice coat of odor-blocking primer + paint would do the trick. I also thought it was a fun opportunity to bring some color into the room with a bright coat of paint on the vanity, paired with clean white walls. Sort of like this.
So on went the primer to the vanity as well as the trim (I did two coats of it on the inside as well, just to squash that smell issue once and for all). This picture is just of the first coat I think though.
Then it was onto those two coats of paint (this is coat #1). We used Simply White (OC-117) by Benjamin Moore in semi-gloss since we loved how it came out on the trim upstairs that we already painted.
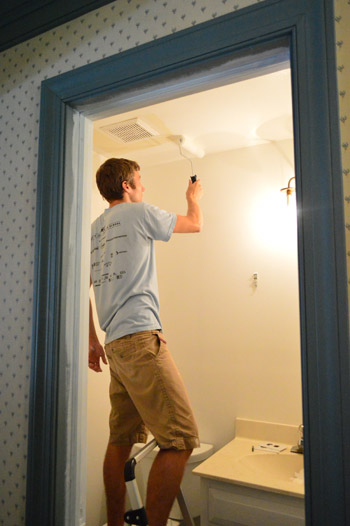
We painted both the walls and the ceiling the same white tone (Simply White in an eggshell finish to allow the trim to look glossy by comparison). I cut in and John rolled.
Two coats and a day later, we had this…
In person it’s a nice clean-feeling difference. And although white is certainly more classic than risky, we think it’ll be fun to bring in color with art and a brightly colored vanity instead of just defaulting to putting color on the walls.
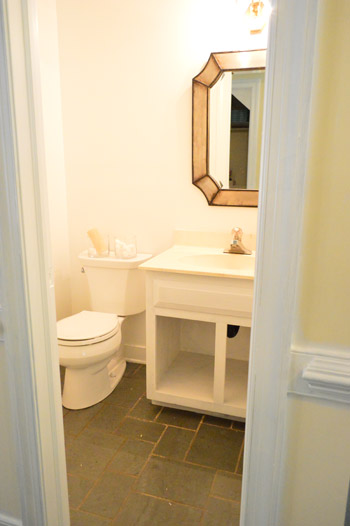
We’d still love to update things like the light and the sink along with possibly doing a more major upgrade down the line (grasscloth wallpaper? tiled accent wall? pedestal sink?). So you could call this first take on the hall bathroom Phase 1, which will just be a combination of a few cheap tweaks to make it more comfortable to live with until we save some money for a more “deep tissue” update later on.
It’s definitely a far cry from what we started with a few weeks ago already…
Oh and you’ll notice in that second to last picture that we’ve started stripping some of the wallpaper in the foyer as well as attempting to de-blue all of the trim out there, but it’s taking forever (this time we discovered a second layer of wallpaper and of course that crazy trim takes four coats) so we hope to be back with an update on those projects someday. You know, if we’re not found hiding under the table muttering “blue trim…. blue trim… it’s haunting my dreams… it’s eating my soul…”
*****************************
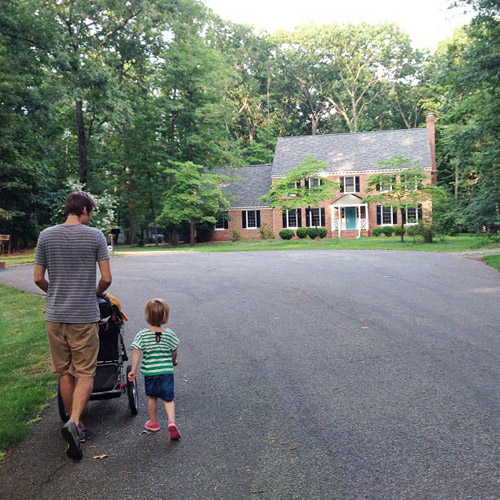
P.S. Last night I quickly snapped this instagram picture on the way back from our evening walk, and it one captures the green undertone in our teal door so it finally looks like real life. Leave it to the ol’ cell phone to take a more accurate picture than the fancy camera. #nofilter #instagrambeatsDSLR

Erin says
Hi John and Sherry –
I’m in the process of painting some reddish-brown stained trim all over my traditional 1950’s home. It’s taking about 4 coats as well, and it’s the pits! Have you guys tried adding Floetrol paint conditioner when doing trim? I read some good reviews on it, but after painting my second, and what I was hoping would be the final coat of white paint with Floetrol, I’m not sure if I’d be getting better results without it.
Thanks!
YoungHouseLove says
I haven’t tried it yet but also have heard good things about it. Anyone love it? Hate it?
xo
s
rachael says
I think Centsational girl uses it, and it is supposed to give you more open time with the paint so you get less brush marks. I don’t think it necessarily makes it cover any better.
Jenna C says
Do you have any idea if the people whose home you bought happen to follow your blog? That would be so neat to see someone redo your house!
YoungHouseLove says
The owners of our second home read the blog and the family of the original owners of our first home read along as well, but we don’t think the owners of this house read – at least we haven’t heard that yet :)
xo
s
Sarah says
Thank you for giving me hope. My full bath (the bigger of two although it’s still incredibly cramped) needs a full professional makeover, which we can’t afford right now due to the fiscal crisis. We’re talking wall down/new wall up, move the doorway, new everything except the toilet, turn the bathtub around/redo the bath plumbing to make the tub kid-washing-friendly/accessible, etc. In the meantime, I’m changing one small thing at a time, like towel bars and toilet paper holder, caulking up what I can, maybe painting the walls a more tolerable color. You guys make it look easy and also inspire me to keep chipping away at it. Thank you.
YoungHouseLove says
Go get ’em Sarah!
xo
s
Emily says
Do you have any tips on painting cabinets? We have an old cabinet in our bathroom and don’t really know where to start. Do we sand it a bit and just go for it?
YoungHouseLove says
Here’s a post with a bunch of tips and even a video for ya: https://www.younghouselove.com/2012/01/how-to-paint-your-cabinets-aka-hallelujah/
xo
s
Kirsten says
I’m a bathroom painting newbie and will be tackling it in a few days. I know you always paint the ceiling the same color as the walls. Is this just preference or easier than a white ceiling? Also, do you remove the toilet tank? Any tips on that, especially since I’m attempting this solo? Thanks!
YoungHouseLove says
In small rooms like bathrooms we just think a ceiling the same color as the walls feels less choppy (and therefore more expansive in a tiny space). I wouldn’t do it with a dark color, but anything light should be great that way. As for the tank, I use a short handled brush to get behind it as much as can be seen (since you can’t stick your head back there to see the rest it works out). Good luck Kirsten!
xo
s
Steph Nelson says
Take the lid off and wrap the tank with a garbage bag. Keeps the paint off and you don’t have to be so careful! :)
Linda says
One trick I read, and followed, if you’re not removing the toilet to paint, is to get that Cling Wrap (I get Reynolds) and wrap the tank, etc., in that. That way if you’re a sloppy painter like I am, the wrap protects the toilet from any stray paint. Worked like a charm for me, and I could use the remaining wrap to keep food fresh!
Also, there are skinny little rollers on long handles that are great for painting behind toilets, etc. For me it was worth the small investment.
Mary says
re: blue trim, do you know if the blue is oil based paint? I’m discovering that we also have this same blue trim under the white latex painted trim, because our white trim is peeling off on the entire house! The previous owners just painted over the blue without using primer (or the correct primer) I assume. I’m slowwwwwwly scraping white paint, priming, and repainting white. Trim and windows. It’s a nightmare! Hoping you guys do not have this same issue after all that work.
YoungHouseLove says
Thankfully we think it’s water based, but using an oil-based primer can “neutralize” any paint (so if it’s oil, just use that and then once it’s dry you can follow that with latex paint). As for all that scraping you’re doing… ahh! Sounds TERRIBLE. Godspeed Mary!
xo
s
BarbOutsideBoston says
You can test for latex vs oil paint with acetone nail polish remover (I just saw that on HGTV’s Property Brothers).
Here’s how it works:
http://homeguides.sfgate.com/can-test-latex-paint-using-acetone-69356.html
YoungHouseLove says
Smart!
xo,
s
Laura & the Shell says
Wow, such an improvement! It’s a good idea to start in a small room like that – you get to see something completed sooner than later! Meanwhile, we just started renovating our back porch yesterday. And it’s the first time we’ve hired someone else to do the work. It makes me crazy not being able to go out there and help! DIY forever!!! I need a t-shirt that says that. :)
Sarah @makingitmyhome.blogspot.com says
Its amazing how some hard work and paint can transform a room to be so light and airy. Looks wonderful!
Julia says
The bathroom is definitely a big improvement already, even though there’s more to come :)
I love the Instagram shot of the house and neighborhood. It’s just dreamy. And I’ll confess, I wasn’t a fan of the door color in the announcement post, but with this picture, I’m officially a convert.
Fermi says
Silly request, but is there anyway that you could show a picture of the stuff you link to Pinterest, etc. Some of us reading at work aren’t allowed to look at those sites. I’m sure it’s probably an extra hassle, but I feel like I’m missing out, lol.
YoungHouseLove says
So sorry Fermi! We don’t have the rights to those images and actually could get sued by whatever mag/photpgrapher was involved with those photos if we shared them here (even with a link back to them, some folks want to be asked personally if you can use a shot or not and others don’t want anyone using their images). That’s why we link over to things instead of risking an issue by hosting them on our site. Hope it helps :)
xo
s
Melissa says
Hey Guys,
I know this is soooo off topic, but I was wondering if it was ok or not to post a link to a site to help my nephew battle cancer in your forum? My sister and Brother-In-law both had to quit their jobs so their bills are piling. He is only 2. Please let me know, I didn’t want to violate anything. Just trying to help them get donations.
Please let me know, and I understand if it is not appropriate. Just wanted to see
X Melissa
YoungHouseLove says
Oh Melissa, I’m so sorry! Post that on our Facebook page. We love “sharing the mic” over there for a good cause, and I hope it sends a lot of people their way. All the best!
xo
s
Melissa says
Thanks so much Sherry. You are all so, so kind. I knew I could ask you :-)
YoungHouseLove says
Of course!
xo
s
Emily says
You know I’ve been loving the white walls look with color brought in through art, furniture, accessories instead. It’s a complete 180 from how I did my first house, which tended to look very matchy-matchy when I was done. I’m hoping on my second house (5 months away – we’re moving from WI to AZ) to try this approach in more rooms. I feel like it will be less restrictive somehow.
Martha says
Where did you get Clara’s green top and why can’t I be three years old anymore??
YoungHouseLove says
That’s from Gap on clearance (or the outlet, I forget). And yes, I wanna be three!
xo
s
Anna @ Crazy Gorgeous says
This is exactly what I told my husband I wanted to do in our bathroom!!! Paint the walls white and then paint the vanity. I also want to paint the sides of the doors that are facing in the bathroom as well, to match the vanity. I was thinking some sort of dark color. I think it would be cool to switch it up, you don’t see that often! :)
PS. Beautiful house pic :)
YoungHouseLove says
Thanks Anna! Send us pics when you do yours!
xo
s
Lola says
Are you planning on keeping the tile?
Amazing a little paint does!!!
YoungHouseLove says
We’d love to save it if we can!
xo
s
Lynn @ Our Useful Hands says
Wow that looks so fresh and so clean slate. Are you going to do any kind of “What color do you like best masses?” so we can kind of collaborate with you or are you like me and love the element of surprise? (Which is why the coal mining scene in Zoolander always kills me when he jumps out of the wall in disguise.) Just wondering. Because I think pulling the color of the front door into their to be used is something I wouldn’t totally hate. ;o)
My best, Lynn
YoungHouseLove says
I think we’re strongly leaning towards the green vanity that we linked to so I think we’re going with that! Just have to pick a swatch (I have 5 million green ones in a pile right now, haha).
xo
s
Erin says
Jeez – John and his mirror issues! Maybe he’s the problem! :)
Loving the crispness of the white and proposed pop of green color for the vanity!
YoungHouseLove says
Ha! That diva husband of mine!
xo
s
misa says
Checking your site every morning makes me feel like I’m having coffee with an old friend. Thank you!
Question about the murky grout. I rent and have a similar situation but I’m not willing to take the time/effort/money to re-grout. I’m considering using a grout cleaner/stripper and then resealing. Any thoughts or experience with the success of this approach?
YoungHouseLove says
Thanks so much Misa! As for the grout, a bunch of people have commented with tips for how to clean it or refresh it, so maybe those will help? When we attempt something we’ll definitely blog about it too!
xo
s
Karen E says
Hi guys. I am loving the new house and can’t wait to read each day what you have been up to. You may already know this, but be careful when painting over walls that have been wallpapered. We have done lots of renos over the years and have stripped more wallpaper than I care to think about. We had 2 baths where we primed with latex primer and then painted with latex paint. After a few months we started to get large areas where the walls would “bubble”. We had to cut the bubble areas away, fix the sheetrock and then start fresh. I was told by the paint store and a repair crew that I should have used an OIL based primer or a product called GARDZ that is made for that purpose. They said it seals in any residue. I had even thoroughly cleaned and sanded the walls and still had the issue.
YoungHouseLove says
Oh no! That stinks! I scrubbed the walls beforehand with vinegar spray and a scrubby sponge to get the glue residue off (it didn’t feel bumpy and sticky anywhere) so here’s hoping it’s ok from here on out. Gardz sounds really smart though!
xo
s
Shawna @DakotaCreekChic says
The facelift looks great. It’s motivating to see how small things really make a big difference. Love the front door too!!
Jason says
I know that this ‘flipped’ light isn’t a long term solution, but I wanted to CAUTION you on the possible fire hazard that you have created. Most lights are designed to be hung in only one direction and by flipping this one over to obviously the incorrect orientation you have created a situation where the heat from the light bulbs will be transferred to the internal materials of the light (heat rises) creating a potential fire risk. This probably isn’t a concern for this bathroom light (usually on for short periods of time) but I wanted to bring it to your attention incase this is a light that you plan to leave on all the time (or for extended periods – nightlight, etc) and also to educate you and fellow readers who may take this transfomation and use it as a permanent solution – NOT A GOOD IDEA.
YoungHouseLove says
Great tip Jason, thanks! We definitely only keep it on for about 2 minutes at a time, but safety first! We’re hoping to switch it out for something really soon (we hope to hit up some thrift stores and our favorite lighting outlet this week).
xo
s
Jillian@TheHumbleGourmet says
I really love white for small bathrooms…brightens them up and makes them seem bigger. I’m painting my small master bath soon and going for a really light colored palette; white walls with birch wood accents. There’s not a whole ton of natural light in there, so brightening up the walls and fixtures should help with the dark and dank situation we have going now.
Danielle says
Do you think it’s ok to paint a vanity white if the tile is white on the floor and shower but the actual sink is an awful beige? Suggestions?
YoungHouseLove says
Hmm, maybe paint a big piece of posterboard with the white paint and tape it up and see how it looks with the sink and the floor?
xo
s
Leah says
I like that you are doing a “Phase 1”. I do believe that sometimes, even though it is more work, it is nice to redo a room to be more “you” and comfortable EVEN THOUGH you know you will “redo” it later on.
Also- I no longer feel like a YHL traitor! The door looks better from afar.. Phew
YoungHouseLove says
Haha!
xo
s
Molly says
You guys are really teaching me something. Patience! I decide I want to make a change and try to squeeze it in to the shortest possible amount of time. That doesn’t always equal the best decisions or decisions that I want to live with very long…which explains why my husband had to paint over the blue paint in the living room after just a few short months. I do wonder though, how you make small changes in the beginning and know they will fit into the big picture in the end? I would tend to think you would start with painting and build, but I’ve noticed sometimes you will start with a light fixture (I don’t know that you’ve done that but you get my point! :-) and go from there.
John says
Miss the mirror you installed over the window in the second house, perhaps a new one would look nice. Guess you left it at the old house.
YoungHouseLove says
I loved that guy! It’s a bathroom mirror so those always convey, but it’s from Lowe’s I think (wonder if they still sell it).
xo
s
Angela Baker says
I get amused wondering if the former owners check out your website and what they think about your taste (“Oh, why would anyone get rid of our beautiful blue?” or “Wow. Our house really looked bad when we owned it. This is kinda embarrassing….” or “These new people are nuts…”) Inquiring minds…
YoungHouseLove says
So funny. We haven’t heard that they read it but the old owners of our last house read along and they said they loved watching us do all the work!
xo
s
Alex says
How did you remove the wallpaper behind the toilet? Did you have to take out the toilet?
We’re in the process of re-doing our bathroom too. The previous owners of our house decided to go with a jungle/Tommy Bahama in the house (black trim, orange and green walls, monkey wallpaper).
YoungHouseLove says
Thankfully the wallpaper didn’t go behind the toilet (only about an inch behind so I could reach it all with my fingers). If it goes all the way behind it I think you’ll have to remove your tank to get to it.
xo
s
Whitney says
Just a bit of info for the future- if you rub coconut oil on wood it takes the smell out!!
YoungHouseLove says
No way! Great tip! I did about 50 rounds of vinegar which usually knocks the smell right out but this guy took a licking and kept on stinking!
xo
s
Kimi says
You guys are AMAZING!! I look forward to reading your post everyday!!
Nik says
Oooo…the bathroom looks so crisp and clean. Yay for clean! I can’t wait to see what color you pick for the vanity. Teal? Eggplant? The possibilities are endless (strumming fingers together mischievously).
Megan says
Fresh white paint does feel better. Sometimes after cleaning our baseboards I want to paint them just because the
“no scuff marks, shiny white” makes me happy! Oh and your front door is identical to the color we painted our front door this weekend. I love it when I read after the fact about something you guys did that we did. Makes me kind of feel like I may have some style sense after all.
katalina says
totally unrelated
saw foyles war on DVD– most beautiful green used in england on doors and fences– not dark, not too light but a medium green with blue in it with brick buildings and I thought– that is the color that would look great on your door.
with layered front garden entry beds with diff heights–some structured, some lacy.
OK maybe too invested in your blog….
YoungHouseLove says
Sounds gorgeous!
xo
s
Shannon says
Great update to the bathroom and the front door, very NICE! I applaud you guys for sharing all your hard work. Thank you!!! oxo
YoungHouseLove says
You’re welcome Shannon!
xo
s
Julianne says
WOW….totally night and day! It’s amazing what a coat of paint does. Looks great! I actually really like that mirror, too. Good find. :O)
Andrea says
I painted our bathroom vanity last week too! It was WAY more work than we thought since it had 4 doors & 3 drawers. We used your tutorial from your kitchen cabinets! Did you sand the vanity first or did you not need to? Also, we got pretty significant bumps when we used a foam roller even with the same paint. Is there a way to prevent this or is it inevitable? Thanks!!
YoungHouseLove says
Since the vanity wasn’t glossy (more chalky and matte) we just went right to primer. But if yours has been sealed/glossed up, it helps to sand and degloss. You can just use an angled brush with super thin and even coats to eliminate bumps from a roller, but if you go on too thick you’ll get brush strokes so they both can be hard to master. Thin & even is key!
xo
s
Kim says
It’s so funny that the previous owners didn’t think about the light/mirror issue, when it was such a simple fix. Maybe they were really short people….
Katie says
SO excited to read this because I have the stinkiest dresser known to man (bought it at an antique store and it reeks of smoke) and I’ve tried just about everything to de-stink it. Picking up odor blocking primer this weekend!
YoungHouseLove says
Good luck Katie!
xo
s
Ginny @ Goofy Monkeys says
I <3 painting the vanity! A painted vanity was one of my very first DIY projects on my house. I just did it without telling my husband. A few years later and we replaced it, but it did make a huge difference at the time.
And yeah, multiple layers (we have FOUR) of wallpaper make the whole removal process a lot tougher.
Jen says
Sherry and John,
Your bathroom looks WONDERFUL!! If the vanity didn’t have a strong odor, would you still have painted the inside walls of the cabinet, or would you have left them the dark wood color?
Thanks!!
Jen
YoungHouseLove says
Totally would have left them!
xo
s
Jennifer :: Creative Scatter says
I love it! The bathroom looks SO much better. So light and fresh. The vanity looks completely different – the white turned out great! Oh jeez, now the idea of painting my bathroom vanities is popping in my head.
Ashley Simmons says
She is so cute.
Amelia R. says
It’s looking so much better, Sherry. Just getting rid of the blue trim around the bathroom door improves the bathroom about a hundred percent. The other updates are very tasteful and simple enough for most home owners to implement. Looking good!
Question: When we moved in to our house a few years ago, the trim throughout was painted a deep almond color. Apparently the paint was oil-based, because the latex primer and paint I used to paint it white has had some peeling, which looks worse than even the almond-colored trim. Because I have a three-year-old son, I don’t want to use oil-based paint to repaint the trim. Do you have any recommendations?
YoungHouseLove says
Oh no! I would go to the paint desk and see what they recommend. Maybe there’s a low-VOC stripping agent and then you can use low VOC primer and regular latex paint.
xo,
s
Ashley Simmons says
Clara… is the cute “she”. The bathroom’s great. But I’m not talking about it in female 3rd person.
YoungHouseLove says
Ha!
xo
s
Theresa says
So bright and fresh! Love that you picked Simply White. I chose the same for my cabinets. Makes me feel like I might know what I’m doing.
The little updates here and there are so motivating. So many blogs just show these final posts with no content or how to. You guys are the first blog I read everyday. (and it should probably be the only one, I’d get more done!)
YoungHouseLove says
Thanks so much Theresa!
xo,
s
Sava says
Great job! I had very similar floors in an apartment. Slate floors hid dirt. They were beautiful, but I had to give them a good scrub to get them clean. I think I went through several boxes of brillos. If I had to do it over again, I would first try a stiff brush, then try some steel wool from the hardware store and wear gloves (steel wool splinters are no fun). Our current house also has slate floor (although in a red, not blue-grey). I also hand scrubbed them, although they were in better shape and a good stiff brush did the trick.
Even through they didn’t look that dirty, I had to dump out the water every four tiles because it was black.
YoungHouseLove says
Love the tip!
xo,
s
Linda says
I actually have a ceiling paint question. My basement is almost done being finished and there’s a new drywall ceiling. I know I want the ceiling to be white, but I was wondering what paint you guys typically use. Is it the one you mention in this post: Simply White in eggshell? What paint color did you use in your last home for the ceilings that were white?
YoungHouseLove says
I don’t think we painted any ceilings in our last house so they were just stock white (whatever we inherited). Although we painted the guest bathroom white so the ceiling got a coat of that (Decorators White).
xo,
s
Heather P. says
Love to see how the house is coming together! It’s small things like painting trim that make such a difference!
Lesley says
So glad to see you are painting out the quarter round with the rest of the baseboard. It keeps bothering me that they didn’t do that in the first place – in my world it goes without saying that is part of the baseboard installation and therefore is treated with the same colour. My world also doesn’t involve trim any other colour than wood or white, and even excludes the existence of quarter round, it’s a pretty lovely place.
I remember in ‘yellow door’ house (can’t just say “your old house” anymore) that you said the quarter round just came that way so you left them, but at least the floors were a wood tone throughout so it looked okay.
Chris says
Can I come over and scrub that grout for you?? I am OCD like that, lol! I just scrubbed my kitchen and baths and it feels so good once it is done, even if it is temporary :)
YoungHouseLove says
Come on over! I tried vinegar and a stiff brush but I need more firepower!
xo,
s