There are almost always three main steps to the room makeovers that we tackle, and depending on the scope/depth of them, they can take a few days or a few months (ok, and sometimes we jump around so much that things take years). Either way, the order seems to go like so:
- prep/planning (brainstorming, picking a color palette, going shopping, priming, sanding, spackling)
- bigger upgrades (painting walls, refinishing or painting cabinets, laying new flooring, etc)
- finishing touches (curtains, new hardware, art, accessories – all the things that add “you” to the space)
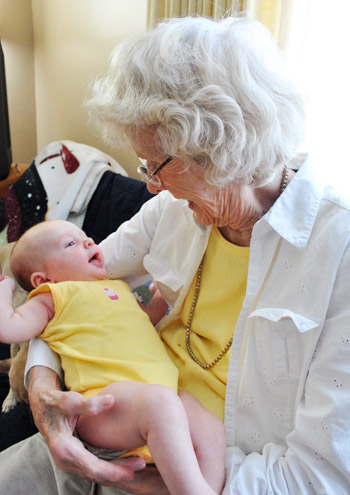
So when John’s mom mentioned his grandma’s half bathroom could use a little makeover we got to put those three steps into action. It resulted in a three day bathroom blitz that involved two seven hour drives and some obligatory midnight painting (thank goodness John’s parents traveled with us to keep Clara busy and happy). First you should meet Granny. She lives in Huntington, West Virginia, and is one of the happiest, kindest women you’ll ever meet. Here she is holding baby Clara for the first time:
And you know we love to share the day-by-day play-by-play, so with further ado, here’s what our To-Do list looked like for our turbo-charged three-day project (along with guesses about when we’d actually tackle things in parenthesis after each line item):
- Brainstorm colors & go shopping for accessories (Day 1)
- Spackle/sand/caulk everything to prep the room for paint (Day 1)
- Rebuild the cabinets a bit so they look more balanced (Day 1)
- Prime and paint the cabinets for a more updated and open look (Day 1 & 2)
- Paint the entire room, including the ceiling (Day 2)
- Fix a few issues, like a rusted duct and an old dingy corner below the sink (Day 2)
- Redo the floors, which were that old sheet laminate stuff (Day 2)
- Revive some hardware/accessories with a fresh finish (Day 2)
- Make & hang curtains to add some charm (Day 3)
- Bring in some meaningful art (Day 3)
- Add some functional/personal accessories to finish things off (Day 3)
- Reveal the whole shebang for Granny, who promised not to peek beforehand (Day 3)
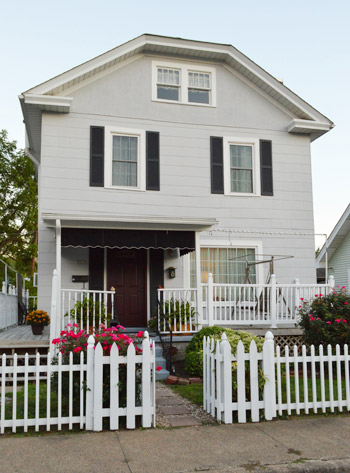
Here’s her charming 1920’s house, which they’ve in since the 1940’s so John’s mom and her siblings all grew up here. John’s late grandfather (“Papa”) actually did a lot of the handiwork himself over the years so there are lots of stories and memories tied to this place.
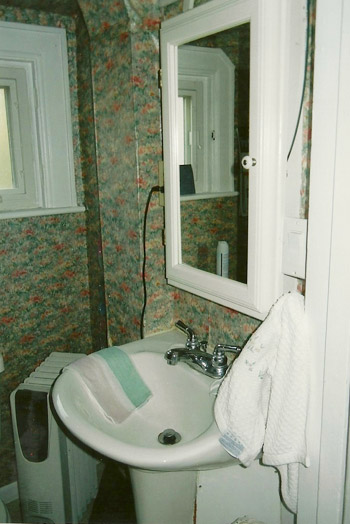
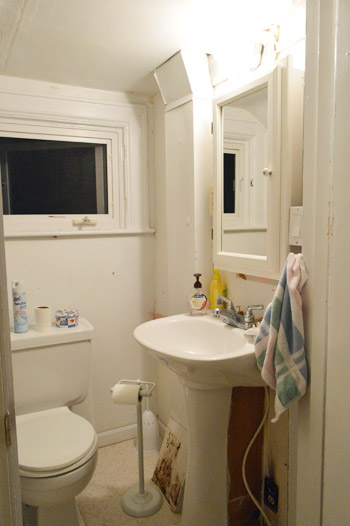
In fact, it was Papa who converted an old kitchen pantry into this little half bathroom! So everything from adding the plumbing to the electrical was all him. But that was decades ago, and the room was looking ready for an update, especially thanks to some wallpaper that Granny was “ready to tear off the walls” herself (at 90 years old, she still has that DIY spirit running through her veins, by the way). So here’s what the room looked like before the wallpaper was removed:

Thanks to Granny, our Aunt Ellen, and our Uncle Dean, the wallpaper was all miraculously removed before we arrived around dinnertime – just in time to work the night away prepping the rest of the room. But not knowing our store options in Huntington, we did some shopping before we left, including a mad dash into HomeGoods for some items we thought could work (we over-bought, knowing we could return whatever she didn’t need). We also knew Granny might have some of the items that we grabbed, so ideally we would get to use some of the new stuff, and some of her existing stuff, for a nice mix (and some nice savings).
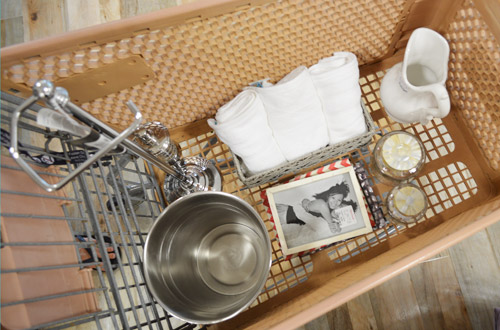
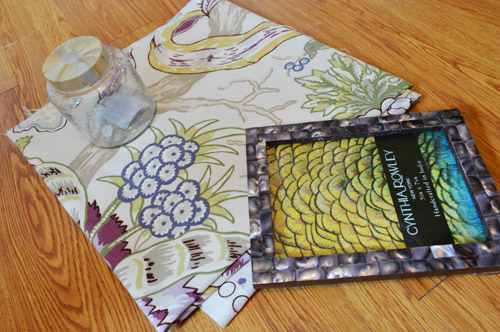
We also stopped at our favorite fabric outlet (U-fab) and grabbed a yard of pretty floral-printed fabric that felt a lot like Granny (it’s made by Braemore, for anyone looking for it) to make sweet little cafe curtains for the one small window in the bathroom. Here’s that fabric with some of the accessories we picked up, just so you can see where we were “going” in our brains:
We also stopped into Home Depot and grabbed some new flooring (which you’ll see more of during Day Two) and we used our seven hour drive to brainstormed a few other ideas for the space while we took in the road trip scenery (slash kept a pooch and a toddler occupied).

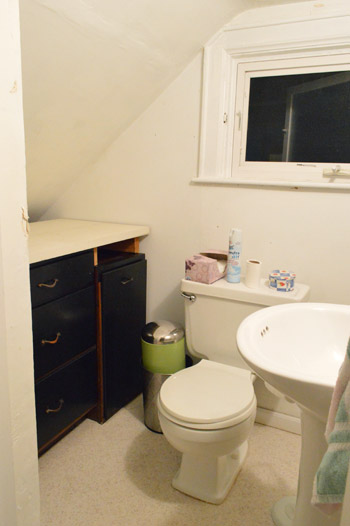
Here’s what the room looked like when we arrived. It was already looking worlds better with just the wallpaper being gone.
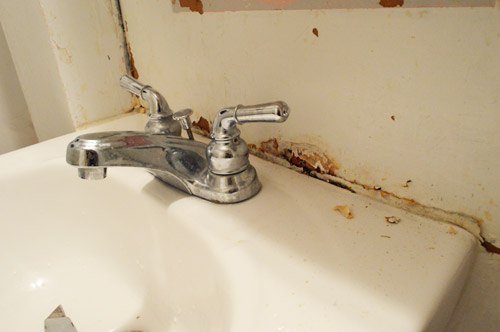
Apparently the paper came down with just a little tugging, so that was the good news. But without the wallpaper, some areas of the room actually looked even more worse for wear… like the bottom corner of the sink, the burned outlet, and the rusted vent on the other side of the pedestal sink.
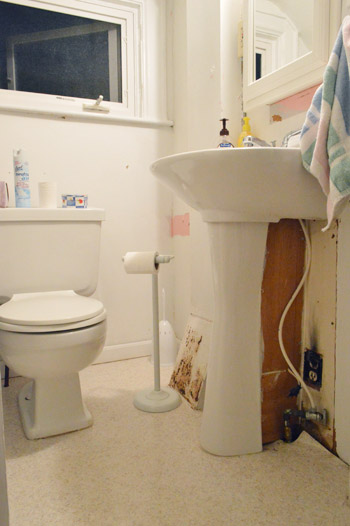
Yup, there were definitely some areas that needed attending to…
So we got right down to business. My job was cutting all of the old caulk out. It’s a step that doesn’t look much better immediately (sometimes it looks worse)…

… but once we get some fresh caulk and painting done, it looks as good as new.
Speaking of cutting out caulk in general, it’s amazing how much of it there can be. Just look at my pile after tackling the sink, the baseboards, and other random corners that also had bits of leftover wallpaper and cracked flooring:
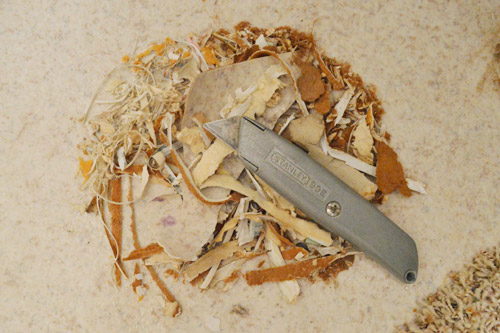
I actually ended up using an entire tube of caulk in this tiny space! Everything from the baseboards to that area around the sink and the doorway/window trim got some fresh caulk. It’s definitely a tedious job, but so worth it for a polished look.
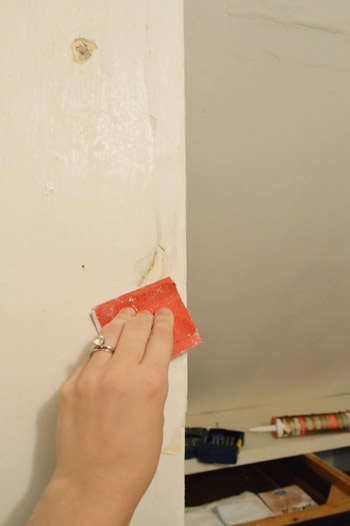
Then it was on to spackling and sanding. We just used regular old Dap spackle (with the blue lid) and a spackle knife, and pressed it into every crack and crevice, working our way around the room. Sometimes I’ll sand something before I spackle it, just if there’s something hanging off (ex: a flake of plaster) so I get a better finished look and a less crumbly foundation under my spackle job.
Meanwhile, John was off doing some wood cutting in the middle of the kitchen. I guess this is what happens when you don’t have your usual workspace and tools with you?
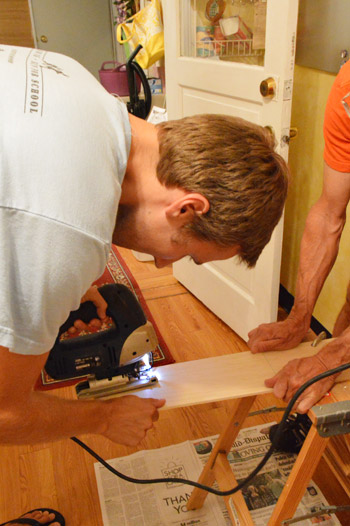
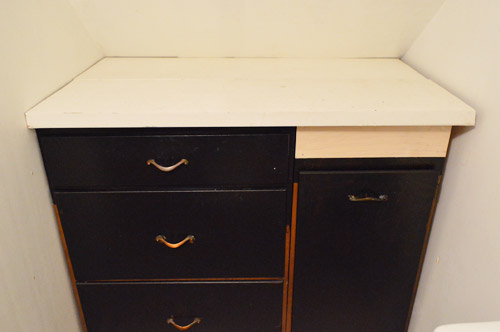
He was cutting a small plank of wood to cover a gap in the top of Granny’s cabinets since they’re actually two cabinets pushed together and topped with an old hollow-core door. So we filled the gap for a seamless look by nailing the plank into the 2 x 4 pieces that were already there to support the counter.
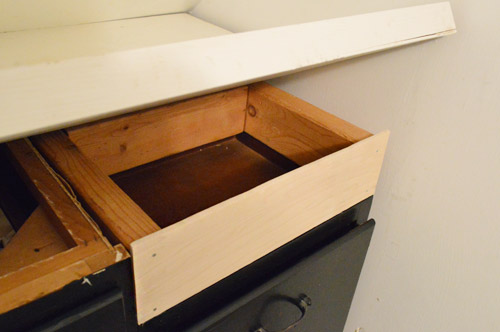
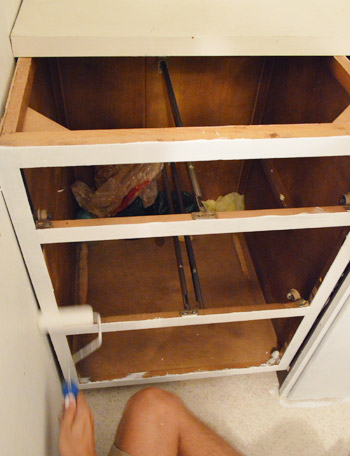
It would of course look more seamless once it was painted, which meant it was time to remove the hardware and prime those cabinets.
Here’s John rolling on some primer (this post has a much more thorough rundown of how we prime and paint cabinets).
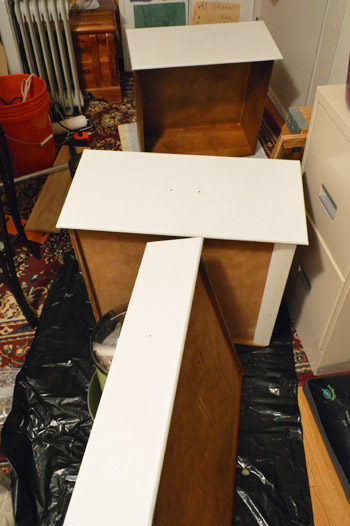
And here are the drawer fronts all drying in Granny’s back-room-turned-cabinet-painting-studio:
It took us a good four or five hours to prep the room as well as prime the cabinets and the countertop, so our to do list now looked like this (with little notes next to each remaining task about when we hoped to tackle them):
Brainstorm colors & go shopping for accessories (Day 1)Spackle/sand/caulk everything to prep the room for paint (Day 1)Rebuild the cabinets a bit so they look more balanced (Day 1)Prime andpaint the cabinets for a more updated and open look (Day 1 & 2)- Paint the entire room, including the ceiling (Day 2)
- Fix a few issues, like a rusted duct and an old dingy corner below the sink (Day 2)
- Redo the floors, which were that old sheet laminate stuff (Day 2)
- Revive some hardware/accessories with a fresh finish (Day 2)
- Make & hang curtains to add some charm (Day 3)
- Bring in some meaningful art (Day 3)
- Add some functional/personal accessories to finish things off (Day 3)
- Reveal the whole shebang for Granny (Day 3)
We had high hopes that we could bang everything out in our three day blitz, and we were really happy with our end-of-Day-1 result. A nice fresh clean slate to start gussying up in the morning. So it was off to bed exactly at midnight, after a very full day of shopping, driving, prepping, and priming.
We’ll be back with the full Day 2 rundown tomorrow, we just have to edit some photos (um yeah, we might have taken 1,294 in just three days…). Are there any other bathroom updates going on? Or shopping/prepping/brainstorming? Have you ever done a little room makeover for someone you love? It sounds weird, but it was even more fun than doing something like this for ourselves because the excitement of the big reveal for Granny got us so dorked up and giddy.

house Crazy Sarah says
oh – can’t wait to see Granny’s bathroom when you get er done! Good on you for tackling family’s projects as well as your own!
Ashley@AttemptsAtDomestication says
I’m excited for this! It’ll be fun to see you guys do a full room weekend makeover as opposed to the usual pace. Even though I like the usual pace too, it’s just fun to mix things up ;)
Sophie says
Looking great so far!
Kudos to you guys for that seven hour drive – I can drive from my house in London to PARIS in two hours less than that!
Belle says
Oh! The drama of waiting for the next installment.
Either I need to get out more, or your blog is amazing. I think a little column A, a little column B!
Maureen says
Maybe it’s just Monday… but this post combined with the news that a baby panda was born at the National Zoo has me feeling all misty. So sweet and considerate that you guys did this for Granny… and baby zoo animals! What a great Monday!! Maureen (Kensington, MD)
YoungHouseLove says
Haha, I love that.
xo
s
Suni says
John, your Granny is so lucky to have you 3 do this for her. I’m sure Clara loved getting lots of Grandparent time too. Can’t wait to see the big reveal!
YoungHouseLove says
Yes! It was the most bonding time they ever had (three days of fun at the park, the book store, out in the yard, etc). It was awesome for them- and Clara’s so in love with Granny.
xo
s
Anele @ Success Along the Weigh says
I got kinda teary reading this. That is so sweet of you guys to do that and I love that she was ready to rip that wallpaper off herself! Go granny!
YoungHouseLove says
Aw thanks Anele! We love Granny!
xo
s
Janelle D says
Can I just say something? You guys are the MASTERS of blog teases.
I’m excited to see how this turned out! I love enchanting little powder rooms tucked away like this one. They’re the perfect spaces for bold design choices. I know you guys won’t disappoint.
Jennifer says
Awwwww. Yay for taking care of Granny. :) I love to do stuff like this for my mom, when she will let me!
lizaanne says
We just did a complete tear out and remodel of our bathroom. It was a pro job, but some things we did DIY – the curtain, the painting of the medicine cabinet to make it what we wanted, I did all the painting myself, and my husband installed the beautiful old vintage heat grate we bought.
Not sure how I could have pulled all the ideas I had in my head if it were not for Pinterest. It was priceless for pulling all my sources for products, paint and tile ideas, all into one place.
Here is my Pinterest board of our shiny new bathroom!! No before photos – sorry, those are all on my Facebook which is not public. :-( But the after photos are pretty! :-)
http://pinterest.com/lizaanne930/our-new-bathroom/
YoungHouseLove says
Sounds gorgeous!
xo
s
Kay says
This is just lovely, Sherry and John. You are so kind and thoughtful, something that absolutely comes through in all of your posts but especially in this one. Can’t wait to see what’s next!
Cristine says
I’m in the middle of redoing my house built over 70+ years ago, and everything is a mess. We’re in the third week of painting! We move so slow with us both working full time jobs! I can’t wait to see Granny’s finished half bath!
Martha says
That’s so sweet that you’re doing this for your Granny. My grandparents built their entire house by hand in the 1940s, so I definitely appreciate the memories associated with granparents’ houses! I’m amazed at how industrious folks were back then.
Can you give a little more detail on how you caulk? It’s kind of a boring questions, but we’ve redone our entire bathroom–we demoed down to the studs retiled and installed new everything, and now we’re having the hardest time with the caulk. Everytime I apply it it looks goopy and smeary and messy and honestly, ruins a beautiful bathroom. Any tips or tricks to getting a clean line?
YoungHouseLove says
Yes! I actually made a video that we’ll share soon (just have to edit it), since that seems to be worth a million words. Haha!
xo
s
Sarah K says
You guys are the best! Can’t wait to see how the bathroom turns out. Such a sweet idea to gift this to your Granny.
And I’m sure Clara loved all the extra attention from the rest of the family!
Kristy says
I am so excited to see all of your work, and what you can accomplish in 3 days! We are tackling our bathroom next summer, and I am trying to get my husband to not panic too much about doing it all ourselves – it will be our first real room project that isn’t just cosmetic. So I think it will be very helpful to show him a project that doesn’t cost thousands of dollars or take six months :)
Crystal says
Love that you’re doing this for Granny, so many older folks have no one to help them. So kudos to you and I hope others who are reading your blog are inspired to help out an older family member or neighbor.
The picture I’m most taken with on this post? The first one where Granny and Clara met for the first time… their smiles are mirror images… and their clothing matches! What a love connection!
YoungHouseLove says
Isn’t that so cute?! It was a total yellow-accident, but we love that picture.
xo
s
Kelley says
I love this story! So nice of you to spruce up for Granny. And YAY for Granny for caring about her space! We are currently in the midst of a bathroom remodel ourselves. A little too large for DIY (we’re scared!), but I’m documenting the process on my blog. Check it out! http://www.kelleyime.com
YoungHouseLove says
Oops, link doesn’t seem to be working.
xo
s
Julia says
What a gorgeous exterior and as they say in the biz that bathroom has great bones! I cannot wait to see how you guys refreshed and modernized it, while still keeping with the spirit of the era the home was built in!
annie says
Love this act of goodwill and good taste! :D
Since y’all asked about other bathroom projects out there . . . I just finished one repair in our single bathroom (the layout and scale looks JUST like the one in your old house with the subway-inspired art, just as an FYI). I am now anxious to re-paint the walls, and am considering installing a textured tin (coated/sealed) ceiling. We are also thinking about hanging and painting this (http://www.lowes.com/ProductDisplay?partNumber=314377-37364-19737&langId=-1&storeId=10151&productId=3104177&catalogId=10051&cmRelshp=req&rel=nofollow&cId=PDIO1) wallpaper with an anti-mildew bright white paint. Thoughts? The house was built in 1949, so I *think* it will work with our general aesthetic, which mixes modern-ish leanings with the vintage and heirloom pieces that we have inherited. Fingers crossed. If it’s successful, maybe we’ll upload to the Reader Redesign!
YoungHouseLove says
Sounds awesome! Would love to see pics!
xo
s
annie says
I should clarify (Clara-fy?) that the wallpaper would go on the ceiling instead of the tin, not on the walls in addition to the textured ceiling. :)
YoungHouseLove says
Haha- Clara-fy = hilarious!
xo
s
Anne says
I just revealed our apartment bathroom on our blog last week! Unfortunately, apartment=renting=we have to keep the space as it is. That didn’t stop us from accessorizing, though!
http://annebronkema.wordpress.com/2012/09/10/bathroom-reveal/
YoungHouseLove says
Looks awesome! Such a nice little upgrade!
xo
s
Lesley says
Best.Post.Ever. I don’t know if it’s the subject matter (helping Granny in her really old house filled with memories) or what, but I cannot wait for the Day 2 post.
YoungHouseLove says
Aw thanks Lesley!
xo
s
Stephanie says
This got me a little misty-eyed. My nana passed away 4 months ago and had a stroke 1 year ago but up until that stroke she was living alone, drinking gin martinis, and walking her dog every day. She was a total firecracker. Your Granny wanting to just tear down that wallpaper made me think of her. This is such a sweet thing you’re doing for your Granny. I can’t wait to see the reveal. And it’s great that Clara will know her. :)
On a lighter note, I was on the recieving end of family help this weekend. My mom came over and helped me get my room in order (I still had unpacked boxed 4 months after move-in.) We even moved my new dresser up 3! flights of stairs, took down a shelf, moved a chaise lounge. It’s starting to look like a room, as opposed to a disaster zone.
YoungHouseLove says
Oh Stephanie, I’m so sorry for your loss. Your room sounds like it’s coming along really well.
xo
s
Katie Rose says
So sad I have to wait another 2 days for the big reveal! Such a sweet thing for you guys to do for Granny. :D
I don’t mean to pry, but did Granny try to pay you for your hard work? Did other family members chip in or were you guys happy to handle all the expenses?
YoungHouseLove says
We covered a lot of the budget since it was our gift to Granny, but you know Granny’s – she refused to let us leave empty handed (and insisted we put it in Clara’s college fund if nothing else).
xo
s
Carla says
When I was in my 20’s and 30’s my mom and I would take road trips from CO to OK to visit my Grandma every spring and every fall. We’d stay a week or two and in addition to doctor’s appointments, hair perms, visiting cemeteries to place flowers, and stocking the pantry we always had some project – redoing a bathroom or bedroom, organizing photos, sprucing up the yard, etc… It was always fun to see how the changes put an extra spring in my Grandma’s step. Having three generations under the same roof was also special – lots of sharing. Now I’m 50 and have great memories of those trips. You and you’re extended family are in a very sweet season of life; bravo for creating memories!
YoungHouseLove says
That’s so sweet!
xo
s
Ali says
Very sweet of you to tackle Granny’s bathroom! Looking forward to the finished version. And I smiled when you mentioned your Uncle Dean – I remember you mentioning him when I saw you guys at preschool the other day. :)
YoungHouseLove says
Oh yeah, Dean = the best name ever!
xo
s
Natalie @ barnesdailycircus says
I love this so much! It is such a thoughtful gift. A “labor of love.” Literally. I teared up a bit! Can’t wait for day 2!!
YoungHouseLove says
Aw thanks Natalie!
xo
s
keri says
WAHHHHH!!!! CLIFFHANGER!!! Looking forward to this redo :)
Anne says
How wonderful you are doing this for her! You must be extra-special-filled-up from this one. Bless you guys!!
Sarah Anne says
Off topic, but PLEASE do another Joss & Main event!!!!!!!!!!
YoungHouseLove says
Aw thanks, we’d love to.
xo
s
Amy @ a new old house says
What a great way to show your Granny some love!
We’re in the middle of a bathroom renovation now, and it’s taking us WAY longer than 3 days (more like 3 months!)
Where do you get your energy!?!
YoungHouseLove says
Granny’s such a sweet lady, I think she had us excited (and uninterested in sleep) as soon as we got there. Haha. Granny power!
xo
s
Kim W Rily says
I’m really hoping the bathroom will pick up some of that wonderful purple in the fabric you bought. Also, looking forward to see how you got rid of the rust. (I need to do some new caulking myself. Do you have a tutorial on that?)
YoungHouseLove says
We’ll be back with a caulking video as well as how we got rid of that rust. Can’t wait!
xo
s
Kristin says
You guys are so sweet to fix up your Granny’s bathroom!
My husband and I repainted my mom’s bathroom and made some very small updates (new shower rod & curtain, new shower head, etc) for her mother’s day present this year, and it made us so happy to see her surprise when it was all finished!
YoungHouseLove says
So sweet!
xo
s
Caitlin @ Desert Domicile says
Awww, you guys are so sweet! I don’t know how you guys pull off 3 day makeovers. I spent the entire weekend DIYing some floating shelves for the nook above the toilet in my powder room and they’re still not done!
Jennifer Jill Araya says
What a wonderful project, and what a great gift to Granny! I grew up in WV, and the photo of her house in this post made me just a bit homesick … it looks so much like all the houses in my tiny hometown!
heyruthie says
yea!!!! So excited for this bootcamp! i’m a single mom, and i have to work bootcamp-like hours when my kids spend a day or two with thier dad. this gets my ideas goin’!
LARY@ Inspiration Nook says
You guys are the sweetest! Looking forward to tomorrow’s post.
Jocelyn Pascall says
First of all, I LOVE that you are doing this for her – very sweet. I am sure she just loved having you all there and getting the help. Secondly, I can’t wait to see how it turns out! I love that fabric.
Amanda Wells says
I have a half bath that has hideous wallpaper from the 60s. I’m waiting to tackle it. Do you guys have any great tips on removing wallpaper? I’m scared to do it for some reason…
YoungHouseLove says
We’ve had luck just peeling it off and sometimes scoring it and spraying it with hot water or vinegar to cut the glue and help release it. Hope it helps!
xo
s
Ali says
Slowly re-doing our guest bath (http://www.alitary.com/2012/09/bathroom-progress.html). Totally inspired by the stripes you’ve done in a bathroom before, so it’s only a matter of time before this place gets its stripe on as well!
YoungHouseLove says
Looking good!
xo
s
Jamie says
For the our full bath, I purchased a new vanity. Our bathrooms are original to the 1970’s, and whoever did the tile then tiled around both vanities, so we have to decide on tile and then rip out everything. It’s going to be a slow remodel, but I’m so glad to have my new Restore Vanity! ($75 for brand new maple vanity!!!)
YoungHouseLove says
Yay! We love the ReStore!
xo
s
Heidi P. says
Ah! Cliff hanger! I wasn’t expecting that for some reason, so it feels like I just walked, unawares, off the edge of that cliff! Excited to see the next few posts!
hillary says
I love this whole concept! Granny sounds awesome and what a gift to give her. Plus it’s fun to see your process condensed down into a weekend. Can’t wait for the next installment!
Laurie says
What a sweet gesture. Very excited for the big reveal. We just did a renovation on a rental property my father in law owned and wanted to sell. The best part? Renovating with someone else’s money! He lives out of state so definitely needed a project manager (read: US!). Even though I knew the house would be sold, the designer in me still loved picking out flooring, paint colors etc… We had a $5,000 budget so it was fun to get creative and decide which improvements would give us the best return. Best news of all? It sold after being on the market for 4 hours for $25,000 more than the realtor expected. We also just did a small tile project in our main bathroom. It was remodeled about 10 years ago but time for a spruce up. We tiled halfway up the wall and did a glass mosaic with a glass insert in the middle and then a tile chair rail. Huge improvement for under $200!
YoungHouseLove says
That sounds like so much fun!
xo
s
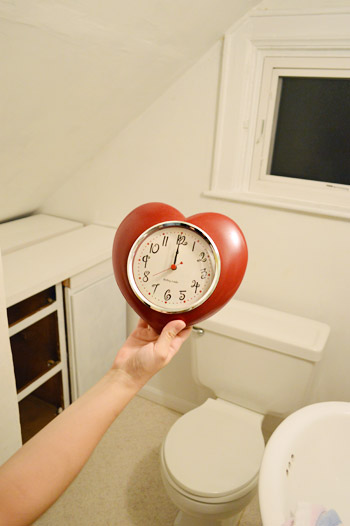
Jessica says
I have that same heart-shaped clock in my office at work (in fact I’m looking at it right now)!
YoungHouseLove says
No way! It’s so cute!
xo
s
Tara says
I’ve been hoping you’d do some things this like. I love your place, but it’s nice too mix it up with a few projects from other places too. This way I can imagine that you are at my house too. ahahaha
Katie says
umm wow Best Grandkids Ever!! So sweet of you!
Krystle @ Color Transformed Family says
What a wonderful house and such a thoughtful thing to do for her. I’m sure y’all had fun getting to spend some time her and giving her the chance to dote on Clara. I get exhausted thinking about driving that much and then working on a three day DIY project.
Carrie says
I love this! So sweet to do for Granny. Her flowers out front are so pretty! Cant wait to see days 2 and 3, and Granny’s reaction :) I grew up in Parkersburg WV and currently live in Charleston WV. Did John grow up in WV by chance?
YoungHouseLove says
He grew up in Northern VA, but his mom grew up in WV!
xo
s
Koliti says
Taking the “LOVE” on the road!
Maybe for your book tour you could have a raffle in every city for YHL to do a “Table-Scape-Blitz” (or other quick tweak). You could swoop in – shop their house – do a tablescape – swoop out! And say “You’ve been LOVED”.
If you do, then you have to come to Tucson :)
YoungHouseLove says
Haha, I wish! That sounds like my idea of a good time! Haha.
xo
s