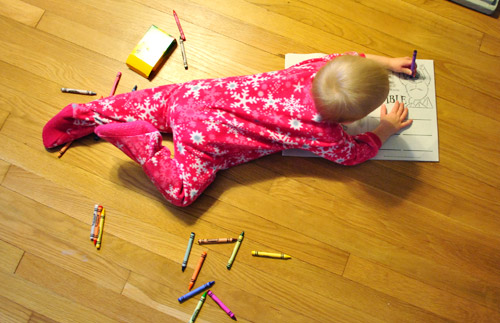
This is the story of a door turned desk turned tinier desk. When Clara came down with a case of the coloring bug a few weeks ago, it became clear that she needed an alternate surface for her artistry than the floor. You know, just in case she didn’t feel like tummy-drawing.
We talked about a few fun play tables over on BabyCenter a couple of weeks ago, but finally found the inspiration that we needed to DIY one right in front of our eyes. And no, it wasn’t this leftover-plywood-slash-side-table combo that Sherry rigged up in about 30 seconds of “hey, maybe this will work!” Sorry, Sherry. #playtablefail. Back to the drawing board…
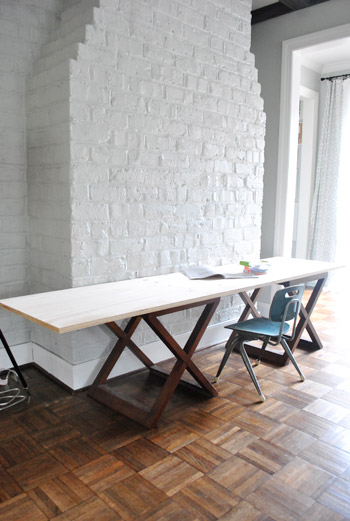
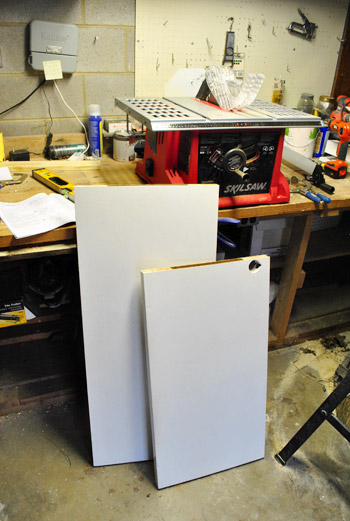
Actually, this was our inspiration. The desk that we built with an old door for our first house’s office, that’s been getting the cold shoulder ever since we DIYed a newer, bigger desk for our current house’s office (which made this one look oddly tiny and cramped). It had been sitting at the opposite end of our dining room for a while – just waiting to somehow be repurposed (or craigslisted).
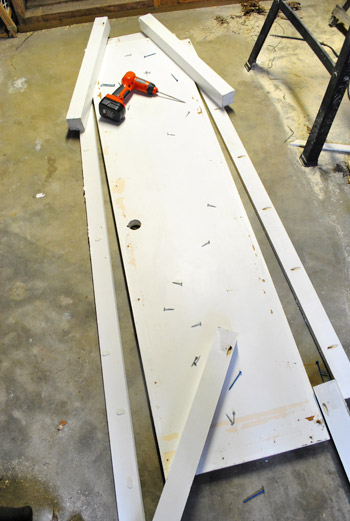
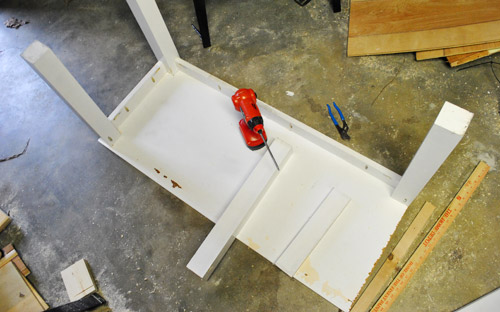
Well, this was its lucky day. It was too tall and too long, but since it was something that we cut to size the first time around, we figured… why not tweak it again? So we set off to create a miniature version of it. But we had a few requirements for it (like for it to be able to be used while Clara’s sitting or standing like a true activity table, to be big enough to seat a few other kiddos, to be sturdy and solid and safe, and to not be too precious – so it wouldn’t be the end of the world if Clara broke out a permanent marker on it one day). After chatting about a game plan with Sherry for a while (to figure out the right width for a few kids and the right height for standing & chairs), I lugged it down to my basement workshop and starting disassembling it.
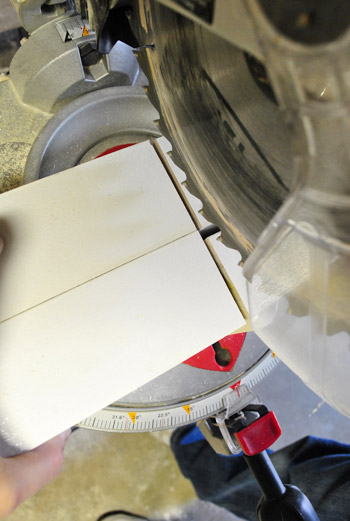
Then I used the miter saw to cut the legs down a few inches.
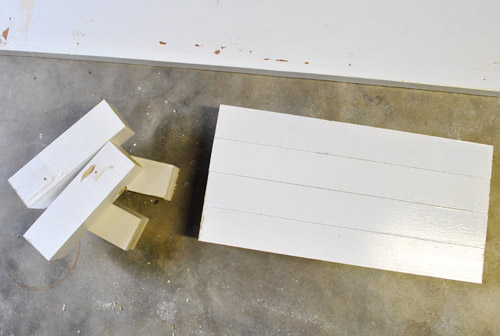
Then I had to cut down the tabletop (aka, the old door). For this I broke out my beloved table saw.
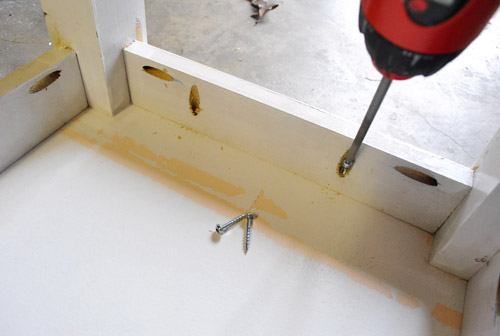
With my top and legs trimmed down to kiddy sizes, I just had to cut down the support pieces (aka: the aprons) and screw everything back together again.
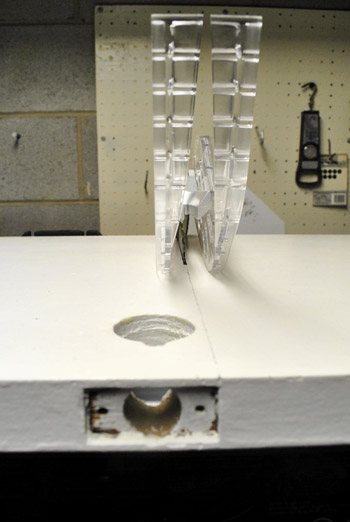
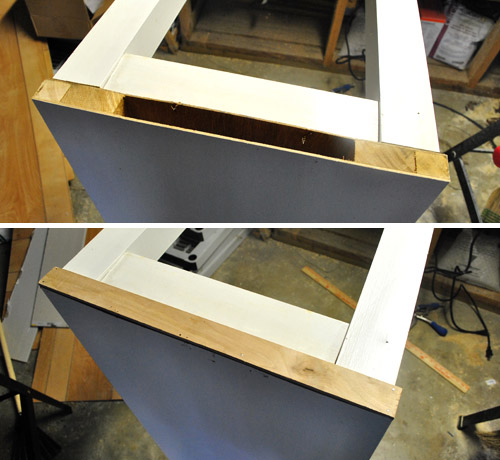
Oh and I did have to patch the open end of the door this time (when it was our desk we just left the end open because it faced the wall, so nobody saw it – and the room was so tiny that no one could get back there). But that wasn’t going to fly with little wandering hands around. So I cut a thin strip of spare plywood and nailed it into place. Once it’s all painted, it should look pretty good.
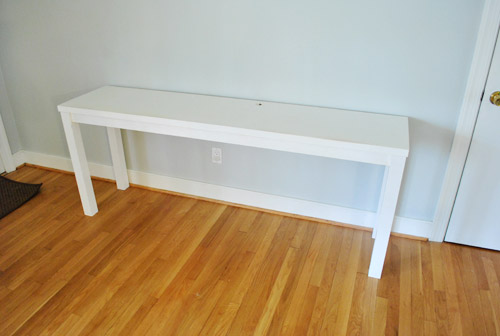
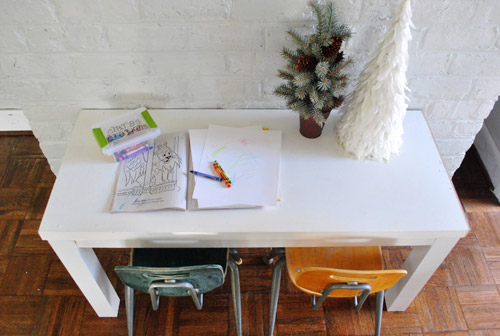
So with that (and zero dollars spent) Clara’s new coloring desk was complete. Well, mostly.

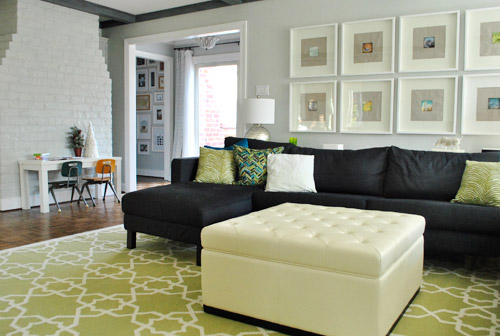
It still needs a fresh coat of paint. And we’re leaning towards (can you handle this?) white, so that we can make the $5 yard sale chairs the colorful accent instead of the table itself. Although Clara has done some crayon scribbling on the top that’s so cute it makes us want to tell her to go nuts and then use some sort of clear sealer to keep the doodles around forever. So we’ll have keep you posted if/when we make a decision…
There’s something really charming about the fact that it was made from an old linen closet door from our first house (where we brought Clara home from the hospital and raised her for her first seven months of life). That’s one sentimental table. And we love that Clara now has her own pint-sized parson’s desk when our adult-sized one (from West Elm) sits on the other side of the living room. It’s like a mini-desk for our mini-me.
Oh and you may remember these yard sale chairs that we scored back in the summer. We actually used them to build the desk at the right height for those chairs (and for playing while standing too – you know we like things that multitask). So it’s nice to have two chairs that already work. You know so if Clara’s baby BFF’s drop by we’re ready (we can also pull the desk away from the wall if kids want to face each other or we want to add more chairs in the future).
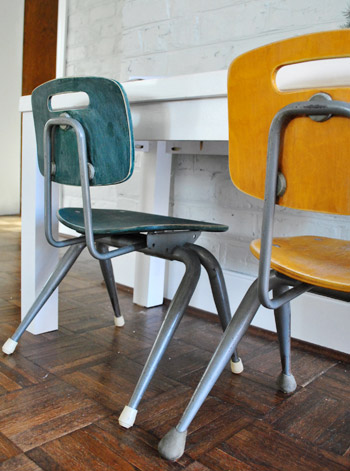
They don’t look half bad as-is (one has been stained yellow while the other was stained an evergreen color and they’re both pretty worn) so they might stick around like that for a while. We did debate painting/staining them someday, but it doesn’t seem to matter to Clara either. She fell in love with her new spot from the first second she laid eyes on it. Must be nice to wake up from a nap to something that was custom built just for you.
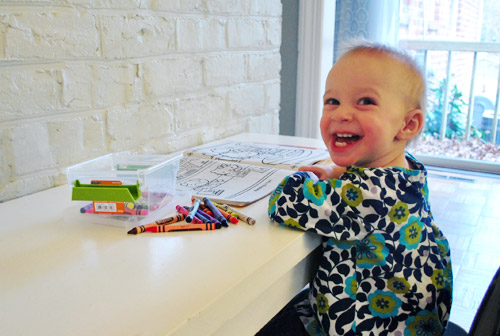
But seriously, look at that face. Does it not make you want to build something for her too?
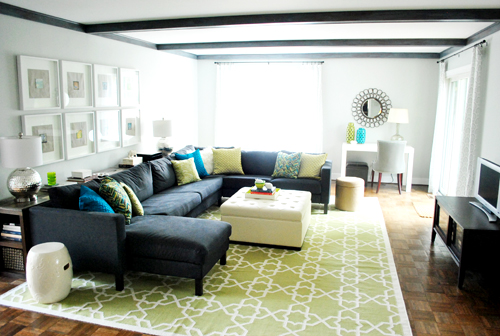
We’re leaving the desk here in the living room for now because it was an empty spot and it’s convenient for her to color while we relax work on the couch/clean up/prepare dinner in the nearby kitchen, etc. But we made sure to keep the desk small enough so that it could also slip into her room, the future playroom, the kitchen, or just about anywhere else that we may want to place it as she grows.
Wanna know the best part of this project? Besides it being 100% free, we got the entire thing done in one day. From concept to completion. Man did that feel good. Especially with a certain other project that’s taking several months (cough…thekitchen…cough…cough). Although now that this is done, it’s back to cutting trim and sanding wood putty. More on that stuff for ya tomorrow.

Heather says
Oh my goodness, how adorable! I love that she loved it immediately!
melinda says
That smile of hers makes it all worth it! What a cutie pie. And talk about green – you may see it repurposed yet again! I made our daughter a little table like that from scratch (painted the top with marine paint so it would be really durable). When she went away to college, (and because it was squarish in shape), she used it as an end table at her first apartment! (She’s 26 now. Where did the time go?!?)
YoungHouseLove says
Aw, it would be so cute if Clara grew up and used it in her apartment or something!
xo,
s
Natalie says
Our mini table and chairs made their appearance too this weekend. We got the white one from Ikea that starts with a K. With one red chair and one blue. That and two chairs from my husband and my youth it was a great addition to a third birthday party :)
YoungHouseLove says
They sound so cute!
xo,
s
Ann says
I love those little baby teeth! I have a picture of my baby girl like that, too, and it’s one of my favorites. :) Cute job!
Kat says
cute! I predict that Clara will soon have her very own blog! Looking forward to it! :)
YoungHouseLove says
Haha, maybe she can take Young House Life and we’ll do Middle Aged House Life!
xo,
s
carolinaheartstrings says
The Clara sized creation station is perfect. The baby is adorable and the jammies…… I LOVE!
Melissa says
Hi! I love the desk! I think this is one of my favorite posts! Some questions…can you just paint white paint right over the old paint? Will you have to strip and sand it first? And…how do you know if you can paint a piece of furniture without sanding or striping the old stuff off? Do you have any posts on this?
Thanks!
YoungHouseLove says
I’ll sand it gently to rough it up and then use a primer and then paint. That way it’ll stick instead of just slipping/scraping/cracking off. In general paint is not a good base for more paint in furnishings (you always want primer before adding new paint to help it stick). Good luck!
xo,
s
Kelley says
I love those school chairs to the max! In fact, combined with your stools from yesterday (eww), I realized the genius behind buying school furniture and have decided to get some similar “school stools” for our kitchen island as well. The ones we like remind me a lot of Clara’s desk chairs. Cuteness, guys!
Kristen says
OMG this is so adorable I love this post! It totally made me smile when you wrote must be nice to wake up to something custom made for you LOL!!
MJB says
Clara’s face could illustrate the term “Pure Joy.” I love her expression!
m @ random musings says
look at all those teeth! Clara’s getting so big ;) (and now my ovaries are in spasms) Sherry – she totally has your smile and eyes
snosie says
Before I saw your ‘reveal’ I thought you might have been inspired by pinterest, where I saw someone turn a crib into a play table (but the crib can easily be converted back to a crib, should the need arise). It was great – although didn’t have two sided access like yours!
YoungHouseLove says
That’s a really cool idea!
xo,
s
Wrenaria says
So cute! Man, I am still coveting your ottoman, btw. Every time there’s a picture of it, I wanna steal it. <3
Eve says
I love the desk! It’s perfect. And I vote for the existing chair colors too… they gel really well with your living room. :)
Ashley @ The North Carolina Cowgirl says
Seeing our kids faces when we do stuff like that for them makes the work so worth it! That was a great idea you guys had..I only wish I was as clever! I’m getting there tho. :) Thanks for sharing! Clara is too cute!
Neyir says
I love the idea of somehow sealing in her drawing. I wonder if there would be a way to section off the top and seal it in sections. I say that only because I was amazed at my son’s artistic evolution as he discovered new things like the day he figured out to draw triangles. It might be a neat way to take a snap shot of her development. Lovely creation of course :-).
YoungHouseLove says
Oh my gosh- I love that idea. Somehow grid-ing off different sections for her to draw on as she grows. So it’s sort of her evolution of coloring!
xo,
s
Jenna says
Looks great, you two! And I’m still in love with those two little chairs. Perfect!
Jenna at Homeslice says
I LOVE when projects just come together and finish in a day. That is the best feeling! I love it. I’m sure Clara is loving it too. Our little guy uses the floor, the kitchen table, and anything else he can find as his ‘drawing desk’ but this would be a great addition to our lives for sure! So glad you were able to find a repurpose for your old door/desk!
Jess @ Life Happily Ever After says
I LOVE the new desk! It’s super cute! I also love the chairs just the way they are! I remember when you got them this summer and they looked like they wouldnt fit in, but I think the teal and yellow look good together and the style of the chairs ties into the new kitchen benches! Keep the chairs the way they are!!
mp says
So sweet! Even better than when Maxwell Gillingham-Ryan made a desk for his daughter Ursula.
Kelly C. says
Love, love, love this! How cute will it be to put her artwork up on the brick fireplace above her??
YoungHouseLove says
I love that idea!
xo,
s
Diane says
LIKE the project. LOVE the face. Actually made me forget what I was even reading for a moment …
Lauren says
I am absolutely smitten with Clara’s new colouring desk – and I can see she is too! I can’t wait to see how you accessorize it. I love the chairs as is, but I’d love to see them painted a colour from Sue The Napkin. The punchy purple would be great (and slightly girly for little miss Clara) or the fab peacock blue.
P.S. Have I mentioned that all I want for Christmas is some kitchen pictures?! I am seriously going to check in on the 25th to see if “Santa” has given us all what we’re desperately waiting for! ;)
Happy Holidays you guys! <3
YoungHouseLove says
Haha- well we have a post about our progress tomorrow (still haven’t gotten to priming yet though- sheesh!). Then it’s looking like the week after Christmas we’ll be priming and painting and things should be dry and rehung (and ready for a big blog post with a million photos) in the first week of January! Wahoo- a whole new kitchen for New Year’s!
xo,
s
Elizabeth K. says
It’s wondrous! Seriously, you two are so awesome.
Becky says
This is so darn cute. We made a built-in desk out of an old door (http://www.diynewbies.com/how-to-build-a-custom-desk-using-an-old-door/) but I love the idea making a Parsons desk out of a door. I guess I never realized that is what your old office desk was! Perhaps that will go on my list of projects since we still have a pile of old doors in the basement.
YoungHouseLove says
Love that little workspace you made!
xo,
s
DeeJay Conley says
Supah Fab!
Emily says
Oh my goodness, it is so cute! I love the little table and I am digging the way the mismatched chairs add a pop of color over there. Love it!
Emily
Sheila @SZInteriors says
I love the idea of preserving Clara’s ‘work’ that makes its way onto the table-top. And the chairs are perfect already – did I just save you some time? ;-)
Merry Christmas to all of you!
Jaz says
Wow! What a fantastic way to reuse an old door! I love, love, love your creativity!
There is something a bit more timeless and special about using older things (like the door) as opposed to buying new…never can get that same “feeling” from new.
Thanks for sharing!
Heidi P. says
Awesome.
And I love the chairs!! The yellow and blue go so well together and they totally fit in w/ your new stools!
That’s such a neat idea to save her scribbles! Never would’ve thought of that. I don’t know if you’ve seen this quote on pinterest, but that idea made me think of it: “If you are still in the process of raising children, be aware that the tiny fingerprints that show up on almost every newly cleaned surface, the toys scattered about the house, the piles and piles of laundry to be tackled will disappear all too soon and that you will—to your surprise—miss them profoundly.”
:)
Clara’s face on that last picture is priceless.
YoungHouseLove says
Aw, such a sweet quote!
xo,
s
Karita says
Great idea. If you wanted to make it even more fun you could paint the top with chalk board paint to make it a draw on table!!! If you cut circles in it and drop little pots in them she could store her chalk in ther too!
Jessie @ Imperfectly Polished says
We did a very similar project last spring! We had an empty nook in our kitchen and used an old door with some decorative legs to make a little computer area. You can see it here: http://imperfectlypolished.com/2011/02/02/built-in-desk/. I love that you made yours the perfect size for Clara. And those chairs are adorable! I’m sure she loves it:)
YoungHouseLove says
Sooo charming! I love it!
xo,
s
Michelle says
LOVE it. Also wanted to let you know that I liked your living room before, but I LOVE it now. The new rug, ottoman and the artwork look FABULOUS!!
C Redmond says
As soon as you mentioned not making it too precious since it is likely to get marked up, I thought of chalkboard surface, too. And as another commenter mentioned, I thought that’s what you were doing when I saw the photo and the top appears nearly black.
Anyhow, if you guys are not considering chalkboard paint because of the vocs (I know that’s an issue for me too) especially for a child’s table. You can make your own voc-free chalkboard paint. Saw the recipe on Martha’s site for making chalkboard paint with paint of your choice and a couple tablespoons of non-sanded grout.
You can then make a customized the colour of your chalkboard table or just leave make it black so that crayon marks are less noticeable. And on days when Clara wants to make less permanent art, she can use chalk right on the table top. Kids can’t resist a chalkboard, so I just love chalk surface kid’s furniture.
You guys may already know about this method but just in case you hadn’t I thought I’d pass it along because I know you care about voc especially around your daughter.
Nice job on the pint-sized table- very cute.
YoungHouseLove says
Such a fun idea!
xo,
s
C Redmond says
oops! the link to the chalkboard paint recipe page on Martha Stewart’s site.
http://www.marthastewart.com/271574/custom-color-chalkboard-paint
YoungHouseLove says
Thanks so much!
xo,
s
Kay says
So sweet! Clara is just too cute! And this is such a great idea too… my son is a bit younger than Clara, so I love getting ideas from you guys for him as well.
RebeccaNYC says
I love that you have a spot for Clara to be crafty! When I was little, my mom always made sure I had my own craft spot, and things from her own projects always found their way there…left over ribbons, buttons, pieces of cloth, yarn, old magazines to cut up, shoe boxes…you name it. She made sure I had the stuff I needed to be creative! And I was ALWAYS making stuff. I LOVED it!
Katie says
Very cute project!!
Shannon says
This is fabulous! Love her smile. I CANNOT wait to see what you are making her for Christmas…selfishly I am hoping for a play kitchen because I have been wanting to repurpose one for my own daughter and would LOVE to see your take on it first!
Teri Bennett says
Maybe I missed it elsewhere, but what is the new table height?
Love, love, love. I am sure Clara loves it more!!
YoungHouseLove says
It’s about 21.5″ – that’s based mainly on the height of the chairs we wanted to use with it.
-John
Eva says
We just LOVE your couch! We are looking for something just like that…where did you find it??
YoungHouseLove says
It’s a Karlstad sectional from Ikea. You can read all about it here: https://www.younghouselove.com/2011/01/surprise/
Best,
John
Stefanie says
What is the height you ended up going for? Thinking of multi-tasking some (to be purchased) furniture but one of the uses needs to be at least 19 inches high so I wasn’t sure if that would be too tall for a baby table…thoughts?
Stefanie says
Just saw your response above to Terri – 21.5 inches to work with the chairs – thanks!
YoungHouseLove says
Sure! Hope it helps!
xo,
s
Audrey says
I love this! I was thinking, wouldn’t it be cool to affix a roll of paper to one side (maybe with a towel bar or something?)that she could pull across the whole table? I know Costco sells those big rolls of paper. You know, like this: http://www.meijer.com/s/guidecraft-art-table-and-chair-set-red/_/R-221465
YoungHouseLove says
Love that!
xo,
s
Rachel A says
Could you give the dimensions of the table? It’s such a great size! We want to do one for my daughter for her birthday coming up in a few weeks.
YoungHouseLove says
So sorry we’re on our book tour right now so I can’t measure it, but maybe if you scroll back in these comments somewhere I mentioned it? Hope it helps!
xo
s
Sheri Johnson says
Do you know the height of your table? I’m trying to make something for my daughter and have no idea about how high I should make it? Thanks!
YoungHouseLove says
Oh man we’re not home to measure it but maybe go to Ikea’s site and see how tall their kids tables are? Hope it helps!
xo,
s
Jeanne says
Hi. I’ve looking back at some of your archives trying to come up with a plan to DIY a kids table. What height did you leave the table? Thanks!!!
YoungHouseLove says
It’s 18″ to the bottom of the apron and 21.5″ to the tabletop. Hope it helps!
xo
s