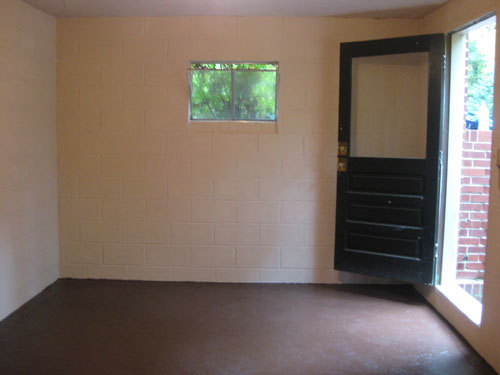
We’re back with the full rundown of basement projects that we took on to totally transform our spooky bug graveyard into clean and functional storage space. First let’s take a walk down memory lane to reminisce about the creepy jail-cell-looking room that we started with:
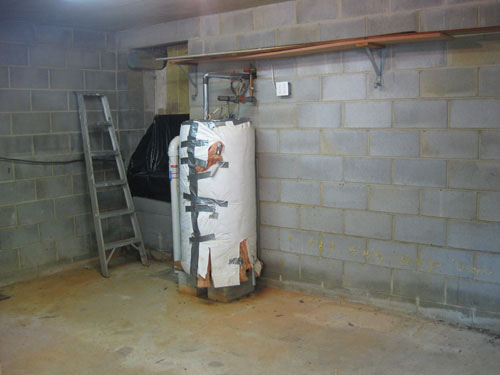
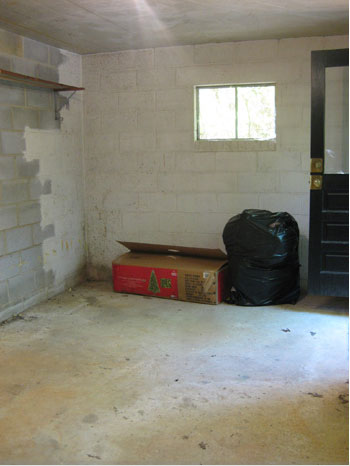
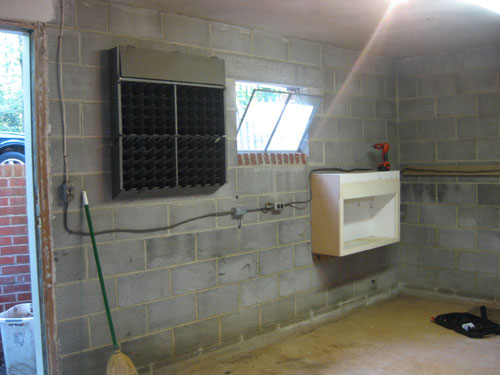
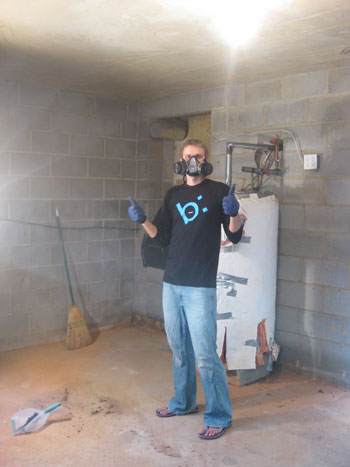
Gross eh? The worst was that although the exterior of the basement’s foundation was equipped with drains and graded to reduce water flow, we still had a bit of moisture seepage through those porous unsealed cinder block walls every time we got a good amount of rain. It wasn’t as if the room flooded by any means, but it was damp and nasty because water slowly oozed through the walls and pooled on the floors (so we couldn’t store a thing in there for fear of moisture damage and even worse… mildew). Yup, we had some of that too. So the first step was to effectively kill the mildew with a part-water-part-bleach solution and then Drylok the cinder block walls and concrete floors (with two thick coats of the tan-tinted oil-based formula) to cure the basement of all its moisture-related shortcomings. And since Drylok is seriously nasty stuff, don’t forget to break out the gas mask! Click here for more detials about this stage of the project.
Then we opted to coat the concrete floor with the same chocolate paint that we used in the sunroom for a rich and durable finish. Click here for more detials about this stage of the project.

The difference that just the tan Drylok and the chocolate floor paint made in the room was pretty unbelievable- and our moisture issues were a thing of the past. As if to test our handiwork, Mother Nature dumped a monsoon of rain (weeks of storming and even a Nor’easter!) and our basement remained bone dry. Which was pretty amazing since many of our neighbors had basements full of water. Thank goodness for good timing! But those changes were just the beginning…
Then it was on to brainstorming the most functional (and budget-friendly) floor plan we could think up. We knew that because we wanted to use the basement primarily as a storage room, we needed to bring in lots of pieces that could house things like sporting equipment, seasonal decor, and even our artificial Christmas tree. So we thought hard about which furnishings would give us the most bang for our buck and landed on the idea of bringing in two armoires for concealed storage along with a book case for more boxes and bins plus a worktable (so we can sort through all those boxes without having to crouch down on the floor). For the full floor planing monty, check out John’s hands in the starring role of “graph paper method explainer” (watch it below or check it out on YouTube):
Click here for more detials about the floor planning and furniture brainstorming stage of the project.
Afterwards our shopping list was pretty straightforward (although we didn’t end up grabbing any woven baskets in the end):
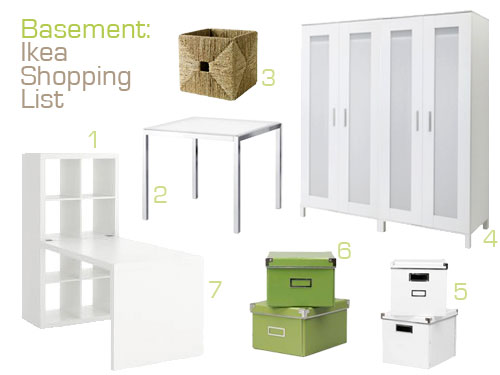
- Expedit shelf (included in the total Expedit Workstation) -$120
- Torsby table (already owned, so it’s free!)
- A woven basket or two – $17 each
- Two Aneboda wardrobes – $100 a pop
- A few white storage boxes – $12 for two
- And a few green storage boxes to keep things interesting – $12 for two
- Expedit desk (included in the Expedit Workstation) accounted for above
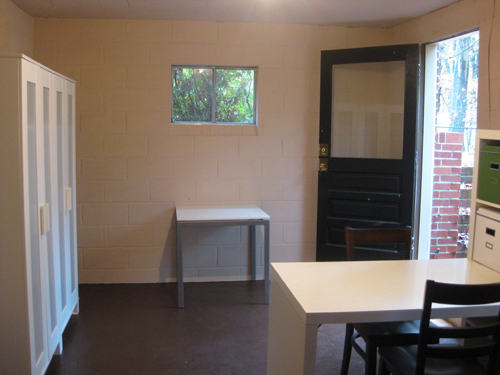
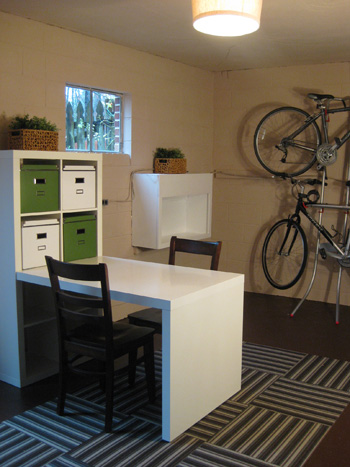
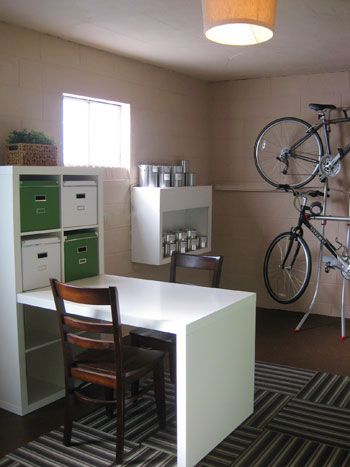
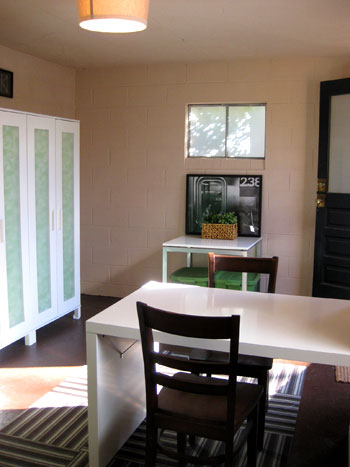
Grand total: We actually came in at $344. Not bad for a large 19′ x 13′ room full of storage (that was previously a bug graveyard). Especially when you consider that one armoire is usually around $500-$1000. Here’s the basement with all of our new Ikea purchases in their places. Click here for more detials about the furniture purchasing and assembling stage of the project.
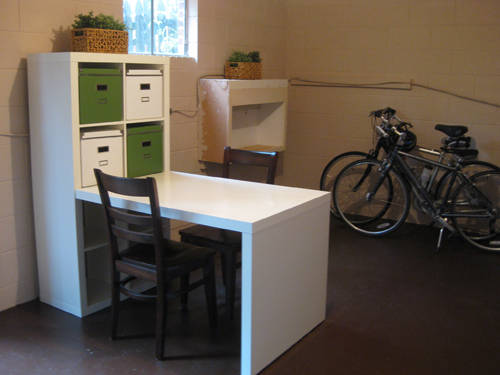
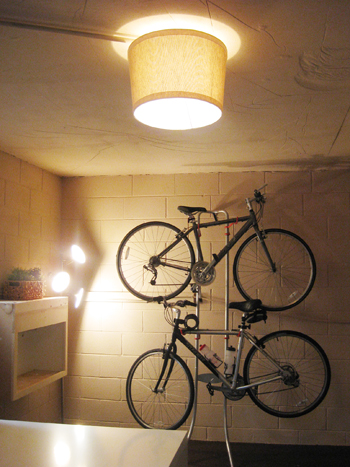
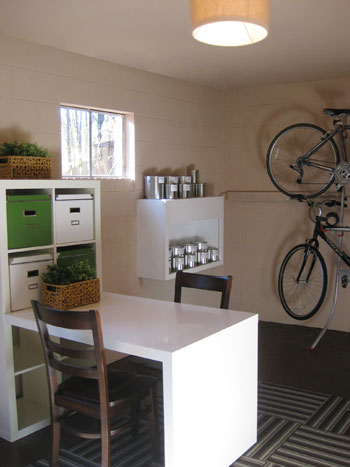
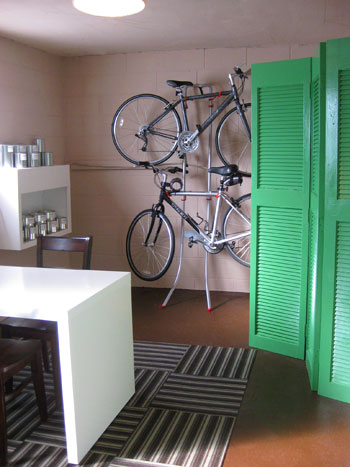
Then came the introduction of the awesome floor tiled area rug that one of our Fab Freebie sponsors (Flor) generously donated (along with gifting one to a lucky blog reader in this giveaway of yore). Thanks so much Flor! We love our playfully patterned squares, and the low pile and durable fibers make it the perfect choice for our highly-trafficked-with-wet-and-leafy-feet basement. You’ll also notice that we added the bike rack we found at Target (on sale) which we especially love since it maximizes the room’s vertical space and gets our bikes off the floor. It’s like totally functional art in the room (plus it’s freestanding so we didn’t have to wrestle with our insanely difficult cinder block walls).
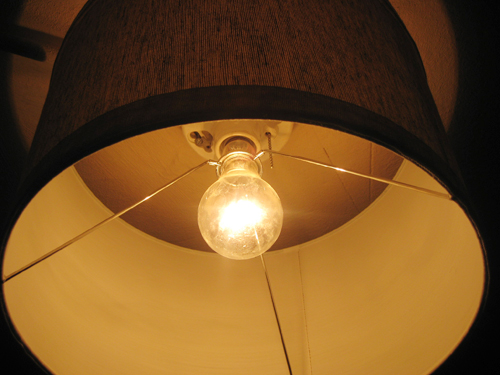
We also grabbed a $25 lamp shade from Target (which was meant for a basic table lamp) and inverted it to create a super affordable and polished looking linen shade that’s a whole lot prettier than the cold and industrial bare bulb that used to reside on the ceiling.
It was a simple as unscrewing the ceiling bulb, passing the base of the bulb through the loop of the lamp, and rescrewing the bulb into the ceiling fixture (so it effortlessly holds the lamp shade in place). Click here for more details on our carpet square rug, the bike rack, and our DIY lamp shade project.
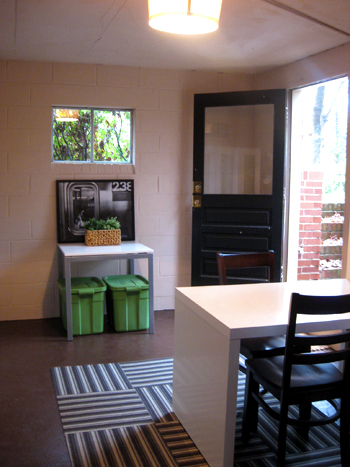
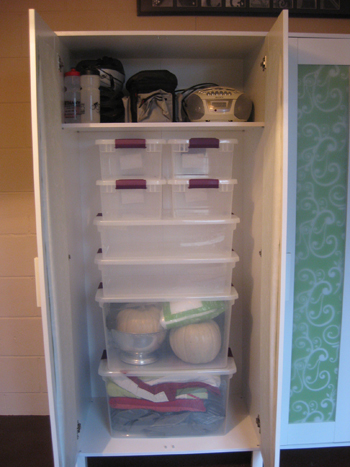
Then it was time to bring in an almost absurd amount of large plastic containers for organization and storage space to spare. You can see the two oversized green bins we snagged (that perfectly slide under the Ikea table). Even though they’re cheap-o storage containers we love the pop of color they add (and of course the function- they house all of our Christmas bulbs, ornaments, and feather trees).
And there are a whole bunch more where those came from in our storage armoires (many of which are still empty, so that’s handy for the future when our stuff expands with every year that we live here). Click here for more details about all the storage bins we brought down for instant organization.
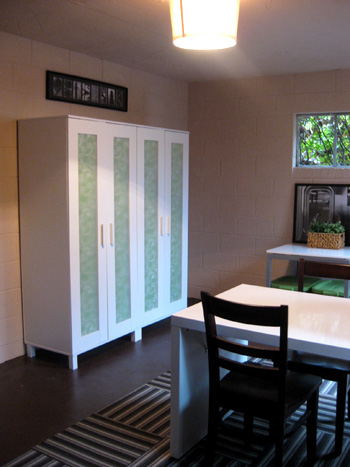
Then we spent less than $6 and used wrapping paper from Target to obscure our otherwise semi-sheer armoire doors (who needs to see all those plastic bins anyway?). Adhering it with double sided tape was quick and easy and the payoff was pretty amazing.
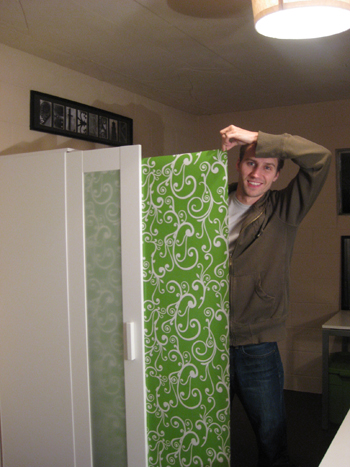
We especially loved pairing the swirly green pattern (which was muted by the doors) with the super linear striped rug. The effect was sort of boy-meets-girl, which we thought worked really well down here. Click here for more details about our wrapping-paper-lined armoire doors.
But even though we had plenty of storage space in those armoires and plastic bins, we still needed a spot to keep all of our paint on hand and in good shape (the basement is the perfect spot for a little “paint center” because it’s a lot more temperature controlled than the garage and we like to keep cans out of the house due to the off-gassing and the air pollution factor). A lot of our old cans were gooped up and past their prime (hardly sealing anymore, which means much of our paint was just months away from drying up and rendering itself utterly useless). And because nothing is more annoying than needing a drop of paint for a touch-up and opening the can to find a spoiled and sticky mess, we decided that investing a few dollars to upgrade each can to a new metal container that seals securely was definitely worth the time and effort since it would save all of our paint for years to come.
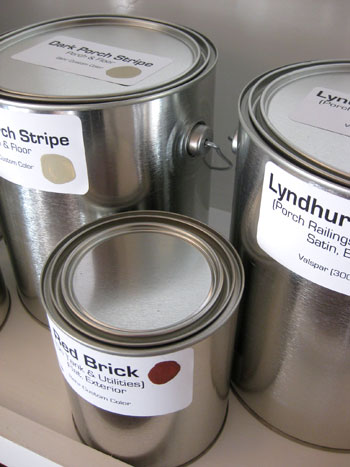
Plus we jumped a the chance to organize and identify our new paint cans (yeah, we’re nerds and we actually went to Office Max and got printed labels). But in our defense, they’ll really come in handy since we’ll never lose the name or the formula of any of our house’s hues again.
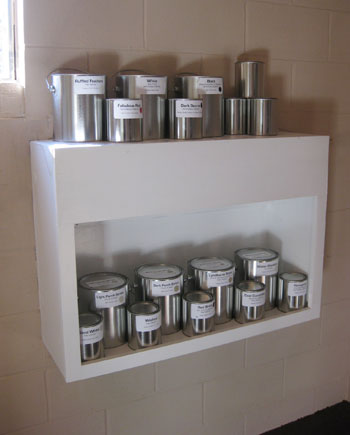
In the end our little matching paint can collection looked so good that it was actually worthy of being displayed out in the open (and we picked up a cheap-o paint pouring spout that will keep these cans pristine and easy to seal for the long haul). Click here for more details about our paint station project.
Then it was time to obscure our water heater, but we didn’t want to build anything around it that would be too permanent or difficult to move in the event that we need quick access. After filtering through ideas like a hanging an all weather curtain suspended from the ceiling or building a bookcase on wheels that can be pulled away in a snap, we decided that a simple folding screen made from secondhand bi-fold doors (picked up for just $18 at our local Habitat For Humanity ReStore) was the way to go.

All we had to do was hinge them together (with the free hinges that came with the doors) and paint them a fun punchy color (that we plucked directly from the bins in our Expedit workstation and the plastic storage containers that we stacked under that table by the window). After a few coats of Benjamin Moore’s Bunker Hill Green 566 (which we had color matched to a quart of Behr paint so it only ran us $14) it was the perfect way to obscure that eyesore of a water heater without blocking access to the other side of the basement. Happily, we still have over 35″ to walk around, roll out bikes out, etc. Click here for more details about our DIY bi-fold door screen.
Then all that was left to do was apply a bit of window frosting film, which we accomplished in less than 40 minutes (and for under $27). We love how the light still floods the room (anything to keep it from looking as dark and prison-esque as it did before the makeover!) but it provides 100% privacy from the exterior, so no one can peer into our little storage mecca uninvited.
Oh and not only did we apply frosting film to the both of the basement windows, we also opted to cover the large pane of glass in the door for even more privacy and that posh and polished look. Click here for more details about our window-film application process.
Long story post short, we can certainly appreciate all that we gained from solving the moisture problem, painting the floor, selecting a workable floor plan, bringing in affordable furnishings, updating the lighting, adding a low-maintenance area rug, hanging bikes as art, papering the armoires, building a punchy green privacy screen, and frosting the windows. So there it is. The Cinderella story of a room that looked so sad-slash-terrifying and served absolutely no purpose other than to provide housing for neighborhood spiders. Heck, for old time’s sake let’s take one last look at the nastified room that we started with just a little over a month ago (afterwards scroll up to the last four photos to compare ’em to the “afters”):
And now for the much awaited budget breakdown. Here’s what we spent for the entire project:
- Drylok: $325 (from True Value)
- Floor paint: free (already owned)
- Ikea desk, bookcase, two armoires, storage boxes: $344
- Brown chairs at workstation: free (already owned, extras from dining set)
- Bike rack: $39 (from Target)
- Overhead lamp shade: $25 (from Target)
- Plastic storage bins: $73 (from True Value)
- Wrapping paper for armoire doors: $6 (from Target)
- Paint station: $58 (cans from True Value, labels from Office Max)
- Carpet tile area rug: free from Flor (who also gave one away to a lucky reader- thanks Flor!)
- DIY water heater screen: $32 (from the Habitat For Humanity ReStore)
- Frosted windows: $27 (film and supplies from Home Depot)
- Grand total: $930
Isn’t that surprising? We were totally shocked because we actually budgeted a few thousand dollars to turn that damp and freakishly infested dungeon into a clean and totally functional storage room. And when you think about how an armoire or a bookcase/desk combo can run you close to $1000 on its own, it’s pretty insane to think that we got all the furniture in the room and all the supplies to make the room waterproof & furniture ready plus all the extras like the bike rack, the lamp shade, the paint cans, the water heater screen and the window frosting film. I know, I know, we’re babbling. But we had to do the math like twenty times before we believed our eyes. Yeah, we’re officially flashing some jazz hands over here.
And because a few people actually requested a time breakdown as well, here’s a rundown of approximately how long each project took:
- Prepping, Dryloking and painting the floor: 25 hours
- Assembling and placing all furniture: 4 hours
- Grabbing the bike rack and storage bins: 1 hour
- Organizing storage bins: 1 hour
- Papering armoire doors and installing overhead lamp shade: 30 mins
- Transferring paint for paint station & printing labels: 1 hour
- Installing carpet tiles: 20 mins
- Building and painting water heater screen: 2 hours
- Frosting windows: 40 mins
- Total time spent: 35 hours and 30 minutes
We actually took our time and tackled all of these projects over the course of a few weekends and a few week nights (spread out over a month and a half). But if anyone’s in a time crunch and wants to devote more hardcore work days to the project, they could probably get ‘er done in less than four ten hour days (or two consecutive weekends, so there’s some drying time worked in after Dryloking and painting).
So that about does it for the basement wrap up. We hope you guys enjoyed this little step-by-step journey through our big makeover from start to finish. We’re definitely planning to use the “new” basement to store lots of stuff for years to come (we can only imagine how handy it’ll be when we amass all the extra equipment that goes hand in hand with having kiddos). But enough about us. We’d love to know how you use your basements (or attics or garages or any other bonus space). Is it strictly for storage or used to sleep extra guests or even converted into a cozy man cave or den for the whole family? Do tell.
Psst- Want to look back on our big basement makeover from start to almost-finished? Here’s the first post, the second post, the third post, the forth post, the fifth post, the sixth post, the seventh post, the eighth post, and the ninth post. Good times.

Leave a Reply