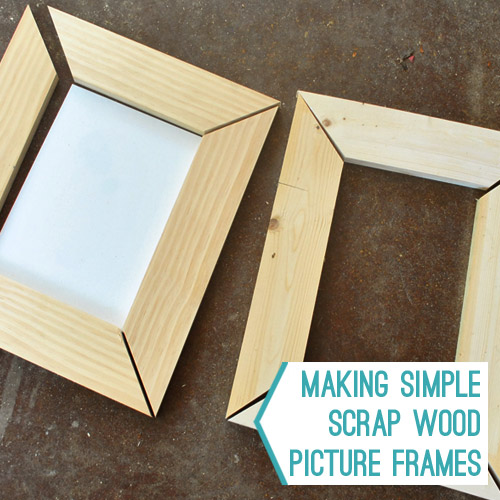
As Sherry mentioned in her Pinterest Challenge post this morning, we DIYed some easy wood frames for her homemade artwork. We did it partially because, well, we’re cheap. And partially because we wanted to see how truly simple we could keep this project.
So we challenged ourselves to try to spend zero dollars and just use things that we had around, which basically ended up being:
- leftover scrap wood
- wood glue
- a staple gun
- a hammer
- sandpaper
- a miter saw (but a miter box and a hand saw would work too)
- duct tape
- spray paint (the kind with primer built in)
Here’s how it all went down. We started off on the right foot by digging out enough scrap wood from my enormous basement junk pile. That, plus a spare canvas still wrapped in plastic (so my manhandling wouldn’t get it dirty) to use as a template for the frame size, kept our grand total at “free” so far.
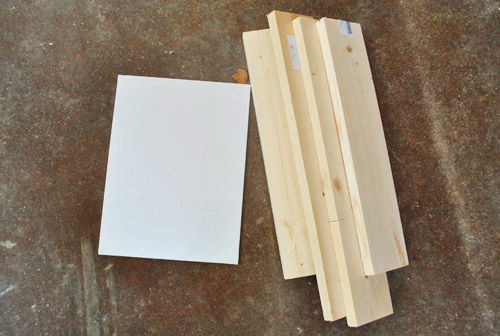
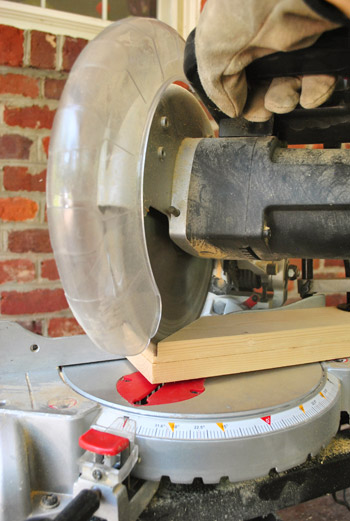
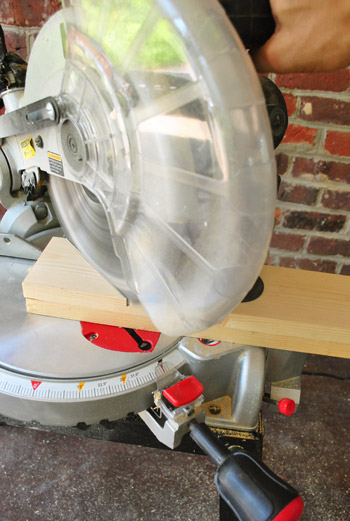
The process promised to be simple: cut 45-degree mitered angled on all four boards and attach them. I already have a power miter saw, so that was the fastest way for me to accomplish it, but if you’re trying to keep things simple are are saw-less, this could be accomplished with an inexpensive miter box and a hand saw (it’ll just take a little longer to make the cuts by hand). Oh yeah, and I cut my boards two at a time (they were held together with a clamp to keep things secure) – both for efficiency and to ensure I’d get equal length boards on parallel sides.
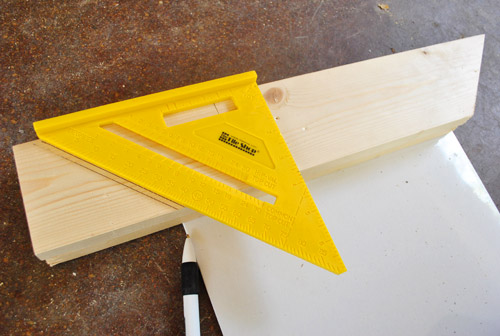
With one miter cut made, I laid my two-stack on the edge of the canvas so I could mark my next cut – being sure to overlap the edge of the canvas a little bit so it’d have something to rest on when my frame was complete.
With the boards still together and lined up perfectly, I did my second 45-degree cut in the opposite direction.
So far this project had taken me about ten minutes. Not bad if I do say so myself.
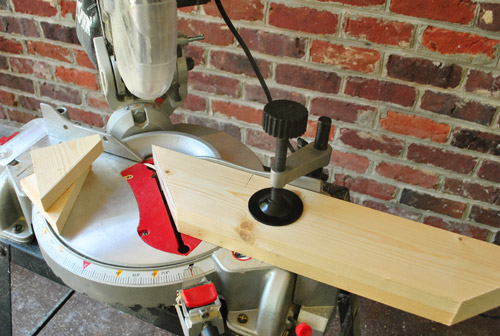
Now that I had my two long sides cut, I took my two shorter boards and repeated the process: stacked them together, cut one side at 45-degrees, then laid it on the canvas to mark my next cut (again overlapping the canvas a bit)…
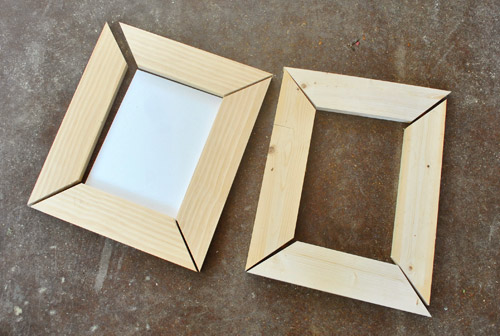
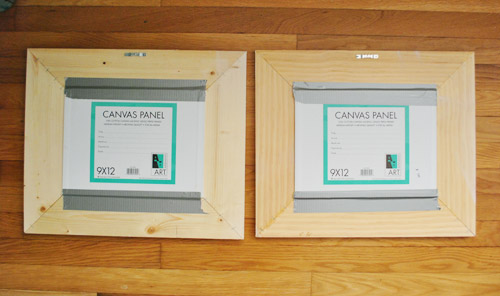
…and then I made my last cut with the saw. Boom. Just like that I had the sides to my simple wood frame all sliced and diced. You can see them just resting together in this photo (nothing was secured yet):
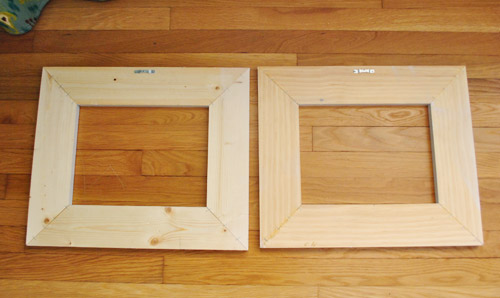
Since Sherry had painted two canvasses, I repeated the process with another piece of scrap wood to make a second frame. It happened to be a different type of wood from our scrap wood (less polished, sort of knottier and more rustic), but at least it was the same size. And we’re not suckers for things being super matchy anyway.
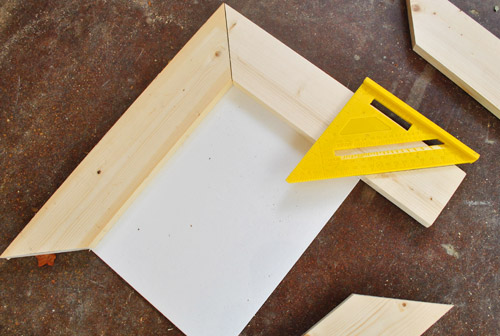
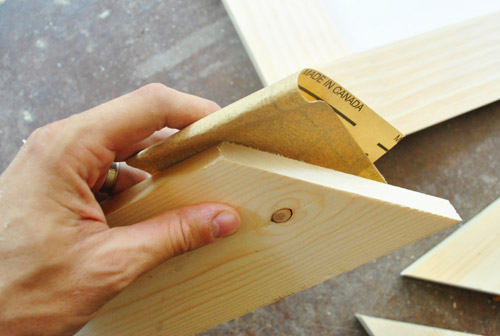
Before attaching the sides together, I did a quick pass with some sandpaper to make sure all of the edges were smooth.
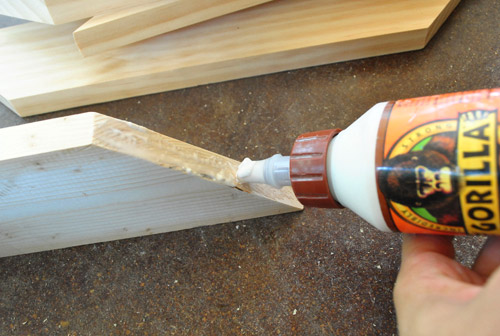
Then – again, trying not to use any terribly complex method to secure them – I broke out some wood glue I already had. I’m usually a nails and screws guy, so I wasn’t thrilled about having to wait for glue to dry – but I figured getting over my glue hang-ups was just part of the simple-and-cheap challenge. But in real life (since clearly this is a fantasy where I’m not allowing myself to follow my instincts) I’d probably screw a flat L bracket into each corner or even drill pocket holes with my Kreg jig to fasten the corners together. I just really wanted to make simple frames so anyone at home without a Jig or other more complicated materials could follow along.
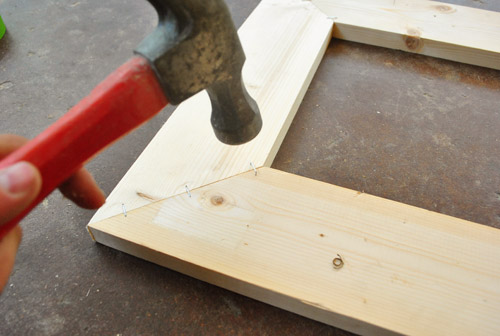
Thank goodness Sherry suggested stapling the corners together (on the backside) to help hold the glued edges together. This made me feel a bit more confident about what I was building. Plus it was pretty darn fast. We used the same sort of staple gun (from Home Depot about five years ago) that we use to upholster things.
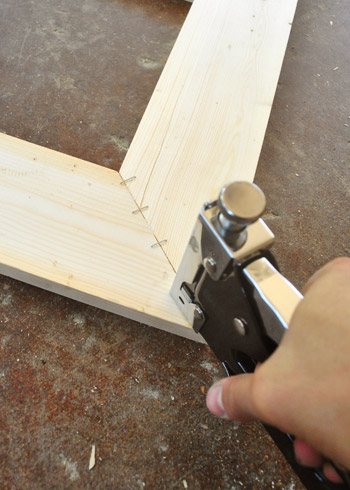
It’s a pretty strong staple gun, but it wasn’t quite strong enough to go all the way into the wood, so I hammered each staple in all of the way just to be sure they were in there well.
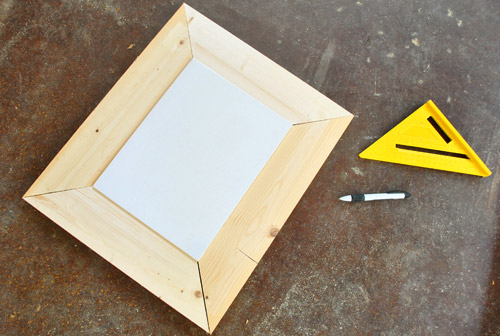
Things were feeling pretty secure, actually. And having clocked in at just about 25 minutes, I was feeling surprisingly secure about my construction method… until I turned it over. Hello wonky!
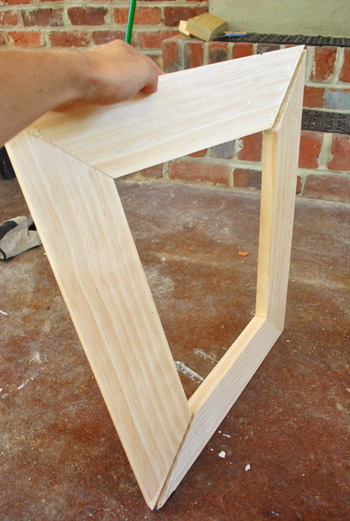
But before I abandoned my method completely, I decided to reinforce things with more glue in the crack (applied from the front this time). Plus, I think my Gorilla Glue may have dried out a bit so fortunately I had some Elmer’s that was in better shape which I used instead.

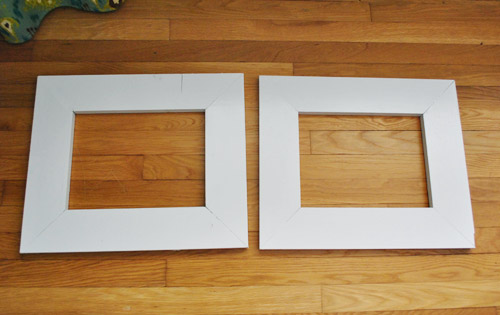
After both frames sat for a couple of hours – all glued and stapled up – we picked them up and they were no longer wonky. They were actually really solid. Woo hoo! So Sherry whisked them to her spray painting station (okay, it’s not a literal station) and applied a nice coat of Rustoleum’s paint-and-primer-in-one spray paint (in satin white). We figured this was the faster version of priming it with a brush, waiting for it to dry, and then painting it by hand – but that always works too (we have painted frames both ways with success).
As for hanging them, Sherry nailed in a couple of those sawtooth hangers on the back. Call us weird, but that’s the sort of thing we actually have around at our house so miraculously we still hadn’t had to purchase anything yet.
When it came time to affix the canvasses to the back, well, we just duct taped them. Certainly not the most elegant solution but hey, it worked, it was a fast and it was free. And it made them easy to switch up down the line (if we glued the canvases in place it would have been a lot more of a commitment).
And the rest is history… Well, actually I should point out that we didn’t actually end up using the sawtooth hangers on the back because the art ended up in the kitchen (not in the office where we originally thought we’d hang it). So we used some 3M velcro-style picture hanging strips for the one over the stove instead. I did have to go buy those (we had run out), so I guess you can call the grand total for this project a whopping $3.

Oh and as we mentioned we also got a piece of plexiglass from Lowe’s to cover the canvas over the stove (to keep it splatter free and wipeable) so that was another $3, although we included that cost in this morning’s Pinterest challenge cost. Has anyone else ever DIYed some cheap frames? Any other trips or tips to share? Or did you tackle something else in the easiest or free-est way possible lately?
Update: We finally created this Shop Our House page to help you hunt down any furniture/accessories that you see in our house, along with all of our paint colors.

Leave a Reply