When we last talked floors in the kitchen, they looked pretty much done.
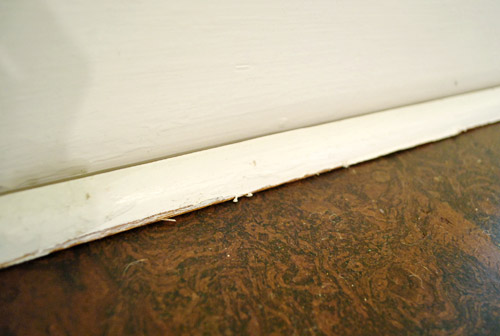
But if you looked closely, they weren’t. They still needed some finishing touches – namely shoe molding to cover the gaps around the edges (which are intentional to allow for temperature expansion and contraction) and some coats of sealant (to keep moisture out of the seams and provide some added durability).
The short version of the “adding shoe molding” step goes something like this: Now you see a gap…
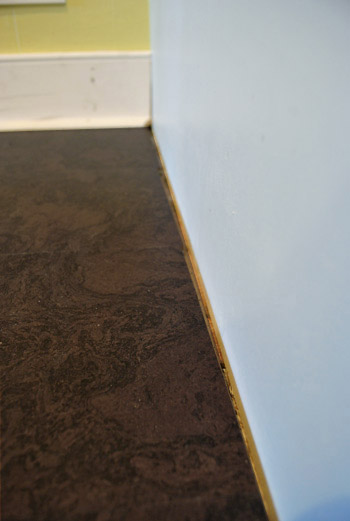
And now you don’t…
Of course then there’s caulk and paint involved (to cover the nail holes and any seams like where corners meet).
But let’s go with the longer version of the story – which has a few more twists and turns – for folks who like details. The first twist was that we actually ended up ditching our plans to reuse our old shoe molding, despite having saved (and meticulously labeled) all of the old pieces when we removed them a few weeks ago:
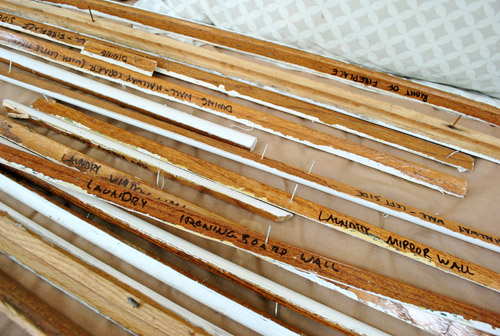
We initially thought that reusing it (after all that meticulous labeling) would make our lives easier. You know, not having to re-cut shoe molding for each span of wall. But when we tried to put some of the old painted pieces in place, they didn’t look so hot. The paint job was a little scrappy looking, and even with touch ups we worried the less than crisp edges wouldn’t look as finished as they could (especially since there’s such a high contrast between the white trim and the dark floor).
So we opted to install all new shoe molding. We had to buy some new stuff for around the cabinets anyway (like the peninsula, which didn’t have old shoe molding for us to reuse since it was newly added), so it wasn’t a bit deal to pick up a few more pieces of it. We figured it wasn’t worth “finishing” our pretty new floor job with rough looking trim. So in total, it was about $35 worth of shoe molding for a nice clean “like new” (because it is new) look.
Since we don’t own a pneumatic nail gun, we installed it old skool style (although we’ve talked about getting one – maybe for Christmas this year?). After cutting each piece, we’d pre-hammer our nails against a piece of scrap wood to get them in a ways, which minimized how much hammering we’d have to do against the floors.
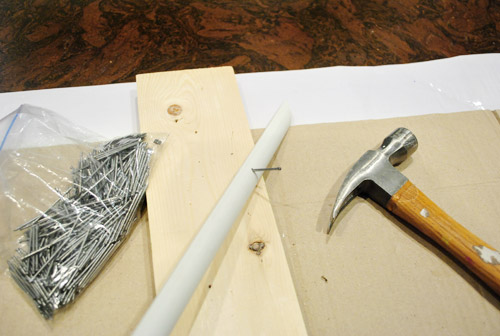
Even when it was ready to nail into place, we still put a piece of cardboard under the work area to keep from banging up the floor too much. Oh, and forgive that piece of baseboard for looking a bit beat up. It was new too (the previous piece was too short since we switched the fridge and pantry location) so we hadn’t painted it yet. It came pre-primed but a bit scraped up.
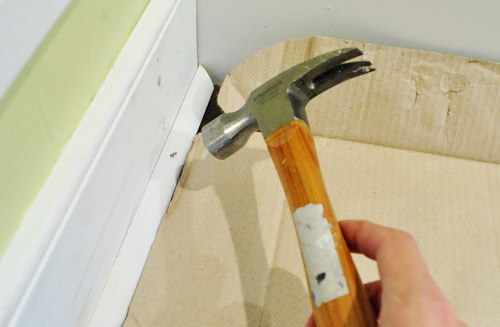
Once the nail was in as far as I could get it with my hammer, I used a manual nail punch to get it in even farther, just beneath the surface. Love that thing. It’s basically just a metal peg with a tiny head that you place right on the nail and bang the end of it to sink the nail in (without leaving big dings in the wood like hammering the nail directly could cause).
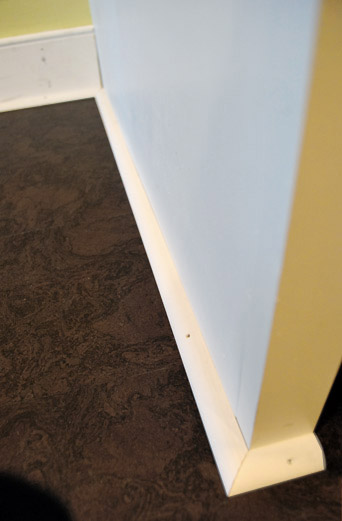
I wouldn’t say there were any “big” transformations as part of this step, but if I had to name one – it would be the area around the peninsula, which was lacking both shoe and baseboard:
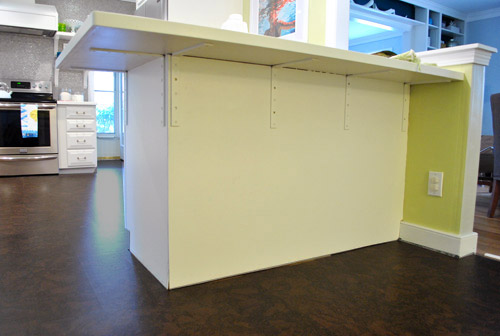
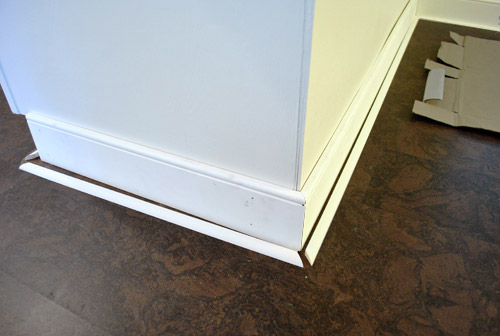
Here it is with baseboard, finally. I’d been dying to add it, but we always figured it didn’t make sense to add until the new floor was in.
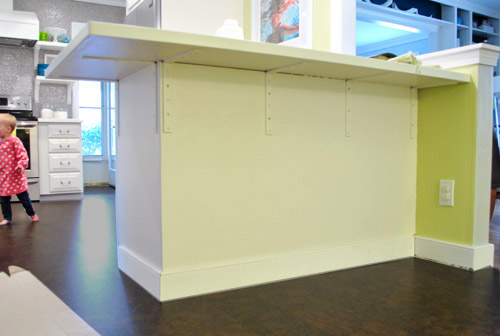
And here’s what it looked like once we had cut the shoe:
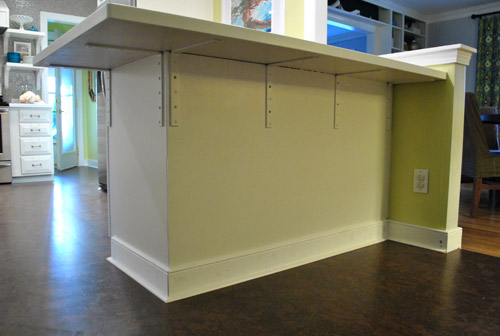
…and now here it is with the shoe all hammered in. It still needs some work (we’d love to add wood molding to hide the metal brackets and add interest to the back of the peninsula someday), but at least it’s looking a bit more finished. When the stools are in there (and you’re looking at it from a normal height instead of squatting in front of it) you actually don’t notice the brackets too much.
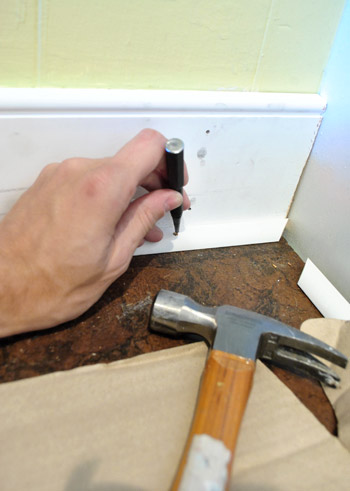
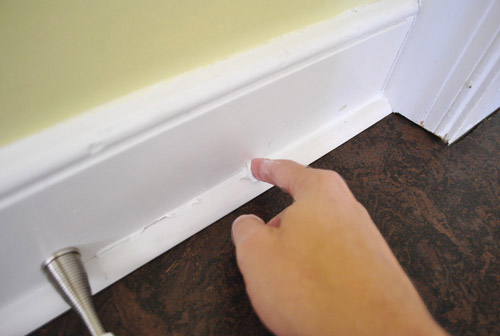
Oh and that picture above is after another important step of the shoe-ing process: Caulk! We always go over all of our seams (including the corners) with a bead of caulk to make everything look more polished. So here’s us gunning a line of it on:
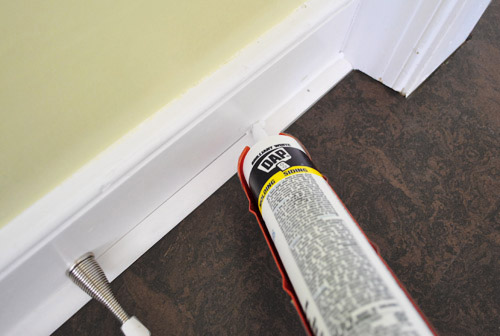
And here I am using my finger to smooth it out. We like to dip our pointer fingers in a cup of warm water to help keep it smooth as we go (and to help keep the caulk from sticking to our hands).
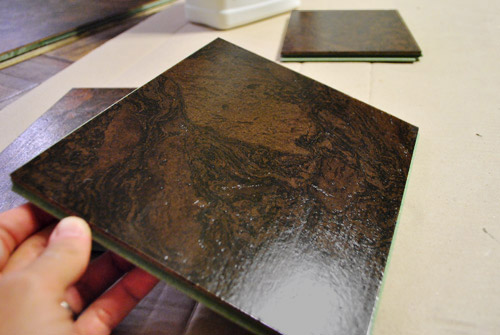
The step after this… well, after the caulk dries… is to paint. We still have to do some of this in a couple of spots, but overall it’s looking much better. But before any “after” pictures, let’s talk about sealing the cork. Even though our cork planks already came pre-sealed, experts recommend sealing them with three additional coats of water based poly after they’re installed to add protection and effectively seal the cracks between the boards (which aren’t sealed even if the tops of each plank come pre-sealed). This also should keep dust and crud from settling into any seams so it’ll hopefully look nice and smooth for the long haul.
We had trouble finding much good info about how this step should go, so we called Lumber Liquidators (where we got our cork) and got to speak with one of their installers. He actually installs and seals the Lisbon Cork that we purchased, so he was able to give us some very clear instructions:
- Hand sand with 100 – 150 grit sandpaper to remove some of the existing finish (“anything higher and you’re just polishing them”).
- Apply a layer of the poly with a 3/8th nap roller
- After that has dried (about four hours according to our poly manufacturer’s label), repeat steps 1 & 2 again… and then a third time.
So yeah, those were his explicit instructions… and we veered off course pretty quickly. But we’re so happy we decided to test things first, because even when experts recommend something, after you painstakingly install something, you want it to look awesome. Not scratched or purple. Yikes.
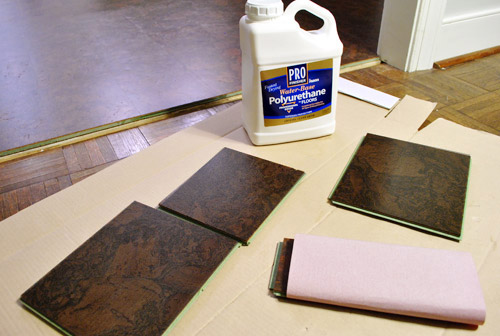
When it comes to what we used, we got some PRO Water-Based Polyurethane from Home Depot since it came highly recommended. We were so glad we didn’t have to use oil-based stuff since when we refinished our first house’s floors it stunk for months- especially on a hot day. Thankfully this stuff has no odor after the four hour drying period. So hooray for water-based stuff.
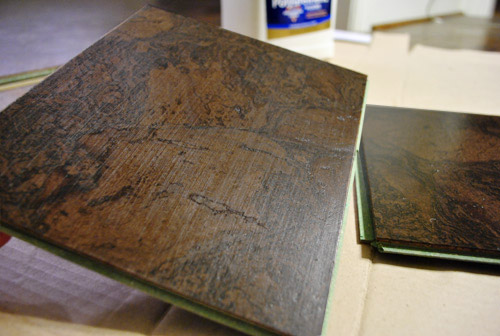
But our deviations off course began after we picked up the recommended poly. It all started at the sanding step. The sound of that very step made us nervous. Sand our pretty new floors?!? So we did some tests on scrap pieces first. On the first piece we sanded just as instructed with the exact grit he recommended. We even watched the guy demonstrate his hand-sanding technique and replicated it exactly, but it left some very obvious (and ugly) swirly scratches on it. And even after applying a layer of poly it didn’t disguise them. Bummers.
So we thought that maybe sanding in a straight motion might be less terrible looking. Nope… just a different brand of scraped-up-yuck (in person it’s really clear that the surface is scratched, although in this pic it looks sort of like wood grain). Not good.
Since sanding seemed to only make things worse, we gave it a go without any initial sanding. We feared it might bead up or slide right off or something without roughing up the surface first. But nope, it worked just fine – and even made the color of the cork really pop. And that, my friends, is how we decided to skip the sanding step. Thank goodness for testing (if we had sanded a corner of the room instead of a test plank, we’d probably be pretty ticked off).
Having opted out of sanding, we went straight to applying it with a 3/8th nap roller, as per the second instruction. Enter “Yikes” moment number 2. This purple party certainly didn’t look right:
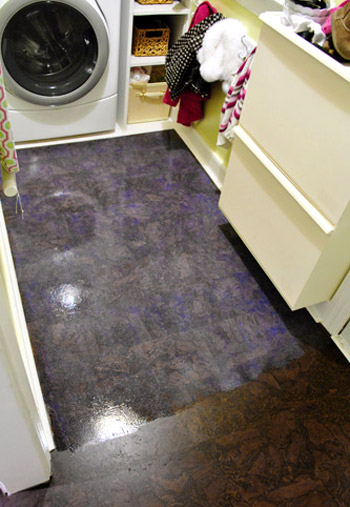
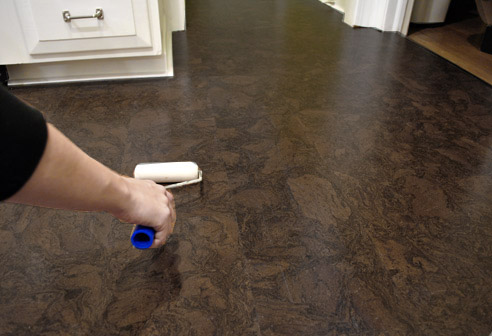
So in a total and complete panic (yes, there might have been some cursing) we quickly wiped up the thick-ish layer of poly that the 3/8th nap roller left with paper towels. It just didn’t feel right. The part of us that lives by the “thin and even coats” mantra (which is how we always apply water-based poly to seal things like wood furniture) decided that we needed to revise this instruction, pronto. So we broke out the least nappy rollers that we had: ultra smooth small foam rollers (the same thing that we use to poly furniture when we stain or paint it).
Worked like a charm. No more glowing purpley-blue haze, just nice thin and even coats to protect things and seal our floors for the long haul. Because just like when you seal furniture, the rule is that thin and even coats adhere better and last longer (anything too thick can crack or peel right off). So it actually makes sense that this works on floors too – all without the purple haze. Whew.
Our revised technique seems to have worked just fine. We can’t even begin to guess why the installer’s detailed tips didn’t work on our sample planks (perhaps he installs lighter cork more often since it’s more common, so maybe the scratches or purple haze aren’t as apparent on that color?).
Thankfully, after three coats (one applied on Friday night right before we went to bed – so we wouldn’t have to avoid the kitchen all day – followed by one on Saturday night and one on Sunday night) it didn’t discolor and it seems to be sealed. Not that we tested it out by dumping water on it or anything. But we have had some small spills that were really easy to wipe up (one even involved boiling water that a friend was using to sanitize her bottles). And it seems to standing up to Clara just fine so far, dump trucks and all:
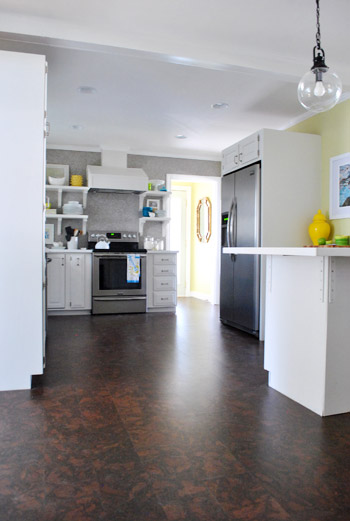
So now here are some “after”-ish pictures of the floors all trimmed out and sealed, with Clara doing some quality control exercises.
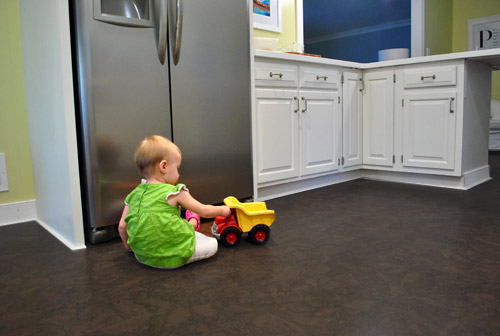
We even dropped a plate (which miraculously didn’t break thanks to the soft cork that cushioned the blow) and there was nary a ding or a dent. And Burger’s nails don’t make any marks either (we heard from someone on this post who has cork floors and a 70lb dog and still doesn’t have any nail scratches, which is pretty cool since we weren’t sure how a larger dog would work with cork).

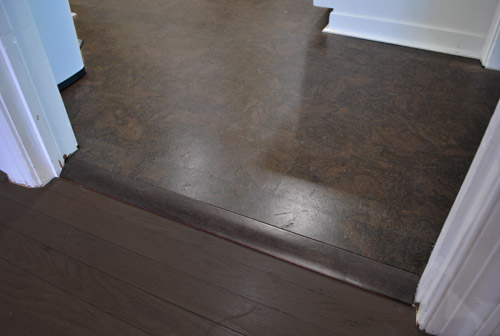
Oh and there was one other thing that are required to “finish” the floors: transitions. We have four doorways in this room, and each needed its own “reducer” – which is a piece designed to join two rooms where one floor is slightly higher than the other. Ours is only about a half-inch higher in the kitchen (due to the asbestos liner under our original vinyl tile, which meant that we couldn’t tear it up and would have to float the cork over it). The guy at Lumber Liquidators suggested getting oak transitions since cork, being a slightly softer wood, could get more beat up on an edge like this where things can catch. LL sold transitions for about $45 a pop, but I found similar options at Home Depot for $29. So after measuring, cutting, and nailing them in – our floors were officially transitioned. Okay, well, I’m actually waiting for two longer length reducers to come in on special order at Home Depot (they only carry 47″ lengths for $17 in the store), so our floors are officially mostly transitioned, to the tune of $140 total (including the special order pieces).
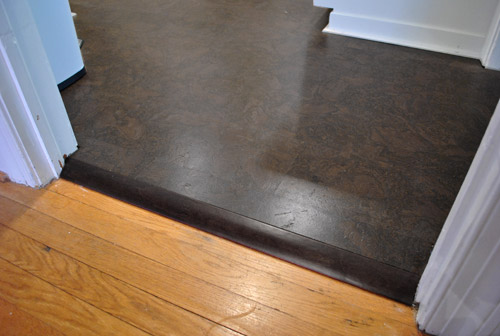
And once we get around to having our other floors stained darker, we might have something that looks more like this (the cork and hardwoods will never look identical, but the same rich mocha tone will unify and help with flow, so our rooms don’t feel as chopped up and disjointed). Ahh, if only getting floors refinished were as easy as Photoshop…
So we’ll call that a wrap on the kitchen floor. And since it was the last big project in the kitchen, we’re thinking we owe you guys some real after pictures and a full-on budget and time breakdown for the entire project. How does that sound? We have some photos to take and some receipts to tally up, so let’s say Wednesday. Same time, same place. In the meantime, what did you guys do this weekend? Any shoe molding installation or sealing going on?

Leave a Reply