Remember this old post about all the fun projects we were daydreaming about taking on with some bonus cash from BHG’s 48-Hour Challenge? Well 20,000+ votes later (!) we didn’t win the 5K (congrats Nicole!), but the good news is that plenty of those projects are still on the agenda. In fact, two of them are already completed! Remember we spruced up our patio a few weeks ago with a DIY firepit and some cheap-o lounge chairs? One down, four to go.
Well, better make that three because we’re back to share the second project that we tackled on the sly. We hinted at wanting to “introduce some layered, textural interest in the half bath” but then decided not to delve into details and surprise you guys instead. Well… surprise!
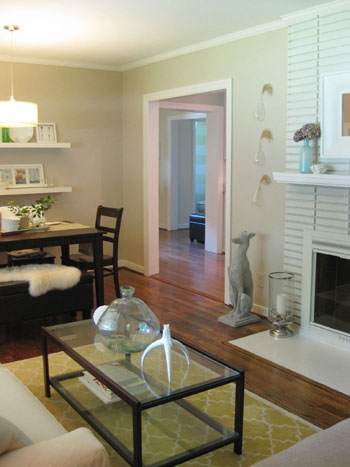
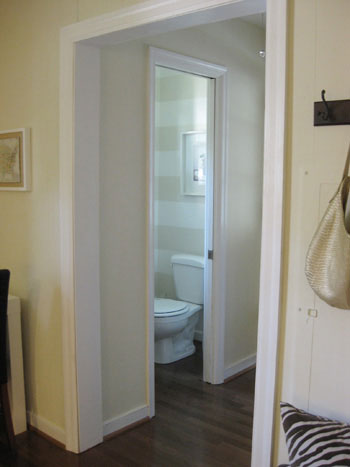
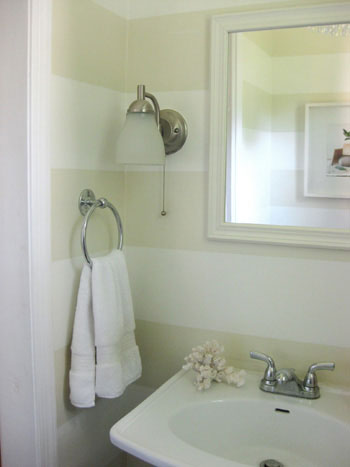
See that cream on cream texture that’s visible all the way from the front door? Let’s get closer shall we?
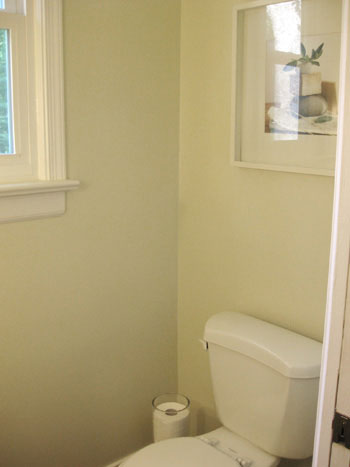
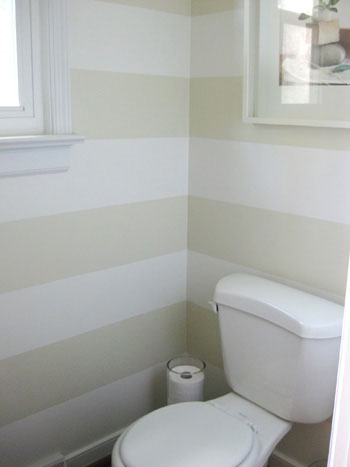
Yup, we painted cream on cream horizontal stripes in the half bathroom! It used to be the same tone as the hallways and the adjoining den (Wishes by Glidden) but we decided to amp it up in that jewel box of a bathroom with some lighter stripes to make the room feel a little more expansive (horizontal stripes have a way of creating that effect) and a heckova lot more interesting. Jenn’s Design Star makeover from last summer was actually our inspiration- it just took us twelve months to make it happen. Here’s the bathroom before our little paint intervention:
The entire project took just 4 hours one evening, and the steps were really simple:
Step 1: Divide & Conquer- Measure the full length of your wall and divide that number by twice the number of stripes that you want to have minus one (ex: our ceiling is 98″ tall and we wanted six horizontal stripes so we divided 98 by 11 (6 x 2 = 12 – 1 = 11) to get the thickness of each stripe. Ours came out to about 8.9 inches.
Step 2: Make Your Mark- Use a ruler to mark off every 8.9 inches starting from the floor and working up to the ceiling (we made two small pencil marks on each wall, one on each side).
Step 3: Tape It Off- Grab some blue painter’s tape and connect your pencil markings to create taped off stripes (once the tape is in place rub it a few times so you know that it’s flush with the wall for cleaner lines). The main thing to remember is that the tape should go outside the marks for the stripes you’ll be painting but inside the marks in the negative space that you won’t be painting. This might sound confusing, but just ask yourself if you’re taping off the stripe or the negative space as you go, and make sure the taped stripes are the right distance apart (ours were 8.9 inches) while the tape for the negative spaces is closer (once you remove the tape both areas will be the same width).
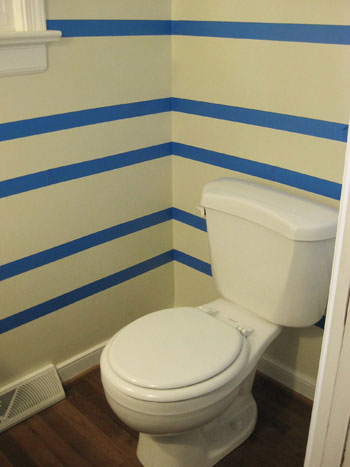
Step 4: Roll With It- Grab a good roller and some slightly lighter or darker paint (subtle is key for this look, so just going a shade or two away from the wall color makes for a soft layered look). Then apply two even and thin coats of latex paint between the tape that’s further apart to create your stripes. You’ll also need to use an angled brush to cut in near the base molding and the ceiling.
Step 5: Take It Off, Baby- This is a very very very important step. It’s crucial that you remove every strip of tape as soon as you’re done with your second coat of paint while the paint is still wet (assuming the coverage is good enough that you don’t need a third coat). Waiting to remove the tape until after the paint has fully dried will cause peeling and uneven lines that are less than crisp (which will make you want to cry after all that taping). In short: as soon as your roller is down, start pulling that tape off the wall for a clean stripe that looks seamless and sleek.
There you have it. Horizontal wall stripes. Easy eh? Oh and we used a quart of Valspar’s Honeymilk for the stripes because we actually had a $10-off coupon to Lowe’s. And thanks to that $10 off coupon, this entire project came in at just… (drumroll please)… $2.48. Gotta love that bang-for-your-buck upgrade!
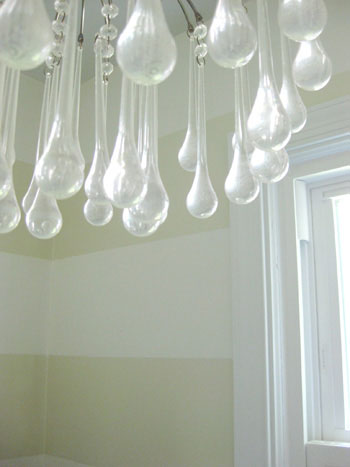
We really like how our crystal tear-drop chandelier (a cheap-o Urban Outfitter’s score from a while back) looks even more dreamy with the soft stripes around it.
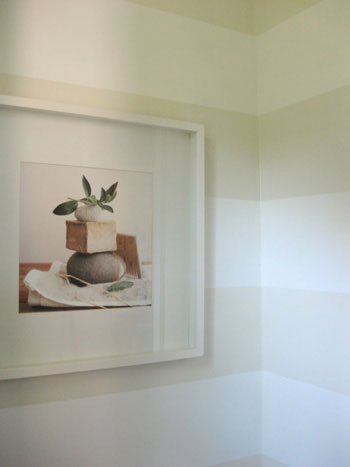
And our $9.99 art somehow feels even more spa-like with the tone on tone stripes:
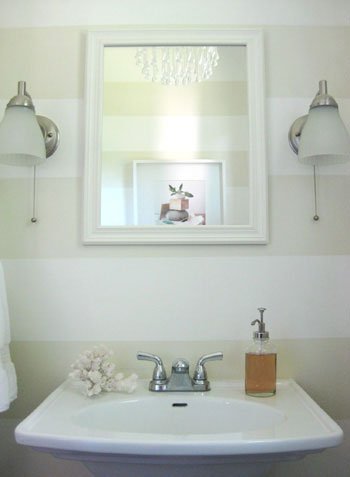
We also feel particularly lucky that our stripes ended up framing our wall sconces perfectly (of course this is something you can ensure by starting your stripes in that area and working up or down to tape off the rest of them so nothing cuts through your lighting at a funny spot).
So there it is. Our under $3 bathroom makeover. We’ve always had a soft spot for stripes (take our blog’s background for example, or our recently striped porch) and I guess we just had to bring ’em into our tiny half bath to fully embrace the linear love.
What do you guys think? Did any of you take on any cheap-o projects this weekend? Any striping stories of your own? Do tell.

Stephanie says
I love it! It looks awesome- great job!
Mary Buckelew says
The bathroom is lovely! I’d really like to copy this look! I’m sure everyone would…. I was thinking about hiring you to help with my living room update, but then got starting on my own mood board on my computer and decided I’m doing pretty well! So thank you! I just have to find the right shade of gray/blue for the walls, so I’ll go back and look at your paint color post. I am in LOVE with Thomas Paul stuff right now, so I’m trying to incorporate his fabrics (including a Target slipper chair covered in TP fabric). Anyway – LOVE your website. It’s such a joy!
Molly says
That looks incredible!
karen says
Your bath looks awesome! I have always wanted to give this a try in my half bath too…your photos and step-by-step instructions may have pushed me to give it a go! Was it very difficult to paint behind the toilet and sink area? Keep inmind I have never painted before. Keep up the good work!
YoungHouseLove says
Hey Karen,
Luckily we didn’t have a hard time painting behind the toilet or the sink thanks to one of our favorite weapons: a short handled 2″ paint brush that allows us to get into tight spots without a long handle getting in the way. In fact it’s such a helpful tool that we’re planning a post all about it soon. Stay tuned…
xo,
s
Delightful Dwelling says
Beautiful, I love it! My arms are so sore from painting all weekend adding some curb appeal to our house. And now I have to repaint because I hate the color I painted our door trim.
Mark says
Great job! Trick I learned when measuring out stripes for painting…white chalk. It will get absorbed by the paint and anything left outside the paint line is easliy brushed off with no damage to the paint job!
Emily says
These are lovely. Another thing that’s fun (and even more foolproof) is to create stripes with the same color but with different paint finishes. We did this on an accent wall in our last living room by alternating eggshell and high gloss stripes in the same color. It added a nice subtle texture and we didn’t worry as much about the stripes having to be perfectly even or level.
YoungHouseLove says
Hey Emily,
We’re actually huge fans of the using-the-same-paint-in-a-different-finish-to-make-stripes approach, so we’re so glad you mentioned it! Since we were dealing with an already semi-gloss bathroom (and were scared that flat stripes might not weather the hand-washing splashes as well) we opted for tone on tone stripes instead of alternating flat and semi-gloss ones, but it’s definitely another great way to add subtle texture and interest to any room!
xo,
Sherry
Jenny says
Looks great! Amazing what a little bit of paint will do. This was really the thing to perk up your itty bitty bath!
Carla says
This looks sooo great! Thanks for the step-by-step too!!
jessica says
I love it! So easy and it does so much. I did this cream on cream wide stripe design on my coffee table (two dark cream, one light cream stripes, all lengthwise) a year ago and its just something about that design that makes me swoon!
Jill Stigs says
Fantastic!
I sure would not have the patience to do this even in a powder room. Looks super great!!
Laurie says
That looks fantastic! I once helped a friend do something like that in her half bath…we did the same color of paint but one was high gloss, the other was matte, looked awesome and very subtle (was a dark color). I LOVE that chandelier.
My only weekend project was sitting by the pool drinking beer ;) We had great weather, finally, so I made sure I enjoyed every second of it :)
Holly says
This is AWESOME! Great job once again :-)
Sara says
Love it! Amazing what those stripes do for that little bath…great job!
Laura says
Love the new paint job! It really does make the bathroom look polished and finished.
I’m so sorry you guys didn’t win. I think Nicole’s porch was nice, but absolutely loved your porch make-over. Congrats to Nicole, though!
Desiree says
I love your blog! You guys inspired me to buy a desk from Salvation Army and paint it white (Valspar Pale Bloom)
– I only have the coat of the polycrylic to go but it already looks so great and I can’t wait to bring it in from the garage!
I ADORE stripes and our breakfast nook is striped – it’s what sold me on the house we just bought. Good job y’all!
Roeshel says
Oh I LOVE it! Great job!
Katy C. says
Love it! We are going to use broad stripes in our dining room. The only thing distinguishing the dining room from the rest of the living room is the ceiling. The ceiling in the dining room is normal height, whereas the rest of the living room is about another 6-8 feet higher. But we think that painting the rooms the same color, and then using the stripes (either in a gloss of the same color, or using a shade lighter)in the dining room will be a subtle way of defining the space but keeping the open feel. I can’t wait! And then I’m going to snag a few Lack shelves from Ikea to go in the dining room, similar to yours but I want to put a buffet below. Thanks for all the inspiration! As for projects, I tackled office closet organization/shelf hanging and hanging some ledge shelves in our guest bedroom as well (Thank you to the Ross store that had a set of ledge shelves for $16!! and a set of 5 box office organizers on clearance for $7…so much for just going there for shoes!)
Danielle Moll says
Great paint job guys! We did a very similar striped color palette in our “reading nook” at the top of our steps (only we did vertical). There was some TERRIBLE 70s wood panelling there that was dark and dreary and we used the lines from the panelling as our guide and painted them very similar colors. The result was wonderful and now our reading nook is bright and inviting!
Tracey says
Looks fantastic!!! And you can’t beat that price.
We did a mini-mini-makover this weekend by getting some new seat cushions and centerpiece for our kitchen table.
Chelsea @ TheVintageChair says
This turned out BEAUTIFULLY, guys! Great choice! I can’t wait to see which one you tackle next!
kelly says
What a happy space to see on my screen this morning. :) I have some horizontal stripes planned for a room in my house soon… :)
Natalie says
You guys, this looks fabulous! Great job :)
elizabeth says
I love, love, LOVE this look! It adds interest and texture without being too “in your face.” I used the same treatment in my little laundry closet, but with two shades of springy green. I am trying to resist the urge to paint more stripes in my house!
Natalie says
P.S. Who made the layout of your website? I’m interested in something similar (but with gray instead of beige). Did you purchase it or was it free…or did you make it yourselves? :)
YoungHouseLove says
Hey Natalie,
The design of our site is a free WordPress template called WP Premium, you can download it here. We then customized all the colors and graphics ourselves. It took a bit of trial and error (plus some knowledge of CSS), so if you’re up to the challenge you could certainly make your gray version. Nicole at Making It Lovely actually uses the same theme too (it’s where we first fell in love with it) so you can see how different it can look with the right customization.
Hope that helps!
-John
Kristin says
It looks terrific, guys!!! A job very well-done! I am trying to figure out if I want to use a horizontal stripe pattern in my dining room–I have pretty high ceilings in there and thought it might help anchor the room. Also, thanks for the painting tips last week! I went by Home Depot yesterday and found some awesome Glidden paint samples. Thanks for sharing!
Blessings,
Kristin
Rebekah says
This looks great!
How do you think striped walls would look with patterned or multi-colored tiles on the floor, as opposed to a solid colored floor? Our bathroom has a 3-color tile border around the room. Would you consider doing this technique in your other bathroom, or do you think it would look strange with the patterned tile?
YoungHouseLove says
Rebekah- I think if you pick subtle wall stripe colors directly from the tones in your tile they can all work together for a soft and cohesive feeling (just be sure to make the stripes very close in color so it’s not a loud pattern and looks more like a soft texture in the room). Hope it helps!
Meredith- Going over that trim with 100-grit sandpaper before applying two thin and even coats of semi-gloss white paint should have your trim looking fabulous in no time. And as for our fireplaces they’re both painted in flat paint (the one in the den is Glidden’s Water Chestnut which is actually a tan tone that’s a bit darker than the other cream walls in the room, and the one in the living room is a soft grey-white tone (Glidden’s Ruffled Feathers) so the white mantel and trim looks a bit crisper by comparison). Happy painting…
xo,
s
Abby says
I love the look. Awesome job! We may incorporate something similar in our upstairs bath.
This weekend, we took a major step toward curb appeal by purchasing 10 new shrubs for our dirt patch in front of our house. They aren’t in the ground yet, because we’re hoping to paing the exterior in the next week or so. I can’t wait for it to be done. Our house has been an eyesore from teh outside for two years now.
Meredith says
Hey all,
After seeing it my friend’s powder room, the hubs and I are planning to do the gloss-on-satin same-color vertical stripe in our little half bath off of our master bedroom. We’re thinking a light, dusty blue. But first we have to scrape and wash off all of the evil wallpaper glue left behind by the amazingly awful wallpaper that was in there – yuck!!
Any tips for painting my trim? I’m done painting the walls, and the trim is currently glossy (I do plan to go over it with some sandpaper first), but to complicate things, it’s already peeling in some spots – I think the previous coat of glossy was applied over an even earlier glossy coat with no sanding in between. Not nice to the future young new owners who don’t like the old-fashioned cream color! We’re doing all the trim in a semi-gloss ultra white – it will really pop out from the light grey-ish and light grey-brown walls we just painted! I will be posting pictures eventually.
AnnaMae says
wow that turned out so well! I love it, and I love your blog! seriously, SO inspiring. Thanks for always working on a budget, it’s encouraging to know you can spruce up your home for little if you’re willing to put in the work.
LeilaMac says
LOVE IT! It’s so bright and airy and definitely packs a punch. Y’all always have such fun projects up your sleeves.
I’ll be working on my own half-bath project this week, also involving paint – but doing some cool medallion stencils instead of stripes!
Megan says
Wow! I love love love the paint job. Who knew that something so simple could really transform a room. Great job!
richard says
I love how the stripes are visible in the living room and refer to the horizontal lines of your floating shelves and fireplace bricks! Well done!
My livingroom is painted with pale yellow/green (BenMoore 387, Jasper Opal) and soft blue(Sherwin Williams SW6519 Hinting Blue) horizontal stripes, with a BIG stripe of bright orange (Behr230B-5 Indian Paint Brush)going thru it all. I love it, but after spending so much time on your blog, I think I may have to wipe it all out and go neutral. The BEST part about paint! My need to change my environment so much is the EXACT reason I have no tattoos!
megan says
I LOVE the stripes! It gives it a whole new life.
Meredith says
PS: I need to know: what paint did you use on your fireplace(s)? I know it’s white, but is it pure white (as in, the ultra white base before any color is added at the paint store), and also what finish is it – semi-gloss? Satin?
Our brick fireplace is already painted, but now that we’ve changed up the walls in our living and dining rooms, it doesn’t work – just the wrong shade of beige. I might paint it one of the wall colors a shade off from the wall behind it, but the white does look good in all your pictures, I just don’t want to paint it with semi-gloss like the trim and have it look too shiny and glaringly white, unless that’s what you guys used and you can vouch that it works. What do you think? The walls are eggshell, but the trim will be semi-gloss ultra white.
Toni says
Fabulous job!!
Allison says
I love it! The colors are so calming. Gotta love coupons; it’s amazing how much you can save.
Rebecca says
wow! your bathroom looks great! what a transformation a little paint can make…
Emily says
wow! so impressed…ive been wanting to try horizontal stripes too but have been too scared – thanks for the step by step instructions and for only $3.00!
Amy says
Wow! What an amazing transformation, especially for the price! Cant beat that.
The only project we did this weekend was to string up some outdoor lights on our screened in porch. It was cheap, easy, and it looks great at night!
Christine says
I really like the stripes in the bathroom!
I’m sorry you didn’t win the BHG challenge… I was rooting for you and did my best to vote daily. I loved your porch makeover (well, I love all your projects!). Thanks so much for this excellent blog and all the great inspiration.
Laura says
Fantastic job. The stripes really add a sense of whimsy and posh-ness to the space, all at the same time!
Oh, you both probably know already, but while browsing through a Nest gallery, I came across a photo of your living room, it was quite nice to see it! It’s the “5 Secrets to a Fab Living Room” gallery. :)
Alison says
My heart is racing!! Ya’ll constantly inspire me. I have been planning these exact stripes in my hallway for some time now. I sqeeked when I saw it! I hope to finish my guestroom soon and send you a pic b/c it is inspired by you two! great job!
trish says
Looks great! I love how it turned out.
Erin says
It looks great guys! Perfect color combo for the small space!
Just another hint for getting clean and crisp lines when doing stripes… If you paint a clear coat over the tape, that keeps color from bleeding at all, as it sometimes does, and when you remove the tape, perfect lines!
KK says
ADORABLE! It really adds flair to that half bath. Love it!
Danielle says
LOVE IT! It’s still neutral, yet has some dimension.
Jomie says
The bathroom looks fantastic!
We did vertical stripes below the chair rail in our dining room – painted the whole thing flat blue, taped off, then painted clear gloss over alternate stripes. So, achieved the same tone-on-tone look of the same color in different finishes, but with much less taping!
Liz says
Wow, this looks wonderful!
My husband and I did vertical stripes in our dining room in a very similar color pallet
My one piece of advice to anyone who is going to try this with light colors–don’t use the blue chalk to make your lines! I was on a ladder (we have 10 foot ceilings) scrubbing the chalk lines for hours! Thankfully, the results made it all worth while!
Nichole says
Amazing!