When looking for some crafty Christmas projects to take on this season, we knew we wanted to do something using our personal photos. And since your typical photo-mug isn’t really our style, we turned to Moo for inspiration. They’re a quirky lil’ printing company (popular among flickr users) that makes it easy for you to print stylish photo cards, postcards and stickers. Our personal faves are their MiniCards, stick-of-gum-sized cards made from your own photos. So we decided to order a $20 pack of 100 cards to tackle two simple holiday projects.
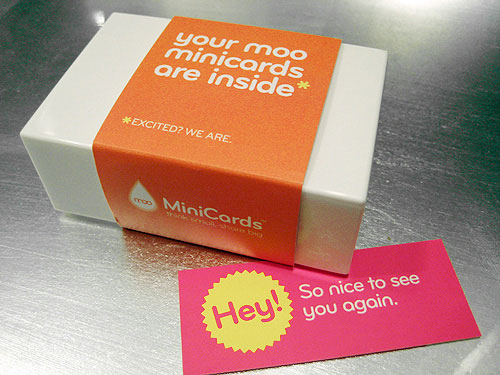
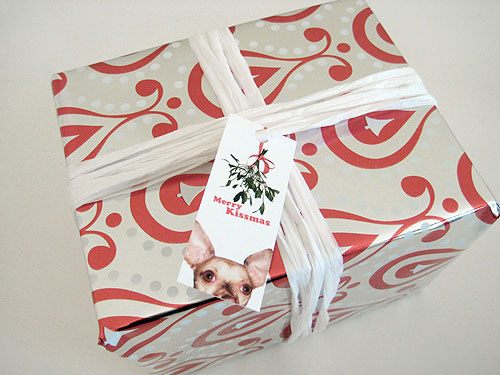
One of our projects came at the suggestion of the folks at Moo themselves. Their site recommends a slew of craft ideas, including a bunch of seasonal ones, and we were all over their personalized gift tag idea. Taking inspiration from the Burger-as-Rudolph Christmas card we made last year, we photoshopped our little guy into another festive scenario for the card’s front and had them print “To:” and “From:” on the back. Mistletoe anyone?
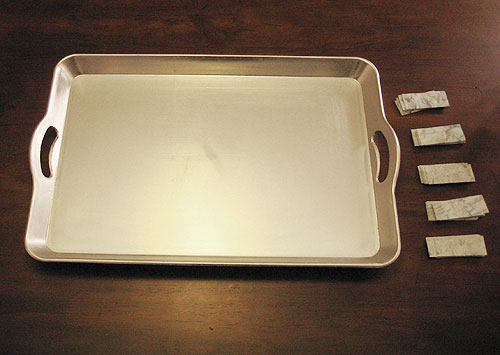
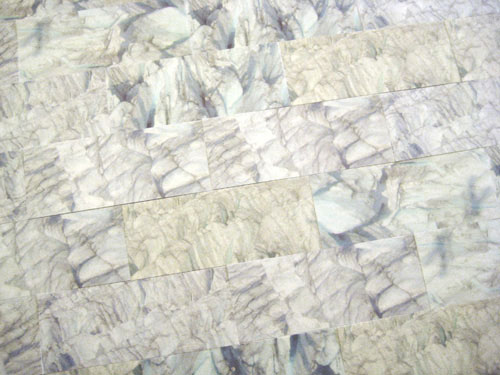
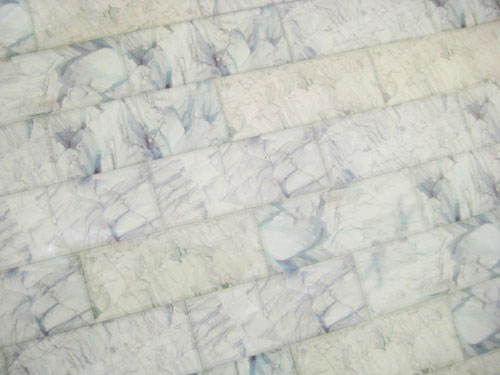
Our second project was inspired by the fact that the MiniCards are roughly the size of those expensive rectangular glass and marble tiles that are all the rage now. All we had to do was find a pattern that mimicked the texture of stone and voila, we’d have some easy faux-tiles at our disposal. Fortunately, we took this cool pic of an Alaskan glacier during our honeymoon last year, and by cropping different areas of the icy peaks and slightly changing the color of each one, we amassed the perfect collection of varied stone-like photo tiles.

Now, where to use them? How ’bout on this $10 holiday tray we snagged at Target? Nothin’ like a good tile job to make it look more expensive…
Tiling the tray was a family affair. I was in charge of applying the tape loops to the back of the MiniCards while Sherry was responsible for laying them in a brick pattern. And Burger, well, he was in charge of not getting himself into any trouble.
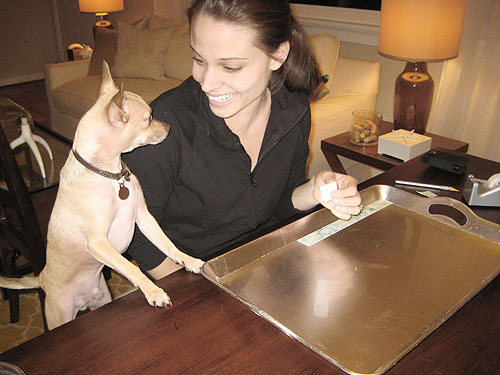
Oh yeah, Sherry was also mistress of the utility knife used to round the corners (something we did with the card in place for the best possible fit).
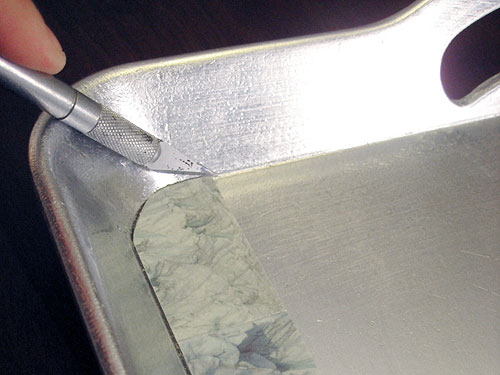
By sheer luck we ended up with the exact amount of tiles we needed – no more, no less (PHEW!). Looks pretty tile-esque, no?
But of course if takes more then tape and paper cards to complete a faux tile project. So in comes the bar coat to finish the job! After mixing up 16oz of a clear liquid resin called Envirotex Lite- Pour On High Gloss Finish (snagged at Michael’s) we poured it evenly across the bottom of the tray to solidify and therefore protect the design.
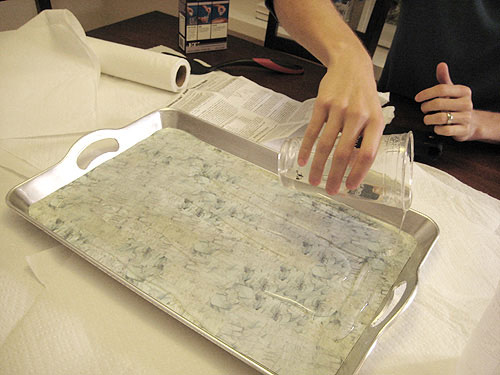
The resin is super thick (the equivalent of 500 coats of varnish- it’s actually what they use to create those thick glossy bar tops) so it takes 72 hours to fully harden into a clear, glossy, waterproof coating.
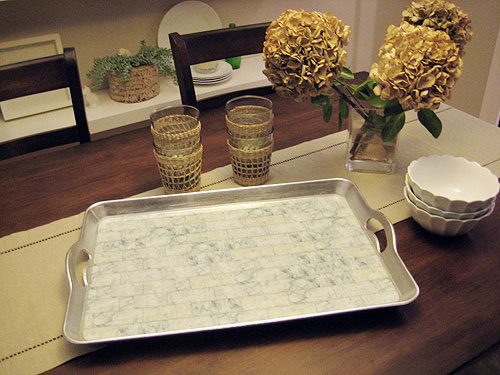
So even though we can’t put anything on the tray quite yet, we can already tell it’s going to come out very nicely. And very tile-like, indeed.
Wanna take on a Moo MiniCard project of your very own? For this week only, if you’re new to Moo you can get 10% off a pack of MiniCards by entering the code “younghousemoo” at check-out. And be sure to let us know what cool projects you’re undertaking with your cards… especially if they’re holiday themed. Now go out there and get carded.

Mike and McGee says
What a neat idea! I love the tray!
swestie says
That tray is SOO cool!
LJK says
What an awesome idea!
Jennifer says
Where are those cute lamps from in your living room…I’ve never noticed them before (HUGE blog fan!)
Jules says
What a great idea!
CH says
I never would have thought of this. The tray looks great!
Laur says
I love love the photo gift tag idea!! What was the turn arround time for your moo cards? I wanna make sure that if I ordered them I’d have plenty of time before Chirstmas :)
YoungHouseLove says
Glad you guys are diggin’ our little projects!
Laur, it took ours about two weeks to arrive by standard shipping. Their site also has some delivery deadlines for the holidays if that helps.
And Jennifer, those lamps were from Linens-n-Things as part of the Nate Berkus collection. We got them last year (a wedding present) and unfortunately, I’m pretty sure they’ve been sold out for a while. I know, bummer. But if they do still have a few laying around (they’ll call places to hunt them down for ya) you’ll certainly get a great deal since LNT is goin’ under.
-John
Amy says
Thanks for sharing! I love both the gift tags and the tray — great ideas!
Erin J says
You guys are SO clever and creative. Just so I can understand the thought process, how did you ever come up with the tray tiling idea? How did you know about the resin stuff? My brain doesn’t think like that (AT ALL) so I’m endlessly fascinated by the thought process behind some of your amazing ideas. Is this way of being teachable???
Rachel says
What a fabulous idea! Finally I have something to round out my husband’s Christmas gifts. Thank you!
Ashley says
Great idea for gift tags!!! Thanks for the link! And that tray…. so creative!!
amanda says
I did those gift tags last year with a photo of us and also a photo of the gift-ee. it made it really fun & easy for the kids to pass out the gifts to everybody & it was a fun alternative to photo Christmas cards.
Jen@OurDailyBigTop says
So creative! Love the idea of gift tags and the tray – who would have thought. Thanks for sharing your creativity!
G&D says
Love the Burger gift tags–so cute! And your tray turned out beautifully!
Cindy says
These are super cute!! Love the tags, and the tray turned out really great. Very creative guys!! As well, the picture with Burger really made me smile. He reminds me of my boys “helping” when I do anything crafty.
Casamacho says
The tray came out great!
Rachel of One Pretty Thing says
Great idea! I’ll be linking to this. Love the discount as well!
YoungHouseLove says
Hey Erin J,
John actually came up with the idea to tile something with Moo cards a while back after we ordered some to use as our Young House Love business cards. He actually surprised me with the business cards- with different rooms of our house on the front and our url and info on the back- for our one year “paper” anniversary… but I digress.
So after we got the business cards he kept musing that they were shaped like tiles so maybe we should order more in solid colors or some sort of texture and faux-tile something. So we went for a long walk (we’re always at our most creative on walks or in the car, when there’s no computer or TV around to distract us) and talked about what we could tile (the top of a table with a sheet of glass over it, a picture and even the frame around it, a wall in our bathroom, etc). Somehow we got to the idea of a tray and we both liked it because it seemed simple and totally useful for entertaining.
John’s also been dying to use bar coat varnish for eons (we always thought we’d end up covering a photo with it and hanging the glossy work of art on the wall) but we thought it would be perfect for our tray project so we finally give it a whirl after months of talking about it.
So I guess the answer to your question is: we actually brainstorm about these things to come up with them (we don’t just wake up with these ideas all flushed out- although that would be just fabulous) and we also have a running list of materials and products that we’d love to try (like bar coat). Hope it helps! Happy creating…
xo,
Sherry
Amanda LeJeune says
Don’t know if you guys will read this since it’s been a while on this post, but I had a question. I have a tray that I wanted to do something different too. It sits atop our rather large ottoman. The colors in our living room are teal and brown. I liked your idea and found some cool rocky pictures that are actually a teal color. Do you think it would be overboard to have a teal tray if I have teal throw pillows and a teal basket on top of the tray? Just wanted your thoughts. Thanks!
YoungHouseLove says
Hey Amanda,
I think a teal tray in a room with teal pillows is fine, but the teal on teal (placing a teal basket on the tray) might be a bit much. Maybe you can find a complementary tone of blue (lighter teal or even navy) and spray paint the basket so it’s a layered look instead of just all the same matchy matchy tone (which can look a bit flat, while different gradients of the same tone add depth and interest). Hope it helps!
xo,
s
Allison says
Hi!
First off, I loved this tray idea so much that the second I saw it I immediately went out and bought all the supplies needed to make my own.
However, I wish you had made a side not about the tile application. I’m not sure if you really did just use tape loops and it came out alright, but the tape loop application did not go well for me. The resin soaked in underneath the paper tiles and caused many of them to sort of float and come up. Afterwards I noticed on the resin container in tiny print that is says if you’re applying it over paper it’s really important to glue them on and then coat something on top of them so you don’t have the whole “floating tiles” problem. (I used the exact same resin you guys used.) So now my resin is all shiny and dry as promised, but has many tiles whose edges have floated up and so it’s rather uneven.
Anyhooo I just thought you might want to add a small warning or side note to the post. Had it not been for the floating tiles mishap, I would have totally LOVED the way the tray came out. I think I’ll remake it …
Thanks!
~Allison~
Allison says
And I just noticed several grammar errors in my comment post … sorry! :P
~Allison~
YoungHouseLove says
Hey Allison,
Weird! I can assure you when we list a project’s steps that’s really what we did so we only used a loop or two of tape to hold each tile down and never had the issue with rising tiles that you describe. I wonder if you used lower strength scotch tape (the not as sticky opaque kind) or different resin (we don’t remember ours having that disclaimer about using glue and not tape. Either way we have had many readers email us photos of their tray projects without mention of this issue at all, but we’re very sorry to hear about those floating tiles. Maybe using glue as the instructions on you resin suggest is the best way to get a more polished finished product! Good luck…
xo,
s
Allison says
Hey,
Well, I used the same resin the two of you used, (I’d never bought resin before so I made sure to buy the exact one that I saw in your picture, lol,) however, I think the lower strength scotch tape that you pointed out is what made the difference. Anyhoo I’m glad that no one else had that problem!
I did remake the tray, and I used extra strength glue adhesive for the tiles instead and it turned out perfect.
Thanks!
~Allison~
Meagan says
J&S,
Do you think the bar coating would work with a wood tray? I’ve got this wood tray that I’d like to use as a catch-all on my entry room table (for keys, mail, etc.), but it’s got this hideous 3M logo on it and I’d like to cover it and make it look a little classier. Any ideas?
YoungHouseLove says
We’d use water based poly for wood! It won’t be as thick but it’ll protect the tray well. Just search “polycrilic” on our site to hopefully come up with the one we love by name. Good luck!
xo,
s
Chelsea says
This is a cool project. What did you print your images on? Paper?
YoungHouseLove says
We got those cards printed by Moo (linked in the post) but you could probably DIY them with card stock or thick paper. Good luck!
xo,
s
Katie says
Neat! Though, I haven’t seen the tiled tray make any appearances in recent memory. Do you still use it on occasion, or did it get downsized in the move? If you still have it, I’m curious how it’s held up over time. Thanks!
YoungHouseLove says
Still have it! Looks good! It’s just so flat and easy to store (nested with other platters) that it’s usually tucked away unless we’re using it to serve stuff!
xo,
s
Alice says
Hey John and Sherry!
I have been a follower of your blog for many years, though I don’t actually do any DIY. Just wanted to share that I too discovered moo cards and fell in love! I’ve used them for years as business cards for my patisserie! So cool how you guys took a memorable photo and turned it into something that really only the two of you would know what it really is!
Just because it’s been a couple more years since the last person asked…do you still have the tray and how’s it holding up? :)
Keep up the great work – you guys are an inspiration!
YoungHouseLove says
Thanks Alice! We still have it in the serving tray cabinet I think! I don’t use it everyday but I think it’s still holding up!
xo
s